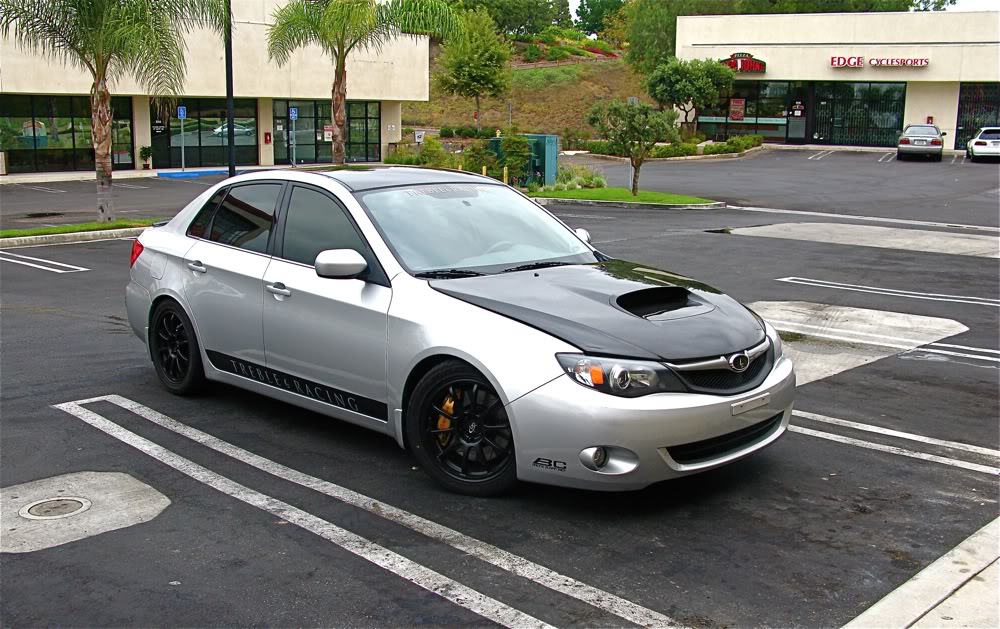
Boost Addict's 08 WRX - 233whp / 334 wtq - Pics, Vids, Dyno

Thread Starter
VIP Member
Joined: Apr 2003
Posts: 846
From: Orange County, CA
Car Info: 08 WRX - 401whp/408wtq
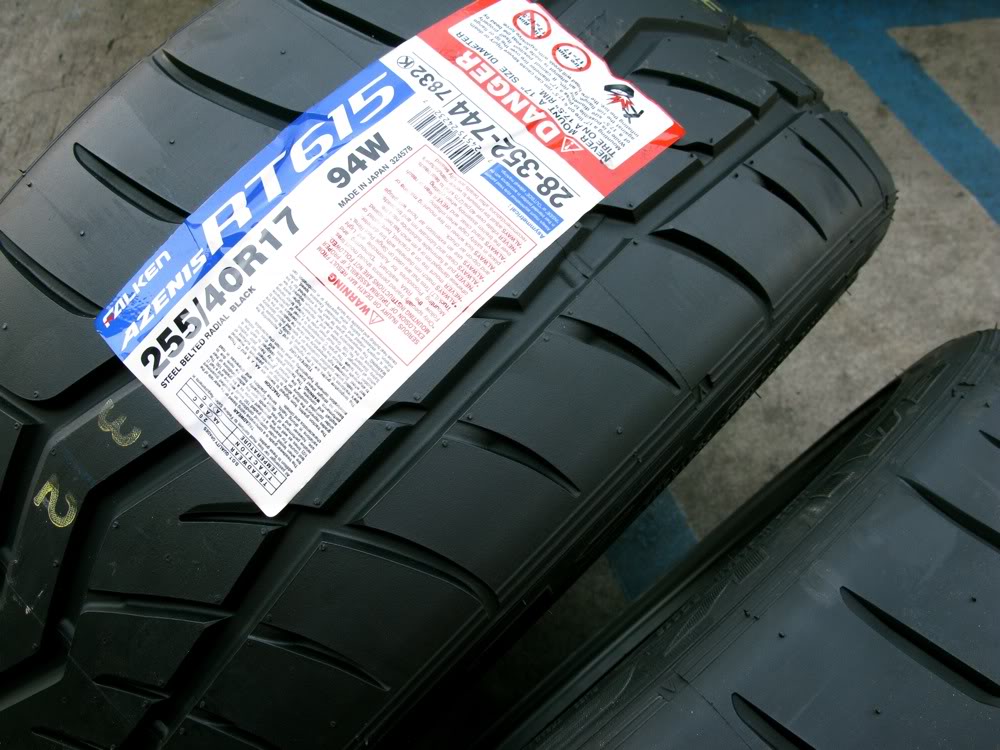
A quick initial review of the Falkens: I'm going to avoid judging the grip at this early stage as there's only about 100 miles on them. But there are a few things that definitely stand out. The Kumho Ecsta XS was said to have a tread pattern that made steering more immediate and snappy. While the tire was quick in changing directions, it had a negative impact during straight line, highway driving. Where the road would have cut recesses or gaps, the Kumho would get 'squirrely' and gently tug the wheel to one side or another. The Falkens track straight! Period. I've driven over recesses and gaps and even let go of the wheel at over 70 mph. I cannot make it pull one way or the other!! This is a HUGE plus. Stability at higher speeds feels far more confidence inducing than the Kumho's ever did. The Falken's are also a much quieter tire. I never considered the Kumho's loud or even notable as noisy. But with the absence of the noise, I now notice that the Falkens are very quiet, at least at this early stage. Below-boost pick up has increased notably! The car just rolls away from a stop with less drag and effort. However, I attribute this advantage to the smaller overall diameter, not necessarily a product of the tire design.
The only thing I can say that doesn't feel 'better' at this point is the overall compound stiffness. It feels harder and less forgiving. Smaller imperfections tremble through the chassis. It's not terrible, but it's there. For those who have BC Coilovers, imagine stepping up the stiffness by 2-3 clicks. It's that different! However, bear in mind, it does have a shorter sidewall than my previous tires, so that could be part of the reason.
I have yet to launch on these and am not prepared to comment on the grip. However, I'll definitely report back once I've put enough miles on them to break them in.
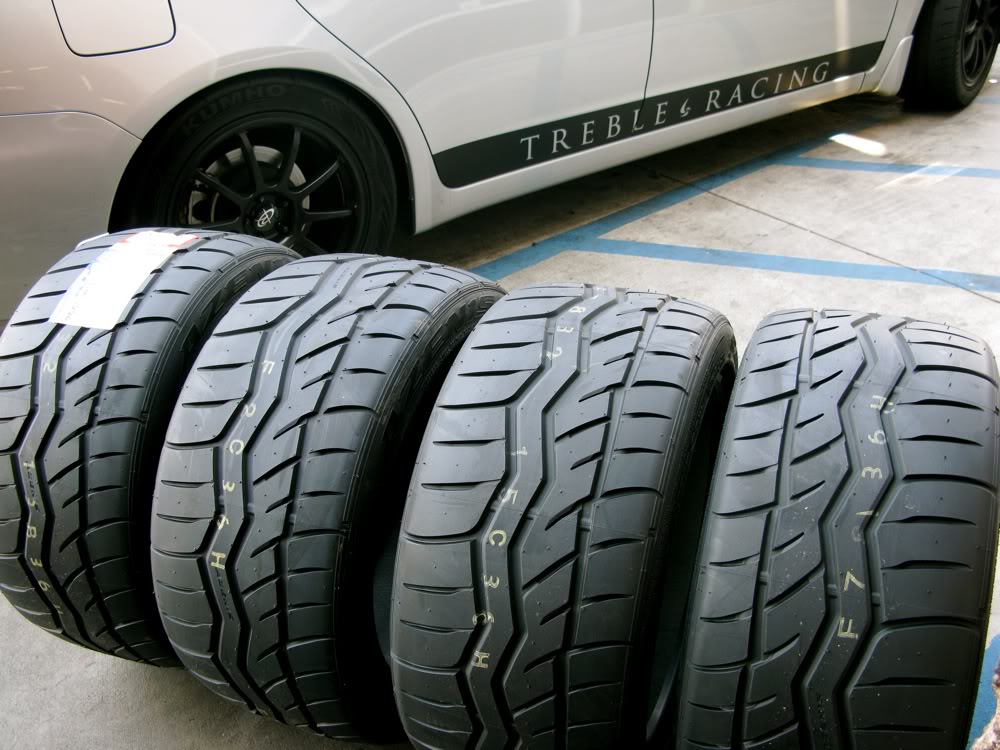
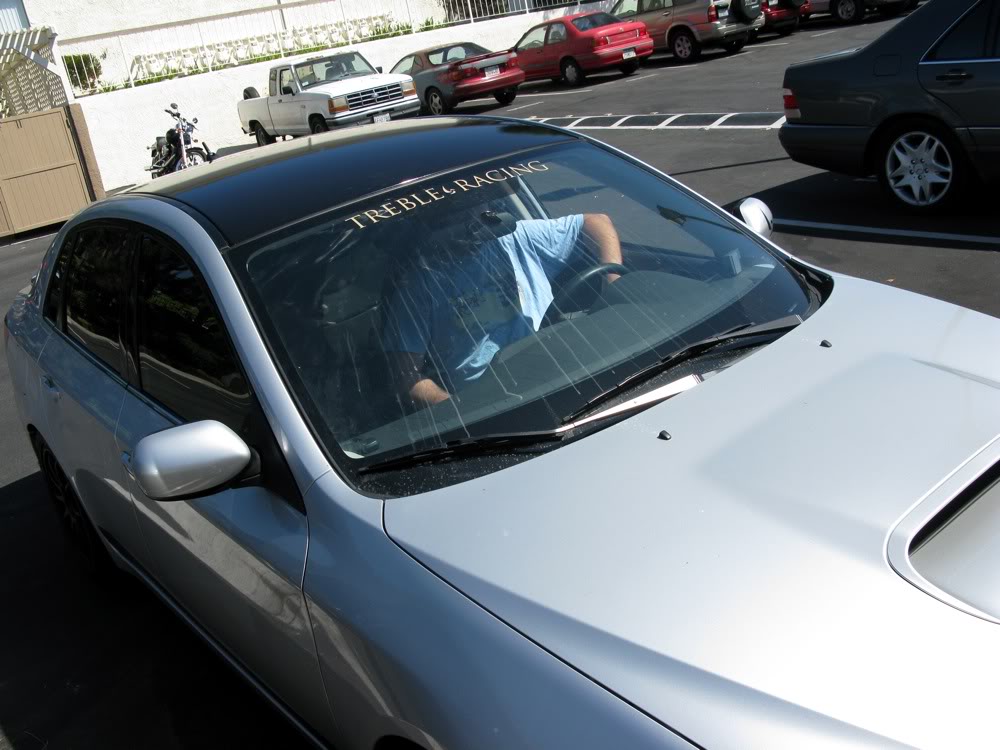
A few pics of the tires during install.
New shoes!
Sticker
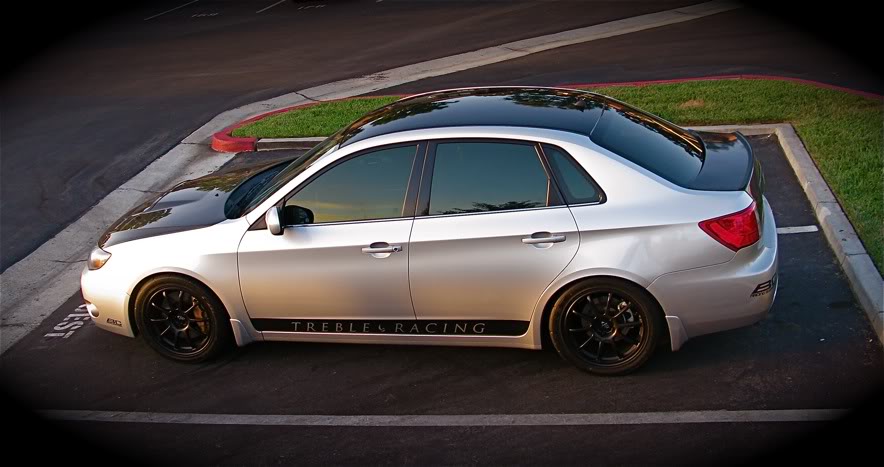
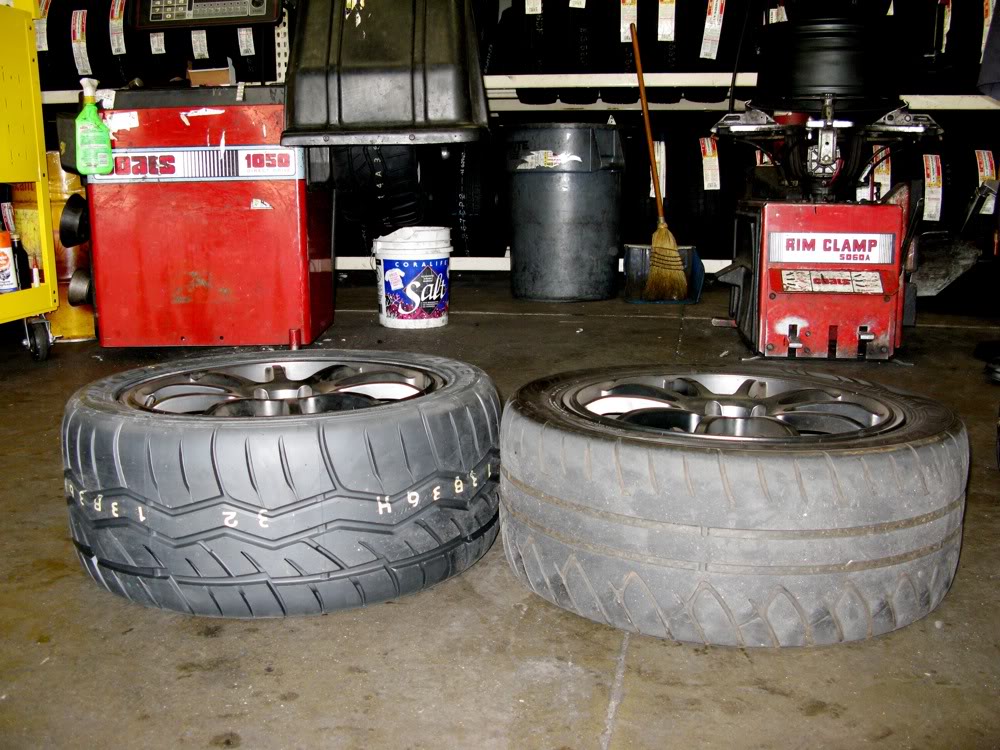
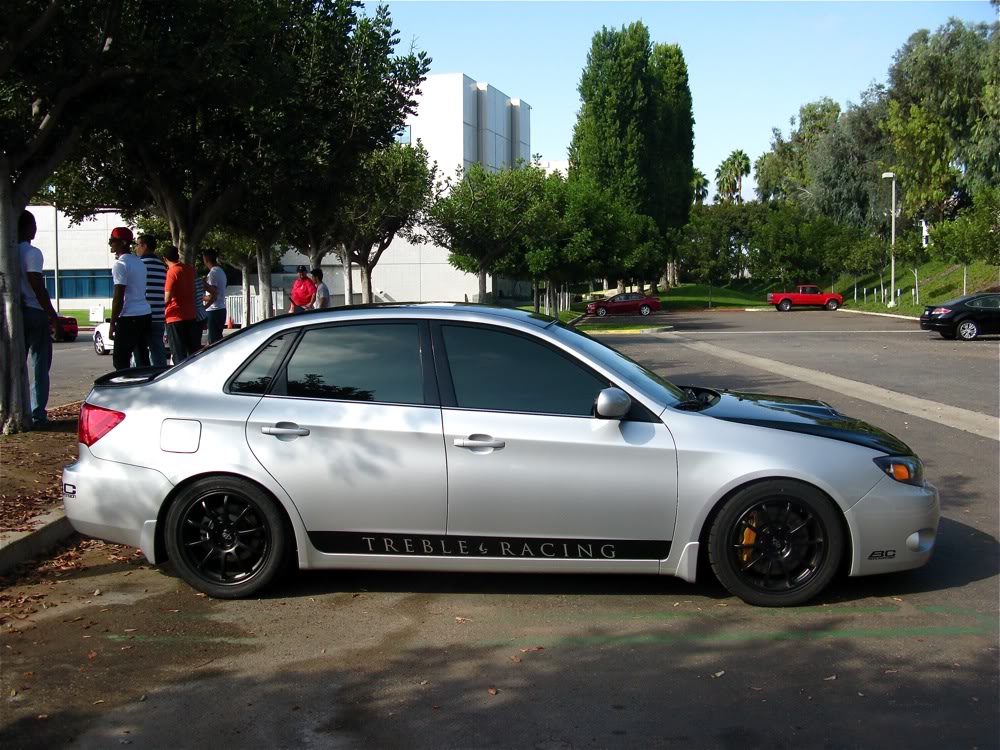
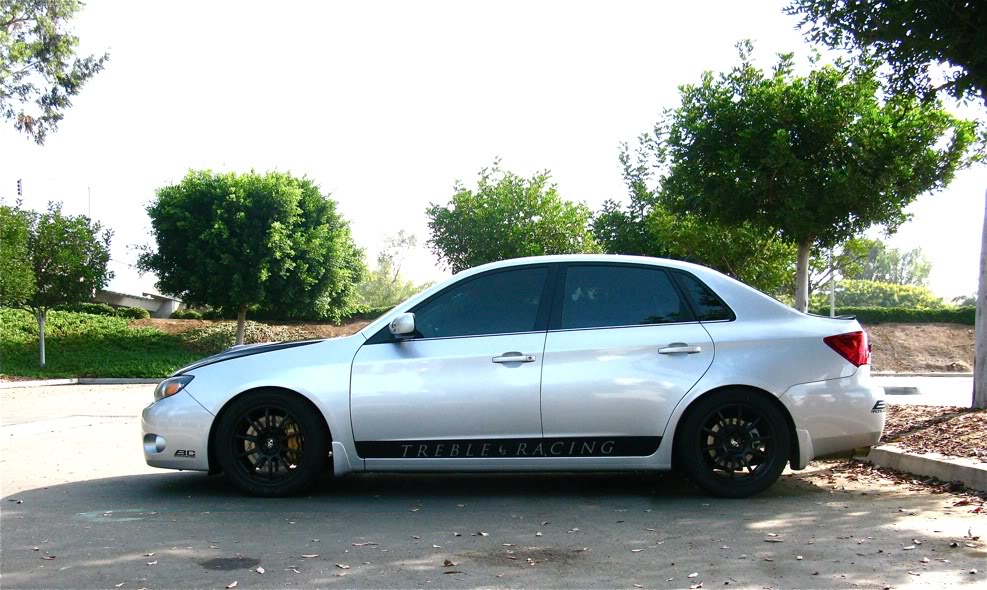
Out with the old. 235/45-17 Kumho Ecsta XS on 17x8 Rota G-Force
In with the new. 255/40-17 Falken Azenis RT-615 on 17x8 Rota G-Force
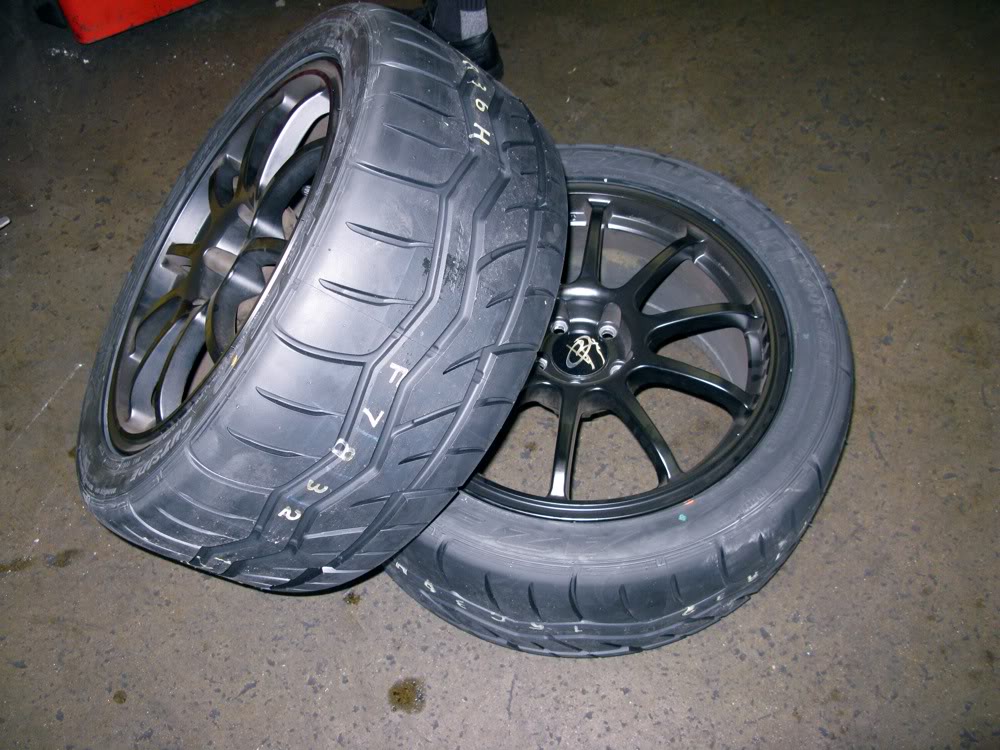
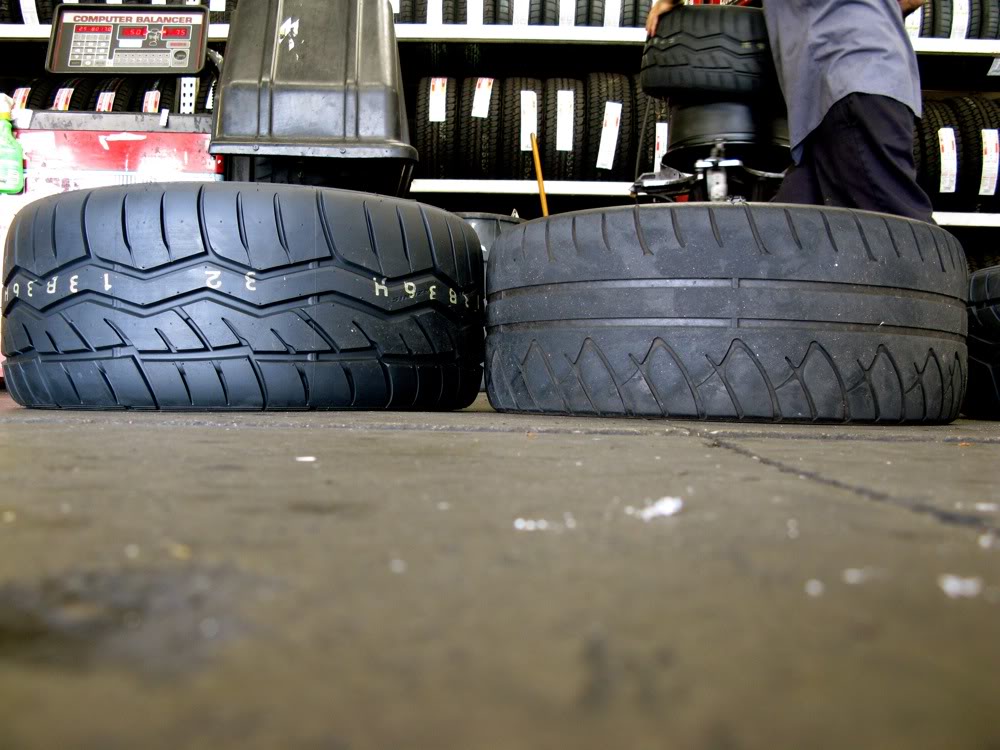
Side by Side. 255/40 Azenis vs 235/45 XS
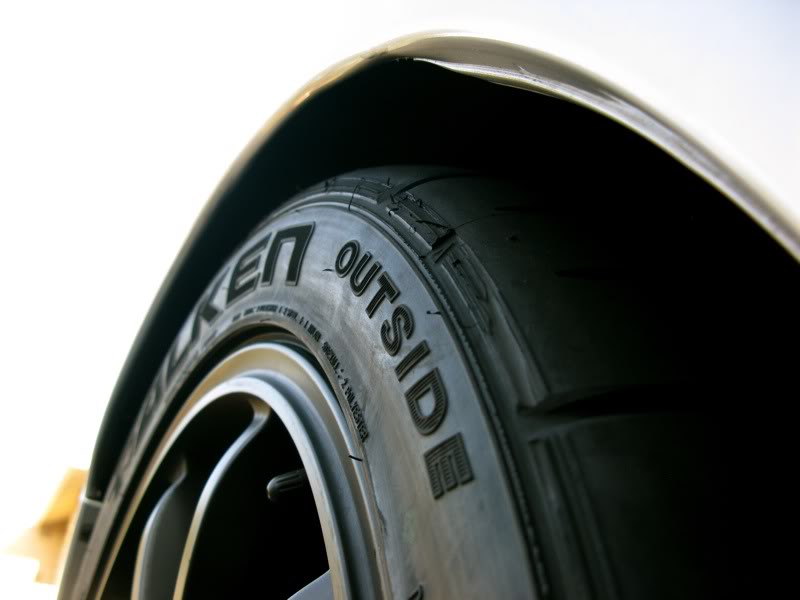
A shot from the front towards back at the rear fender rolled. Just enough clearance!
--
I'm scheduled to have the roof done in Gloss Black on Monday... I will definitely take some pictures soon showing off the new tires and roof. Hopefully hood will be installed shortly as well!
The only thing I can say that doesn't feel 'better' at this point is the overall compound stiffness. It feels harder and less forgiving. Smaller imperfections tremble through the chassis. It's not terrible, but it's there. For those who have BC Coilovers, imagine stepping up the stiffness by 2-3 clicks. It's that different! However, bear in mind, it does have a shorter sidewall than my previous tires, so that could be part of the reason.
I have yet to launch on these and am not prepared to comment on the grip. However, I'll definitely report back once I've put enough miles on them to break them in.
A few pics of the tires during install.
New shoes!
Sticker
Out with the old. 235/45-17 Kumho Ecsta XS on 17x8 Rota G-Force
In with the new. 255/40-17 Falken Azenis RT-615 on 17x8 Rota G-Force
Side by Side. 255/40 Azenis vs 235/45 XS
A shot from the front towards back at the rear fender rolled. Just enough clearance!
--
I'm scheduled to have the roof done in Gloss Black on Monday... I will definitely take some pictures soon showing off the new tires and roof. Hopefully hood will be installed shortly as well!
Thread Starter
VIP Member
Joined: Apr 2003
Posts: 846
From: Orange County, CA
Car Info: 08 WRX - 401whp/408wtq
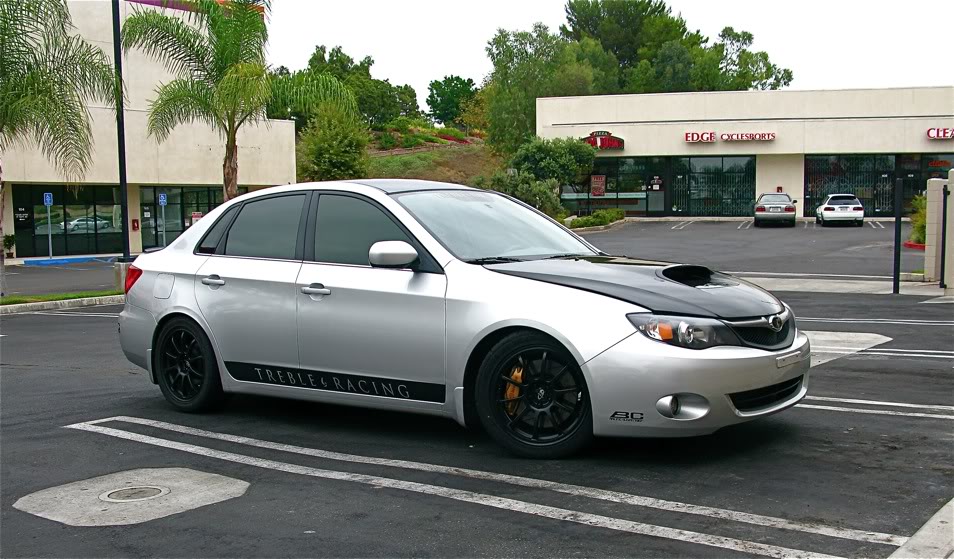
Got the roof wrapped in gloss black vinyl this morning. Dan of DownShift Custom Graphics came out and spent some time laying it on!! The dude's super patient and does incredibly meticulous work! Tucks every edge in perfectly and guarantees his work! The install is SEAMLESS and gorgeous! You'd think it's painted on.
One fear I had was that I would have a severe lack of patience to complete the look with a carbon hood. Well, I've changed my mind on the vented hood and will be getting an oem-style one tomorrow if we've got one at the warehouse!
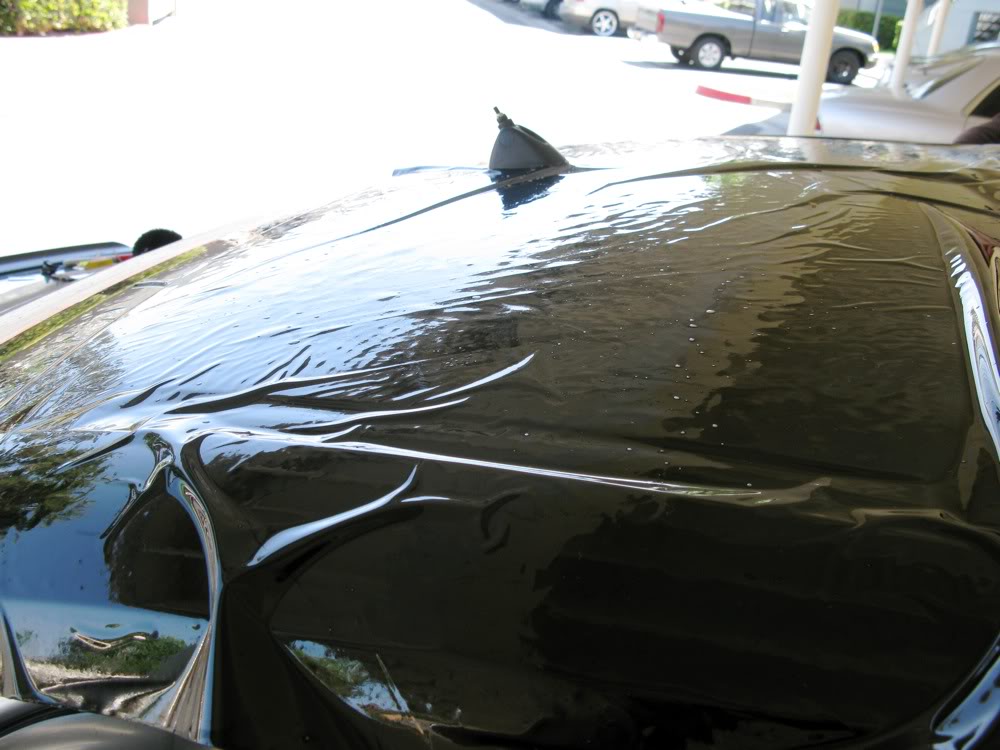
PICS OF THE INSTALL. PLEASE PARDON HOW DIRTY THE CAR WAS DUE TO USE OF SOAPY WATER DURING INSTALL.
DAN DID A CLAY JOB ON THE ROOF BEFORE INSTALLING THE VINYL OVERLAY:
OVERLAY PLACED ROUGHLY ON THE ROOF:
STARTING TO TUCK EDGES:
EDGES TUCKED!:
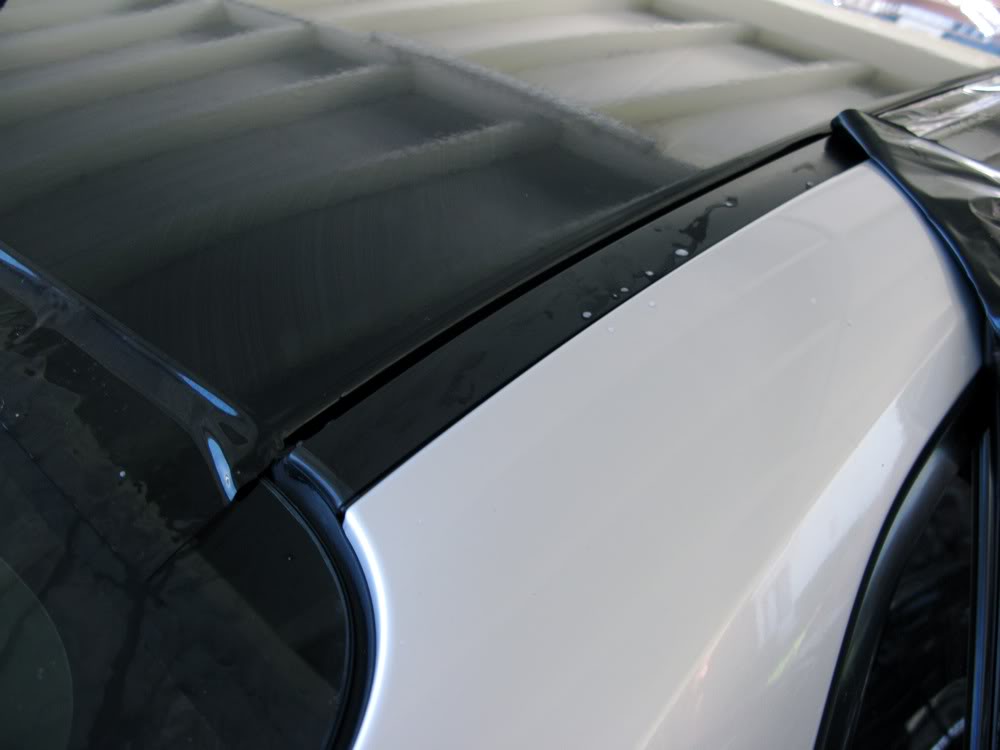
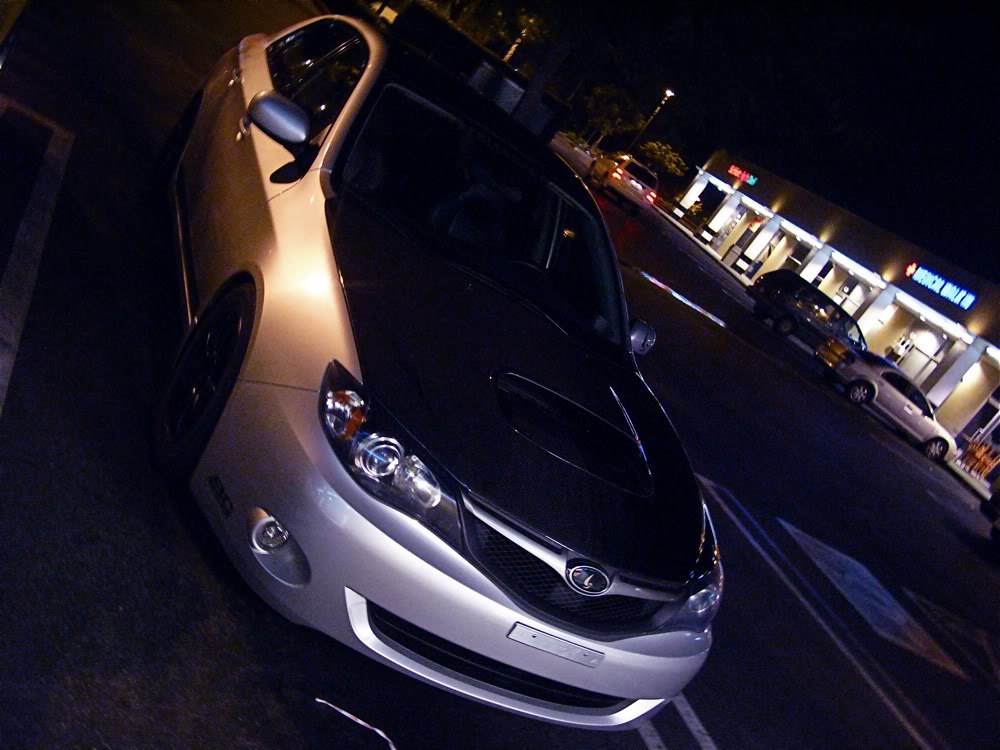
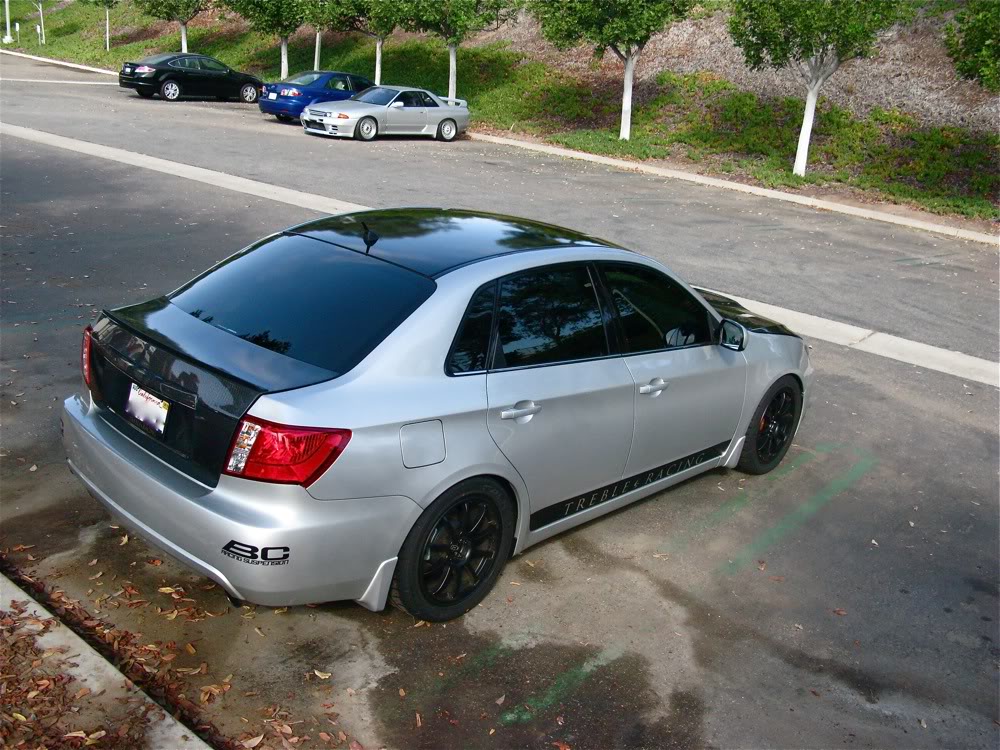
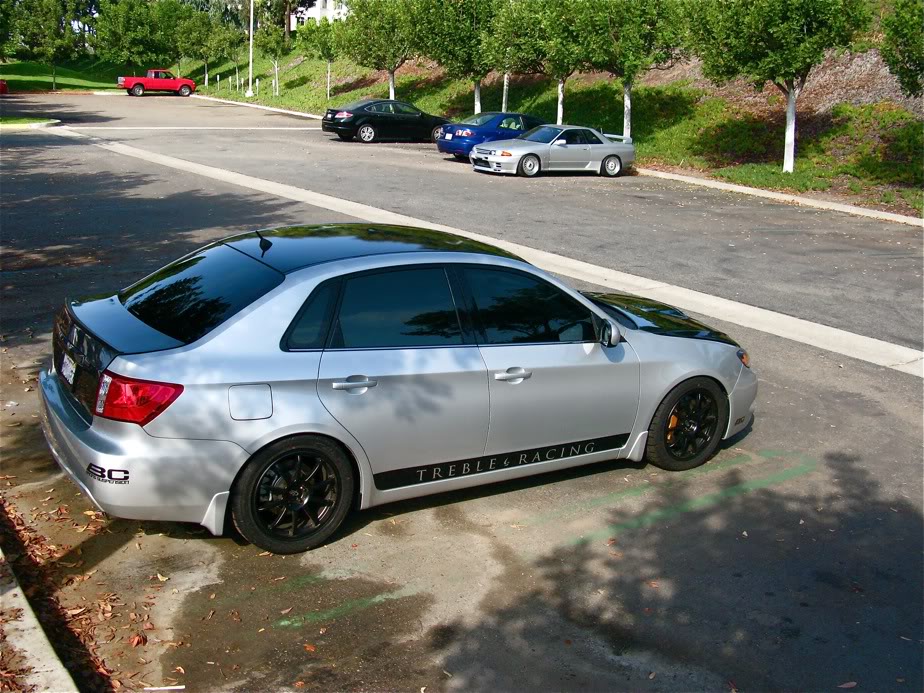
FINISHED PRODUCT FROM FRONT 3/4 ANGLE:
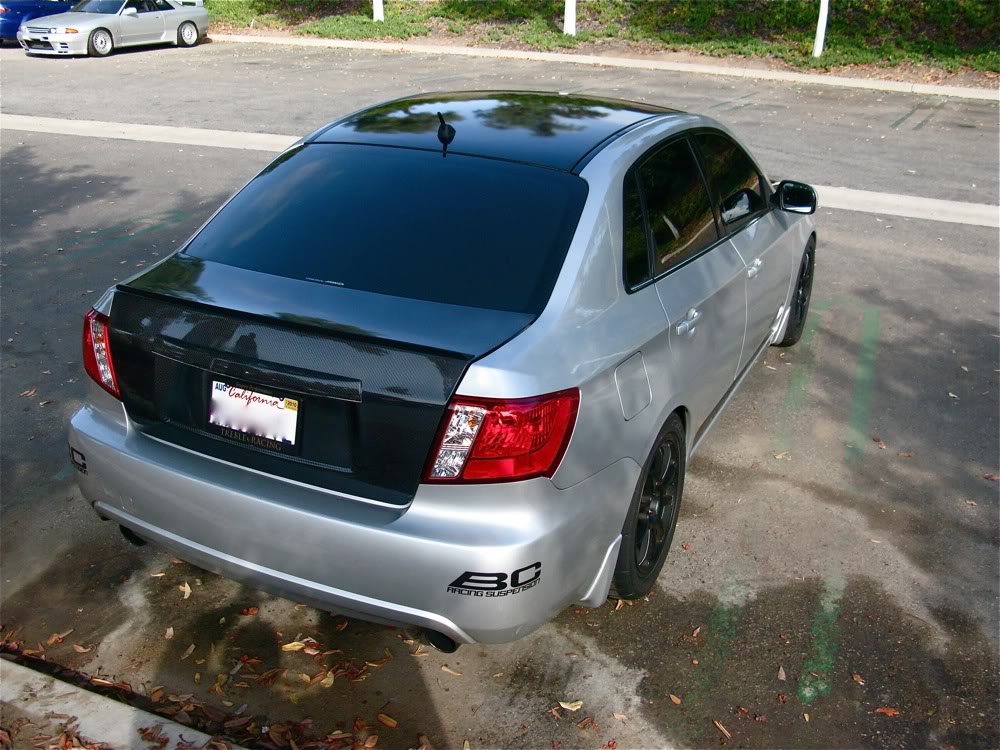
FINISHED PRODUCT FROM REAR 3/4 ANGLE:
DRYING IN THE SHADE:

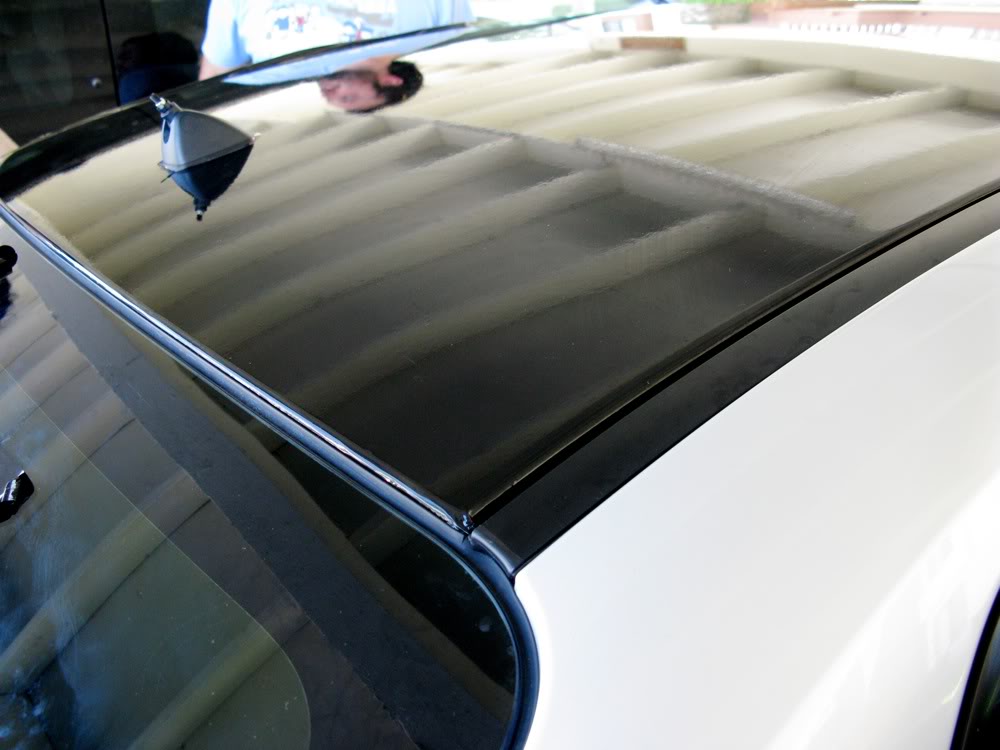
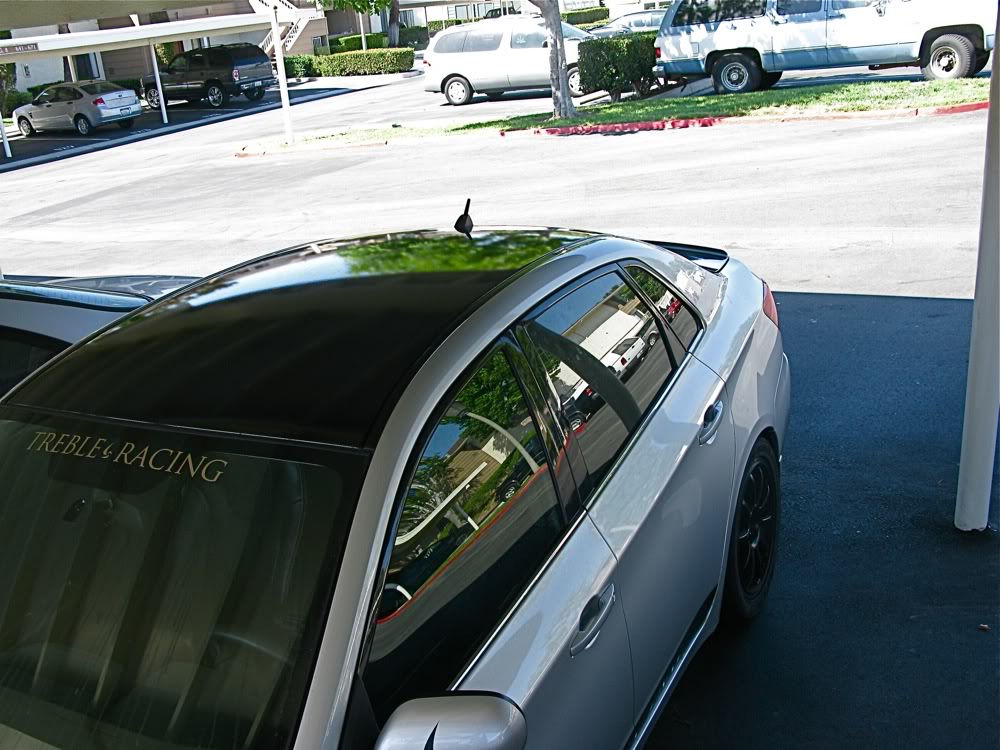
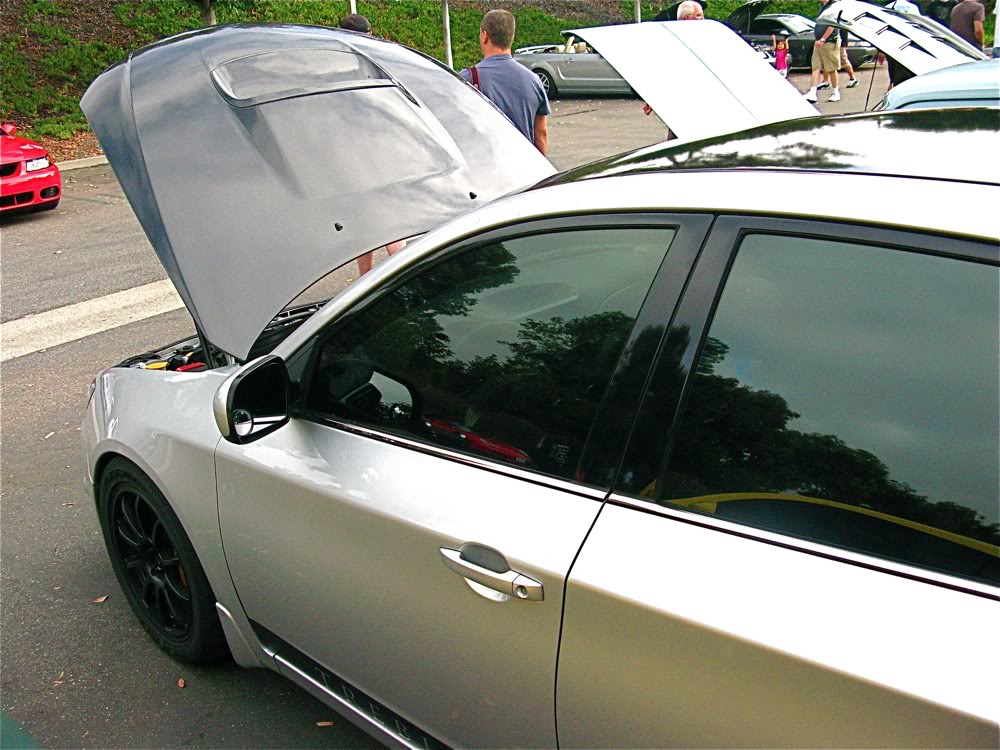
TOP VIEW DRIVER:
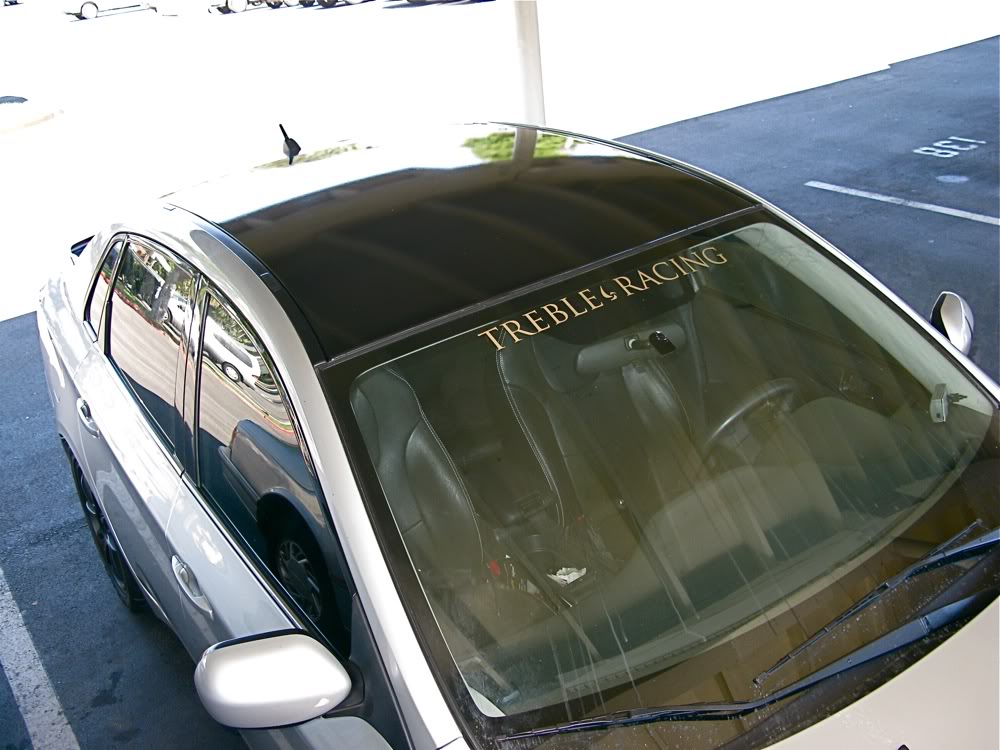
TOP VIEW PASSENGER:
TOP VIEW TO BACK:
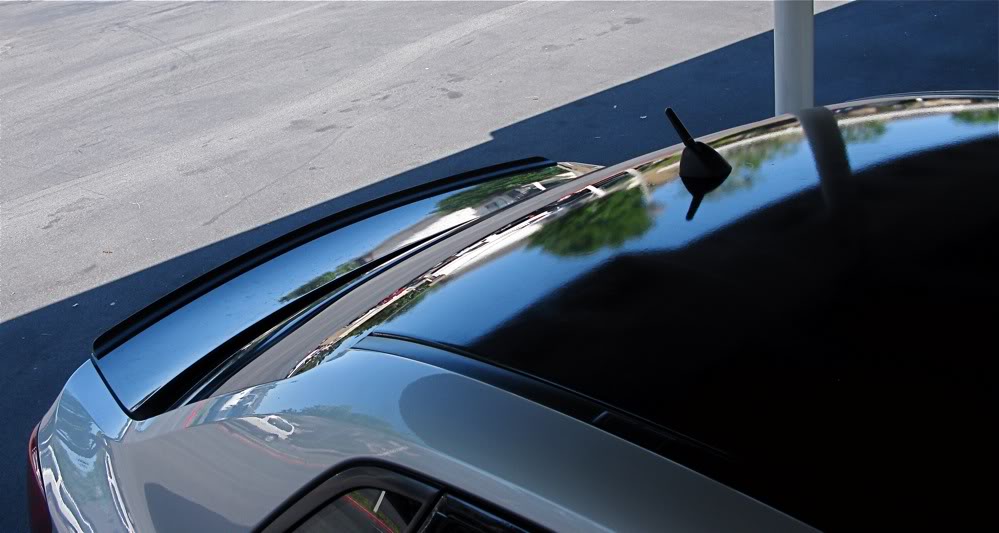
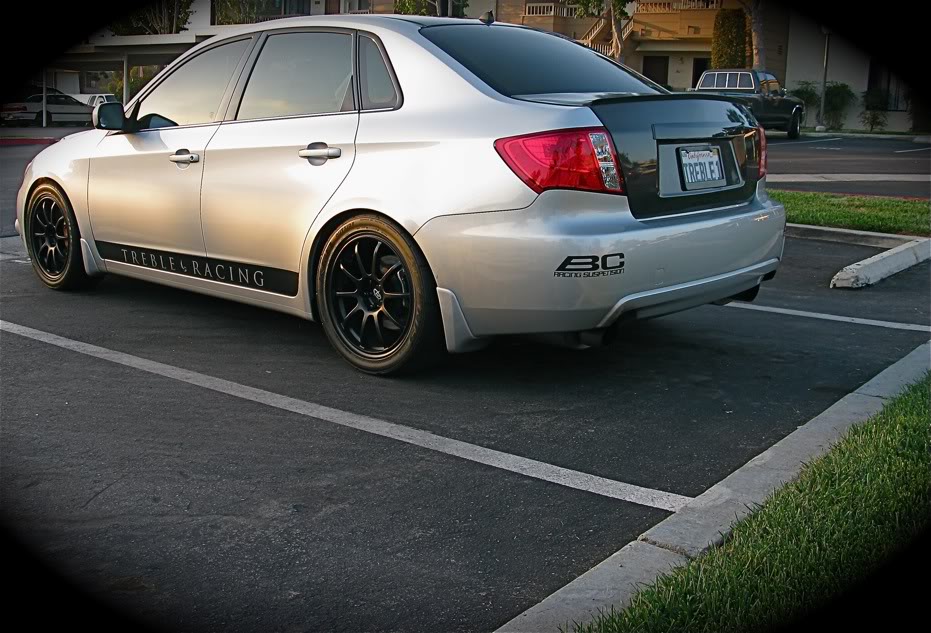
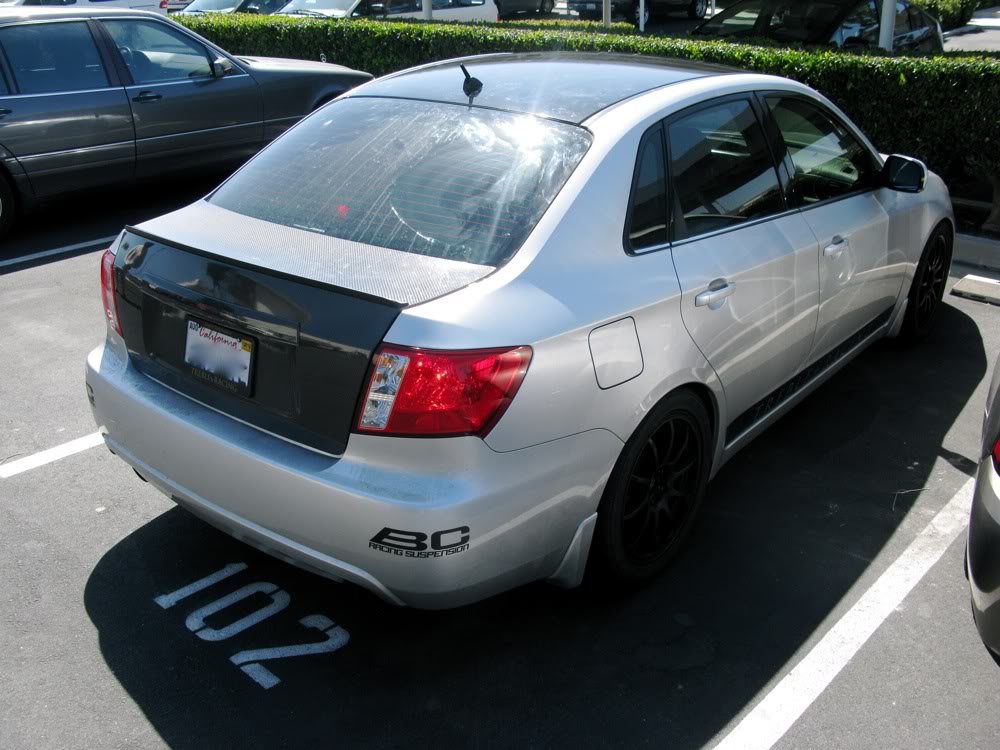
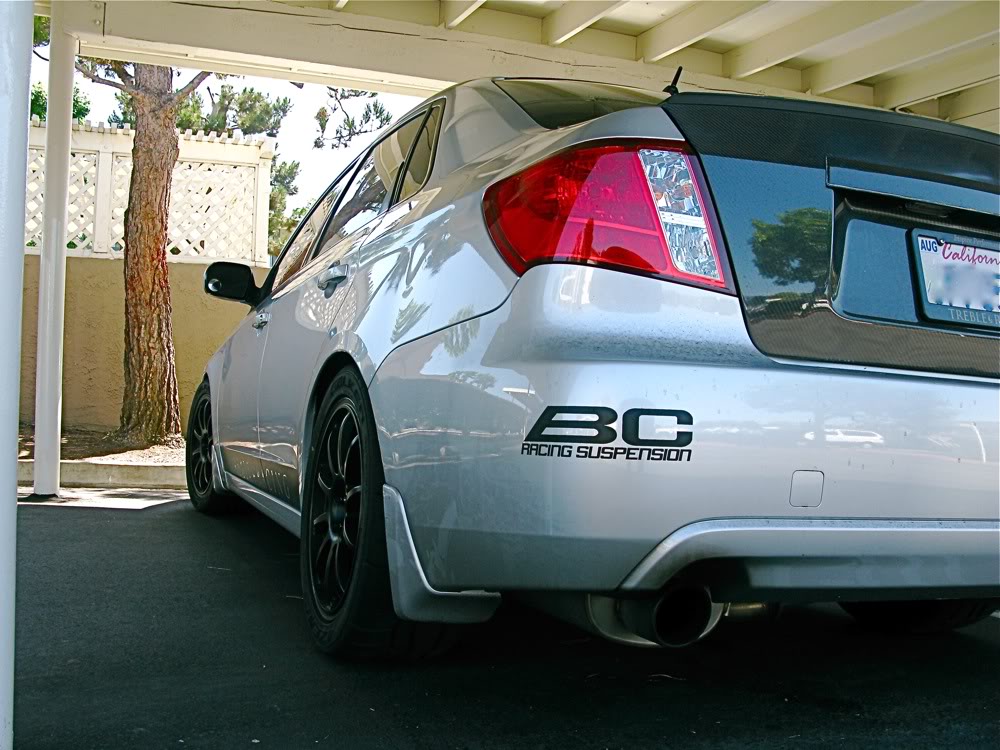
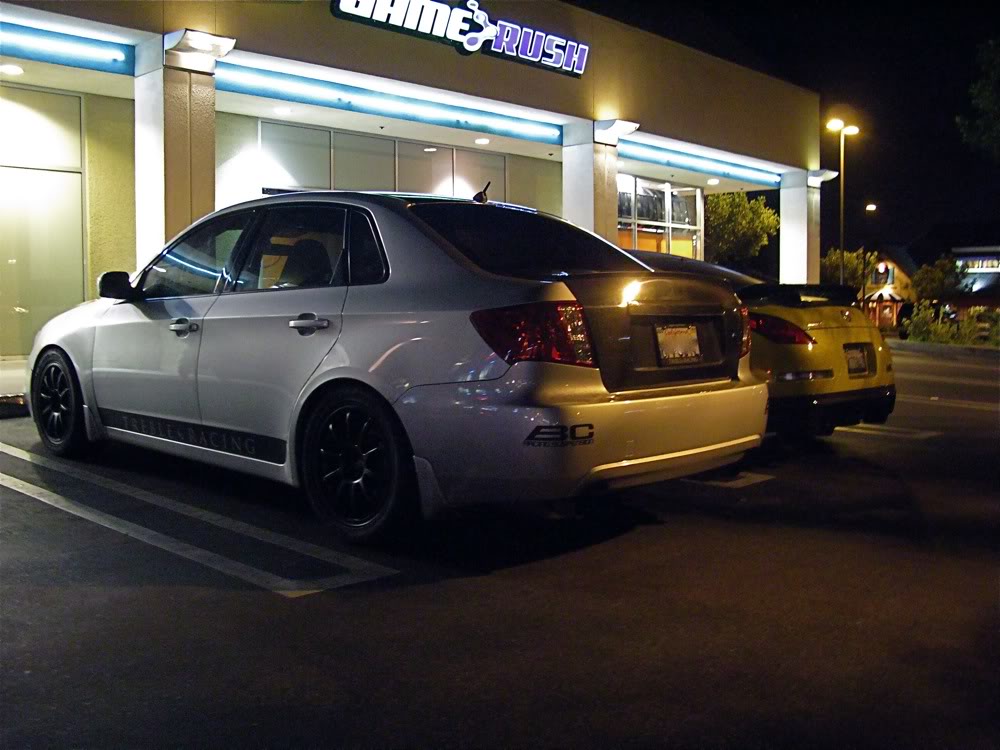
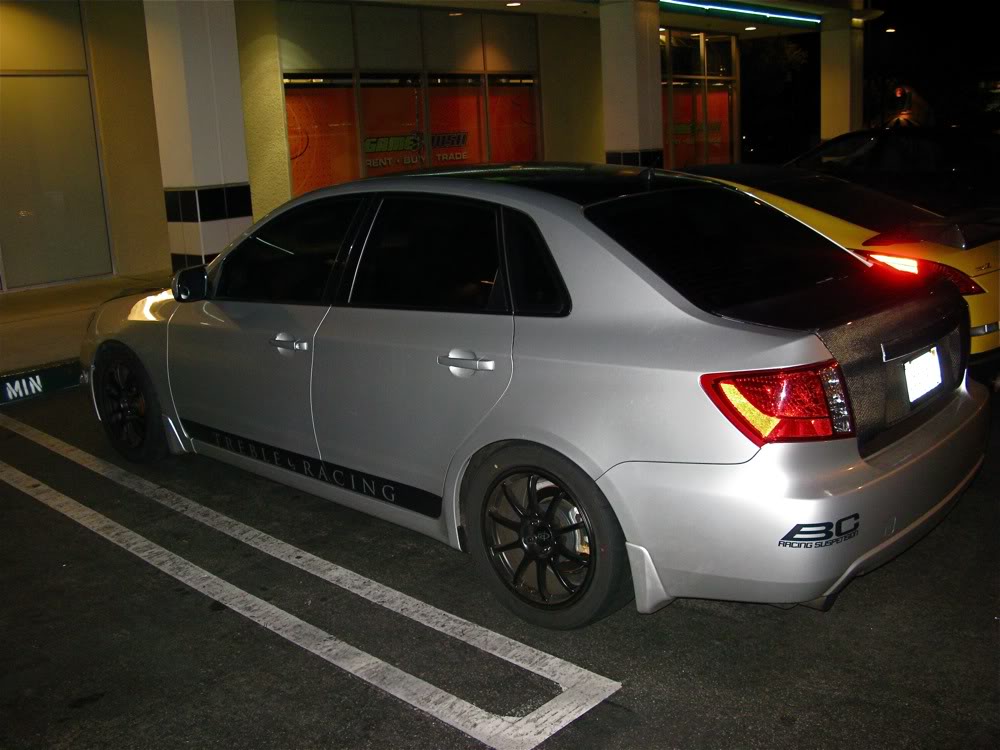
REAR 3/4 LOW, DISPLAYING NEW TIRES, ROLLED FENDER, AND REAR SPOILER:
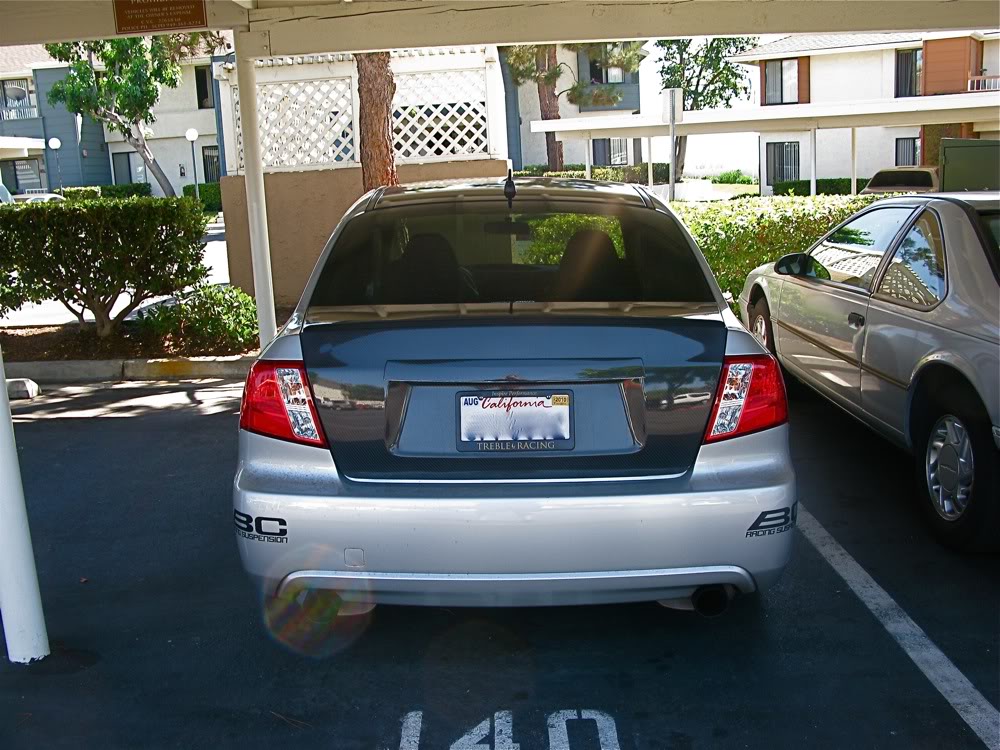
REAR VIEW:
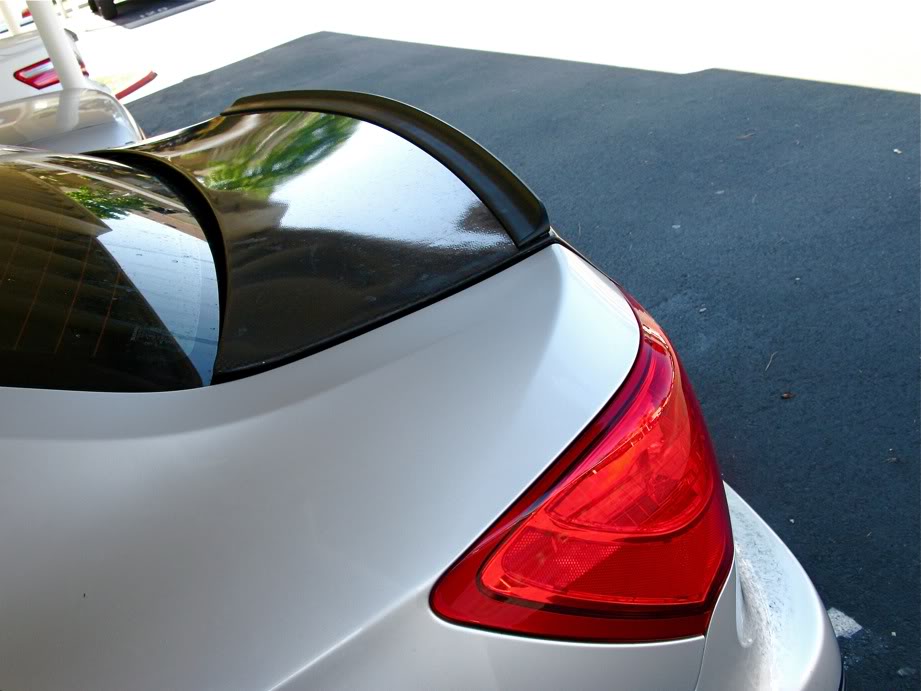
CUSTOM REAR LIP SPOILER:
One fear I had was that I would have a severe lack of patience to complete the look with a carbon hood. Well, I've changed my mind on the vented hood and will be getting an oem-style one tomorrow if we've got one at the warehouse!
PICS OF THE INSTALL. PLEASE PARDON HOW DIRTY THE CAR WAS DUE TO USE OF SOAPY WATER DURING INSTALL.
DAN DID A CLAY JOB ON THE ROOF BEFORE INSTALLING THE VINYL OVERLAY:
OVERLAY PLACED ROUGHLY ON THE ROOF:
STARTING TO TUCK EDGES:
EDGES TUCKED!:
FINISHED PRODUCT FROM FRONT 3/4 ANGLE:
FINISHED PRODUCT FROM REAR 3/4 ANGLE:
DRYING IN THE SHADE:
TOP VIEW DRIVER:
TOP VIEW PASSENGER:
TOP VIEW TO BACK:
REAR 3/4 LOW, DISPLAYING NEW TIRES, ROLLED FENDER, AND REAR SPOILER:
REAR VIEW:
CUSTOM REAR LIP SPOILER:
Thread Starter
VIP Member
Joined: Apr 2003
Posts: 846
From: Orange County, CA
Car Info: 08 WRX - 401whp/408wtq
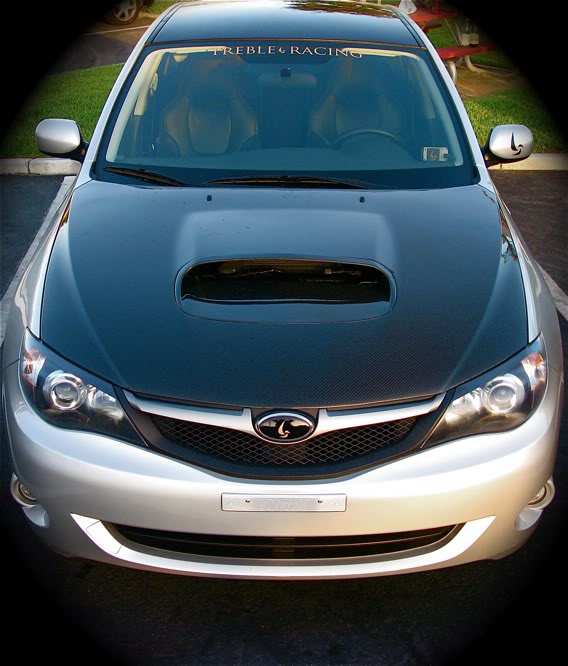
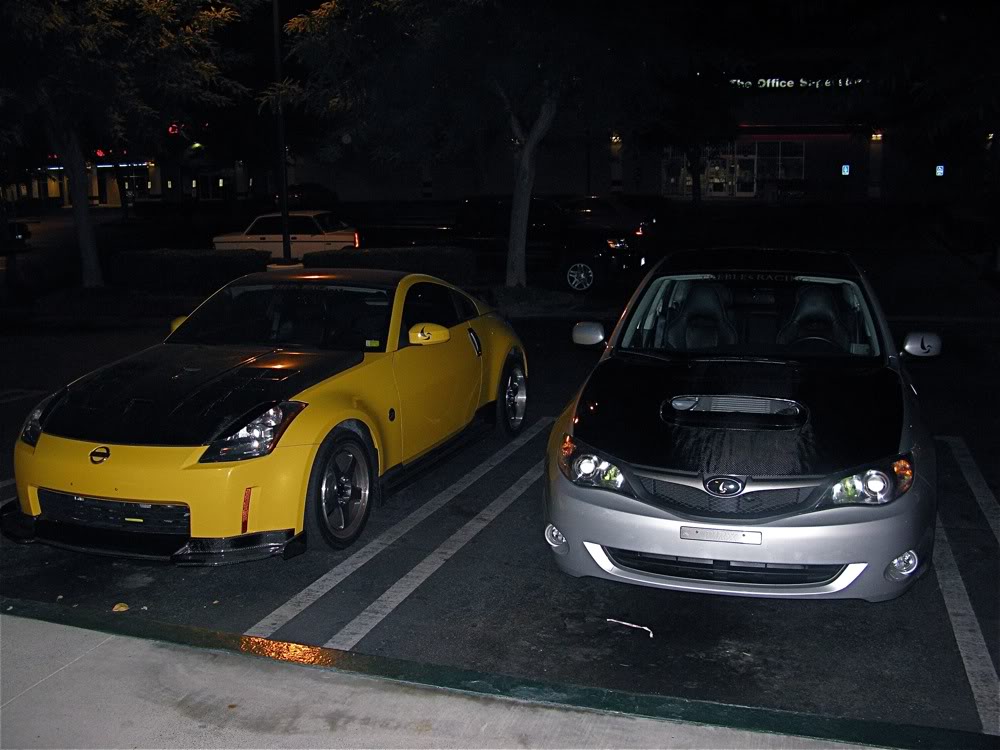
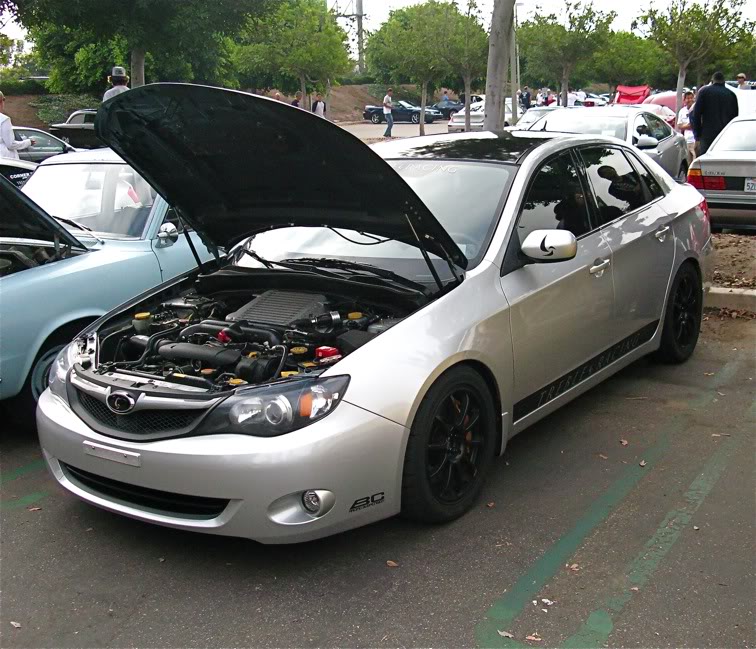
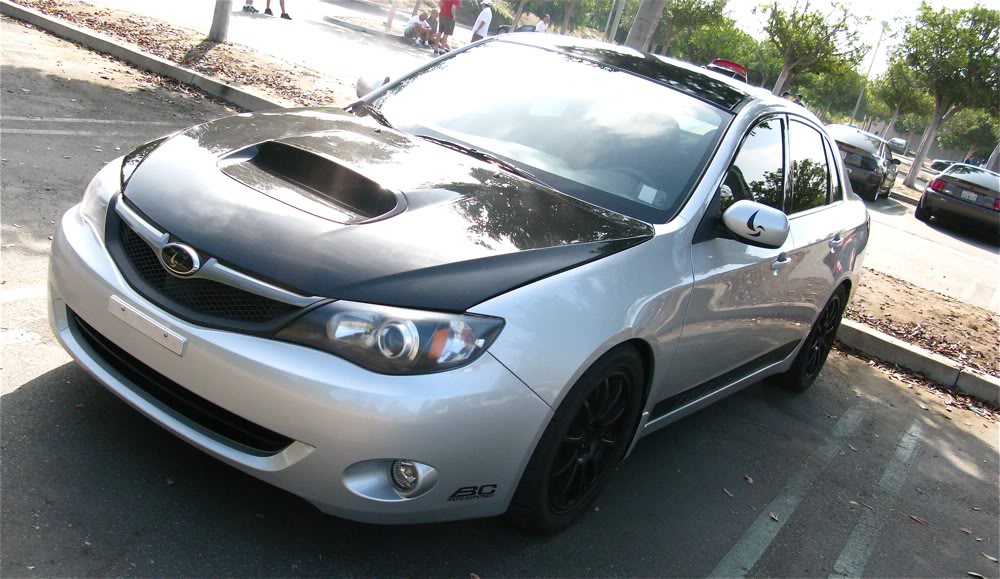
INSTALLED CARBON FIBER HOOD:
Got home late and was running out of sunlight. Install took about an hour. All pre-drilled holes for washer tube tabs needed additional filing to be large enough to work. Same issue with the washer nozzle area. Aside from that, all is good! Sorry for dark, dirty, crappy pictures.
HOODLESS:
INSTALLED!:

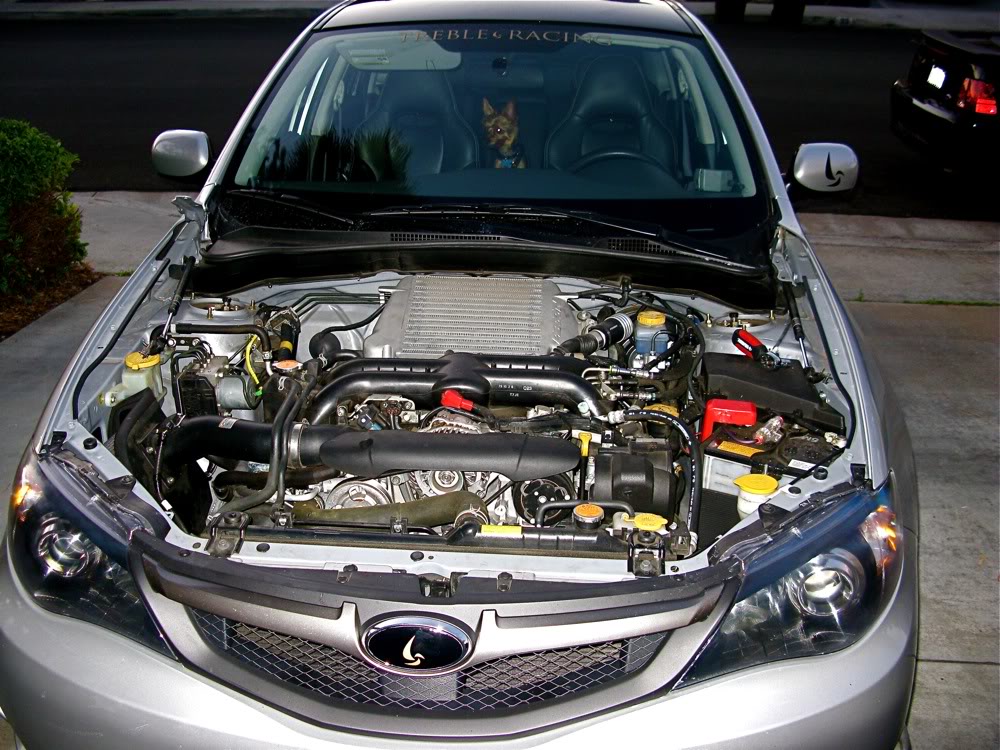
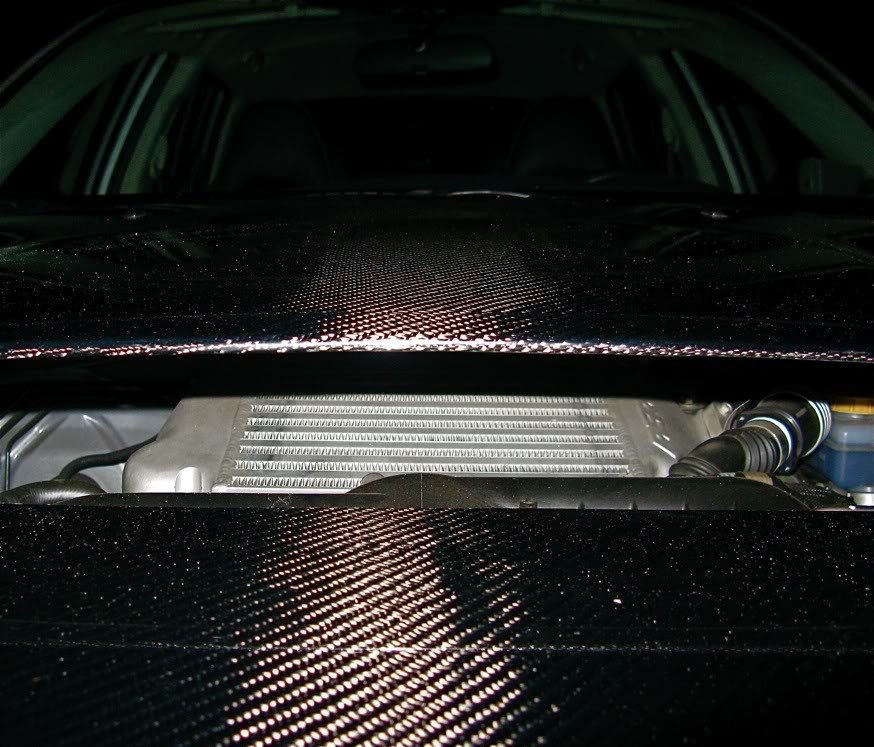
STANDING DIRECTLY IN FRONT OF THE CAR A FEW FEET BACK, YOU CAN SEE THE PERRIN INTERCOOLER PEERING THROUGH THE SCOOP LIKE YOU'D SEE A FRONT MOUNT PEERING THROUGH A GRILLE! LOOKS PRETTY SICK, IN MY OPINION! BPV IS ALSO VISIBLE!:
HIGHER ANGLE:

THERE GOES THAT INTERCOOLER, PEERING THROUGH AGAIN!:
REAR 3/4 LOW, NO FLASH:
REAR 3/4, WITH FLASH:
TILTED:
More pictures coming soon, once everything is washed and waxed!
Got home late and was running out of sunlight. Install took about an hour. All pre-drilled holes for washer tube tabs needed additional filing to be large enough to work. Same issue with the washer nozzle area. Aside from that, all is good! Sorry for dark, dirty, crappy pictures.
HOODLESS:
INSTALLED!:
STANDING DIRECTLY IN FRONT OF THE CAR A FEW FEET BACK, YOU CAN SEE THE PERRIN INTERCOOLER PEERING THROUGH THE SCOOP LIKE YOU'D SEE A FRONT MOUNT PEERING THROUGH A GRILLE! LOOKS PRETTY SICK, IN MY OPINION! BPV IS ALSO VISIBLE!:
HIGHER ANGLE:
THERE GOES THAT INTERCOOLER, PEERING THROUGH AGAIN!:
REAR 3/4 LOW, NO FLASH:
REAR 3/4, WITH FLASH:
TILTED:
More pictures coming soon, once everything is washed and waxed!
Thread Starter
VIP Member
Joined: Apr 2003
Posts: 846
From: Orange County, CA
Car Info: 08 WRX - 401whp/408wtq
Finally got around to uploading some videos, here's one.
http://www.youtube.com/watch?v=WzIl6jC-7_I
youtube channel: BoostAddictv24
http://www.youtube.com/watch?v=WzIl6jC-7_I
youtube channel: BoostAddictv24
Thread Starter
VIP Member
Joined: Apr 2003
Posts: 846
From: Orange County, CA
Car Info: 08 WRX - 401whp/408wtq
Thread Starter
VIP Member
Joined: Apr 2003
Posts: 846
From: Orange County, CA
Car Info: 08 WRX - 401whp/408wtq
------Update!------
Equal Length Header, Walbro 255lph Fuel Pump & Deatschwerks 750cc Injector install scheduled for Sunday, September 20th!!! Church Automotive Testing on Monday, September 21st!!!
Target Boost: 20psi
Goal: 330whp / 360wtq
Equal Length Header, Walbro 255lph Fuel Pump & Deatschwerks 750cc Injector install scheduled for Sunday, September 20th!!! Church Automotive Testing on Monday, September 21st!!!
Target Boost: 20psi
Goal: 330whp / 360wtq
Thread Starter
VIP Member
Joined: Apr 2003
Posts: 846
From: Orange County, CA
Car Info: 08 WRX - 401whp/408wtq
---Update---
The Injectors, Fuel Pump, and Header are in!!!!! Tune tomorrow!
The install took a lot longer than we expected! Some quick notes and impressions.
-Header was a quick 45-minute deal including jacking up both sides of the car and removing the under-tray. Perrin's equal length header fit perfectly with the slip joints loosened. Once the header was tightening to the heads, we tightened down the slip joints. Very straight forward install!
-Fuel Pump was a bit of a chore and not as straight forward as we would have hoped. The Walbro 255lph fuel pump is a large unit; it's slightly larger in girth than the stock pump, and has a longer body. First, the rear seat bottoms are super easy to remove, just press back and up from each side to access the pump housing which is located on the passenger side. Removal of the housing was straight forward, but to fit the new pump in the housing, it took a lot of trimming and grinding down of the inner housing. We finally got everything connected and figured we would use the stock fuel filter as the one that came in the pack was way too large to fit. Even still, with everything snapped in place, the housing bulges a bit on the bottom, and we feared this would cause a restriction in fuel delivery. Thankfully, it seems ok. The Walbro is loud and proud; A high pitch buzz emits through your cabin when the key is selecting the ON position. All systems go!
-Injectors took the absolute longest time to access! Here's a brief summary of how it went.
We tackled the Passenger Side first. We removed the K&N Typhoon Intake and dismounted the coolant reservoir that's mounted beside the intake manifold. We had to push it out of the way to access the metal bracket covering the rail and injectors. Well, most of the bolts for the metal tray were easy to remove. However, there's one little metal nipple that protrudes from the head and blocks any standard socket from fitting over the lower bolt holding the bracket in place. We had to use a universal joint and finagle it off. Once we had access to the injectors, it was just a game of patience to properly lube the new o-rings carefully and slide them into their ports with finesse.
Then came the Driver's Side. It looked easier at first, but man was it a hassle! First we removed the battery and tray. Then we removed that lovely hunk of emission add-on hunk of plastic on the right side of the bay. We also removed the two hard fuel lines to the right of the TMIC, as well as the TMIC bracket. We went ahead and removed the little funnel that you pour engine oil down into. After all that, we thought we were golden. So we started unbolting the metal bracket that covers the injectors and rail. Then we realized we had all but one... again. We thought we could access it by reaching straight down... And it was WAY down there! So we unbolted the TMIC and went for it. Alas, it was a failed attempt, as we realized there was no way we could place a socket over it or get any sort of clearance to unbolt it. So we carefully and conservatively bent the bracket back, did our deal with the injectors, then bolted it back in place.
-The Start Up! It was really exciting and nerve wrecking anticipating the moment of fire up! Say a prayer... Will the pump work? Will there be some leak in the system? We've taken so many things apart just to access the injectors, have we missed anything? Will we end up having to uninstall things all over again just to fix a problem!?!? So we started by priming the injector several times. When the key is turned to the ON position, you hear the fuel pump buzz as it fills the line with fuel. The buzz only lasts for about 5 seconds max(I actually didn't count). So I turned to the ON position about 15-20 times while 2 buddies checked for leaks by the rails, injectors, etc... While 15-20 may sound excessive, we wanted to ensure there were no leaks, that pressure was built up in the system, and that all the air pockets were pushed out. We fired her up and, wow! It started quickly and sounded smooth! We let the motor warm up for a few minutes watching AFRs on the DashHawk. The car idled very smoothly hinting at the changed exhaust note.
I've driven it very gently (staying out of boost) and will be driving it to Shawn's tomorrow morning for the tuning session. Initial impressions are very good! The exhaust note has changed from a dirty grumble to a higher pitched, buttery-smooth howl. The car idles so smooth, and off-boost torque feels improved! I will post pictures tomorrow, but you'll notice the collectors of the header are very small in diameter, even compared to stock. My early assumption is that the smooth, equal length design gives the on-boost horsepower and torque, while the narrower diameter maintains a healthy abundance of off-boost torque. I am very excited to see what kind of numbers the car will put down tomorrow!
Wish me luck
Thread Starter
VIP Member
Joined: Apr 2003
Posts: 846
From: Orange County, CA
Car Info: 08 WRX - 401whp/408wtq
---Quick Update after a long day!---
So, I've got some news from our tuning session which ended up being a Part 1... Thankfully, we are getting very consistent and strong pressure from the fuel pump, and the injectors are delivering beautifully! Shawn appreciated the reliable flow of the new fueling system and was equally impressed with the equal length header (much more on the header later!). Without much fine adjustment, the car effortlessly made over 380 ft-lbs to the wheels! Of course, that was a peak figure and certainly tapered off as the rpm grew. Shawn wasn't comfortable with that kind of peak torque on the stock block, and neither am I. He suggested that we lower the peak figure to obtain a flatter torque curve to provide a healthy dose of gusto among a broad range of the rpm band without causing unnecessary risk to the internals and drivetrain. I gave him the thumbs up, so he fine tuned his way to ~361 ft-lbs from ~3000-4500rpm.
Once he started working on the top end, he realized the turbo wasn't holding sufficient boost. As the rpm would climb, our peak of ~21 psi would taper lower and lower until it reached ~14.7 psi at 6000 rpm. In fact, we would hold a very steady 19 psi until 4500 rpm. It was after 4500 rpm that things started tapering off. We were only able to put down ~270 whp. So we looked to the Boost Control system... We figured we can swap the two Tee-d off hoses from the turbo and wastegate, to see if the internal pill sizes being switched may help. It definitely helped. We were able to make more power, but it still wanted to taper off. The end result for the day was 296 whp. While that's 9 whp less than our last tune, the power plateaus from 4500-6500! Simply looking at the horsepower curve, the car wants to continue making power if the Boost Controller were to allow it.
After some thinking and researching, we decided that a GM 3-port Boost Control Solenoid was in order. A good friend of mine had one and generously offered it up. Tomorrow we will be fitting the new Boost Control Solenoid, and finally tuning for some serious horsepower in the upper rpm range.
At this point, I am really happy to say that the fuel pump, injectors and header have been VERY potent additions to the car. Just how potent is still to be determined. The fact that the header and a little extra boost knocked out an effortless 380 wtq, is kind of amazing. If we considered that amount of torque to be safe on the stock block, then it would mean we made an additional 45 wtq! That's downright ridiculous! The header also helps the car spool up around 500 rpm earlier! The entire driving dynamic has changed with the addition of this part. It feels like an easier breathing, fine-tuned powerplant. I will be going into more detail about the header soon. But let's just lay it out there now that I am downright impressed with this piece!
If we can accomplish about 330 whp tomorrow, I will be very satisfied with the results! Because this will be complemented by a very healthy, broad torque curve of 360 ft-lbs! The car already feels lighter-revving and significantly faster as all the power and torque comes on much sooner and stronger! Highway pulls are now giggle-worthy.
Result of Tune Part 1: 296 whp / 361 wtq
Thread Starter
VIP Member
Joined: Apr 2003
Posts: 846
From: Orange County, CA
Car Info: 08 WRX - 401whp/408wtq
The tuning is complete!
Horsepower and Torque goals are a great way to project and benchmark the type of performance potential you're looking for from your car. However, peak figures are only that; peak figures. A lot goes into tuning a vehicle properly and safely. When examining a vehicles performance on a dyno graph, it's important to notice how much power it's making at what point and for how long. Sometimes, just because a vehicle is capable of making a certain amount of power, does not necessarily mean it's safe. With that said, let's look at the results!
Power Related Performance Mods:
COBB AccessPORT
K&N Typhoon Intake
VF-52 Turbocharger
PERRIN Top Mount Intercooler
PERRIN Bypass Valve
PERRIN Equal Length Header
Invidia Catted Downpipe
SPT Cat-Back Exhaust
Prodrive 3-Port Boost Control Solenoid
Deatschwerks 750cc Fuel Injectors
Walbro 255lph Fuel Pump
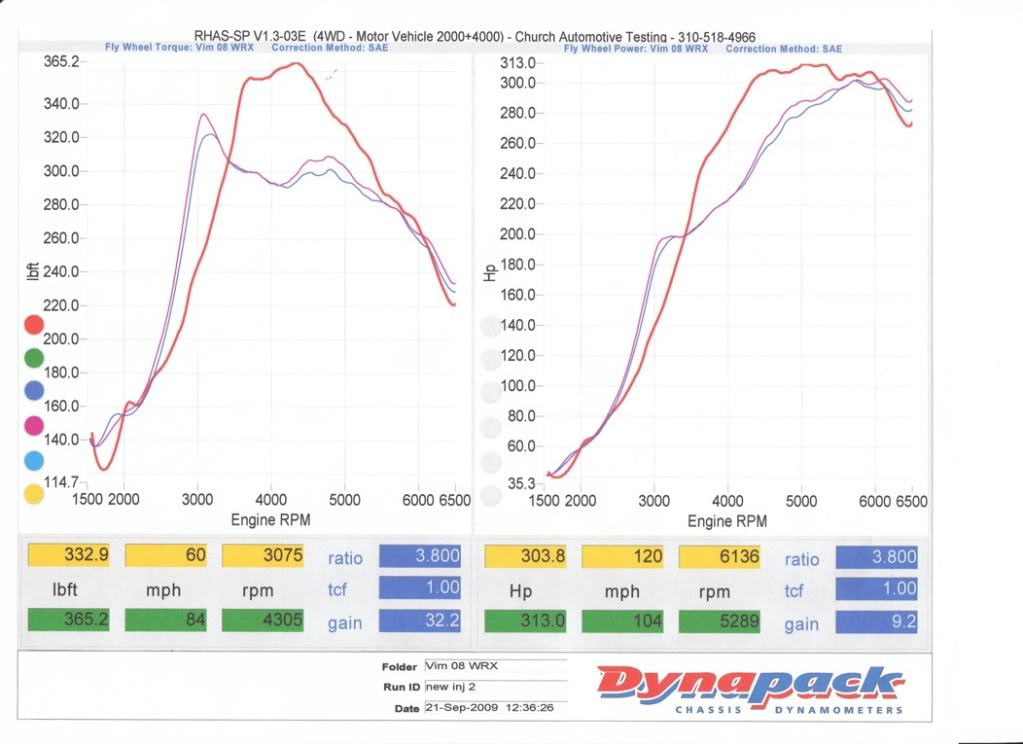
Current Peak Results: 313.0 whp / 365.2 wtq
-----
Previous Set Up (all modifications from above EXCEPT for the following):
PERRIN Equal Length Header
Prodrive 3-Port Boost Control Solenoid
Deatschwerks 750cc Fuel Injectors
Walbro 255lph Fuel Pump
Previous Peak Results: 303.3 whp / 334.3 wtq
DYNO GRAPH SHOWING CURRENT TUNE IN RED, PREVIOUS TUNE IN PURPLE:
---
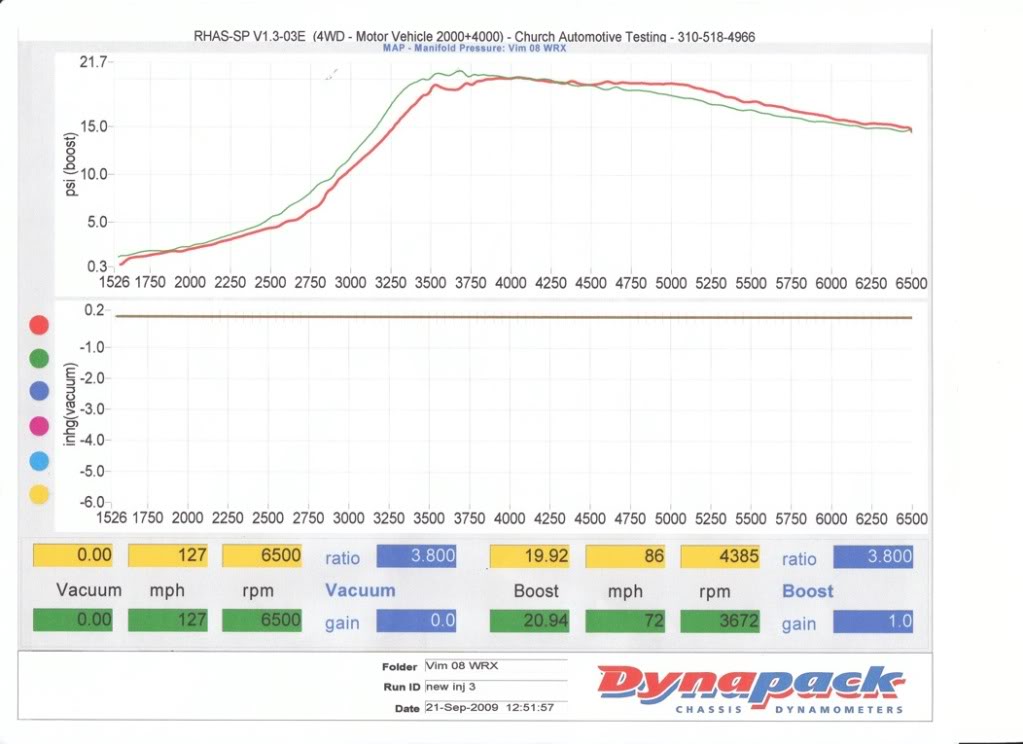
BOOST CONTROL: The Prodrive 3-port boost control solenoid helped promote more reliable and less peaky boost delivery. Maximum boost pressure is 20.94psi at 3672 rpm. Boost is held very consistently above 19psi until about 5000 rpm, then it begins to slowly taper. We found our boost level tapering down to about 16.5 psi by 6000 rpm and finishing off the rev band at just over 15 psi. Initial boost delivery was tuned to be delayed with drivetrain and motor preservation in mind. GREEN LINE is yesterday's boost graph with the stock 2-port BCS, and RED LINE is today's graph with the Prodrive 3-port BCS.
---
TUNING: First and foremost, we are tuned on 91(ACN) fuel here in California. Yesterday, we'd already determined that the PERRIN Equal Length Header enabled the car to shoot up a super quick spool, achieving over 380 ft-lbs of wheel torque at just under 3000 rpm! We were absolutely impressed with the super quick spool up and smooth delivery of power, but after some discussion and thought we agreed to back off the peak torque and let the turbo spool up a little later, protecting the drivetrain and motor. The 3-port bcs allowed us to make a little more power up top as well without dropping off as badly. However, we still realized that the limited horsepower potential was more a product of the VF-52 than anything else. The turbo simply cannot push enough air at those high rpm levels. Here's a look at a graph I modified to give you a rough idea of what our 380 ft-lb run looked like.

---
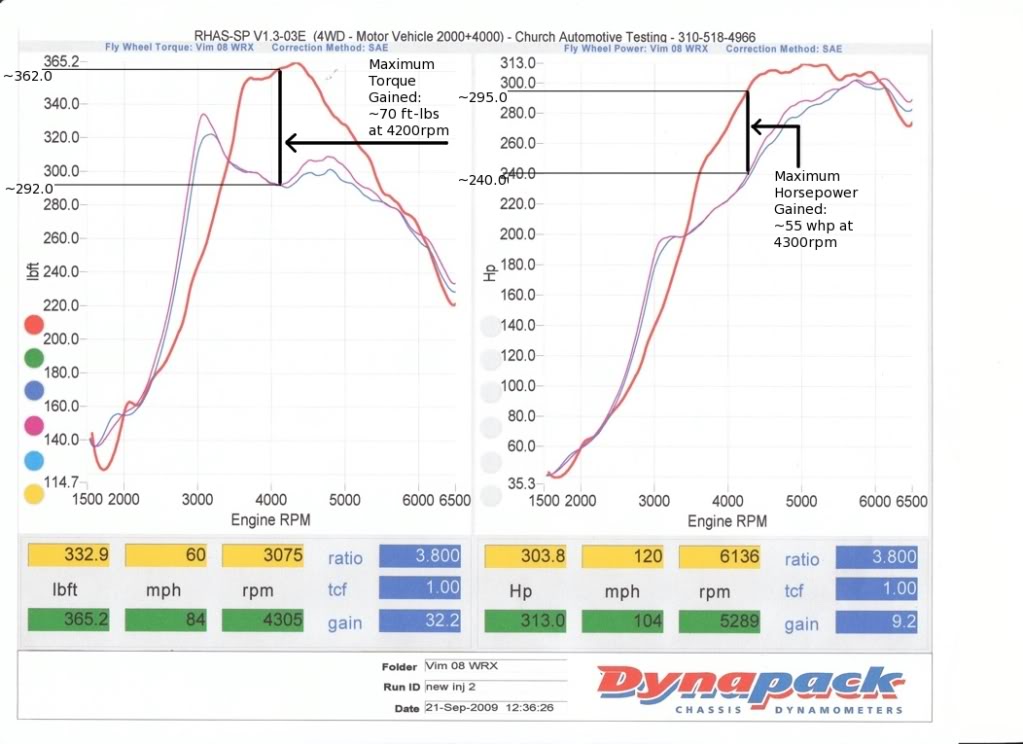
However, the car is not a Dyno Queen looking to prove a point. Instead, we wanted raw, usable power with reliability in mind. So rather than exploiting a potentially dangerous, early spool up, we ditched it for a smoother spool up that still managed to give us a fat 365 wtq which wasn't an isolated peak. The car makes over 350wtq between 3500-4500 rpm! If you compare to our previous results(before 3-port, elh, pump & injectors), the gains are really staggering! The mid-range pull has improved dramatically. Notice a maximum torque gain of 70 ft-lbs at 4200 rpm and a maximum horsepower gain of 55 whp at 4300 rpm!!! Check out the graph below for the maximum gains:
---
DRIVING IMPRESSIONS: The car feels entirely different from earlier! The peak gains don't even begin to tell the story, which is why I tried to breakdown the dyno graph above. Pre-Boost street driving is so smooth and torquey. The revs fly up with far less effort, almost as if the flywheel was significantly lightened. I simply cannot put into the words the way it feels. Imagine your rough revving ej25 has transformed to a fine-tuned race motor. Equaling out those exhaust gas pulses has seriously changed this vehicles character. I think I'm in love with the equal lengths! The results I speculated for the header were exceeded. I'm realizing that I cannot shut up about this piece of piping.
The Subaru Signature Rumble is gone, as expected. But I am simply in love with the sound accomplished by pairing the ELH, Invidia Catted DP and SPT Catback together. I'll let videos do the talking once I get a chance to record a few more and upload them all.
Power delivery is dramatically stronger! A 3rd gear pull will no longer kick you in the seat with the previous 3000 rpm torque peak. Instead, a light revving, yet powerful pull is accompanied by a force that pushes you into the seat and buries you deeper and deeper the higher up the rev band you travel. Before you know it, you're going a lot faster than you anticipated. I will record 0-60 runs and make a visit to the strip sometime soon to compare numbers with my previous set-up. I'm anticipating 0-60 times to fall in the 3.8-3.9 range, if I can find the courage to launch hard enough with such an abundance of torque on this 5-spd.
OVERALL: At first, I was a little disappointed that we couldn't make more than 313 whp, but after driving it, I couldn't believe the improvement and had no complaints! With the injectors and pump, I was seeking a more reliable fueling system. We are barely touching over 60% injector duty cycle, and the fuel pump is doing it's job well. With the equal length header I was looking for a little more power in the mid-range and just liked the idea of smoothing out the exhaust flow, because it made sense in theory. In application, the PERRIN Equal Length Header has blown me away. I'm officially crowning it as my favorite modification due to the way it's effected the driving experience in many different ways! More power, more torque, quicker spool, lighter and quicker rev-up, and a very intoxicating sound!
----
A FEW SPECIAL THANKS FOR THOSE INVOLVED THIS WEEKEND: These individuals were involved in a process that could have went drastically different. Just because everything has gone smoothly, does not mean it couldn't have gone the other way. There were a few key people that made sure everything went well, and I feel they deserve a moment of appreciation in this thread for all their hard work and involvement!
A big thank you to Manny, my good friend, who has always been there for me in helping with big installs. His positive attitude, extensive knowledge, and focused work ethic has always proven to be a huge asset when working on the car. The passion with which he applies himself to the task at hand is inspiring! Thank you so much for everything.
Quest, thank you for always being there on the sidelines. Your unique input and train of thought has always gotten us out of the stickiest of situations. You are an out-of-the-box problem solver that always has a solution to bring to the table! Thank you for all your involvement in this project! That fuel pump wouldn't have fit in that housing without you.
Mike... Thanks for stopping by yesterday and showing support! You still haven't given up on my humble ride. Haha. Maybe I can beat the G on ice?
Shawn Church is a serious tuner who has NEVER let me down. From my previous Mazdaspeed6 to this WRX and it's previous tunes... I've always been impressed with his professionalism, knowledge and experience. He knows what he's doing, and he never allows peak goals to compromise a quality tune. It's all about the real world driving experience and the way the power is applied to the ground. I feel like he's taken this car under his wing, as he's always helped me decide which direction to take it. An honest and passionate tuner like Shawn deserves a huge shout out. Church Automotive Testing is definitely getting some serious love here and will soon be represented on the car as well. Thank you for everything, my friend!
And finally, a big Thank You for everyone on this thread who has been showing support and following this build! I will have some videos up along with a few pictures from the install soon!
Horsepower and Torque goals are a great way to project and benchmark the type of performance potential you're looking for from your car. However, peak figures are only that; peak figures. A lot goes into tuning a vehicle properly and safely. When examining a vehicles performance on a dyno graph, it's important to notice how much power it's making at what point and for how long. Sometimes, just because a vehicle is capable of making a certain amount of power, does not necessarily mean it's safe. With that said, let's look at the results!
Power Related Performance Mods:
COBB AccessPORT
K&N Typhoon Intake
VF-52 Turbocharger
PERRIN Top Mount Intercooler
PERRIN Bypass Valve
PERRIN Equal Length Header
Invidia Catted Downpipe
SPT Cat-Back Exhaust
Prodrive 3-Port Boost Control Solenoid
Deatschwerks 750cc Fuel Injectors
Walbro 255lph Fuel Pump
Current Peak Results: 313.0 whp / 365.2 wtq
-----
Previous Set Up (all modifications from above EXCEPT for the following):
PERRIN Equal Length Header
Prodrive 3-Port Boost Control Solenoid
Deatschwerks 750cc Fuel Injectors
Walbro 255lph Fuel Pump
Previous Peak Results: 303.3 whp / 334.3 wtq
DYNO GRAPH SHOWING CURRENT TUNE IN RED, PREVIOUS TUNE IN PURPLE:
---
BOOST CONTROL: The Prodrive 3-port boost control solenoid helped promote more reliable and less peaky boost delivery. Maximum boost pressure is 20.94psi at 3672 rpm. Boost is held very consistently above 19psi until about 5000 rpm, then it begins to slowly taper. We found our boost level tapering down to about 16.5 psi by 6000 rpm and finishing off the rev band at just over 15 psi. Initial boost delivery was tuned to be delayed with drivetrain and motor preservation in mind. GREEN LINE is yesterday's boost graph with the stock 2-port BCS, and RED LINE is today's graph with the Prodrive 3-port BCS.
---
TUNING: First and foremost, we are tuned on 91(ACN) fuel here in California. Yesterday, we'd already determined that the PERRIN Equal Length Header enabled the car to shoot up a super quick spool, achieving over 380 ft-lbs of wheel torque at just under 3000 rpm! We were absolutely impressed with the super quick spool up and smooth delivery of power, but after some discussion and thought we agreed to back off the peak torque and let the turbo spool up a little later, protecting the drivetrain and motor. The 3-port bcs allowed us to make a little more power up top as well without dropping off as badly. However, we still realized that the limited horsepower potential was more a product of the VF-52 than anything else. The turbo simply cannot push enough air at those high rpm levels. Here's a look at a graph I modified to give you a rough idea of what our 380 ft-lb run looked like.
---
However, the car is not a Dyno Queen looking to prove a point. Instead, we wanted raw, usable power with reliability in mind. So rather than exploiting a potentially dangerous, early spool up, we ditched it for a smoother spool up that still managed to give us a fat 365 wtq which wasn't an isolated peak. The car makes over 350wtq between 3500-4500 rpm! If you compare to our previous results(before 3-port, elh, pump & injectors), the gains are really staggering! The mid-range pull has improved dramatically. Notice a maximum torque gain of 70 ft-lbs at 4200 rpm and a maximum horsepower gain of 55 whp at 4300 rpm!!! Check out the graph below for the maximum gains:
---
DRIVING IMPRESSIONS: The car feels entirely different from earlier! The peak gains don't even begin to tell the story, which is why I tried to breakdown the dyno graph above. Pre-Boost street driving is so smooth and torquey. The revs fly up with far less effort, almost as if the flywheel was significantly lightened. I simply cannot put into the words the way it feels. Imagine your rough revving ej25 has transformed to a fine-tuned race motor. Equaling out those exhaust gas pulses has seriously changed this vehicles character. I think I'm in love with the equal lengths! The results I speculated for the header were exceeded. I'm realizing that I cannot shut up about this piece of piping.
The Subaru Signature Rumble is gone, as expected. But I am simply in love with the sound accomplished by pairing the ELH, Invidia Catted DP and SPT Catback together. I'll let videos do the talking once I get a chance to record a few more and upload them all.
Power delivery is dramatically stronger! A 3rd gear pull will no longer kick you in the seat with the previous 3000 rpm torque peak. Instead, a light revving, yet powerful pull is accompanied by a force that pushes you into the seat and buries you deeper and deeper the higher up the rev band you travel. Before you know it, you're going a lot faster than you anticipated. I will record 0-60 runs and make a visit to the strip sometime soon to compare numbers with my previous set-up. I'm anticipating 0-60 times to fall in the 3.8-3.9 range, if I can find the courage to launch hard enough with such an abundance of torque on this 5-spd.
OVERALL: At first, I was a little disappointed that we couldn't make more than 313 whp, but after driving it, I couldn't believe the improvement and had no complaints! With the injectors and pump, I was seeking a more reliable fueling system. We are barely touching over 60% injector duty cycle, and the fuel pump is doing it's job well. With the equal length header I was looking for a little more power in the mid-range and just liked the idea of smoothing out the exhaust flow, because it made sense in theory. In application, the PERRIN Equal Length Header has blown me away. I'm officially crowning it as my favorite modification due to the way it's effected the driving experience in many different ways! More power, more torque, quicker spool, lighter and quicker rev-up, and a very intoxicating sound!
----
A FEW SPECIAL THANKS FOR THOSE INVOLVED THIS WEEKEND: These individuals were involved in a process that could have went drastically different. Just because everything has gone smoothly, does not mean it couldn't have gone the other way. There were a few key people that made sure everything went well, and I feel they deserve a moment of appreciation in this thread for all their hard work and involvement!
A big thank you to Manny, my good friend, who has always been there for me in helping with big installs. His positive attitude, extensive knowledge, and focused work ethic has always proven to be a huge asset when working on the car. The passion with which he applies himself to the task at hand is inspiring! Thank you so much for everything.
Quest, thank you for always being there on the sidelines. Your unique input and train of thought has always gotten us out of the stickiest of situations. You are an out-of-the-box problem solver that always has a solution to bring to the table! Thank you for all your involvement in this project! That fuel pump wouldn't have fit in that housing without you.
Mike... Thanks for stopping by yesterday and showing support! You still haven't given up on my humble ride. Haha. Maybe I can beat the G on ice?
Shawn Church is a serious tuner who has NEVER let me down. From my previous Mazdaspeed6 to this WRX and it's previous tunes... I've always been impressed with his professionalism, knowledge and experience. He knows what he's doing, and he never allows peak goals to compromise a quality tune. It's all about the real world driving experience and the way the power is applied to the ground. I feel like he's taken this car under his wing, as he's always helped me decide which direction to take it. An honest and passionate tuner like Shawn deserves a huge shout out. Church Automotive Testing is definitely getting some serious love here and will soon be represented on the car as well. Thank you for everything, my friend!
And finally, a big Thank You for everyone on this thread who has been showing support and following this build! I will have some videos up along with a few pictures from the install soon!
Thread Starter
VIP Member
Joined: Apr 2003
Posts: 846
From: Orange County, CA
Car Info: 08 WRX - 401whp/408wtq
A couple of quick videos with more to come soon:
A decent clip of the equal length header, accelerating out of a parking lot.. Part throttle, hardly any boost achieved:
YouTube - Treble Racing 08 WRX - Perrin Equal Length Header + Invidia Catted DP + SPT Catback
On the dynapack getting tuned:
YouTube - Treble Racing 08 WRX - Dyno Tuning
A decent clip of the equal length header, accelerating out of a parking lot.. Part throttle, hardly any boost achieved:
YouTube - Treble Racing 08 WRX - Perrin Equal Length Header + Invidia Catted DP + SPT Catback
On the dynapack getting tuned:
YouTube - Treble Racing 08 WRX - Dyno Tuning