
Chicken's Crosstrek


Thread Starter
Churro Aficionado
iTrader: (38)
Joined: Feb 2008
Posts: 54,661
From: IG - @thomas.teammoist
Car Info: IG - @TEAMMOISTOFFICIAL
Pic didnt work 
Just got home this morning from a redeye flight. Been traveling for the honeymoon for the last two weeks.
Have some goodies for the car that have been sitting in the garage. Might get to them in the next few days after yard work is caught up lol.
Just got home this morning from a redeye flight. Been traveling for the honeymoon for the last two weeks.
Have some goodies for the car that have been sitting in the garage. Might get to them in the next few days after yard work is caught up lol.


Thread Starter
Churro Aficionado
iTrader: (38)
Joined: Feb 2008
Posts: 54,661
From: IG - @thomas.teammoist
Car Info: IG - @TEAMMOISTOFFICIAL
Bought a muffler delete on the cheap. Bolts right up to factory location and uses the OEM hardware.
Hardest part was breaking lose the nuts/bolt (off-road fun comes at a price sometime lol) and removing the exhaust hangers.
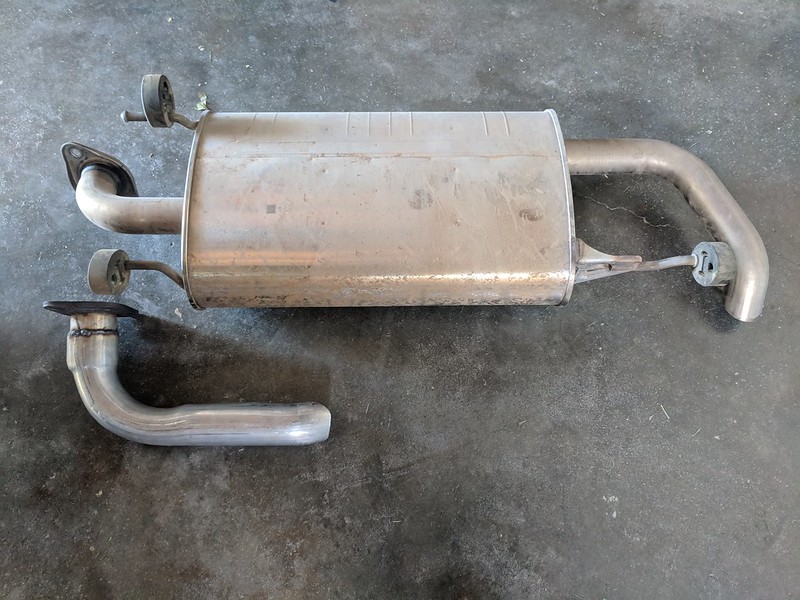
Its for sure louder while accelerating between 3-4k rpm. Coasting or generally outside of that range, its almost as quiet as stock
When it is louder, it kind of sounds like a late 80's/early 90's Toyota pickup (kinda nostalgic for me haha).
Hardest part was breaking lose the nuts/bolt (off-road fun comes at a price sometime lol) and removing the exhaust hangers.
Its for sure louder while accelerating between 3-4k rpm. Coasting or generally outside of that range, its almost as quiet as stock
When it is louder, it kind of sounds like a late 80's/early 90's Toyota pickup (kinda nostalgic for me haha).
Thread Starter
Churro Aficionado
iTrader: (38)
Joined: Feb 2008
Posts: 54,661
From: IG - @thomas.teammoist
Car Info: IG - @TEAMMOISTOFFICIAL
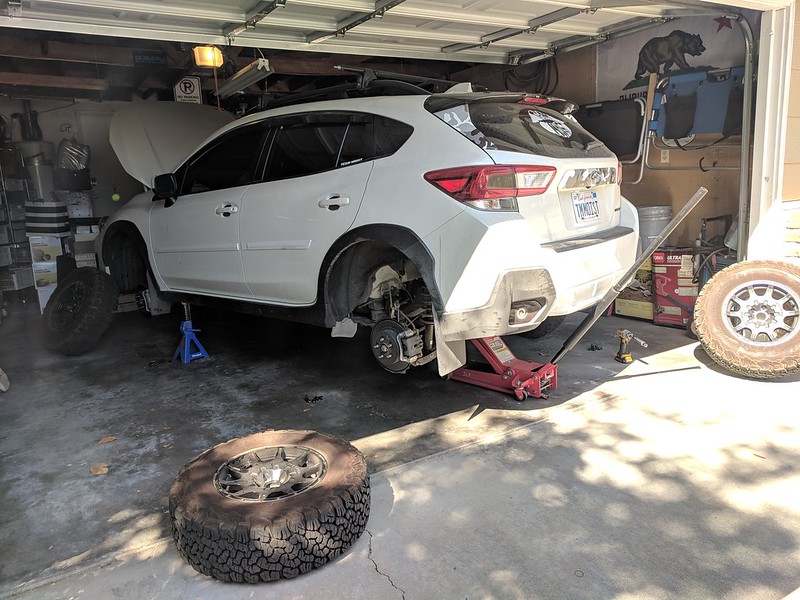
Saturday I performed the Crosstrek's third oil change, my first time doing it (first two were "free" from the dealer).
Found out that my oil extractor does not fit far enough into the oil pan due to the dip-sticks tight turns into the block
So I have to remove the skid plate and do it the old fashioned way. This will probably push me to at least get a Fumoto valve to speed things up just a bit for future changes.
Thought I was done when I remembered Im doing tire rotations at every oil change as well. And I have a full size 5th spare, so I always need to throw that into the rotation so I had to unbolt that from the wall and pull it down too lol.
Thread Starter
Churro Aficionado
iTrader: (38)
Joined: Feb 2008
Posts: 54,661
From: IG - @thomas.teammoist
Car Info: IG - @TEAMMOISTOFFICIAL
Had some fun over the weekend.
Got everything mounted up and had a bit of fun. Sunday we hadl BAM.
Found some good spots for more stickers lol
Hanging out at the Team Moist vendor booth

Got everything mounted up and had a bit of fun. Sunday we hadl BAM.
Found some good spots for more stickers lol
Hanging out at the Team Moist vendor booth
If in doubt, FLAT OUT
iTrader: (33)
Joined: Oct 2010
Posts: 7,046
From: Nor Cal SJ
Car Info: 2010 Hatch, 2011 Sedan
I want a sticker pack when you get some damn glasses back in lol. You know I will never, ever make it to the Moist booth before noon at BAM haha. Should not have told people asking about the glasses, since we were all wearing them, that you guys were there LMFAO.
Thread Starter
Churro Aficionado
iTrader: (38)
Joined: Feb 2008
Posts: 54,661
From: IG - @thomas.teammoist
Car Info: IG - @TEAMMOISTOFFICIAL
It was pretty cool seeing so many people wearing the glasses around!
Thread Starter
Churro Aficionado
iTrader: (38)
Joined: Feb 2008
Posts: 54,661
From: IG - @thomas.teammoist
Car Info: IG - @TEAMMOISTOFFICIAL
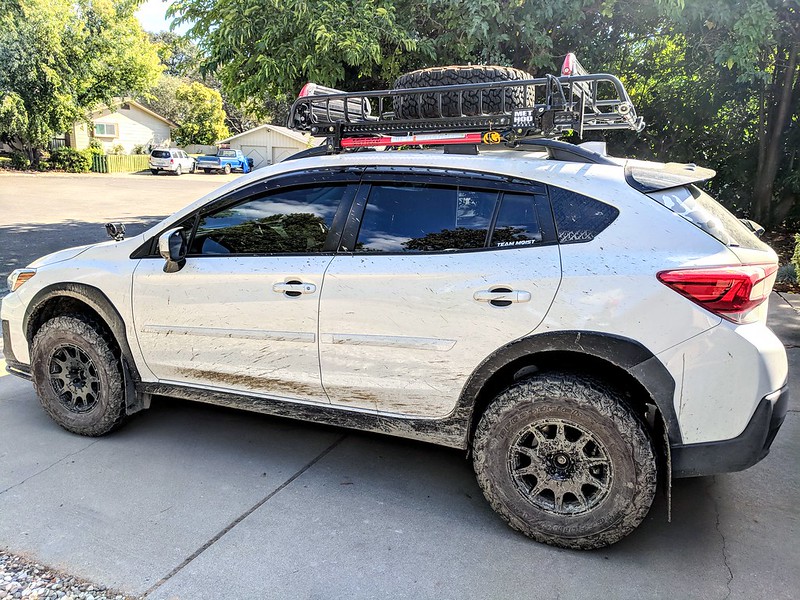
A few people have asked how I mounted the full size spare on the roof.
I, shockingly, did a DIY lolol.
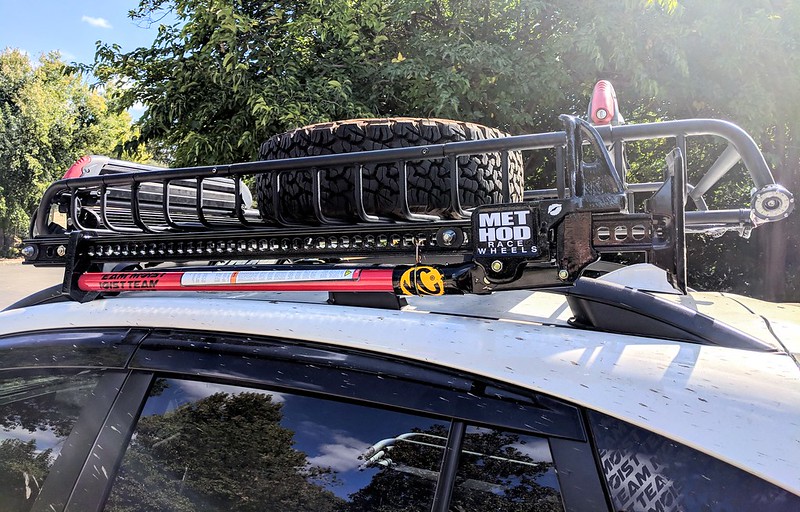
Bought a large eye-bolt that had enough length to run through the spare wheel. I then used a cut-off wheel to take a chunk out just large enough to slip around the bars of the Yakima loadwarrior. I also wrapped the bottom that would be in contact with the roof-rack with electrical tape to cut down on vibration and scratching.
I had an old rounded over nut that would fit perfectly inside where the lug nuts normally go. Since it was rounded, it would mare or scratch the wheel. Only issue with that was the nut had a smaller thread size than the eye-bolt. So I took a large bit and reamed it out, now it slides onto the bolt like a thick washer.
Thought I would be good to go, when I realized that the threads of the bolt stop about a third of the way down, thus there was no way for the nuts to clamp the tire down. So I pulled out a couple washers to sandwich an old socket lol. The socket was a half inch drive so the drive side was large enough for the bolt to fit through.
From there I double nutted the top.
So the wheel/tire just sits in the basket. I can throw the bolt in under the wheel, loop onto the crossbars of the basket and feed it through one of the lug nut wholes.
-rounded nut washer
-washer
-old socket
-washer
-double nut
that basically just cinches everything down and the wheels doesnt budge AT ALL.
I, shockingly, did a DIY lolol.
Bought a large eye-bolt that had enough length to run through the spare wheel. I then used a cut-off wheel to take a chunk out just large enough to slip around the bars of the Yakima loadwarrior. I also wrapped the bottom that would be in contact with the roof-rack with electrical tape to cut down on vibration and scratching.
I had an old rounded over nut that would fit perfectly inside where the lug nuts normally go. Since it was rounded, it would mare or scratch the wheel. Only issue with that was the nut had a smaller thread size than the eye-bolt. So I took a large bit and reamed it out, now it slides onto the bolt like a thick washer.
Thought I would be good to go, when I realized that the threads of the bolt stop about a third of the way down, thus there was no way for the nuts to clamp the tire down. So I pulled out a couple washers to sandwich an old socket lol. The socket was a half inch drive so the drive side was large enough for the bolt to fit through.
From there I double nutted the top.
So the wheel/tire just sits in the basket. I can throw the bolt in under the wheel, loop onto the crossbars of the basket and feed it through one of the lug nut wholes.
-rounded nut washer
-washer
-old socket
-washer
-double nut
that basically just cinches everything down and the wheels doesnt budge AT ALL.