
Chicken's Crosstrek

Thread Starter
Churro Aficionado
iTrader: (38)
Joined: Feb 2008
Posts: 54,661
From: IG - @thomas.teammoist
Car Info: IG - @TEAMMOISTOFFICIAL
Thread Starter
Churro Aficionado
iTrader: (38)
Joined: Feb 2008
Posts: 54,661
From: IG - @thomas.teammoist
Car Info: IG - @TEAMMOISTOFFICIAL
To start off, I generally hate electrical work and wiring. I know enough to get by and be dangerous lol. So I had the wiring kit that came with the compressor, hooked it up and nothing... So I troubleshooted and still couldnt get it working.
Decided to see if my buddy could help me out. 1) He has the upgraded kit I have and D) he's an electrician haha. He came over Friday after work and he was having issues too. After an hour or so, and almost giving up, we finally figured it out. So we tested it in its position and after it was working, he thought the 12 gauge wire was too small to run the length it is. I decided to take his advice since he know what he's talking about. I ordered some 8 gauge and it showed up yesterday.
So today after work I should run that to the rear of the car and then figure out how I want to run the wire harness so its clean, neat, and out of the way.
Here is a pic of his rig. 4runner with flex. He trails this thing and is in no way any type of mall crawler! Rollin on 40's
Thread Starter
Churro Aficionado
iTrader: (38)
Joined: Feb 2008
Posts: 54,661
From: IG - @thomas.teammoist
Car Info: IG - @TEAMMOISTOFFICIAL
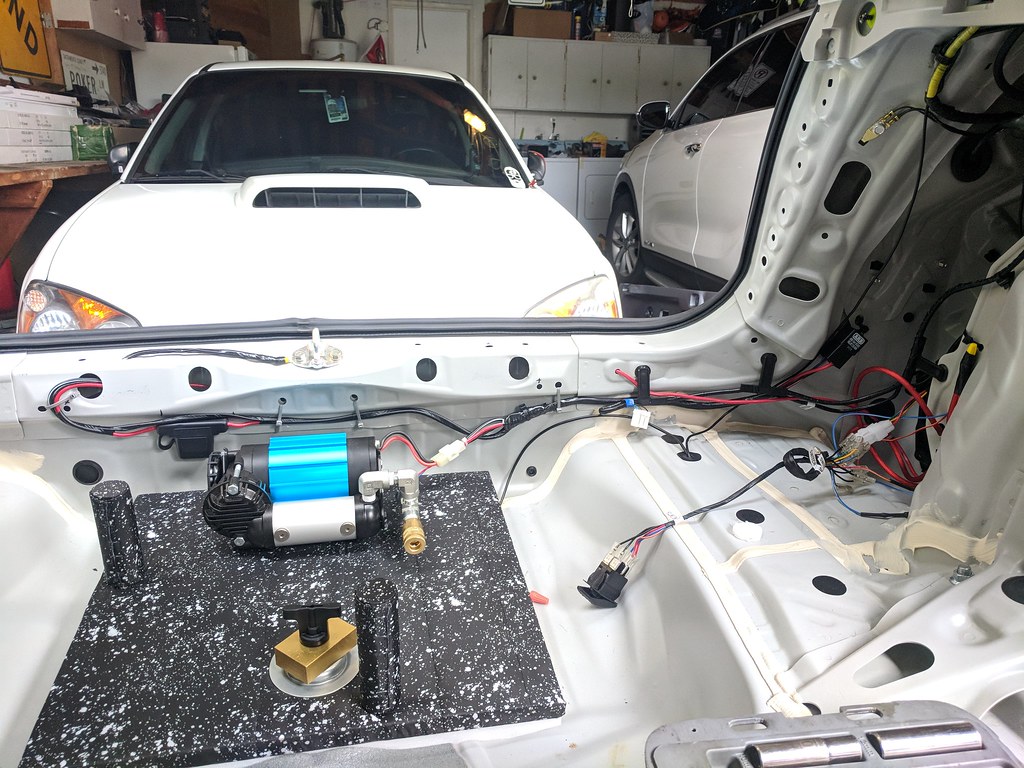
But I did get some work done for the compressor set up this weekend.
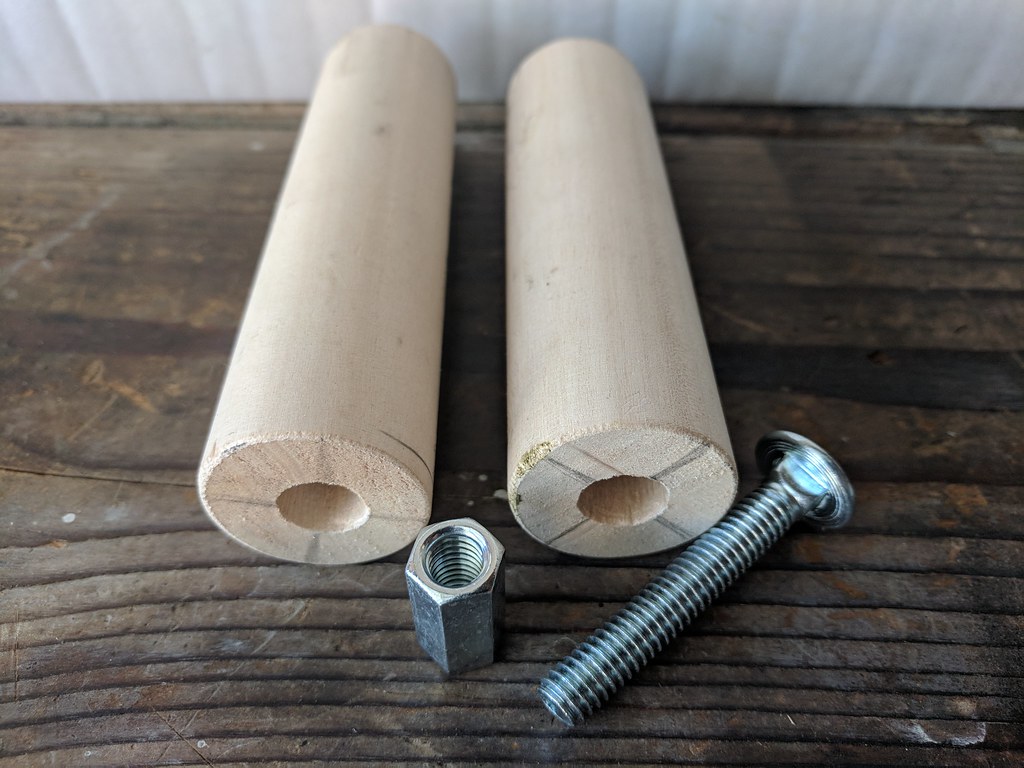
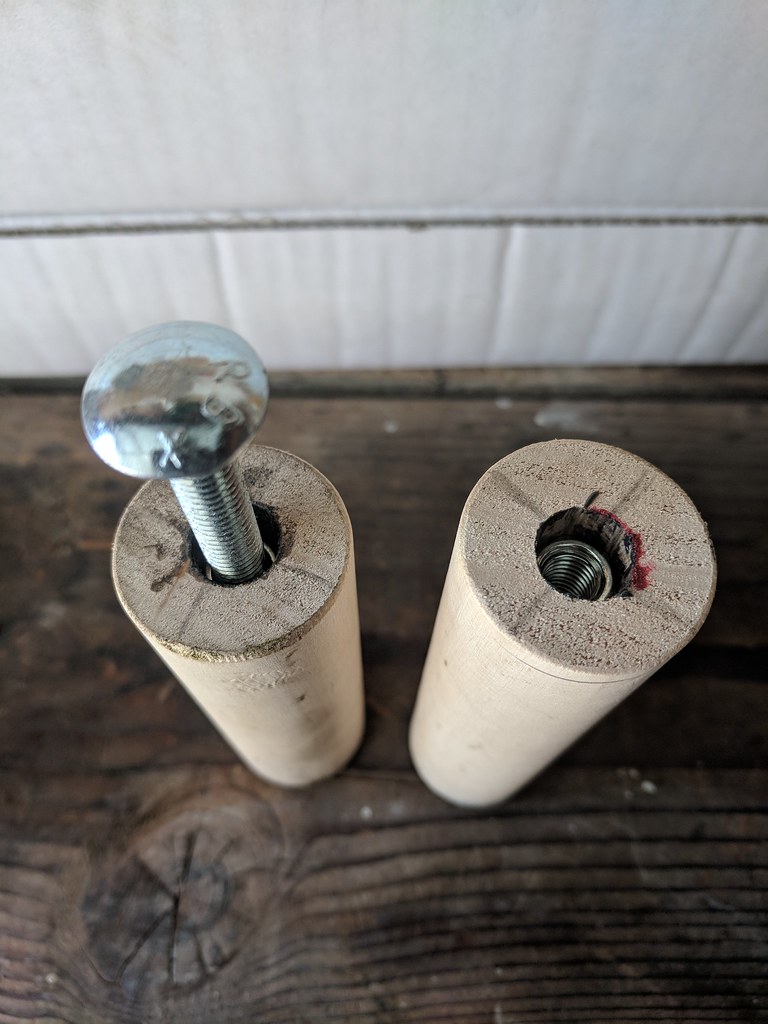
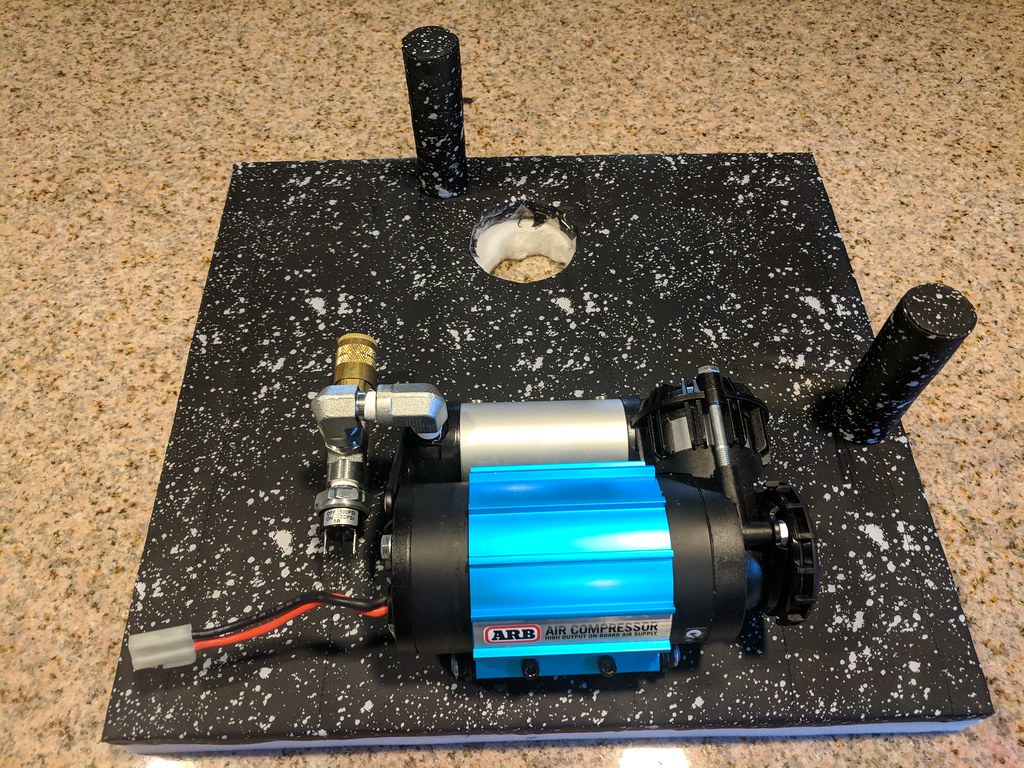
I cut a couple pegs for the plywood the compressor is mounted on. These will help route the air hose and help support the cargo tray. I cut them to length so the cargo tray will also rest on top of them, so if I ever have anything really heavy up there, they have some more support from under.
I drilled out a hole and sunk in a long nut into the pegs. I coated the holes with some JB weld prior to putting the nut in.
Marked the locations on the plywood where the pegs would go. Drilled a couple holes out and set in the bolts.
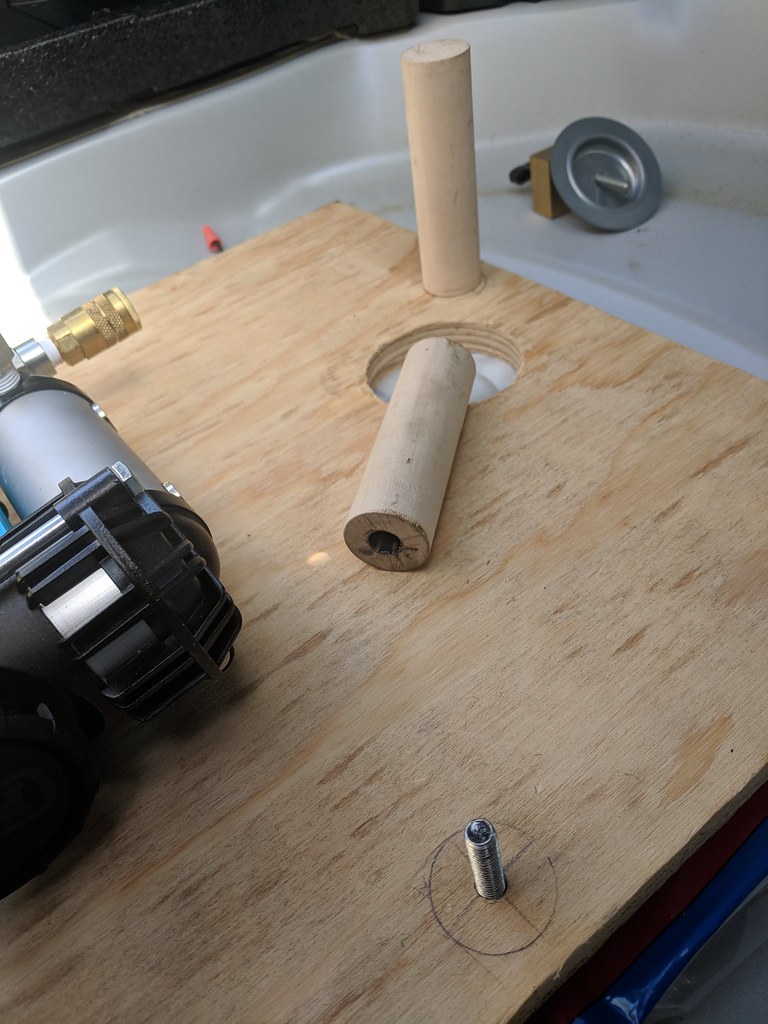
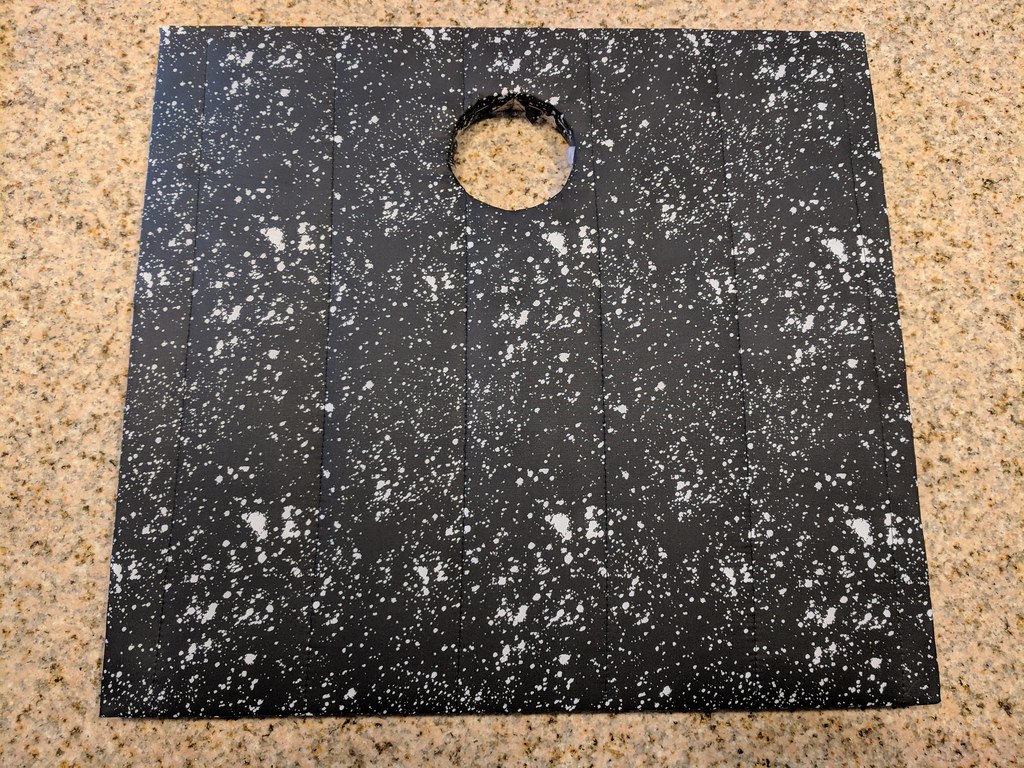
Then I removed everything I had added to the plywood lol. I decided to wrapped the plywood. Decided to make it a bit nicer looking. I was trying to find some snow/white camo - to match the black/white theme of the car.. but the craft store I was at didnt have anything like that. I also didnt want to order online and have to wait a few days for it. So this was the closest thing I could find.
I cut a couple pegs for the plywood the compressor is mounted on. These will help route the air hose and help support the cargo tray. I cut them to length so the cargo tray will also rest on top of them, so if I ever have anything really heavy up there, they have some more support from under.
I drilled out a hole and sunk in a long nut into the pegs. I coated the holes with some JB weld prior to putting the nut in.
Marked the locations on the plywood where the pegs would go. Drilled a couple holes out and set in the bolts.
Then I removed everything I had added to the plywood lol. I decided to wrapped the plywood. Decided to make it a bit nicer looking. I was trying to find some snow/white camo - to match the black/white theme of the car.. but the craft store I was at didnt have anything like that. I also didnt want to order online and have to wait a few days for it. So this was the closest thing I could find.
Thread Starter
Churro Aficionado
iTrader: (38)
Joined: Feb 2008
Posts: 54,661
From: IG - @thomas.teammoist
Car Info: IG - @TEAMMOISTOFFICIAL
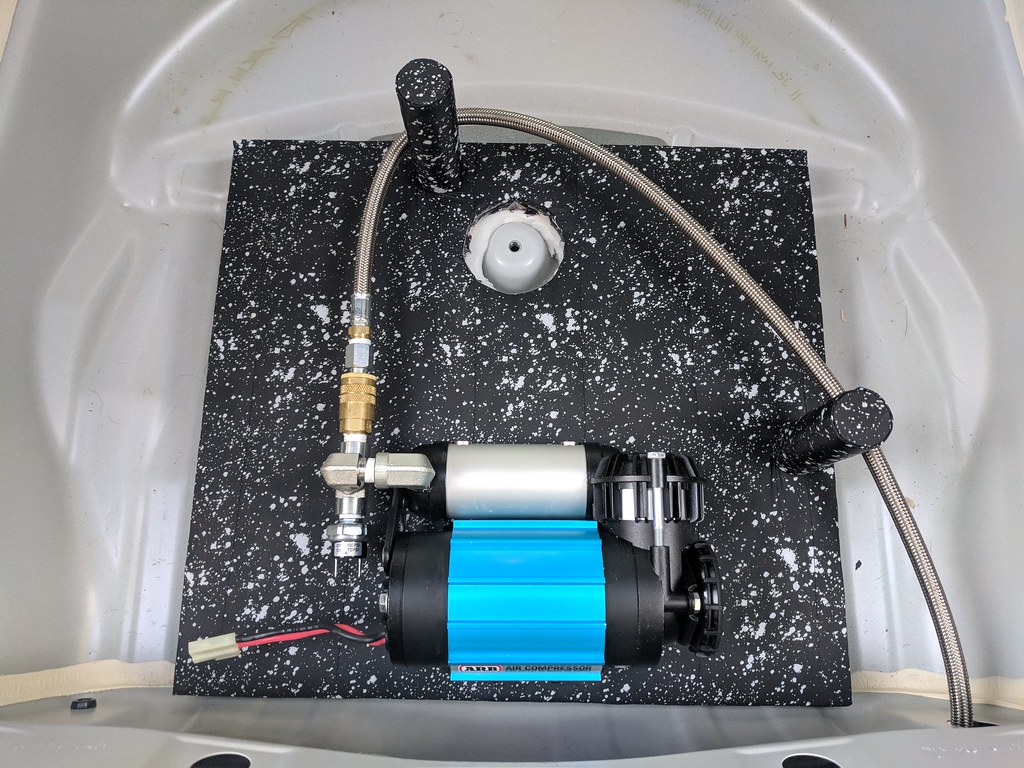
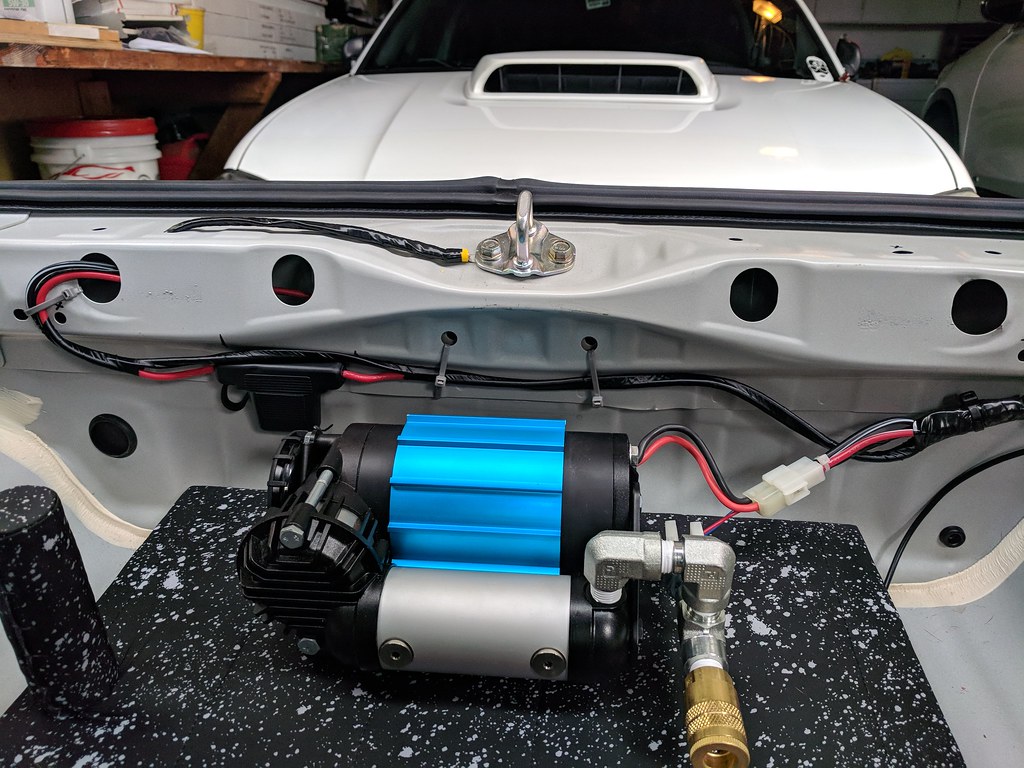
I added a 1" foam backer to the underside of the plywood. Figured this would be nice when the compressor is on, it should soak up a lot of the rattling.
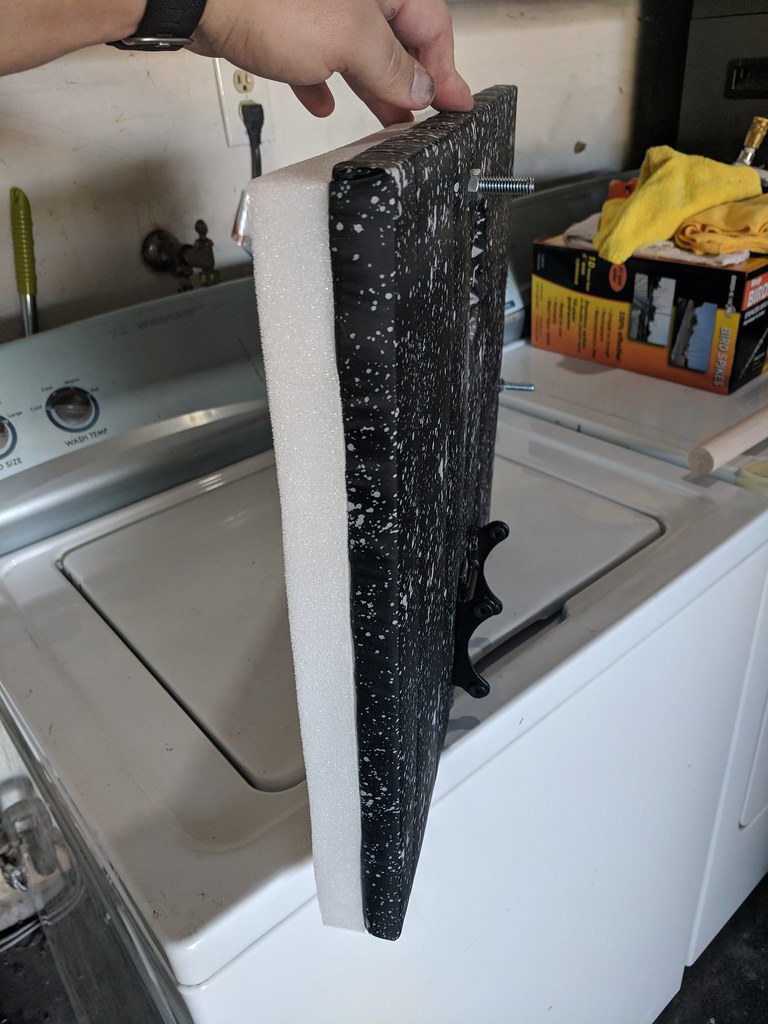
Wrapped the pegs and installed everything back on the board. Wrapping the pegs was a bit tricky. I had to do each in 2 separate pieces to get full coverage. But they turned out a bit nicer than I was thinking!
Threw it all in the car and tested the air line with it. All is well. So hoping today after work Ill run the new power wire to the rear and hope to start the harness as well!
Thread Starter
Churro Aficionado
iTrader: (38)
Joined: Feb 2008
Posts: 54,661
From: IG - @thomas.teammoist
Car Info: IG - @TEAMMOISTOFFICIAL
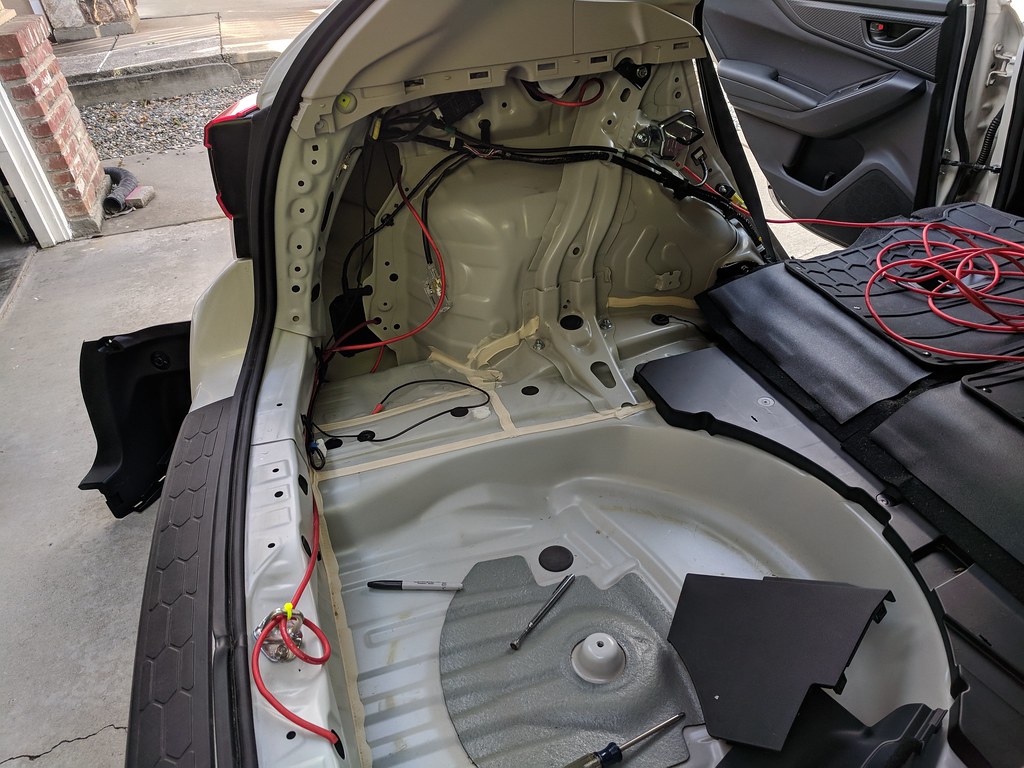
New 8 gauge wire came in. Got it ran through the car. This time I decided to run it on the interior. removed all the panels along the drivers side and then under the carpet.
This was all much easier than running it under the car as I did the previous two times.... that being said.. the hardest part was getting it through the firewall. When I installed my switches, I ran the cable through the firewall with the main harness and it was a PITA. I went the same direction with this, mainly because its the only real way through.
There are a couple rubber grommets that go through, but they go into the fender and I didnt feel like taking it off for this. Im pretty sure there are some on the passenger side, but it would mean running it behind the console/dash, then routing the wire back to the drivers side of the engine bay for connection, that didnt really make sense to me either.
Got it all ran and hooked up. Everything from the B-pillar forward is buttoned back up. I drove to work today with the rear of the car still torn apart as seen below, its crazy how much louder the road noise is just without those in there!
So hoping today after work will be the harness side of things and putting everything back in its home.
Thread Starter
Churro Aficionado
iTrader: (38)
Joined: Feb 2008
Posts: 54,661
From: IG - @thomas.teammoist
Car Info: IG - @TEAMMOISTOFFICIAL
Got the wiring harness installed and tucked away. Tried to keep everything clean, out of the way but still easy to get access to fues/relay if needed.
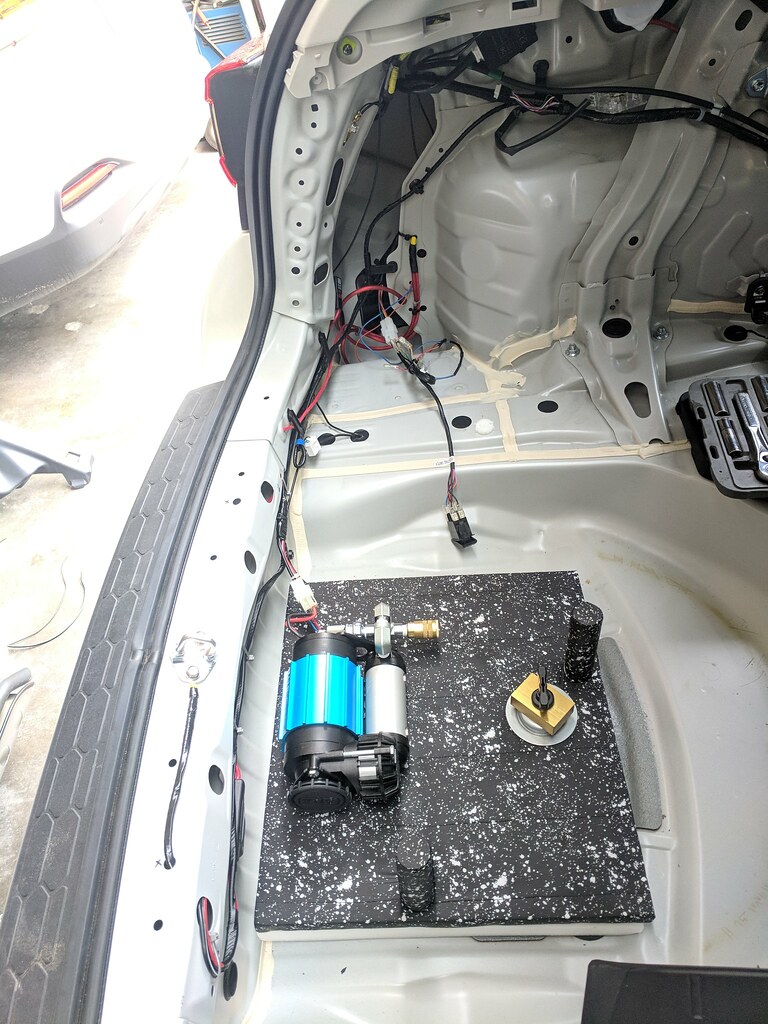
Have the power connector to the compressor, then the fuse and power/ground leads head towards the passenger side of the car. They both tuck into the frame with the ground coming up and grounding out to the rear hatch latch. Power continues back to the drivers side and out of the frame.
The rear corner on the drivers side has a HUGE cavity with tons of space back there. The relay got mounted here, along with excess wiring. If I ever needed to pull some to get some slack in the line, the power leads from the harness, and the one I ran from the front of the car, have all the extra tucked back here.
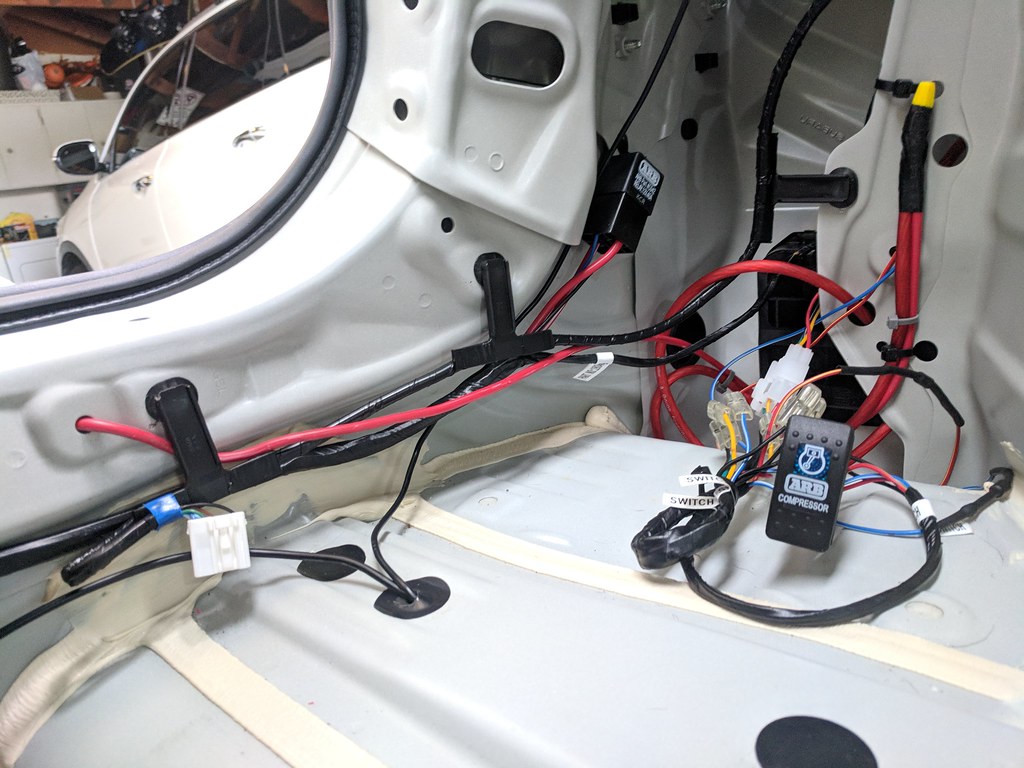
looks a bit messy because the harness has connectors for up to 3 switches. Obviously im not running any air lockers, so I didnt need those. Thought about cutting them out, but if I ever decided to sell the kit, or transfer it over to another project in the future... why not.
Have the power connector to the compressor, then the fuse and power/ground leads head towards the passenger side of the car. They both tuck into the frame with the ground coming up and grounding out to the rear hatch latch. Power continues back to the drivers side and out of the frame.
The rear corner on the drivers side has a HUGE cavity with tons of space back there. The relay got mounted here, along with excess wiring. If I ever needed to pull some to get some slack in the line, the power leads from the harness, and the one I ran from the front of the car, have all the extra tucked back here.
looks a bit messy because the harness has connectors for up to 3 switches. Obviously im not running any air lockers, so I didnt need those. Thought about cutting them out, but if I ever decided to sell the kit, or transfer it over to another project in the future... why not.
Thread Starter
Churro Aficionado
iTrader: (38)
Joined: Feb 2008
Posts: 54,661
From: IG - @thomas.teammoist
Car Info: IG - @TEAMMOISTOFFICIAL
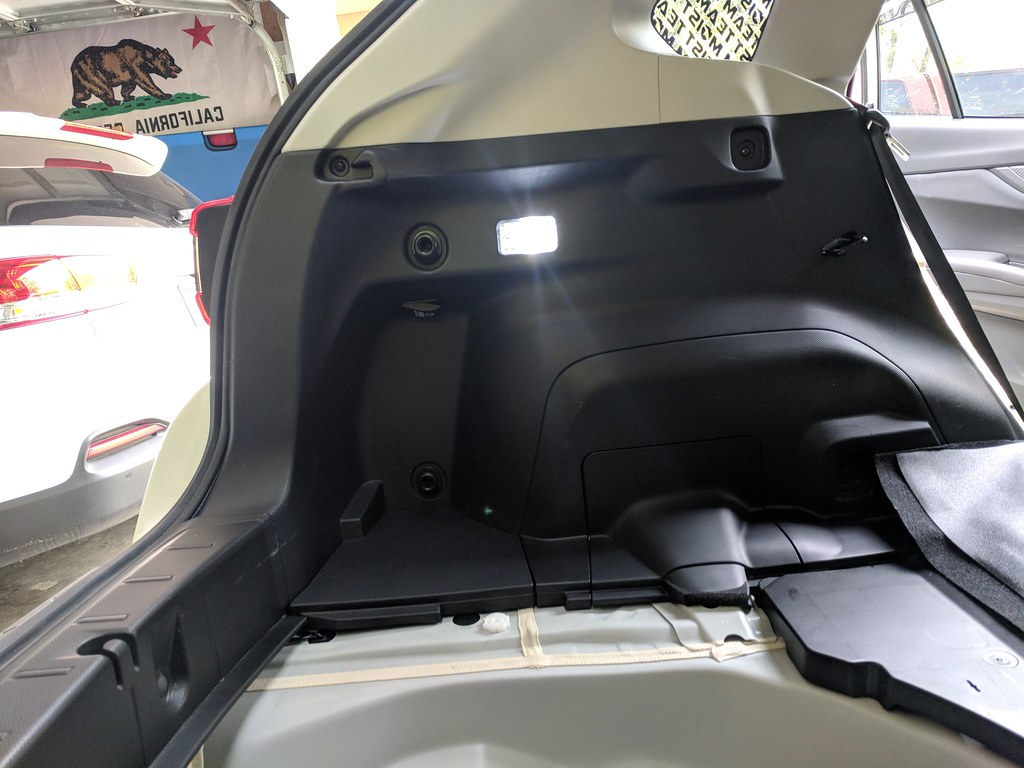
Then I had to figure out where to mount the rear switch... yes REAR switch.. Not what I originally had in mind, but the ARB harness wont work as easy without using it.. My original plan was to have my front switches power the compressor.. well now I kinda just use both..
I can leave the rear in the on position, so when I hit the panel up front, the compressor kicks on. This also means that when im in the back of the car, I can easily turn it on/off without having to run to the front. So I guess it all works out.
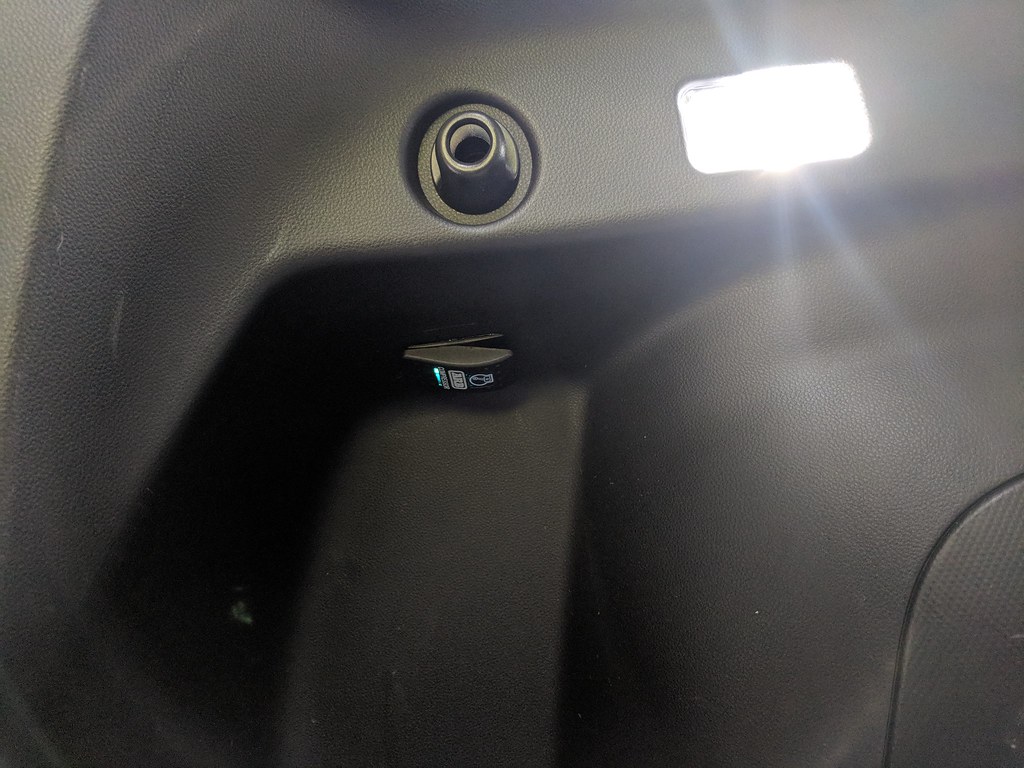
I wanted to mount it out of the way, somewhat hidden but again easy access. So i chose this part of the paneling.
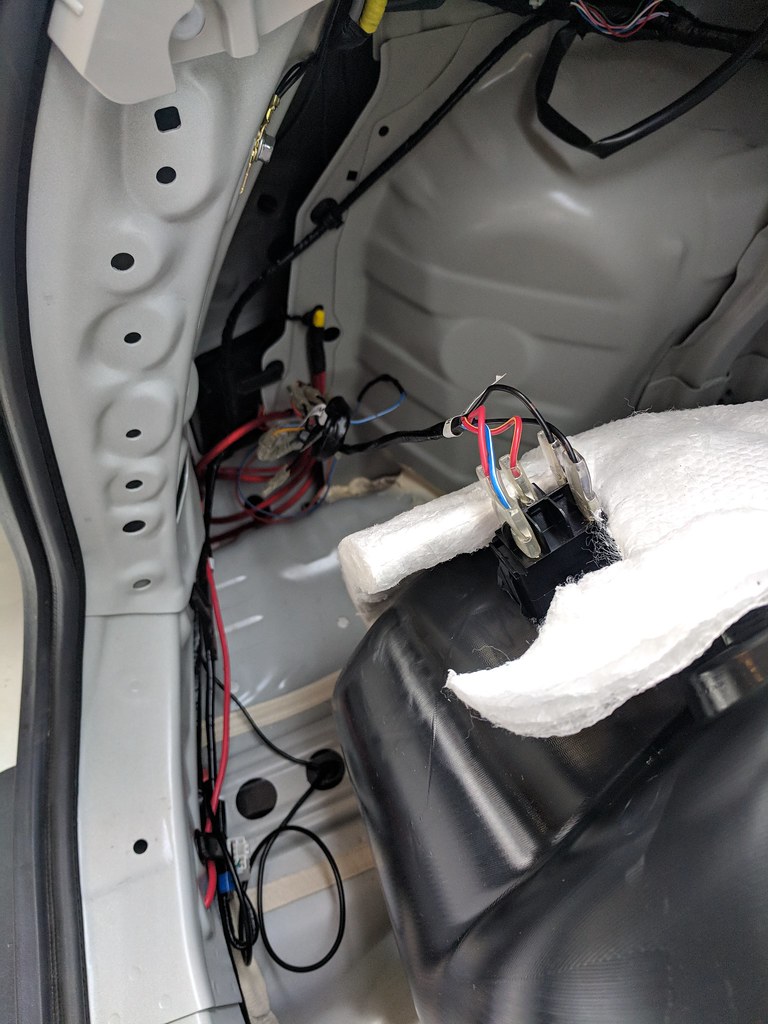
Tucked up under the recess. Shouldnt really get hit with anything accidental, but easy to get to.
Everything buttoned back up.

Now Ive just got to run the line to the outside of the car and figure out how ill mount it.
I can leave the rear in the on position, so when I hit the panel up front, the compressor kicks on. This also means that when im in the back of the car, I can easily turn it on/off without having to run to the front. So I guess it all works out.
I wanted to mount it out of the way, somewhat hidden but again easy access. So i chose this part of the paneling.
Tucked up under the recess. Shouldnt really get hit with anything accidental, but easy to get to.
Everything buttoned back up.
Now Ive just got to run the line to the outside of the car and figure out how ill mount it.
