
Boost Addict's 08 WRX Project - 233whp/334wtq - Pics, Vids, Dyno

Thread Starter
VIP Member
Joined: Apr 2003
Posts: 846
From: Orange County, CA
Car Info: 08 WRX - 401whp/408wtq
Quick Update Folks!
- Got the Carbonetics clutch kit. See below!
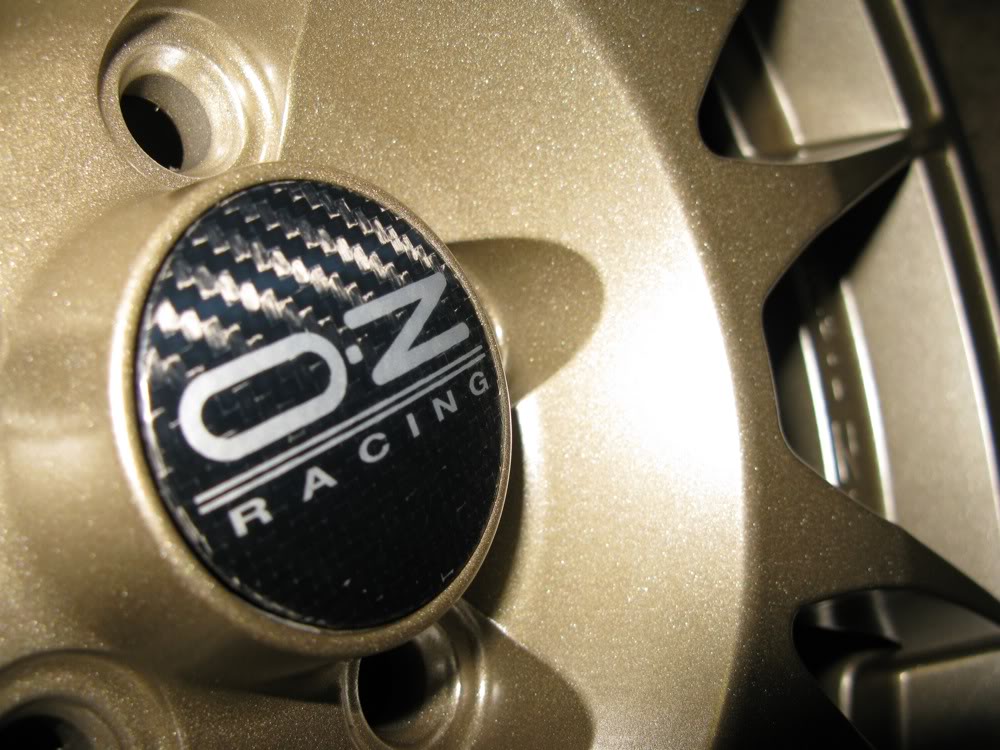
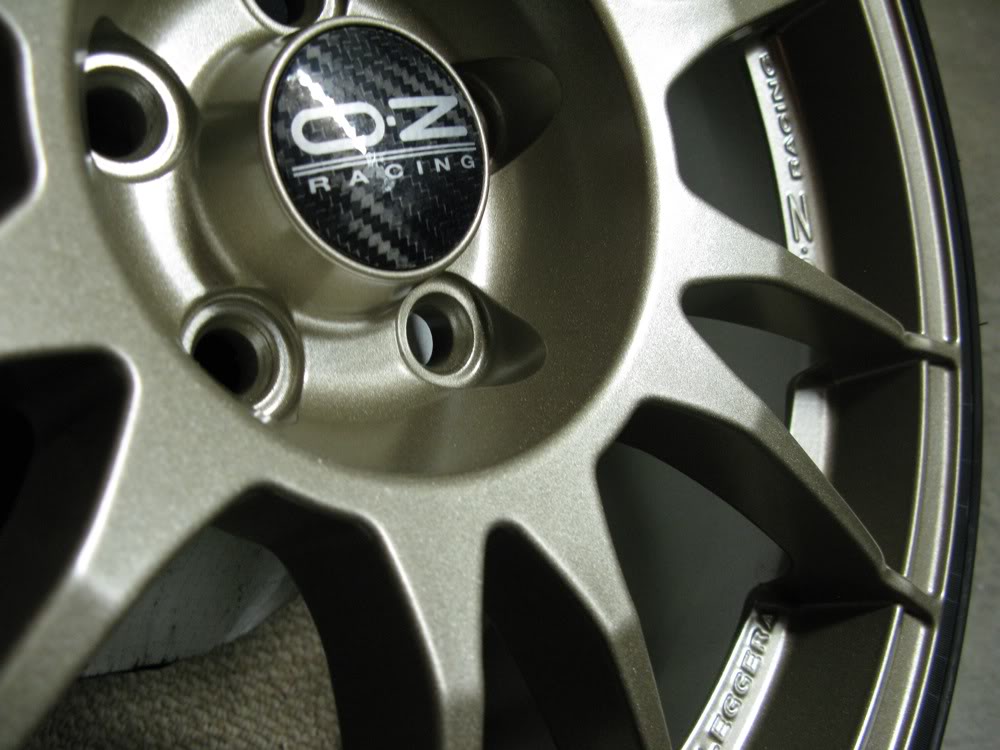
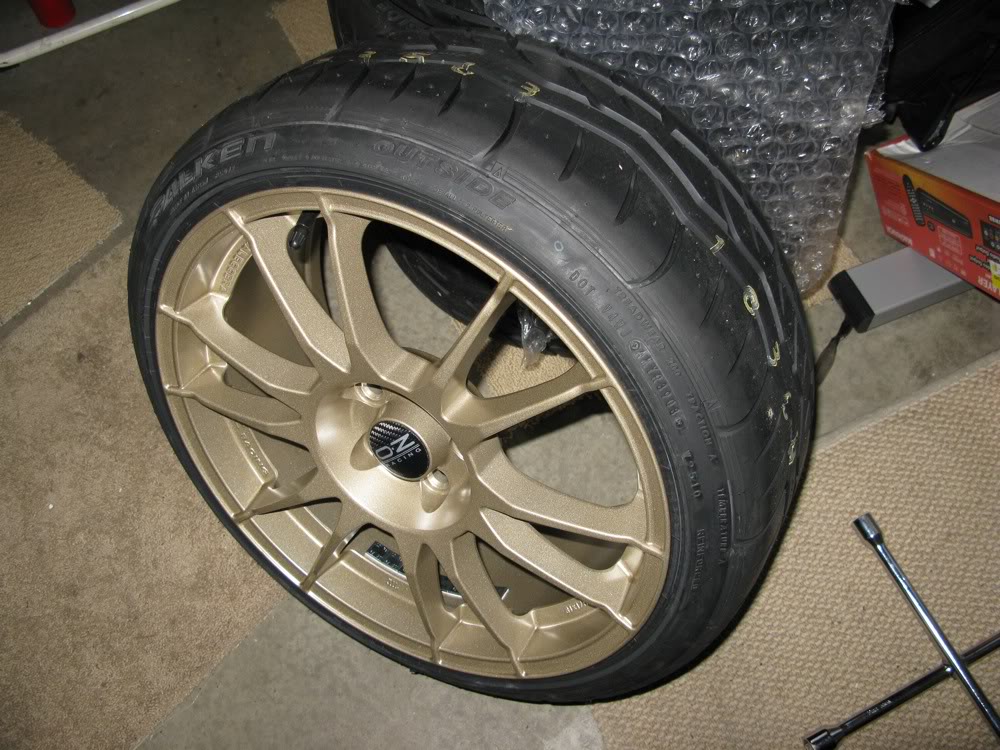
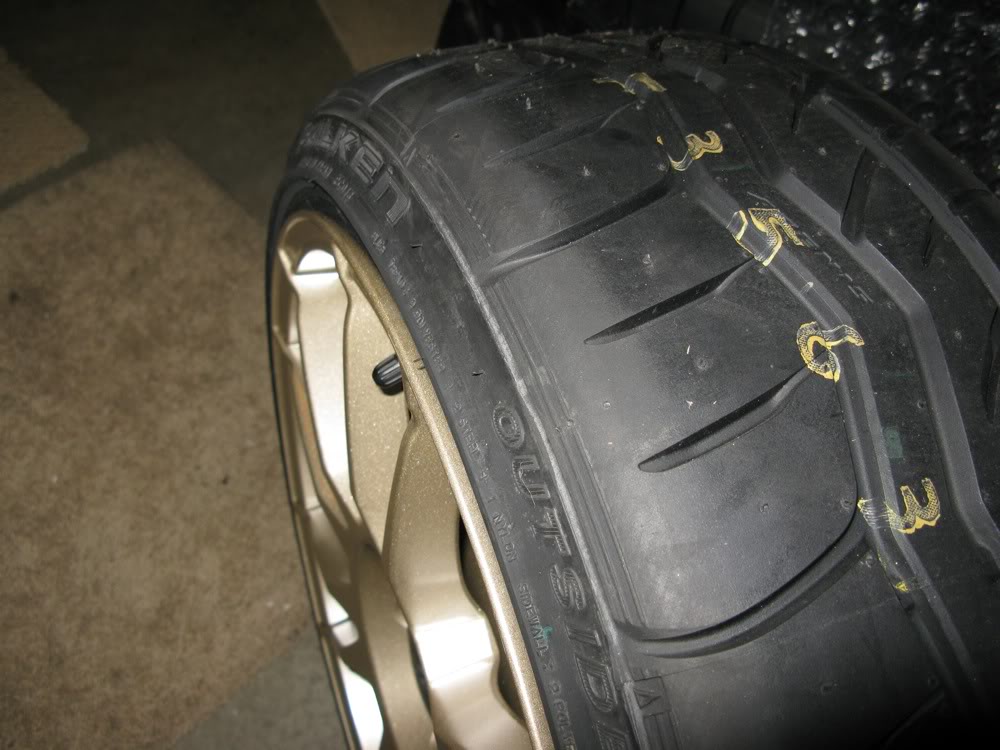
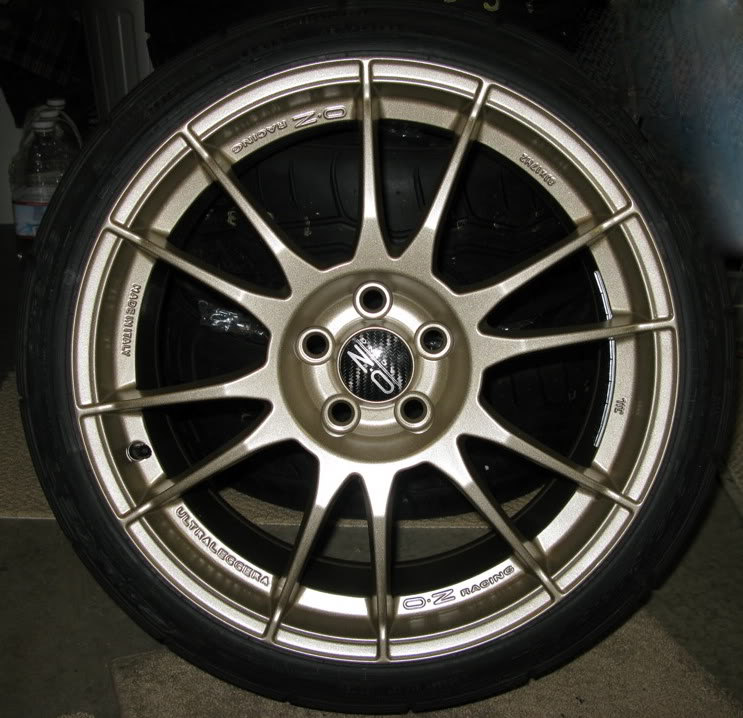
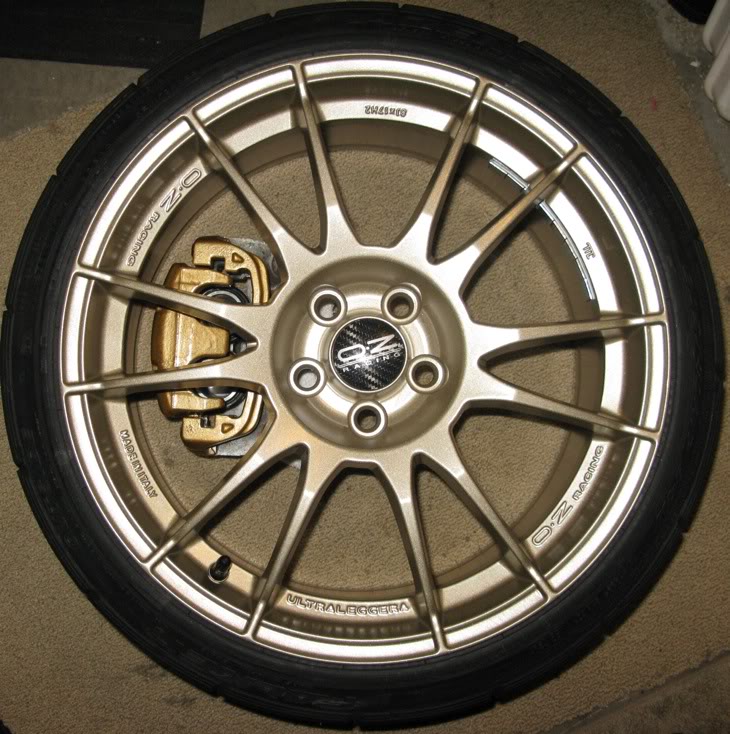
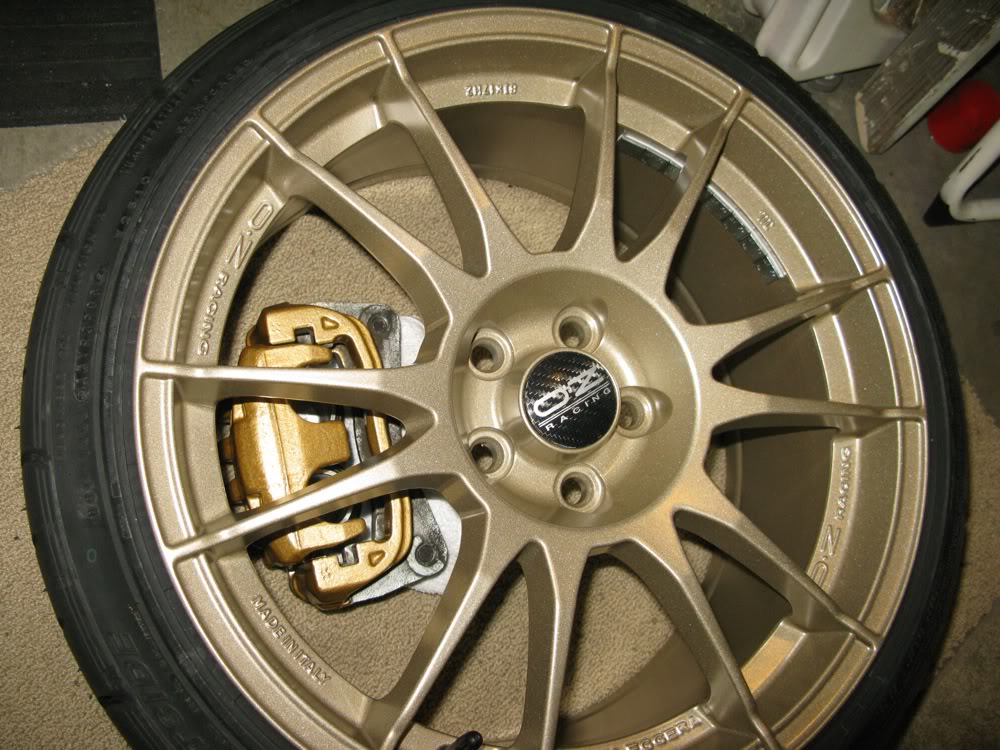
- Picked up my new OZ Ultraleggera's from the powder coater. Mounted and balanced them with 205/40-17 Falken Azenis RT-615s... See below!
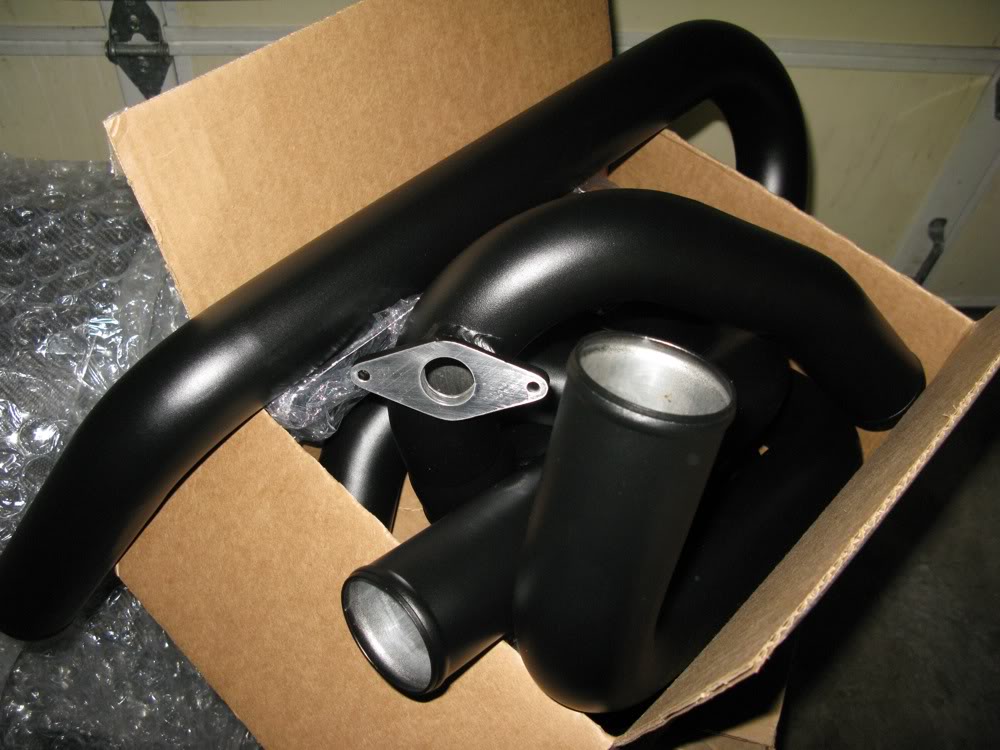
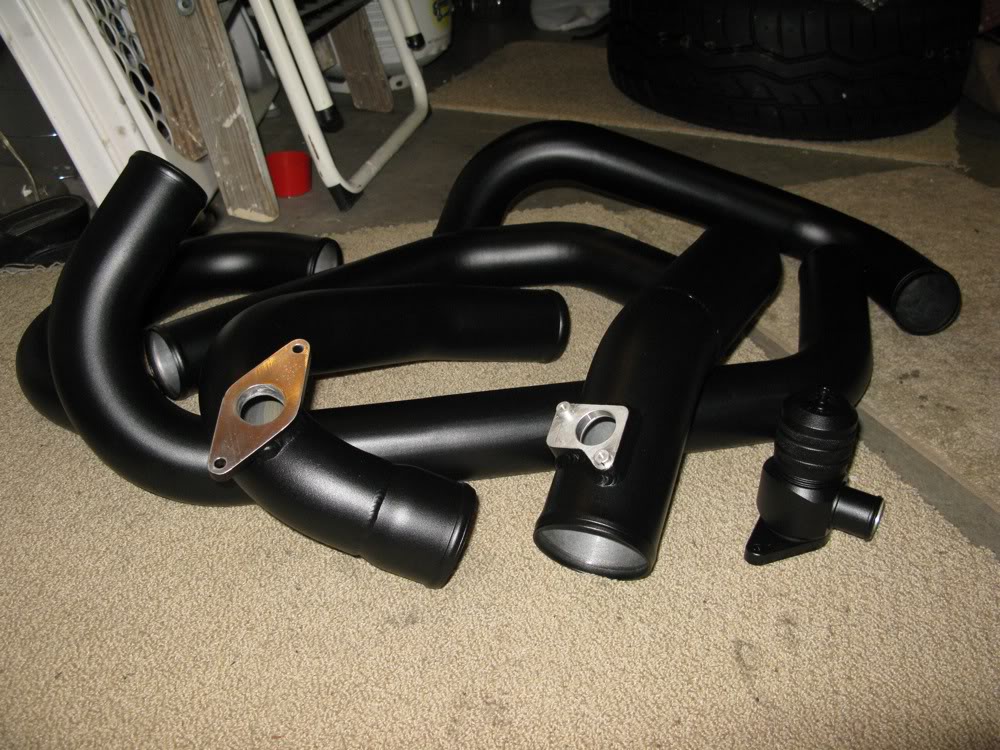
- Dropped off TurboXS FMIC piping, TurboXS BPV and KS Tech Intake for a textured semi-gloss black powder coat to be applied.
- Applied Gold G2 paint to the OEM Tokico Brake Calipers tonight and am letting them dry/cure. I'll take some pictures tomorrow.
Carbonetics Clutch Kit. Entire kit w/ flywheel weighs 19.78 lbs!!! Over 14 lbs lighter than stock!
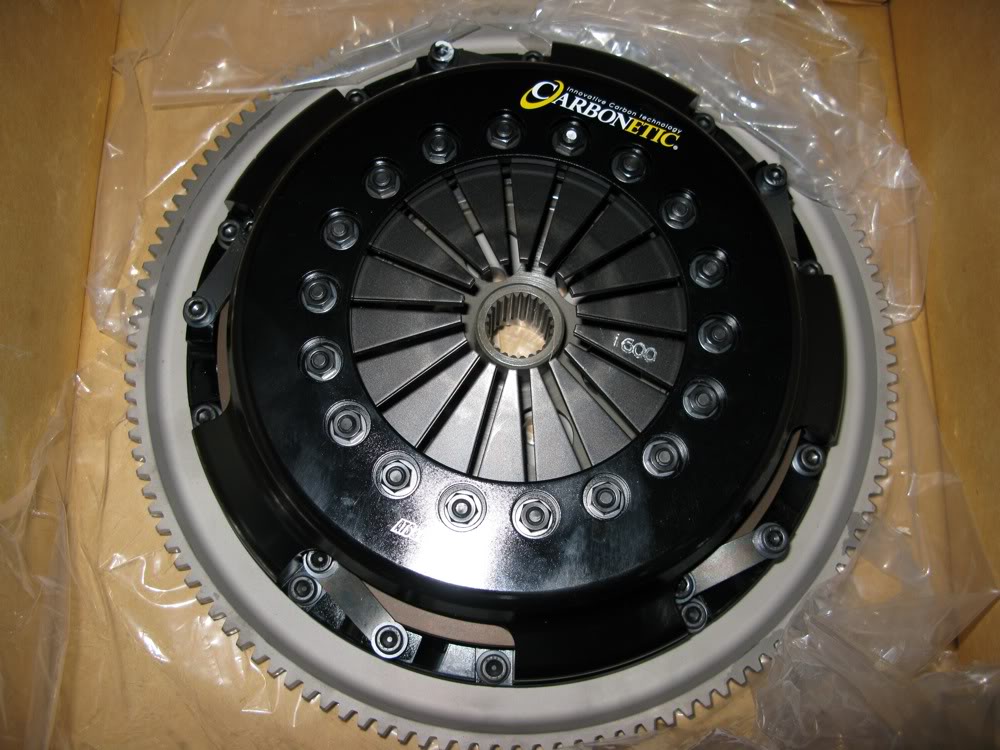
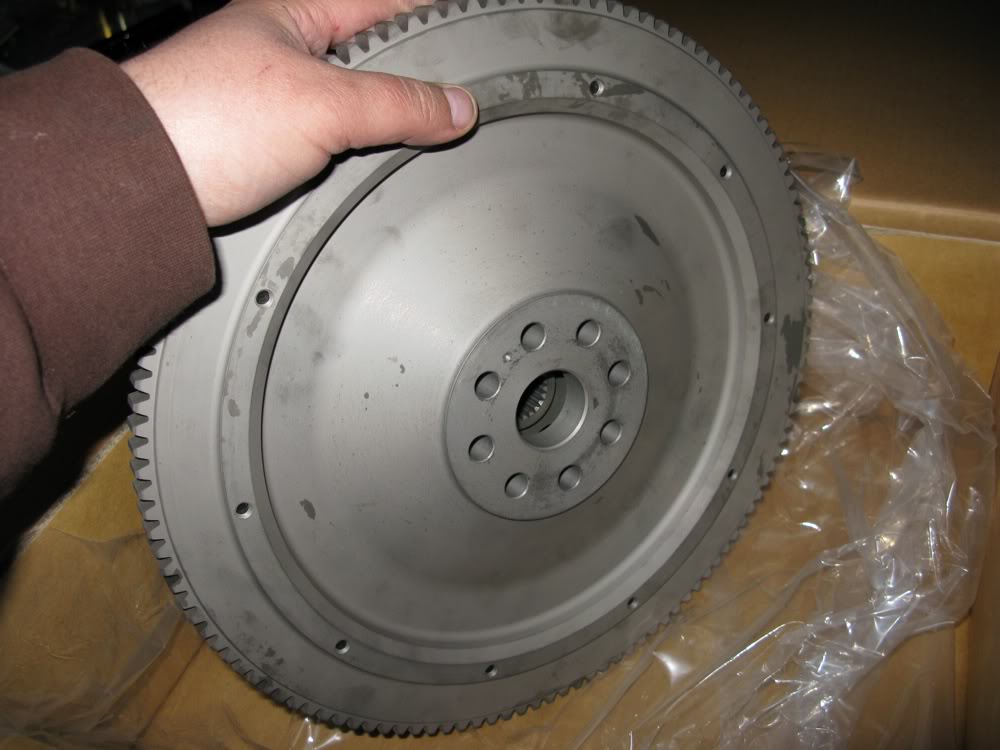
Light Flywheel. Only 9.6 lbs!!!
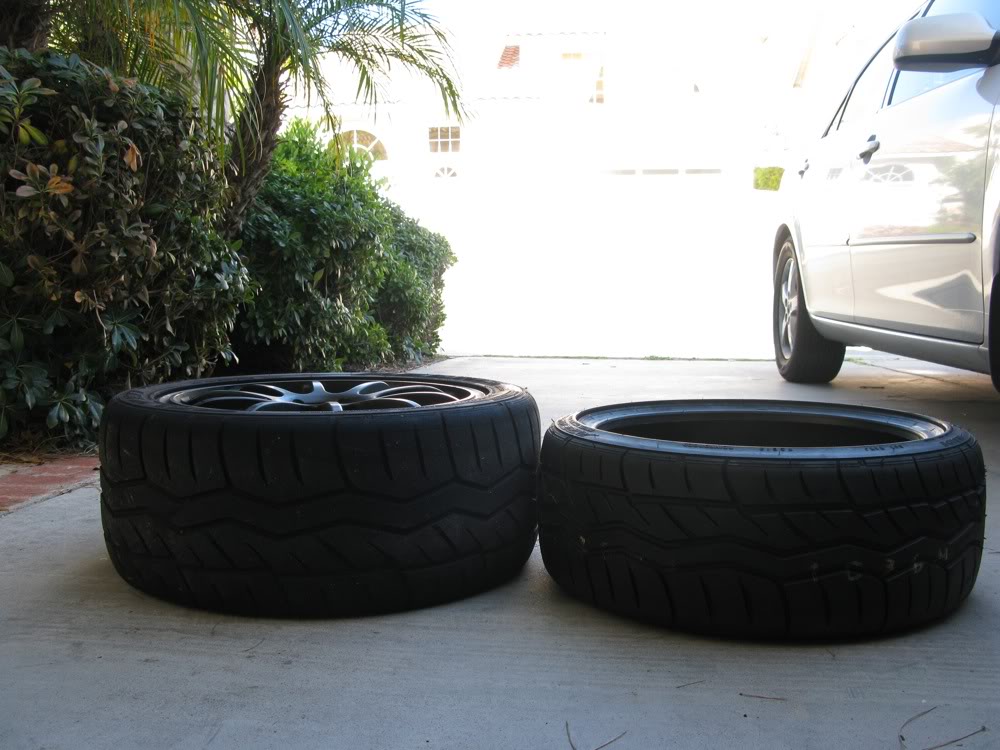
Azenis on Azenis... The old 255/40-17s vs the new 205/40-17s. Serious size and weight reduction.
...and now, the Sterling Gold OZ's! This color is simply gorgeous! A great color that looks gold , but reflects in a somewhat pearlescent manner. They can look anywhere from a matt bronze to a glossy gold depending on flash, no flash, light, no light, etc. It was fun to just skew these wheels in different angles and see what kind of colors I could get out of them. Choosing a powder coat color from a little sample strip can be tough, but I think we got pretty lucky with a very unique sort of gold!
- Got the Carbonetics clutch kit. See below!
- Picked up my new OZ Ultraleggera's from the powder coater. Mounted and balanced them with 205/40-17 Falken Azenis RT-615s... See below!
- Dropped off TurboXS FMIC piping, TurboXS BPV and KS Tech Intake for a textured semi-gloss black powder coat to be applied.
- Applied Gold G2 paint to the OEM Tokico Brake Calipers tonight and am letting them dry/cure. I'll take some pictures tomorrow.
Carbonetics Clutch Kit. Entire kit w/ flywheel weighs 19.78 lbs!!! Over 14 lbs lighter than stock!
Light Flywheel. Only 9.6 lbs!!!
Azenis on Azenis... The old 255/40-17s vs the new 205/40-17s. Serious size and weight reduction.
...and now, the Sterling Gold OZ's! This color is simply gorgeous! A great color that looks gold , but reflects in a somewhat pearlescent manner. They can look anywhere from a matt bronze to a glossy gold depending on flash, no flash, light, no light, etc. It was fun to just skew these wheels in different angles and see what kind of colors I could get out of them. Choosing a powder coat color from a little sample strip can be tough, but I think we got pretty lucky with a very unique sort of gold!
Registered User
iTrader: (14)
Joined: Jan 2006
Posts: 852
From: Washington
Car Info: 05 wrb wrx wagon
wow, those OZ's look sweet! gonna look so good when your car is wrapped in that flat black vinyl. just wondering why you went with the 205's over your old 255's though. was it to get that stretched/hellaflush look?
how's the engine rebuild coming along?
how's the engine rebuild coming along?
Thread Starter
VIP Member
Joined: Apr 2003
Posts: 846
From: Orange County, CA
Car Info: 08 WRX - 401whp/408wtq
I did an entire write up on why the 205s, I must not have posted it here on this thread. I was seeking a smaller diameter for improved acceleration gearing, shorter torque arm, and less drivetrain stress. I'd rather burn rubber and not the transmission.
And I'm with you... really anticipating that matte black wrap to tie everything together. Thanks for the compliments man!

--Quick update--
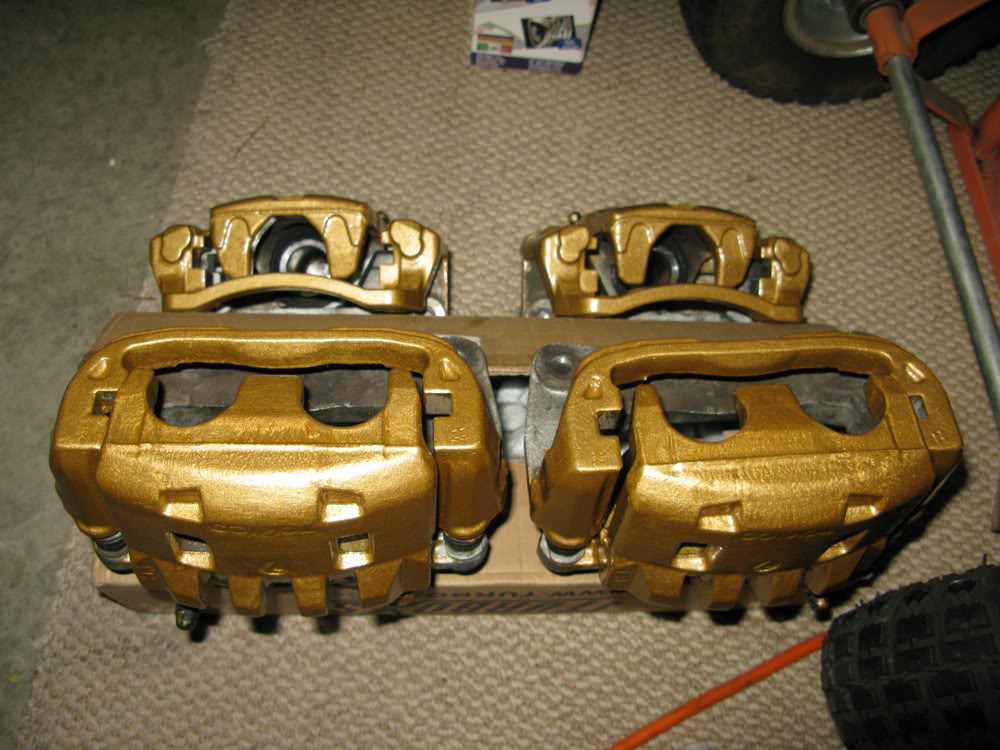
As promised a few shots of the calipers done... and a look through the wheels
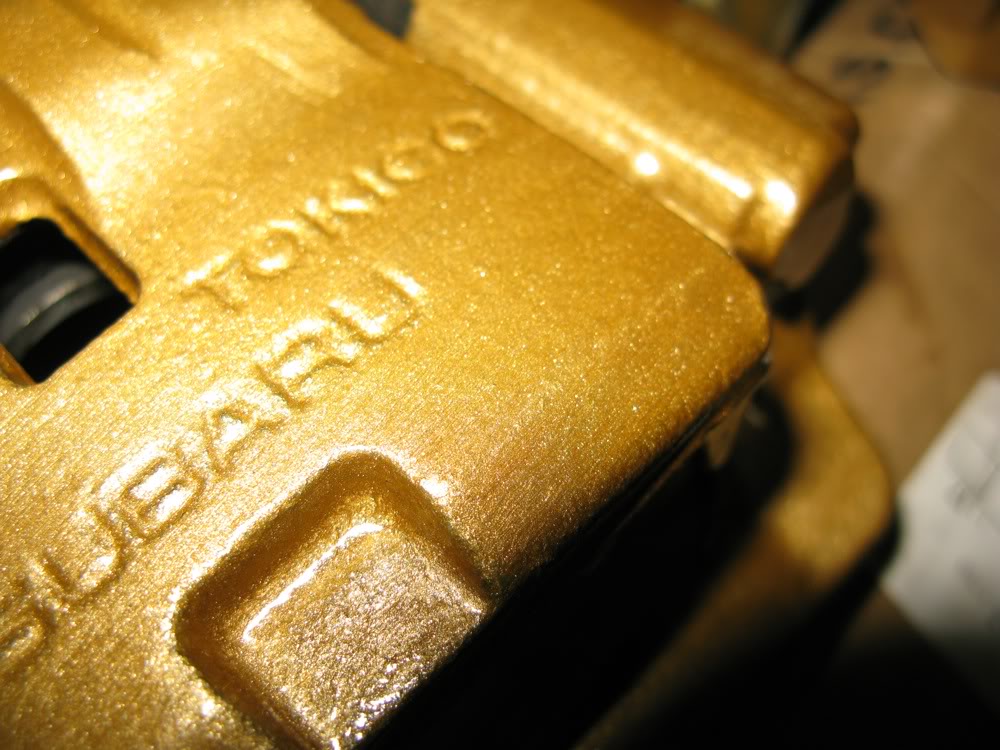
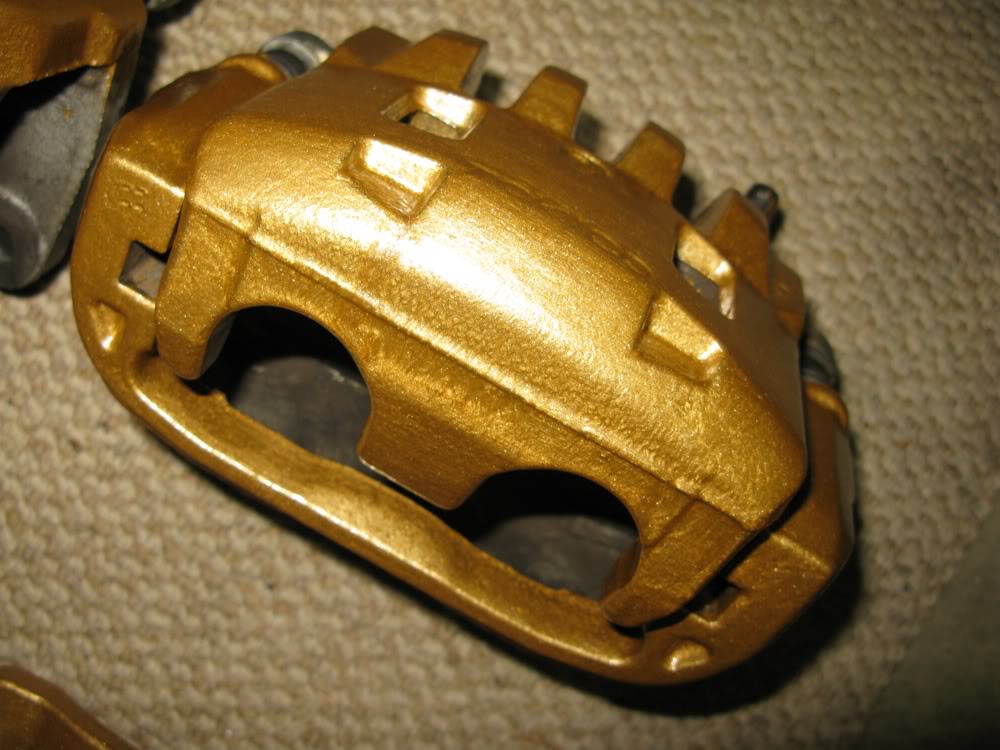
OEM Tokico Calipers painted with G2 Caliper Paint in Gold
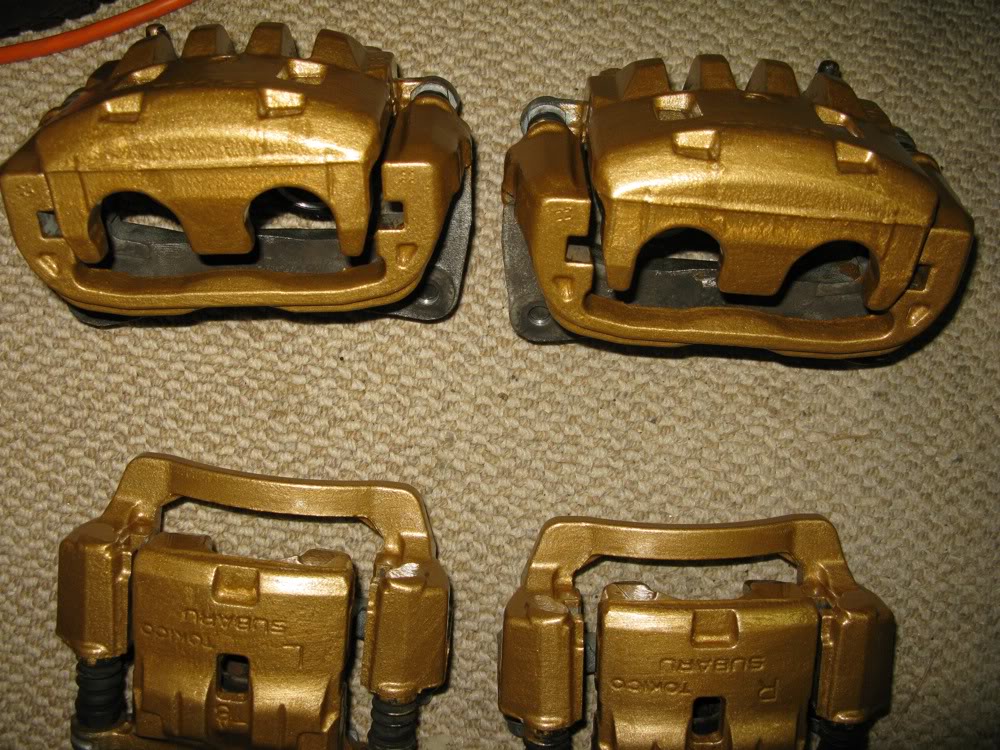
A couple shots of the G2 Gold vs custom Sterling Gold of the OZs... Check out the differences in color.
---
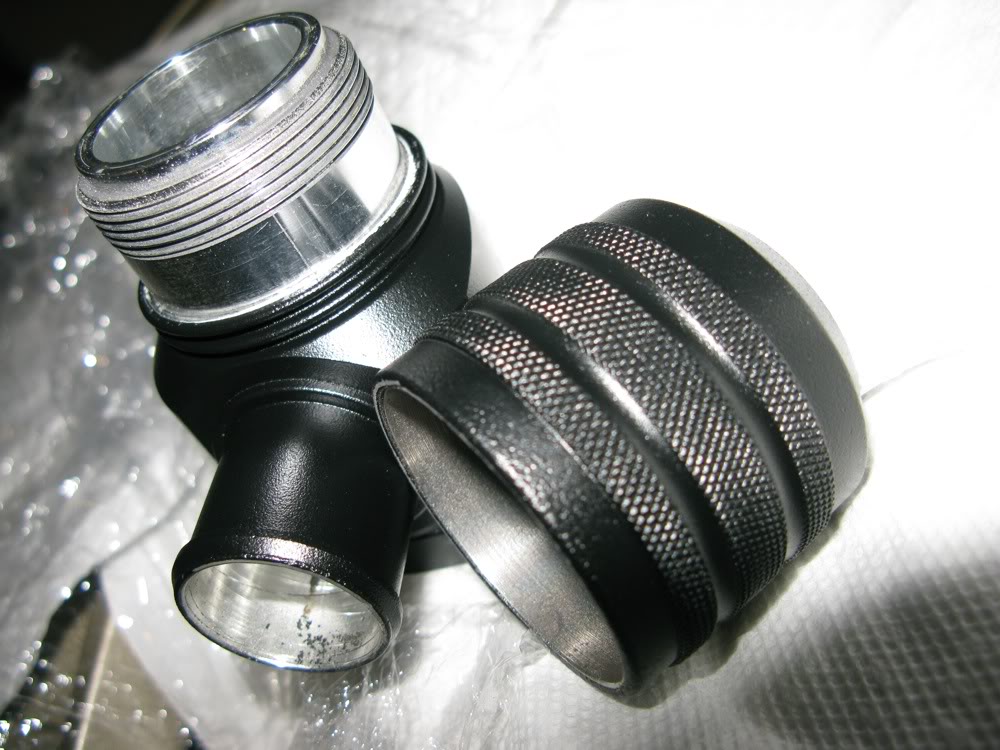
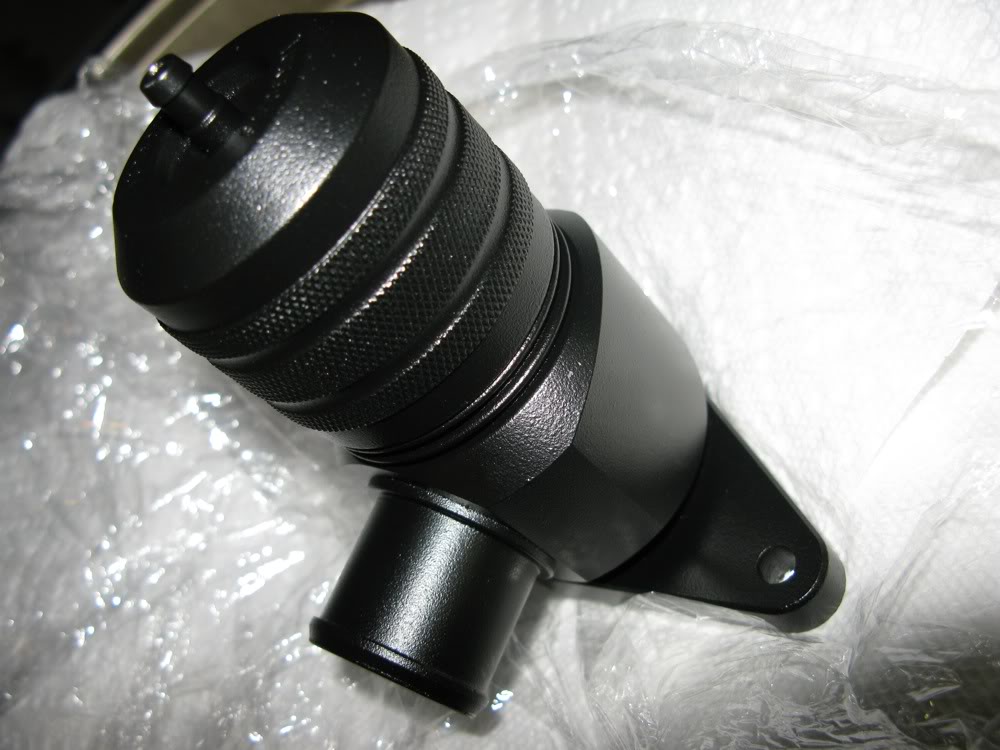
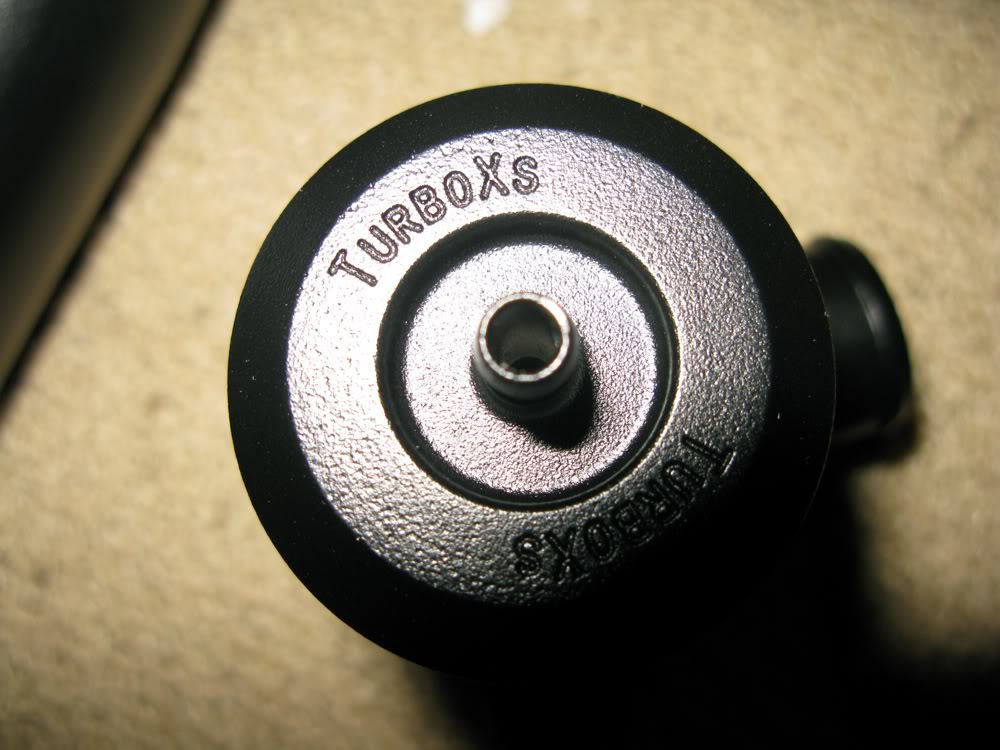
With the increasing amount of referee tickets given recently, we're trying to cut down a little bit on the under-hood glimmer while staying within the black and gold theme this car will display. We chose to have our TurboXS front mount intercooler pipes, TurboXS bpv and our KS Tech Type-TXS 73mm Intake powdercoated in a wrinkle black finish for a more stealthy appearance. Check them out!
Thread Starter
VIP Member
Joined: Apr 2003
Posts: 846
From: Orange County, CA
Car Info: 08 WRX - 401whp/408wtq
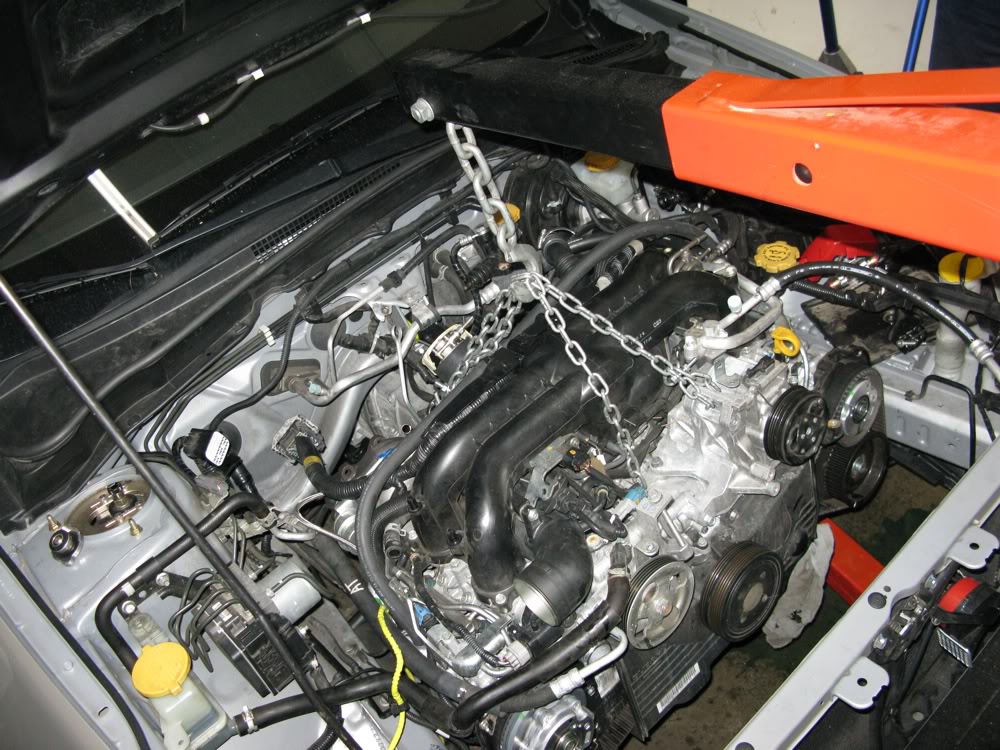
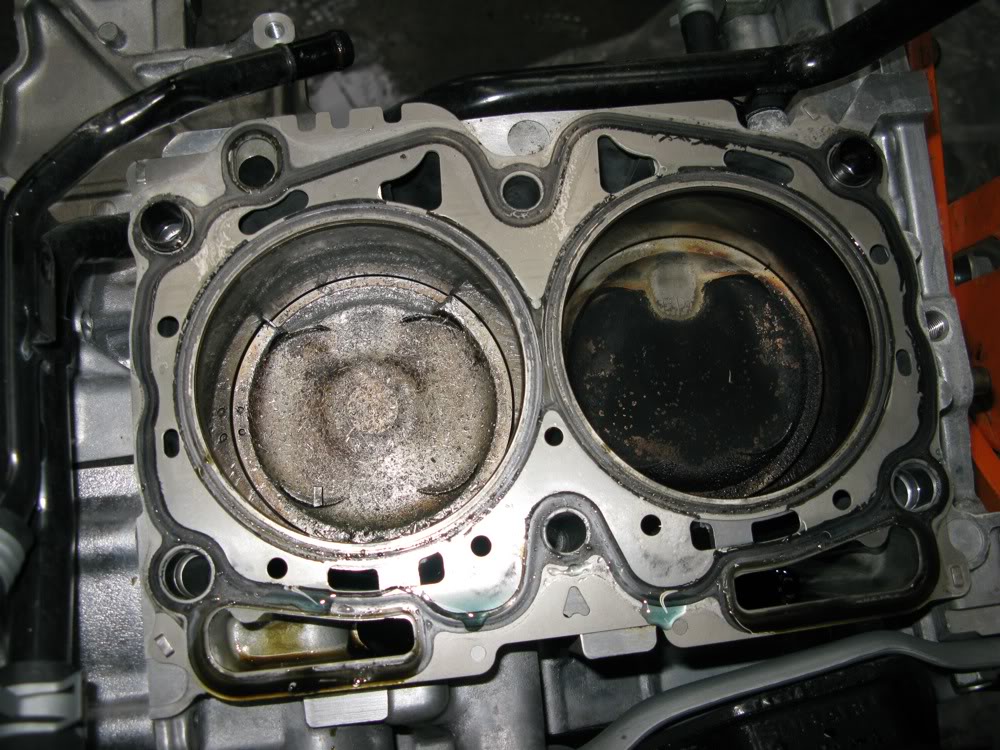
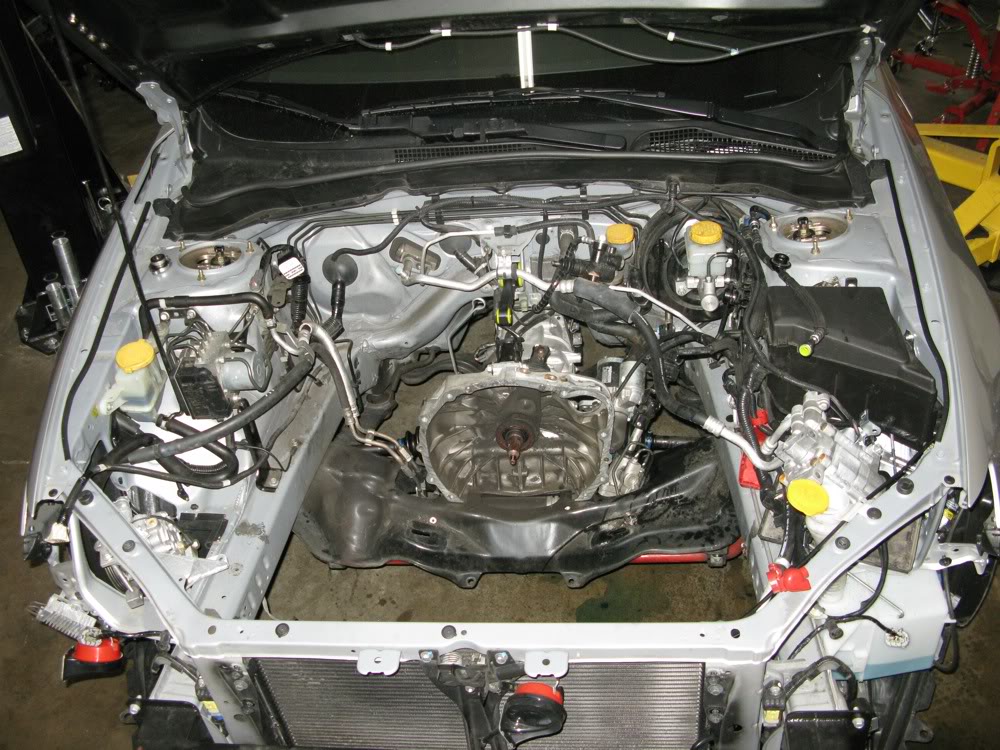
And so it begins. We pulled the engine today and removed many other parts to prepare for things to come. Everything went smooth and the damage was revealed! What caused the damage remains unknown until we flow test our injectors and inspect everything else in the system. Enjoy the images.
Ready for it's heart transplant. All the vinyls removed.
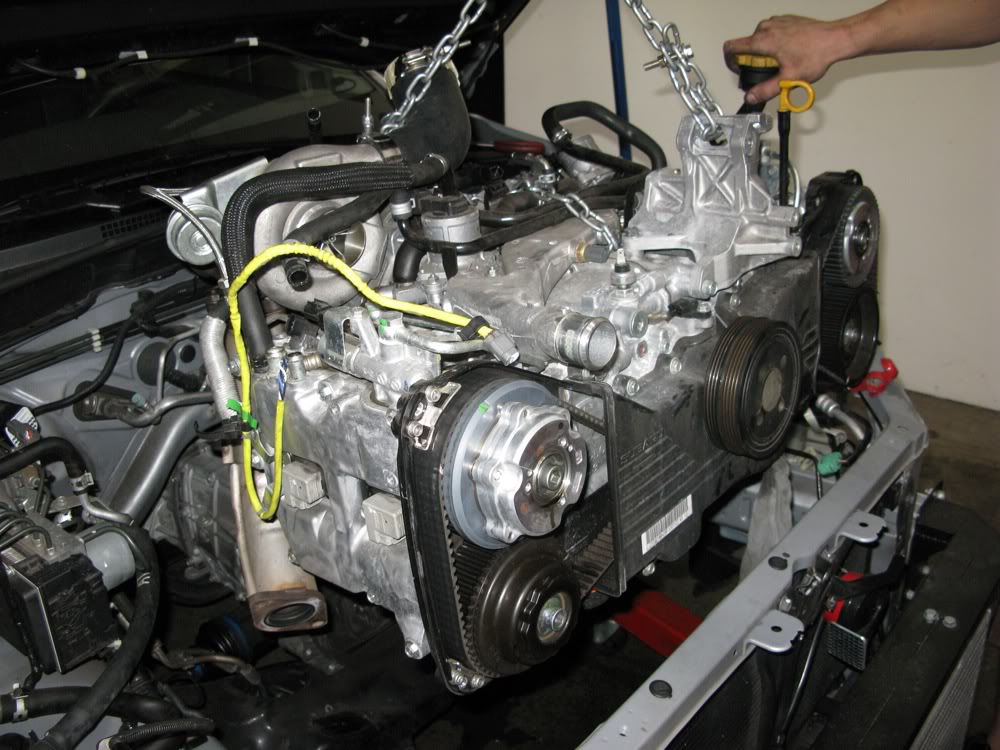
Motor being pulled out.
Almost there...
And she's out!
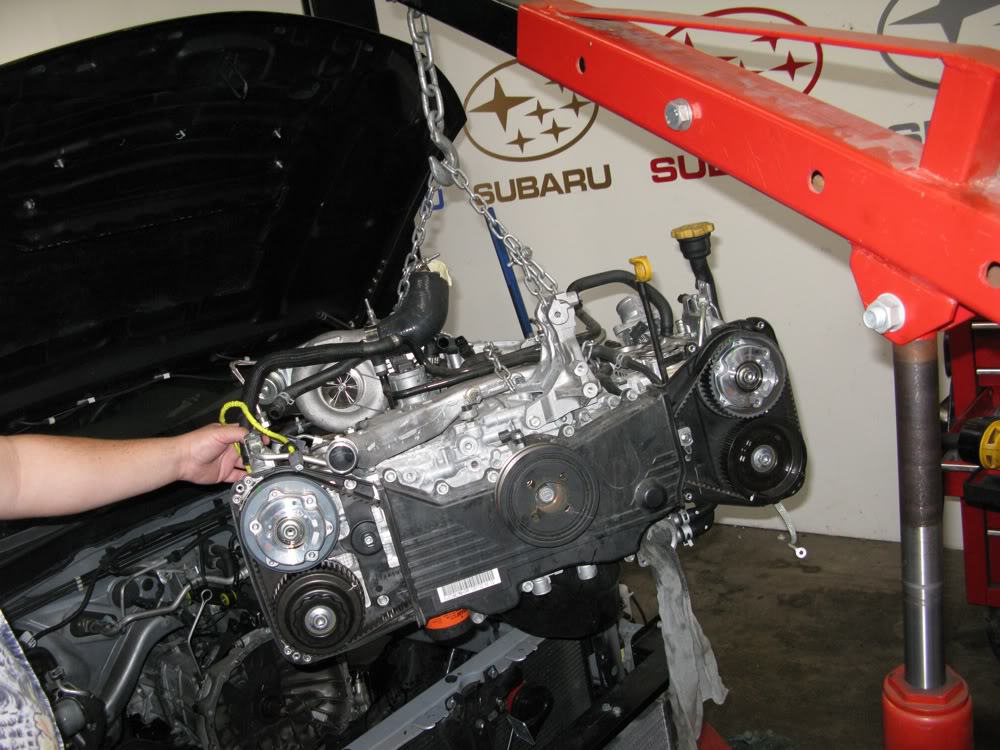
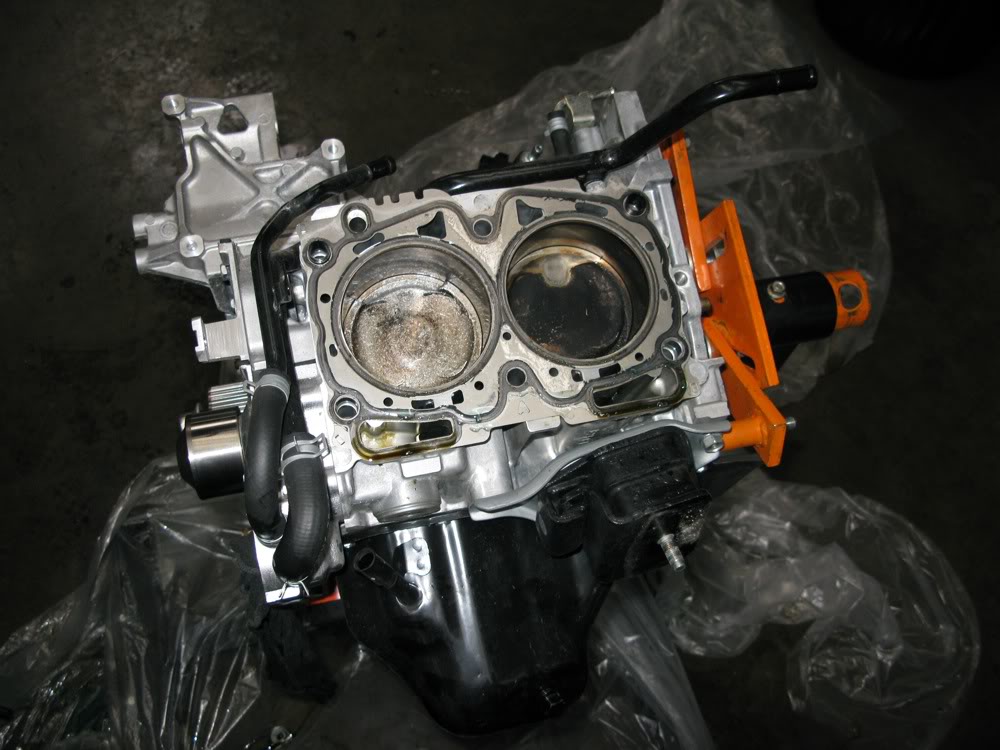
On the Engine Stand.
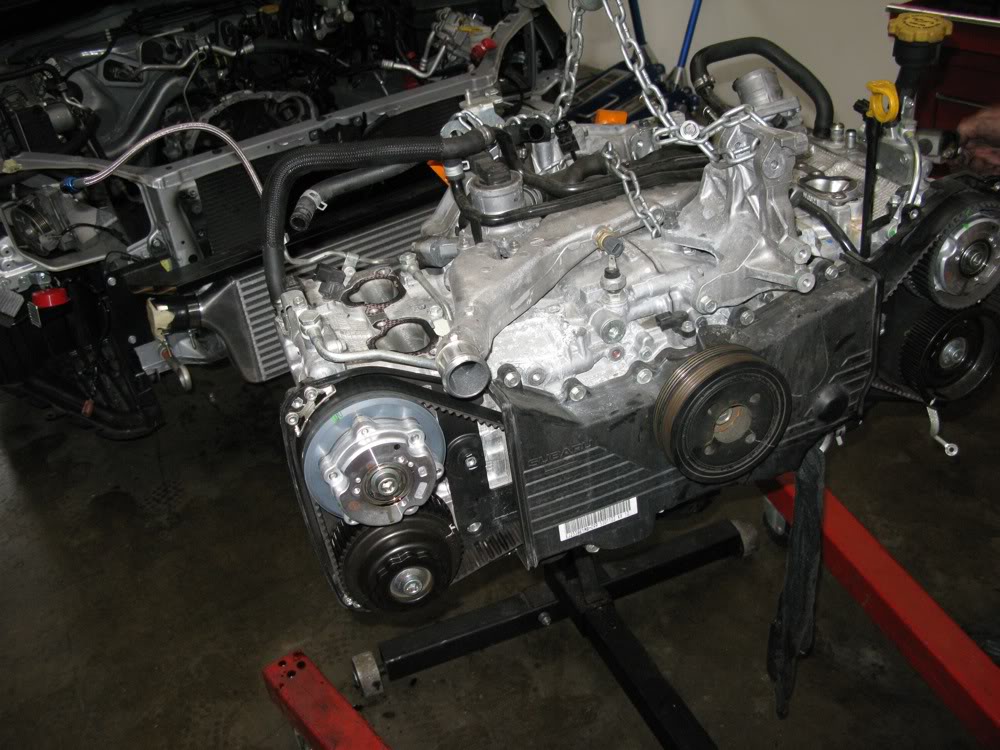
Looking alright thus far.
Still good.
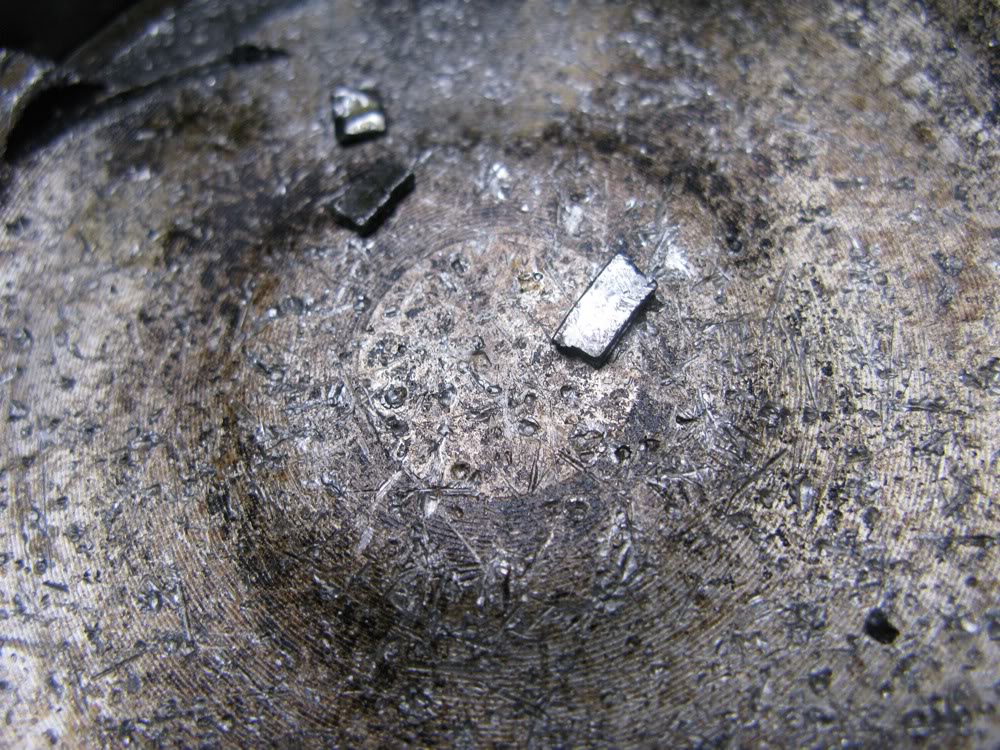
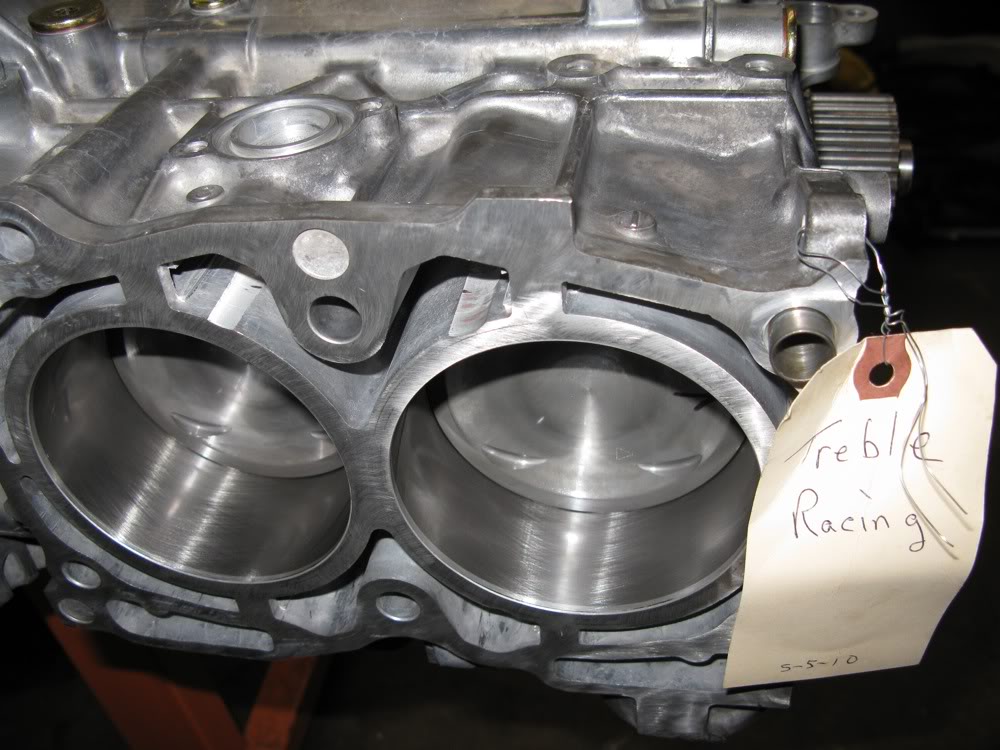
And here's our damage. 27k healthy miles with Chevron CA-91 with normal deposits to the right and a serious detonation to the left.
A closer look at the damage... Piston chunk and ring piece blown off.
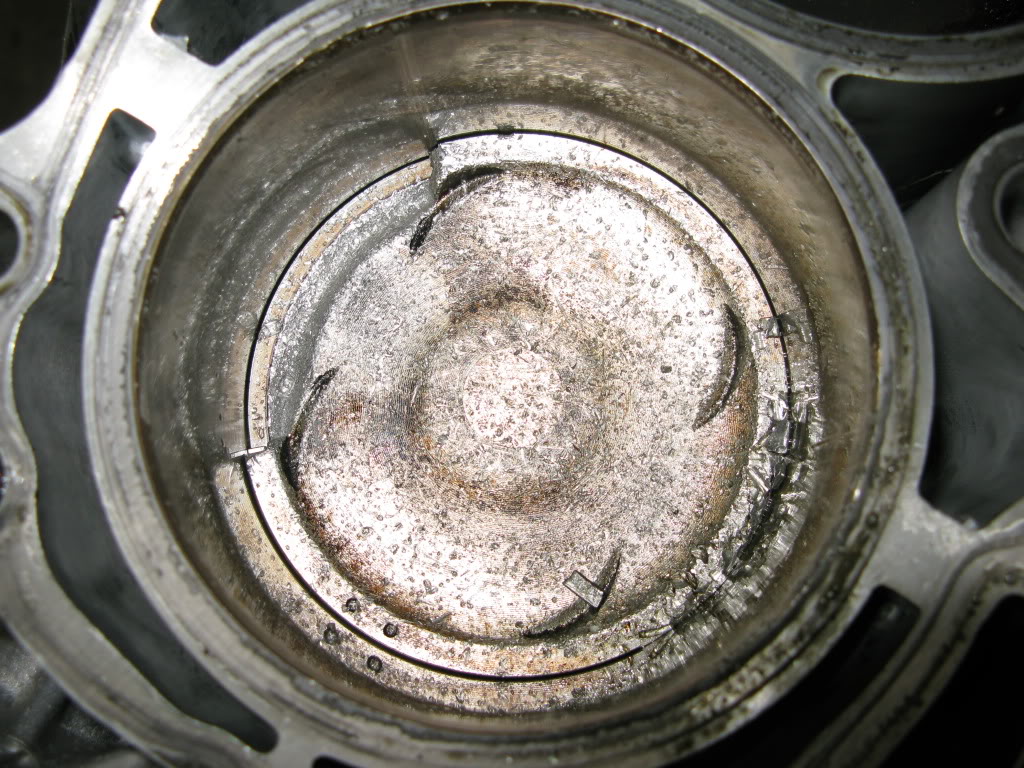
The footsteps rings leave when they dance in your cylinder.
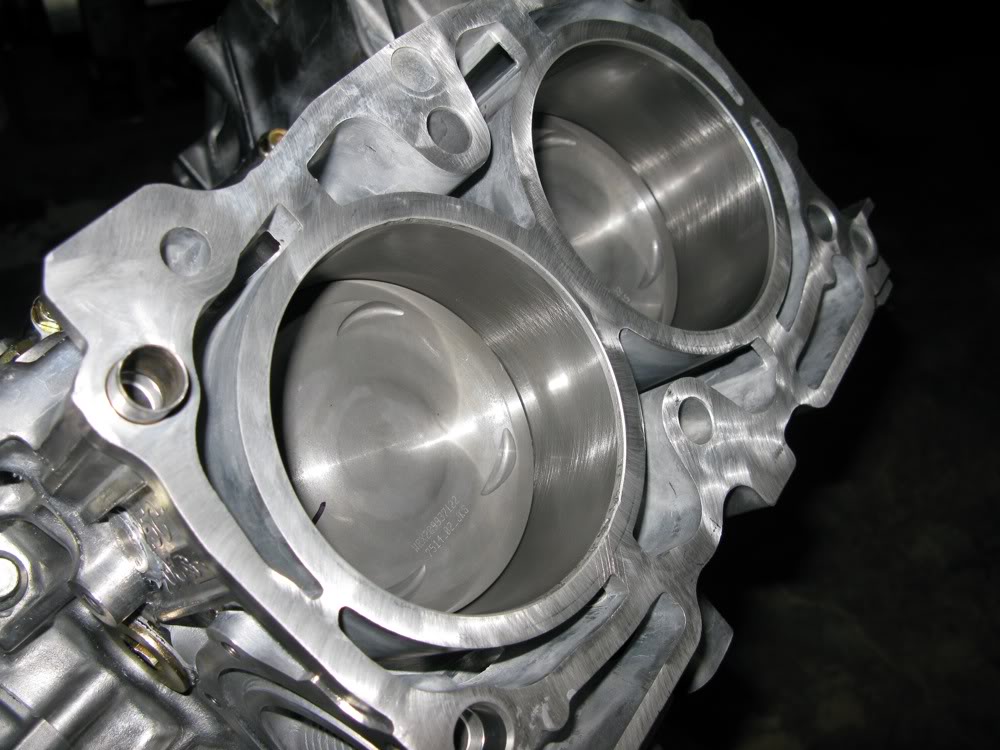
Another look.
And the other side.

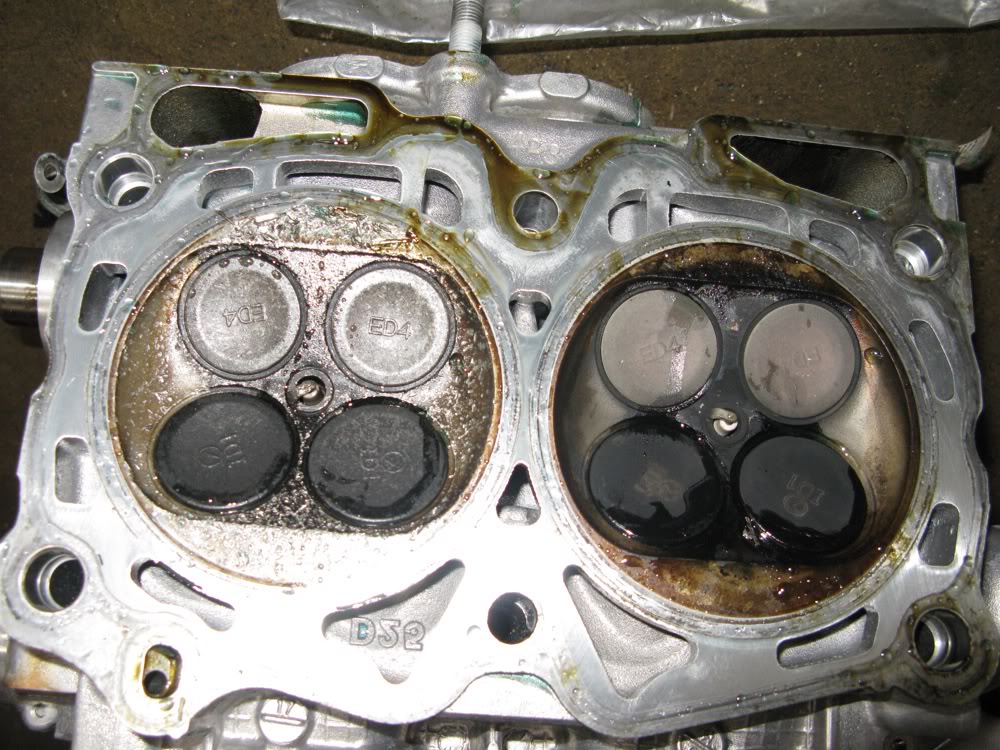
Damaged head. The pieces of ring chewed up the head surface too, looks like we're in for a new head.
Shortblock draining, awaiting it's trip to Outfront Motorsports to be re-machined and built.
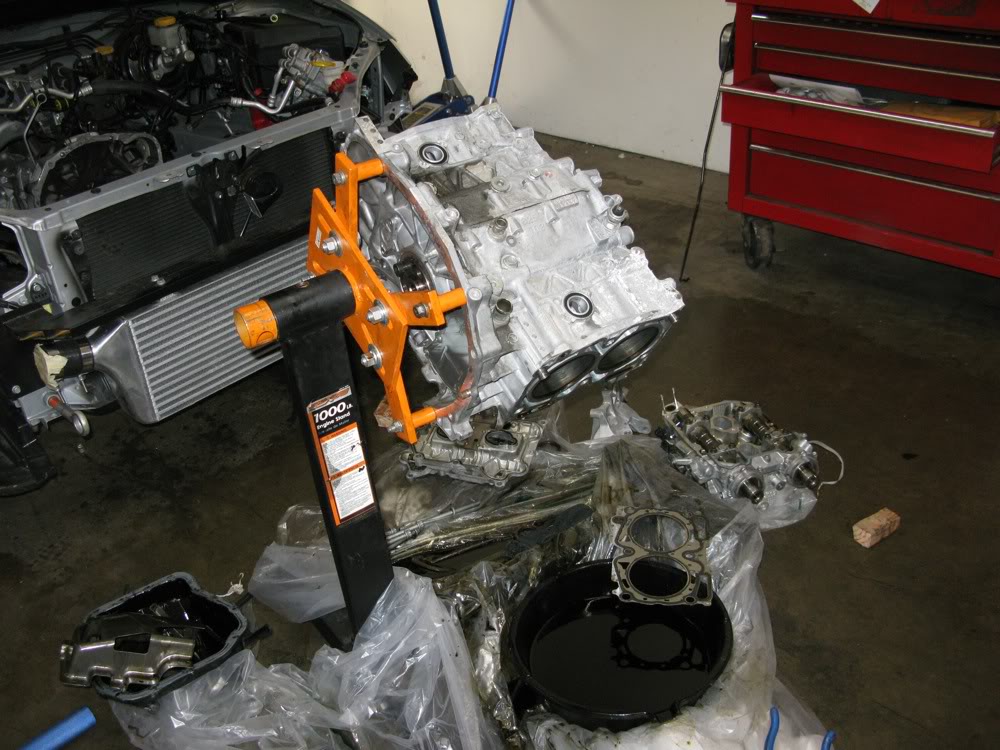
Awaiting its new heart.
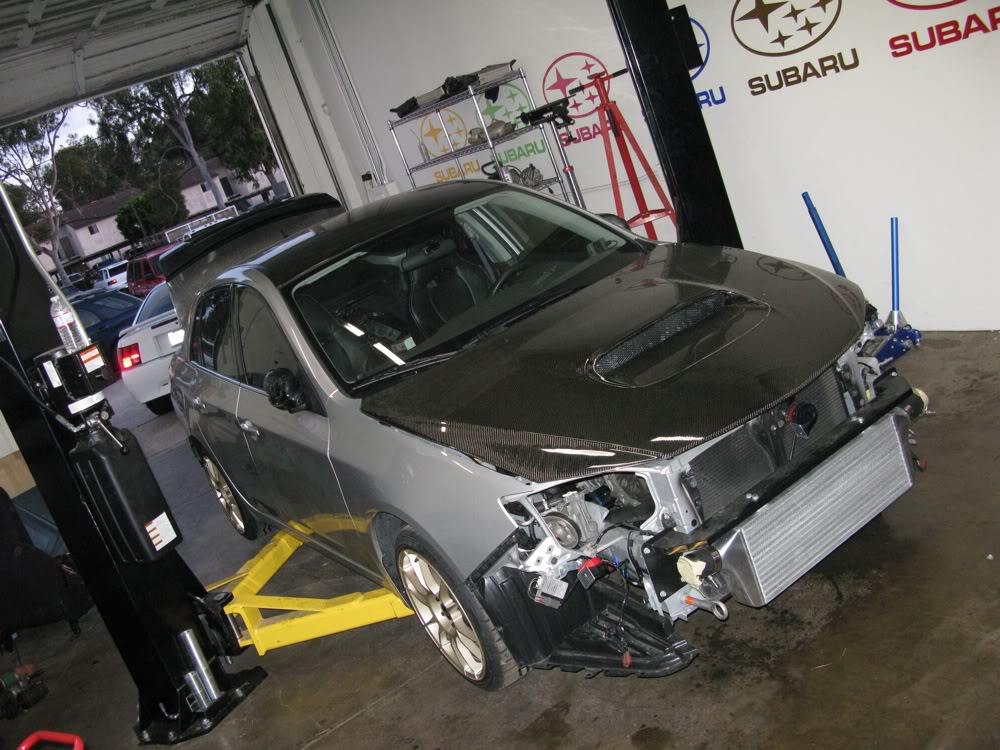
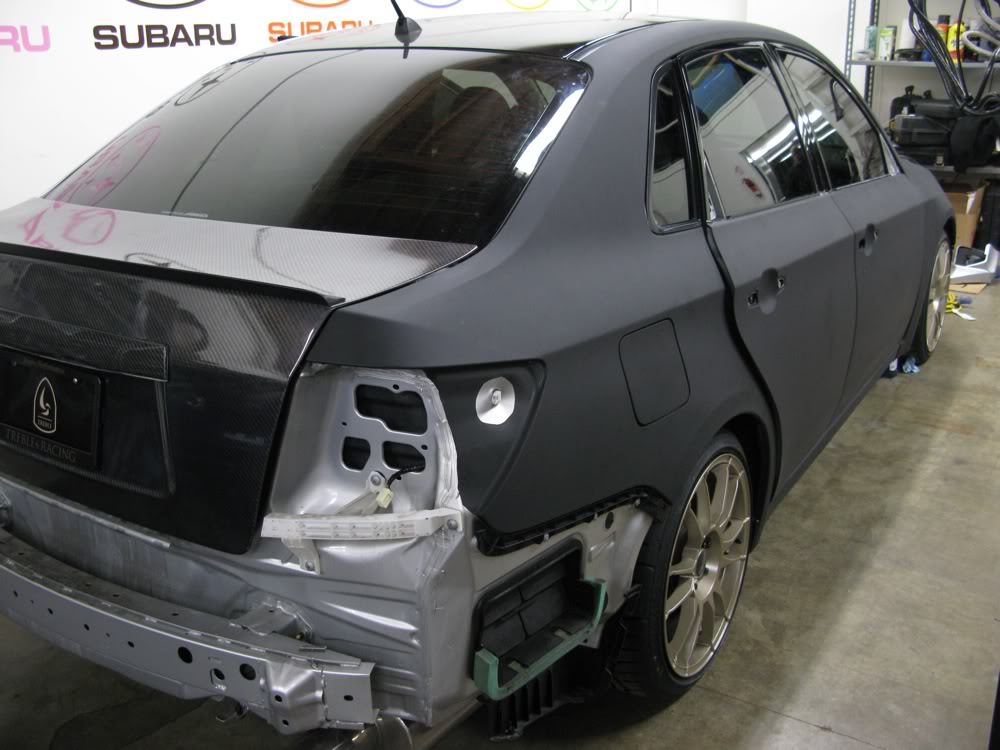
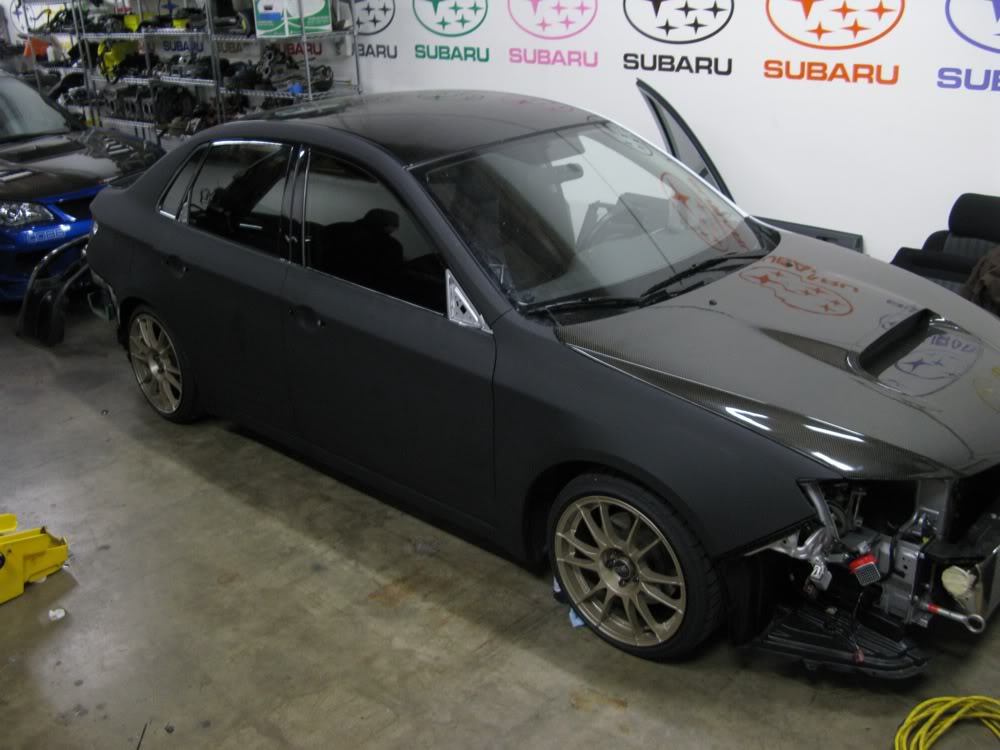
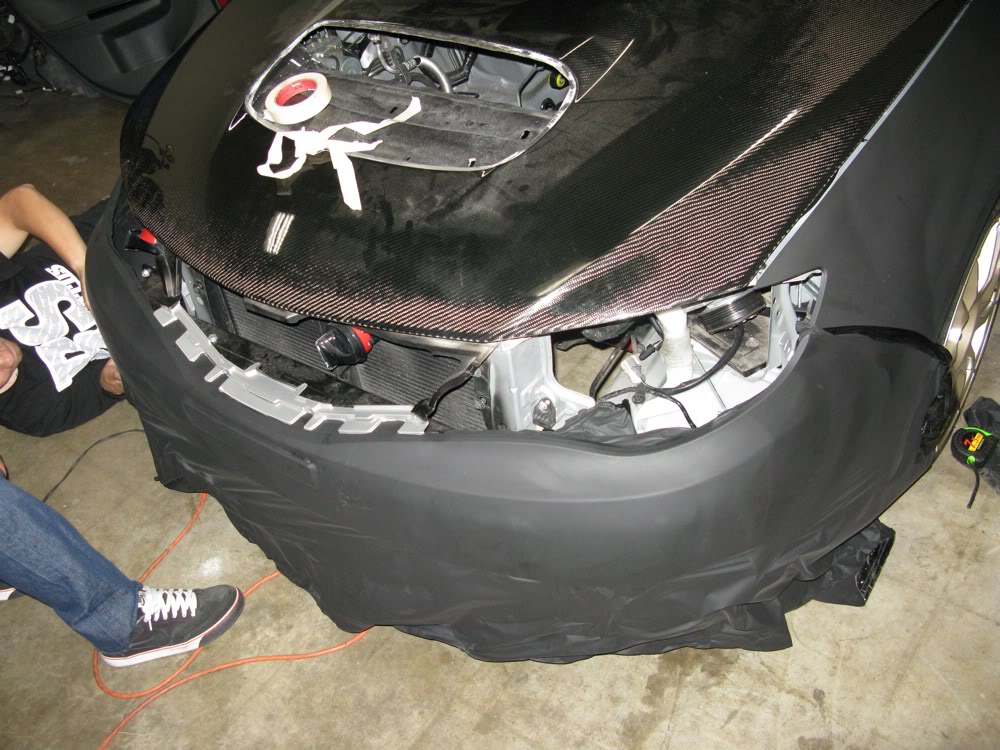
Headlights, taillights, splash guards, mirror caps and bumpers removed awaiting the matte black wrap job by Down Shift Graphics.
So the engine is out and ready to be re-built. I will try to drop it off at Outfront Motorsports tomorrow. I'll also be heading over to Forman Performance after work to figure out a way to remove the door handles to prepare for the matte wrap job.
Ready for it's heart transplant. All the vinyls removed.
Motor being pulled out.
Almost there...
And she's out!
On the Engine Stand.
Looking alright thus far.
Still good.
And here's our damage. 27k healthy miles with Chevron CA-91 with normal deposits to the right and a serious detonation to the left.
A closer look at the damage... Piston chunk and ring piece blown off.
The footsteps rings leave when they dance in your cylinder.
Another look.
And the other side.
Damaged head. The pieces of ring chewed up the head surface too, looks like we're in for a new head.
Shortblock draining, awaiting it's trip to Outfront Motorsports to be re-machined and built.
Awaiting its new heart.
Headlights, taillights, splash guards, mirror caps and bumpers removed awaiting the matte black wrap job by Down Shift Graphics.
So the engine is out and ready to be re-built. I will try to drop it off at Outfront Motorsports tomorrow. I'll also be heading over to Forman Performance after work to figure out a way to remove the door handles to prepare for the matte wrap job.
Thread Starter
VIP Member
Joined: Apr 2003
Posts: 846
From: Orange County, CA
Car Info: 08 WRX - 401whp/408wtq
Update 04/21/2010
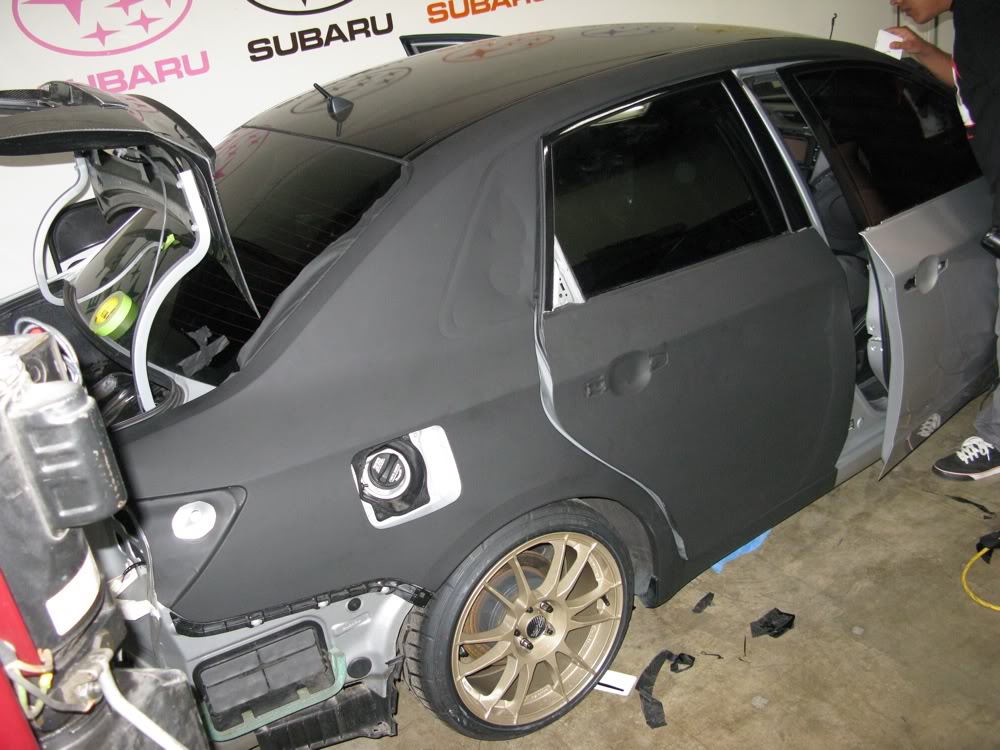
Tonight was all about getting more parts out for vinyl wrapping and painting. We want to ensure Down Shift Graphics will have nothing in their way to compromise a properly wrapped vehicle. To have appropriate access and wrap all edges and ends, we decided to remove a lot of components to make the job easier.
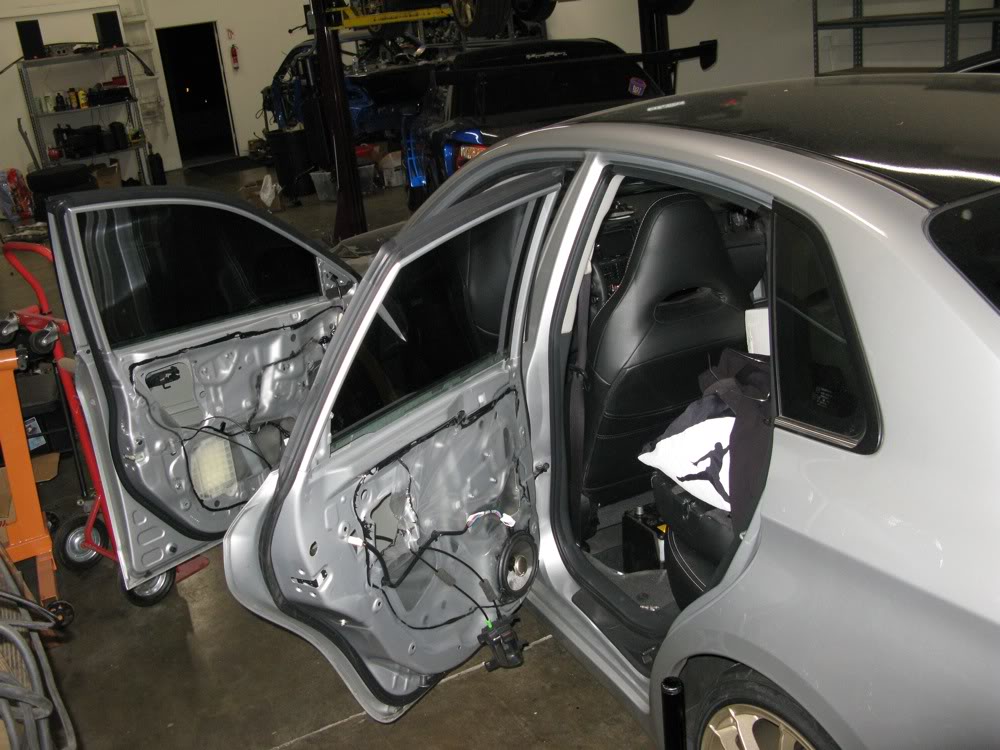
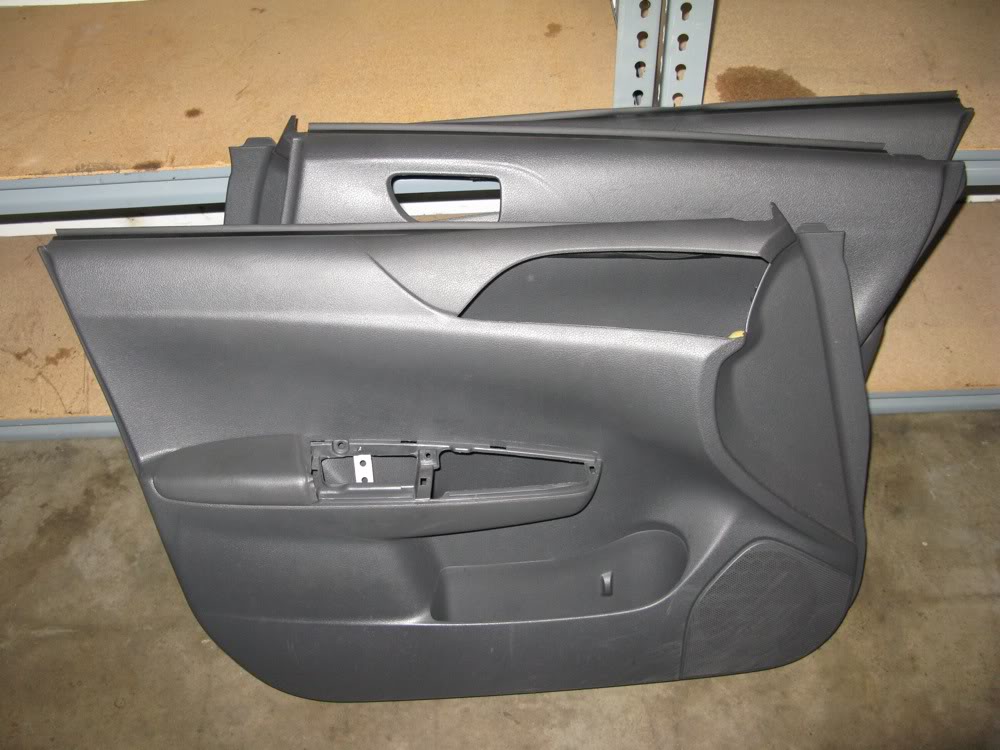
Figuring the most difficult part would be the door handles, I dove right into popping off the door cards and removing related components.
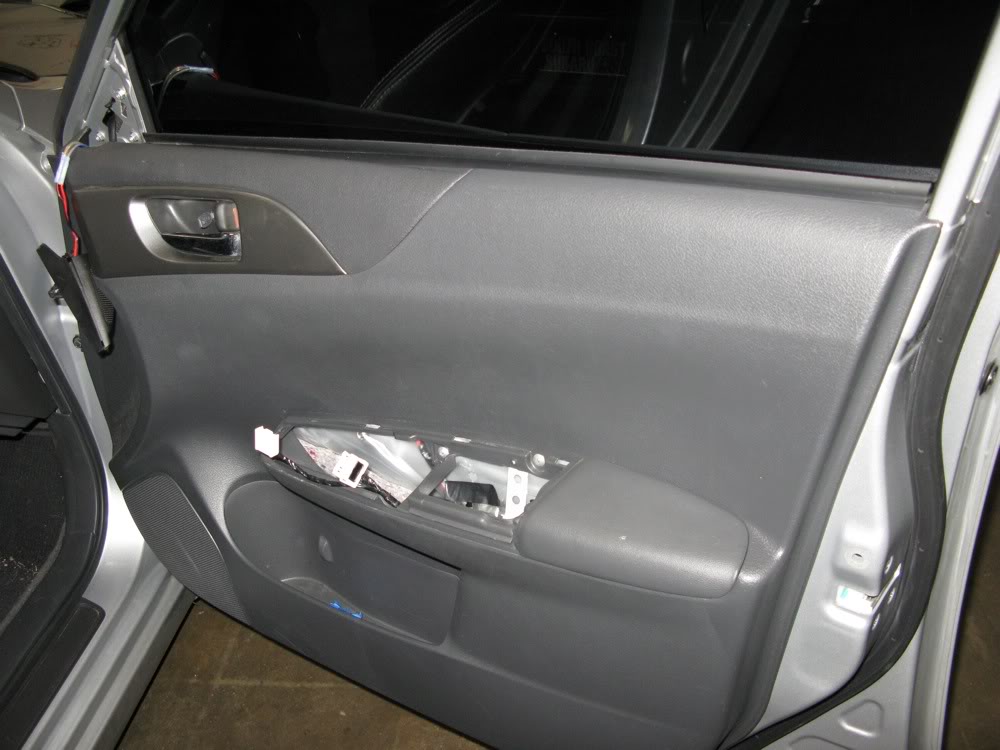
Stripped.
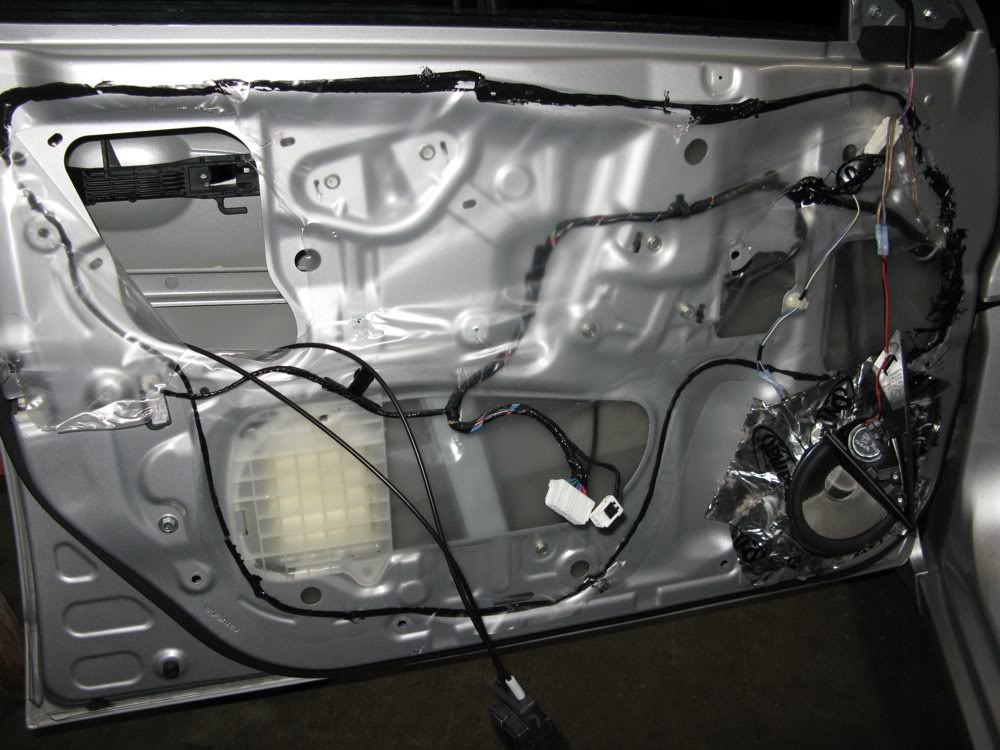
Both stripped.
My good friend got anxious and was already perfecting the art of disassembling the handles from the inside. I just stayed out of his way and worked on the interior.
How reassuring.
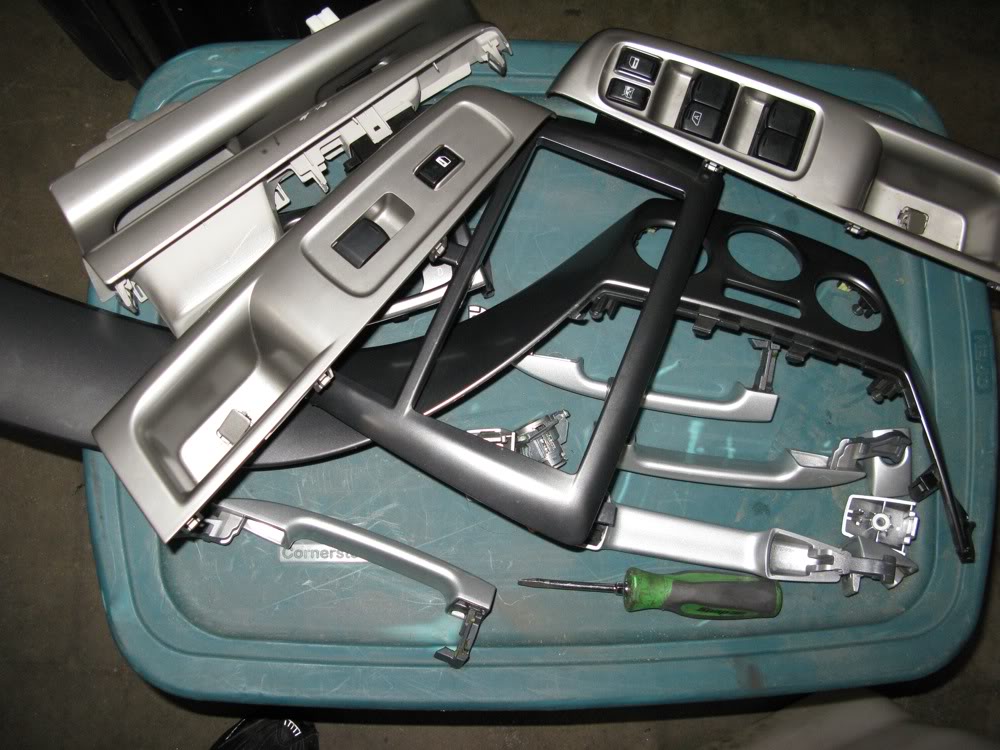
After I took apart all the parts we'll be wrapping.
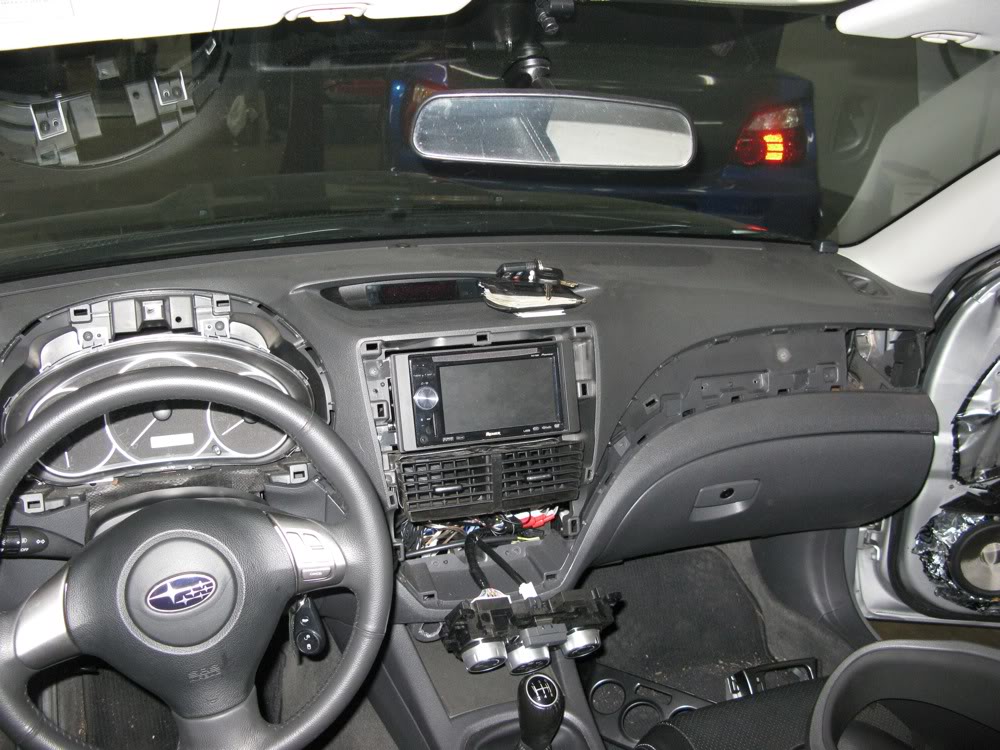
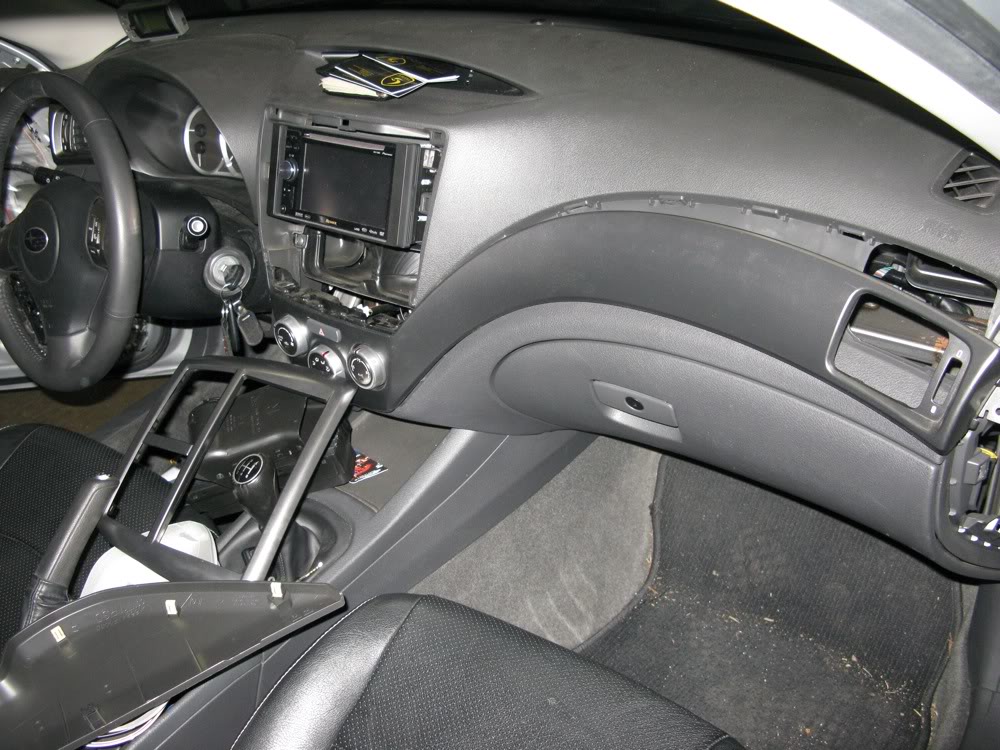
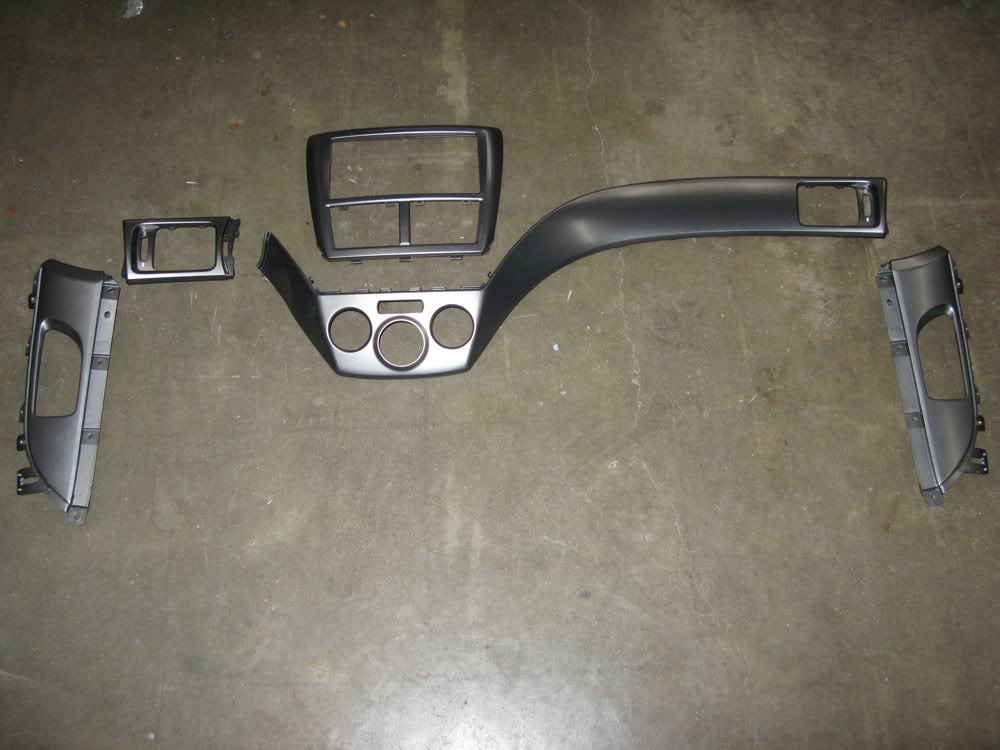
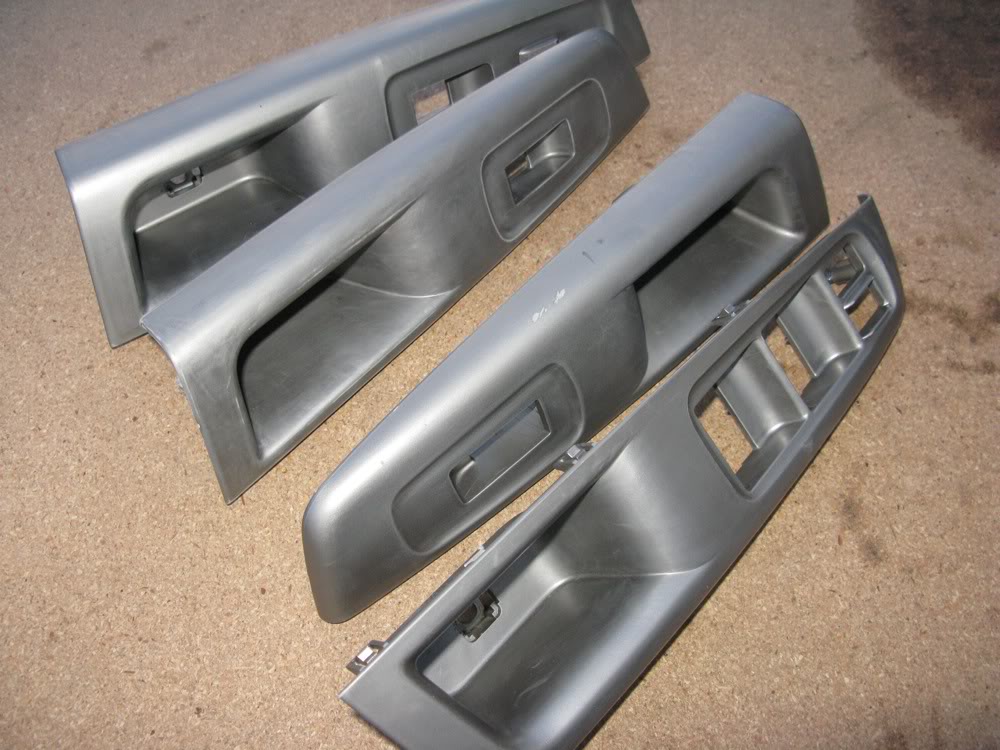
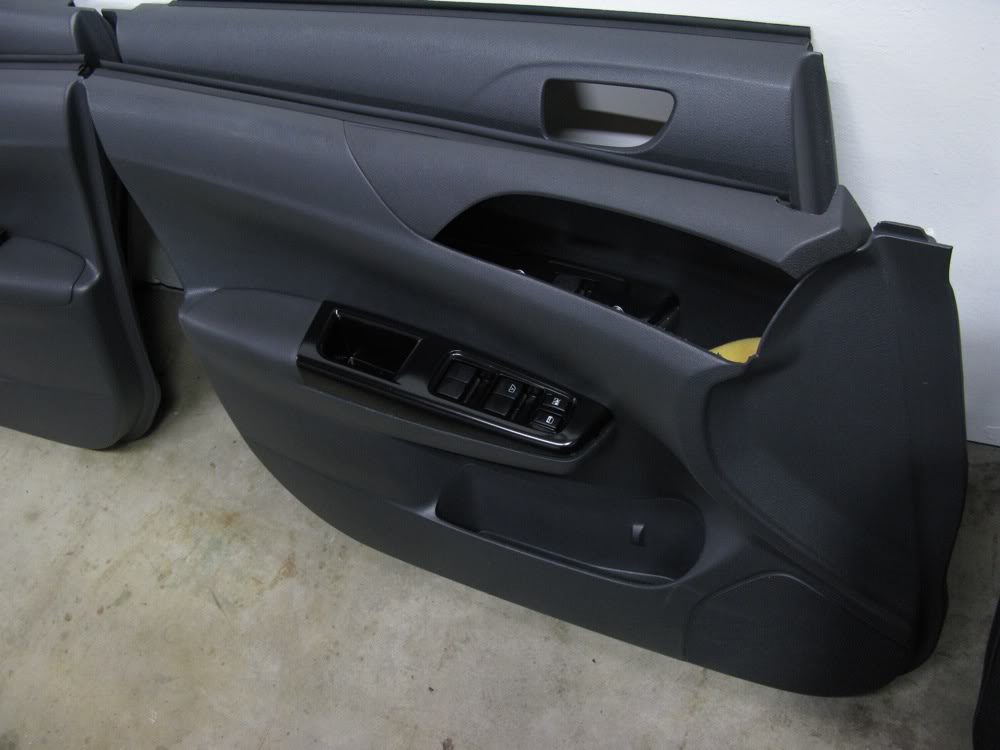
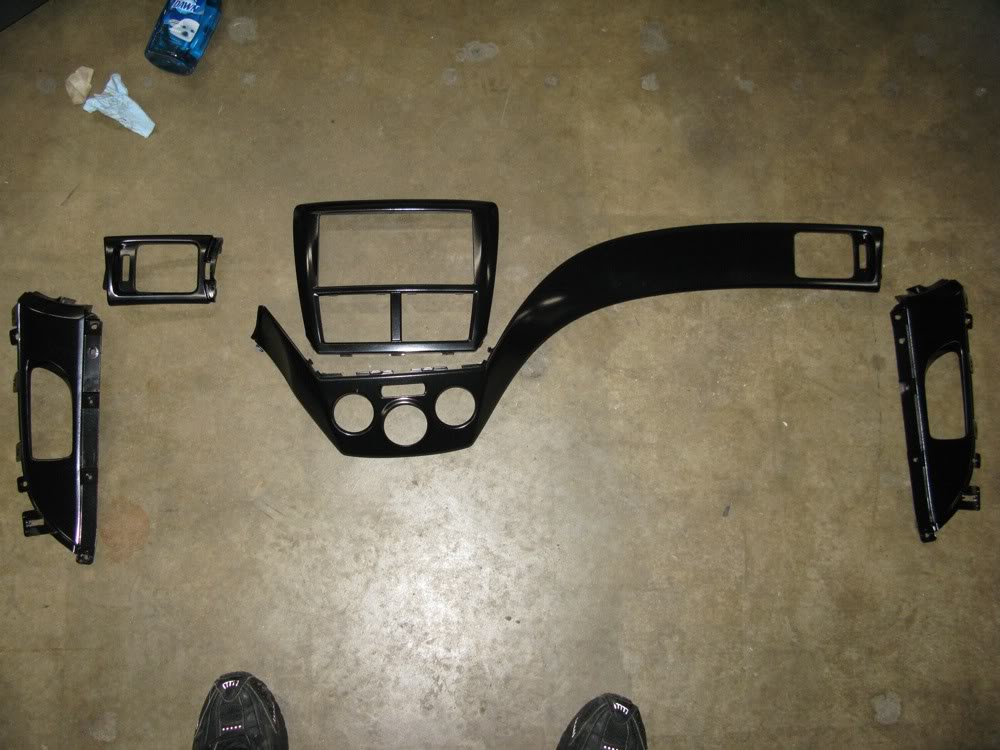
Some of the parts removed: Door switches, door handles, head unit bezel and dash trim.
Disassembling switches from their trim pieces. I am planning on painting these pieces as a few of them are weathered and scuffed. Also, with a carbon dash trim, I'm thinking the silver pieces will pop too much. So I'll look into some graphite gray-type plastic paint options tomorrow at a store and see if I can find something that will suite the theme better.
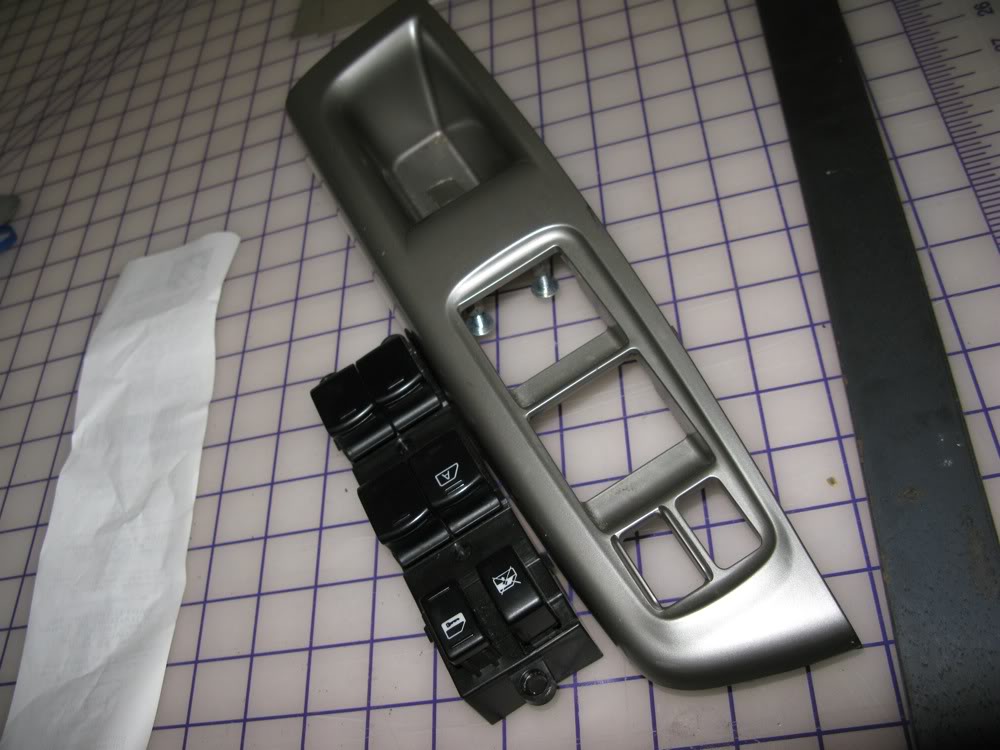
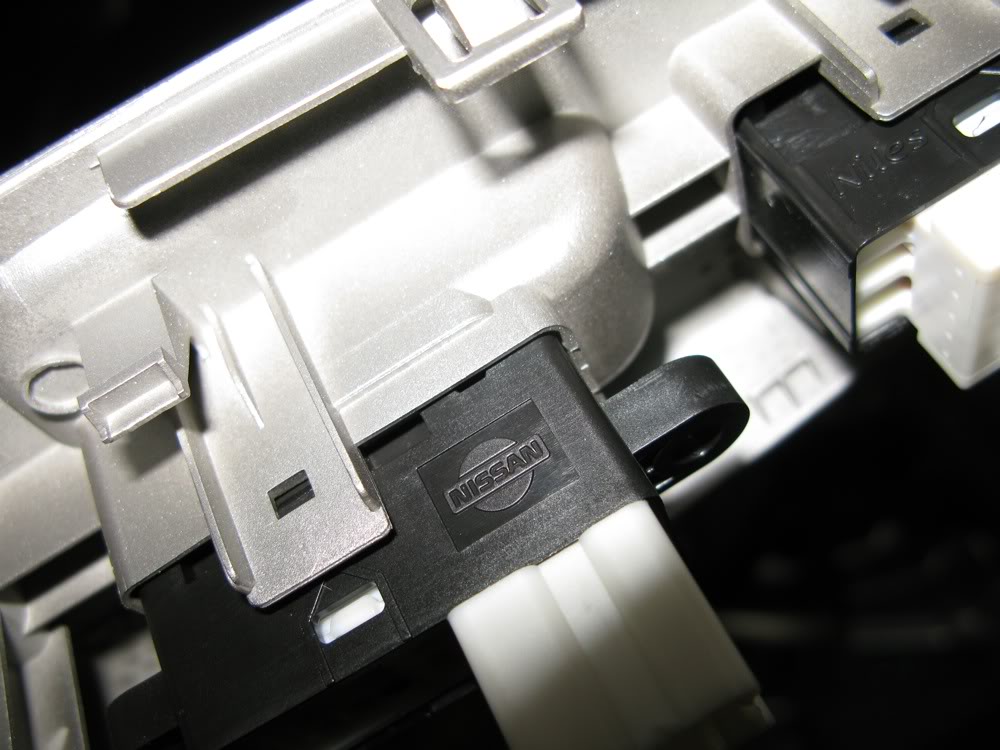
Window switches, powered by Nissan!!!
Stripped door cards wait patiently for their day of reinstall.
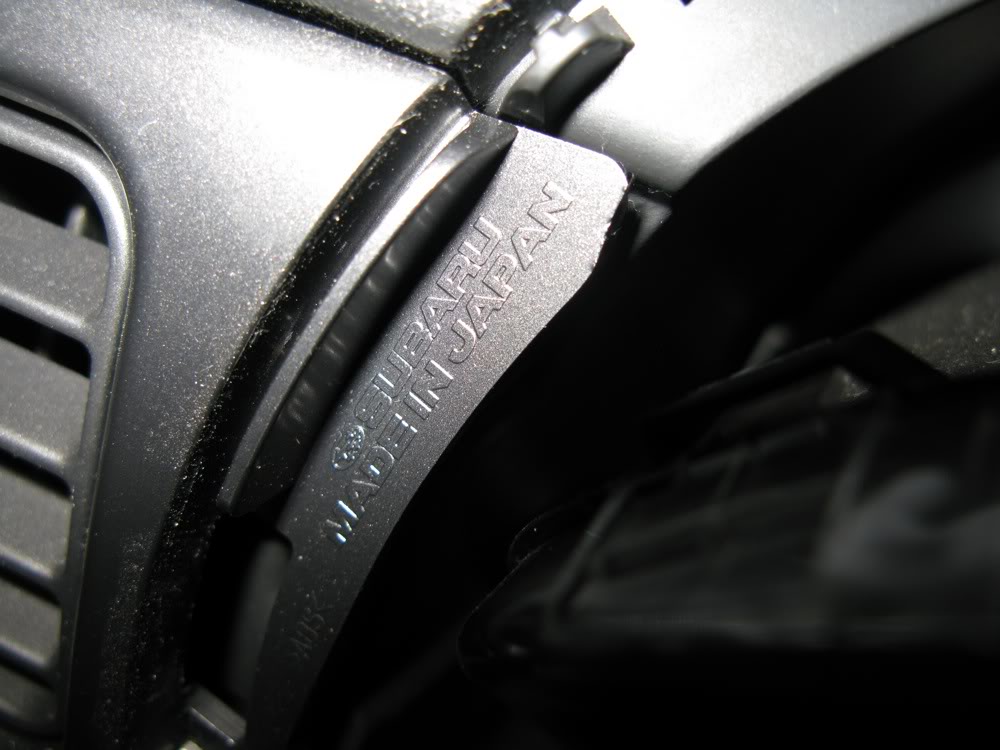
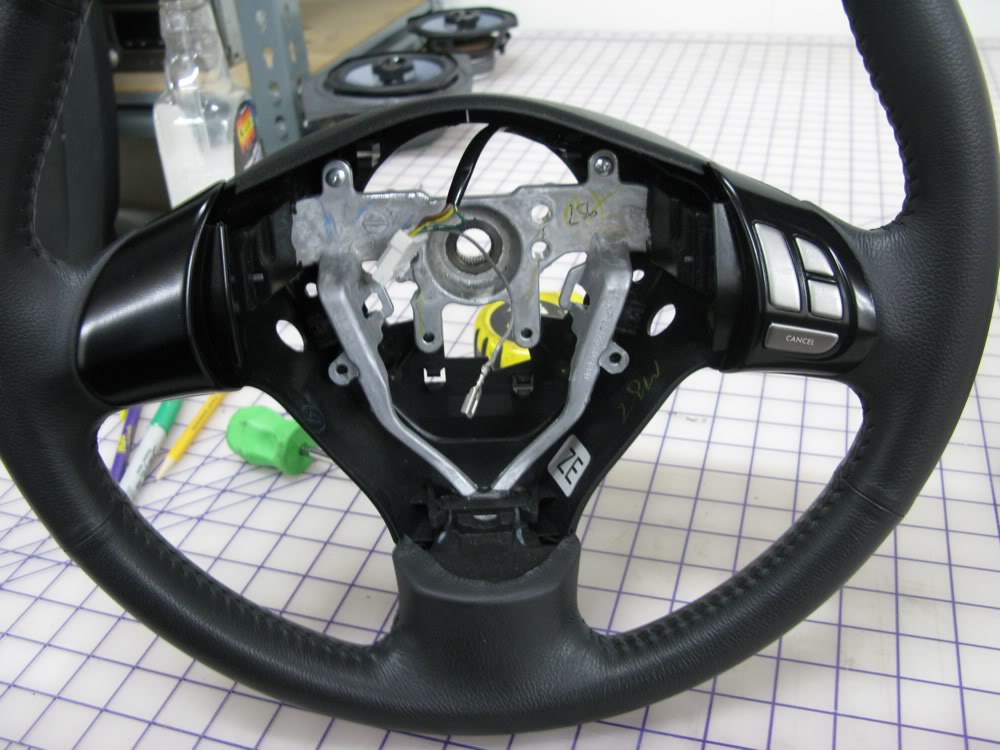
The trim pieces that will be wrapped in Carbon Fiber vinyl. I need to figure out how to get the steering wheel control trims off.
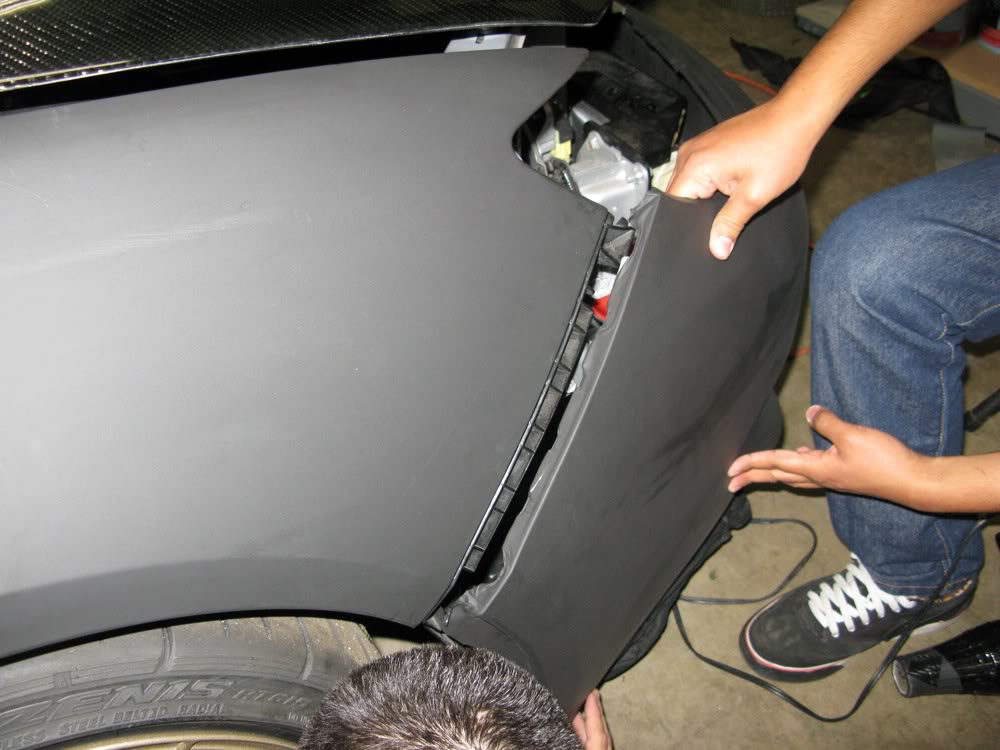
Door handles. Removing these took some time to get to, but if we're doing a full wrap, we're going to make sure we properly wrap every edge and corner. This is the right way to do it. Once it's wrapped and reinstalled, there will be no way for the edges to lift.
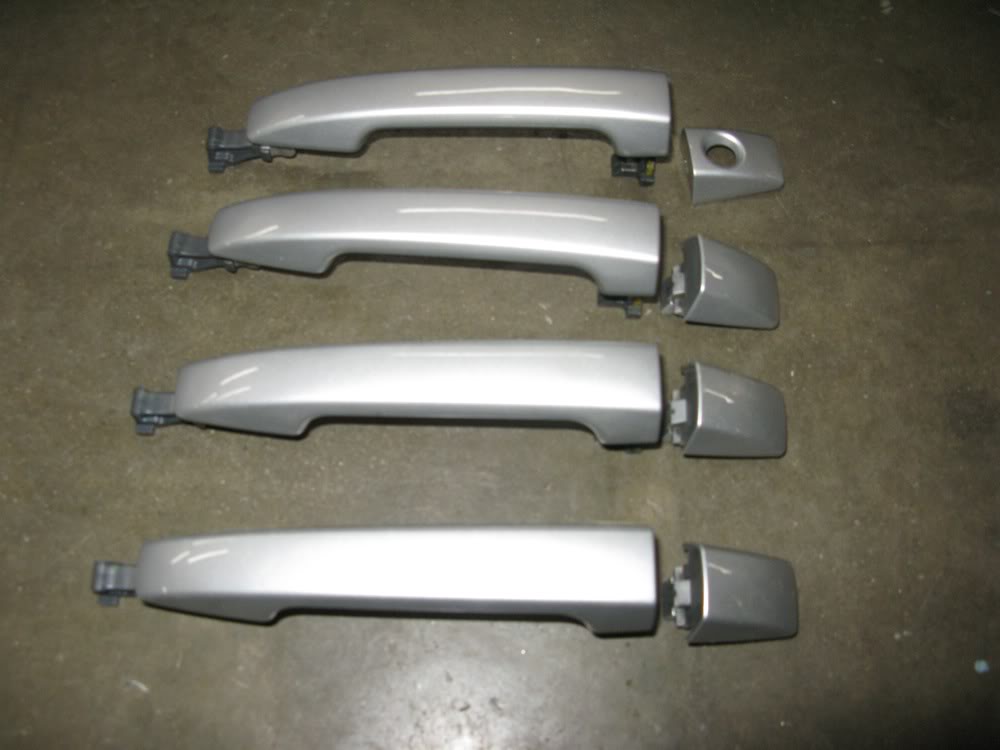
You can't handle this... Ummm... literally.
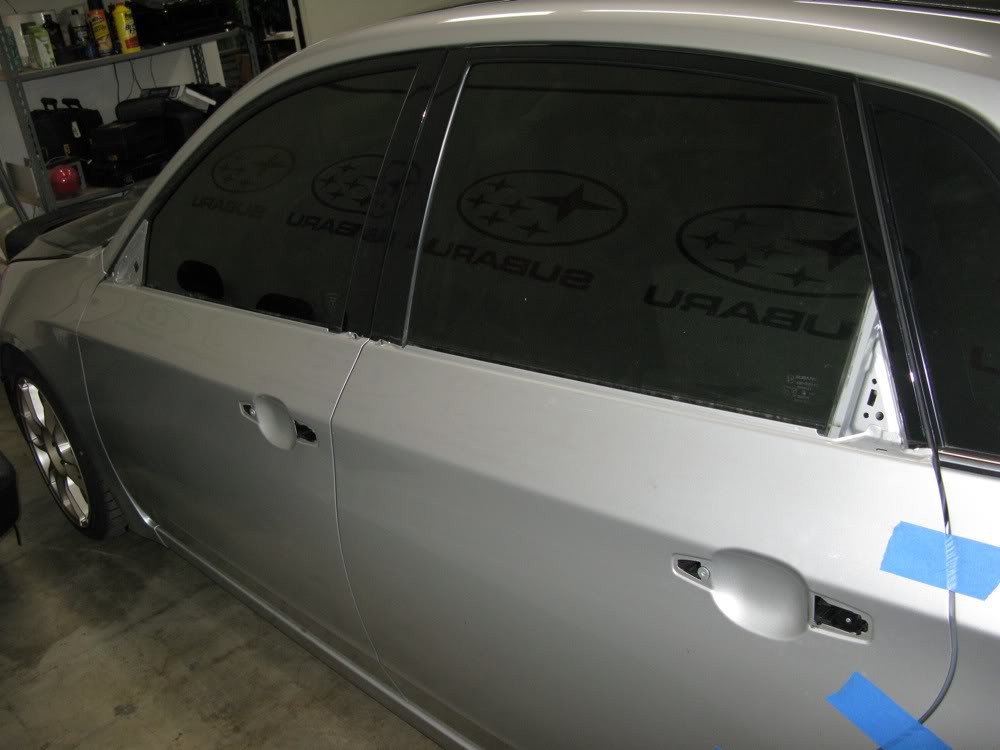
A closer look. No handles, no base window trim and no mirrors. By the way, here's a link to Larry's very helpful walk through videos to remove the chrome window strips: http://www.3gwrx.com/forum/index.php...18.0#msg125702
If all goes according to plan, vinyl wrapping begins tomorrow!!!
Tonight was all about getting more parts out for vinyl wrapping and painting. We want to ensure Down Shift Graphics will have nothing in their way to compromise a properly wrapped vehicle. To have appropriate access and wrap all edges and ends, we decided to remove a lot of components to make the job easier.
Figuring the most difficult part would be the door handles, I dove right into popping off the door cards and removing related components.
Stripped.
Both stripped.
My good friend got anxious and was already perfecting the art of disassembling the handles from the inside. I just stayed out of his way and worked on the interior.
How reassuring.
After I took apart all the parts we'll be wrapping.
Some of the parts removed: Door switches, door handles, head unit bezel and dash trim.
Disassembling switches from their trim pieces. I am planning on painting these pieces as a few of them are weathered and scuffed. Also, with a carbon dash trim, I'm thinking the silver pieces will pop too much. So I'll look into some graphite gray-type plastic paint options tomorrow at a store and see if I can find something that will suite the theme better.
Window switches, powered by Nissan!!!
Stripped door cards wait patiently for their day of reinstall.
The trim pieces that will be wrapped in Carbon Fiber vinyl. I need to figure out how to get the steering wheel control trims off.
Door handles. Removing these took some time to get to, but if we're doing a full wrap, we're going to make sure we properly wrap every edge and corner. This is the right way to do it. Once it's wrapped and reinstalled, there will be no way for the edges to lift.
You can't handle this... Ummm... literally.
A closer look. No handles, no base window trim and no mirrors. By the way, here's a link to Larry's very helpful walk through videos to remove the chrome window strips: http://www.3gwrx.com/forum/index.php...18.0#msg125702
If all goes according to plan, vinyl wrapping begins tomorrow!!!
Thread Starter
VIP Member
Joined: Apr 2003
Posts: 846
From: Orange County, CA
Car Info: 08 WRX - 401whp/408wtq
Update 04/22/2010
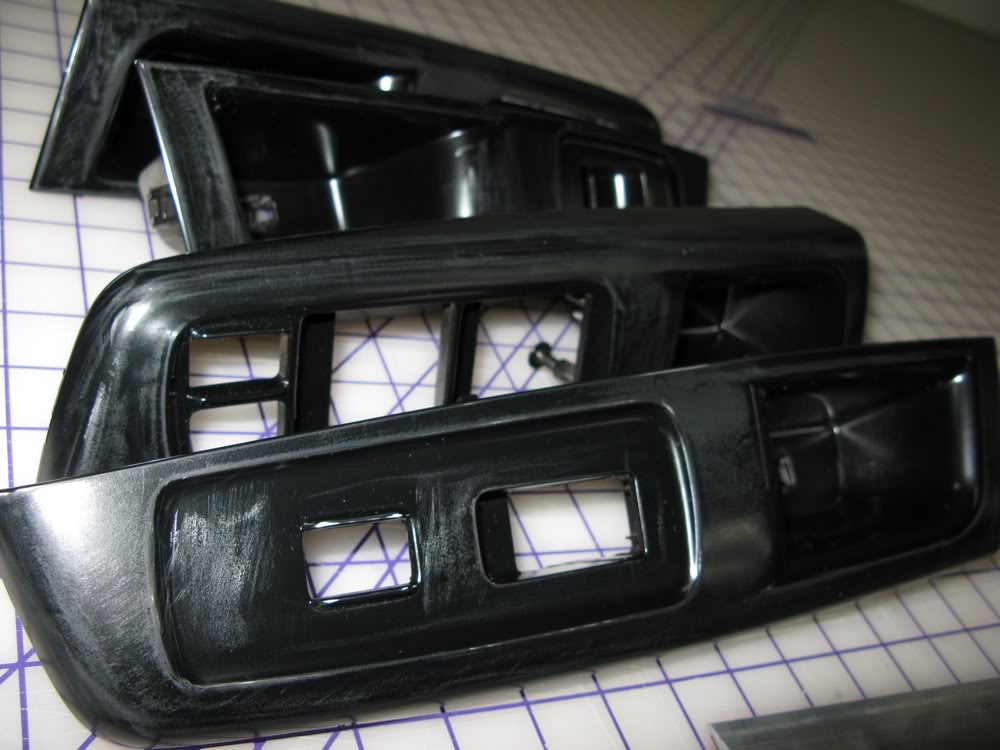
Daniel of Down Shift Graphics came out to measure things up and get started on the matte wrap. It's way early in it's stage, but I'm confident it's going to look stunning! While Daniel was hard at work on the exterior, I shifted gears to the interior. Since we'll be wrapping the center dash trim in a carbon vinyl, I decided the door switch panels and steering wheel pods would look out of place in their oem bright silver. So I hit them with Dupli-Color Satin Black paint. I'm very happy with the results!
Switch panels wet sanded with 1500.
After several light coats, more wet sanding to smooth out imperfections.
After final coats and re-installation of switches. Pretty sharp, eh?
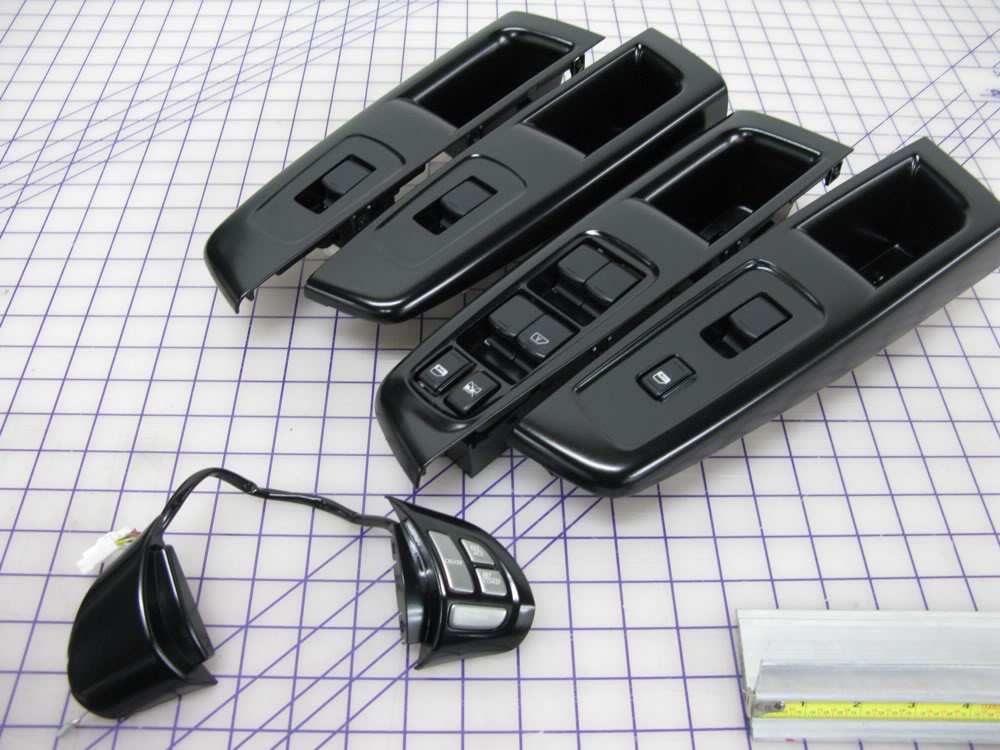
And the steering wheel pods re-installed. I love the outcome!
Mock fitment of panel on door card to get an idea of how it'll look. Looks a lot more upscale to me...
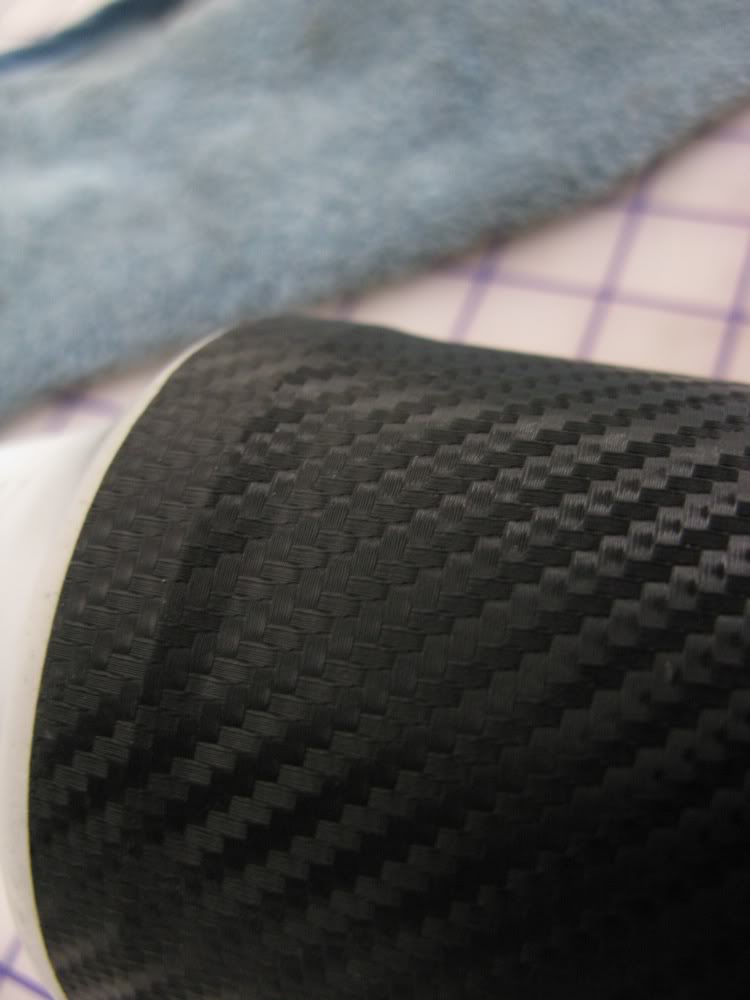
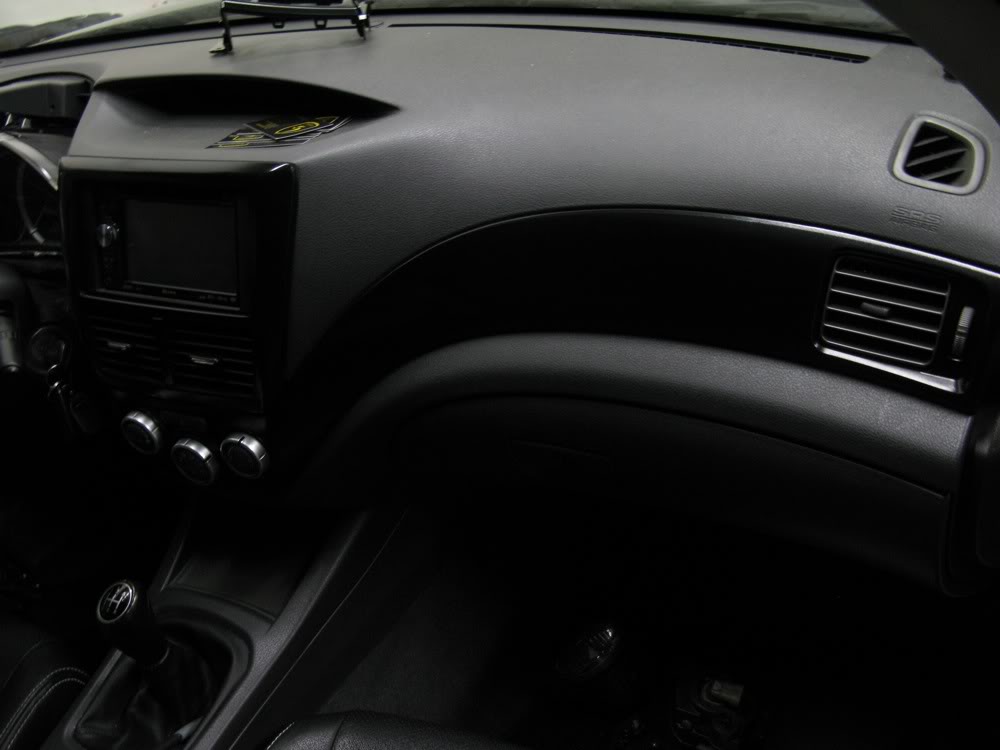
A sample of the Carbon vinyl we'll be using to wrap the main dash trim and A/V surround.
Daniel putting in work!
The dude's a master at his craft. Every edge is properly tucked. What a clean outcome!!!
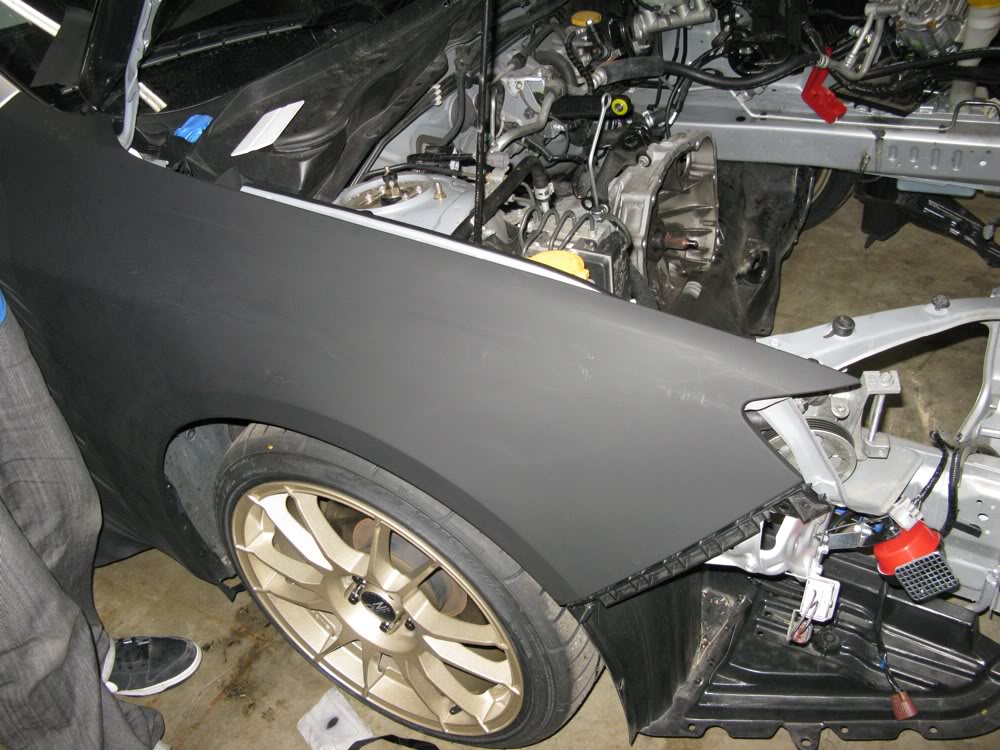
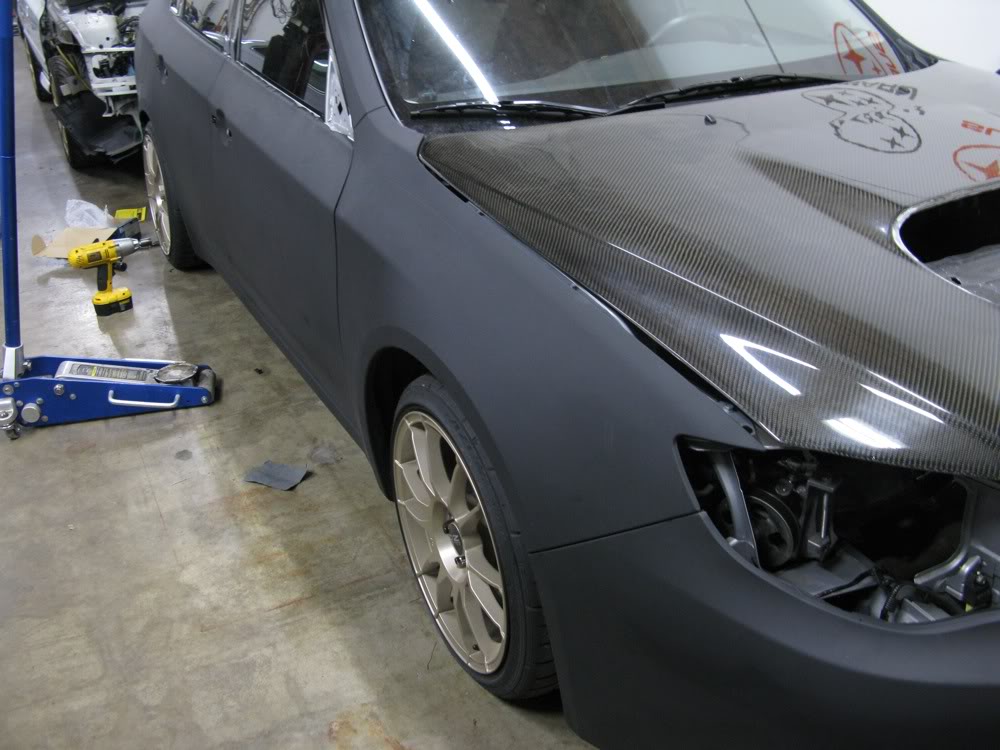
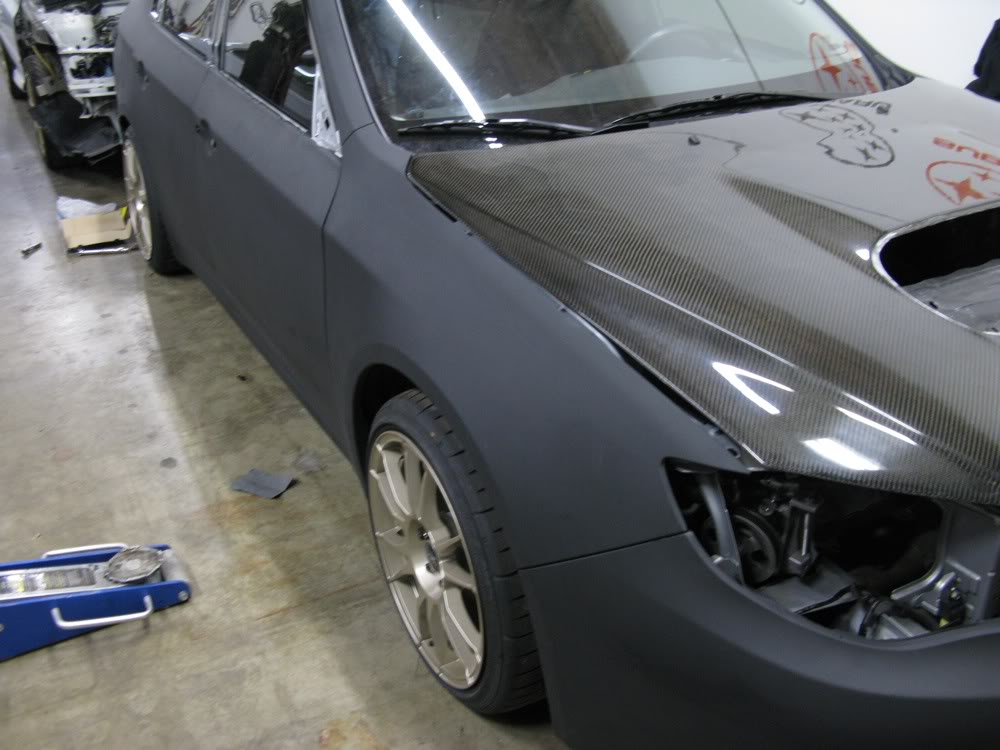
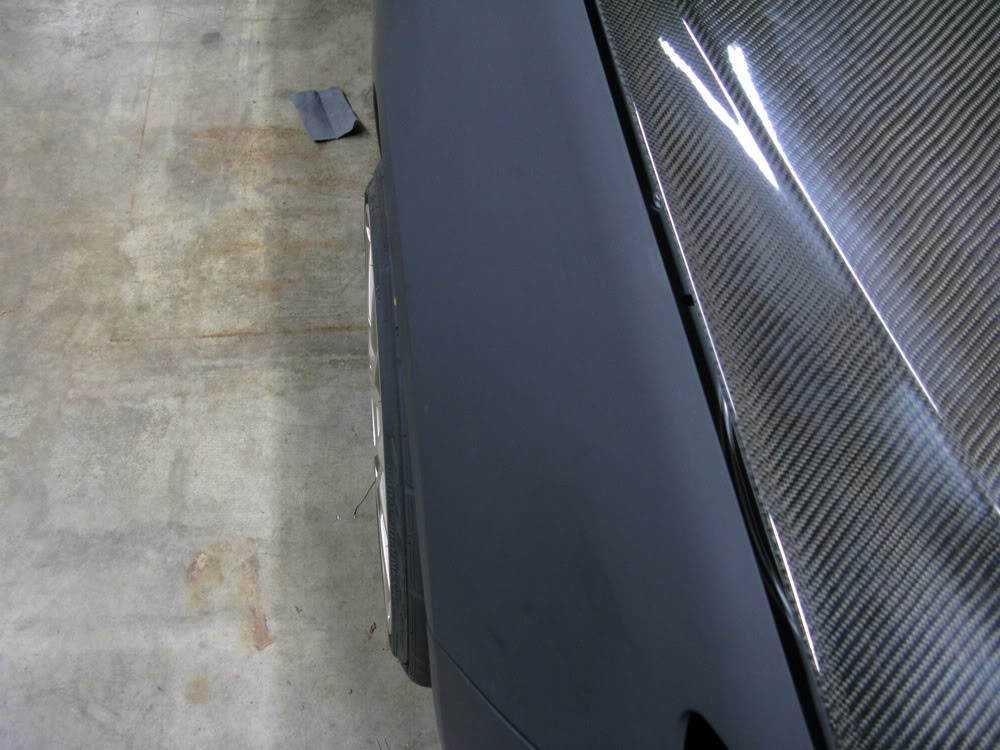
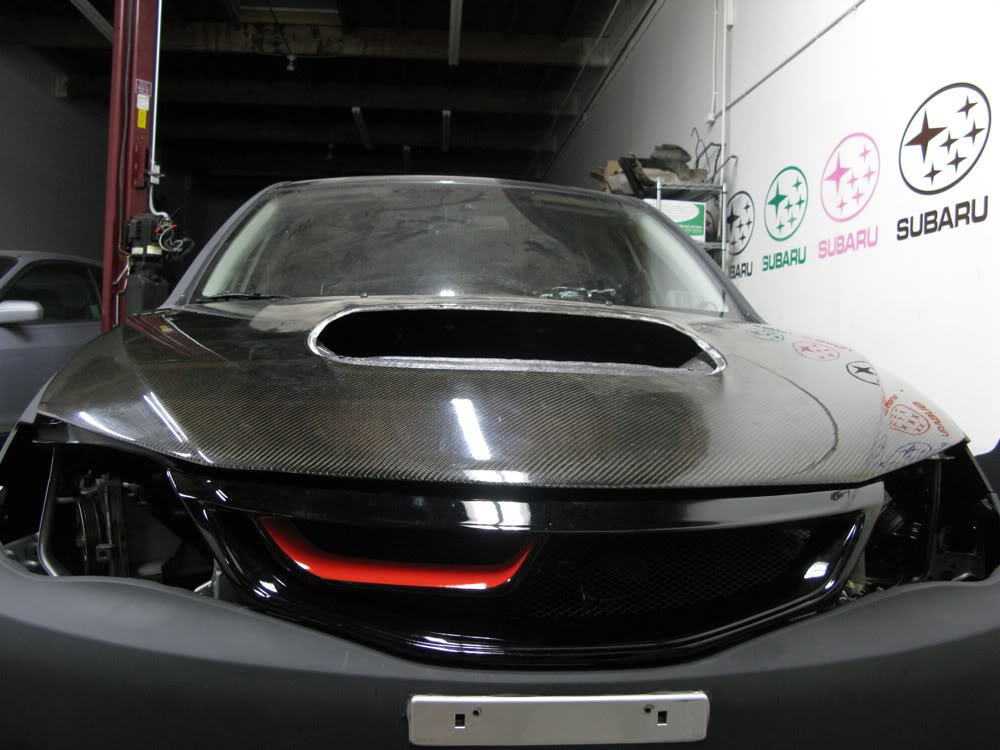
Contrast between matte black fender and carbon hood. Please excuse the dirt and dust.
Another look at the wrapped fender.

Laying over the rear door.
Where we left off tonight.
Tomorrow we will be tackling the carbon interior wraps and focusing more on the exterior wrap. Stay tuned!
Daniel of Down Shift Graphics came out to measure things up and get started on the matte wrap. It's way early in it's stage, but I'm confident it's going to look stunning! While Daniel was hard at work on the exterior, I shifted gears to the interior. Since we'll be wrapping the center dash trim in a carbon vinyl, I decided the door switch panels and steering wheel pods would look out of place in their oem bright silver. So I hit them with Dupli-Color Satin Black paint. I'm very happy with the results!
Switch panels wet sanded with 1500.
After several light coats, more wet sanding to smooth out imperfections.
After final coats and re-installation of switches. Pretty sharp, eh?
And the steering wheel pods re-installed. I love the outcome!
Mock fitment of panel on door card to get an idea of how it'll look. Looks a lot more upscale to me...
A sample of the Carbon vinyl we'll be using to wrap the main dash trim and A/V surround.
Daniel putting in work!
The dude's a master at his craft. Every edge is properly tucked. What a clean outcome!!!
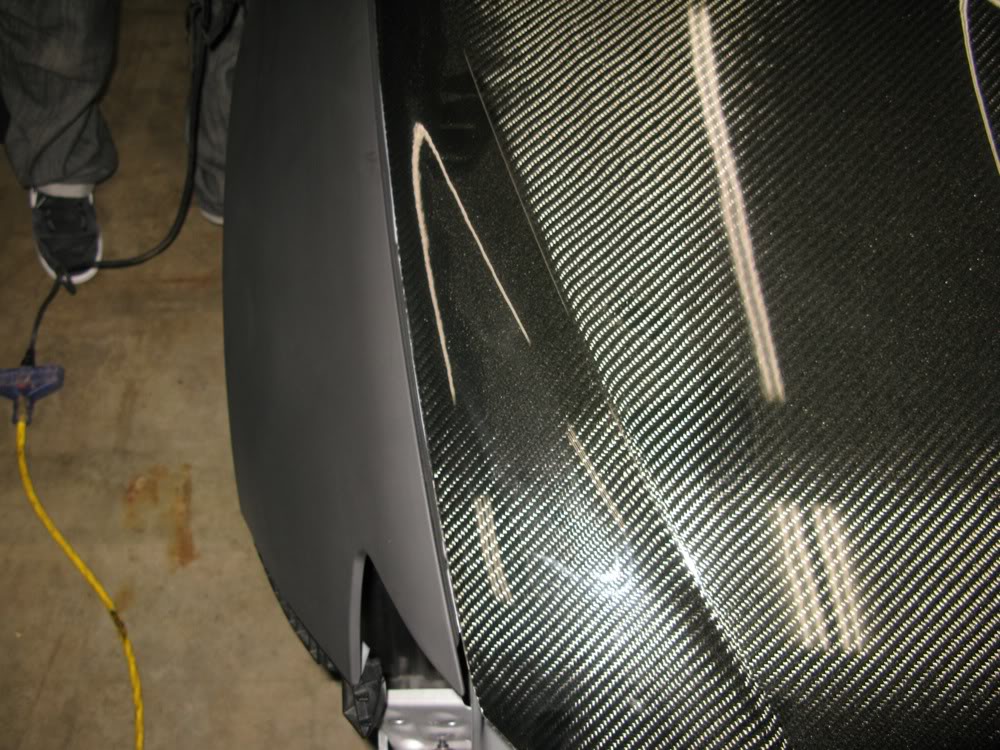
Contrast between matte black fender and carbon hood. Please excuse the dirt and dust.
Another look at the wrapped fender.
Laying over the rear door.
Where we left off tonight.
Tomorrow we will be tackling the carbon interior wraps and focusing more on the exterior wrap. Stay tuned!
i've been following along for a while now. couple of quick questions:
-if you're getting interior pieces wrapped, what made you stick with the USDM center panel (around the stereo) instead of getting a JDM panel (better fit for DD stereo)?
-i noticed the gold painted calipers. what happened to the brembos?
btw, great work documenting your build.
-if you're getting interior pieces wrapped, what made you stick with the USDM center panel (around the stereo) instead of getting a JDM panel (better fit for DD stereo)?
-i noticed the gold painted calipers. what happened to the brembos?
btw, great work documenting your build.
Thread Starter
VIP Member
Joined: Apr 2003
Posts: 846
From: Orange County, CA
Car Info: 08 WRX - 401whp/408wtq
i've been following along for a while now. couple of quick questions:
-if you're getting interior pieces wrapped, what made you stick with the USDM center panel (around the stereo) instead of getting a JDM panel (better fit for DD stereo)?
-i noticed the gold painted calipers. what happened to the brembos?
btw, great work documenting your build.
-if you're getting interior pieces wrapped, what made you stick with the USDM center panel (around the stereo) instead of getting a JDM panel (better fit for DD stereo)?
-i noticed the gold painted calipers. what happened to the brembos?
btw, great work documenting your build.
- I was going to get the JDM trim piece as it's more attractive. However, since I'm wrapping it, I wasn't really motivated to make the change.
- I sold the Brembo's because we never found the time to make the correct custom brackets for the rear set to fit. I figure, I will just buy a serious big brake kit sometime down the line. I prefer to run the oem Tokicos in the meantime which will have proper brake force distribution. The Brembos with oem rear calipers were not performing at full potential, as the STI master cylinder was valved for Brembos all around.
Thanks for following the build! I appreciate the support!
----
Update 04/23/2010
This evening was very productive... Down Shift Graphics completed one entire side of the exterior wrap while I fiddled around, got bored and decided to perform my TGV delete. Check out the progress!
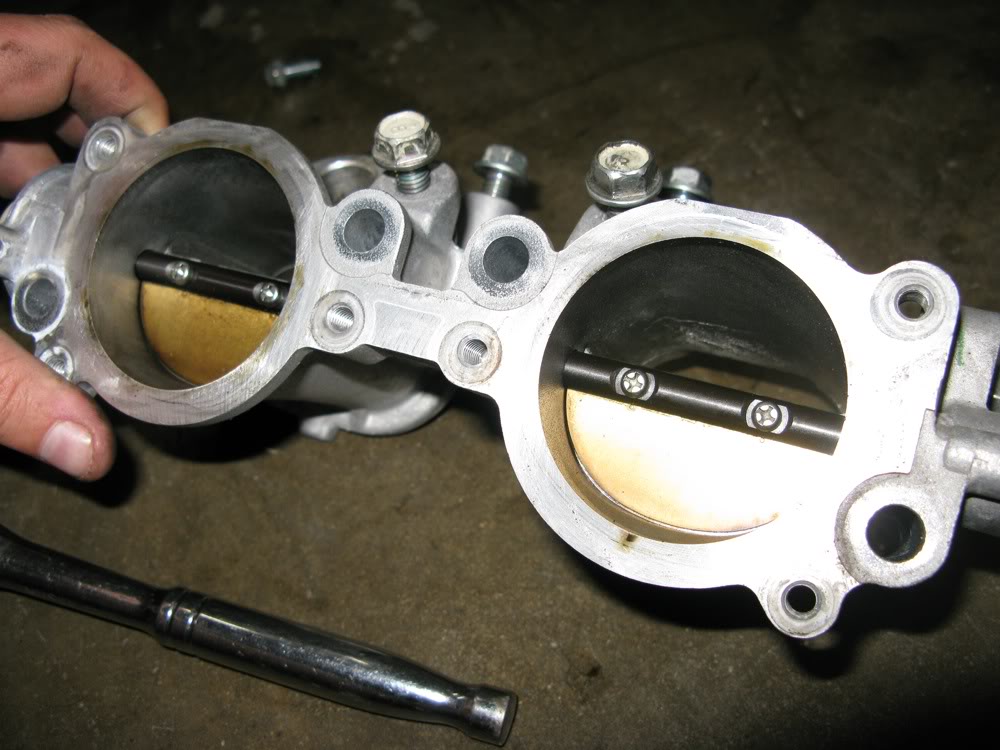
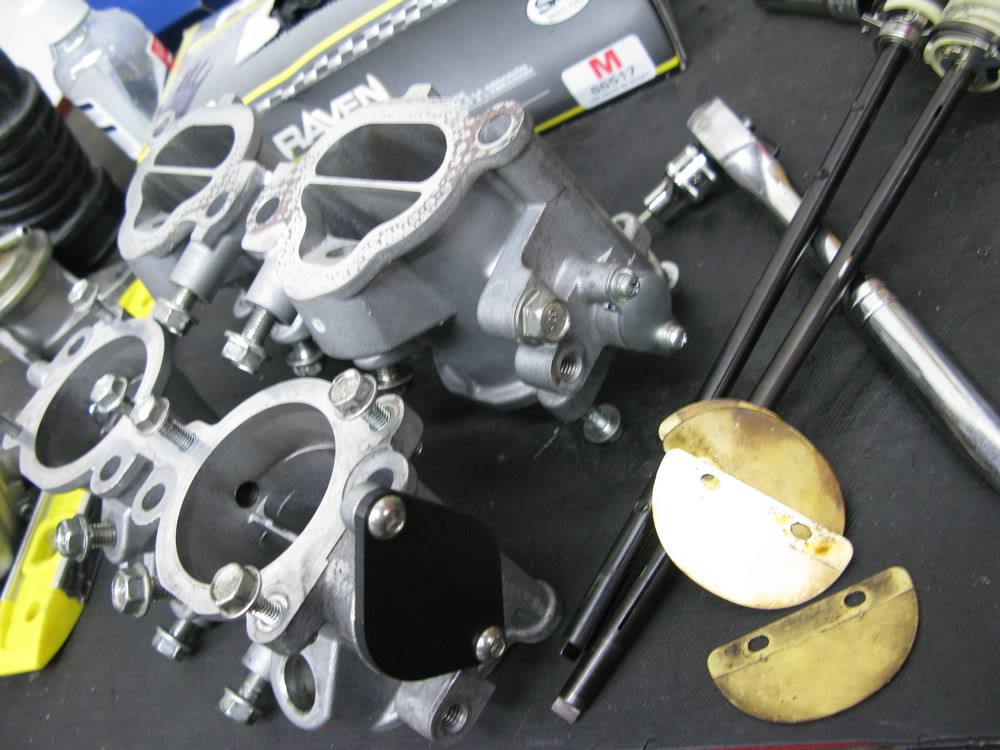
A look at the TGV shaft and butterflies before deletion with KS Tech's TGV Delete Kit.
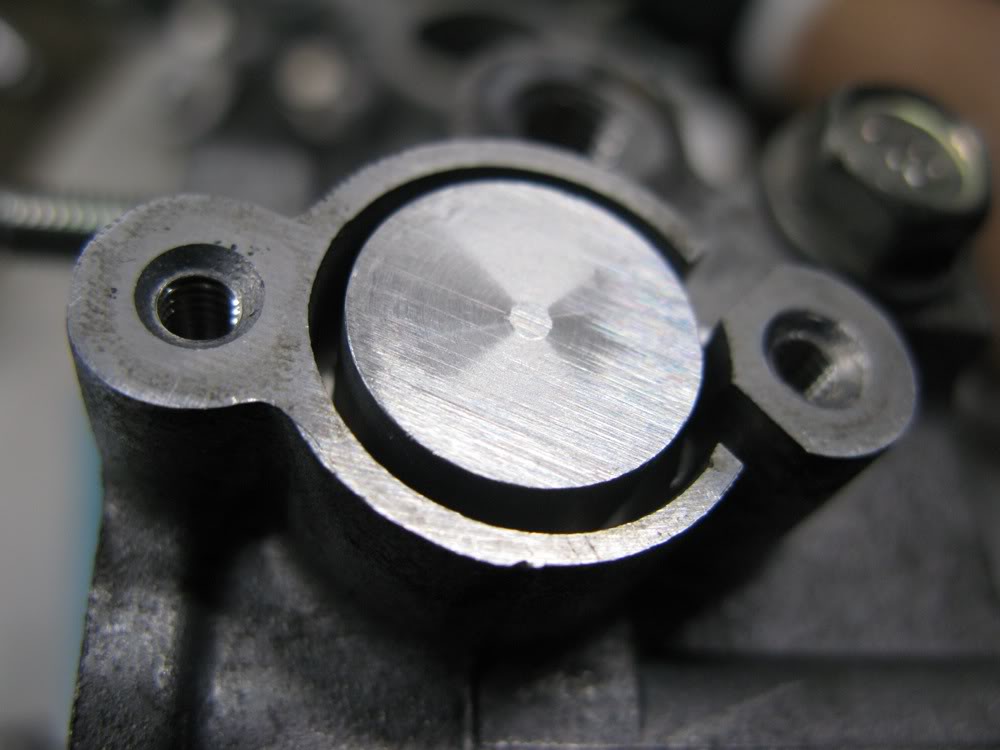
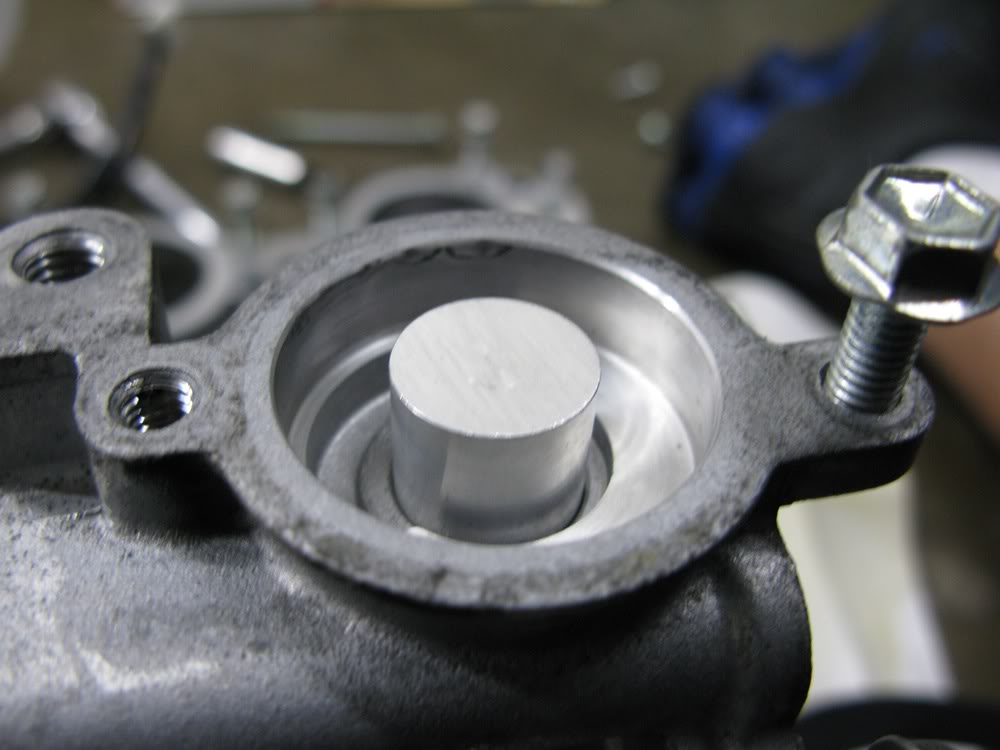
After drilling out the screws that held the butterflies on the shaft, we slid out the shaft and then filled the holes with KS Tech's provided machined plugs.
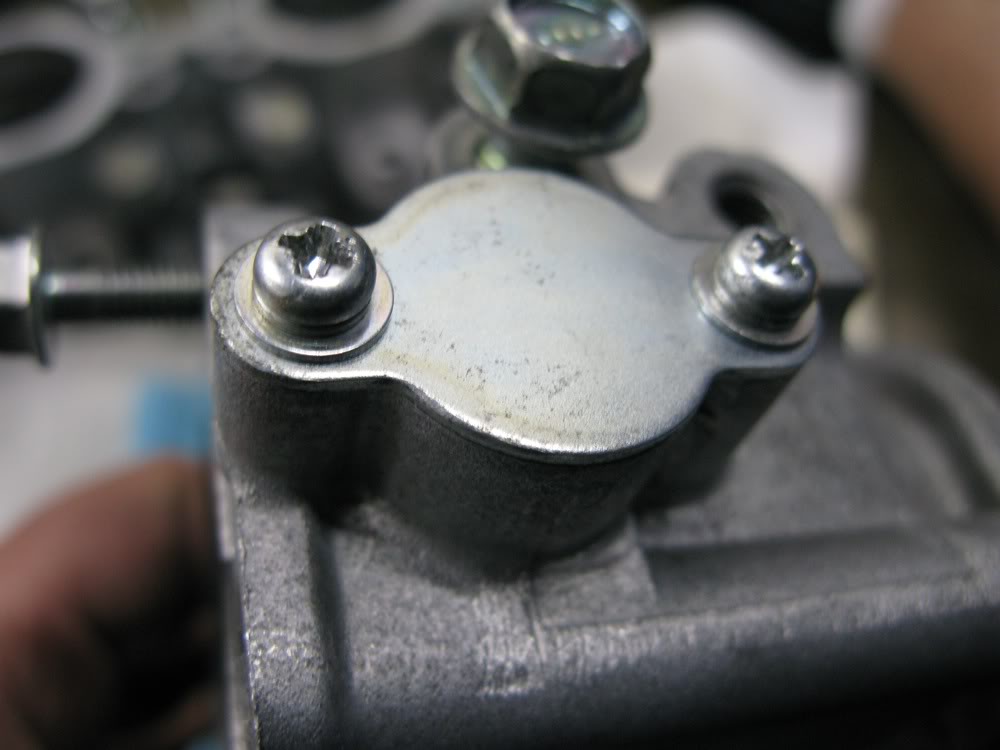
Once plugged, we capped off each end. The shaft side used the same oem cover, while KS Tech provided a black cover for the side the TGV motor used to be on.
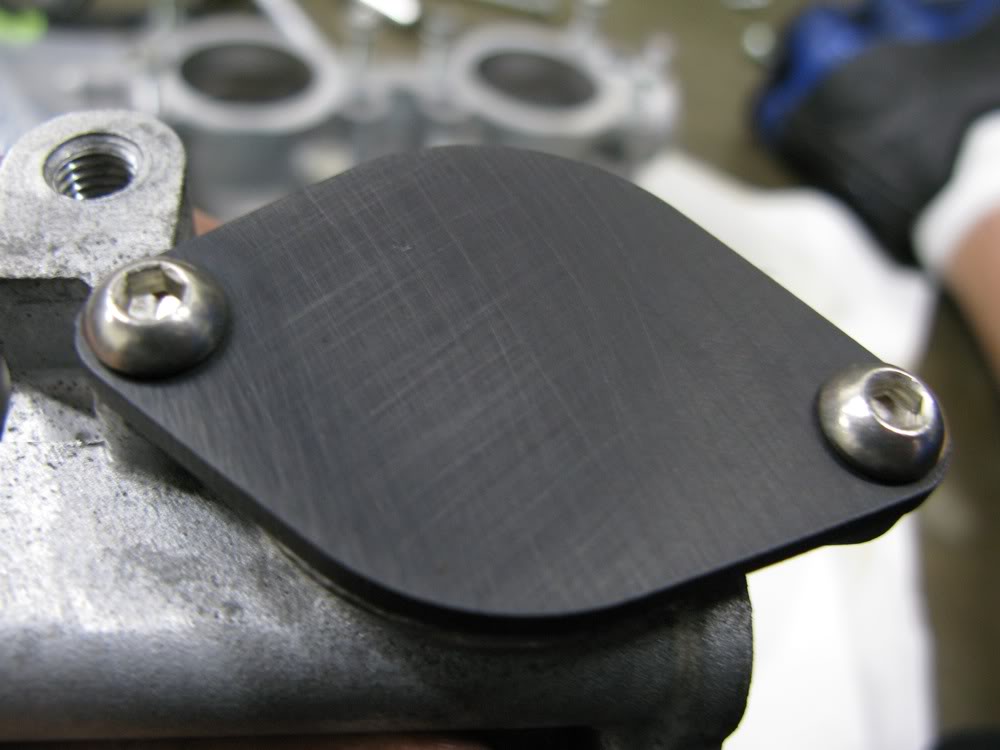
Overall, the TGV deletes were painless. And a major kudos to KS Tech for a very simple and effective solution!
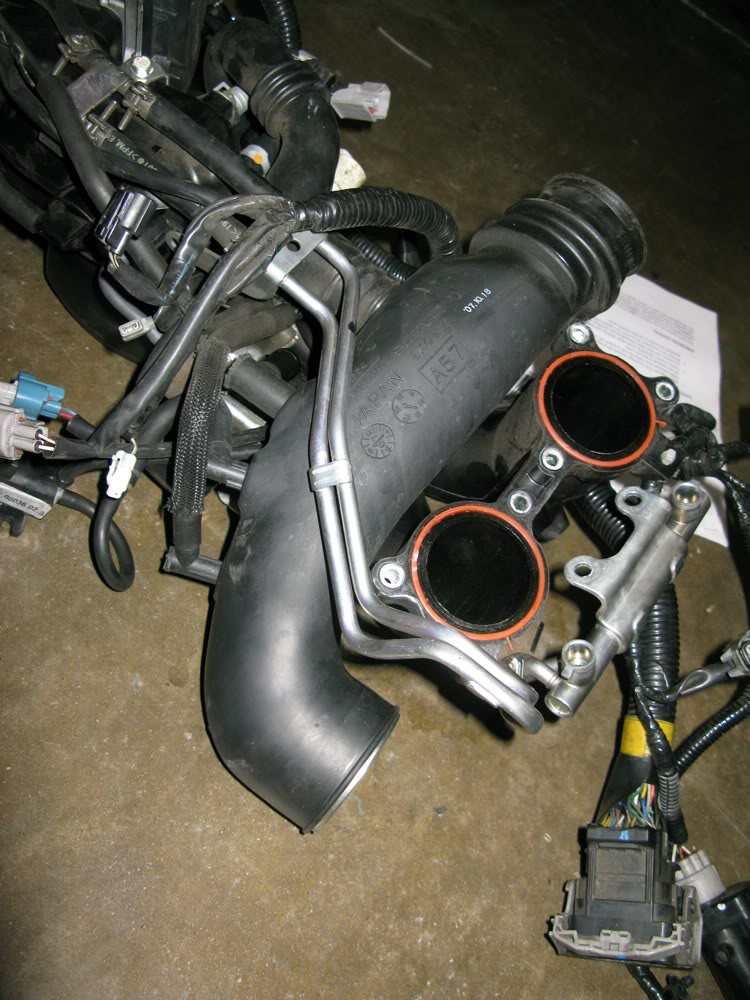
A look under the intake manifold revealing the oem turbo inlet hose that we have yet to find a good reason to replace. I know, I know... Look how easy it would be to swap now with everything out!!! Well, the oem design is much nicer than previous generations and there are no serious reductions or poor bends. It's a high flowing plastic piece that runs no risk of collapsing as a silicone counterpart would. Also, our turbo is a 2.4" inlet anyway, so we're proudly sticking to this as the only piece of intake plumbing that remains factory.
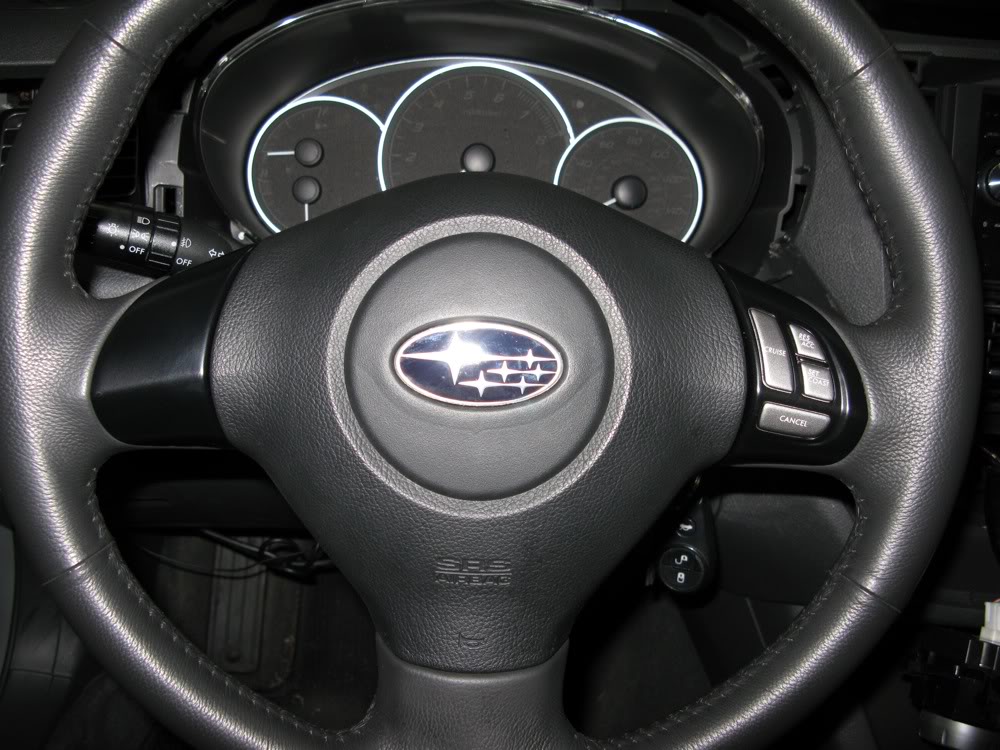
Steering wheel is back on, and those painted pods are looking rather handsome. Upscale FTW!
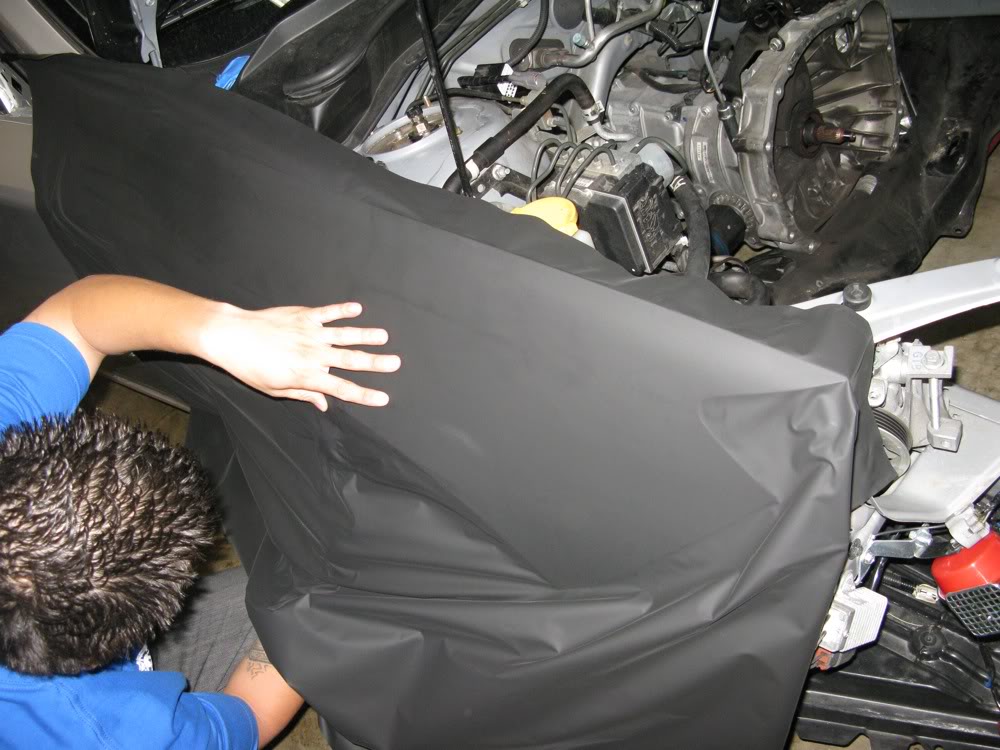
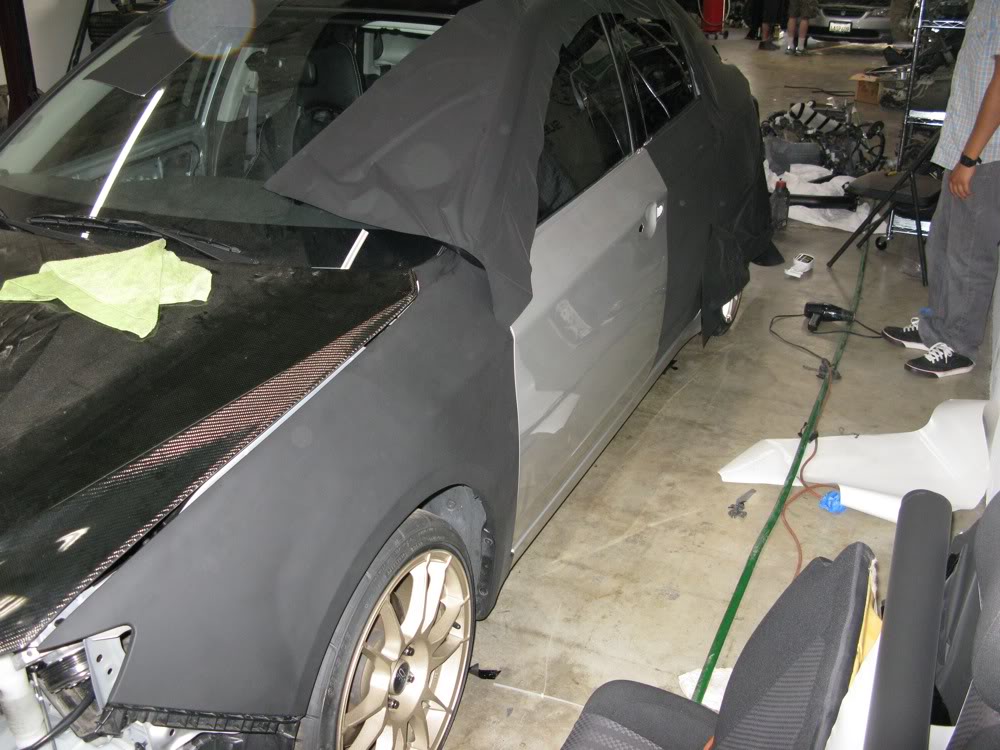
Vinyl wrapping in progress.
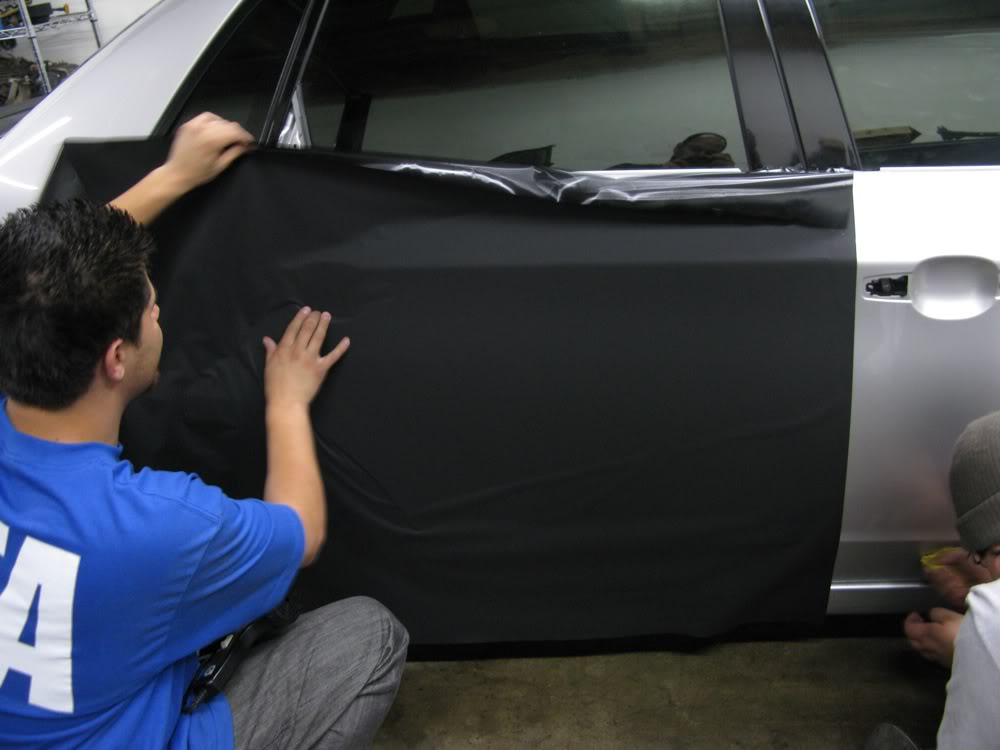
Down Shift Graphics laying the front door piece.
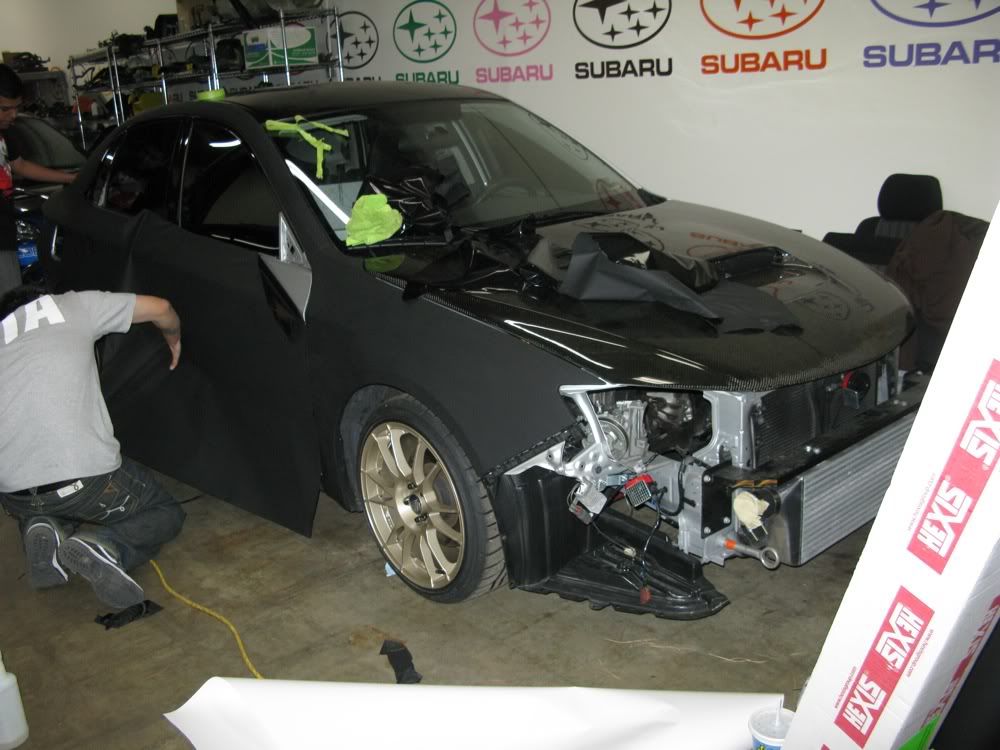
This guys a serious master at his craft. Look at that amazing tuck job!!!! Please excuse how dusty/dirty the car is!
Trimmed door handle platforms.
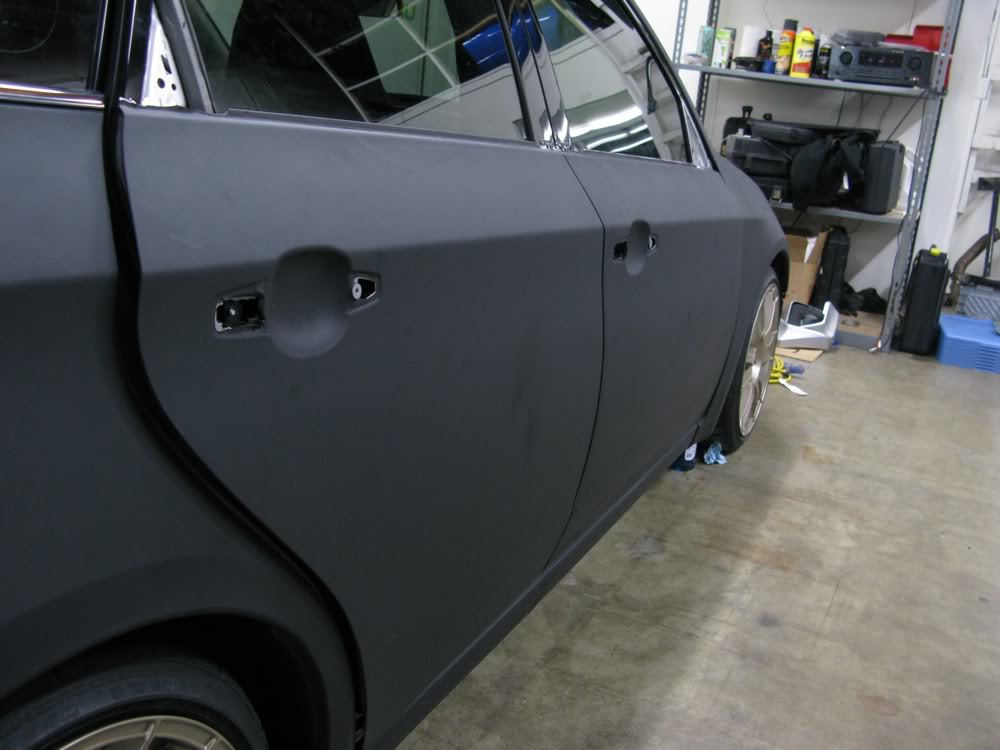
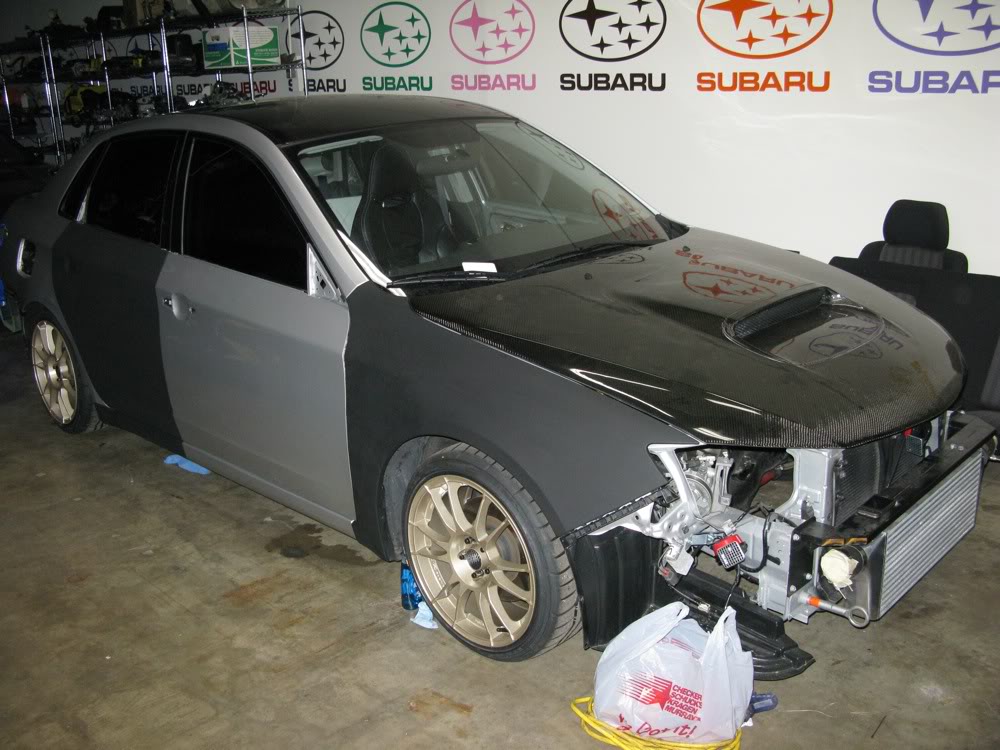
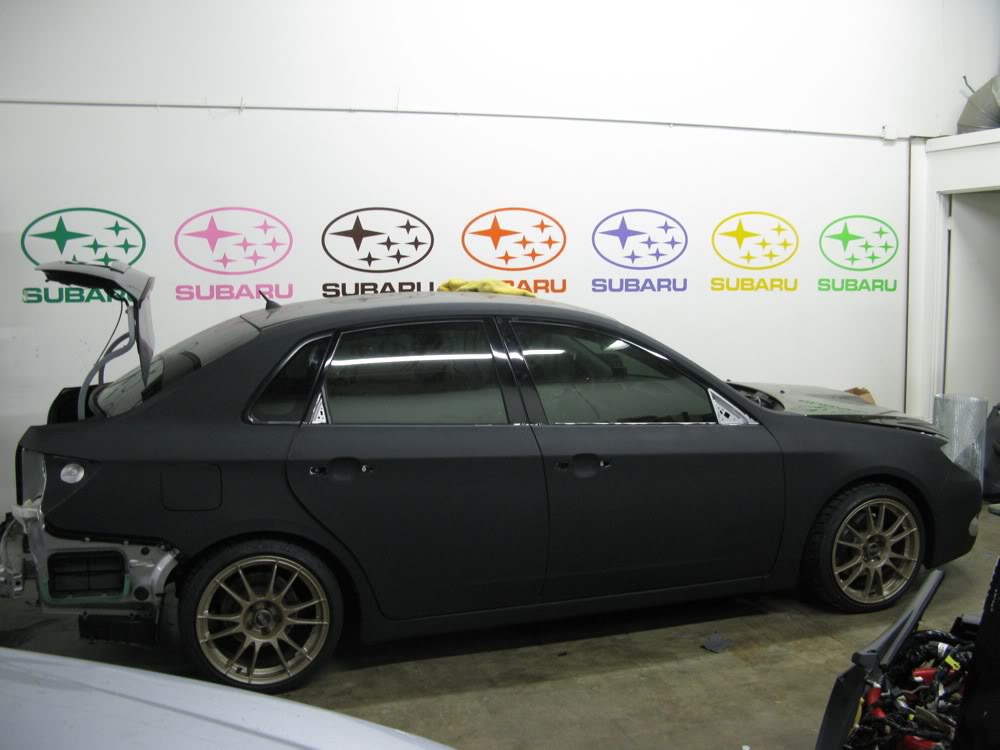
Aside from a few accessories, the passenger side wrap is done!
Love the flat to gloss contrast!!!
We will be taking a little break from the project until next week. We hope to complete the vinyl wrapping next week and hopefully have some additional news about the motor!
Thread Starter
VIP Member
Joined: Apr 2003
Posts: 846
From: Orange County, CA
Car Info: 08 WRX - 401whp/408wtq
Built motor is complete. Specs to follow. Some eye candy in the meantime.
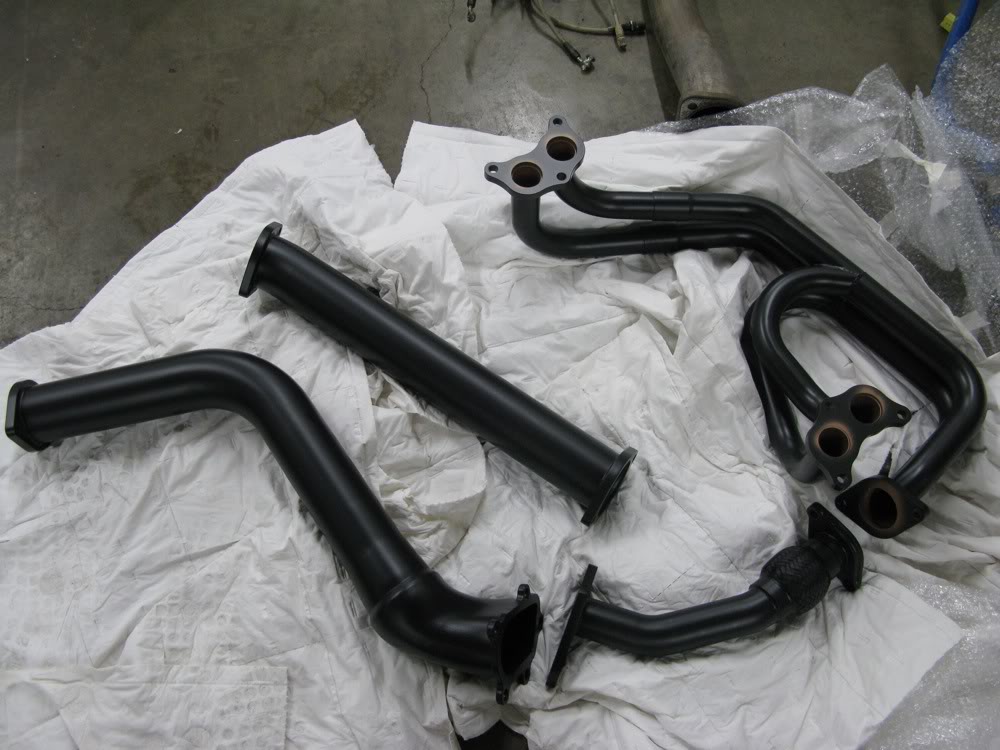
Jet hot coated equal length header, TurboXS Uppipe and 2-piece Downpipe. Courtesy of Jason!

Received the spec sheet for the built motor. Here's all the information.

----------------------------------------
Update 05/17/10:
Drivers side being foiled.
Drivers side 3/4 panel being foiled.

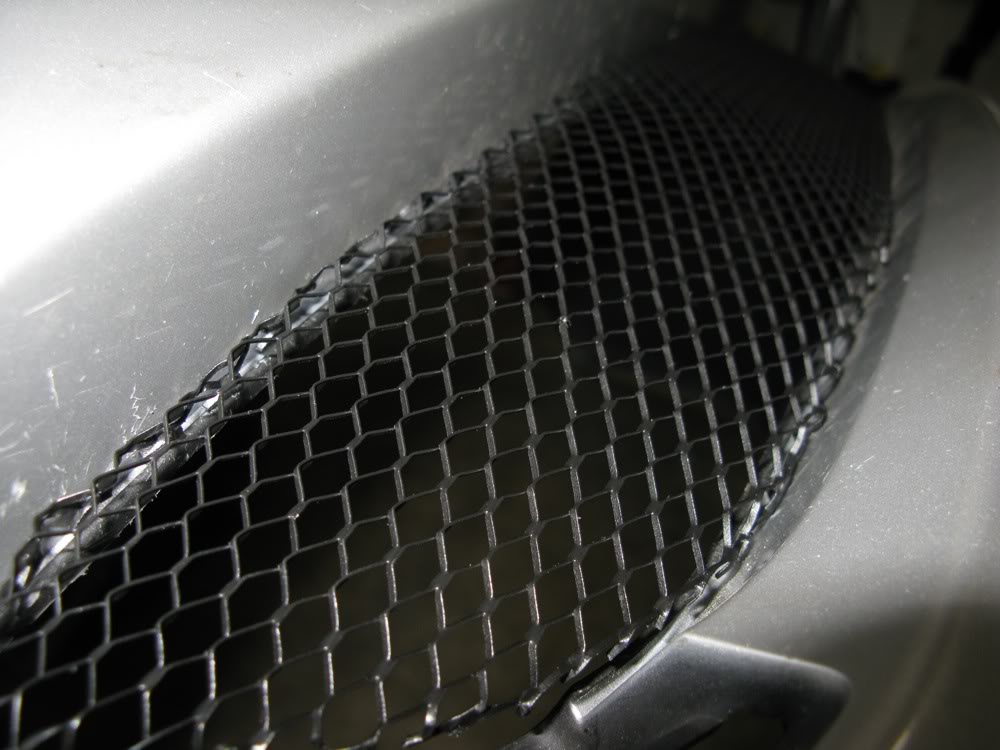
Cut a Home Depot mesh to loose shape and pressed down to form of lower grille.
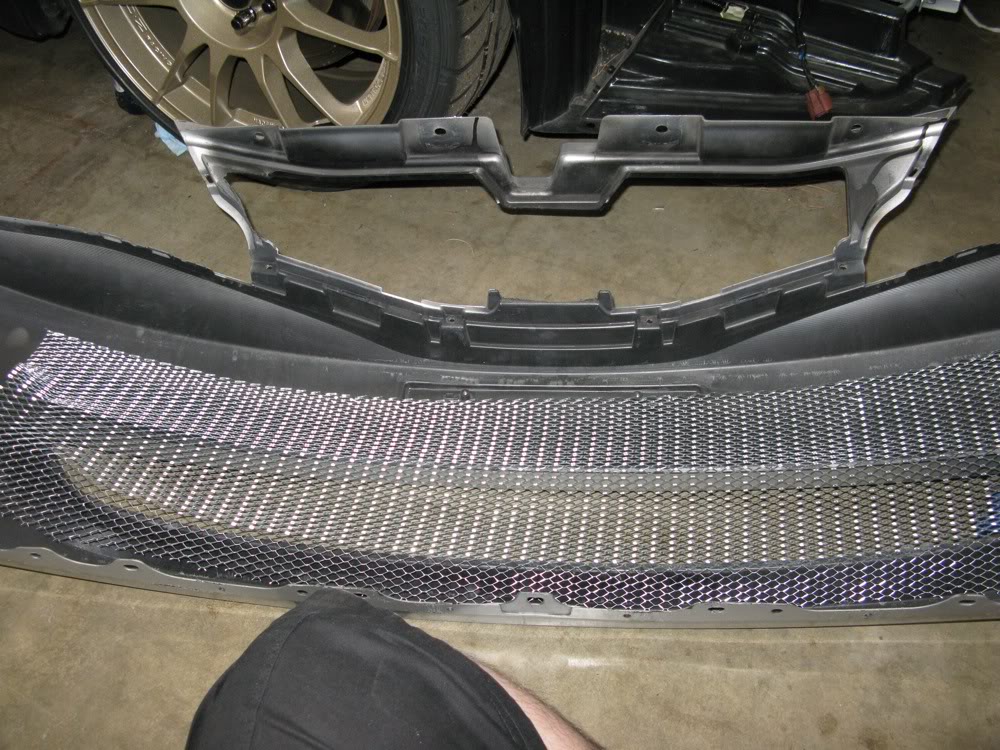
Marked and cut to shape with a little extra slack on each end.
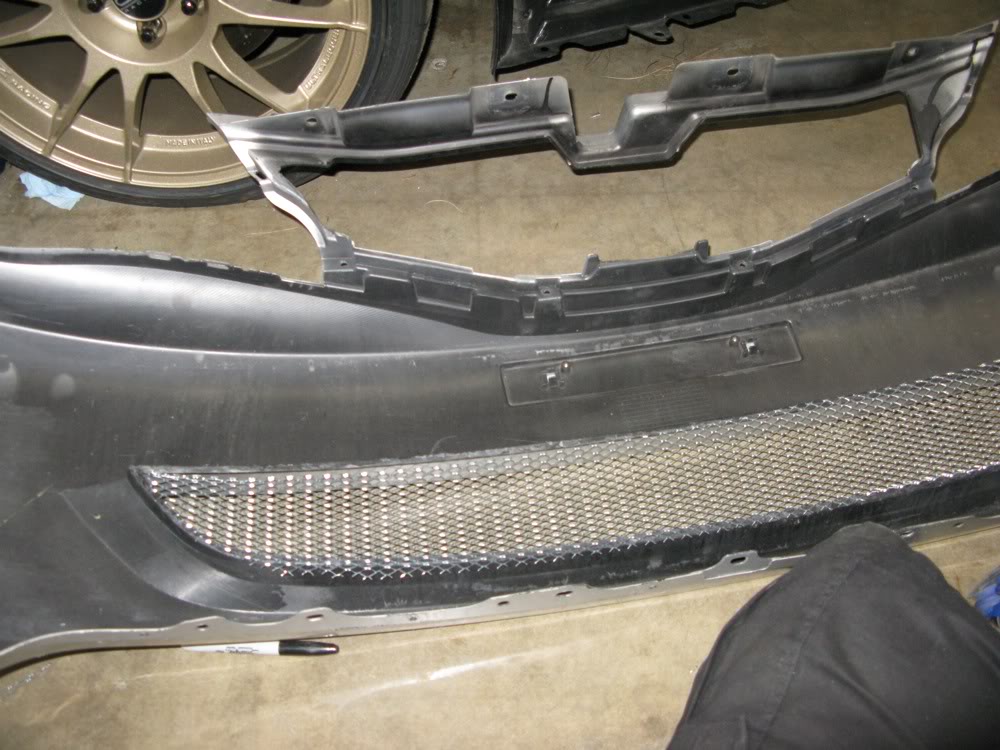
Bent the edges down and test fitted prior to prep and paint.
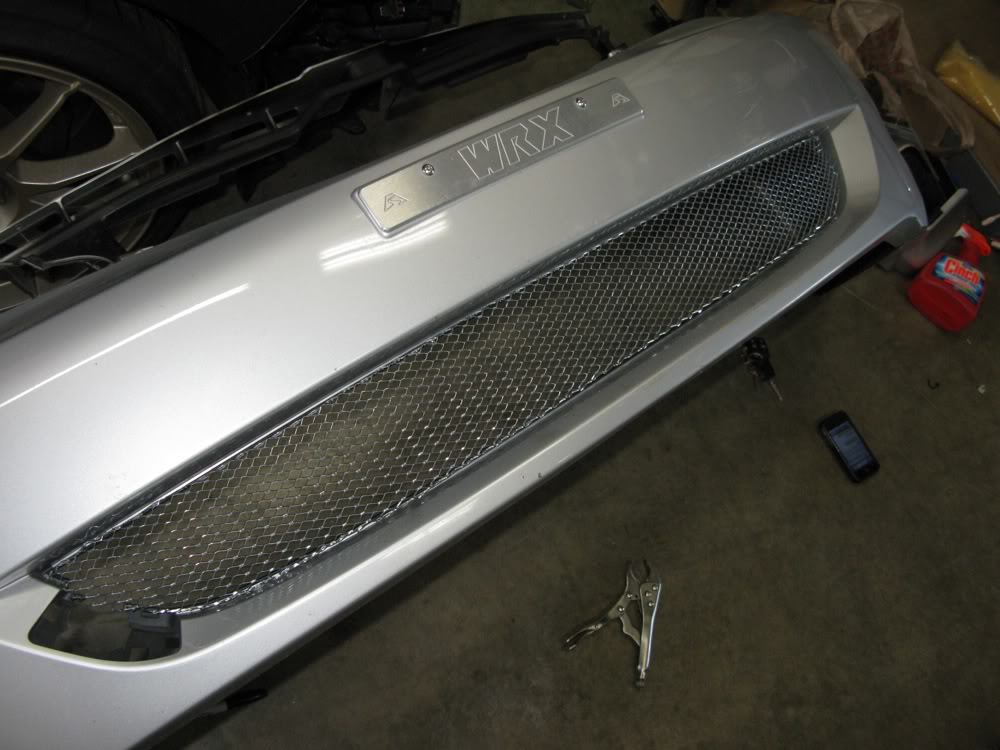
After 4-5 coats of Plasti-Dip spray with 30-min dry time in between.
Closer up, finished product.
----
I'm very happy with the way the grille turned out. I will be zip tying it in place from the backside of the bumper once the front of the bumper is wrapped in vinyl. The zip ties will stand out less than L-brackets and bolts.
Also, the H&R Trak+ 15mm spacers have been exchanged out for the 25mm variants to flush out the wheels to the fenders. Upon more measuring, we found that the 15mm spacers wouldn't quite have enough of a flush look. It's gonna look good when we're done.
Hopefully, we will be coming to completion very soon. Stay tuned.
Jet hot coated equal length header, TurboXS Uppipe and 2-piece Downpipe. Courtesy of Jason!
Received the spec sheet for the built motor. Here's all the information.
----------------------------------------
Update 05/17/10:
Drivers side being foiled.
Drivers side 3/4 panel being foiled.
Cut a Home Depot mesh to loose shape and pressed down to form of lower grille.
Marked and cut to shape with a little extra slack on each end.
Bent the edges down and test fitted prior to prep and paint.
After 4-5 coats of Plasti-Dip spray with 30-min dry time in between.
Closer up, finished product.
----
I'm very happy with the way the grille turned out. I will be zip tying it in place from the backside of the bumper once the front of the bumper is wrapped in vinyl. The zip ties will stand out less than L-brackets and bolts.
Also, the H&R Trak+ 15mm spacers have been exchanged out for the 25mm variants to flush out the wheels to the fenders. Upon more measuring, we found that the 15mm spacers wouldn't quite have enough of a flush look. It's gonna look good when we're done.
Hopefully, we will be coming to completion very soon. Stay tuned.
Thread Starter
VIP Member
Joined: Apr 2003
Posts: 846
From: Orange County, CA
Car Info: 08 WRX - 401whp/408wtq
Thread Starter
VIP Member
Joined: Apr 2003
Posts: 846
From: Orange County, CA
Car Info: 08 WRX - 401whp/408wtq
Quite a bit accomplished yesterday and tonight.
Motor is making progress. I painted my interior dash trim tonight as well as plasti-dipped all the front grille pieces. I also custom vinyled the intake ram scoop on the Ings+ grille in a red.
Lots of foiling has been accomplished with very little left!
I installed the Trak+ spacers tonight and man does it make a dramatic visual difference! Please bear in mind, the car still needs to be corner balanced, aligned, and the ride height will be re-adjusted to be lower and more aggressive. So never mind the wheel gap. Enjoy the pictures.
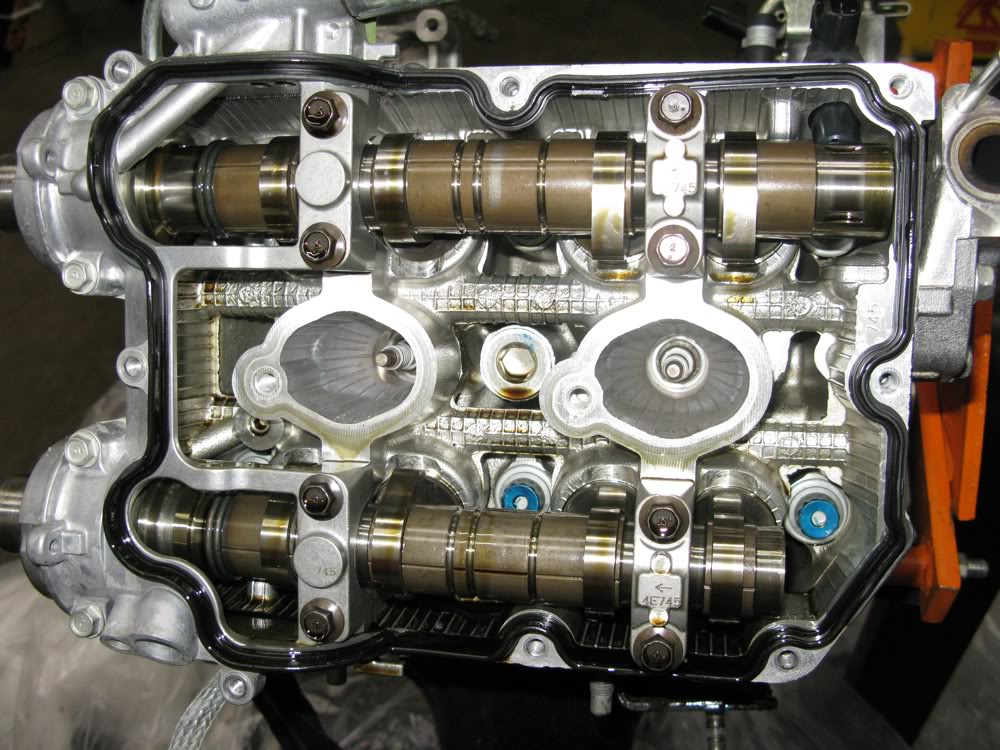
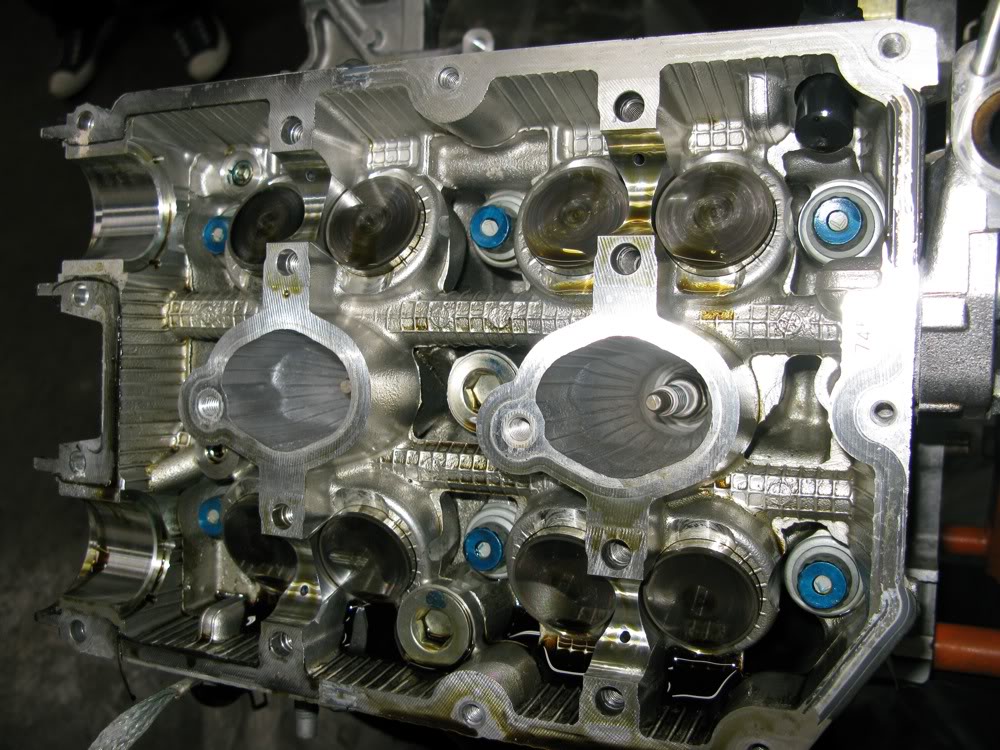
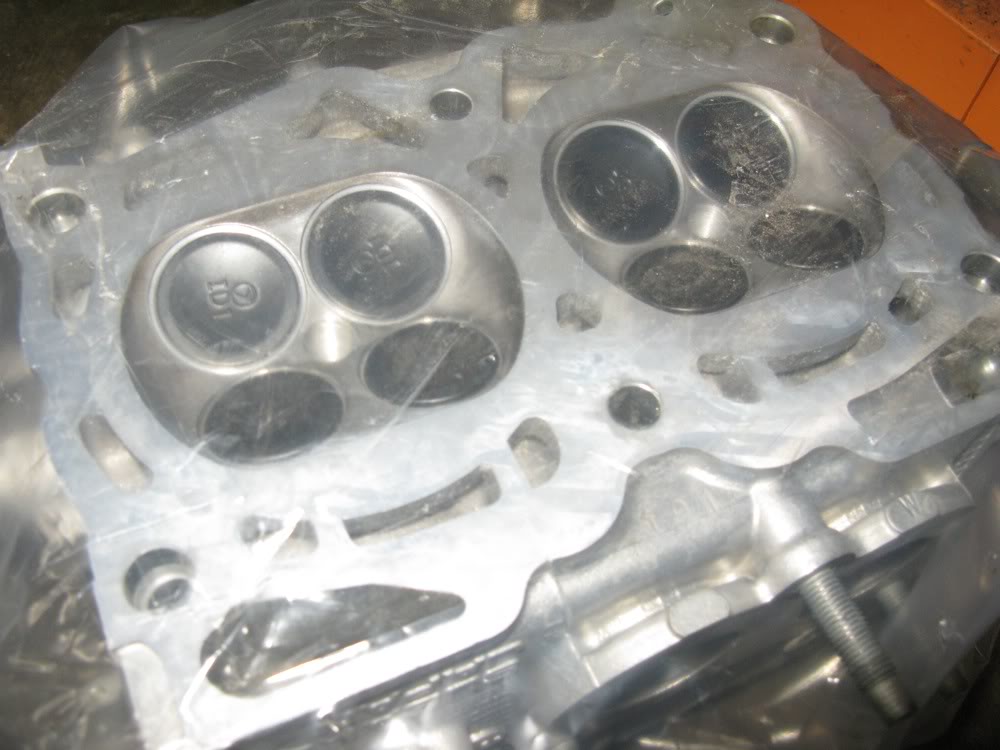
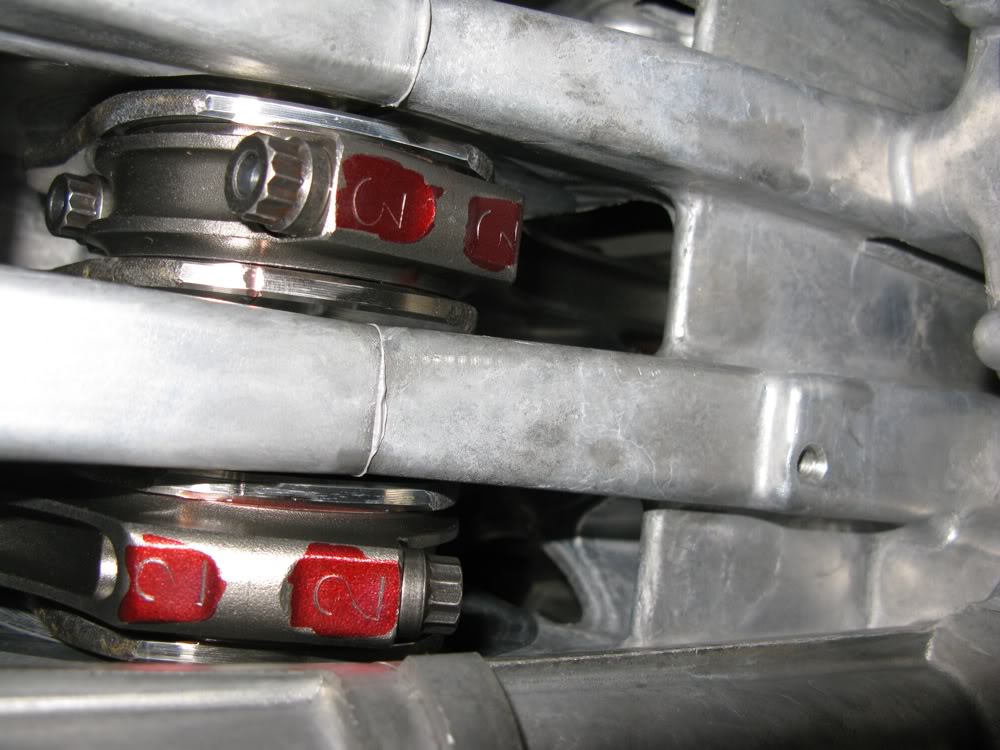
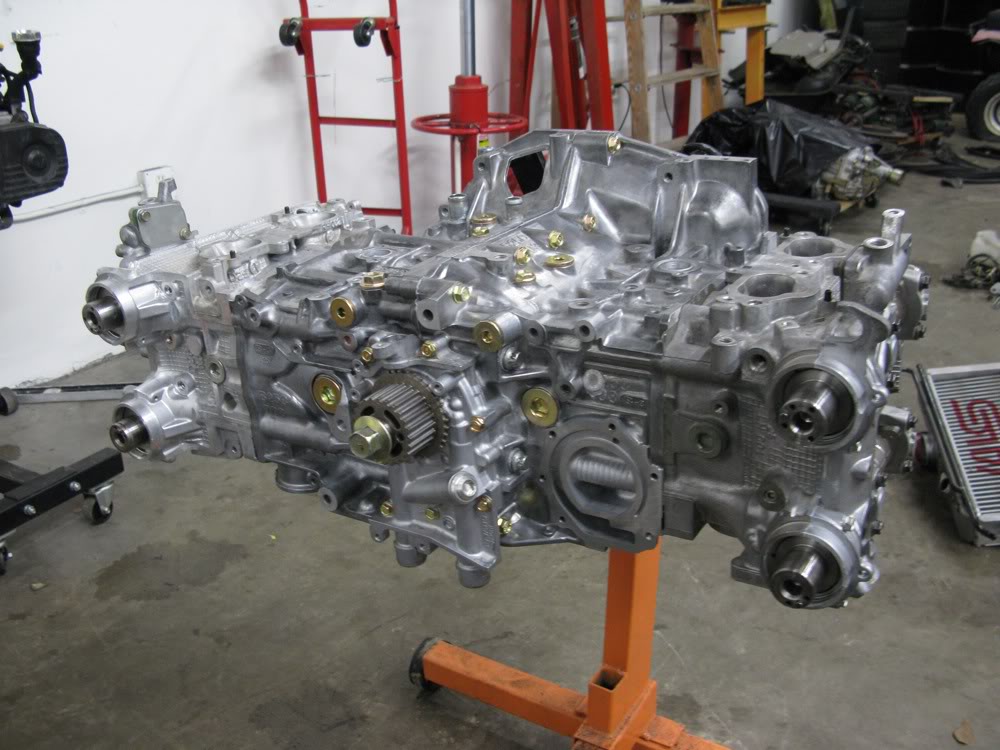
Motor is now a long-block... Heads are bolted on with ARP studs... Accessories, cam gears, etc will soon follow.
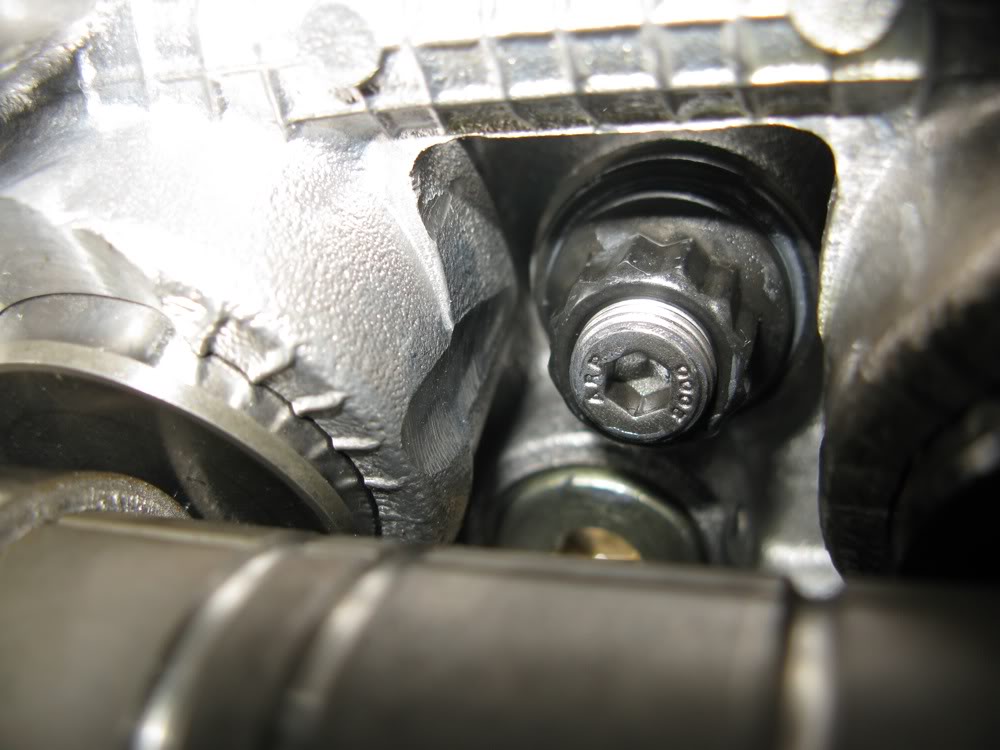
ARP detail.
Sanded and prepped for paint.
Painted.
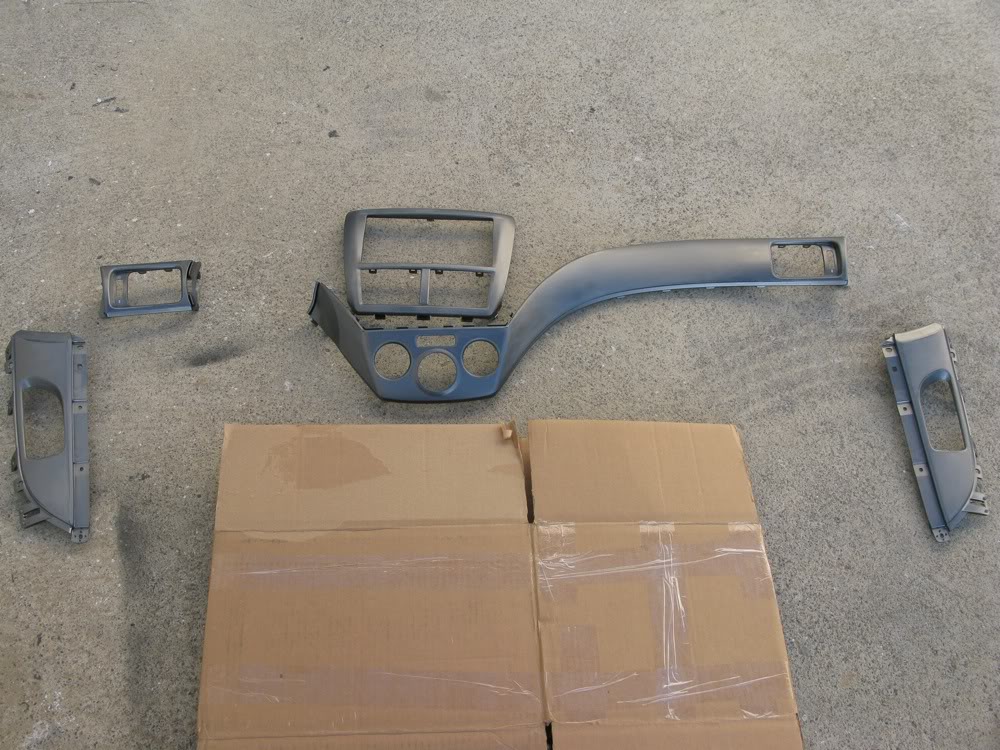
Sneak peak at interior trim installed.
Down Shift Graphics laying down some serious vinyl work!
Down Shift Graphics detail work.
Down Shift Graphics tucking edges clean.
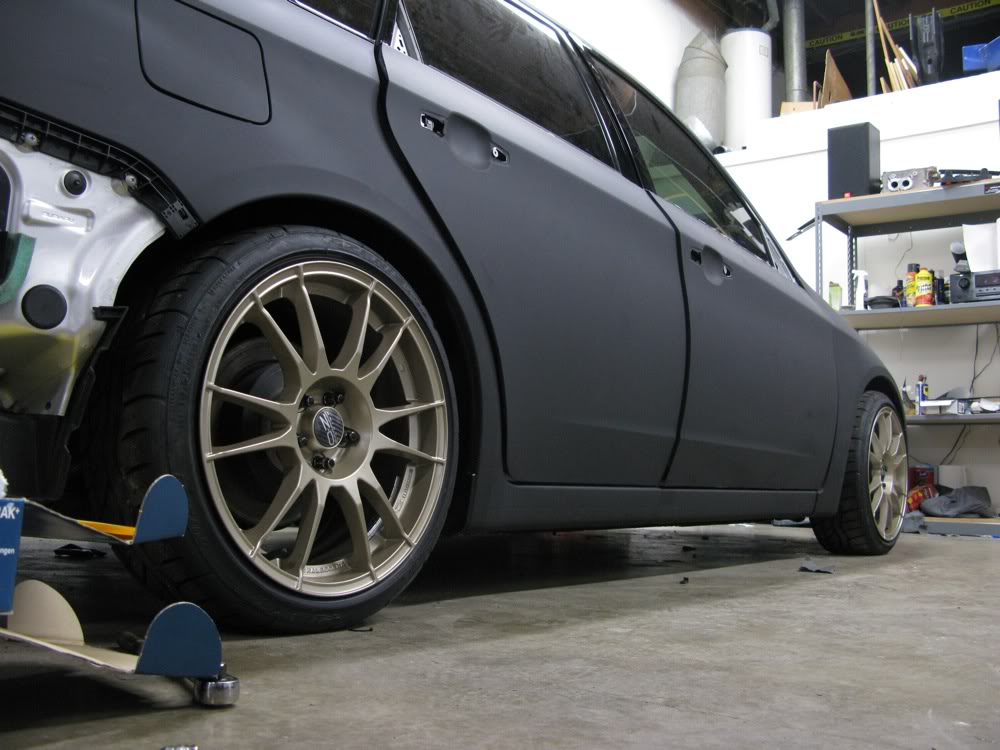
H&R Trak+ 25mm wheel spacers installed.

Front BEFORE spacing.
Front AFTER spacing.
Low view from Front of offsets, spaced out.
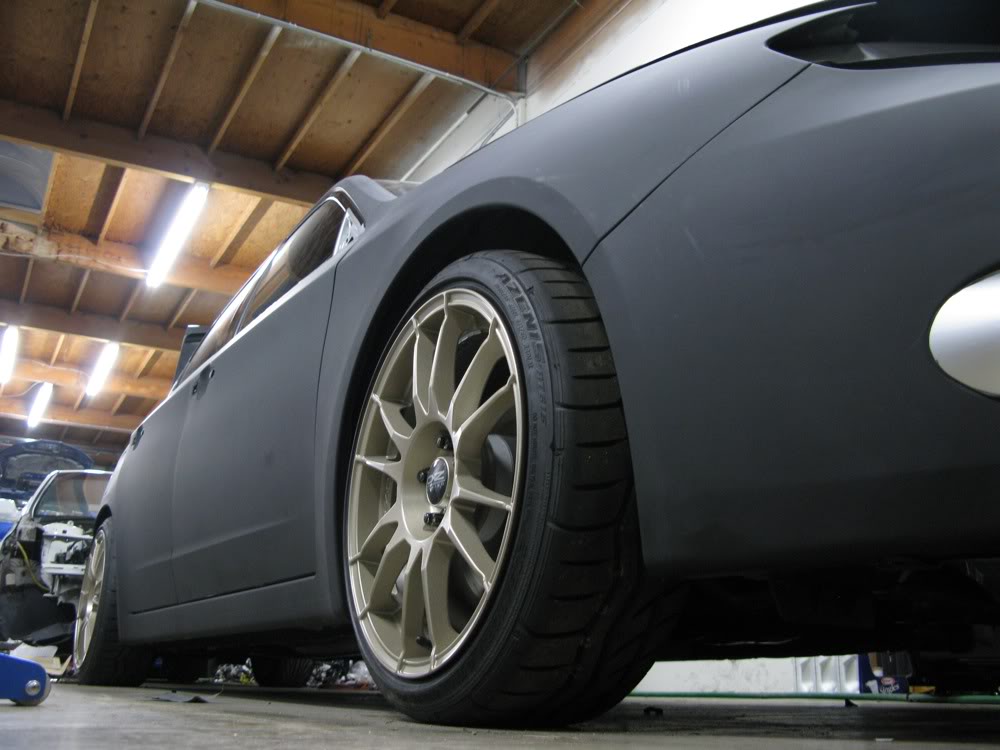
Fender clearance, or lack thereof. After an alignment and lowering, this should be nice and flush.
Current stance.
Low view from Rear of offsets, spaced out.
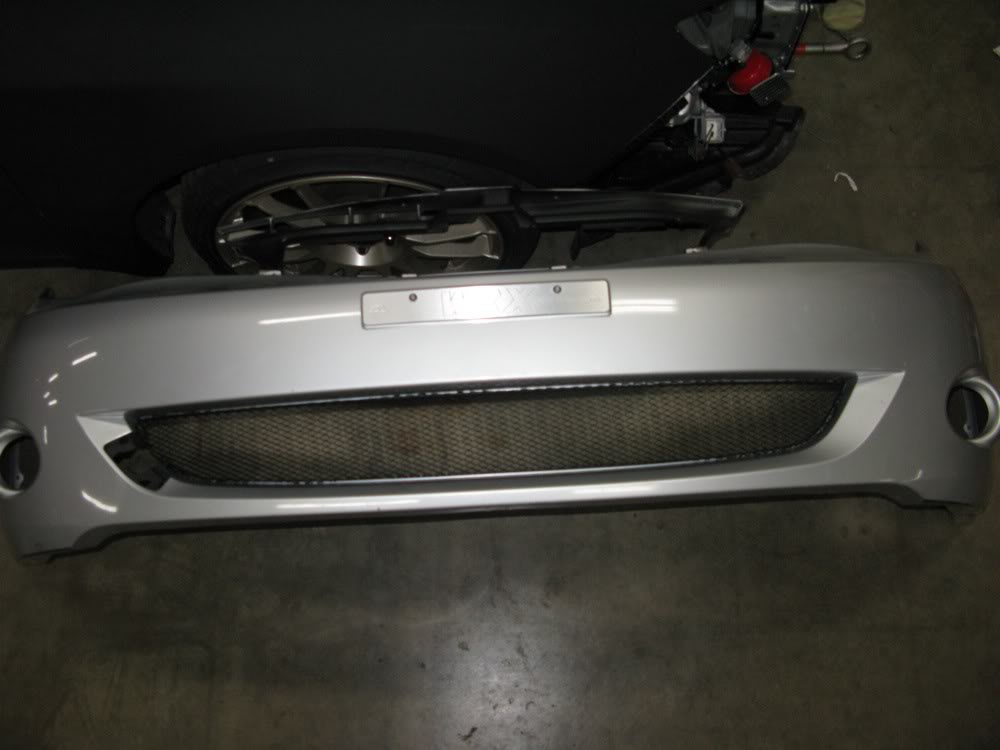
Test fitted bumper, grille, etc... Still a work in progress.
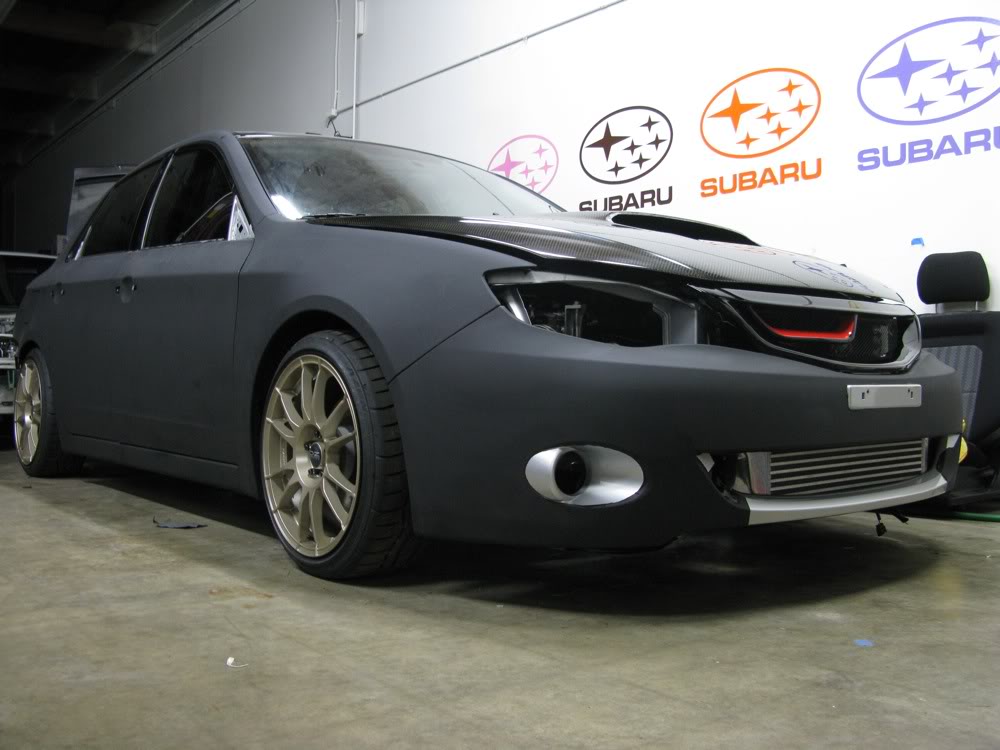
Closer look at the off-center red intake ducting.
More to come.
Motor is making progress. I painted my interior dash trim tonight as well as plasti-dipped all the front grille pieces. I also custom vinyled the intake ram scoop on the Ings+ grille in a red.
Lots of foiling has been accomplished with very little left!
I installed the Trak+ spacers tonight and man does it make a dramatic visual difference! Please bear in mind, the car still needs to be corner balanced, aligned, and the ride height will be re-adjusted to be lower and more aggressive. So never mind the wheel gap. Enjoy the pictures.
Motor is now a long-block... Heads are bolted on with ARP studs... Accessories, cam gears, etc will soon follow.
ARP detail.
Sanded and prepped for paint.
Painted.
Sneak peak at interior trim installed.
Down Shift Graphics laying down some serious vinyl work!
Down Shift Graphics detail work.
Down Shift Graphics tucking edges clean.
H&R Trak+ 25mm wheel spacers installed.
Front BEFORE spacing.
Front AFTER spacing.
Low view from Front of offsets, spaced out.
Fender clearance, or lack thereof. After an alignment and lowering, this should be nice and flush.
Current stance.
Low view from Rear of offsets, spaced out.
Test fitted bumper, grille, etc... Still a work in progress.
Closer look at the off-center red intake ducting.
More to come.
It's QQ thankyouverymuch
iTrader: (39)
Joined: May 2007
Posts: 19,721
From: San Jose
Car Info: 2011 SWP WRX Hatch
I guess I hit the wrong thread...
But seriously mad props.
Just out of curiosity, how have the BC Coils been holding up?
Ok... I'm going to come clean. This is an awesome build and an awesome thread all done by an awesome guy.
I have seen this thread pop up many times here, a few times on 3gwrx, and once on nasioc. For some reason I never thought much about this build. Maybe I figured it would only be a power build, or that it would just be a bunch of lists and pictures and no real information.
Boy was I WRONG. I came across thread a few weeks ago when I was doing some research on the COBB Short Shifter, which I ended up getting last week and I am loving every minute of it, and then I was just doing so research on coilovers, specifically BC coils and I this thread came up in my search again. Holy **** you did an awesome write-up about the coils. I am really regretting not getting them back in February when I had the chance. But they are now back on the list of things to get.
Well done sir. I shall keep a tab on this thread, it will be very interesting to see how this project evolves over time.
Just out of curiosity, how have the BC Coils been holding up?