
Good bye OEM Turbo Oil Drain, Hello -10AN


Thread Starter
Registered User
iTrader: (4)
Joined: Dec 2004
Posts: 970
From: roseville, ca
Car Info: 06 obp sti
lol....i want something a little more luxury with good performance and an automatic. I have what i want in mind, just need to figure out how to get it and is it something that i really want.
Thread Starter
Registered User
iTrader: (4)
Joined: Dec 2004
Posts: 970
From: roseville, ca
Car Info: 06 obp sti
thank you, always a work in progress.
I finished the intercooler today after work. I also welded in the radiator shroud piece to cover the gap between the core and top radiator support. Its all one piece and looks really nice. I also welded in brackets for the flex a lite fan i bought. I got a 16" flex a lite fan that pulls around 2300 cfm, so cooling shouldnt be much of an issue. My large radius bends arrive tomorrow as well. I'll be running 2.5" intercooler piping with a 3" blow thru section. The bends will be a large 5" radius for long sweeping bends to keep efficiency high. trying to make the "system" work as efficiently as possible and make max hp on my little setup
I finished the intercooler today after work. I also welded in the radiator shroud piece to cover the gap between the core and top radiator support. Its all one piece and looks really nice. I also welded in brackets for the flex a lite fan i bought. I got a 16" flex a lite fan that pulls around 2300 cfm, so cooling shouldnt be much of an issue. My large radius bends arrive tomorrow as well. I'll be running 2.5" intercooler piping with a 3" blow thru section. The bends will be a large 5" radius for long sweeping bends to keep efficiency high. trying to make the "system" work as efficiently as possible and make max hp on my little setup
Thread Starter
Registered User
iTrader: (4)
Joined: Dec 2004
Posts: 970
From: roseville, ca
Car Info: 06 obp sti
yes sir......once my car is done. We can start on your setup. Got your setup and Pauls cage and other fab work next. i have your radiator and endtanks here with all the machiend pieces ready to go. need to have another set of endtanks made as well for your intercooler.

Registered User
iTrader: (16)
Joined: Apr 2009
Posts: 1,196
From: Fog Town
Car Info: 05 Flat White STi, 96 Widebody Brighton
"little".. haha.. havent forgot about getting those flares from ya karlton... just gotta get some stuff in line with the car before i get em.. you like ur's murphy?
Thread Starter
Registered User
iTrader: (4)
Joined: Dec 2004
Posts: 970
From: roseville, ca
Car Info: 06 obp sti
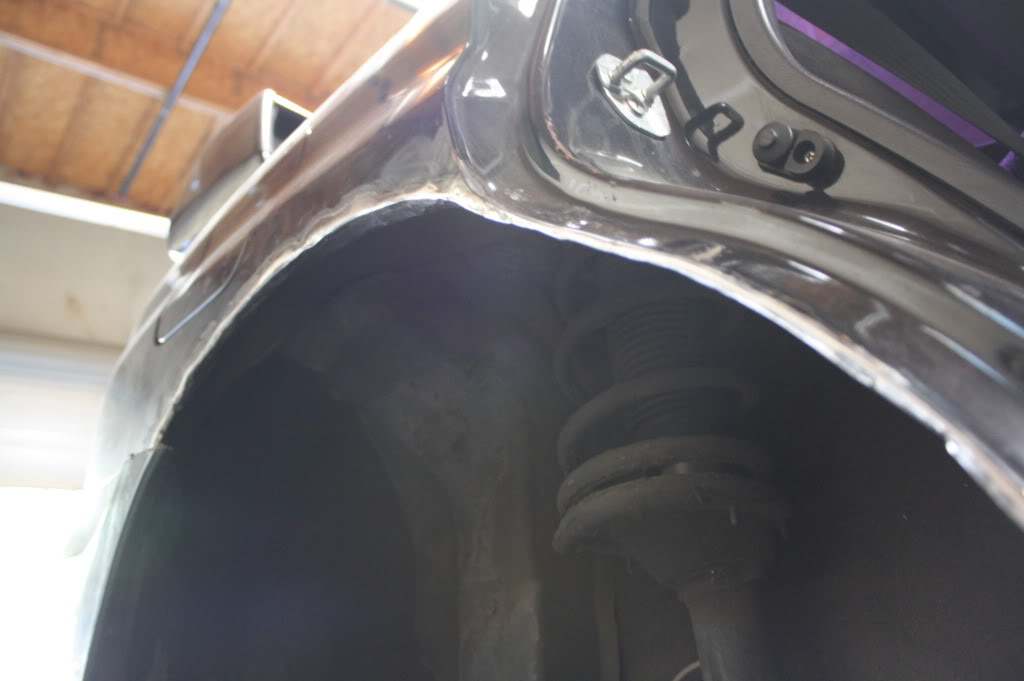
ya i like em, need to buy some fiberglass filler to fill in some gaps and build up some areas on the flares. Still need to isntall my 4th flare on the d-side rear. The rear section takes quite a bit of time to do. But it all depends on how you do it. It seems a lot of people just bend up some of the portion you dont cut on the wheel wells, other epoxy it together. I welded mine back together which is a much more in length process due to getting the wheel well and body sheet metal formed back to eachother nicely and then welded together. Fitment is key on this since the sheet metal is so thin.
Registered User
iTrader: (16)
Joined: Apr 2009
Posts: 1,196
From: Fog Town
Car Info: 05 Flat White STi, 96 Widebody Brighton
ya i like em, need to buy some fiberglass filler to fill in some gaps and build up some areas on the flares. Still need to isntall my 4th flare on the d-side rear. The rear section takes quite a bit of time to do. But it all depends on how you do it. It seems a lot of people just bend up some of the portion you dont cut on the wheel wells, other epoxy it together. I welded mine back together which is a much more in length process due to getting the wheel well and body sheet metal formed back to eachother nicely and then welded together. Fitment is key on this since the sheet metal is so thin.
Thread Starter
Registered User
iTrader: (4)
Joined: Dec 2004
Posts: 970
From: roseville, ca
Car Info: 06 obp sti
no you definitely have to cut to take advantage of them, theres jsut different ways of going abotu sealing it back up after cutting. I cut a lot of my body.
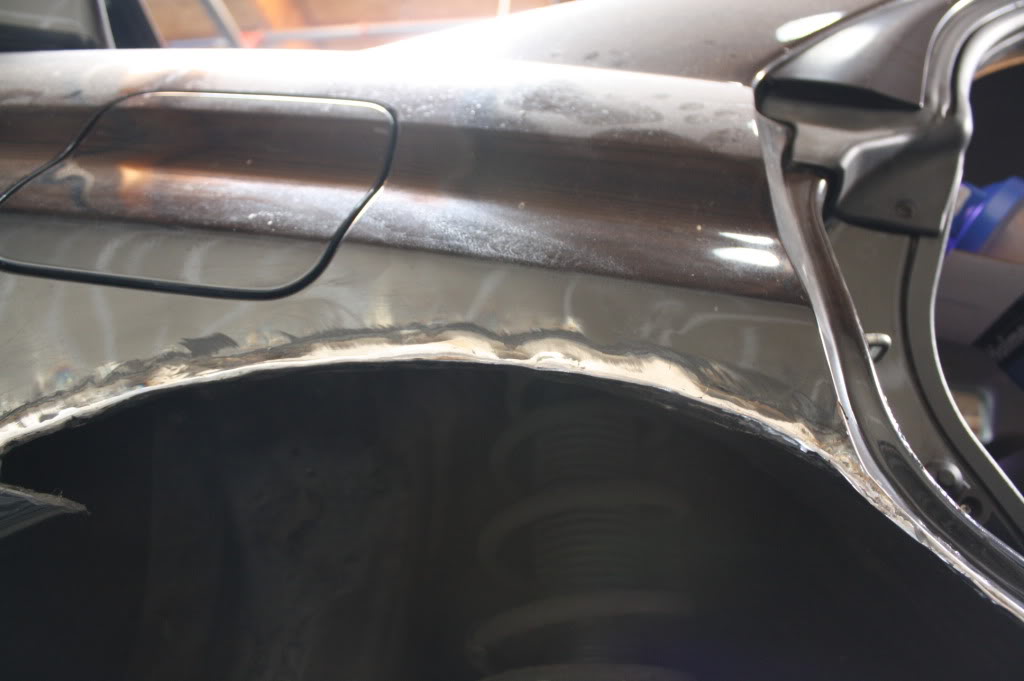
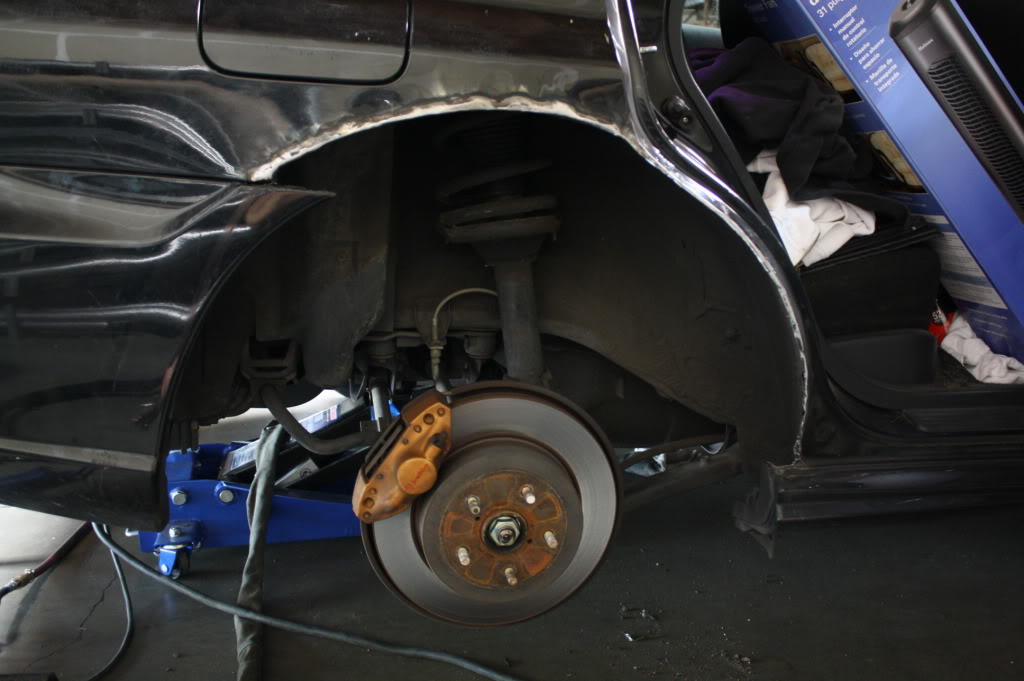
Yea definitely have to cut the metal away to take advantage of flares, otherwise if you just stick them on you'll still rub the tires. Kelly is the sheetmetal a little wavy from the heat? That's what I was afraid of with mine, so I just used the auto panel adhesive to glue the inner and outer metal back together. You did cut A LOT away lol.
Registered User
iTrader: (16)
Joined: Apr 2009
Posts: 1,196
From: Fog Town
Car Info: 05 Flat White STi, 96 Widebody Brighton
yes cause i really want to go this way instead of widebody.. too many of them out there.. murphy are you also cutting away at the rear bumper to get the correct fitment..? that is quite a bit of cutting but i wouldn't be scared to do something like that if its whats needed.. i also plan on trying to run 295's, what size wheel you have..?
Thread Starter
Registered User
iTrader: (4)
Joined: Dec 2004
Posts: 970
From: roseville, ca
Car Info: 06 obp sti
Yea definitely have to cut the metal away to take advantage of flares, otherwise if you just stick them on you'll still rub the tires. Kelly is the sheetmetal a little wavy from the heat? That's what I was afraid of with mine, so I just used the auto panel adhesive to glue the inner and outer metal back together. You did cut A LOT away lol.