Good bye OEM Turbo Oil Drain, Hello -10AN


Thread Starter
Registered User
iTrader: (4)
Joined: Dec 2004
Posts: 970
From: roseville, ca
Car Info: 06 obp sti
They are nice to look at, spend most my time on 2-3 good fab forum sections when im on the net, never gets old. I decided to sleep in for once and not be at the shop at 4-5am so hopefully today is productive.

Thread Starter
Registered User
iTrader: (4)
Joined: Dec 2004
Posts: 970
From: roseville, ca
Car Info: 06 obp sti
Rotated uppipe is done and pretty much ready for production. Jig worked out nicely. Need to face off a certain amount of thousandths on each side of the jig to compensate for material shrinkage during welding. But other then that, its golden. Downpipe fixture is next, already have flanges located, o2 bungs located, and bracket made as well as made in solidworks which is out getting lasered and cnc bent. Thanks to stupidchicken for use of the downpipe for making sure downpipe was positioned correctly.
This is the 321 stainless steel version tubing. Pictures of inconel uppipe and 321 header coming in the next day or so.
This is the 321 stainless steel version tubing. Pictures of inconel uppipe and 321 header coming in the next day or so.
Thread Starter
Registered User
iTrader: (4)
Joined: Dec 2004
Posts: 970
From: roseville, ca
Car Info: 06 obp sti
I ordered some small OD tubing with a thin wall thickness of .028" as well as some very nice tube benders. Today i removed the stainless braid avcs line i had on my car and bent up some .25"x.028" 304 seamless tube. I then put 37* flares on either end and installed it ont he car. Came out very clean, might redo it so it cuts in after the head breathers, but undecided. didnt have the camera with me so i'll get some pics tomorrow in the AM. Going to run the power steering lines tomorrow hopefully.

Registered User
iTrader: (8)
Joined: Oct 2006
Posts: 2,506
From: BorderJumperEnforcer's momma's house
Car Info: Fast
Sounds like a good part to have. I dunno if my PS pump sucks, but I have had a whine which I assume is an air leak ever since going to a stainless braided line
Thread Starter
Registered User
iTrader: (4)
Joined: Dec 2004
Posts: 970
From: roseville, ca
Car Info: 06 obp sti
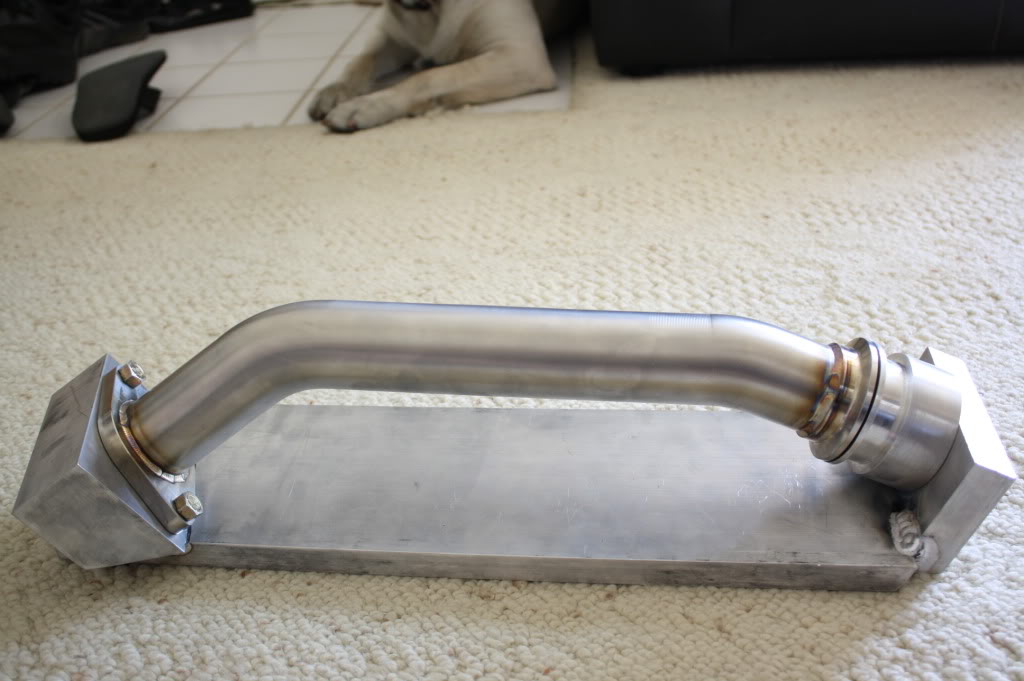
So i ran 3 test units today to fine tune the program on the cnc lathe. running 2 feet worth of fitting tomorrow and the bracket file is sent for quoting at the laser company. But this replaces the big black plastic fitting and it might replace the aluminum fitting on some pumps as well, but need to check the dimensions of that to see if this fitting matches up to it. But you essentially remove the power steering feed fitting and replace it with this. This will allow mounting of a power steering resv somewhere else in the engine bay and makes line routing a lot more versatile since you arent constrained to the the oem fitting and you'll be able to use a nice worry free way of installing with an fittings and hose, or stainless hard line which i'll probably be doing. -8AN fitting made from stainless rod, bracket will be 12g 304 laser cut.
Test fitting the unit in the pump today and had a nice snug fit inside the hole in the power steering and the o-ring fit nice and snug as well.
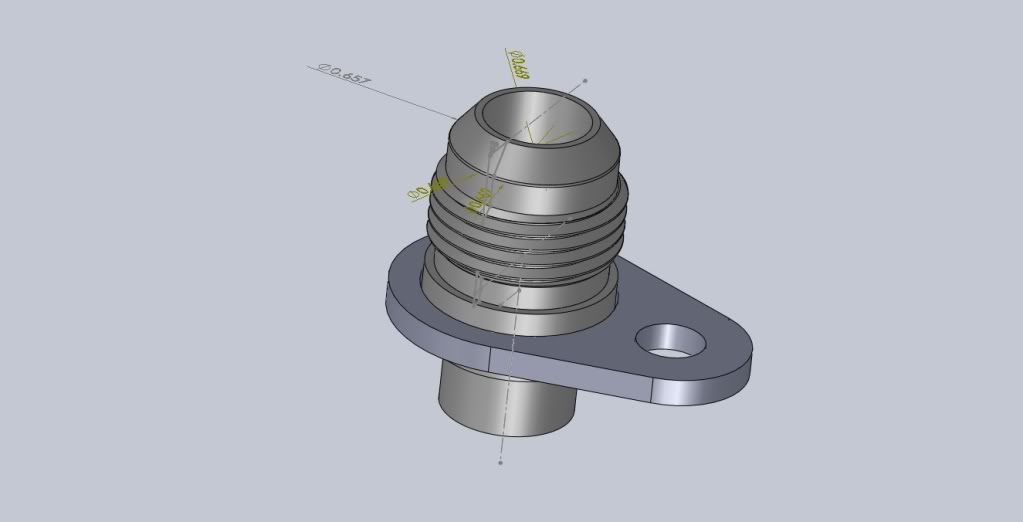
Test fitting the unit in the pump today and had a nice snug fit inside the hole in the power steering and the o-ring fit nice and snug as well.
Thread Starter
Registered User
iTrader: (4)
Joined: Dec 2004
Posts: 970
From: roseville, ca
Car Info: 06 obp sti
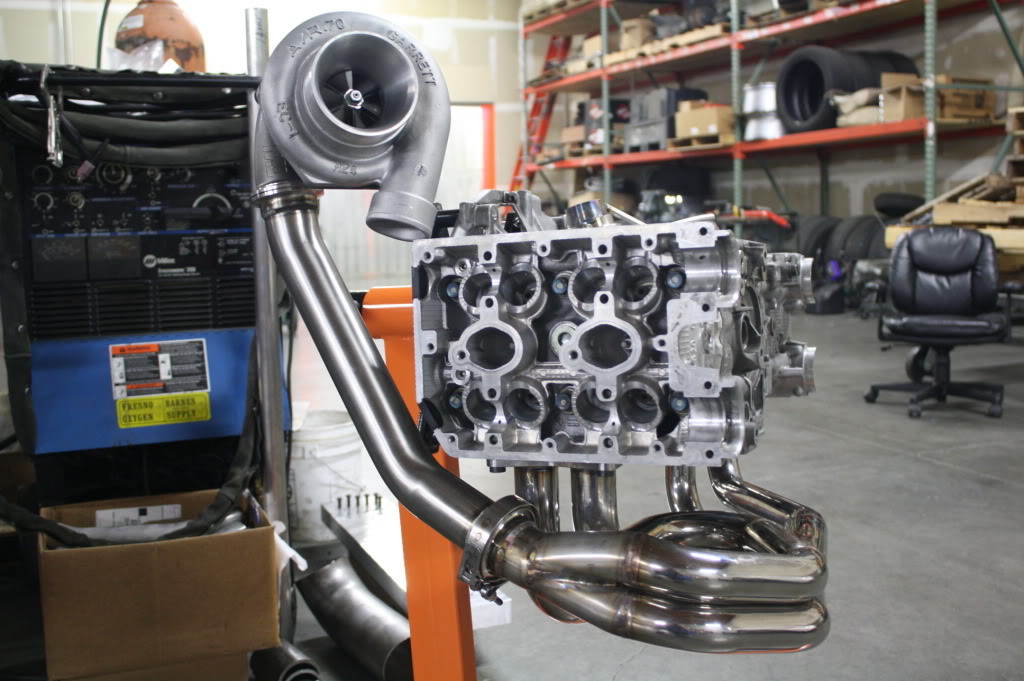
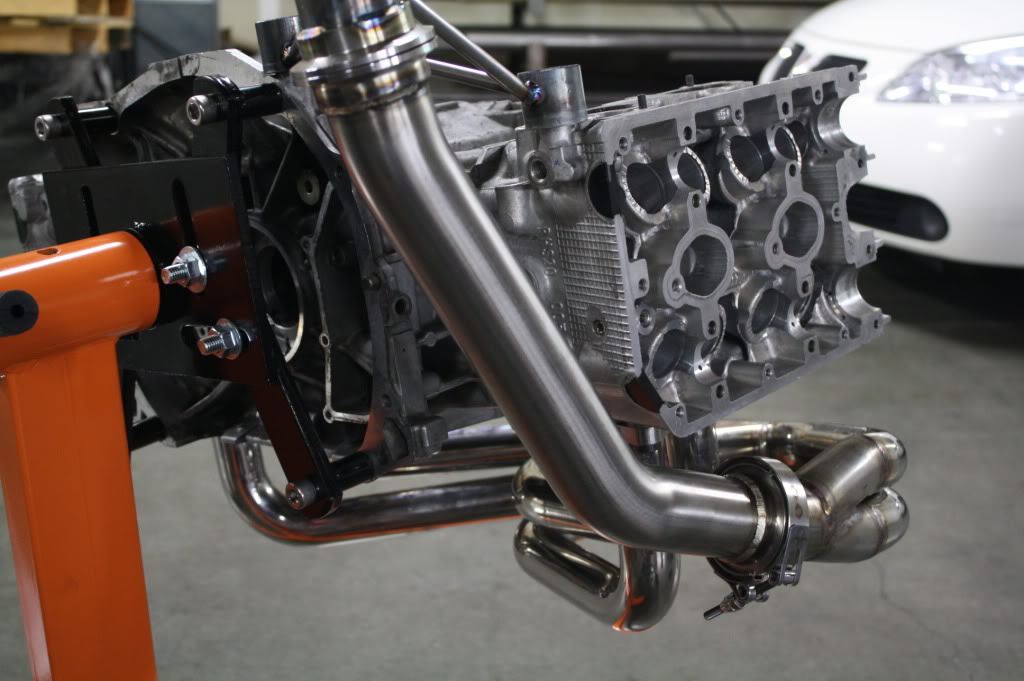
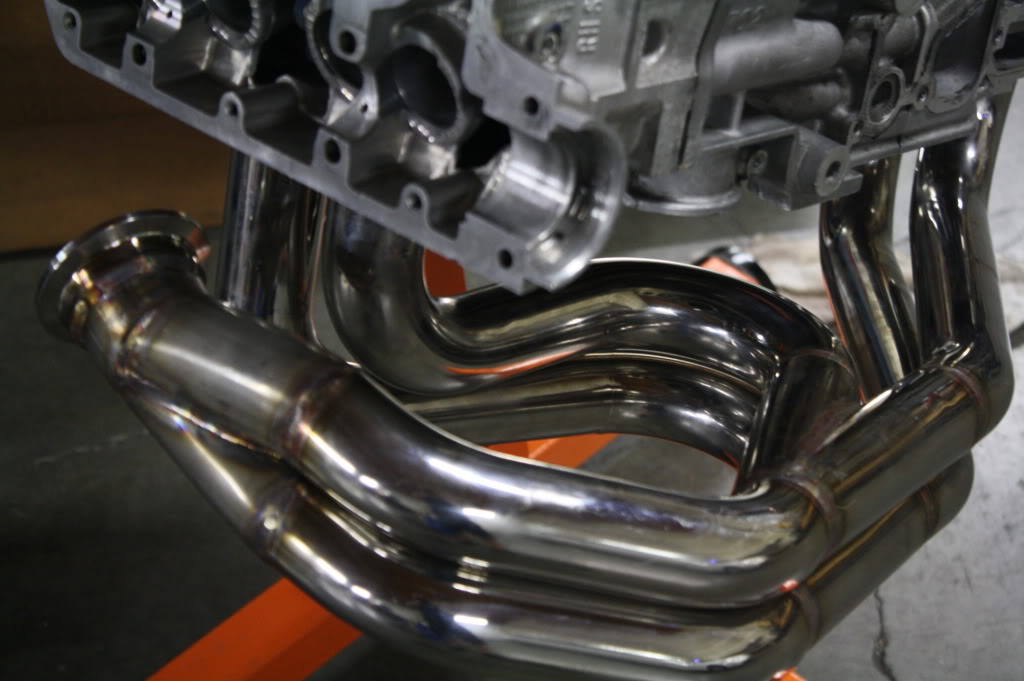
Here is a full 321 header with v-band outlet, and an inconel uppipe. Uppipe-Manifold v-band setup is a custom in house deal I make/modify. Turbo used from pics is a 35r, but the turbo going on this setup is an hta86 with a tial v-band housing. owner is shooting for over 600whp on e85. Turbo is kinda propped against the head since i only have one clamp and thats the only way i could get it to stay for pics. ENJOY!!!!
Thread Starter
Registered User
iTrader: (4)
Joined: Dec 2004
Posts: 970
From: roseville, ca
Car Info: 06 obp sti
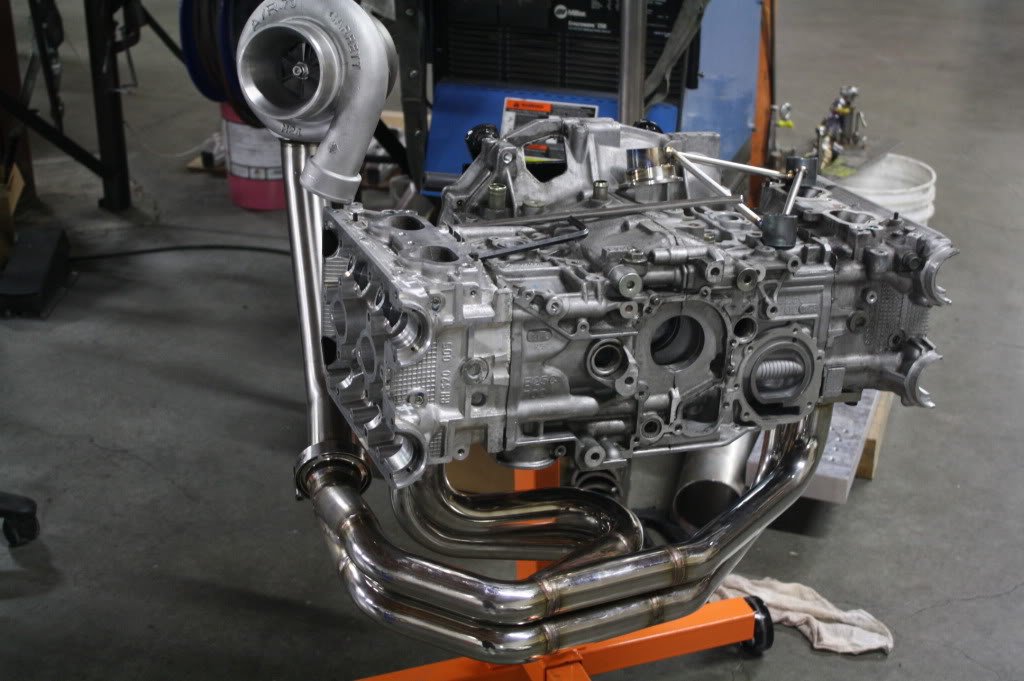
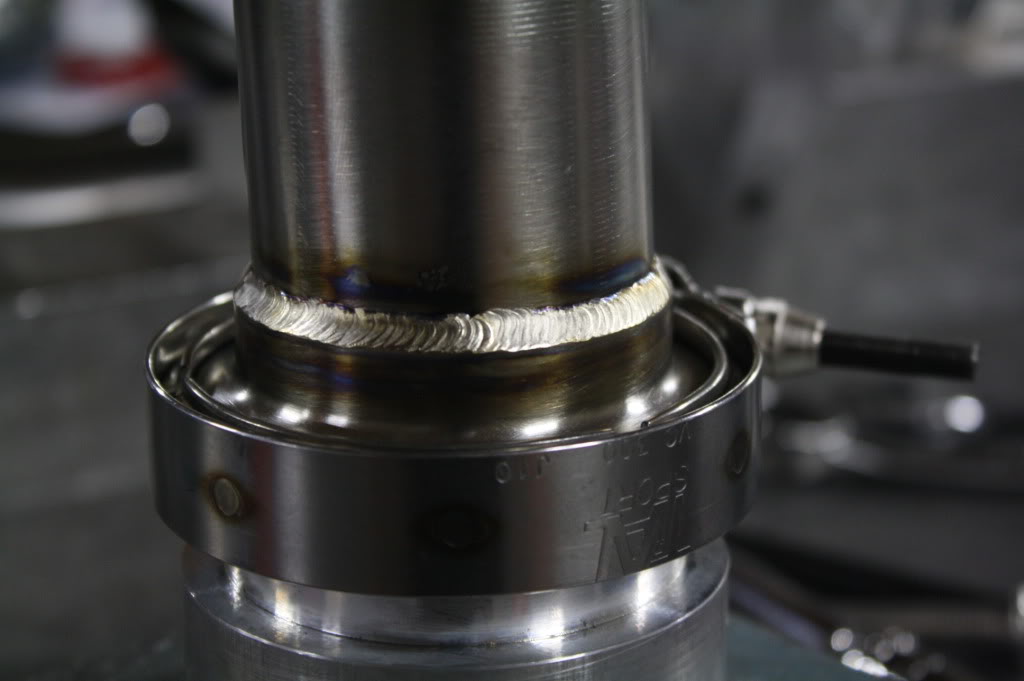
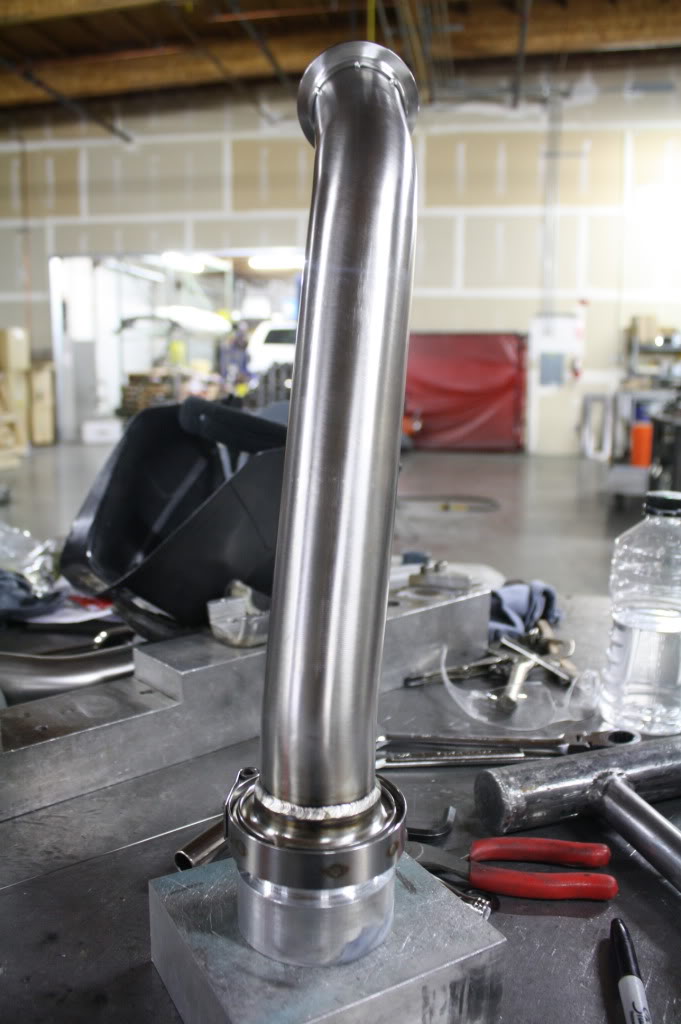
Picking up everything from getting ceramic coated on friday. Everything is getting done in a semi dark silver titanium color. Turbo kit is incredibly light, I'll have to weigh everything once it gets back. The inconel uppipe with v-bands feel like 1lb, as well as the downpipe with the thin wall 321 tubing and v-bands on both ends.
I'll get pics of everything mounted up on a motor as well.
I'll get pics of everything mounted up on a motor as well.
Thread Starter
Registered User
iTrader: (4)
Joined: Dec 2004
Posts: 970
From: roseville, ca
Car Info: 06 obp sti
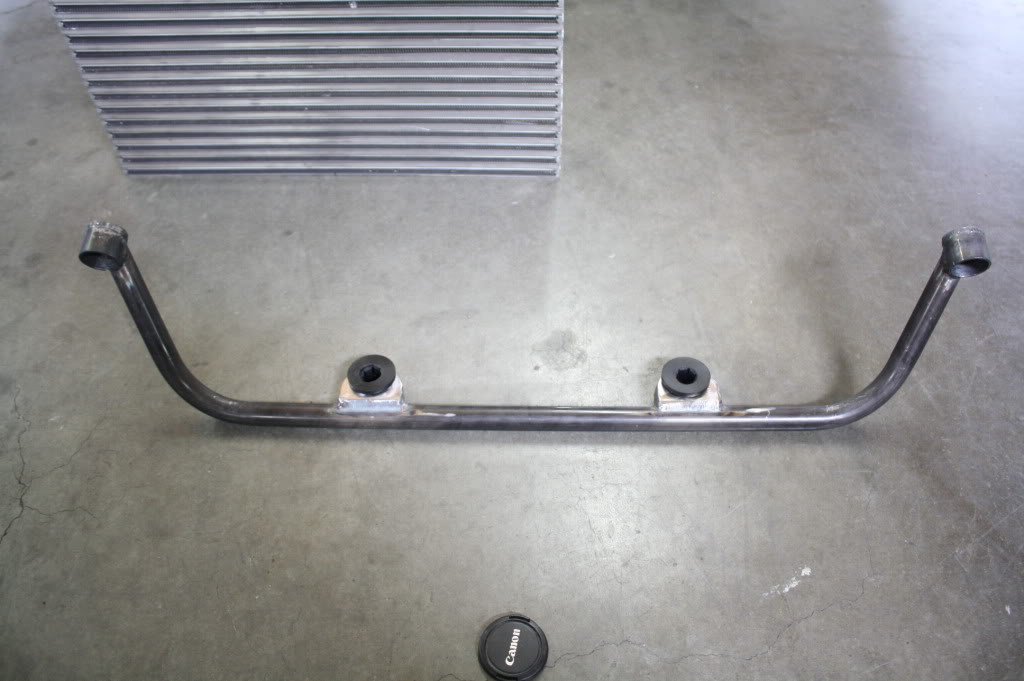
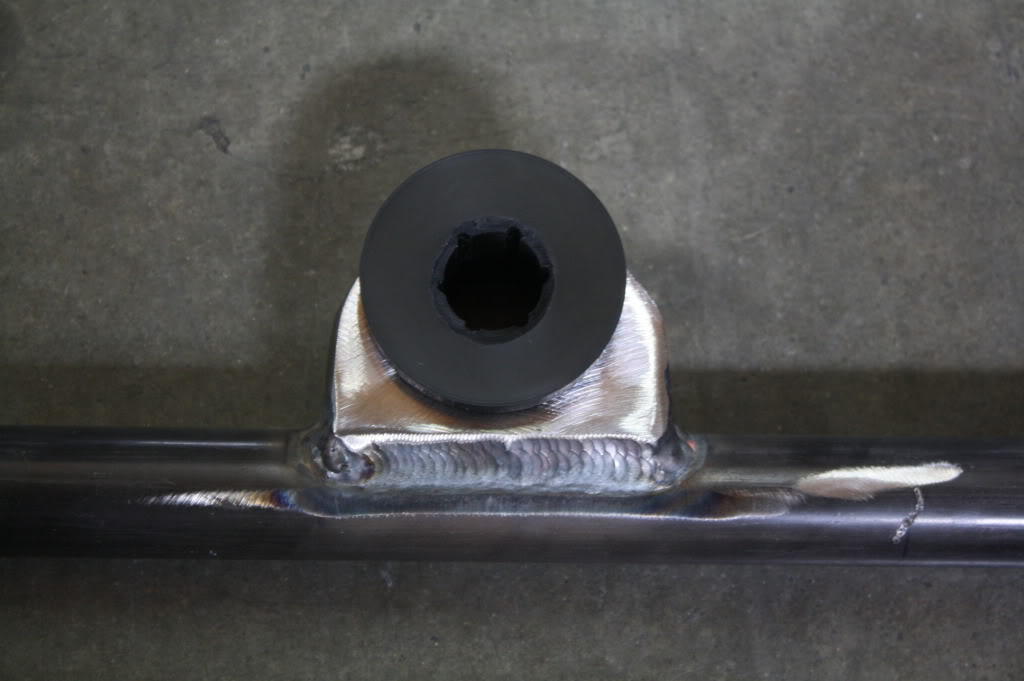
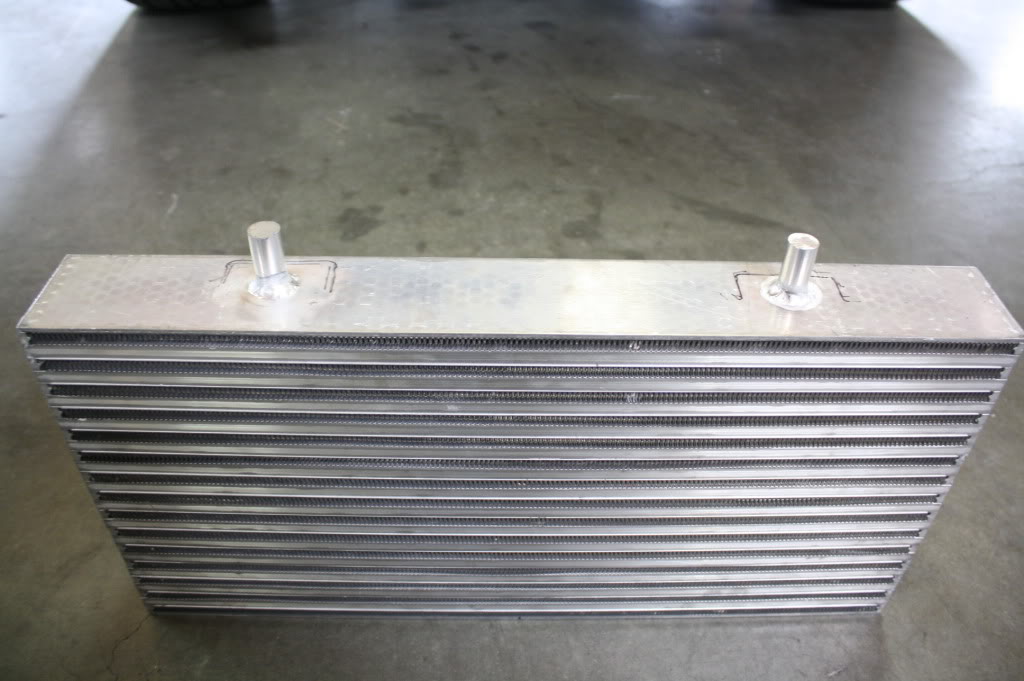
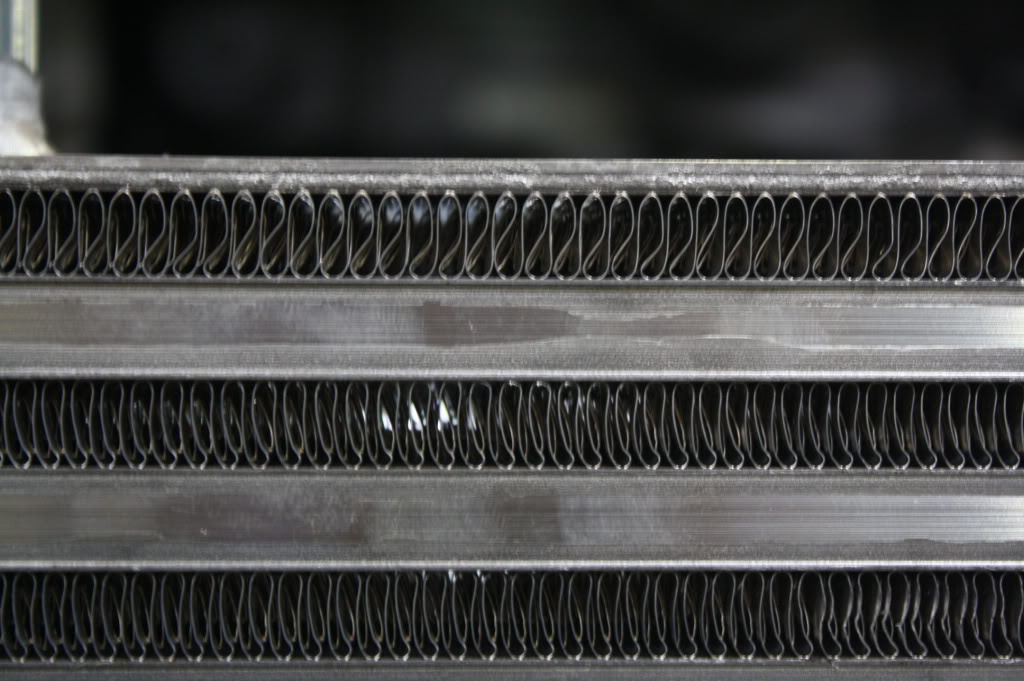
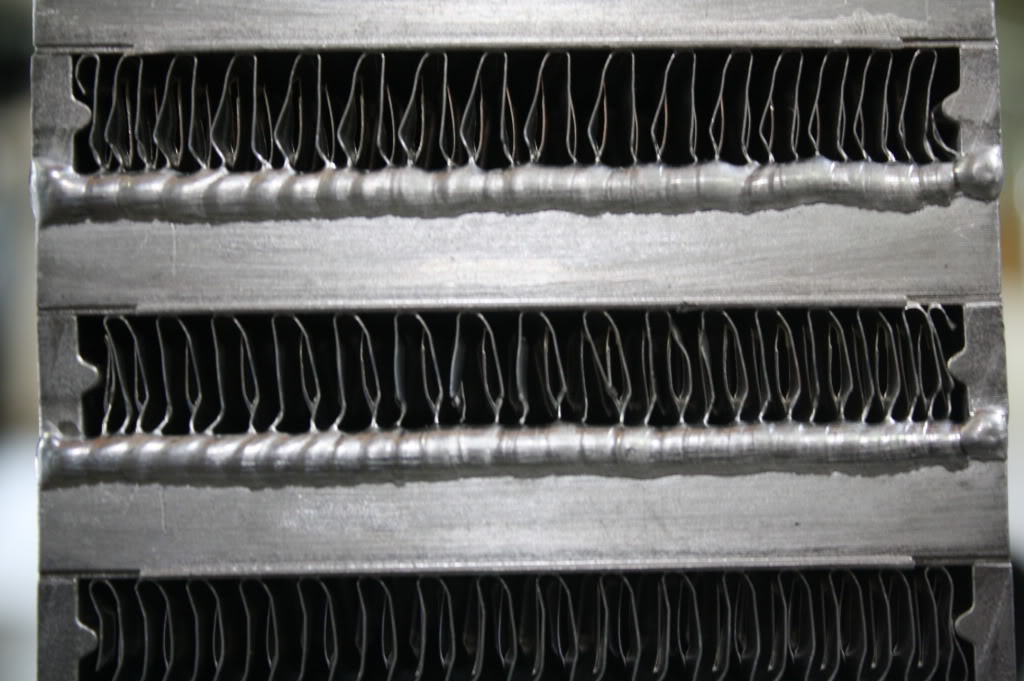
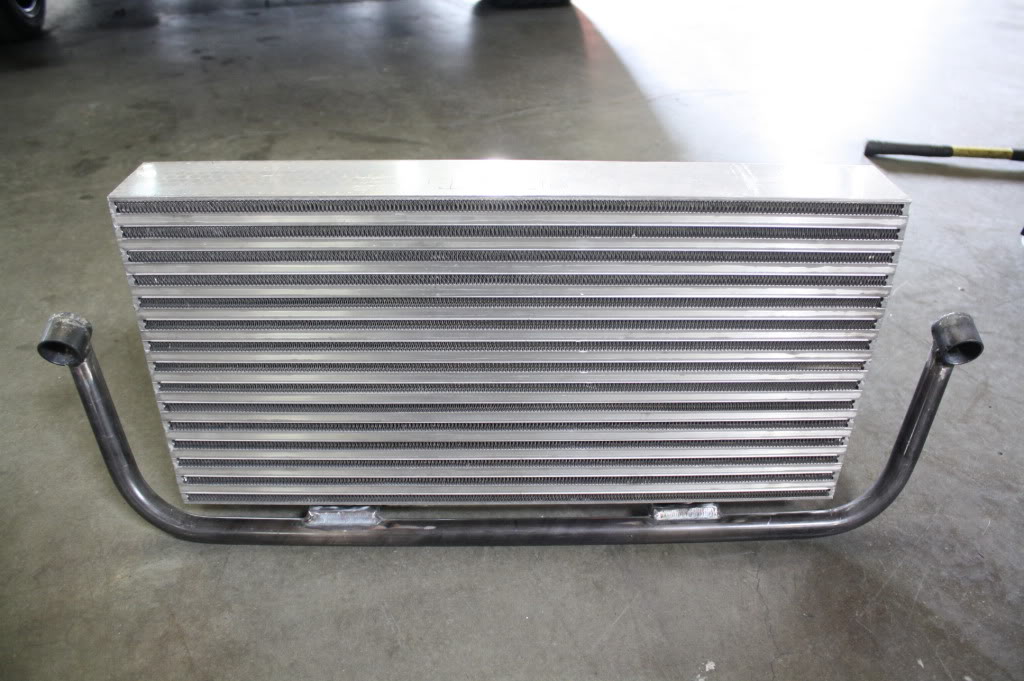
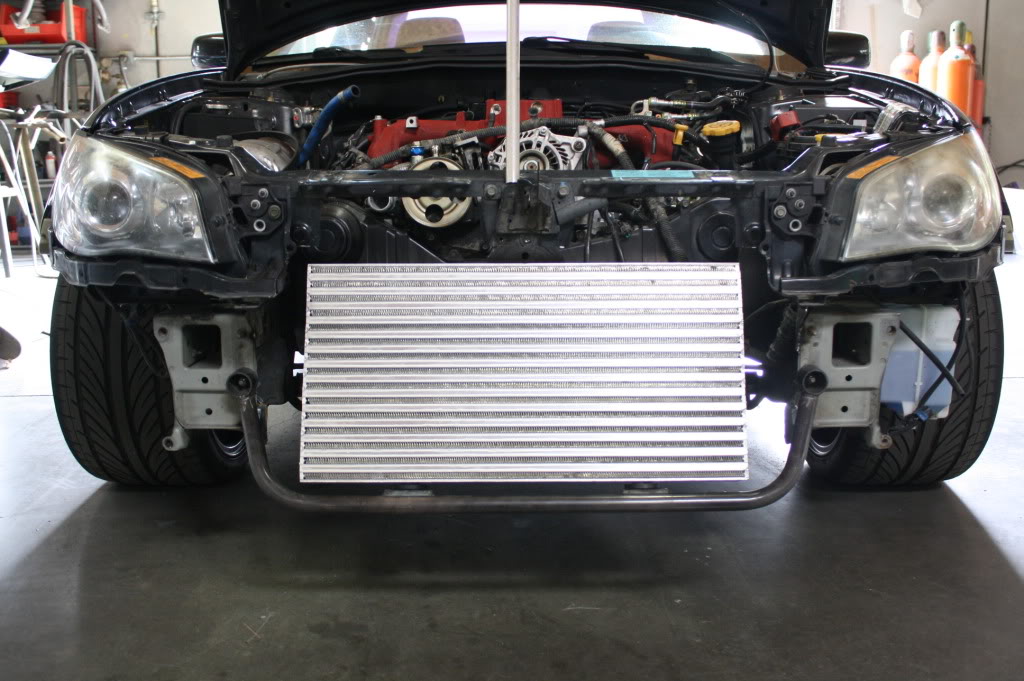
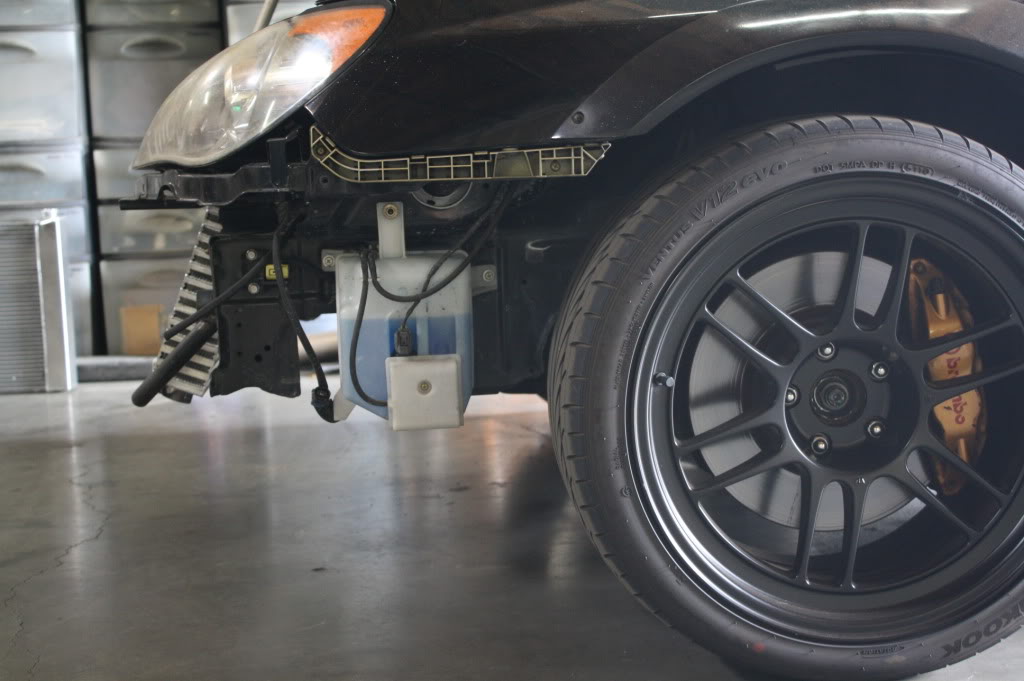
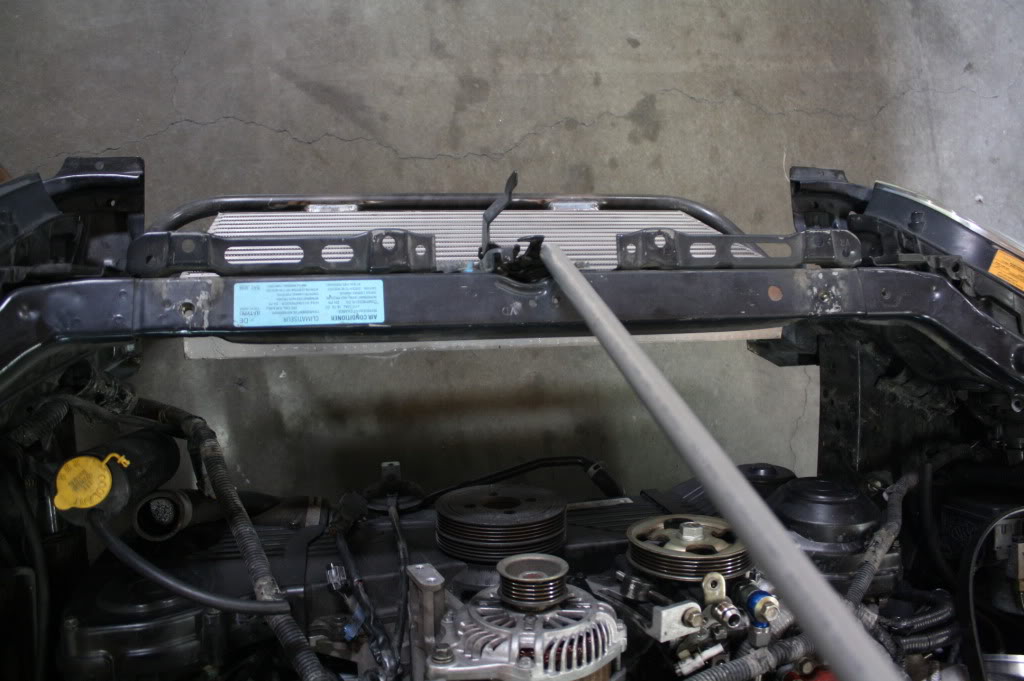
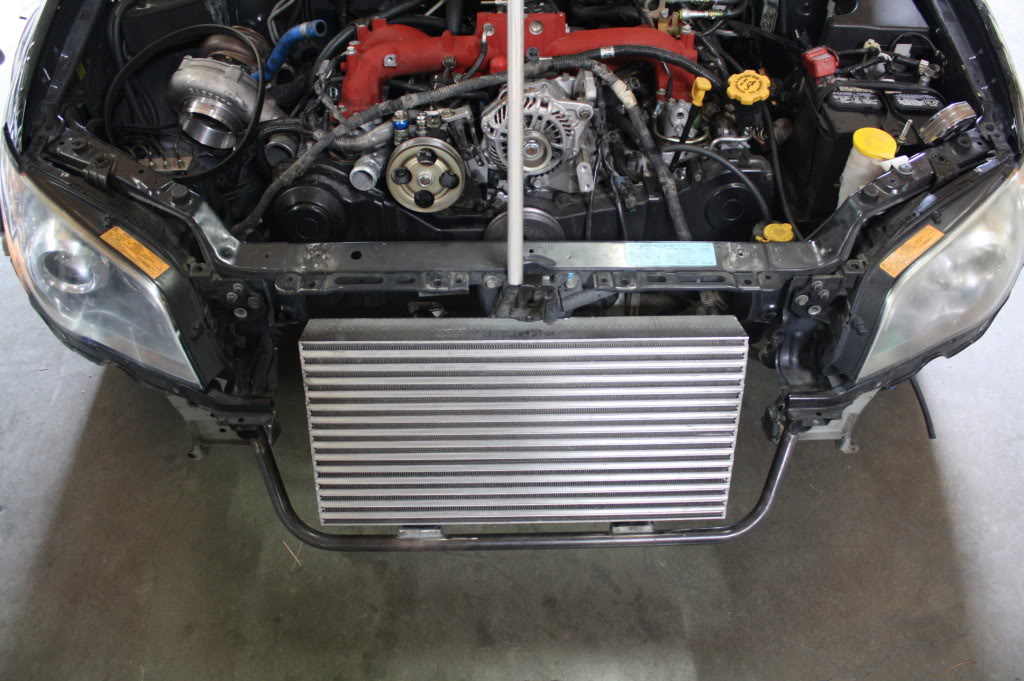
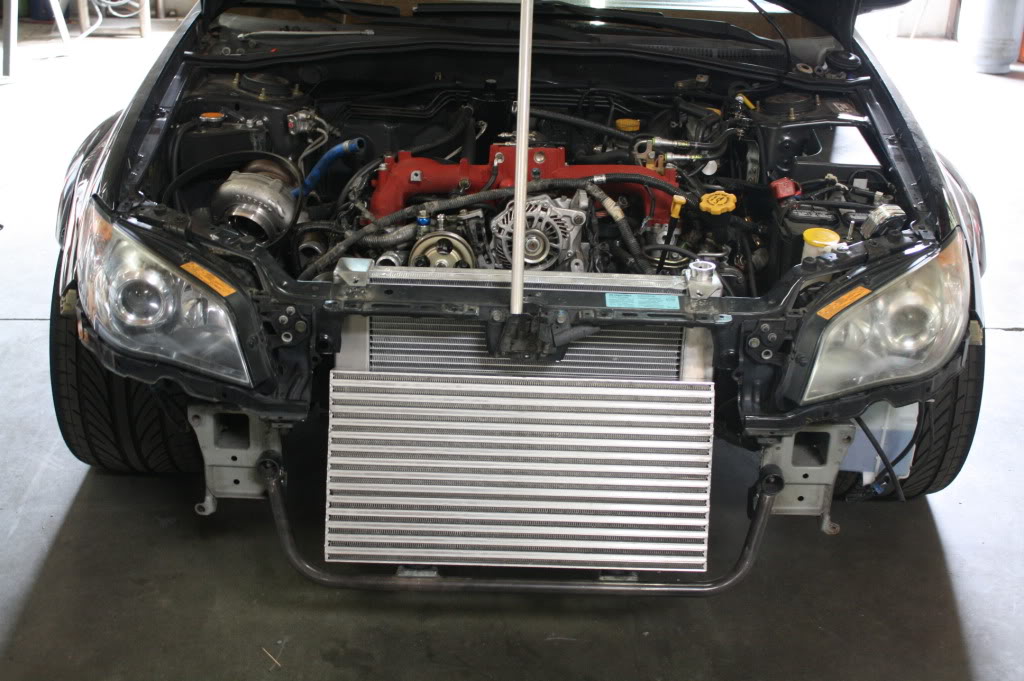
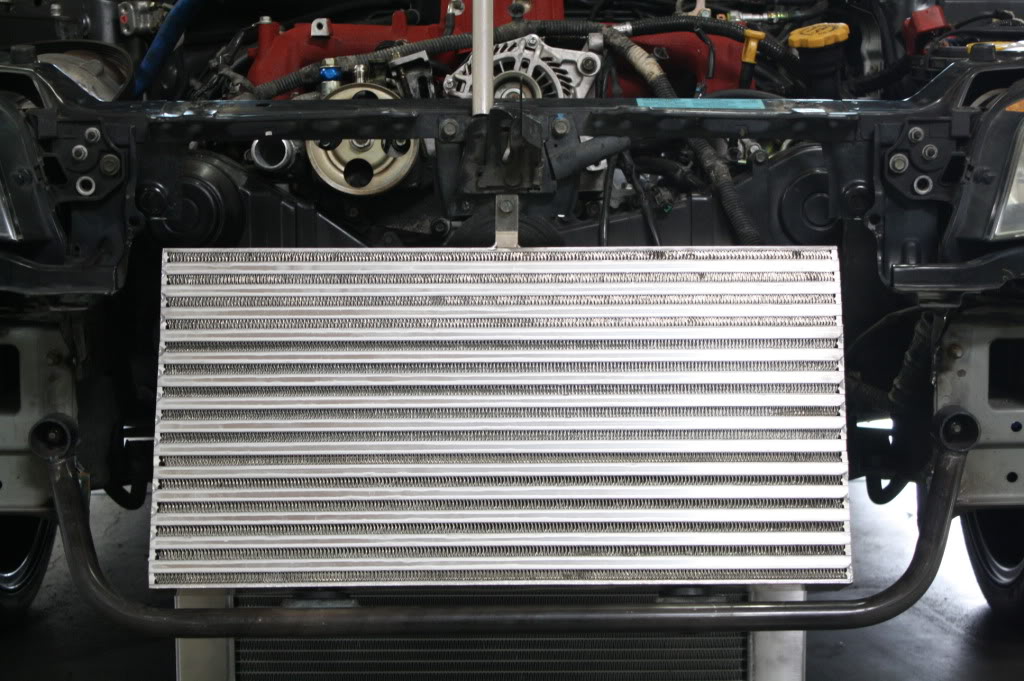
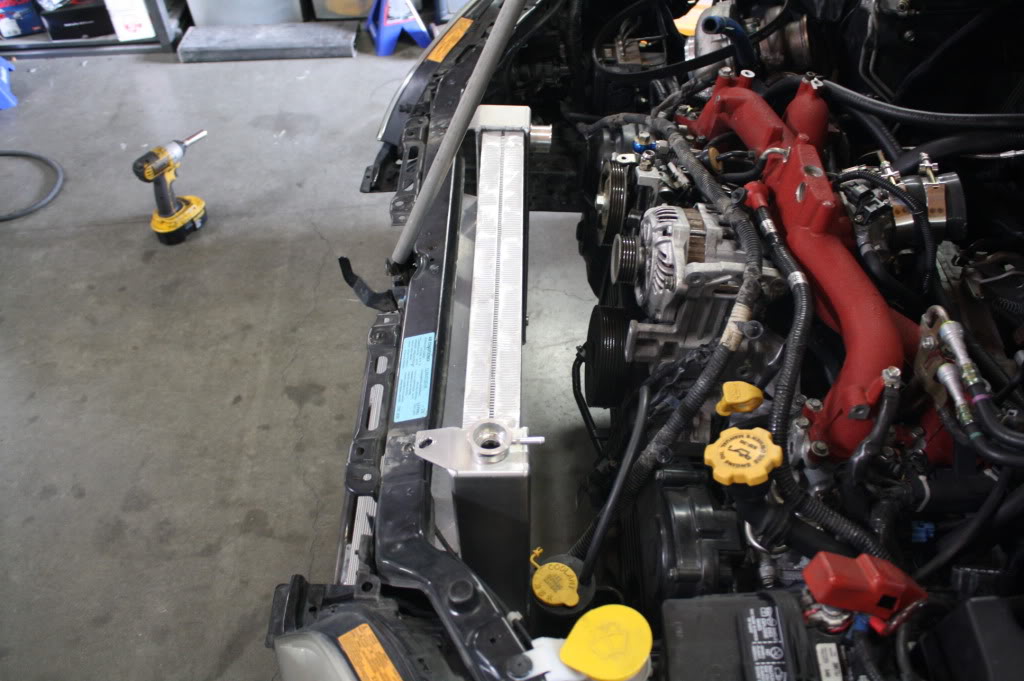
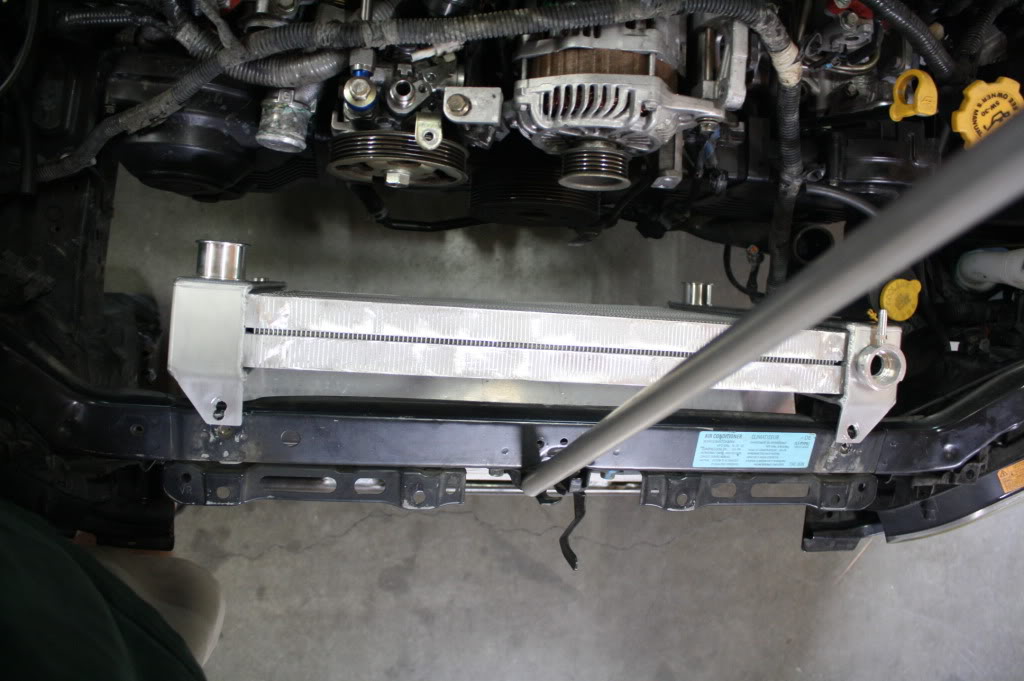
Built a couple parts this morning and then proceeded to get bored and I was alone inthe shop. So..... I ended up cutting off sheetmetal from the front end, cut out the center radiator support piece, cut some tube and put it ont he tube bender and made a small cross member to mount my new intercooler. I may end up cutting more stuff of as well from the front end mainly the lower radiator support and replacing it with some tube so I can better mount my custom radiator and intercooler. Not sure what i got myself into, but......hopefully I make the most of it 
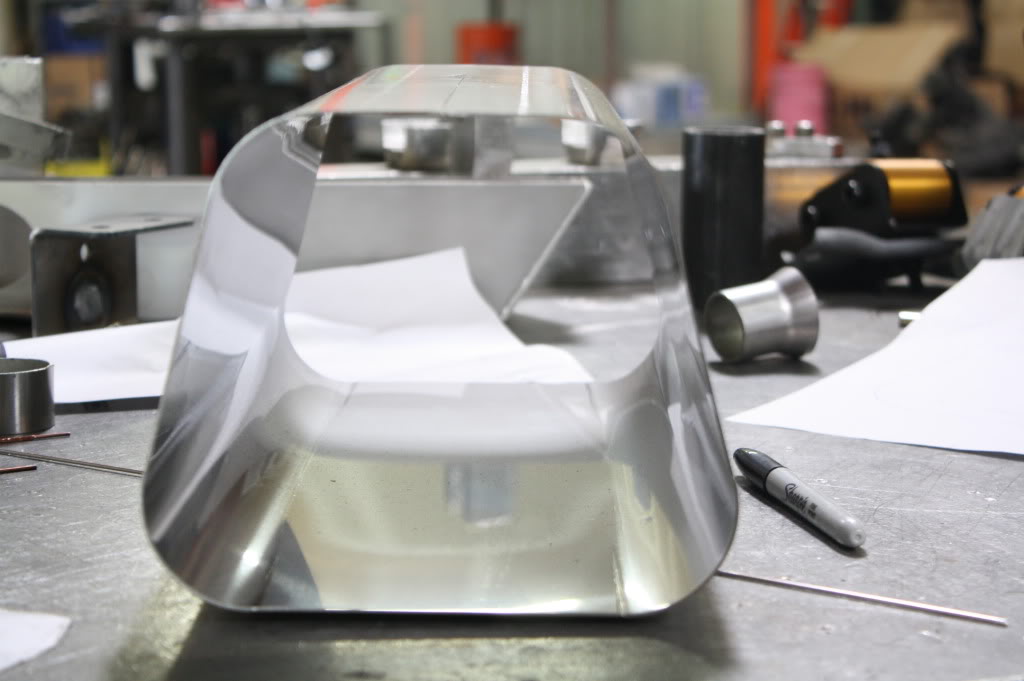
Oh....and my muffler shell bodies came back from laser and forming and look very nice. So hopefully i'll have my new catback made within 2 weeks or so after i get the perforated tubing mandrel bent since there are 2 slight bends inside muffler to help quite things down.
Oh....and my muffler shell bodies came back from laser and forming and look very nice. So hopefully i'll have my new catback made within 2 weeks or so after i get the perforated tubing mandrel bent since there are 2 slight bends inside muffler to help quite things down.
Thread Starter
Registered User
iTrader: (4)
Joined: Dec 2004
Posts: 970
From: roseville, ca
Car Info: 06 obp sti
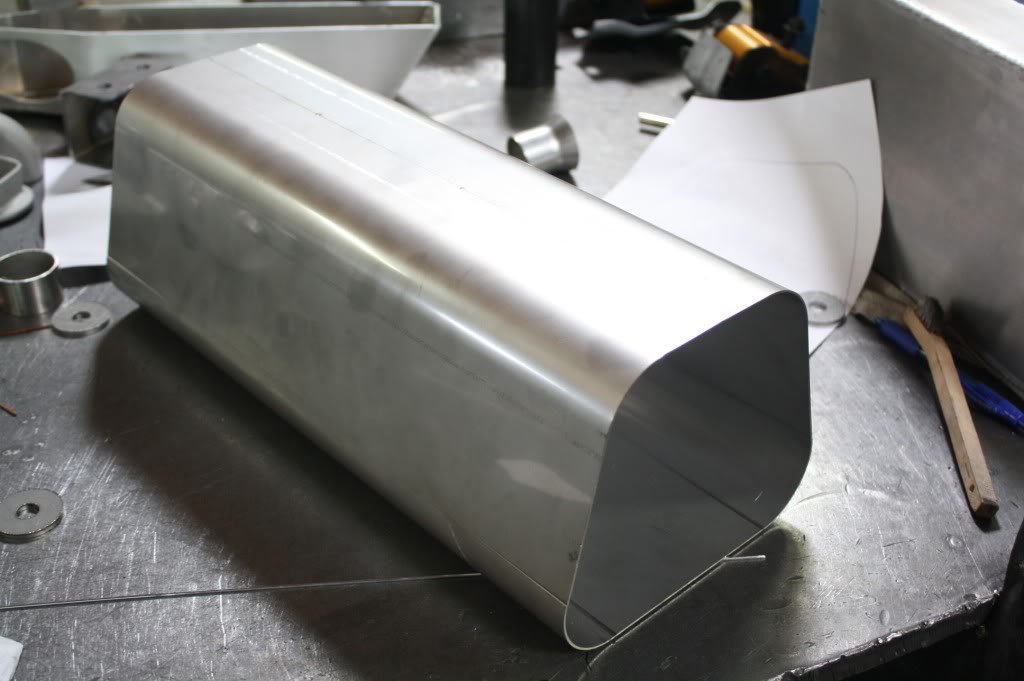
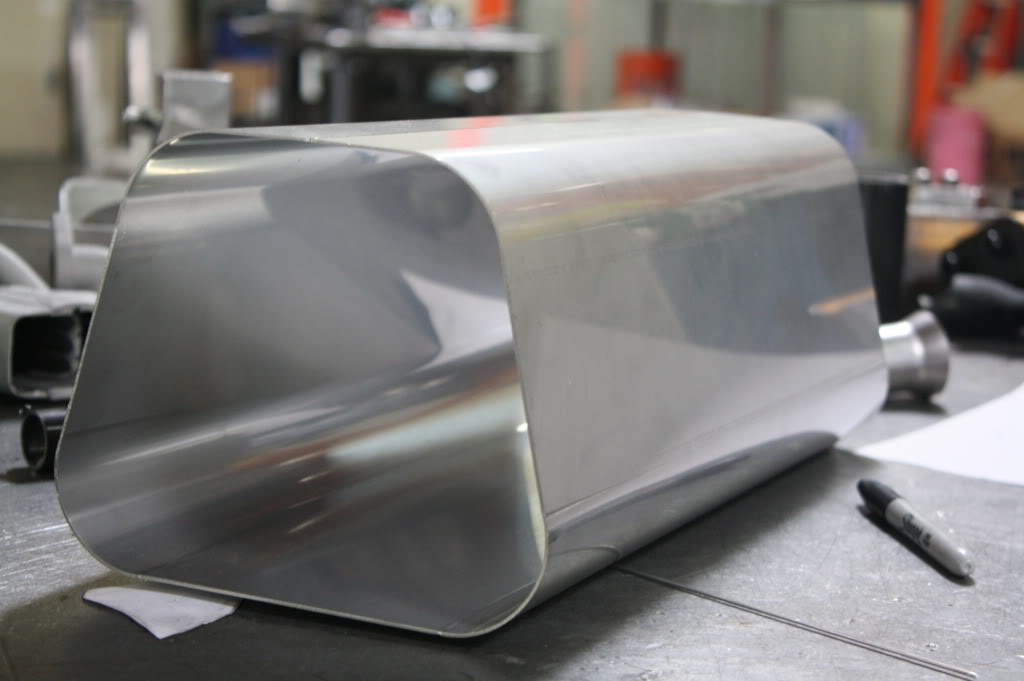
So here pics of the muffler shell/body back from laser and forming. Designed it to mimic the shape of the stock sti muffler body for stealthy appearance. Will use a 3" perforated tube inside with 2 - 18* bends inside to hopefully help quite it down.
Thread Starter
Registered User
iTrader: (4)
Joined: Dec 2004
Posts: 970
From: roseville, ca
Car Info: 06 obp sti
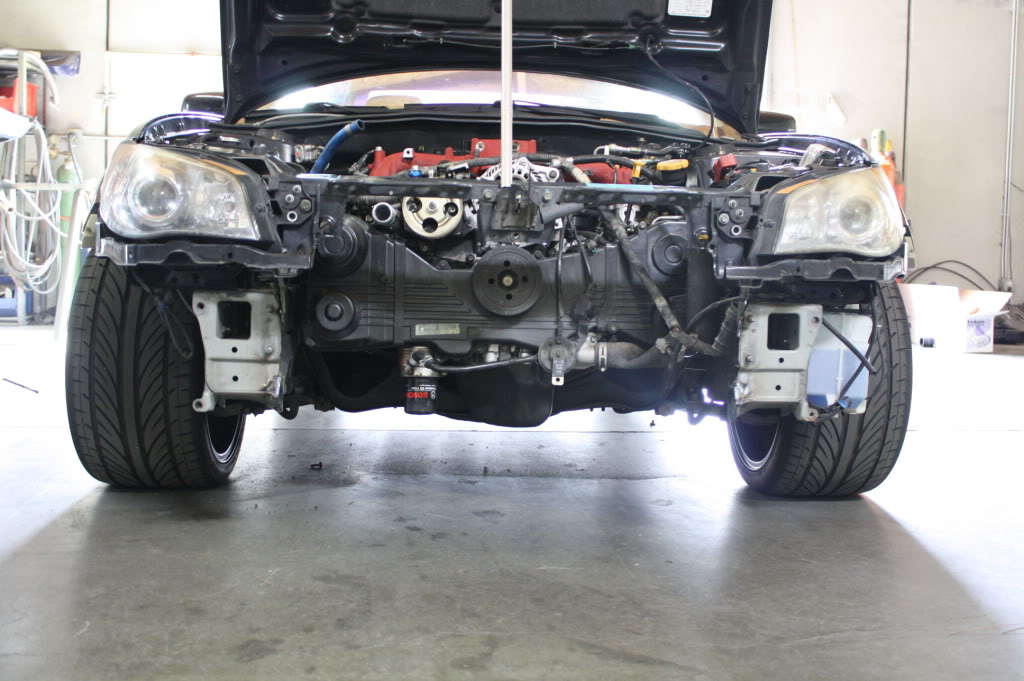
And here are pics of my destruction and rebuilding of the sti. I dont know how or why i did this. All i was supposed to do was redo my turbo setup mock-up my new exhaust and redo my engine bay and lines. But now im knee deep into this mess lol.