Chicken's Crosstrek


Thread Starter
Churro Aficionado
iTrader: (38)
Joined: Feb 2008
Posts: 54,661
From: IG - @thomas.teammoist
Car Info: IG - @TEAMMOISTOFFICIAL
Knowing I couldnt really use the OEM jack that came with the car (being lifted, and the air compressor in it's place), I wanted to still be able to jack my car up when needed. So I sprung for a hi-lift brand jack.
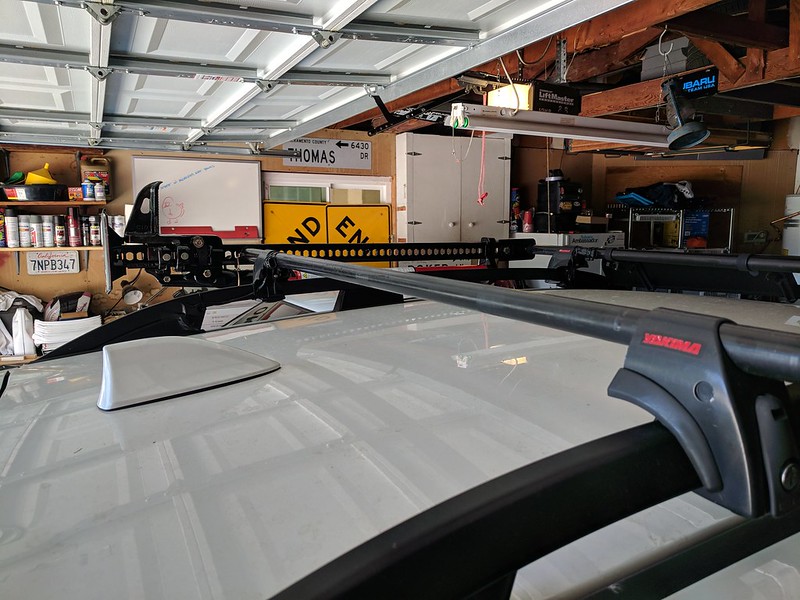
Knowing that was the route I was going to go, I needed to find a way to mount it to the car. There are TONS of aftermarket parts for Jeeps, but nothing really Subaru specific. Yakima does make a roof basket attachment to mount the jack. My two problems with that was 1) it costs over $100 and 2) I would only have the jack when I have the basket mounted.
I bought the smallest size they offered (36") and it does fit in the trunk sideways just fine. But if I have the dogs back there, or its filled up with camping gear, I dont want to move stuff around to get to it nor have the dogs trip up on it.
So here goes my crazy idea on another DIY creation.
Friday after work I bought all the hardware and Saturday I put my plan into action. I personally think its great, and another awesome part is that it cost me under $18 lol.
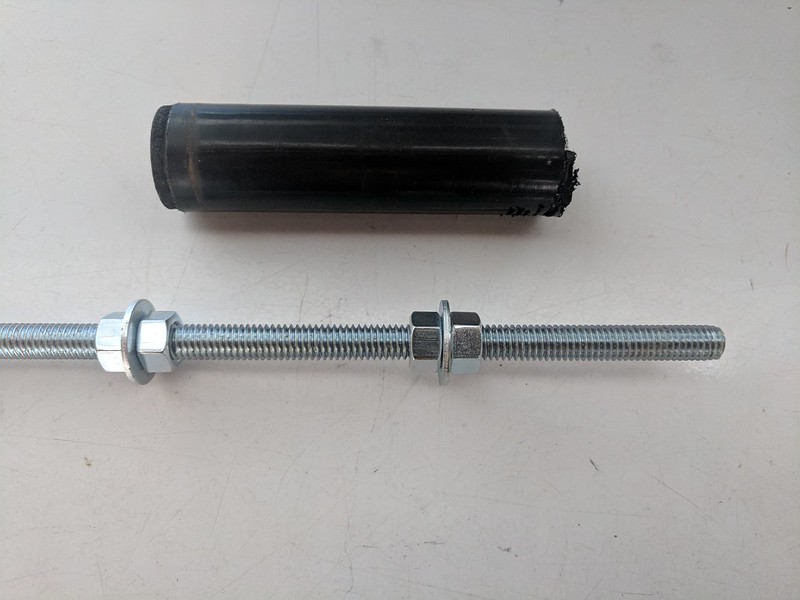
I bought 2 6ft threaded rods (the most expensive parts of the whole project at around $5 each haha), a bunch of nuts, washers, and a couple rubber washer/gaskets.
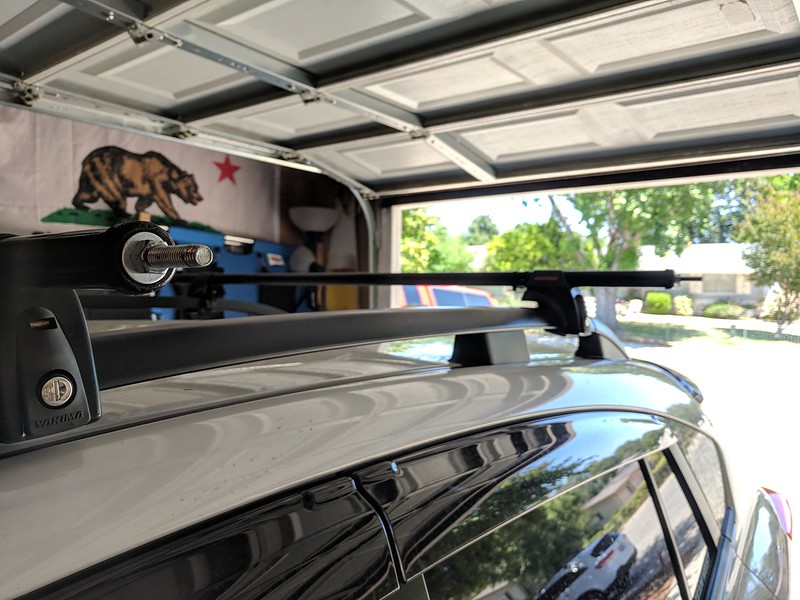
My idea was to put the threaded rod through the yakima round bars, leaving close to an inch in a half extra hanging out of each end. The round bars I have are about 53 3/4 inch long. I cut the rods down to about 57" long each.
The washers I got had an inner diameter just large enough for the threaded rod to fit through and an outer diameter just small enough to fit perfectly inside the round yak bars.
Here is a small scale example of my idea:

The round bars were originally off a friends trunk and much too long for the Crosstrek, so I cut the ends off to get them to a length I liked. This was the leftover I just happened to keep for hording reasons lol.
I put the washers in so the rod would not be flopping around inside the yak bar. The nuts were used to just capture the washers in place.
I drilled a hole in the end caps of the yak bar just large enough for the rod to fit through. here is how it would look when finished.
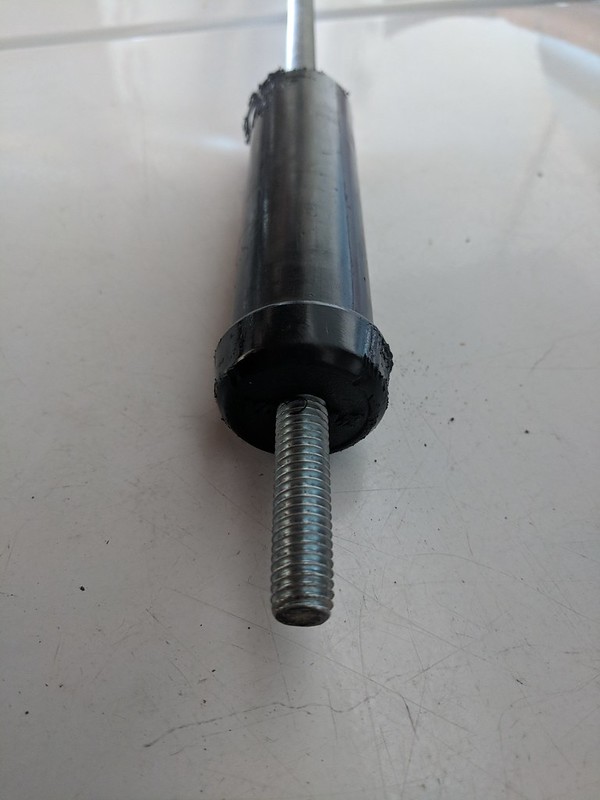
I did a total of 4 internal washers for each rod. Then I put 2 nuts on each outer end as these would be just enough for the cap to sit flush on the bars and just touch the nuts. I placed a washer and another nut on the outside of the caps to tighten everything in place.
Knowing that was the route I was going to go, I needed to find a way to mount it to the car. There are TONS of aftermarket parts for Jeeps, but nothing really Subaru specific. Yakima does make a roof basket attachment to mount the jack. My two problems with that was 1) it costs over $100 and 2) I would only have the jack when I have the basket mounted.
I bought the smallest size they offered (36") and it does fit in the trunk sideways just fine. But if I have the dogs back there, or its filled up with camping gear, I dont want to move stuff around to get to it nor have the dogs trip up on it.
So here goes my crazy idea on another DIY creation.
Friday after work I bought all the hardware and Saturday I put my plan into action. I personally think its great, and another awesome part is that it cost me under $18 lol.
I bought 2 6ft threaded rods (the most expensive parts of the whole project at around $5 each haha), a bunch of nuts, washers, and a couple rubber washer/gaskets.
My idea was to put the threaded rod through the yakima round bars, leaving close to an inch in a half extra hanging out of each end. The round bars I have are about 53 3/4 inch long. I cut the rods down to about 57" long each.
The washers I got had an inner diameter just large enough for the threaded rod to fit through and an outer diameter just small enough to fit perfectly inside the round yak bars.
Here is a small scale example of my idea:
The round bars were originally off a friends trunk and much too long for the Crosstrek, so I cut the ends off to get them to a length I liked. This was the leftover I just happened to keep for hording reasons lol.
I put the washers in so the rod would not be flopping around inside the yak bar. The nuts were used to just capture the washers in place.
I drilled a hole in the end caps of the yak bar just large enough for the rod to fit through. here is how it would look when finished.
I did a total of 4 internal washers for each rod. Then I put 2 nuts on each outer end as these would be just enough for the cap to sit flush on the bars and just touch the nuts. I placed a washer and another nut on the outside of the caps to tighten everything in place.
Thread Starter
Churro Aficionado
iTrader: (38)
Joined: Feb 2008
Posts: 54,661
From: IG - @thomas.teammoist
Car Info: IG - @TEAMMOISTOFFICIAL
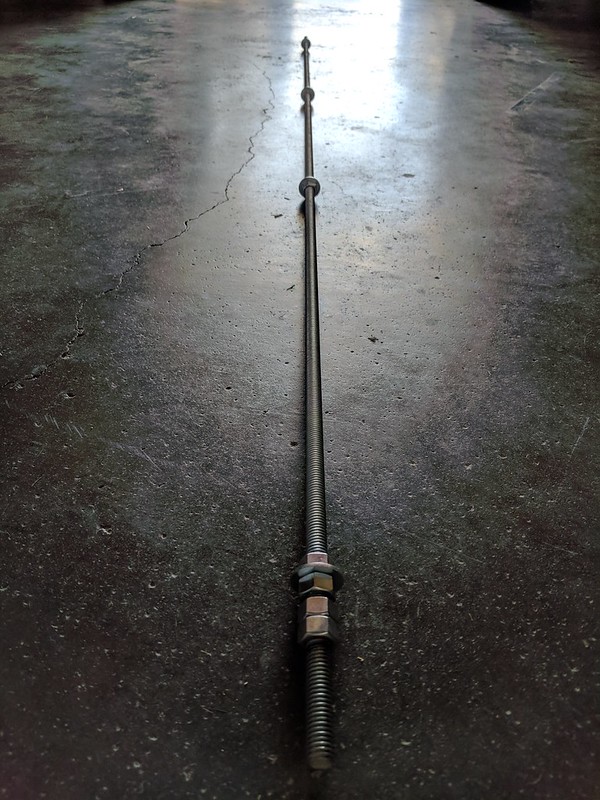
Here is the rear bar done. Washer and nut on both ends keeping the rod in place.
Got to be too hot outside, so I pulled the fiance's car out of the garage so I could work in the shade. Front and rear now done.
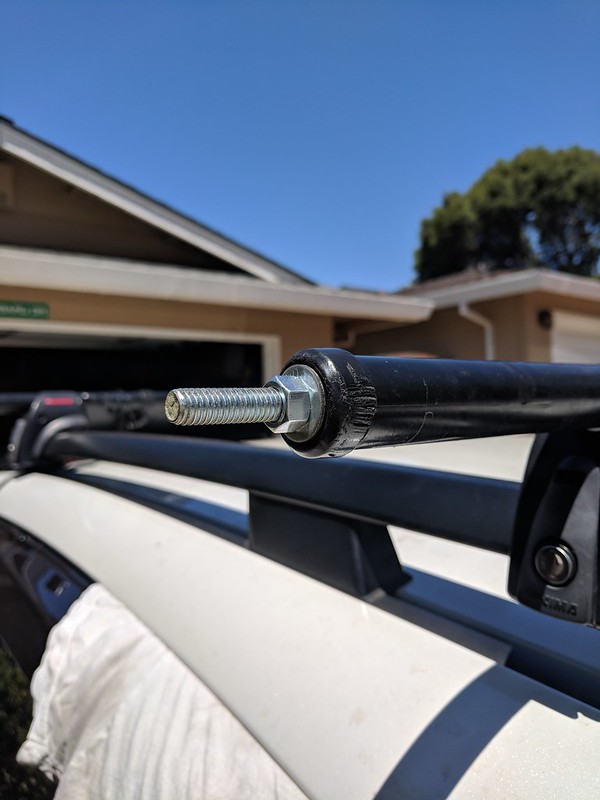
I bought 2 large outer diameter washers (right) that I cut two sides off and painted black. I did the same in cutting the sides of the rubber washer (left). Now they both will fit in the jack's "channel" to mount it.
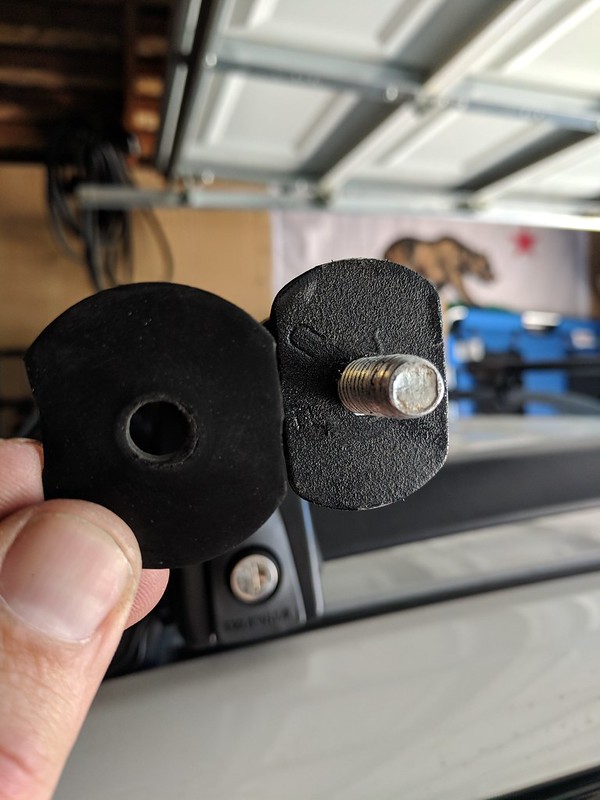
Jack - metal washer - rubber washer - nut
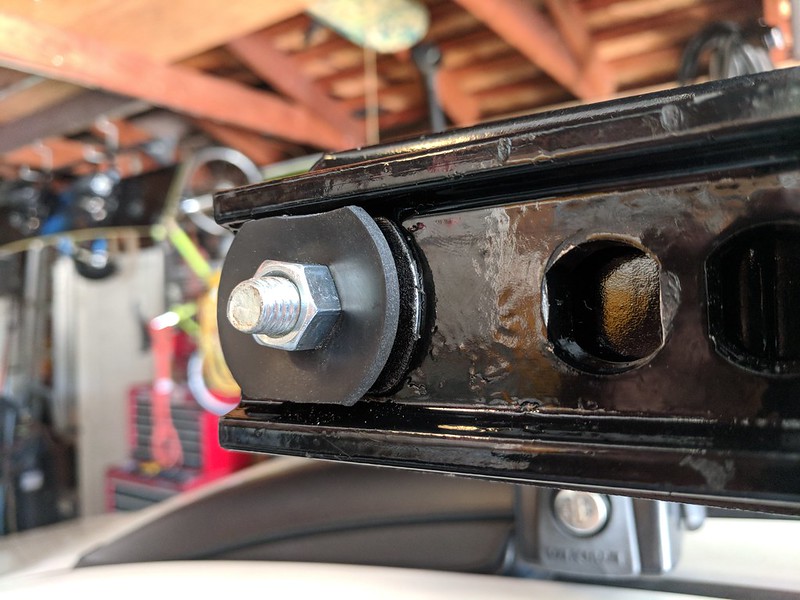
I ordered 4 security nuts that I will replace the standard nut with. Then I can leave the jack mounted and run inside a gas station or food without feeling like someone can run up with a 14mm socket and steal my jack.
I do not plan on leaving the jack there for daily driving, but I have the option to mount it and leave it whenever need be.
Once the security nuts come in, I also plan on putting a thin layer of black silicone behind the outside washer. Just to try and prevent more water/dirt/grim getting into the bars.
Got to be too hot outside, so I pulled the fiance's car out of the garage so I could work in the shade. Front and rear now done.
I bought 2 large outer diameter washers (right) that I cut two sides off and painted black. I did the same in cutting the sides of the rubber washer (left). Now they both will fit in the jack's "channel" to mount it.
Jack - metal washer - rubber washer - nut
I ordered 4 security nuts that I will replace the standard nut with. Then I can leave the jack mounted and run inside a gas station or food without feeling like someone can run up with a 14mm socket and steal my jack.
I do not plan on leaving the jack there for daily driving, but I have the option to mount it and leave it whenever need be.
Once the security nuts come in, I also plan on putting a thin layer of black silicone behind the outside washer. Just to try and prevent more water/dirt/grim getting into the bars.
Thread Starter
Churro Aficionado
iTrader: (38)
Joined: Feb 2008
Posts: 54,661
From: IG - @thomas.teammoist
Car Info: IG - @TEAMMOISTOFFICIAL
Some shots of it mounted.
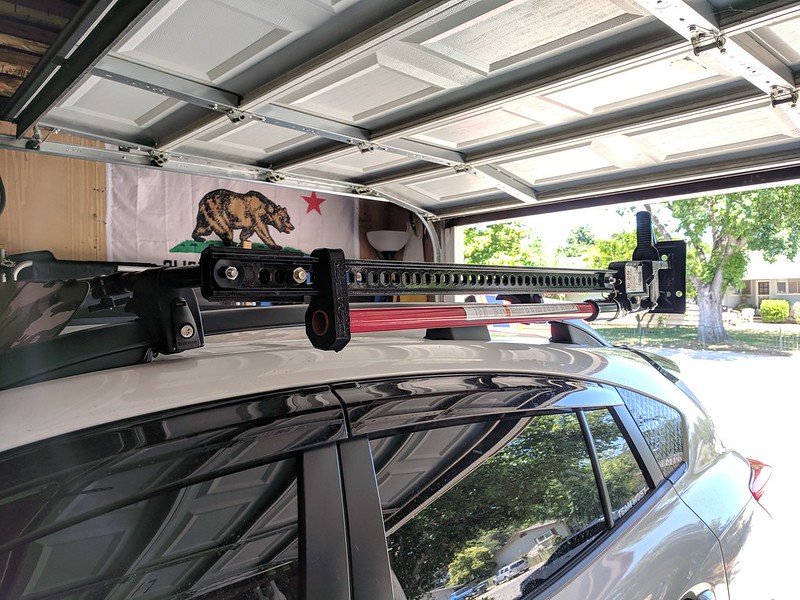
I also bought the rubber handle mount. This helps prevent the red handle from just falling (that would probably put a nice scratch down the side of the doors....). I also put it to the very end of the handle as a "just in case" I hit my head. The rubber/silicone will be much more forgiving than the end of a metal pipe lol.
I can open both front and rear door with no where near any interference from the jack. It sits high enough for me personally not to bang my head getting in/out of the car either.
This might not be ideal for some, but it works great for me (at least so far haha).
I even took it out on the freeway between 70-75 MPH to see if it might make some crazy noise at speed. Luckily nothing!
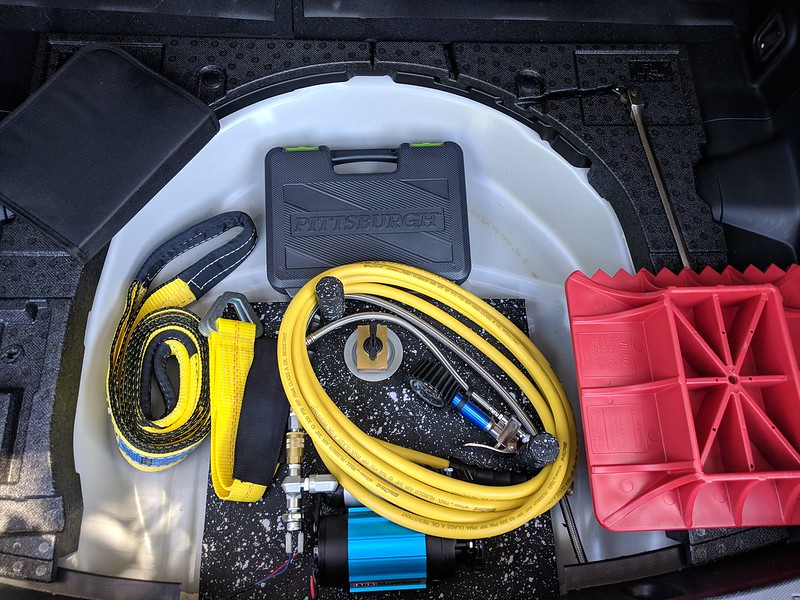
Then to finish everything off. I filled the rest of the trunk space with some gear. Picked up a basic socket set at Harbor Freight for cheap. So Ive got sockets, screwdrivers, and a couple wrenches in the back. A couple different tow straps and a base pad for the jack. You can use that for mud/sand to get a better jack point. I also modified the hard foam on the right hand side. I was able to fit a large breaker bar in there now hehe.
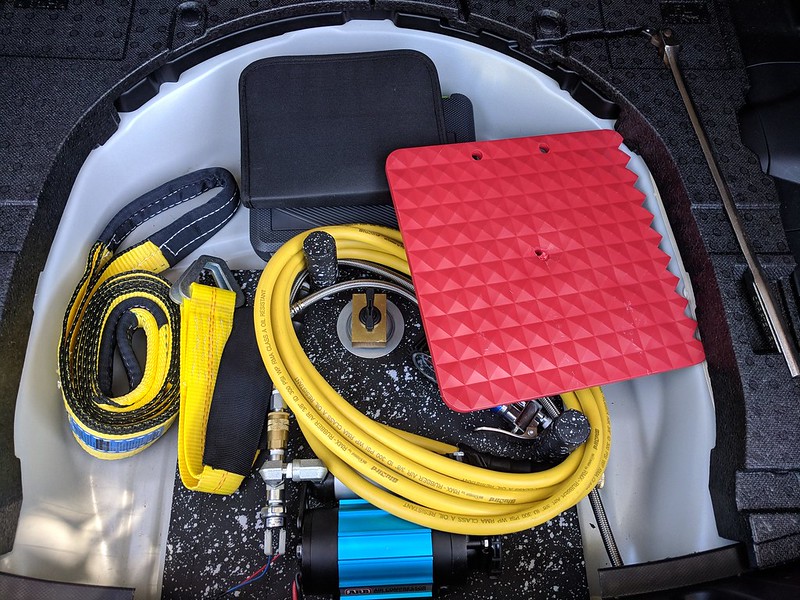
Everything tucked in it's place and sits flush below the carpet cover. Whenever I plan to take some long trails off road, Ill take this stuff out of the trunk and set it all into a cargo container so it has much quicker/easier access.
I also bought the rubber handle mount. This helps prevent the red handle from just falling (that would probably put a nice scratch down the side of the doors....). I also put it to the very end of the handle as a "just in case" I hit my head. The rubber/silicone will be much more forgiving than the end of a metal pipe lol.
I can open both front and rear door with no where near any interference from the jack. It sits high enough for me personally not to bang my head getting in/out of the car either.
This might not be ideal for some, but it works great for me (at least so far haha).
I even took it out on the freeway between 70-75 MPH to see if it might make some crazy noise at speed. Luckily nothing!
Then to finish everything off. I filled the rest of the trunk space with some gear. Picked up a basic socket set at Harbor Freight for cheap. So Ive got sockets, screwdrivers, and a couple wrenches in the back. A couple different tow straps and a base pad for the jack. You can use that for mud/sand to get a better jack point. I also modified the hard foam on the right hand side. I was able to fit a large breaker bar in there now hehe.
Everything tucked in it's place and sits flush below the carpet cover. Whenever I plan to take some long trails off road, Ill take this stuff out of the trunk and set it all into a cargo container so it has much quicker/easier access.


Thread Starter
Churro Aficionado
iTrader: (38)
Joined: Feb 2008
Posts: 54,661
From: IG - @thomas.teammoist
Car Info: IG - @TEAMMOISTOFFICIAL
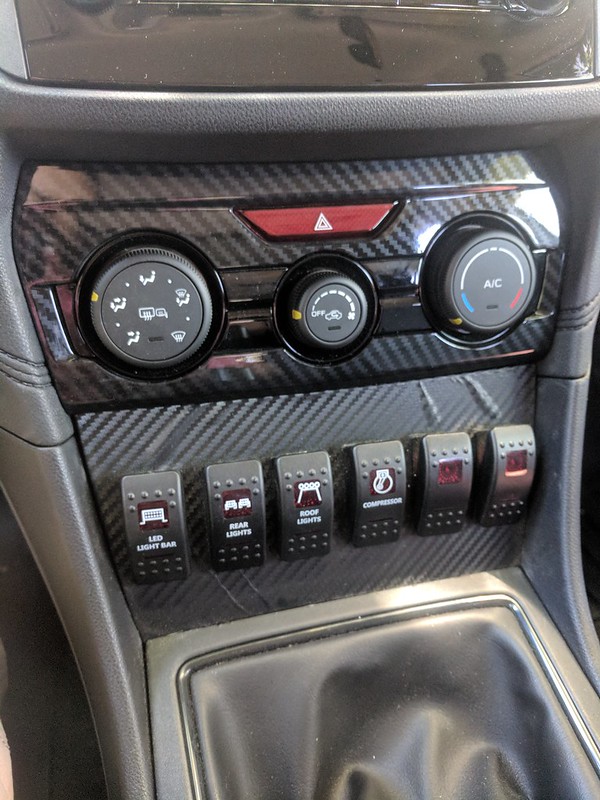
Since I got the glossy CF HVAC cover, the CF vinyl I originally used to wrap my switch panel has been bugging me more and more.
It was old old scrap I just had laying around. It was more of a satin/dry finish. And there were a couple bubbles and stretch marks that were just not ok..
And it was bugging a friend of mine because the weave patterns were not matching each other lolol.
So I ordered some glossy CF vinyl. Yesterday I removed everything and started over.
Here is how it looked prior to removal
gross.
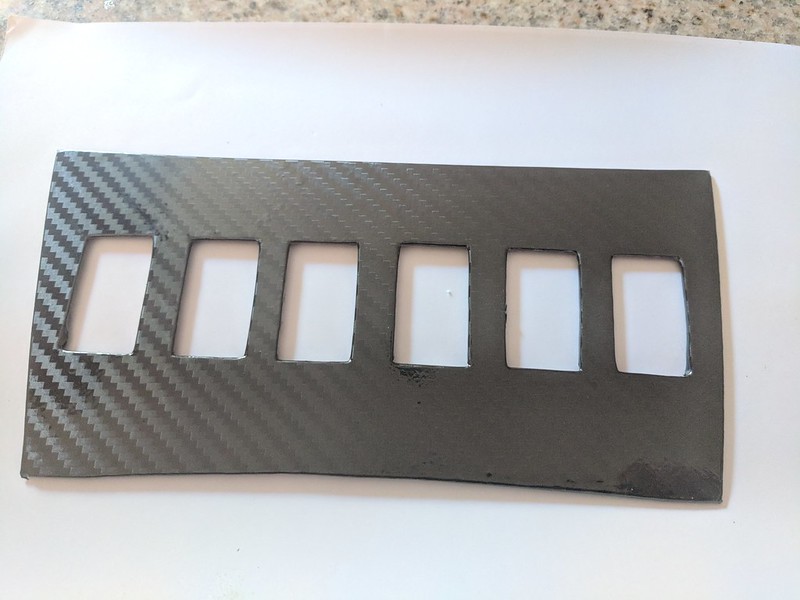
Switches removed, old vinyl off, new wrap.
Everything reinsalled, and made sure the weave is the same direction as the HVAC panel hehe
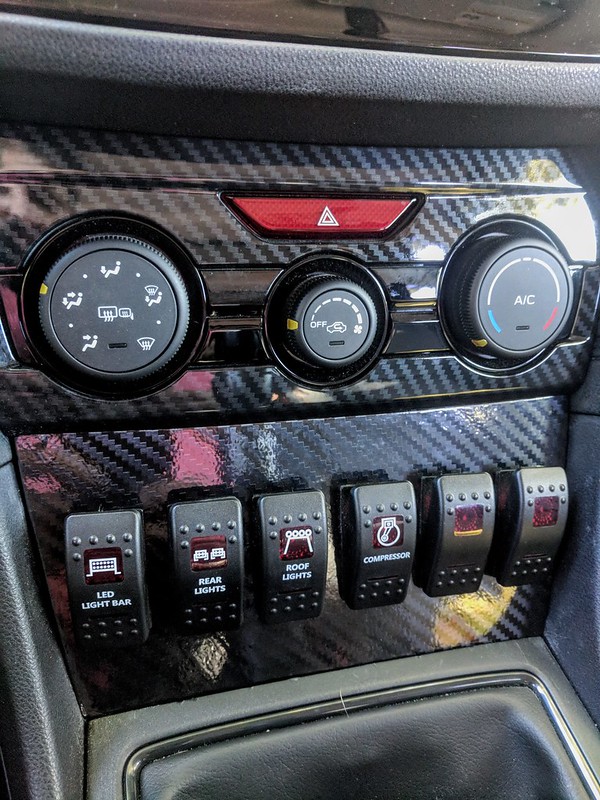
Also still rockin the BDR shift **** they made for me!
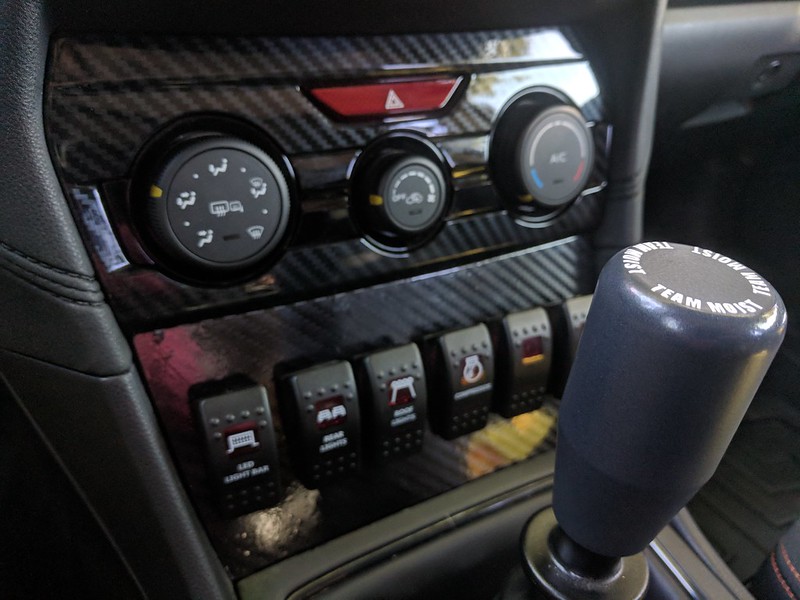
All and all, I think it looks much better and not having the bubbles/wrinkle will finally stop bugging me every time I look at it haha.
It was old old scrap I just had laying around. It was more of a satin/dry finish. And there were a couple bubbles and stretch marks that were just not ok..
And it was bugging a friend of mine because the weave patterns were not matching each other lolol.
So I ordered some glossy CF vinyl. Yesterday I removed everything and started over.
Here is how it looked prior to removal
gross.
Switches removed, old vinyl off, new wrap.
Everything reinsalled, and made sure the weave is the same direction as the HVAC panel hehe
Also still rockin the BDR shift **** they made for me!
All and all, I think it looks much better and not having the bubbles/wrinkle will finally stop bugging me every time I look at it haha.
Give Me All the Miatas
iTrader: (4)
Joined: Oct 2011
Posts: 3,481
From: Lincoln, CA
Car Info: 2001 Miata
Thread Starter
Churro Aficionado
iTrader: (38)
Joined: Feb 2008
Posts: 54,661
From: IG - @thomas.teammoist
Car Info: IG - @TEAMMOISTOFFICIAL
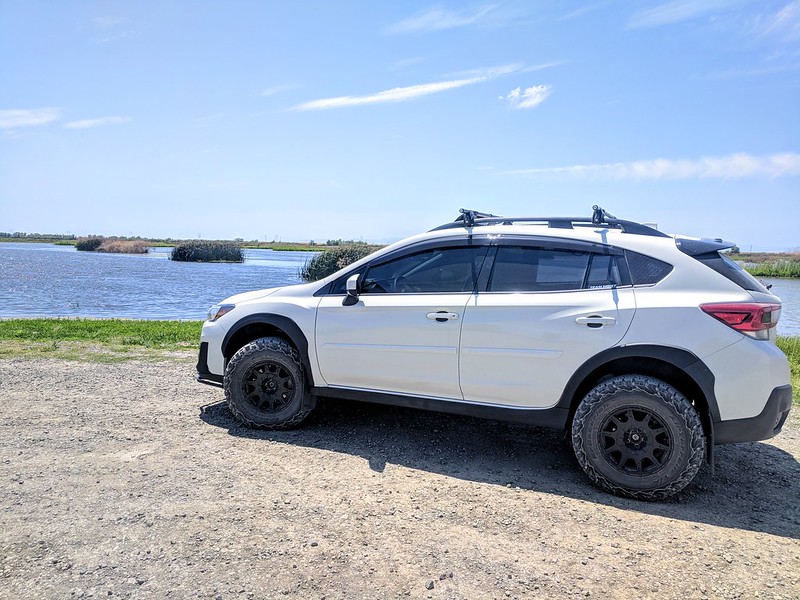
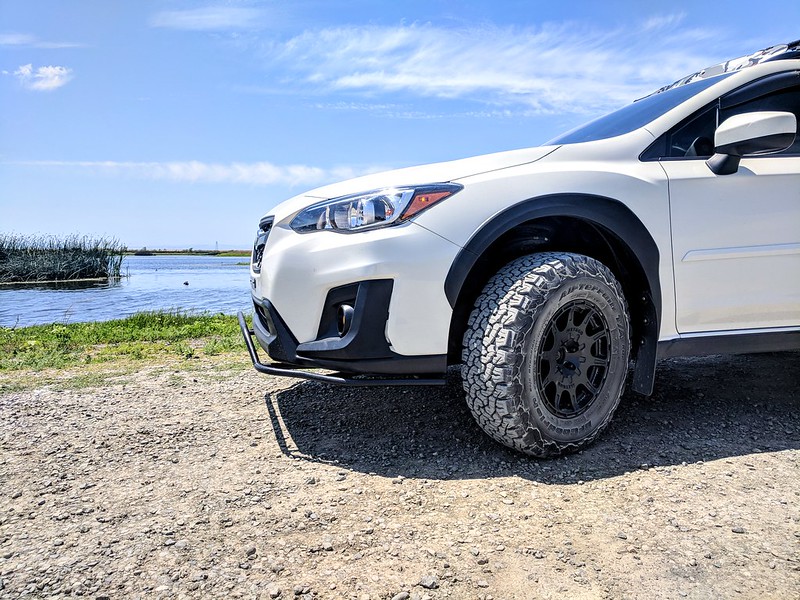
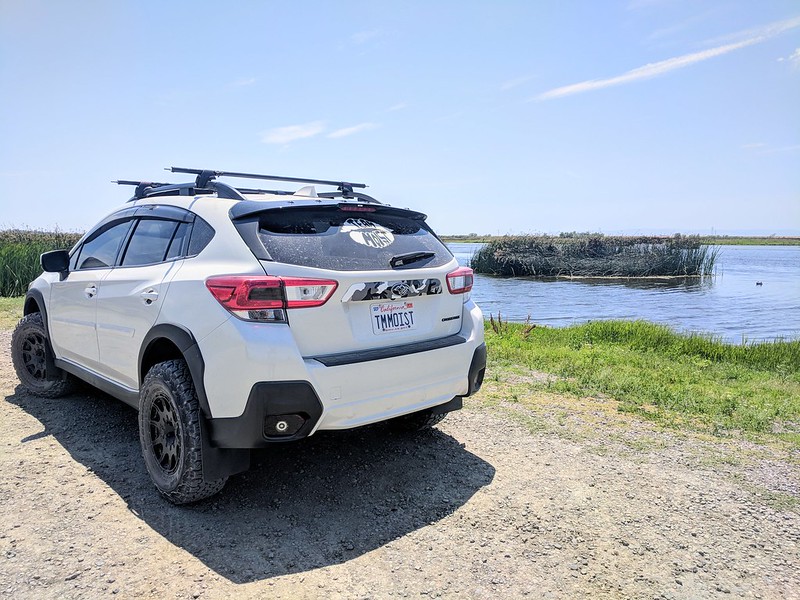
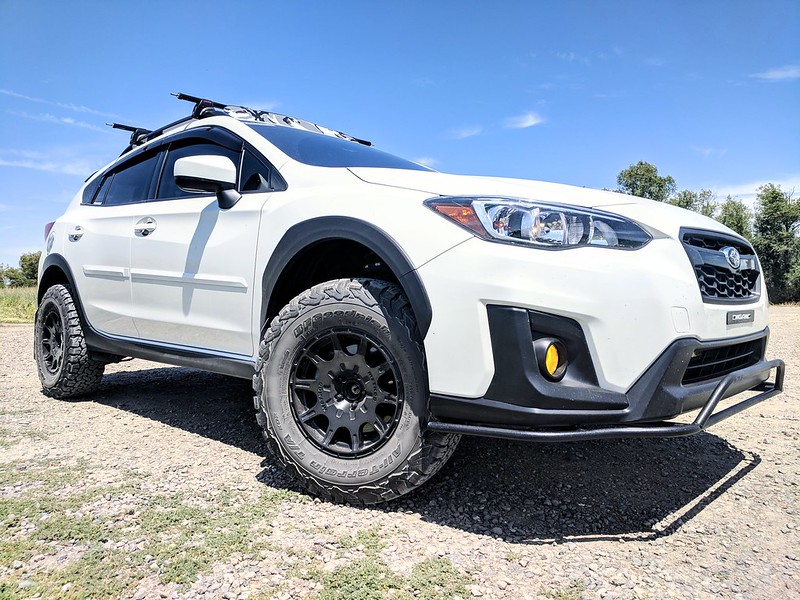
Decided to take a detour home yesterday from work. Made it off the beaten path aways. Had a perfect breeze, quiet, and no one else around lol.