
DIY: Paint '97-'01 Impreza headlights

Thread Starter
Registered User
iTrader: (10)
Joined: Jun 2005
Posts: 2,641
From: Daly City
Car Info: 2001 Impreza 2.2L
DIY: Paint '97-'01 Impreza headlights
First off, I don't know if the '97 lights follow these same steps since they're not "clear" or multi reflective. If not, ignore it.
DISCLAIMER: I am not responsible for anything that goes wrong. Remember to follow directions closely. Any damage done to your car is your fault!
The purpose of this tutorial is to paint the headlight insert to whichever color you want. The most common color is black, which is what I'm gonna do.
You will need the following items:
- 10mm socket ratchet or wrench
- Flat head screwdriver
- Phillips head screwdriver
- An oven
- Baking tray
- Oven mitts
- Silicone (if needed)
Step 1: Removing the grille.
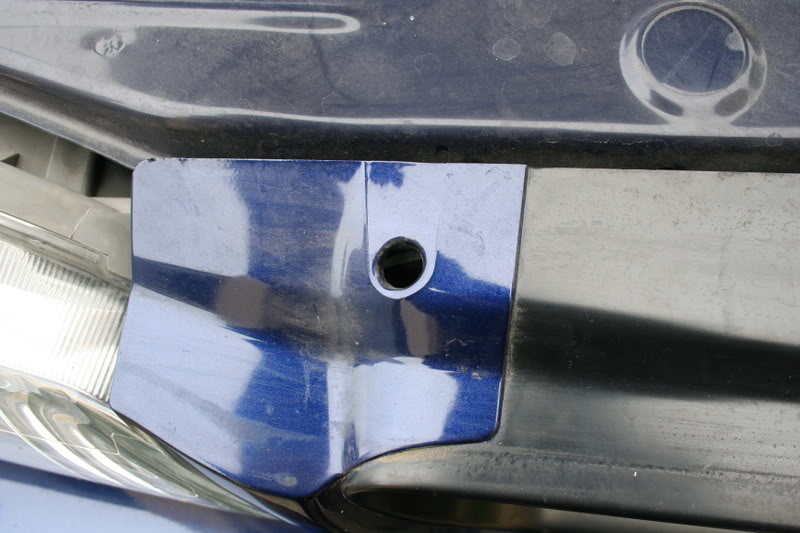
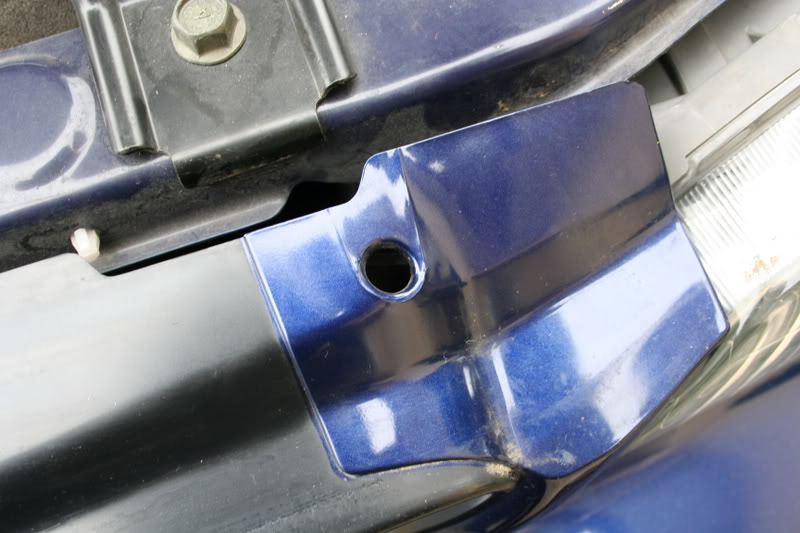
Open hood and remove the grille. This is very simple to do. There is one hole on each side of the grille and has a tab inside. You will need to stick a flathead into these holes. First, push then pull the grille out. Repeat for other side.
Left:
Right:
Step 2: Removing the headlights and corners.
Take the 10mm ratchet and take off the two nuts that are visible.
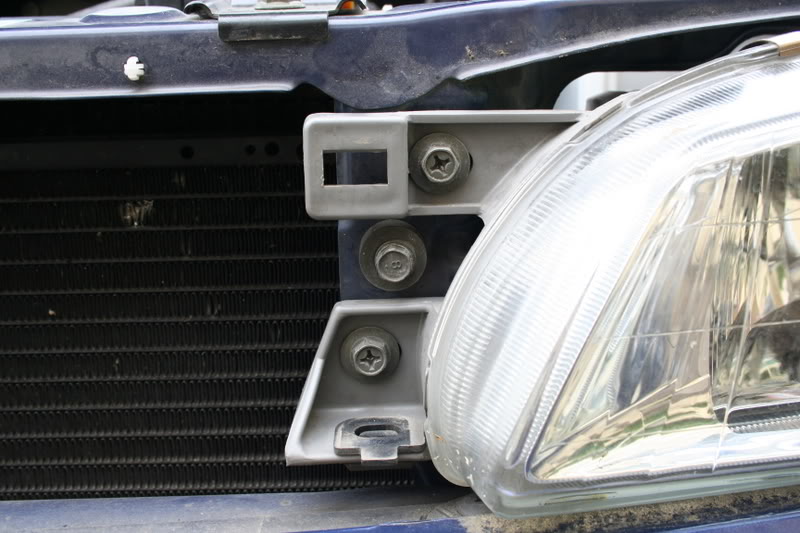
Then unscrew the screw with a phillips head screwdriver.
Pull out the corner, being careful not to break the tab on top. Take out the bulb /wire by twisting then pulling. After you pull out the corners, you will see 2 more 10mm nuts. Take these off with the ratchet. Take out the wiring for the headlights by pressing both sides of the rubber wiring assembly and pulling out.
Repeat for other side.
Step 3: Taking apart the headlights.
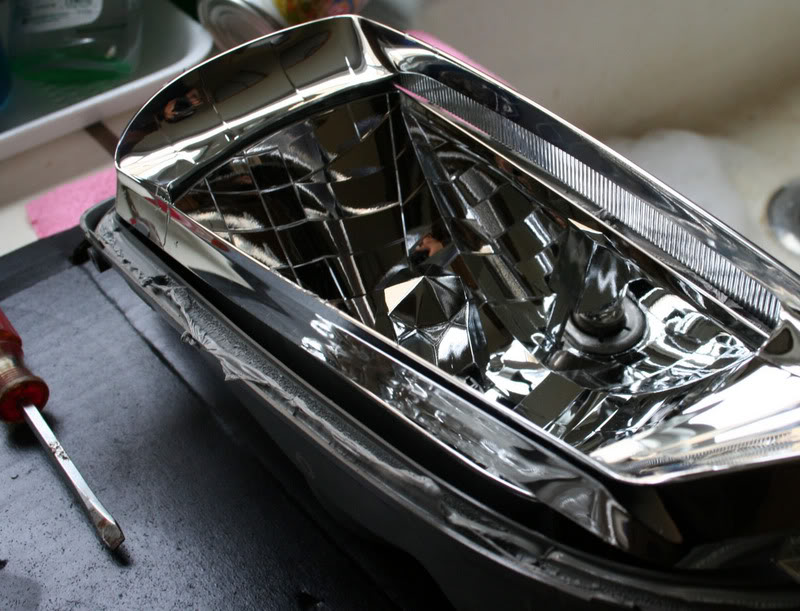
Preheat oven to 220-230 degrees Fahrenheit. Take a headlight and take off the (4) metal clips that secure the glass from the housing with a flathead. You're not done yet! Take the baking pan and put a baking/cookie sheet on top of it (you can use aluminum foil too). When the oven is done preheating, put the headlight into the pan, and put the whole thing into the oven. Wait 10-15 minutes. After that, take it out (BE CAREFUL!) with some oven mitts on. Carefully pry the glass away from the housing using a flathead. If it doesn't pull out right away, pop it back in the oven for about 5 minutes. The glass should pull away from the housing with ease. This is much easier with another person!
Once the glass has been pulled away, you should be left with this:
Let it cool for 5-10 minutes before you work on it. Remember, it is HOT.
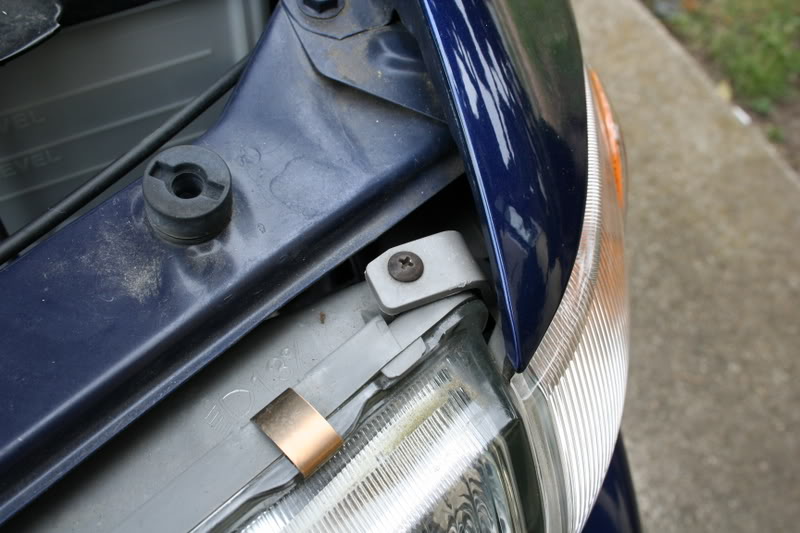
After it has been cooled, it is time to take out the "insert". This is the part you will be painting. To do this, you must remove a small phillips head screw pointed out here:
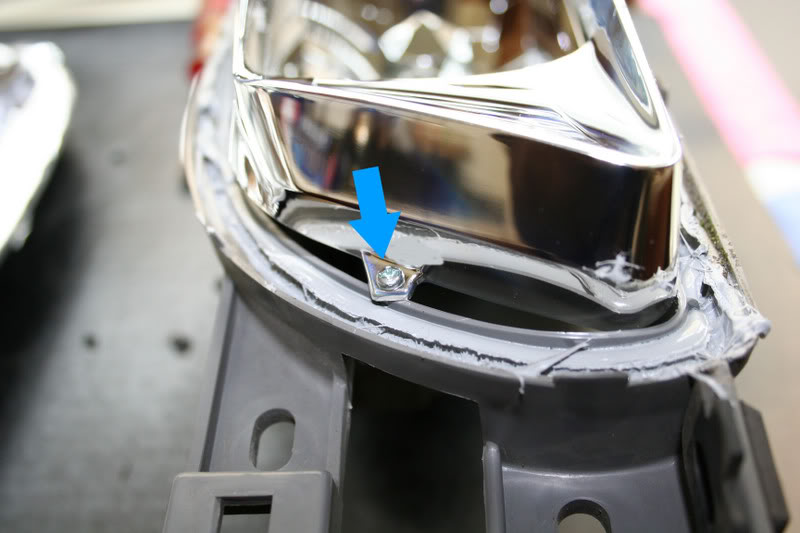
There are two parts in the back where it holds to the housing itself. Don't worry, just pull it right out. Remember these two parts when re-assembling.
You are ready to paint.
Step 4: Painting.
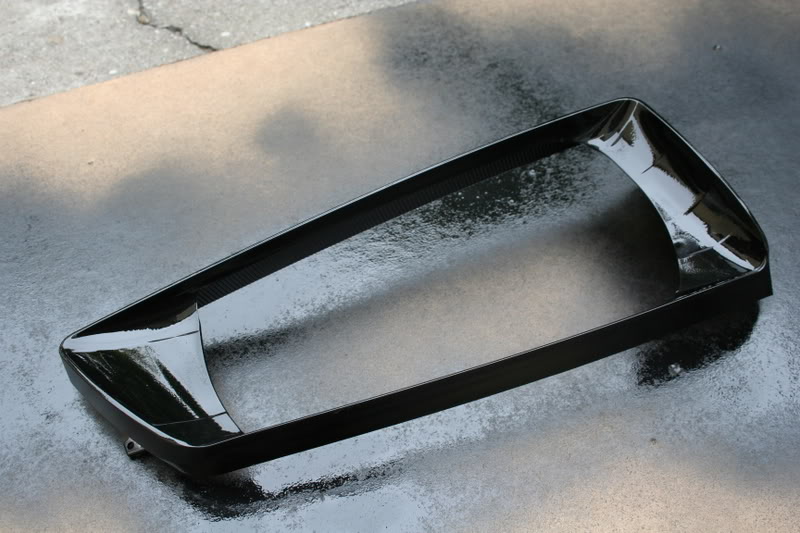
Before you can paint, remember to sand down the surface using some sandpaper so the paint can stick better. Wash off all the dust, and let the insert dry.
Paint the insert with even layers of paint. You do not want too much on a certain layer or else you will see flooding.
Let the paint dry.
Step 5: Re-assembly.
After the insert has dried, put it back into the housing, remembering to attach those two parts in the housing first, then screwing the little phillips head screw back on.
This part is optional if you feel that you have enough silicone on the housing already.
You can apply more silicone if you feel that there isn't enough for a complete seal. Remember to even out the silicone. It will be easier later on.
Put the glass back on the housing, making sure the tabs line up. Push the assembly together as hard as possible, making sure it is even all around.
Put it back in the oven for about 5-10 minutes. Take it out carefully, then push down again, making sure it is sealed all the way around. Let the assembly cool before doing anything else. When cool, put the 4 metal tabs back on.
Repeat for other side.
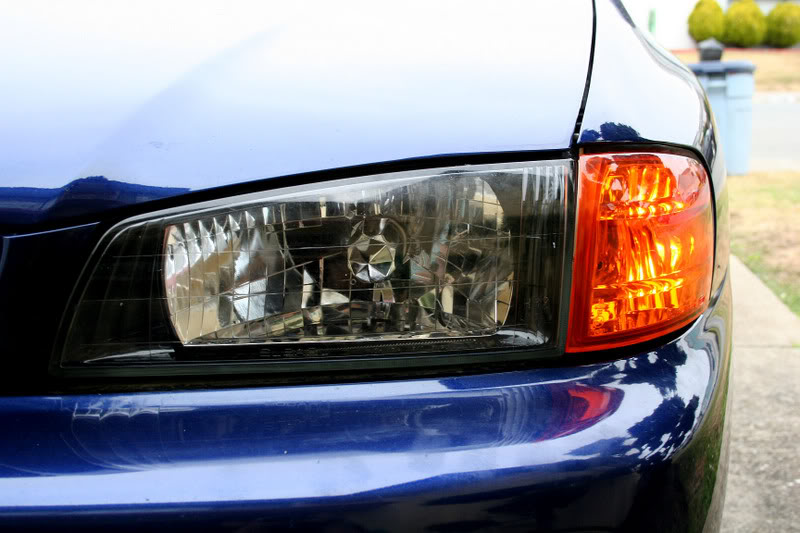
Final results:

DISCLAIMER: I am not responsible for anything that goes wrong. Remember to follow directions closely. Any damage done to your car is your fault!
The purpose of this tutorial is to paint the headlight insert to whichever color you want. The most common color is black, which is what I'm gonna do.
You will need the following items:
- 10mm socket ratchet or wrench
- Flat head screwdriver
- Phillips head screwdriver
- An oven
- Baking tray
- Oven mitts
- Silicone (if needed)
Step 1: Removing the grille.
Open hood and remove the grille. This is very simple to do. There is one hole on each side of the grille and has a tab inside. You will need to stick a flathead into these holes. First, push then pull the grille out. Repeat for other side.
Left:
Right:
Step 2: Removing the headlights and corners.
Take the 10mm ratchet and take off the two nuts that are visible.
Then unscrew the screw with a phillips head screwdriver.
Pull out the corner, being careful not to break the tab on top. Take out the bulb /wire by twisting then pulling. After you pull out the corners, you will see 2 more 10mm nuts. Take these off with the ratchet. Take out the wiring for the headlights by pressing both sides of the rubber wiring assembly and pulling out.
Repeat for other side.
Step 3: Taking apart the headlights.
Preheat oven to 220-230 degrees Fahrenheit. Take a headlight and take off the (4) metal clips that secure the glass from the housing with a flathead. You're not done yet! Take the baking pan and put a baking/cookie sheet on top of it (you can use aluminum foil too). When the oven is done preheating, put the headlight into the pan, and put the whole thing into the oven. Wait 10-15 minutes. After that, take it out (BE CAREFUL!) with some oven mitts on. Carefully pry the glass away from the housing using a flathead. If it doesn't pull out right away, pop it back in the oven for about 5 minutes. The glass should pull away from the housing with ease. This is much easier with another person!
Once the glass has been pulled away, you should be left with this:
Let it cool for 5-10 minutes before you work on it. Remember, it is HOT.
After it has been cooled, it is time to take out the "insert". This is the part you will be painting. To do this, you must remove a small phillips head screw pointed out here:
There are two parts in the back where it holds to the housing itself. Don't worry, just pull it right out. Remember these two parts when re-assembling.
You are ready to paint.
Step 4: Painting.
Before you can paint, remember to sand down the surface using some sandpaper so the paint can stick better. Wash off all the dust, and let the insert dry.
Paint the insert with even layers of paint. You do not want too much on a certain layer or else you will see flooding.
Let the paint dry.
Step 5: Re-assembly.
After the insert has dried, put it back into the housing, remembering to attach those two parts in the housing first, then screwing the little phillips head screw back on.
This part is optional if you feel that you have enough silicone on the housing already.
You can apply more silicone if you feel that there isn't enough for a complete seal. Remember to even out the silicone. It will be easier later on.
Put the glass back on the housing, making sure the tabs line up. Push the assembly together as hard as possible, making sure it is even all around.
Put it back in the oven for about 5-10 minutes. Take it out carefully, then push down again, making sure it is sealed all the way around. Let the assembly cool before doing anything else. When cool, put the 4 metal tabs back on.
Repeat for other side.
Final results:


Thread
Thread Starter
Forum
Replies
Last Post
wrxracing
Subaru OEM Parts For Sale
0
Aug 2, 2009 06:32 PM
wrxracing
Subaru OEM Parts For Sale
1
Jul 29, 2009 06:56 PM
tekgnosis
Engine/Power - EJ20T (pre-2006 WRX and JDM)
14
Sep 7, 2006 05:21 AM
253'Sang
Interior, Exterior & Lighting
2
Mar 30, 2004 07:42 PM