
Harry Maneuvers 1999 Legacy frankenmotor build!!!


Thread Starter
Registered User
iTrader: (2)
Joined: Jul 2011
Posts: 491
From: Sacramento
Car Info: 04 WRX Wagon, 06 Forester XT, 99 Legacy Sedan
Harry Maneuvers 1999 Legacy frankenmotor build!!!
Hey I-club!!!
So I am far enough into this project that I figured I would start a build thread over here.
Background:
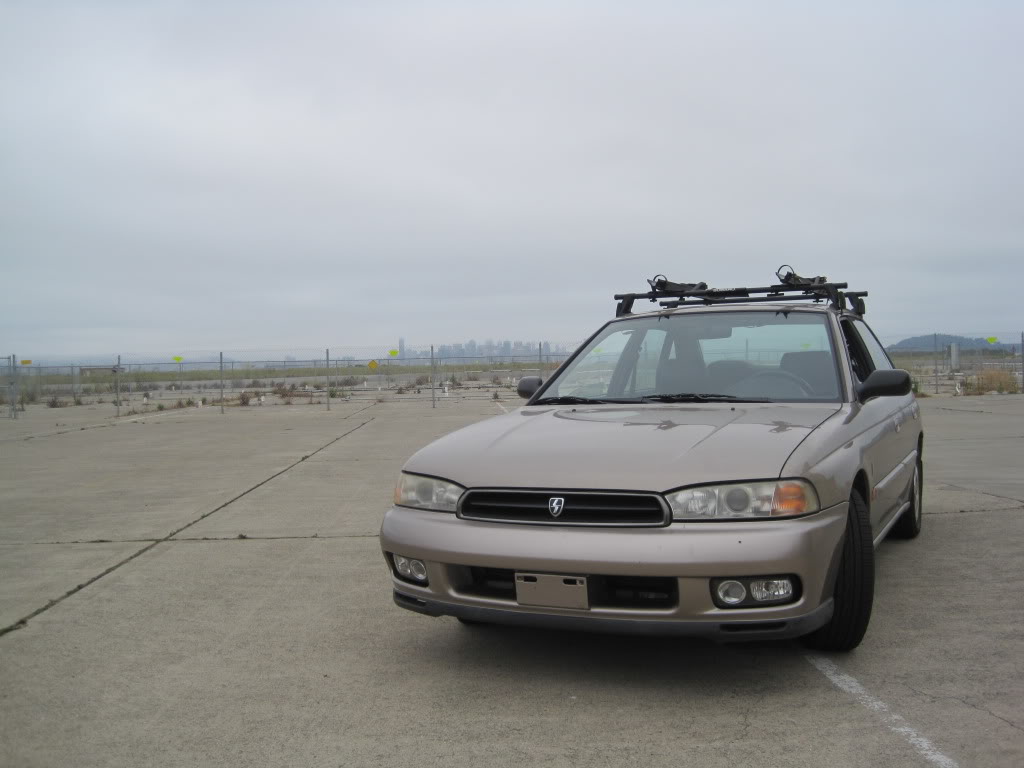
Bought my 1999 legacy (first subaru) in 2007 with 141k miles on it for $3700. It is the 30th Anniversary 2.2L Sedan. It served me well and eventually led me to convince my fiance to ditch her Chevy Aveo hatch in favor for a 2004 WRX wagon which I quickly started mildly modifying.
Legacy Sedan at BAM 2 years ago:
WRX wagon after widebody front end:

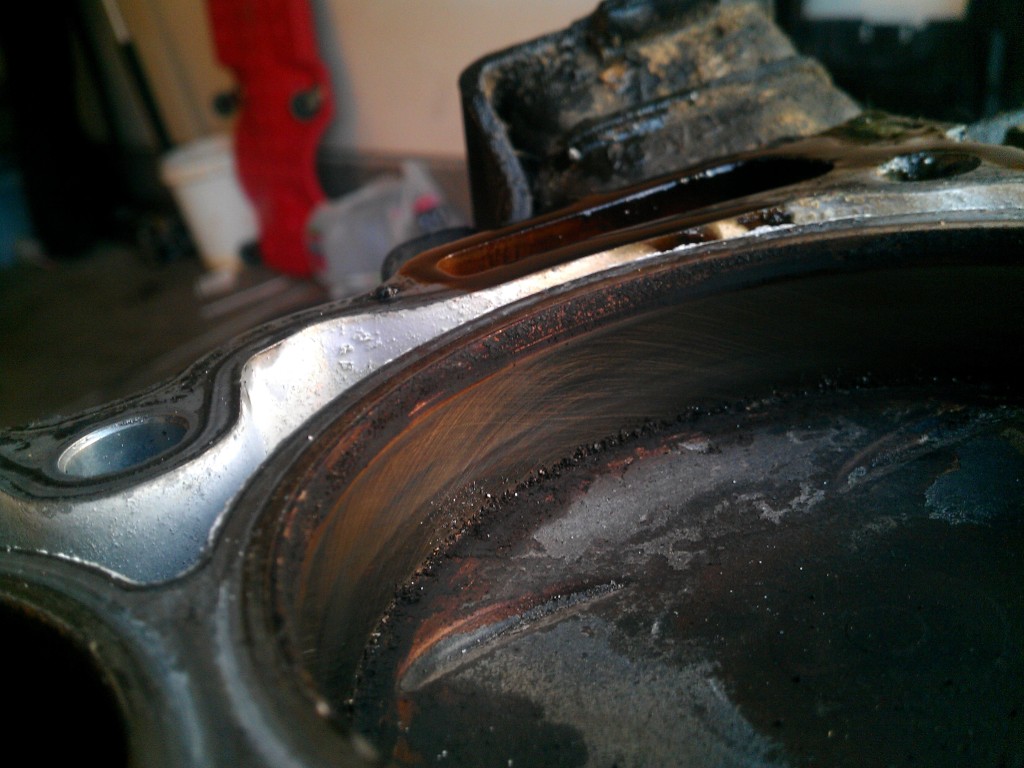
That was here DD and the legacy was mine. At 242K miles the legacy finally spun a bearing on the way to Portland for my birthday... leaving us stranded in Yreka of all places.
Luckily pops was able to meet me in Yreka on our way back down from Portland so we could return our rental car, load up the legacy on his flatbed trailer and all ride back down to Roseville together.
Spun bearing:
We got back to Sacramento and end up buying my Fiance a 2006 FXT limited for her new DD making the WRX my DD.
I decided I wasnt ready to let go of the legacy quite yet so I decided to embark on my first ever build.
Plans:
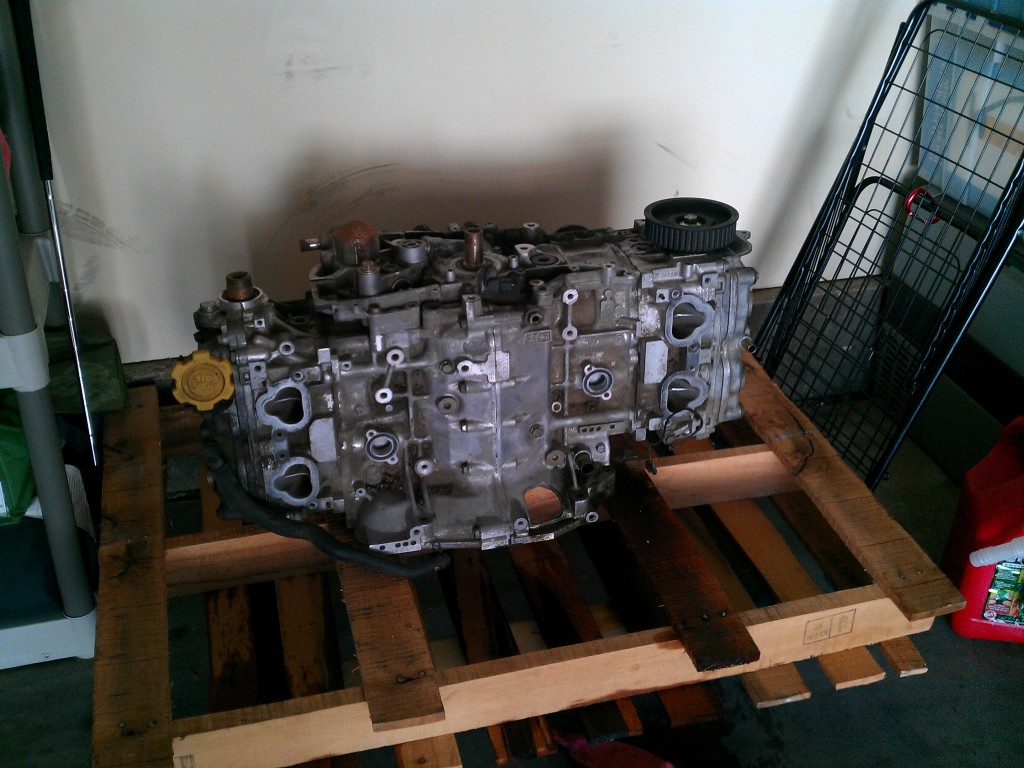
EJ251 Bottom end with new ACL race bearings, NPR rings, 10mm oil pump, 06+ Impreza oil pan, baffle, pickup ect. Bought a used 2002 Forester long block with blown headgaskets for $150 off craigslist.
Top end will keep my Phase 2 EJ22 heads with the exception of Delta 1000 (torque grind) cams thus making a nice high compression NA motor. Valve job, phelonic spacers ect.
Ditch the 4eat in favor of a 5sp. I just recently purchased a 5MT from a 2010 Impreza complete with rear diff and clutch for the awesome price of $600.
http://www.ebay.com/itm/08-12-Subaru...12f6f1&vxp=mtr
And onto the pictures!!!
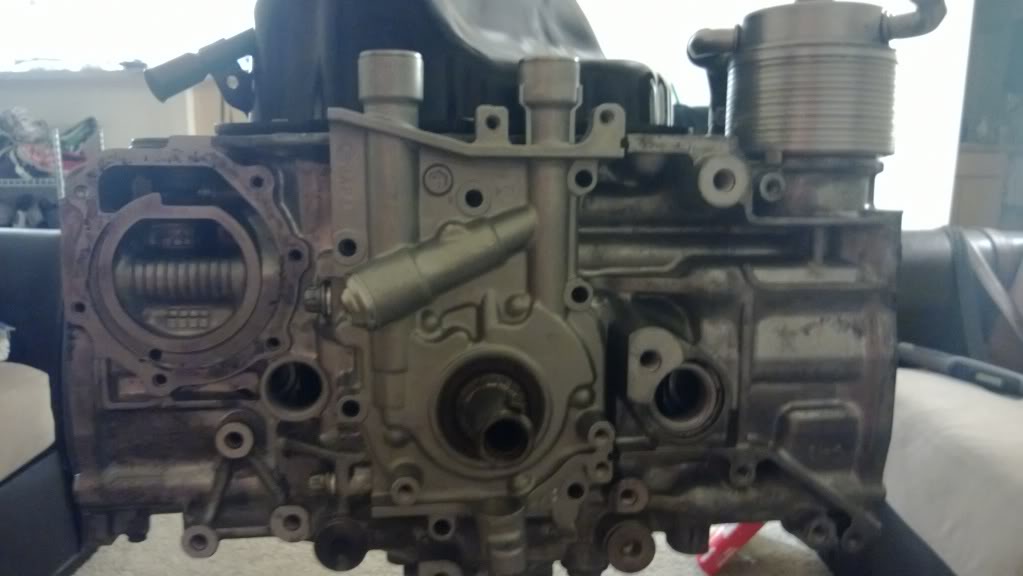
Donor long block (115k miles) from 02 Forester the day I got it home:
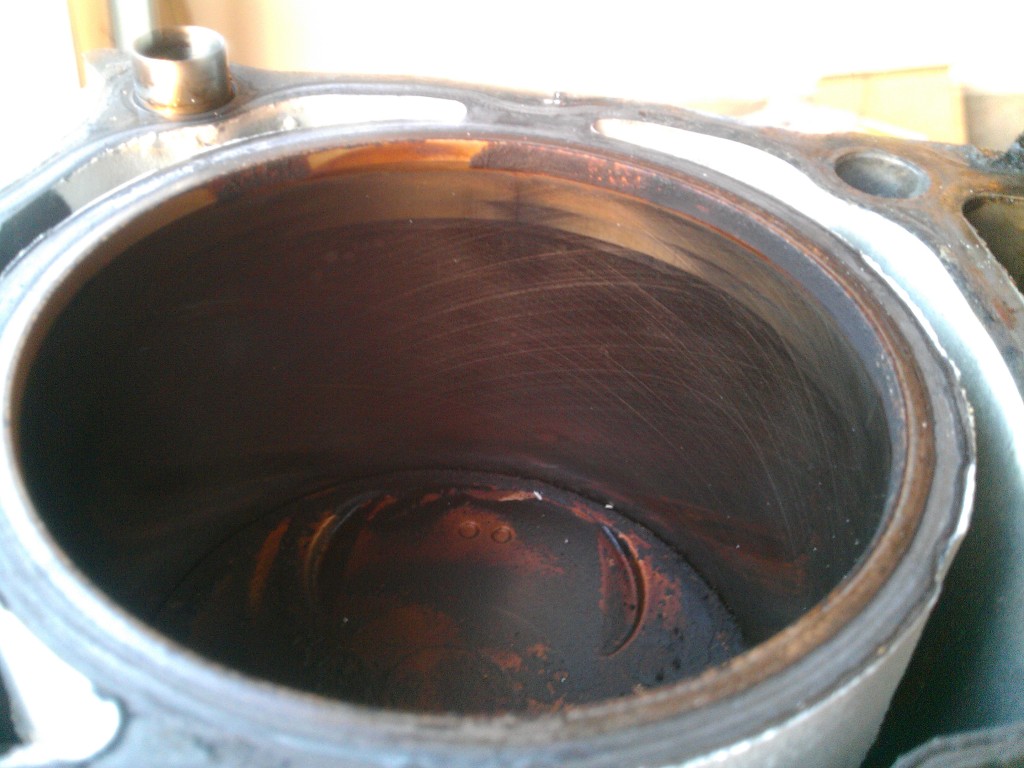
Inside of donor block:
Pulling old EJ22 with spun bearing:
IMAG0254-1.jpg?t=1348930485


Head off EJ22 and cams out and off to delta:
IMAG0288.jpg?t=1349972945
I sold the old EJ22 short block to a fellow I-clubber from the bay who has made several V8 coffee tables who wanted to try to make an EJ coffee table. Basically sold it to him for the cost of the HF engine stand that I wanted him to take with the motor.
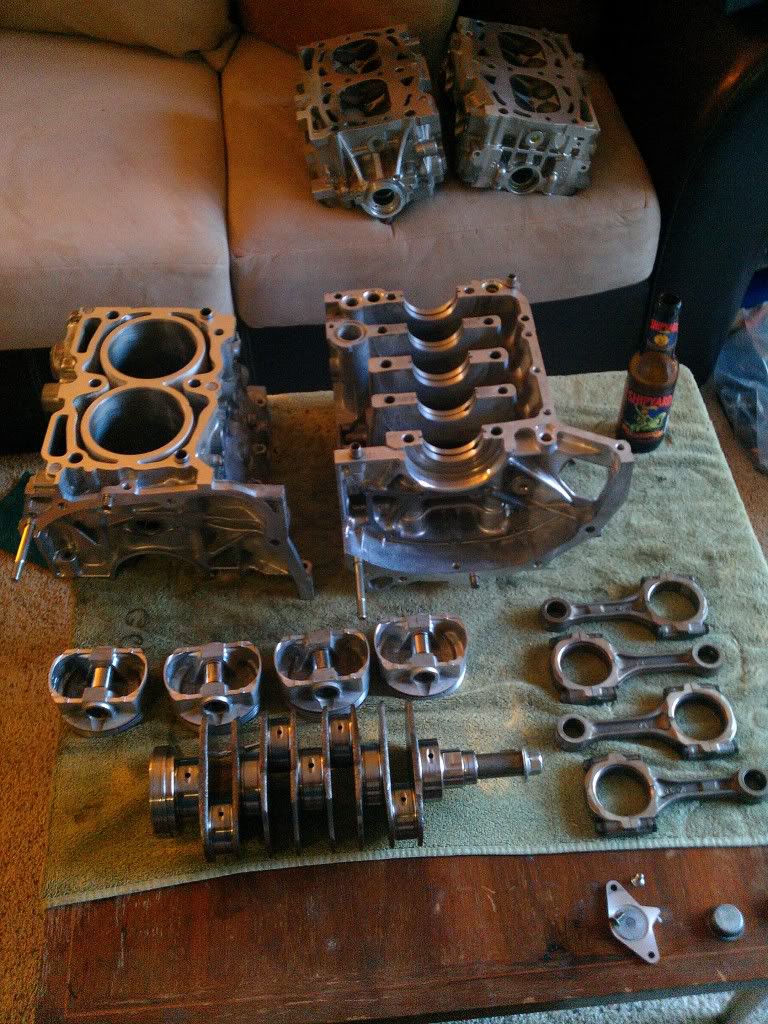
EJ251 Split with internals removed:
IMAG0297.jpg?t=1350175970
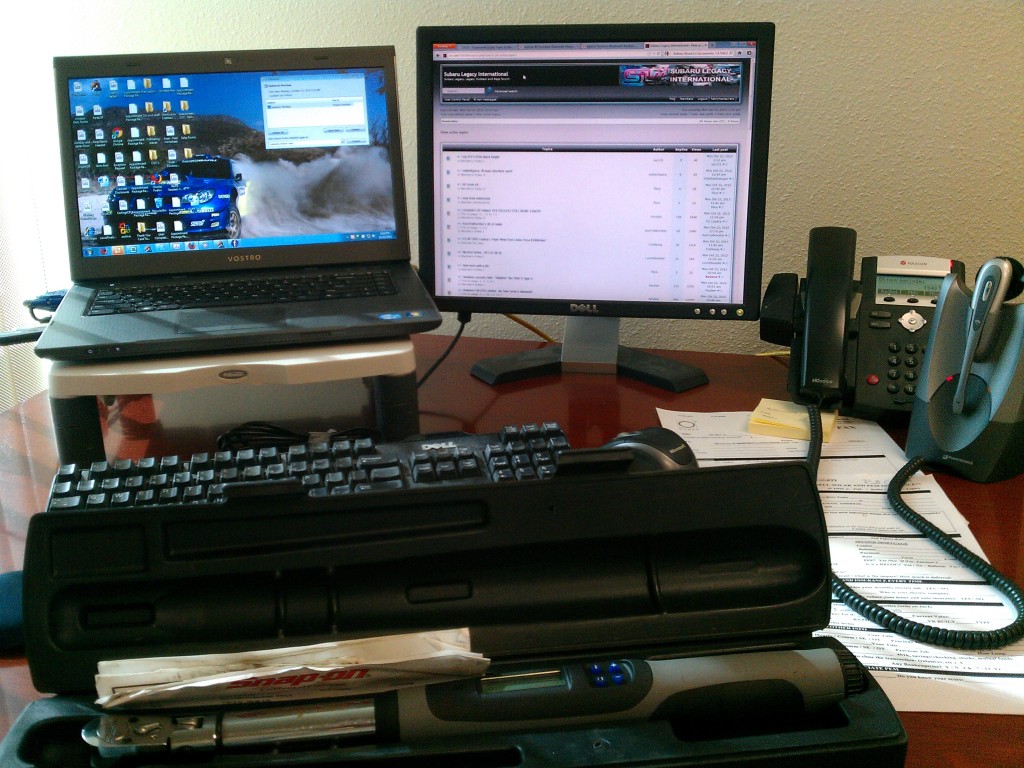
Snap-on Techangle wrench for assembly
My Living room currently. Block honed, mating surface decked and cleaned, heads decked and cleaned (yes I know I should have waited for the valve job), everything else cleaned and ready for assembly:
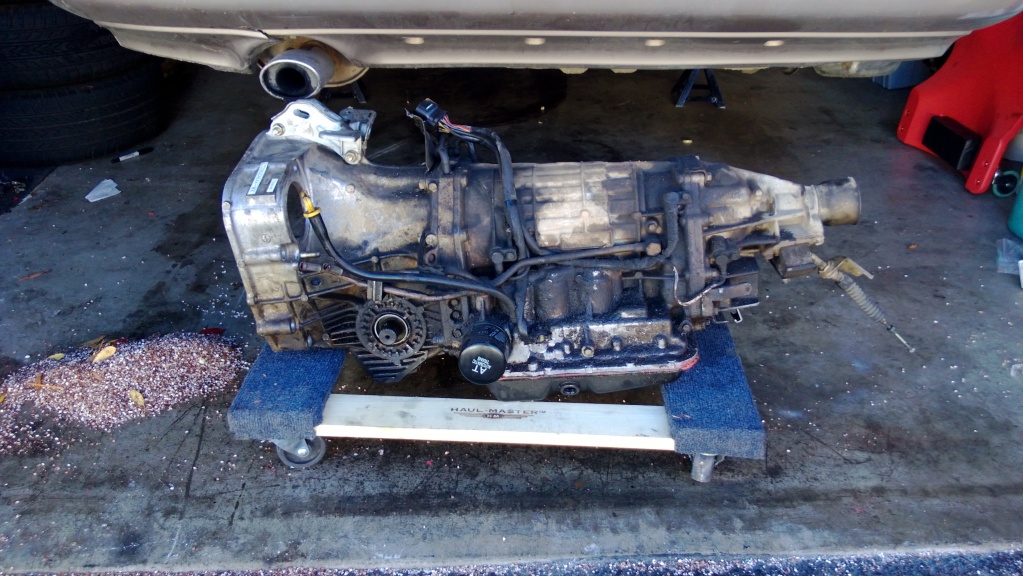
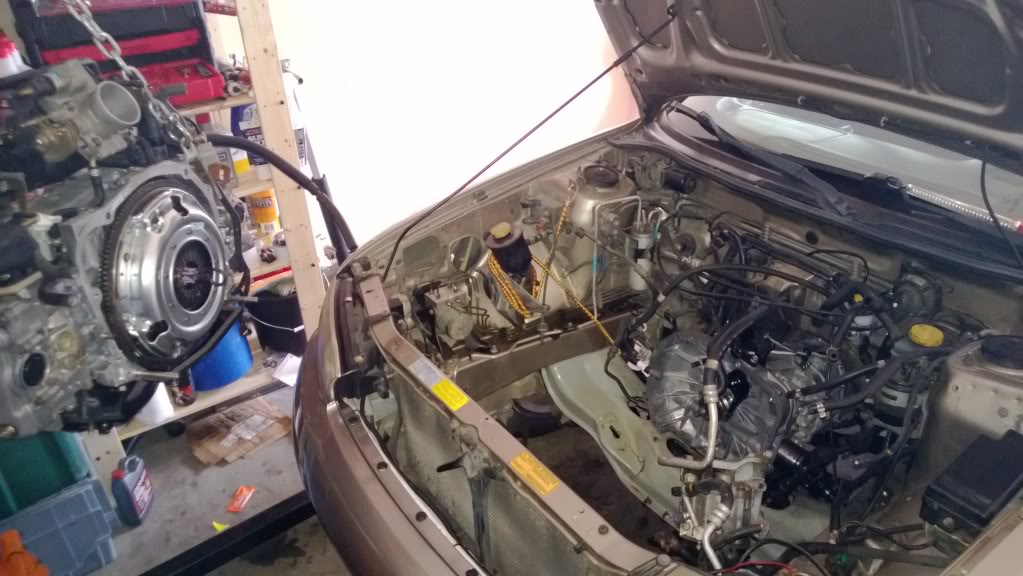
Removing the old 4EAT:

So the way it stands now:
I am just waiting for cams to get back from delta next week to get the valve job done. I am picking the transmission, rear diff, clutch and flywheel up in Eugene on my way back down from Portland after Christmas.
I should be able to assemble the short block in the next couple weeks. Then the full block as soon as the valve job is done.
Here is a link to my google docs spreadsheet with all parts that I have needed/will need, their part numbers and the costs of which parts I have purchased so far.
https://docs.google.com/spreadsheet/...jUFZ0RUE#gid=0
Any questions or comments please feel free to ask or post.
This is a condensed version of the full build thread that is over at SL-i.net
Subaru Legacy International • View topic - Harry Maneuver's 99 Sedan-2010 5spd with 16k miles bought!!
Thanks for reading!!!
So I am far enough into this project that I figured I would start a build thread over here.
Background:
Bought my 1999 legacy (first subaru) in 2007 with 141k miles on it for $3700. It is the 30th Anniversary 2.2L Sedan. It served me well and eventually led me to convince my fiance to ditch her Chevy Aveo hatch in favor for a 2004 WRX wagon which I quickly started mildly modifying.
Legacy Sedan at BAM 2 years ago:
WRX wagon after widebody front end:
That was here DD and the legacy was mine. At 242K miles the legacy finally spun a bearing on the way to Portland for my birthday... leaving us stranded in Yreka of all places.
Luckily pops was able to meet me in Yreka on our way back down from Portland so we could return our rental car, load up the legacy on his flatbed trailer and all ride back down to Roseville together.
Spun bearing:
We got back to Sacramento and end up buying my Fiance a 2006 FXT limited for her new DD making the WRX my DD.
I decided I wasnt ready to let go of the legacy quite yet so I decided to embark on my first ever build.
Plans:
EJ251 Bottom end with new ACL race bearings, NPR rings, 10mm oil pump, 06+ Impreza oil pan, baffle, pickup ect. Bought a used 2002 Forester long block with blown headgaskets for $150 off craigslist.
Top end will keep my Phase 2 EJ22 heads with the exception of Delta 1000 (torque grind) cams thus making a nice high compression NA motor. Valve job, phelonic spacers ect.
Ditch the 4eat in favor of a 5sp. I just recently purchased a 5MT from a 2010 Impreza complete with rear diff and clutch for the awesome price of $600.
http://www.ebay.com/itm/08-12-Subaru...12f6f1&vxp=mtr
And onto the pictures!!!
Donor long block (115k miles) from 02 Forester the day I got it home:
Inside of donor block:
Pulling old EJ22 with spun bearing:
IMAG0254-1.jpg?t=1348930485
Head off EJ22 and cams out and off to delta:
IMAG0288.jpg?t=1349972945
I sold the old EJ22 short block to a fellow I-clubber from the bay who has made several V8 coffee tables who wanted to try to make an EJ coffee table. Basically sold it to him for the cost of the HF engine stand that I wanted him to take with the motor.
EJ251 Split with internals removed:
IMAG0297.jpg?t=1350175970
Snap-on Techangle wrench for assembly
My Living room currently. Block honed, mating surface decked and cleaned, heads decked and cleaned (yes I know I should have waited for the valve job), everything else cleaned and ready for assembly:
Removing the old 4EAT:
So the way it stands now:
I am just waiting for cams to get back from delta next week to get the valve job done. I am picking the transmission, rear diff, clutch and flywheel up in Eugene on my way back down from Portland after Christmas.
I should be able to assemble the short block in the next couple weeks. Then the full block as soon as the valve job is done.
Here is a link to my google docs spreadsheet with all parts that I have needed/will need, their part numbers and the costs of which parts I have purchased so far.
https://docs.google.com/spreadsheet/...jUFZ0RUE#gid=0
Any questions or comments please feel free to ask or post.
This is a condensed version of the full build thread that is over at SL-i.net
Subaru Legacy International • View topic - Harry Maneuver's 99 Sedan-2010 5spd with 16k miles bought!!
Thanks for reading!!!
Last edited by Harry Maneuvers; Dec 3, 2012 at 01:20 PM.
Thread Starter
Registered User
iTrader: (2)
Joined: Jul 2011
Posts: 491
From: Sacramento
Car Info: 04 WRX Wagon, 06 Forester XT, 99 Legacy Sedan
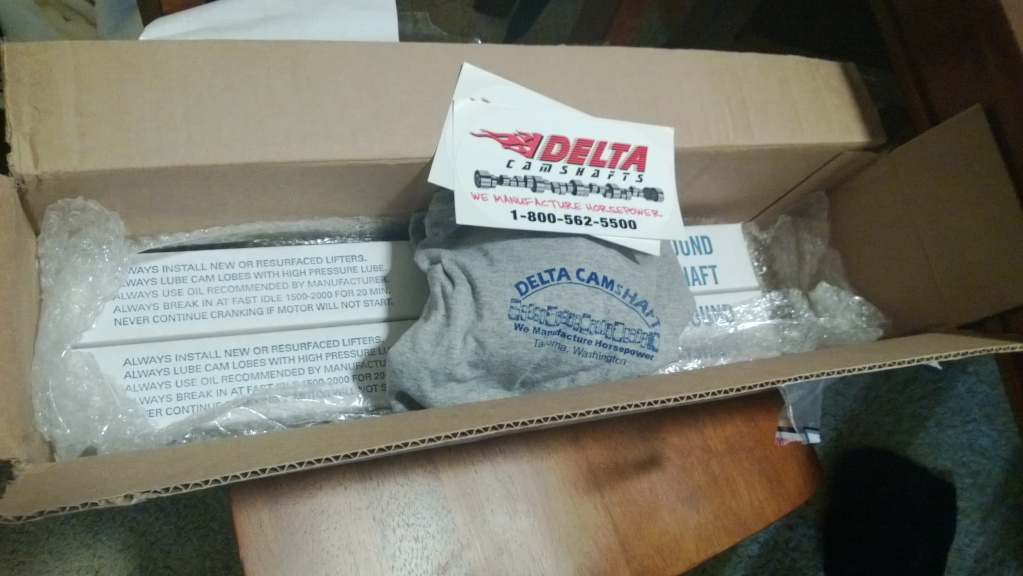
New parts arrived at work yesterday!!! Getting closer!
Should be installing the steering rack bushings tonight after work.
Should be installing the steering rack bushings tonight after work.
Last edited by Harry Maneuvers; Dec 6, 2012 at 12:39 PM.
Thread Starter
Registered User
iTrader: (2)
Joined: Jul 2011
Posts: 491
From: Sacramento
Car Info: 04 WRX Wagon, 06 Forester XT, 99 Legacy Sedan
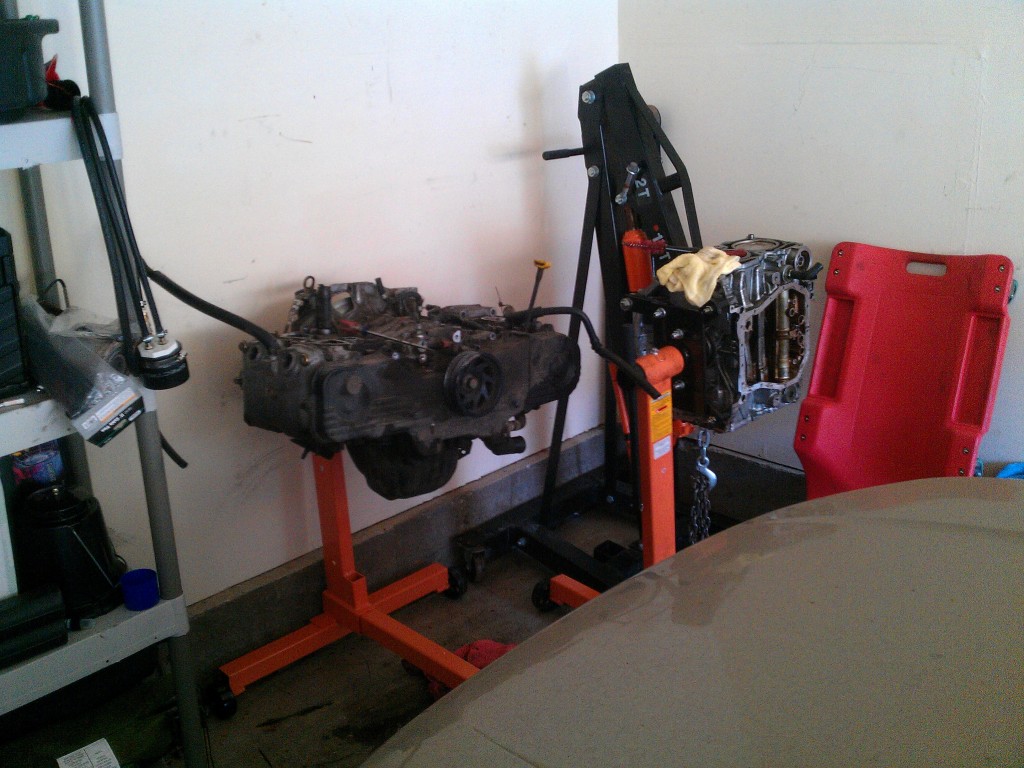
FWIW I have done all of this while living in an apartment. Granted I do have a 1 car garage... but space is limited to say the least.
Thread Starter
Registered User
iTrader: (2)
Joined: Jul 2011
Posts: 491
From: Sacramento
Car Info: 04 WRX Wagon, 06 Forester XT, 99 Legacy Sedan
Another short and condensed update:
Steering rack bushings are installed.
Intake manifold is stripped of all harnesses, fuel lines, brackets ect. Ready to be powder coated this weekend most likely. Going with flat black.
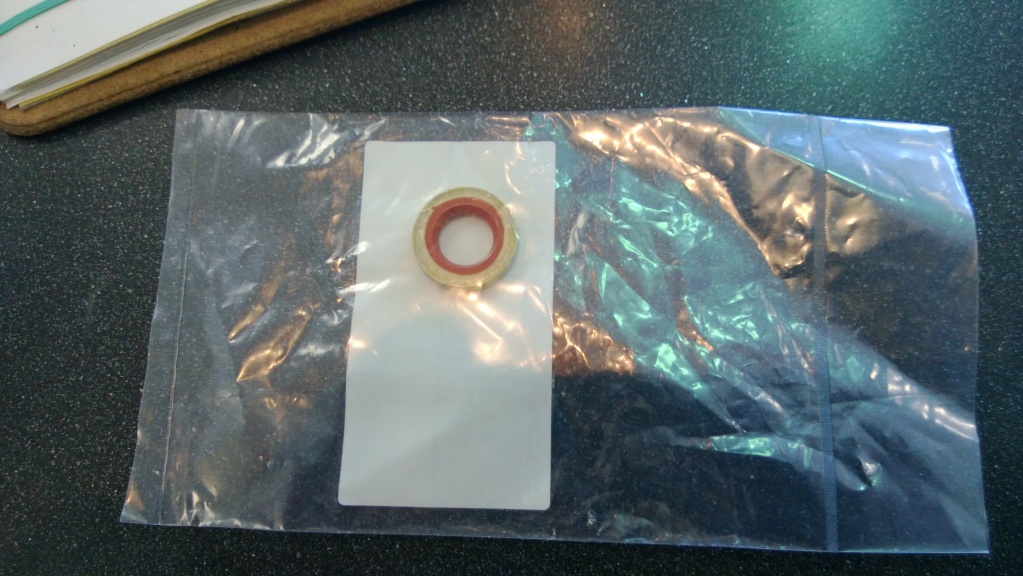
Also, I went ahead and ordered new block bolts for the ones that are inside the waterjacket as the ones I have from the EJ251 are slightly corroded from the previous owner running it for a while with bad headgaskets. I also ordered new washers for each of those bolts because it looks like they have a rubber inner coating almost like the valve cover grommets. Probably the most expensive OEM part (compared) to size that I have ever found. $3.72 per washer!
I should have my new oil separator plate kit with screws by tomorrow when my case block bolts and washers arrive at Maita Subaru.
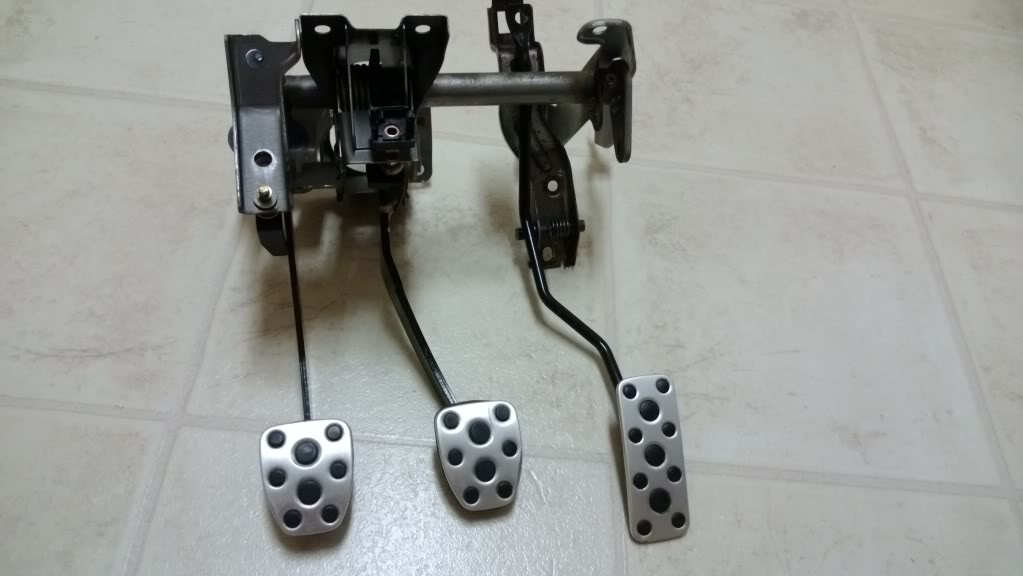
I picked up my new 5 speed pedals too. The brake/clutch is from an 06 STI but the gas pedal is from an 04 STI (drive by wire).
Ordering new shifter bushings, 10mm oil pump, positive shift kit (transmission crossmember bushings) and a few other odds and ends by the end of this week.
I am hoping to have the short block assembled by the end of this weekend along with having the clutch master cylinder and pedals installed
Steering rack bushings are installed.
Intake manifold is stripped of all harnesses, fuel lines, brackets ect. Ready to be powder coated this weekend most likely. Going with flat black.
Also, I went ahead and ordered new block bolts for the ones that are inside the waterjacket as the ones I have from the EJ251 are slightly corroded from the previous owner running it for a while with bad headgaskets. I also ordered new washers for each of those bolts because it looks like they have a rubber inner coating almost like the valve cover grommets. Probably the most expensive OEM part (compared) to size that I have ever found. $3.72 per washer!
I should have my new oil separator plate kit with screws by tomorrow when my case block bolts and washers arrive at Maita Subaru.
I picked up my new 5 speed pedals too. The brake/clutch is from an 06 STI but the gas pedal is from an 04 STI (drive by wire).
Ordering new shifter bushings, 10mm oil pump, positive shift kit (transmission crossmember bushings) and a few other odds and ends by the end of this week.
I am hoping to have the short block assembled by the end of this weekend along with having the clutch master cylinder and pedals installed
Thread Starter
Registered User
iTrader: (2)
Joined: Jul 2011
Posts: 491
From: Sacramento
Car Info: 04 WRX Wagon, 06 Forester XT, 99 Legacy Sedan
Ok so I have been lagging on this but it is still moving.
New head bolts, cometic ej25/ej22 hybrid Cometic gaskets, oil filter post, all timing covers/slings all should be here this week. Everything I need to build the shortblock and mate the heads.
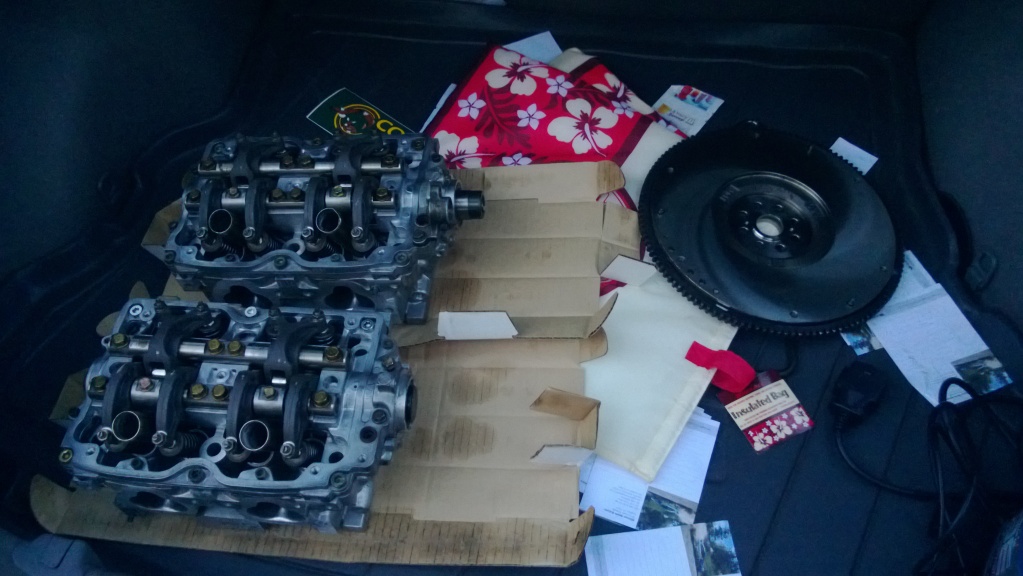
Got the a valve job at Moore's Engine Supply in Auburn, CA. So now the heads are all assembled WITH the Delta torque grind cams.
They also did a LIGHT resurfacing of the 2010 flywheel because it has some light surface rust on it.
I am more than happy, I was able to pick them both up 24 hours later.
I have been pouring over the factory wiring diagram and have identified how to get the VSS Pro (because the 08+ manual transmission doesnt have a speed sensor), Neatral Saftey, and Reverse Switch wired up.
Havent quite gotten to the Cruise Control portion and I havent yet installed the WRX pedals to see which connectors I do or dont have down there for the two switches on the clutch pedal.
Now I am just trying to source all of the bulkhead plugs that my AT car didnt come with so that I can keep the wiring as clean as possible.
New head bolts, cometic ej25/ej22 hybrid Cometic gaskets, oil filter post, all timing covers/slings all should be here this week. Everything I need to build the shortblock and mate the heads.
Got the a valve job at Moore's Engine Supply in Auburn, CA. So now the heads are all assembled WITH the Delta torque grind cams.
They also did a LIGHT resurfacing of the 2010 flywheel because it has some light surface rust on it.
I am more than happy, I was able to pick them both up 24 hours later.
I have been pouring over the factory wiring diagram and have identified how to get the VSS Pro (because the 08+ manual transmission doesnt have a speed sensor), Neatral Saftey, and Reverse Switch wired up.
Havent quite gotten to the Cruise Control portion and I havent yet installed the WRX pedals to see which connectors I do or dont have down there for the two switches on the clutch pedal.
Now I am just trying to source all of the bulkhead plugs that my AT car didnt come with so that I can keep the wiring as clean as possible.
Thread Starter
Registered User
iTrader: (2)
Joined: Jul 2011
Posts: 491
From: Sacramento
Car Info: 04 WRX Wagon, 06 Forester XT, 99 Legacy Sedan
Another update!!!!!
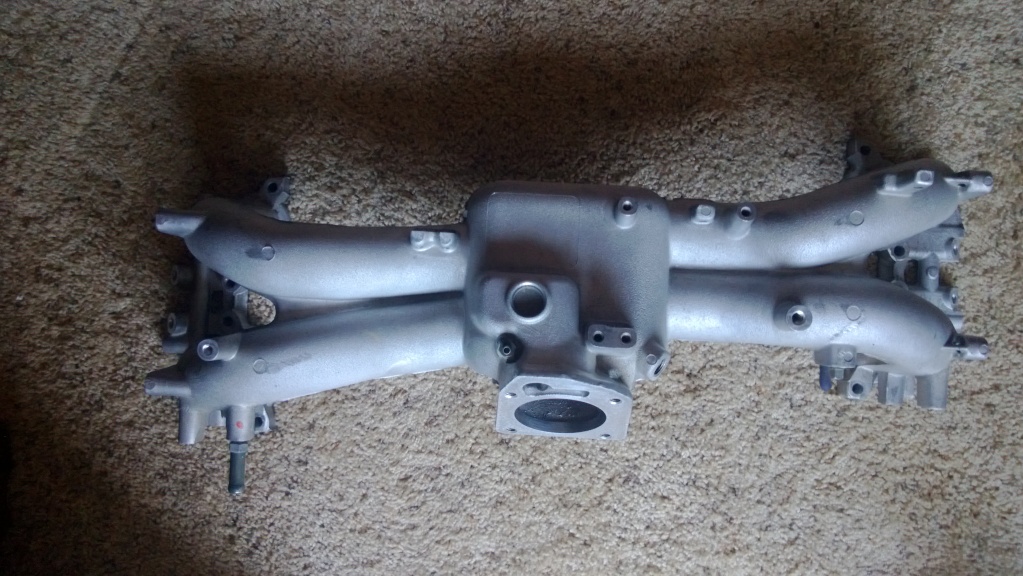
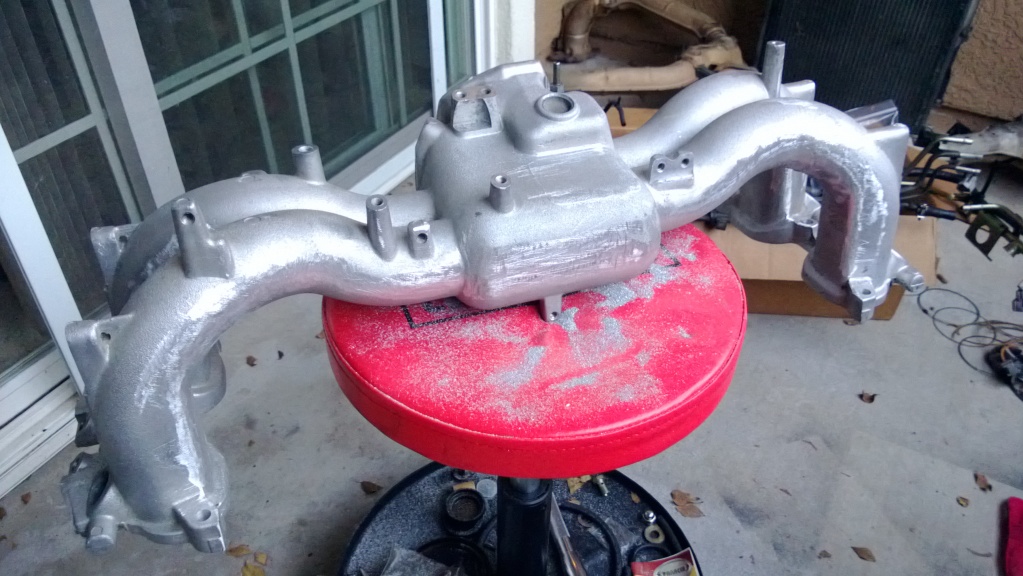
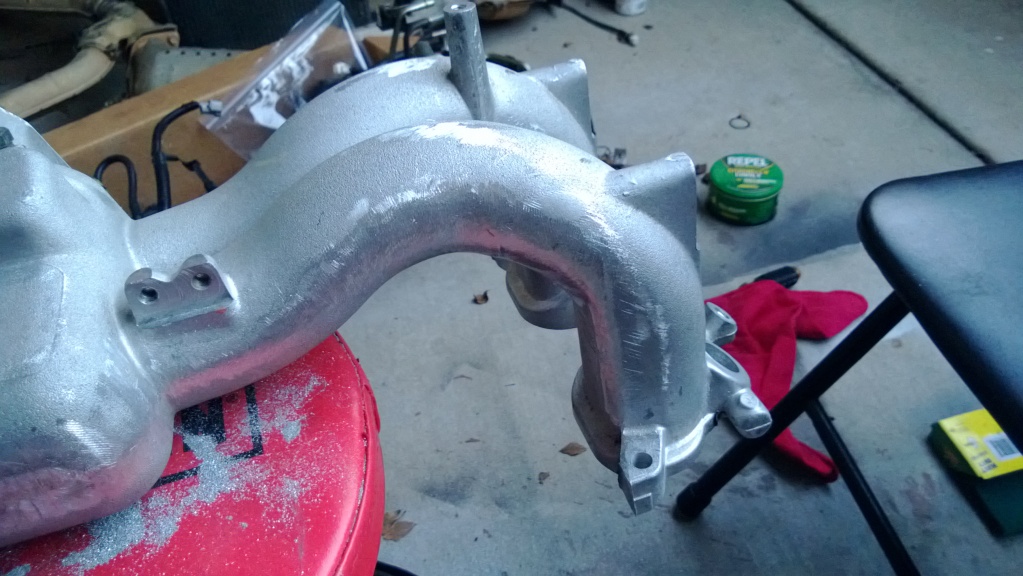
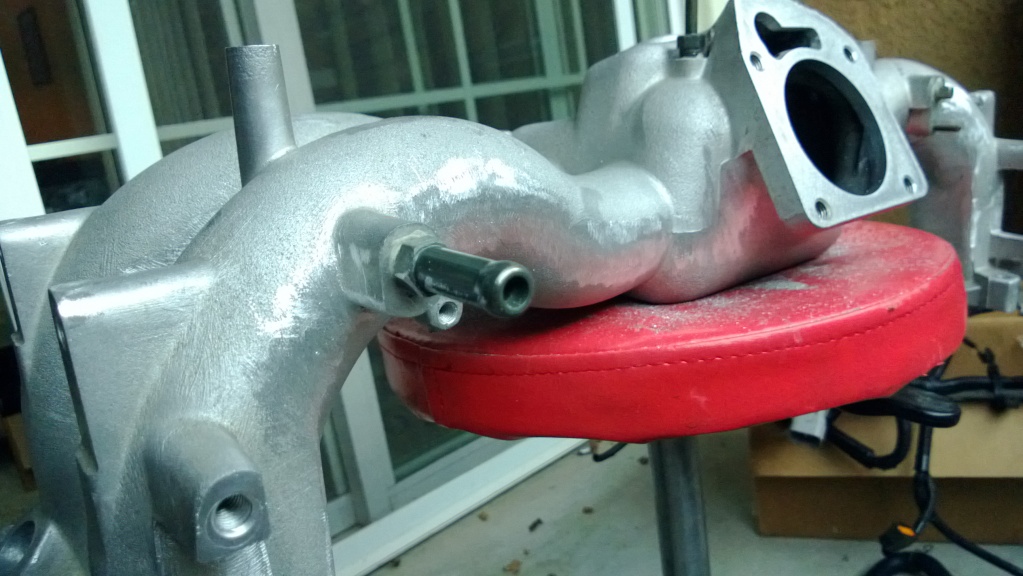
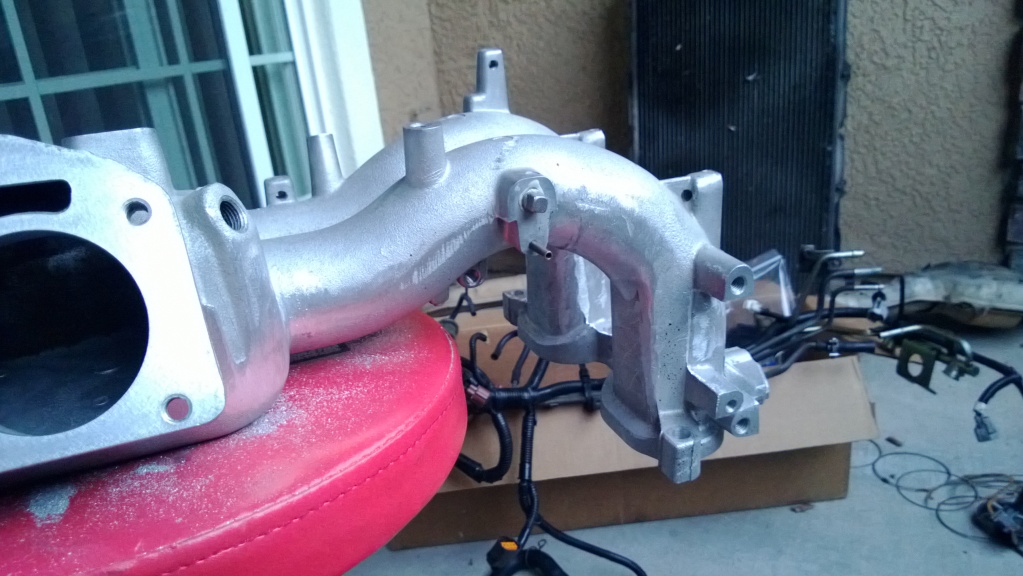
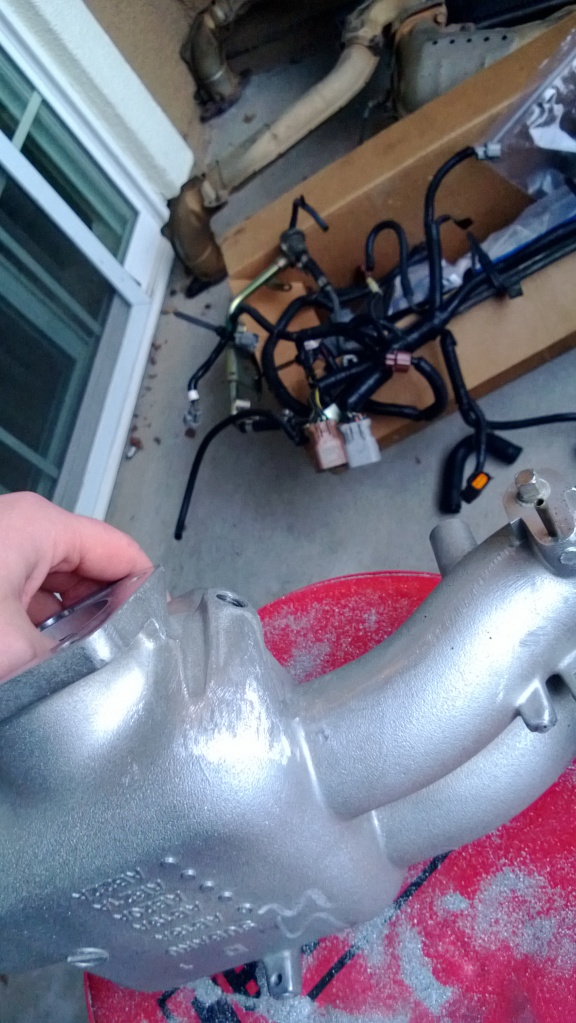
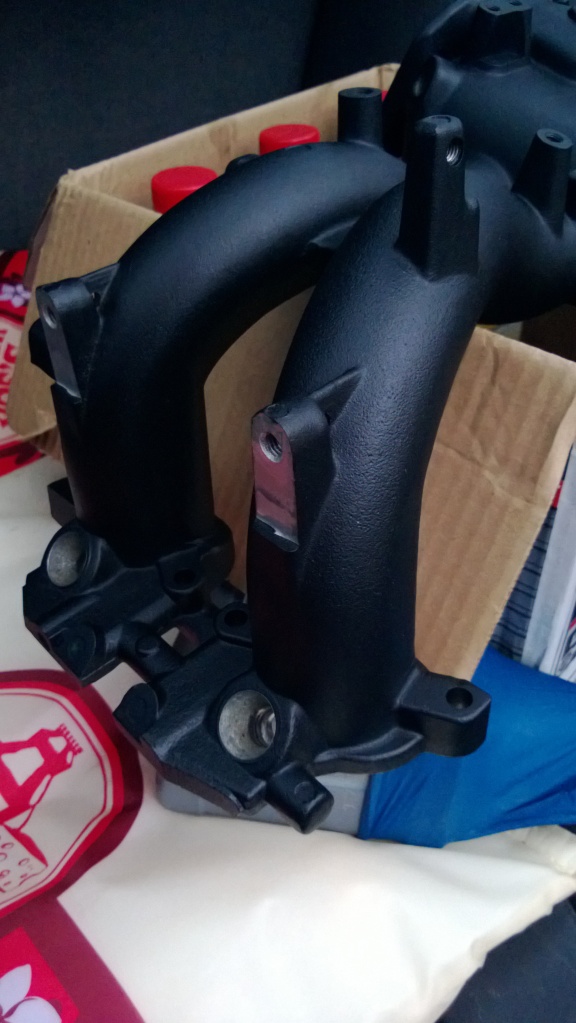
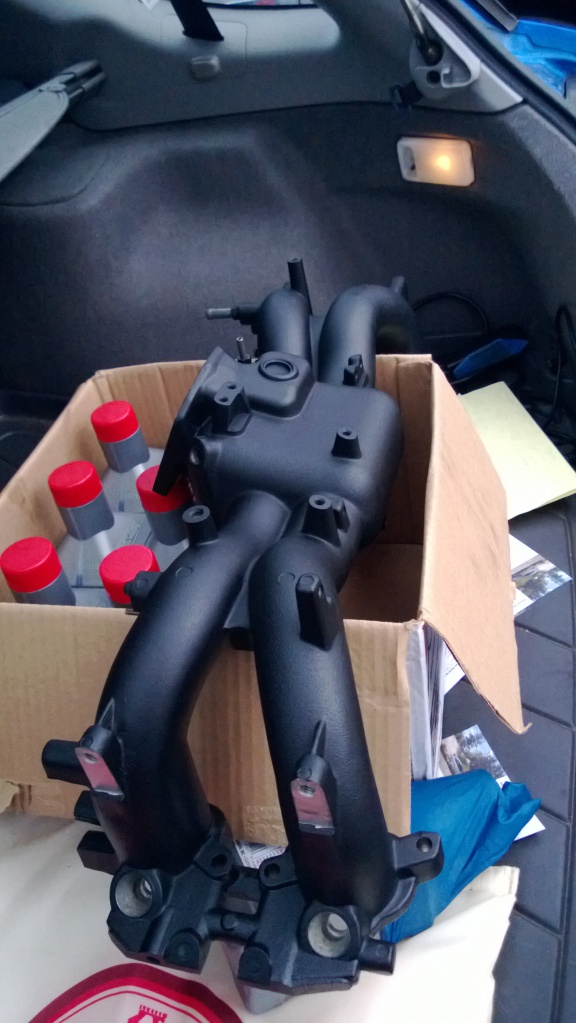
I went ahead and cleaned up the intake manifold while I had everything apart. I filed away all of the sharp casting marks and lines with a hand file.
Before:
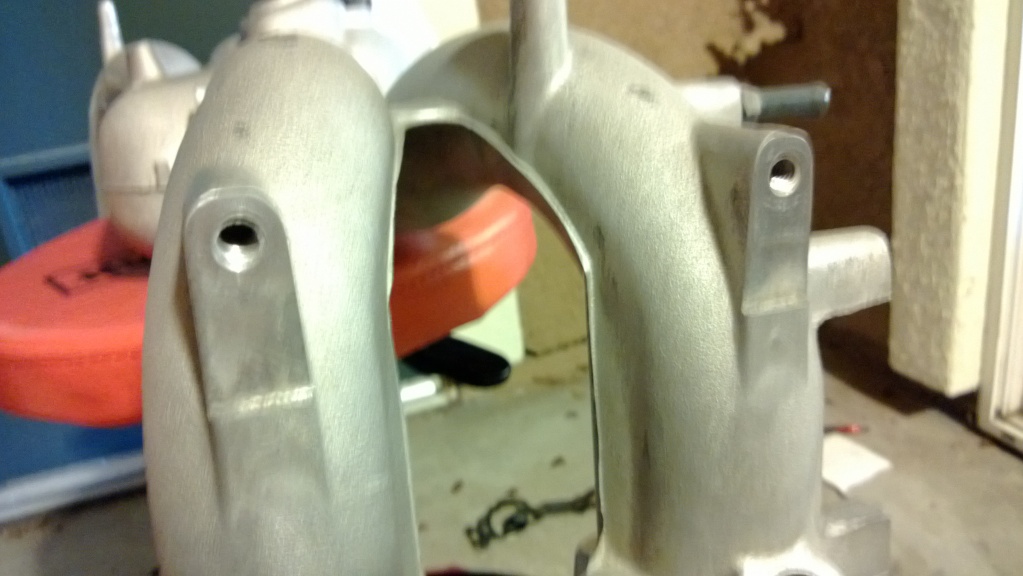
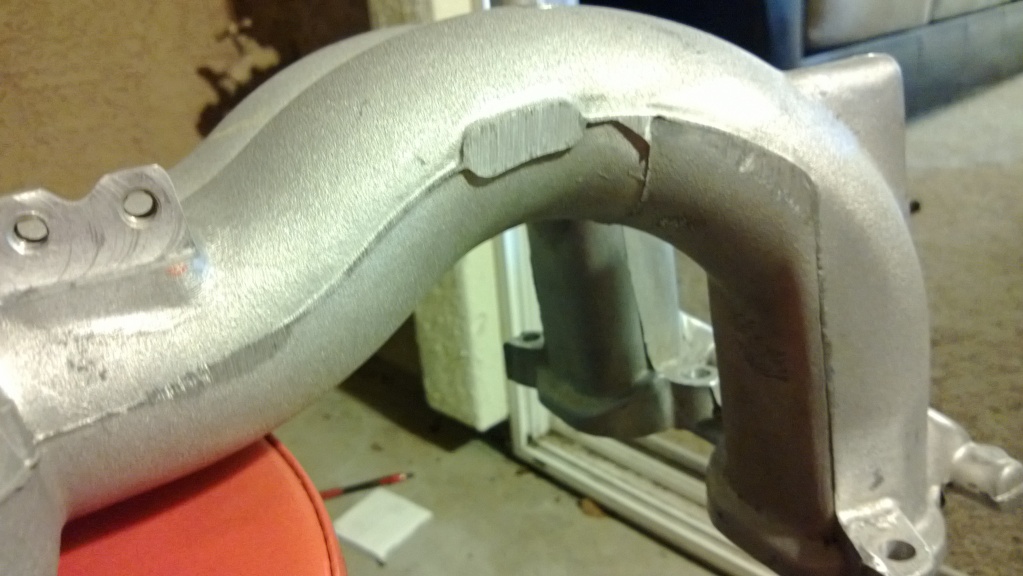
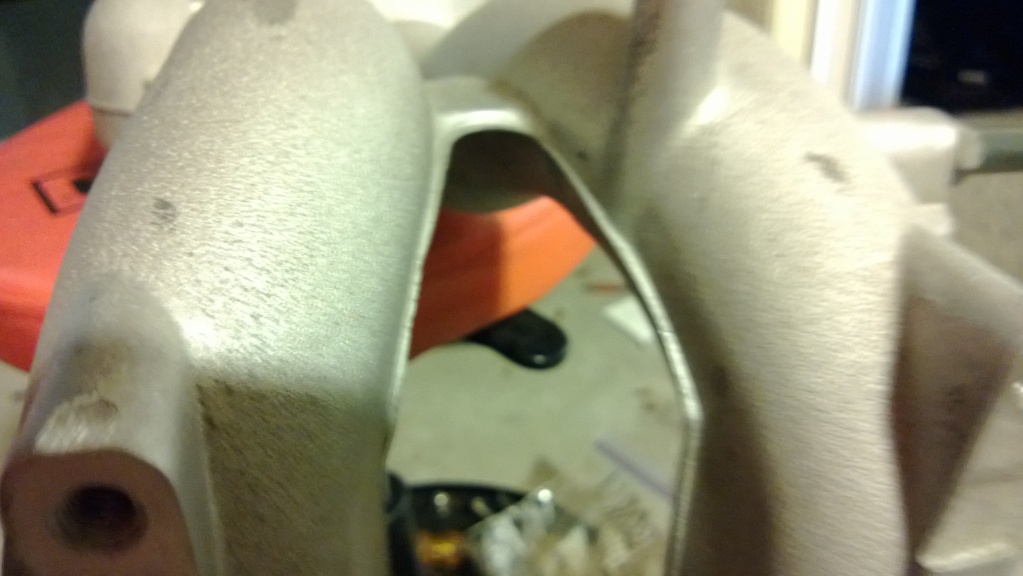
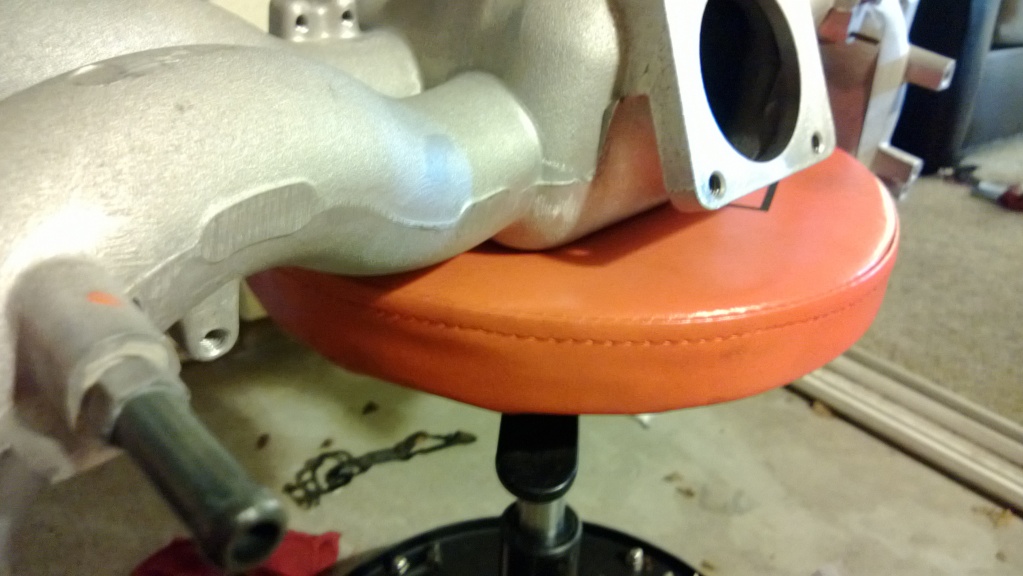
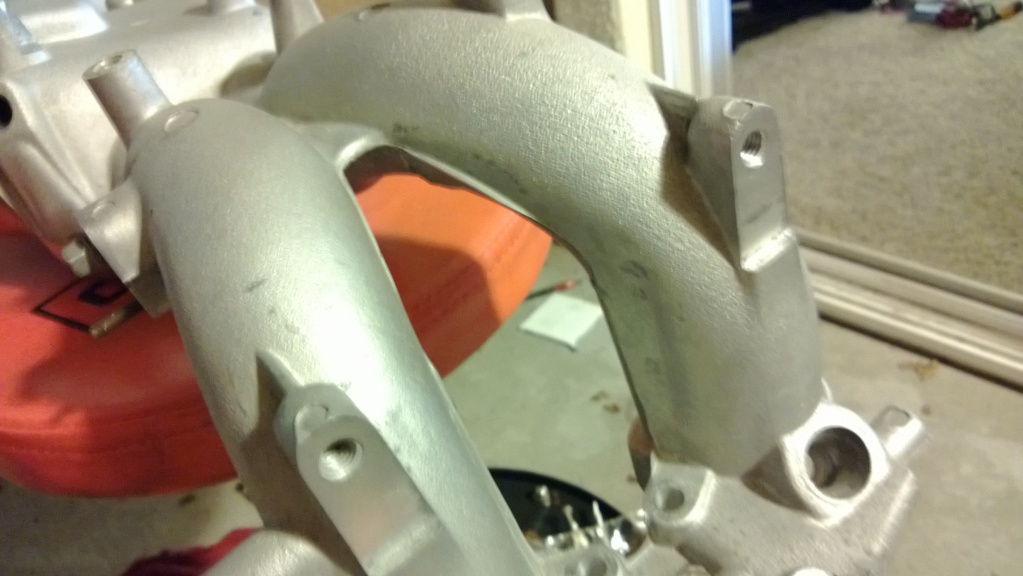
After:
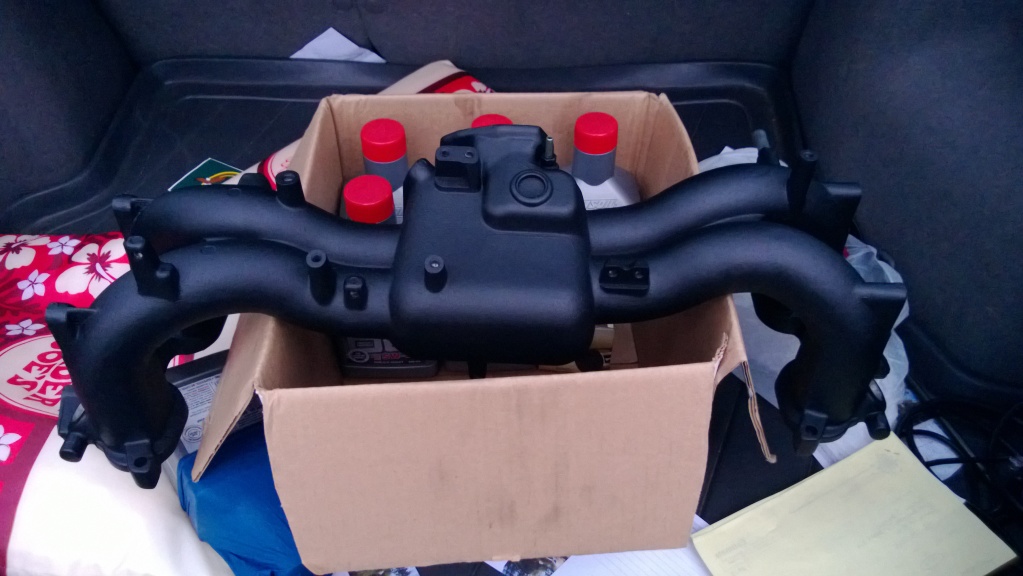
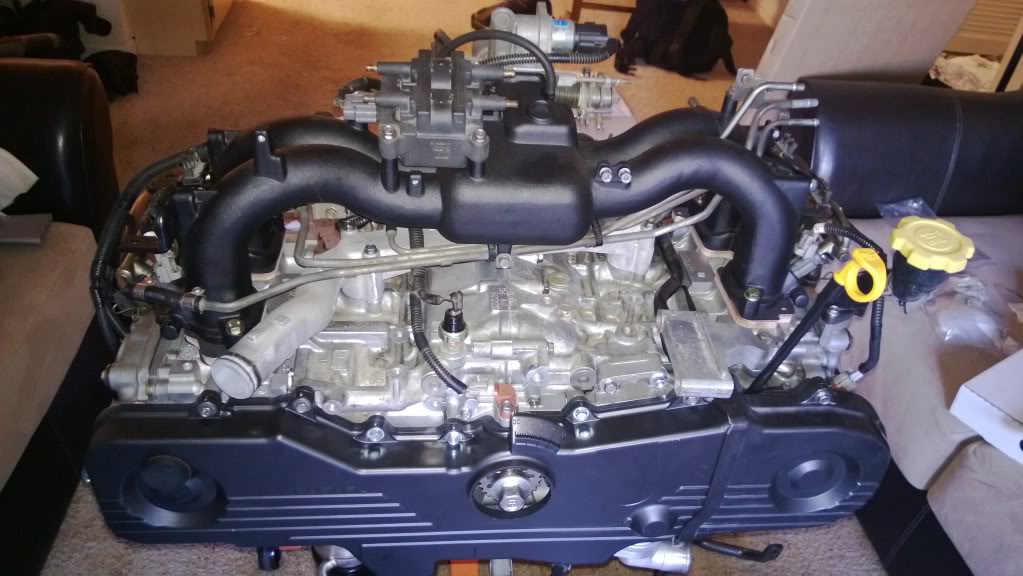
I then had it powder coated black:
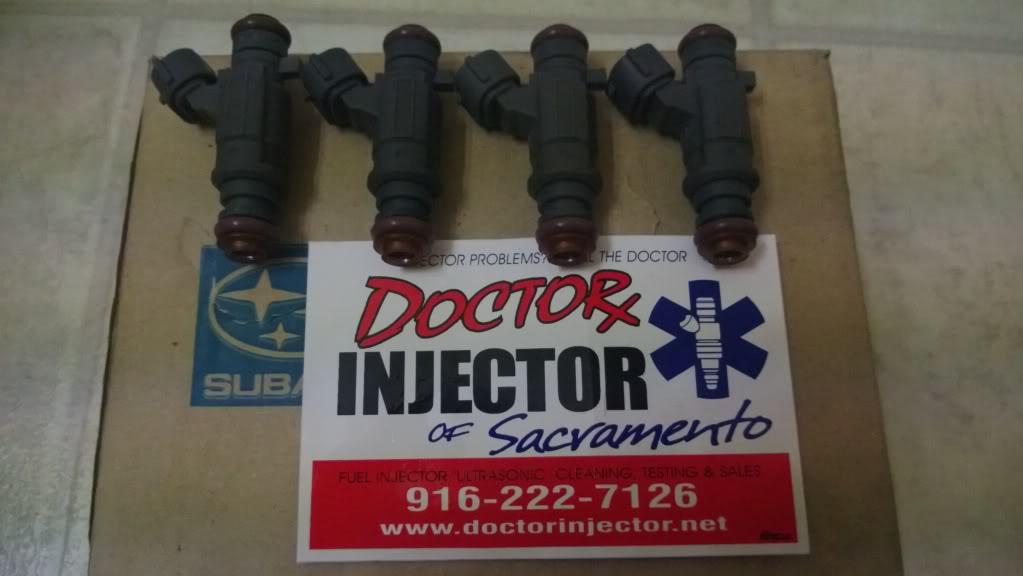
I also got my injectors cleaned and flow matched with all replaceable parts (seals, screens ect) replaced at Doctor Injector in Rancho Cordova. I would highly recommend Jake's services there.

Everything re-assembled with the fuel rail cover and other brackets painted VHT wrinkle black.
temporary_zpsa1e65451.jpg?t=1359862707
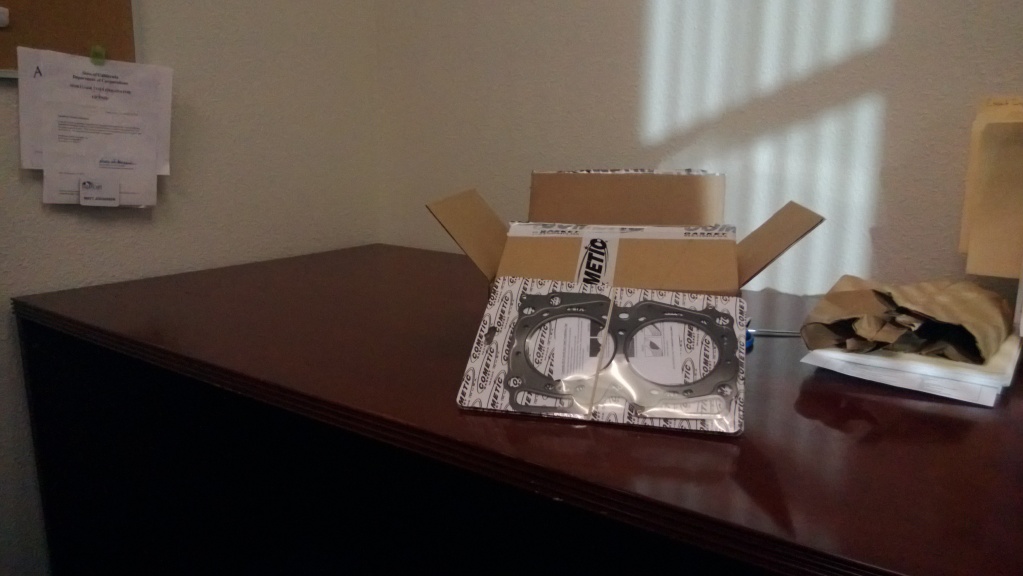
Headgaskets came in from Cometic:
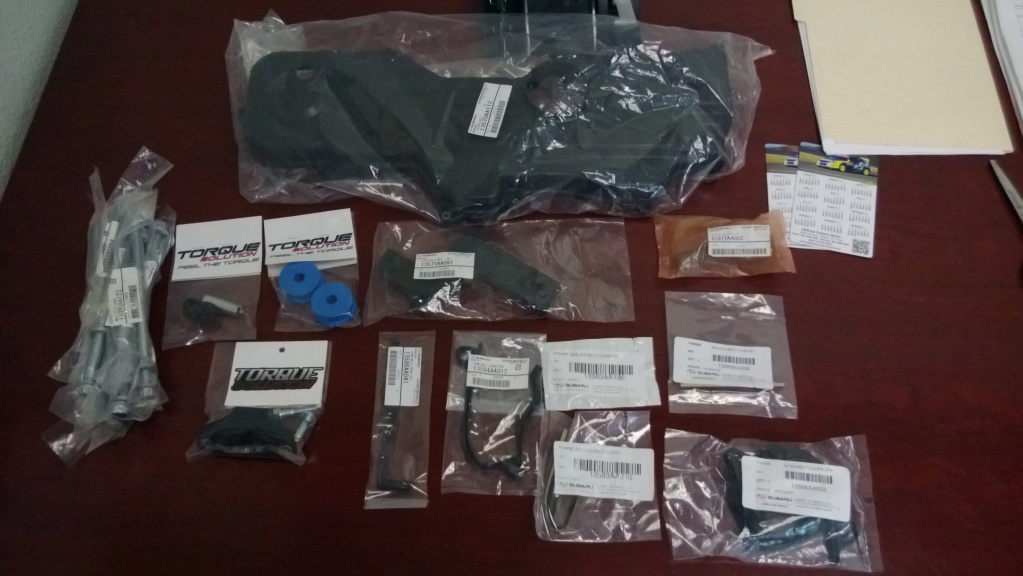
All timing covers, slings and Torque Solutions front, rear and shifter linkage bushings along with all new OEM head bolts:
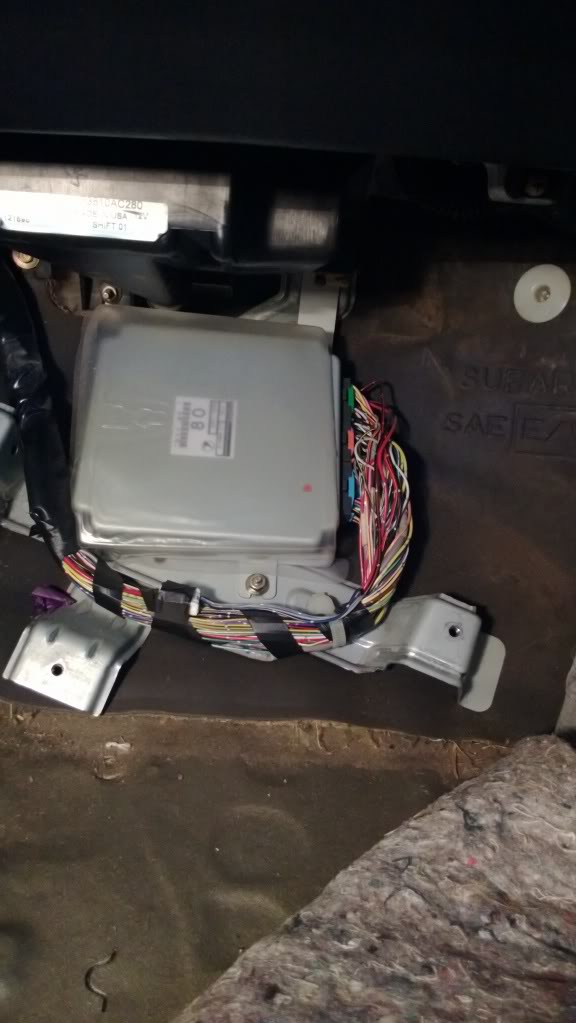
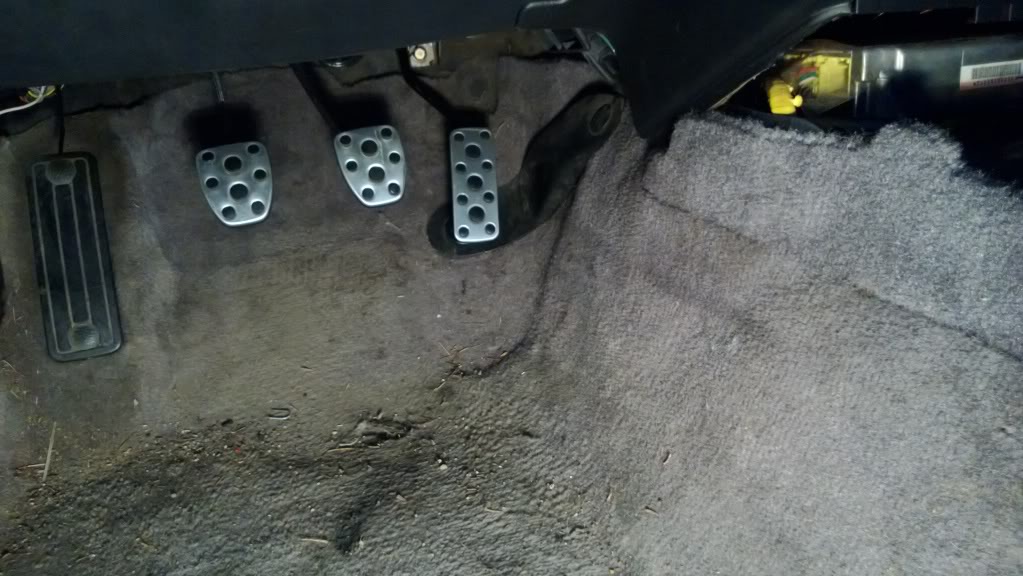
Finally, I removed the AT brake pedal with TCU (even though I will be keeping the TCU) and mounted both of the clutch switches (one for cruise) and the brake switch.
temporary_zpsb1a7022a.jpg?t=1359950158
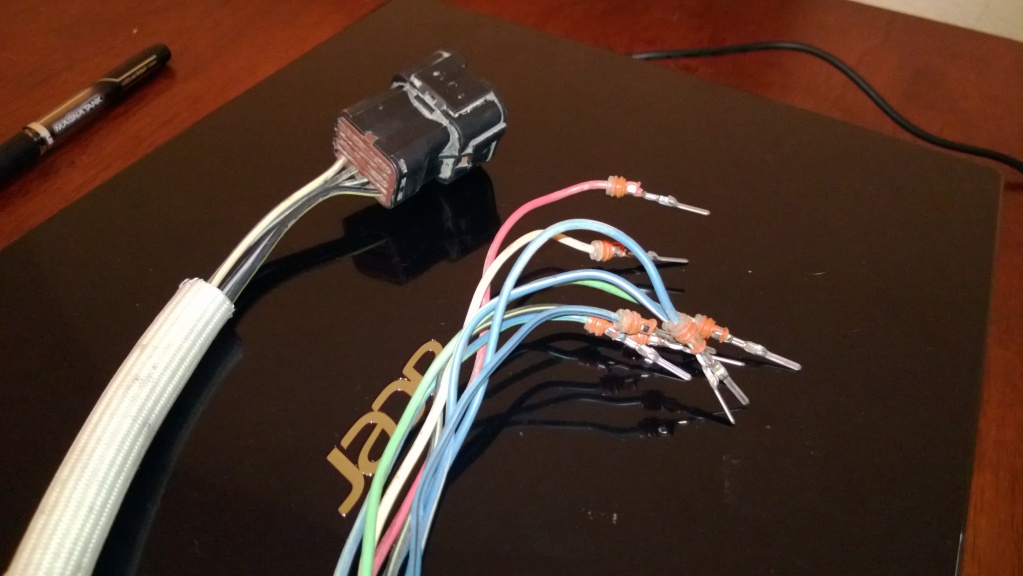
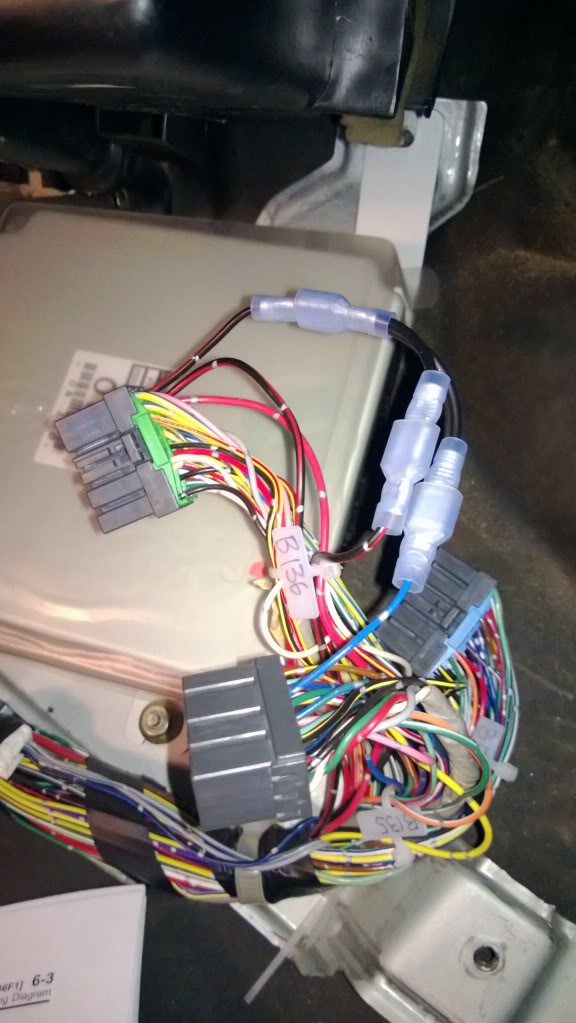
I also got my jumper harness ready to start wiring the reverse and neutral switches off the 5MT along with the VSS Pro for the speedometer:
That is it for now... hoping to have the 5MT pedals in and wired by the end of this week along with getting the rear diff and axles in.
I went ahead and cleaned up the intake manifold while I had everything apart. I filed away all of the sharp casting marks and lines with a hand file.
Before:
After:
I then had it powder coated black:
I also got my injectors cleaned and flow matched with all replaceable parts (seals, screens ect) replaced at Doctor Injector in Rancho Cordova. I would highly recommend Jake's services there.
Everything re-assembled with the fuel rail cover and other brackets painted VHT wrinkle black.
temporary_zpsa1e65451.jpg?t=1359862707
Headgaskets came in from Cometic:
All timing covers, slings and Torque Solutions front, rear and shifter linkage bushings along with all new OEM head bolts:
Finally, I removed the AT brake pedal with TCU (even though I will be keeping the TCU) and mounted both of the clutch switches (one for cruise) and the brake switch.
temporary_zpsb1a7022a.jpg?t=1359950158
I also got my jumper harness ready to start wiring the reverse and neutral switches off the 5MT along with the VSS Pro for the speedometer:
That is it for now... hoping to have the 5MT pedals in and wired by the end of this week along with getting the rear diff and axles in.
Last edited by Harry Maneuvers; Feb 4, 2013 at 11:06 AM.
Thread Starter
Registered User
iTrader: (2)
Joined: Jul 2011
Posts: 491
From: Sacramento
Car Info: 04 WRX Wagon, 06 Forester XT, 99 Legacy Sedan
Its time for another update!
Because the full build thread is on SL-I.net and now over 14 pages long, I-club gets the condensed version.
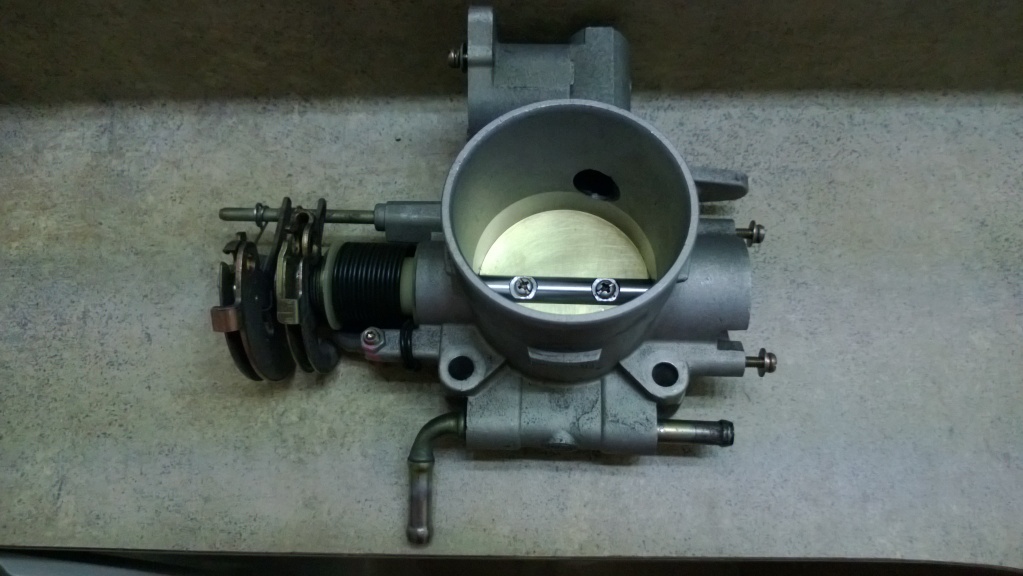
Throttle body/IACV valve completely cleaned.
Injectors cleaned, all replaceable parts replaced and flow tested. Huge thanks to Jake from Doctor Injector in Rancho Cordova.
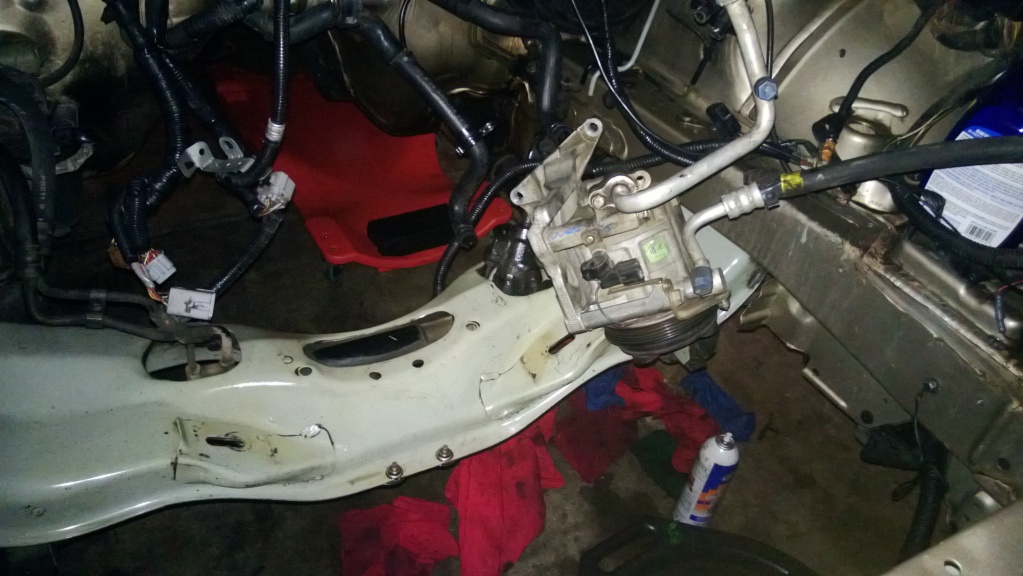
Finished all the swap wiring except for the speedometer... Still need to buy the VSS Pro but I have the wiring figured out:
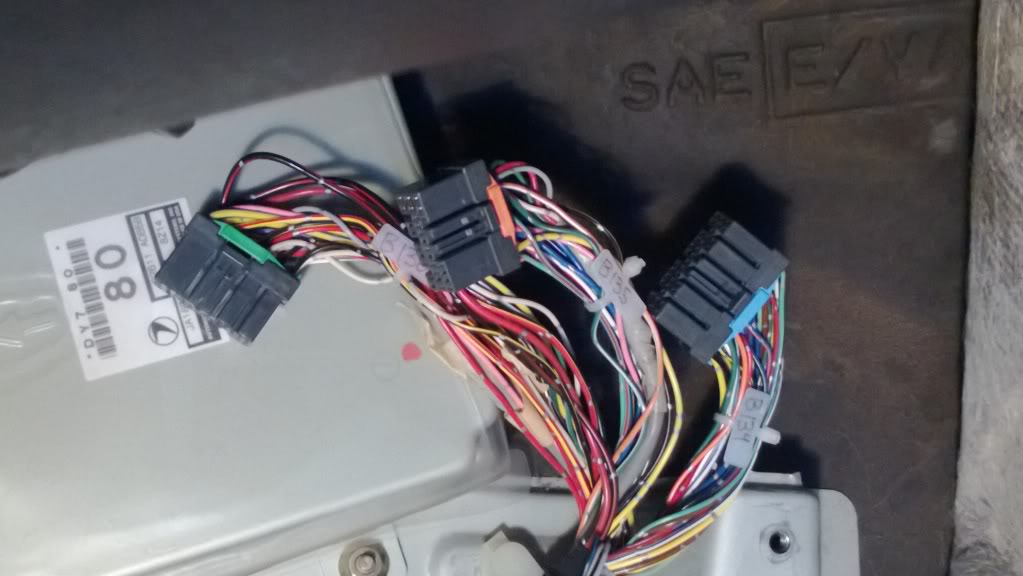
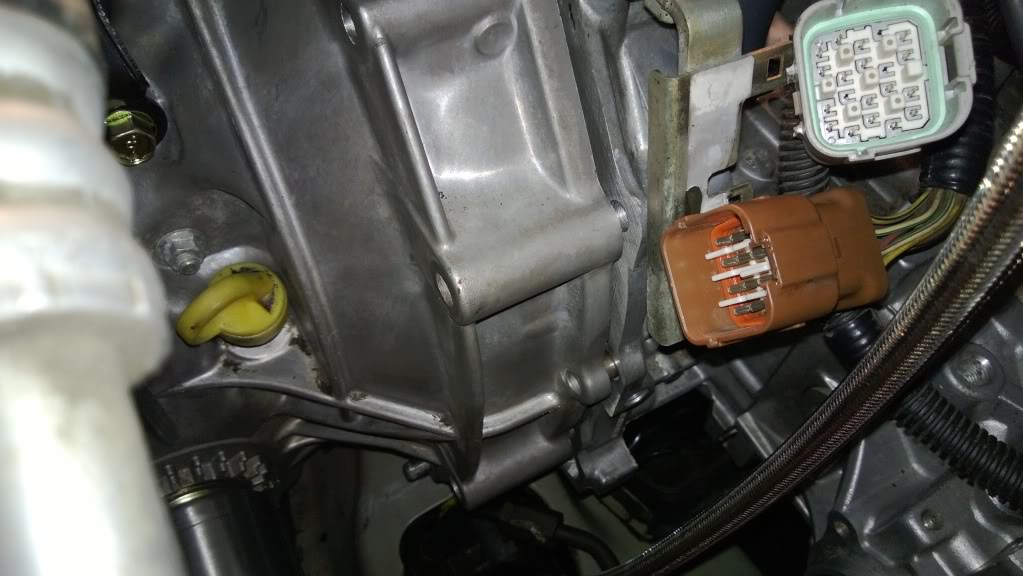
Finished the engine wiring harness. Notice the two connectors for the reverse and neutral switches coming from the transmission I sourced pigtail connectors for all connectors that my car didnt have to keep it as clean as possible.
Pedals are in.
Went to build the shortblock. Got one piston in just fine. Got the second one in and noticed it had a little bit more resistance then the first one so I popped it back out just to make sure all was good.
All was not good.
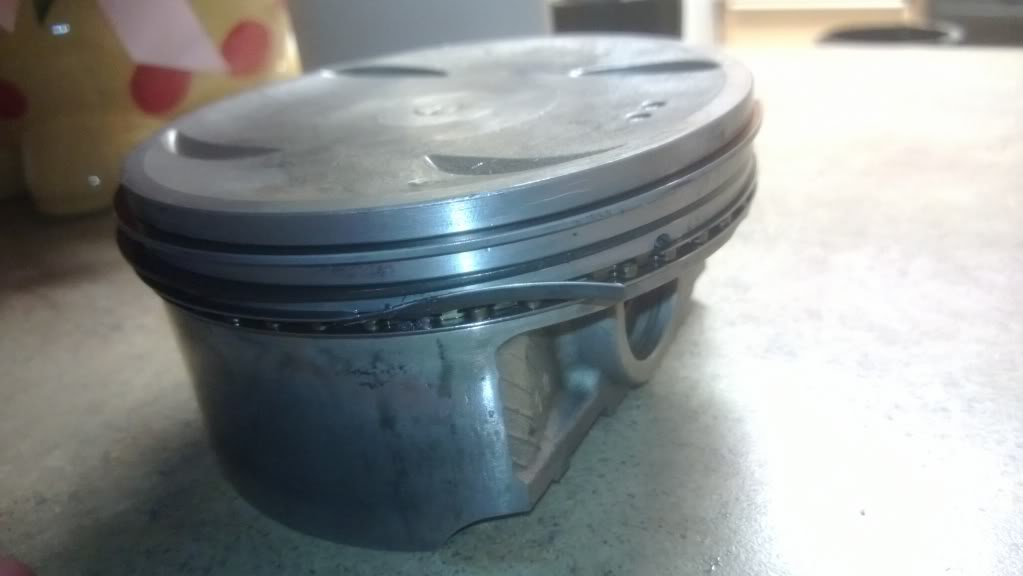
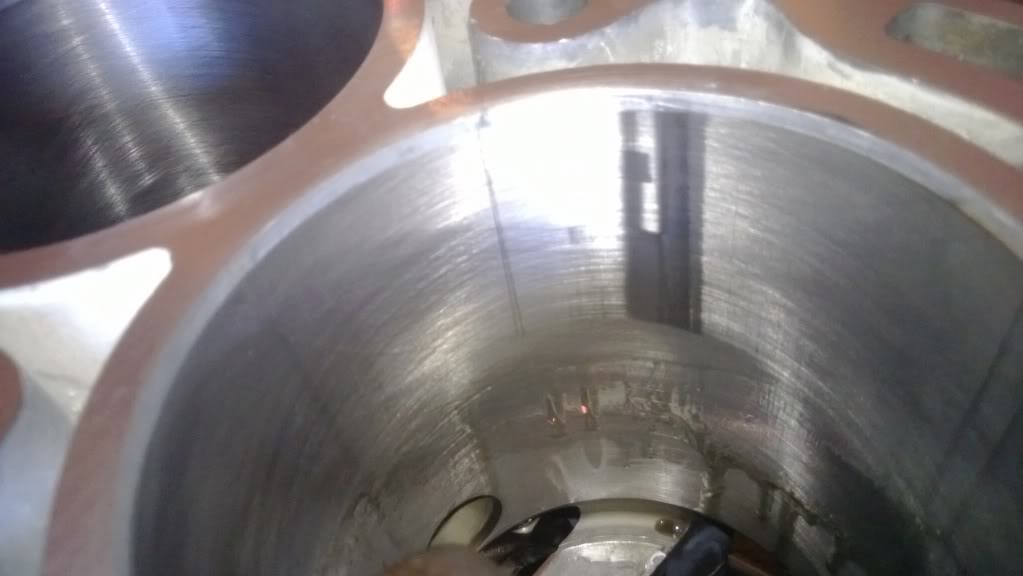
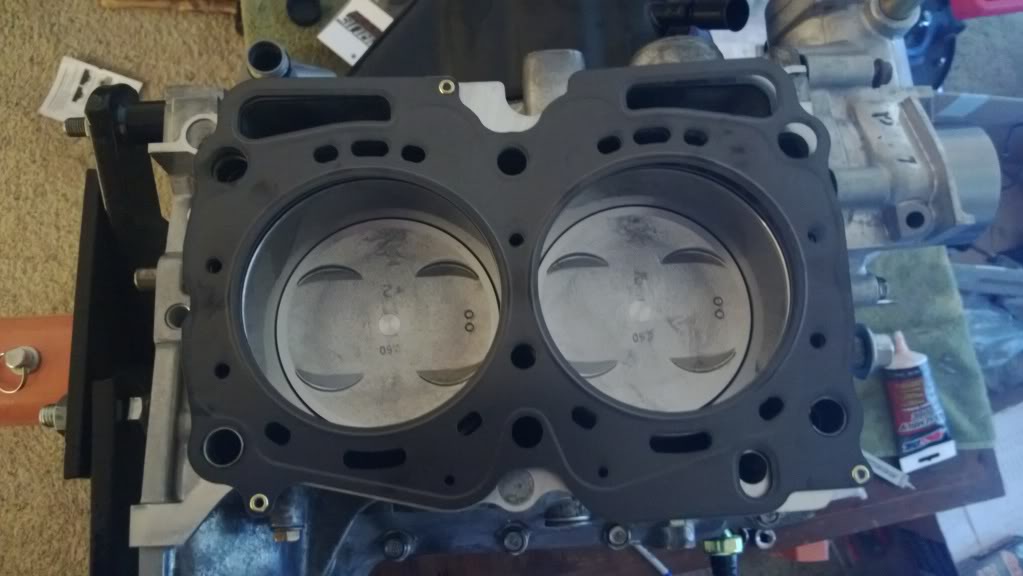
So after another few hundred dollars and the help from Bob at Moore's Engine Supply in Auburn, I am now bored .5 over with new MOS2 anti-friction coated pistons and Hastings rings.
Pistons look like this:
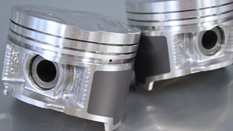
I cannot even begin to tell you how happy I am with the service that Bob has given me. The valve job was done in 24 hours and the engine re-bore would have been done in 24 hours if he already had the new pistons. Pistons came the next day and I picked everything up the day after that.
Second time was the charm. I went horrifically slow and got everything assembled correctly.
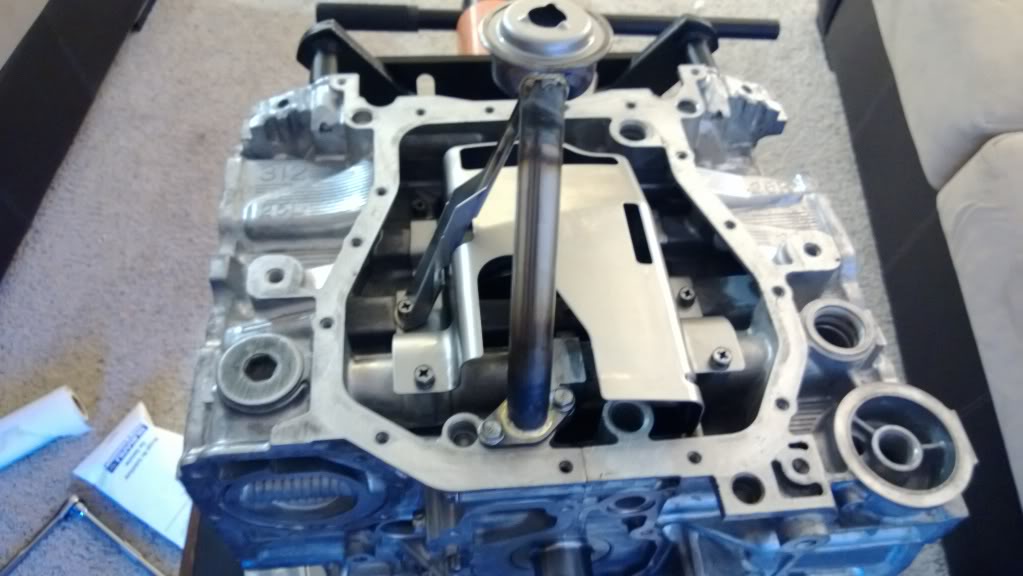
Rear main seal, oil separator plate and rear wrist pin access plugs installed.
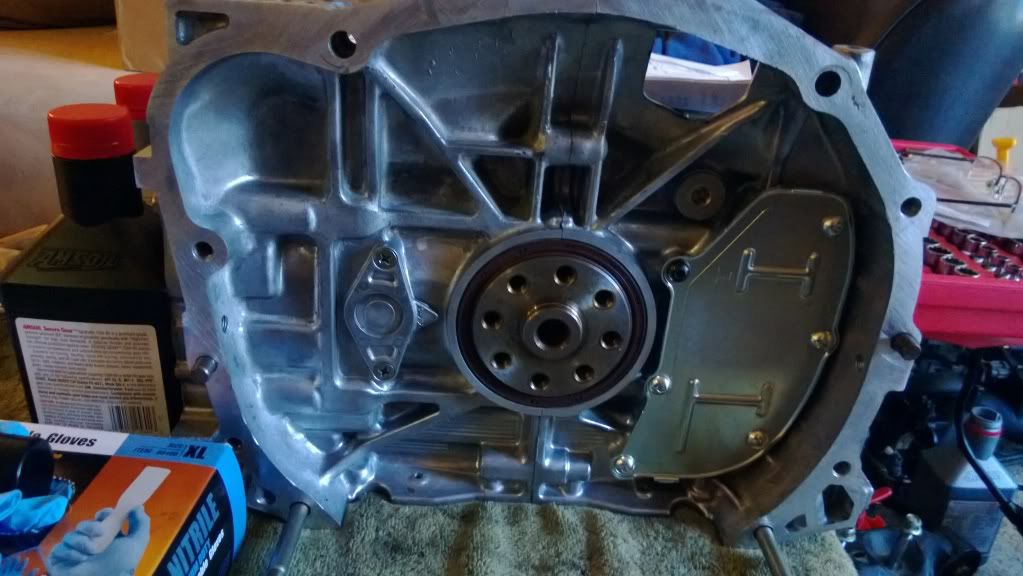
06+ oil baffle and pick up tube installed
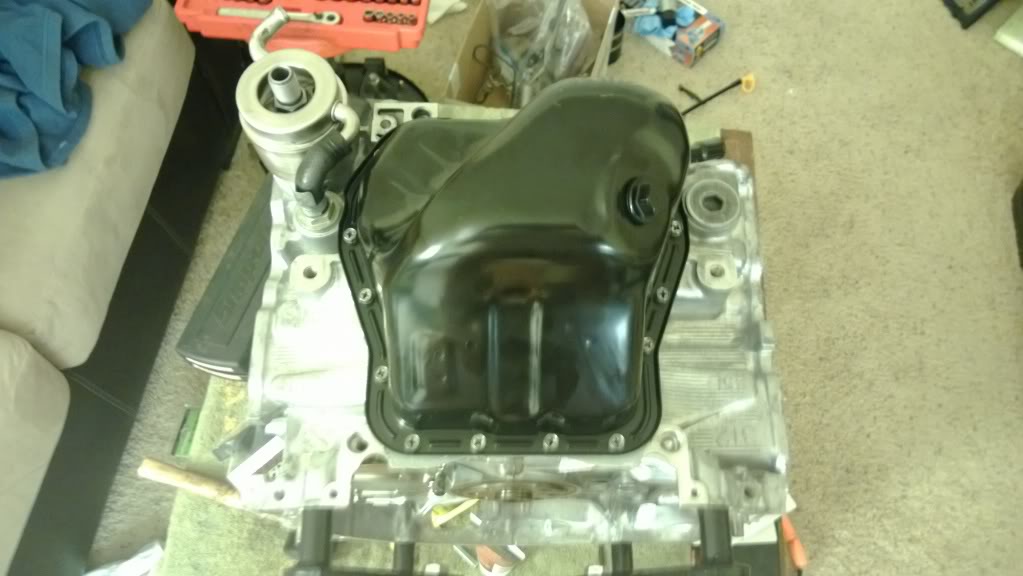
06+ oil pan installed
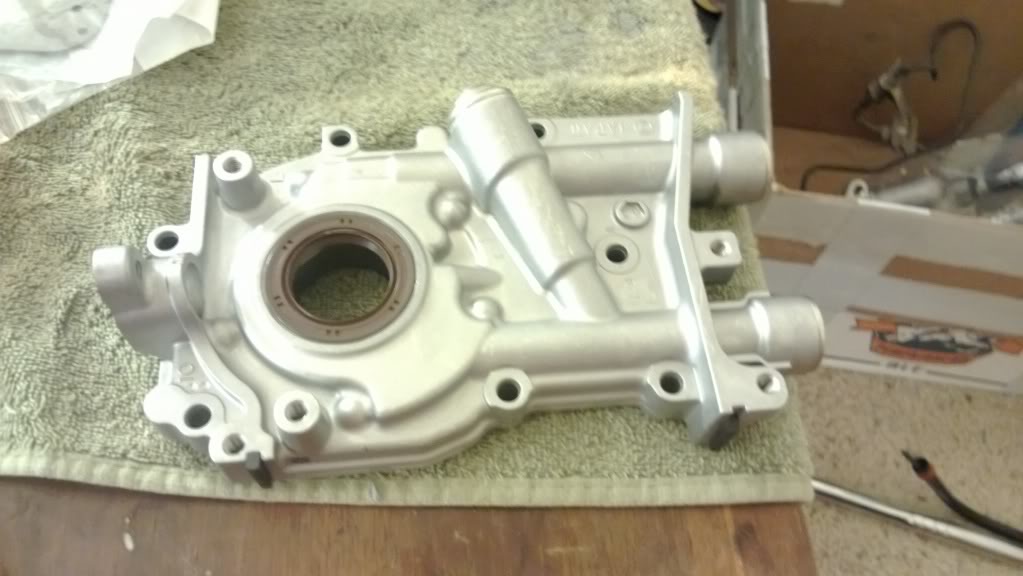
10mm oil pump installed
Mating the heads
How I torqued down the two cam sprockets
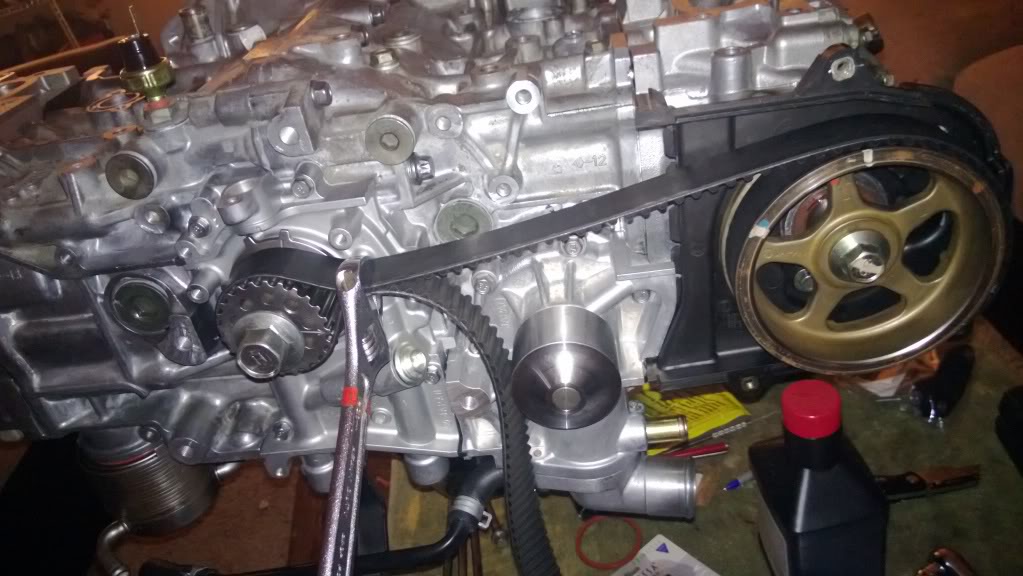
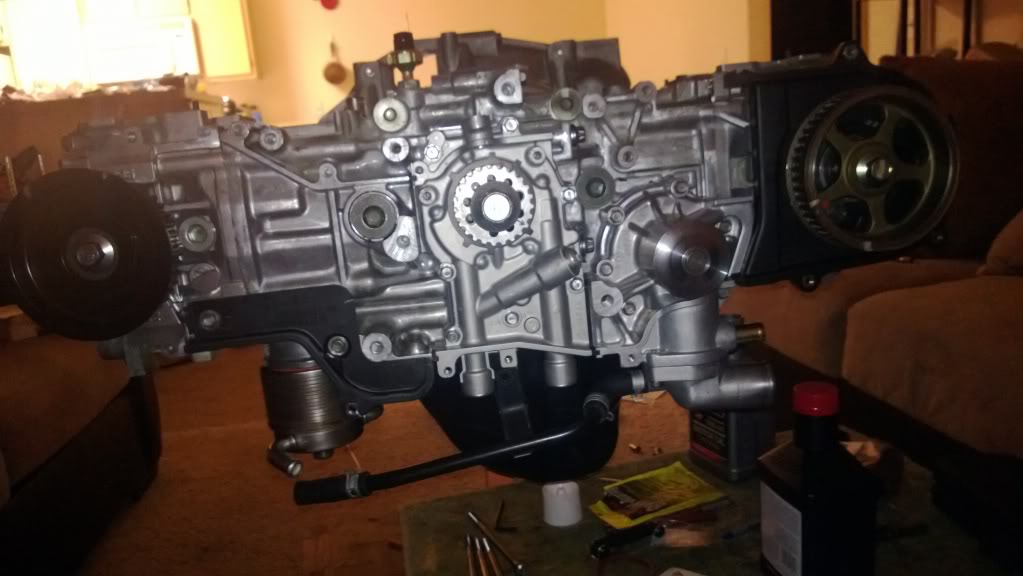
Timing belt is done
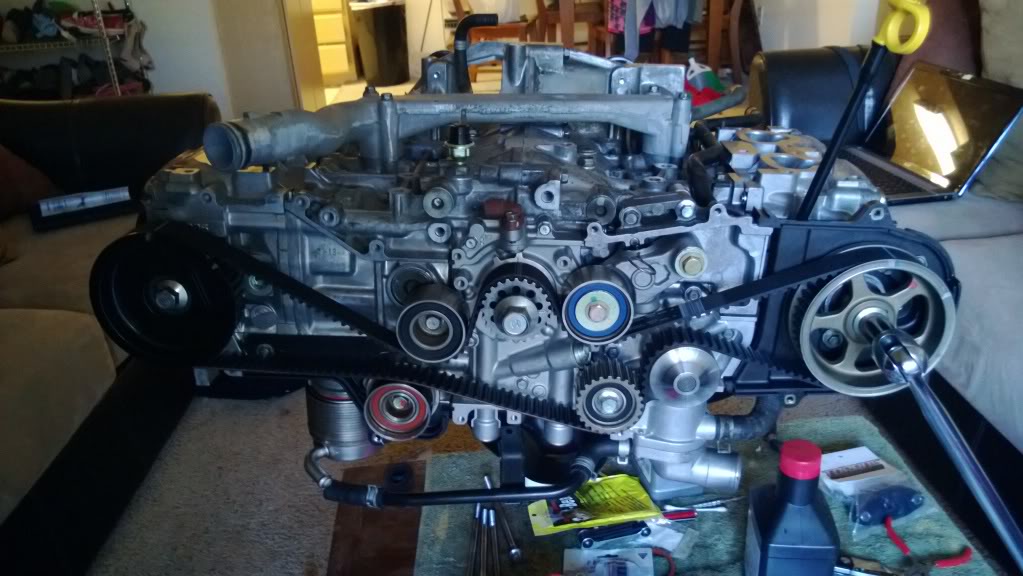
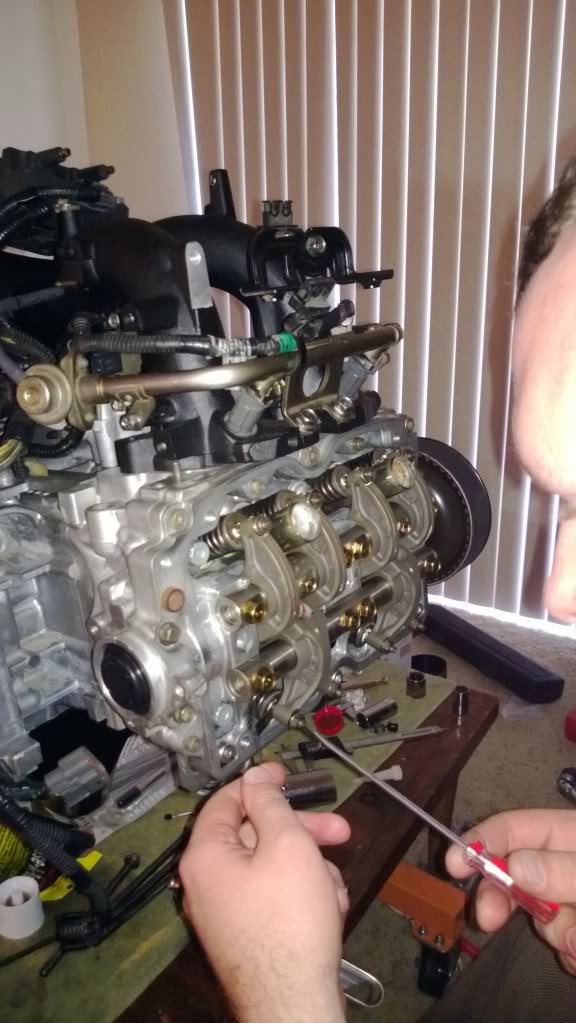
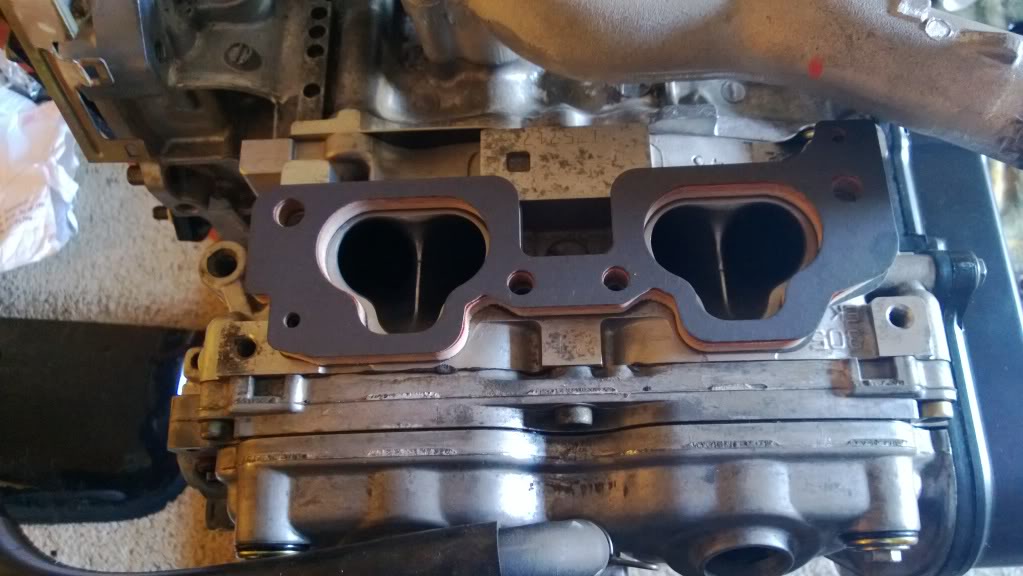
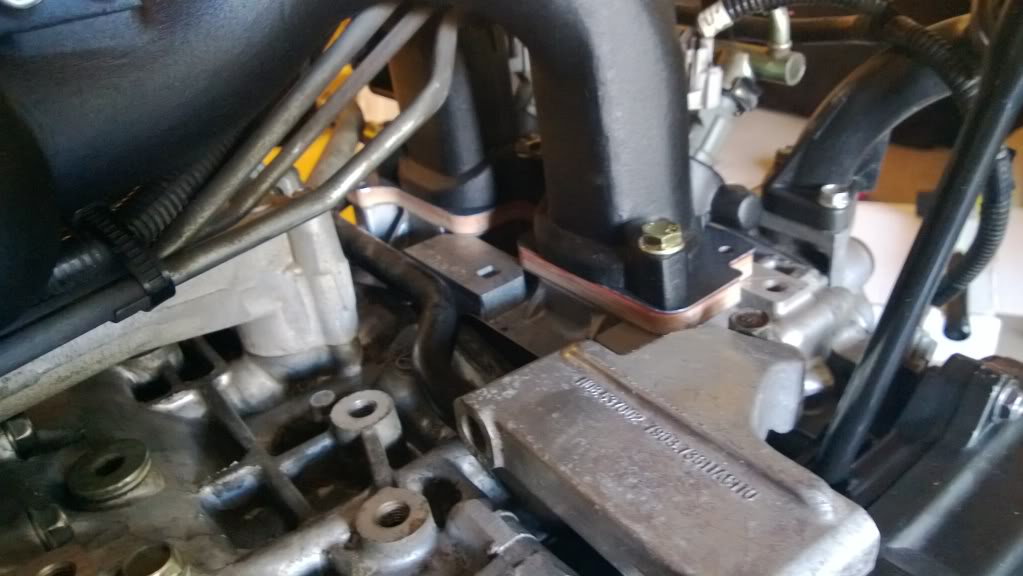
Got a little excited when I placed the intake manifold on the engine. Havent installed it yet because I am waiting on my 8mm phelonic spacers to get here. Yes I am aware that they might be overkill but WTH.

Setting valve clearances which has to be done with the timing belt on.
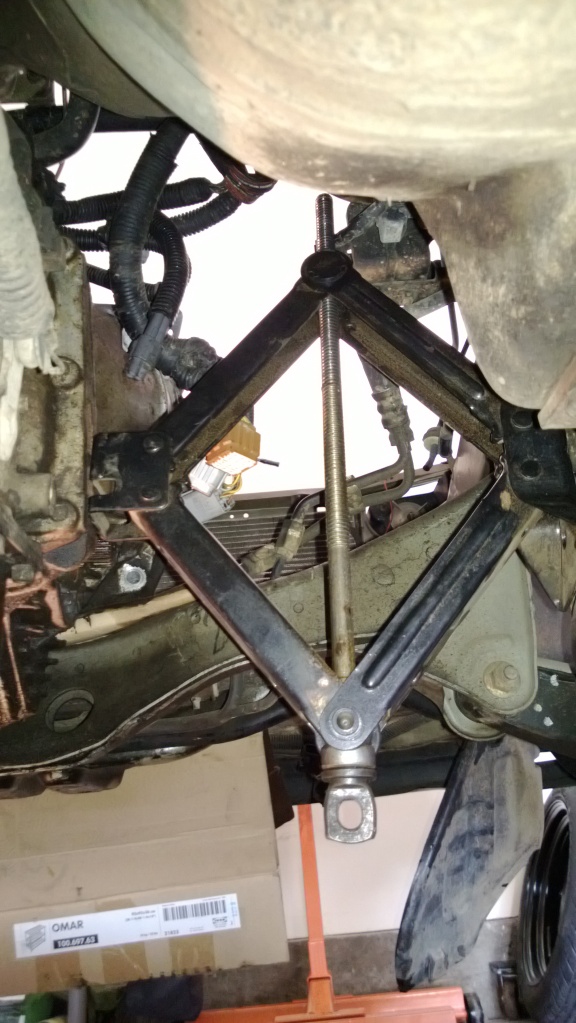
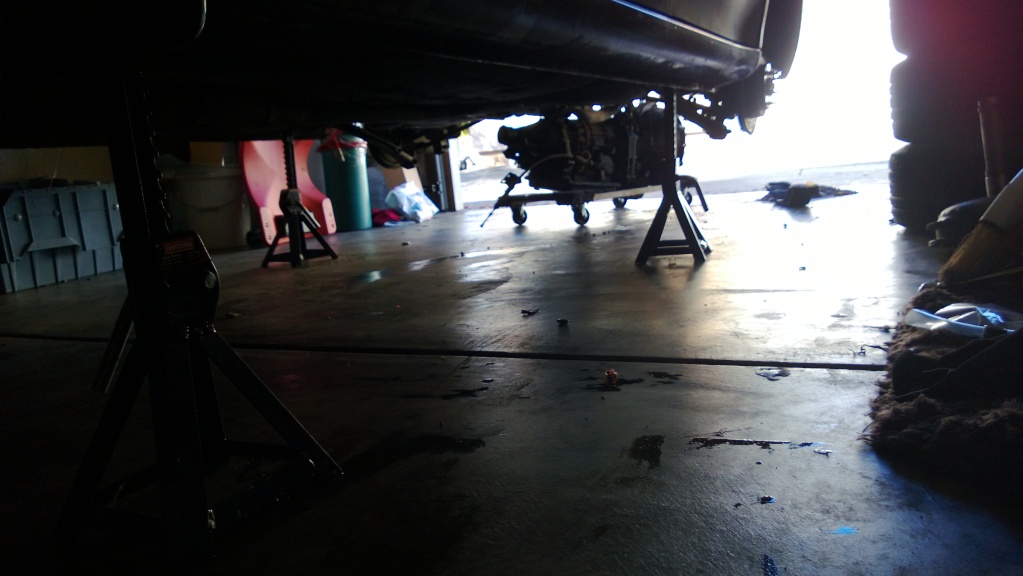
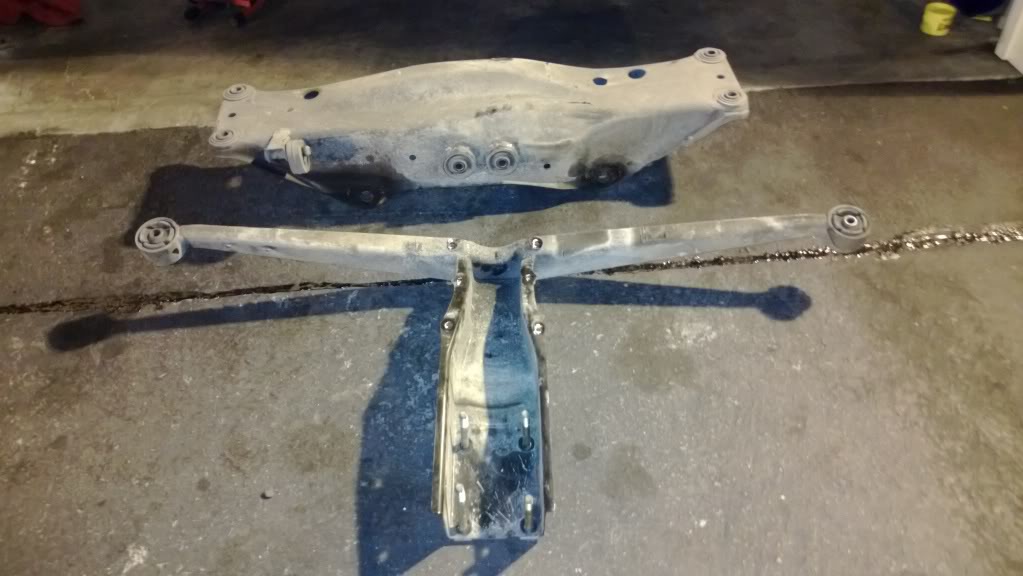
Since the legacy is up on jackstands in the garage, I figured I would replace some bushings while I have the chance considering the driveline, rear differential and rear axles are all off the car.
So I dropped the subframe and the rear diff outrigger support.
Whiteline press in bushings will be here on Tuesday for where the rear differential mounts to the subframe and the outrigger mounts to the body.
So that is where things are currently.
Hoping to have everything up and running by the end of May.
Because the full build thread is on SL-I.net and now over 14 pages long, I-club gets the condensed version.
Throttle body/IACV valve completely cleaned.
Injectors cleaned, all replaceable parts replaced and flow tested. Huge thanks to Jake from Doctor Injector in Rancho Cordova.
Finished all the swap wiring except for the speedometer... Still need to buy the VSS Pro but I have the wiring figured out:
Finished the engine wiring harness. Notice the two connectors for the reverse and neutral switches coming from the transmission
I sourced pigtail connectors for all connectors that my car didnt have to keep it as clean as possible.Pedals are in.
Went to build the shortblock. Got one piston in just fine. Got the second one in and noticed it had a little bit more resistance then the first one so I popped it back out just to make sure all was good.
All was not good.
So after another few hundred dollars and the help from Bob at Moore's Engine Supply in Auburn, I am now bored .5 over with new MOS2 anti-friction coated pistons and Hastings rings.
Pistons look like this:
I cannot even begin to tell you how happy I am with the service that Bob has given me. The valve job was done in 24 hours and the engine re-bore would have been done in 24 hours if he already had the new pistons. Pistons came the next day and I picked everything up the day after that.
Second time was the charm. I went horrifically slow and got everything assembled correctly.
Rear main seal, oil separator plate and rear wrist pin access plugs installed.
06+ oil baffle and pick up tube installed
06+ oil pan installed
10mm oil pump installed
Mating the heads
How I torqued down the two cam sprockets
Timing belt is done
Got a little excited when I placed the intake manifold on the engine. Havent installed it yet because I am waiting on my 8mm phelonic spacers to get here. Yes I am aware that they might be overkill but WTH.
Setting valve clearances which has to be done with the timing belt on.
Since the legacy is up on jackstands in the garage, I figured I would replace some bushings while I have the chance considering the driveline, rear differential and rear axles are all off the car.
So I dropped the subframe and the rear diff outrigger support.
Whiteline press in bushings will be here on Tuesday for where the rear differential mounts to the subframe and the outrigger mounts to the body.
So that is where things are currently.
Hoping to have everything up and running by the end of May.
Thread Starter
Registered User
iTrader: (2)
Joined: Jul 2011
Posts: 491
From: Sacramento
Car Info: 04 WRX Wagon, 06 Forester XT, 99 Legacy Sedan
Mini bump.
Rear subframe bushings are in as well as the rear differential outrigger press in bushings.
Rear subframe, differential, axles ect all installed:
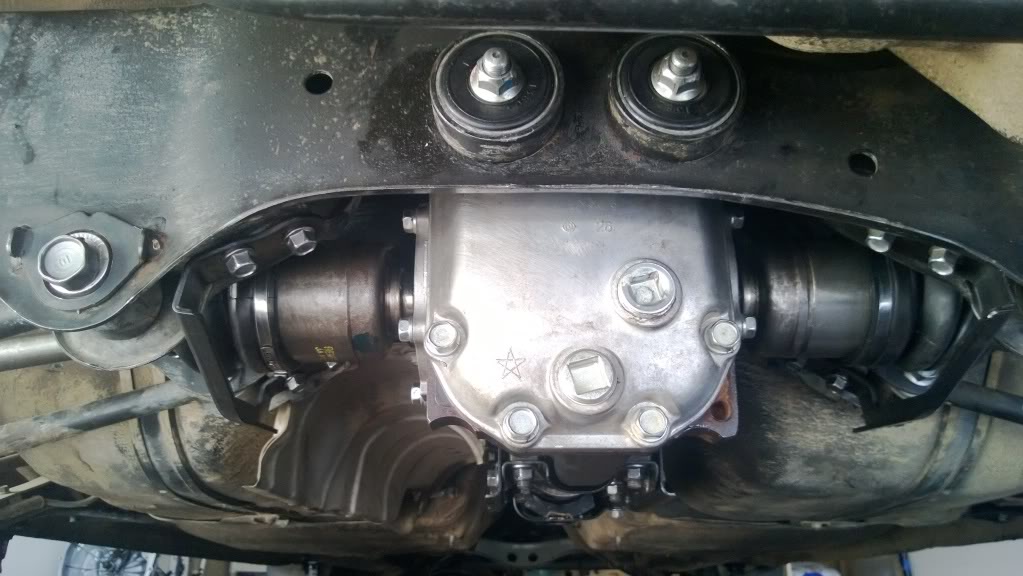
And now with both axles fully seated in the rear differential which has internal circlips instead of the type that pull out with the axle.
temporary_zpsbdb470db.jpg?t=1366857963
Before:
After:
temporary_zps6955ea7c.jpg?t=1366858002
Phelonic Spacers just for the heck of it:
Going to try to get the transmission installed this weekend so that all is left is clutch, motor, fluids!!!
Rear subframe bushings are in as well as the rear differential outrigger press in bushings.
Rear subframe, differential, axles ect all installed:
And now with both axles fully seated in the rear differential which has internal circlips instead of the type that pull out with the axle.
temporary_zpsbdb470db.jpg?t=1366857963
Before:
After:
temporary_zps6955ea7c.jpg?t=1366858002
Phelonic Spacers just for the heck of it:
Going to try to get the transmission installed this weekend so that all is left is clutch, motor, fluids!!!
Thread Starter
Registered User
iTrader: (2)
Joined: Jul 2011
Posts: 491
From: Sacramento
Car Info: 04 WRX Wagon, 06 Forester XT, 99 Legacy Sedan
Another mini update:
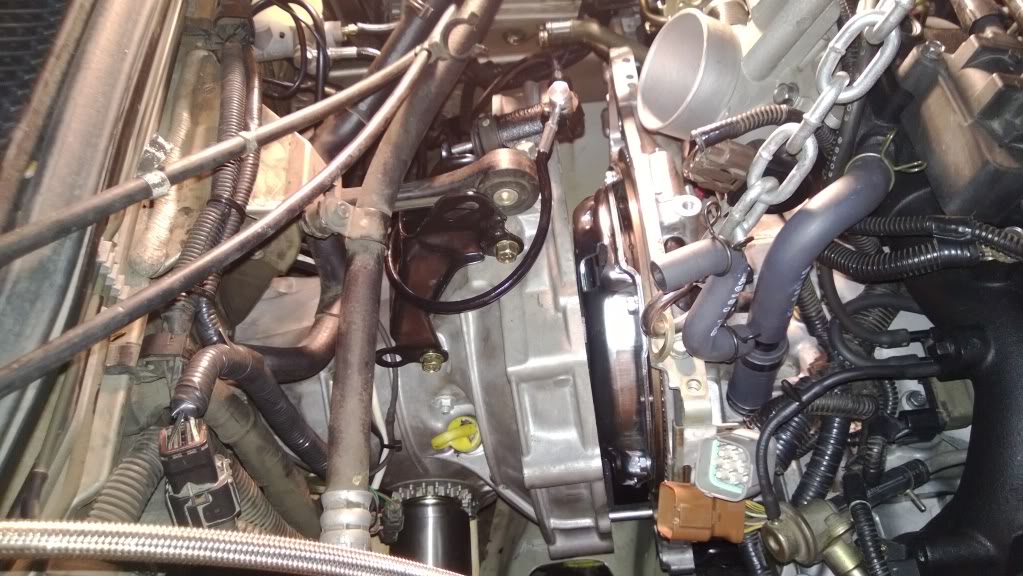
Transmission is installed along with the Group-N transmission mount, front axles and all shifter related items!!!
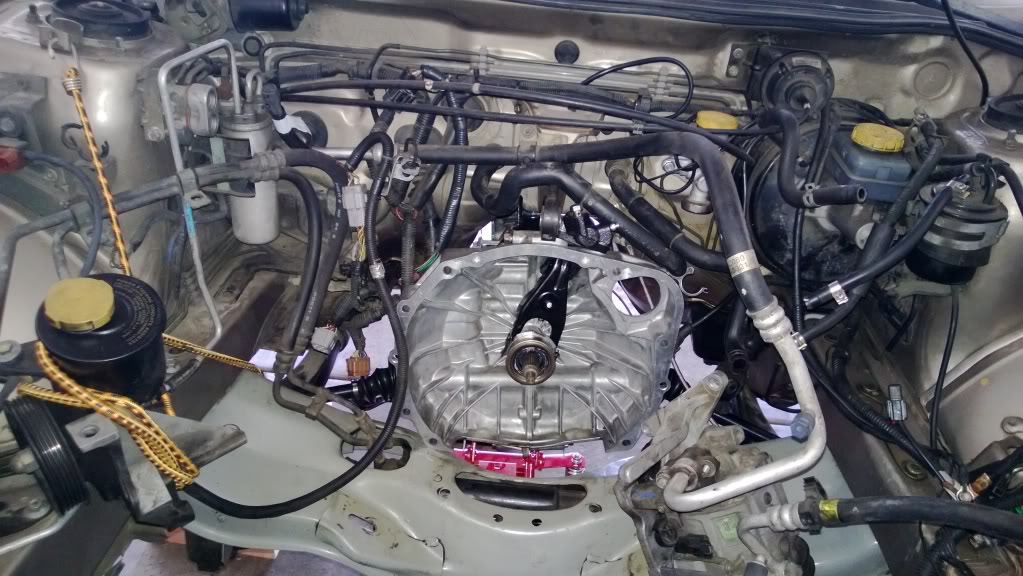
temporary_zps0508c7d8.jpg?t=1370529019
I ended up buying a new master cylinder with bleeder screw as well as a Chase Bays braided clutch and power steering line.
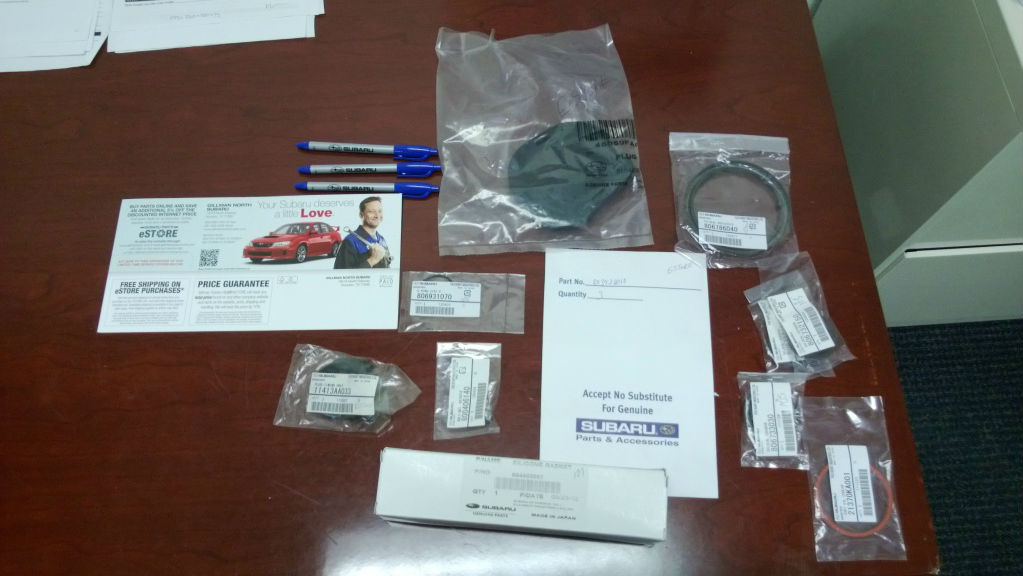
Got all of the loose odds and ends from the dealership:
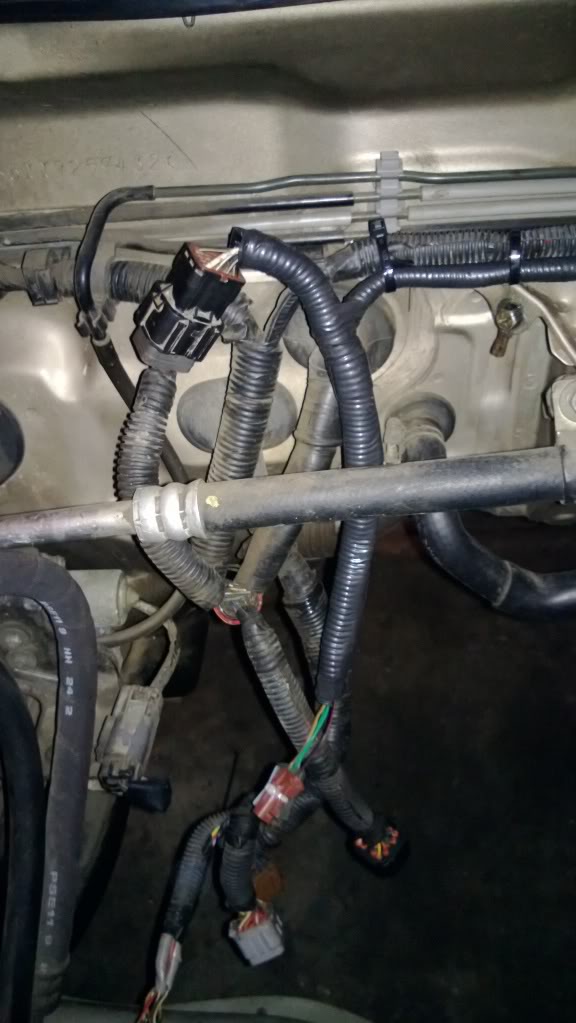
- New PCV hose assembly
- New exhaust manifold studs and nuts
- New exhaust gaskets
Will be moving the fully assembled engine out of my living room and into the garage so that I can put it on the engine lift in order to install the Excedy Stage 1 Organic clutch and flywheel.
Picking up a MT driveshaft and starter tomorrow.
I am hoping to have everything installed this weekend!!!!!!!
Transmission is installed along with the Group-N transmission mount, front axles and all shifter related items!!!
temporary_zps0508c7d8.jpg?t=1370529019
I ended up buying a new master cylinder with bleeder screw as well as a Chase Bays braided clutch and power steering line.
Got all of the loose odds and ends from the dealership:
- New PCV hose assembly
- New exhaust manifold studs and nuts
- New exhaust gaskets
Will be moving the fully assembled engine out of my living room and into the garage so that I can put it on the engine lift in order to install the Excedy Stage 1 Organic clutch and flywheel.
Picking up a MT driveshaft and starter tomorrow.
I am hoping to have everything installed this weekend!!!!!!!
Thread Starter
Registered User
iTrader: (2)
Joined: Jul 2011
Posts: 491
From: Sacramento
Car Info: 04 WRX Wagon, 06 Forester XT, 99 Legacy Sedan
Well I ended up cross threading the passenger side front tranny cross member bolt so I ordered a Permacoil M12 x 1.25 repair kit and it will be here tomorrow.
In the meantime, I took a trip to the pick and pull that is right down the street from me. Just about bought a long block from a 94 Turbo legacy for a whopping $185... Odometer says it has 131k miles on it but I held off.
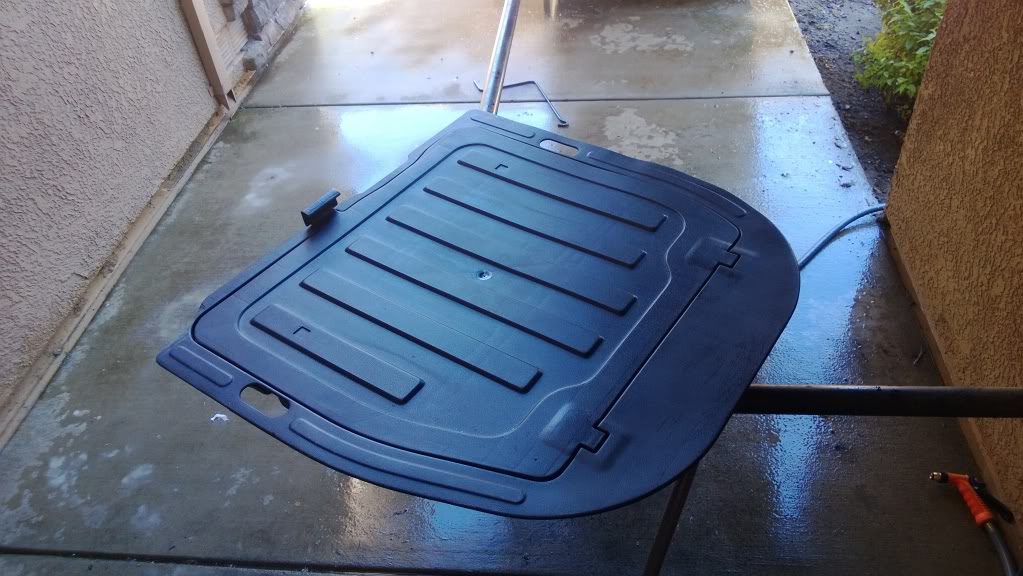
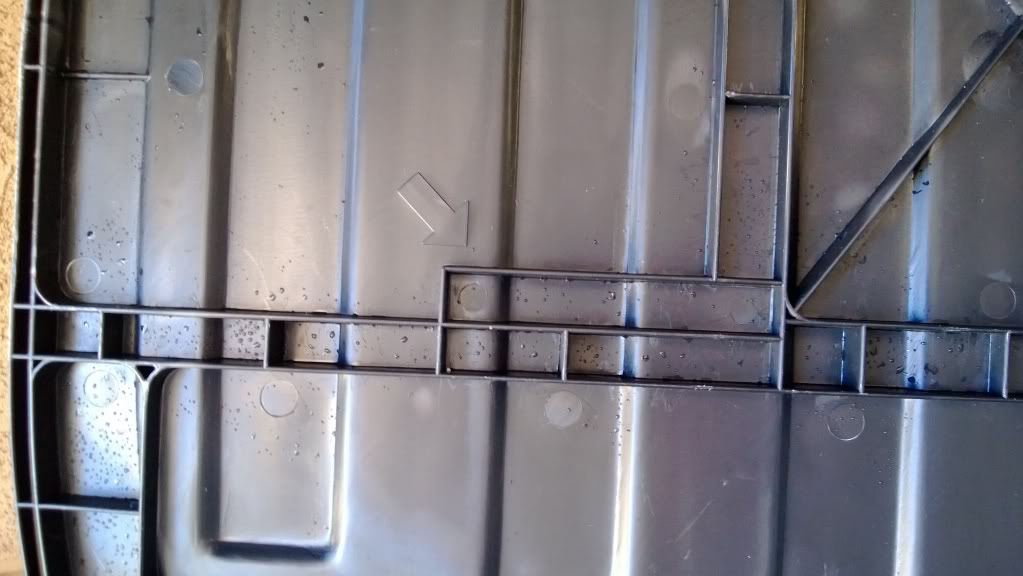
I was able to find myself a gen 1 spare tire cover/trunk box which will henceforth be known by its correct name: Multibox
Total cost (including $2 entrance fee) was a whooping $7

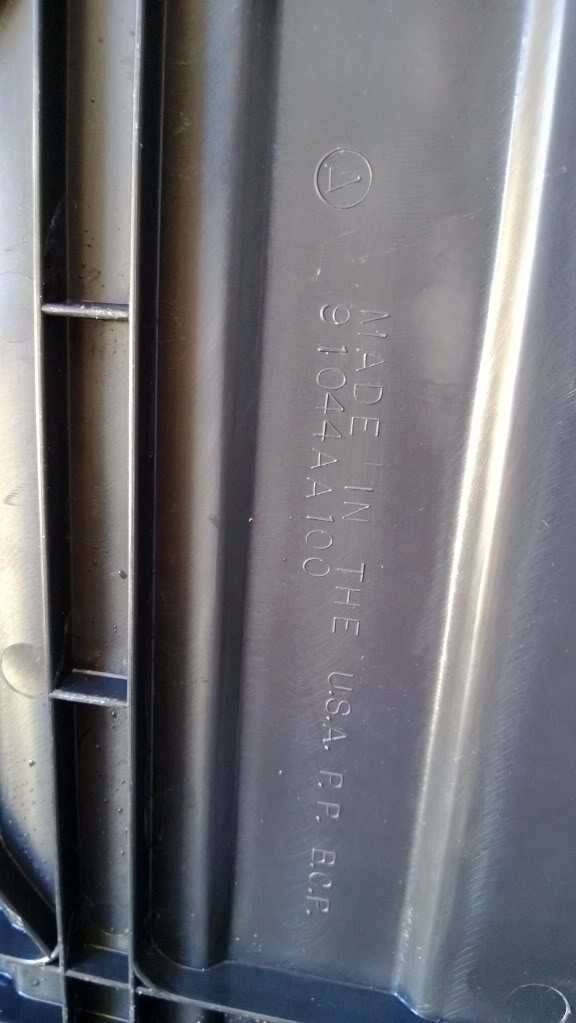
Part number for those who are curious:
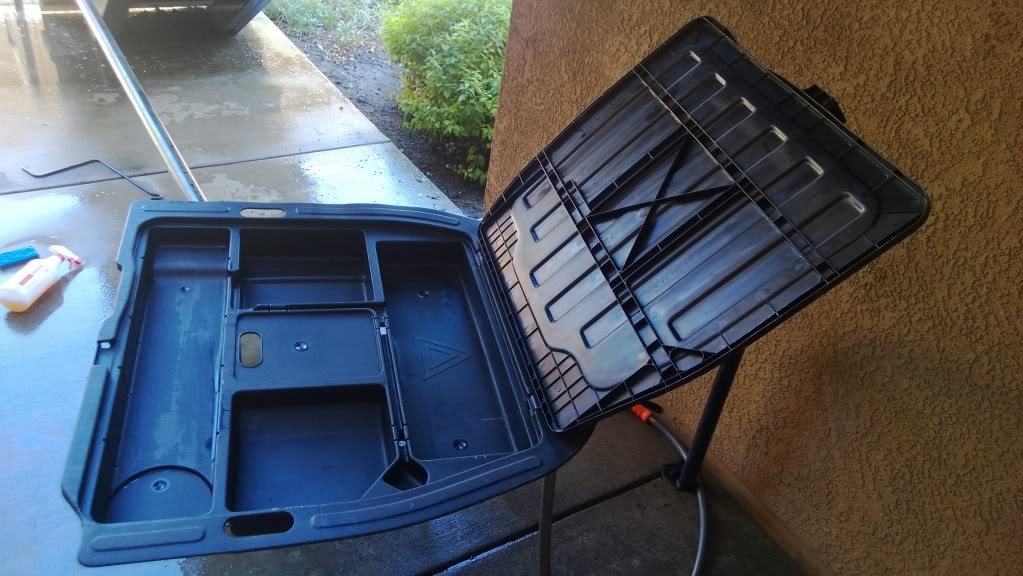
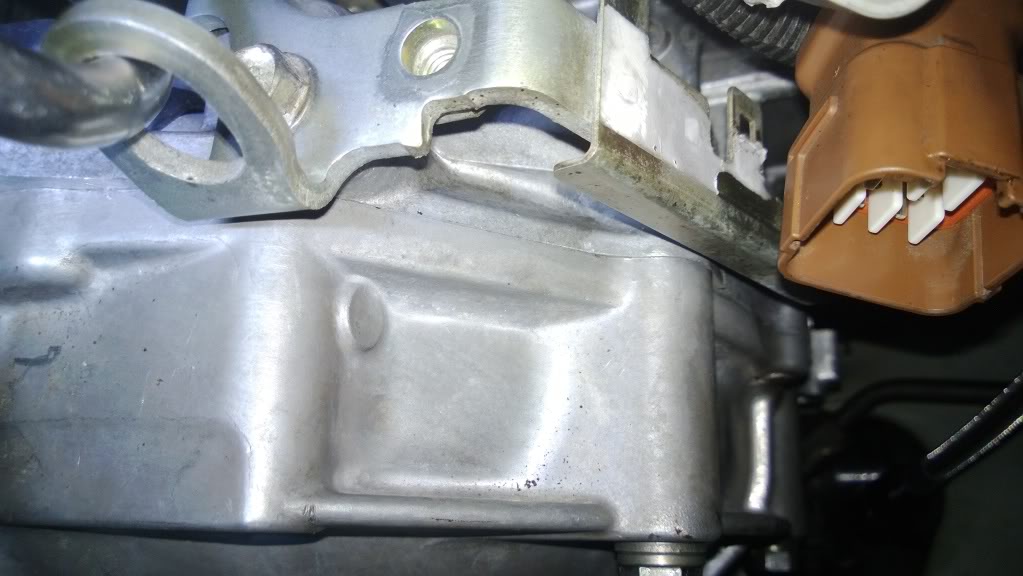
Anybody know what the hell this area is for that has an arrow pointing at it? It is under the lid of the box:
I also took a trip down to recycle row in search for a MT BD driveshaft and MT starter which I was able to find. The place I bought them from also had these in their front lobby being repaired to be sold as a Salvage/branded title
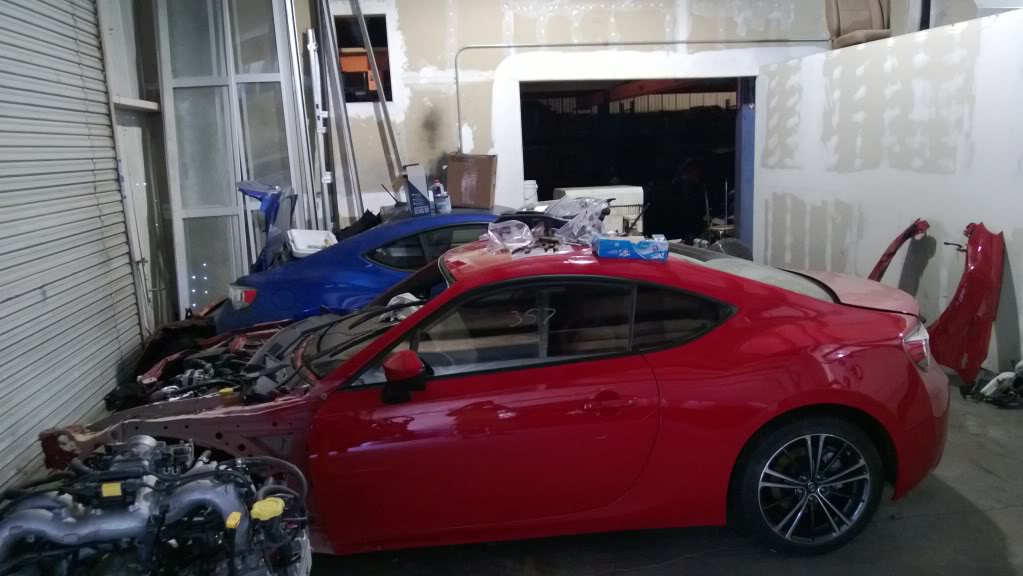
Turns out the driveshaft that they had for me was a rebuilt driveshaft with grease fittings on each u-joint for a grease gun. $85 with a 3 year warranty. Starter was $35 with same 3 year warranty.
So I was able to get the drive shaft installed
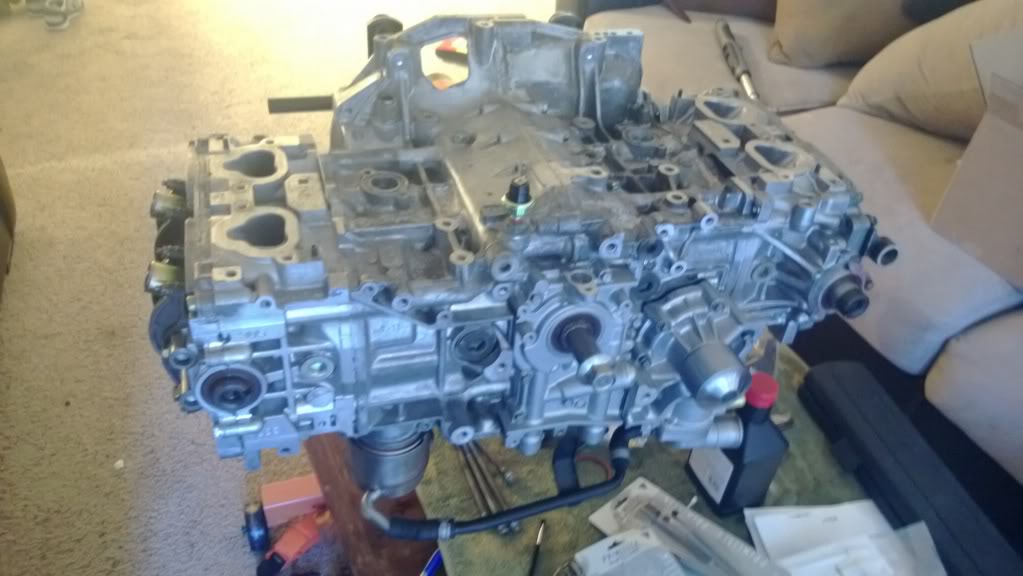
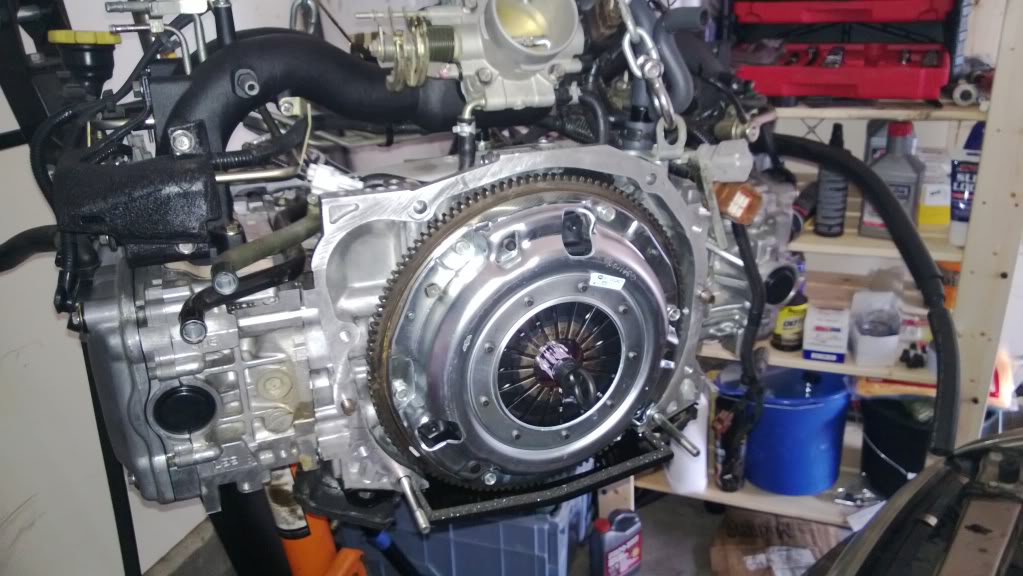
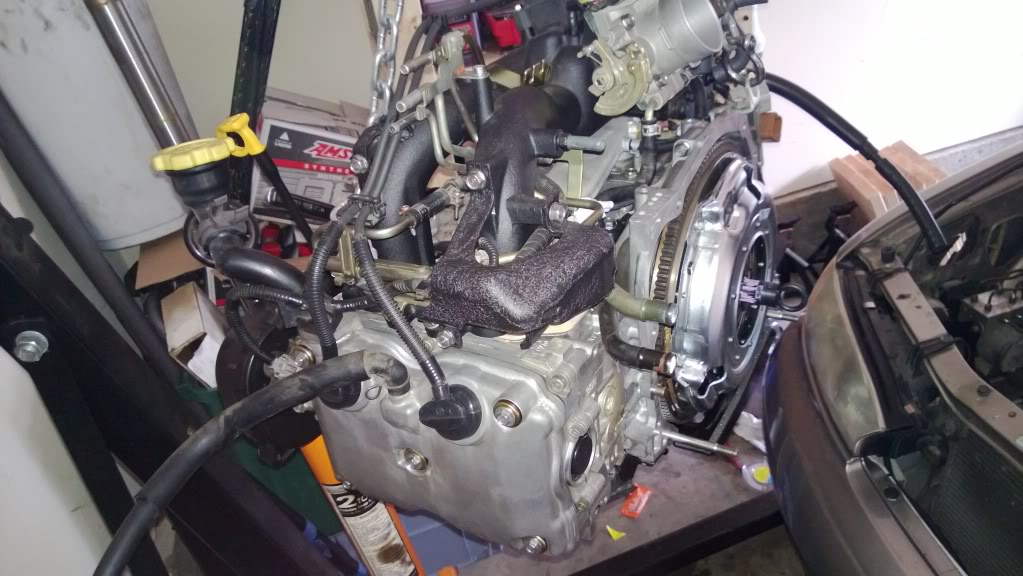
I was also FINALLY able to wheel the finished motor out of my living room and into the garage.
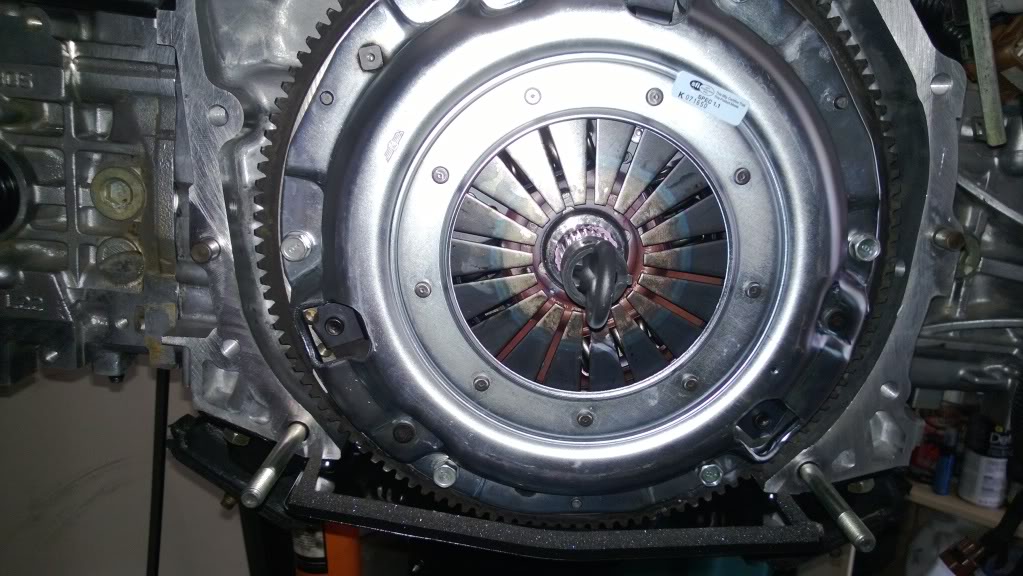
Got it up on the engine lift and installed the flywheel, clutch disk and clutch cover.
I think I did it right... torqued the flywheel down, then put the clutch disc on using the alignment tool to hold it in place. Then put the clutch cover on (still with the alignment tool in place) and gradually tightened (in a star pattern) the 6 clutch cover bolts until they were torqued.
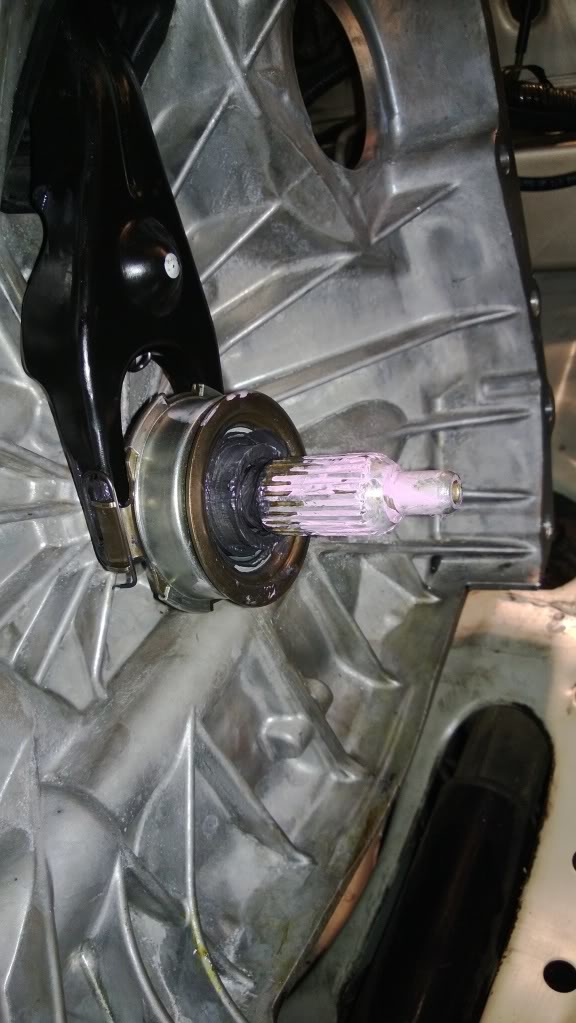
Alignment tool can still be inserted and removed easily with everything torqued down.
All that is left are the power steering line and clutch line which should be here tomorrow
Might have this thing done in time for this weeks Thursday night meet!!!
In the meantime, I took a trip to the pick and pull that is right down the street from me. Just about bought a long block from a 94 Turbo legacy for a whopping $185... Odometer says it has 131k miles on it but I held off.
I was able to find myself a gen 1 spare tire cover/trunk box which will henceforth be known by its correct name: Multibox
Total cost (including $2 entrance fee) was a whooping $7
Part number for those who are curious:
Anybody know what the hell this area is for that has an arrow pointing at it? It is under the lid of the box:
I also took a trip down to recycle row in search for a MT BD driveshaft and MT starter which I was able to find. The place I bought them from also had these in their front lobby being repaired to be sold as a Salvage/branded title
Turns out the driveshaft that they had for me was a rebuilt driveshaft with grease fittings on each u-joint for a grease gun. $85 with a 3 year warranty. Starter was $35 with same 3 year warranty.
So I was able to get the drive shaft installed
I was also FINALLY able to wheel the finished motor out of my living room and into the garage.
Got it up on the engine lift and installed the flywheel, clutch disk and clutch cover.
I think I did it right... torqued the flywheel down, then put the clutch disc on using the alignment tool to hold it in place. Then put the clutch cover on (still with the alignment tool in place) and gradually tightened (in a star pattern) the 6 clutch cover bolts until they were torqued.
Alignment tool can still be inserted and removed easily with everything torqued down.
All that is left are the power steering line and clutch line which should be here tomorrow
Might have this thing done in time for this weeks Thursday night meet!!!
Thread Starter
Registered User
iTrader: (2)
Joined: Jul 2011
Posts: 491
From: Sacramento
Car Info: 04 WRX Wagon, 06 Forester XT, 99 Legacy Sedan
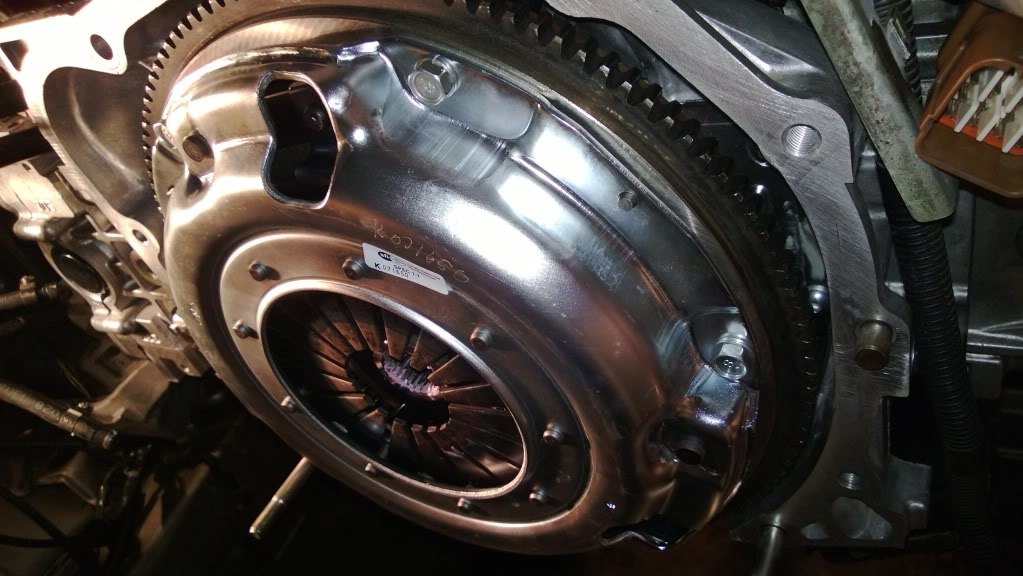
Engine and transmission are 99% mated!! Just missing the starter/starter bolts...
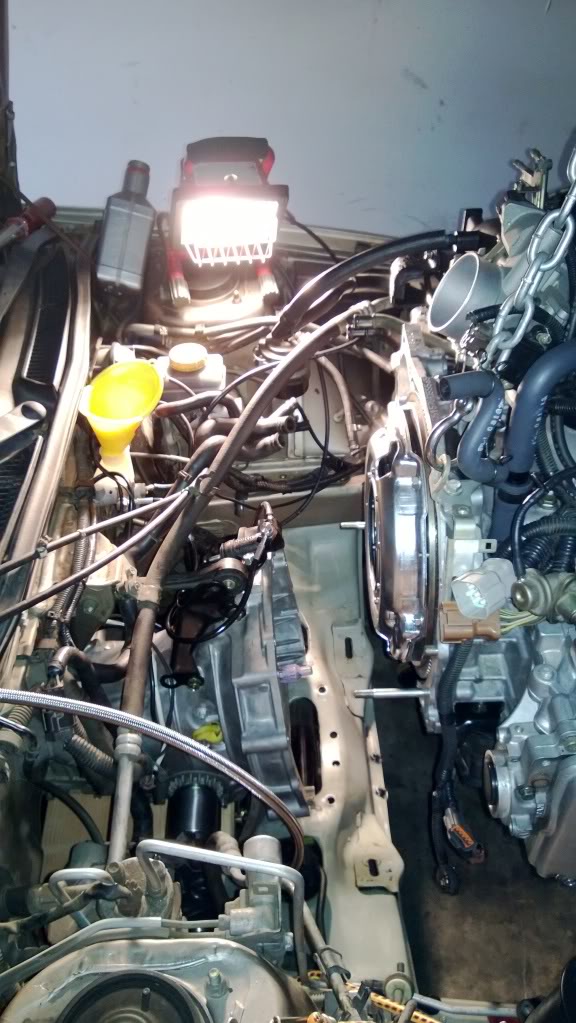
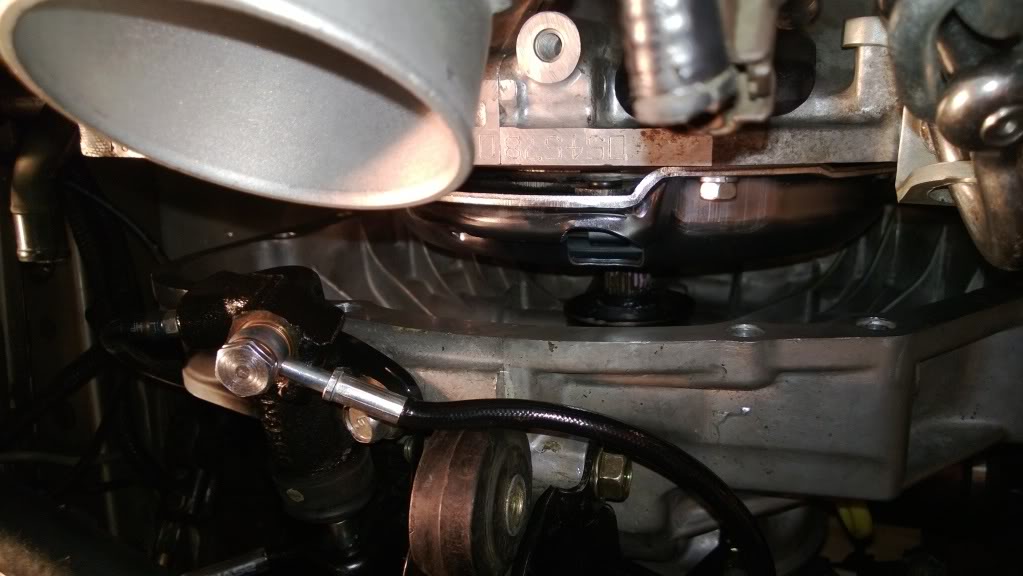
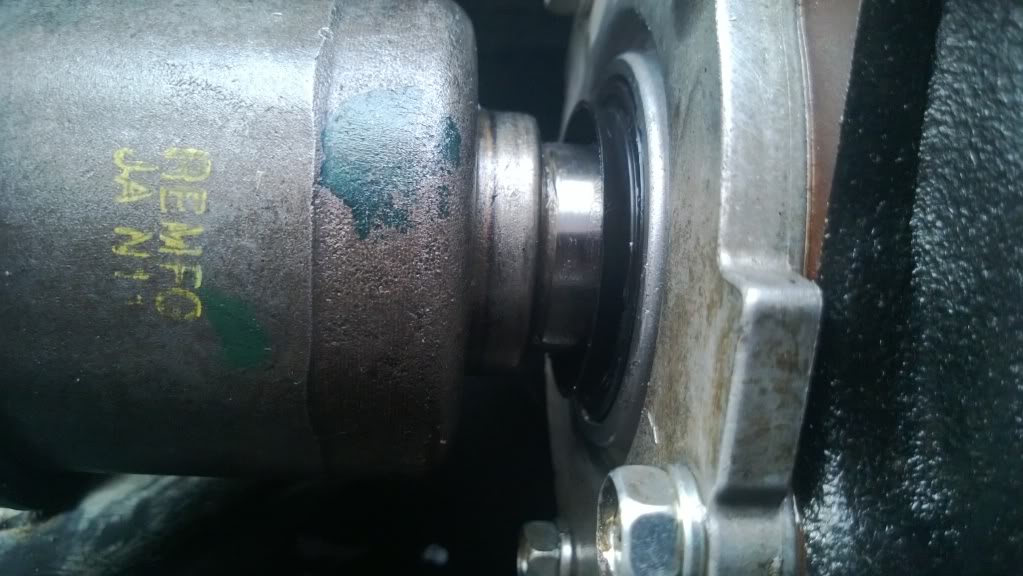
The only thing I am not entirely satisfied with would be the front CV boots look like this... I am hoping it is because the front end of the car is still not supporting the weight of the motor... it is still hanging from the engine hoist barely.
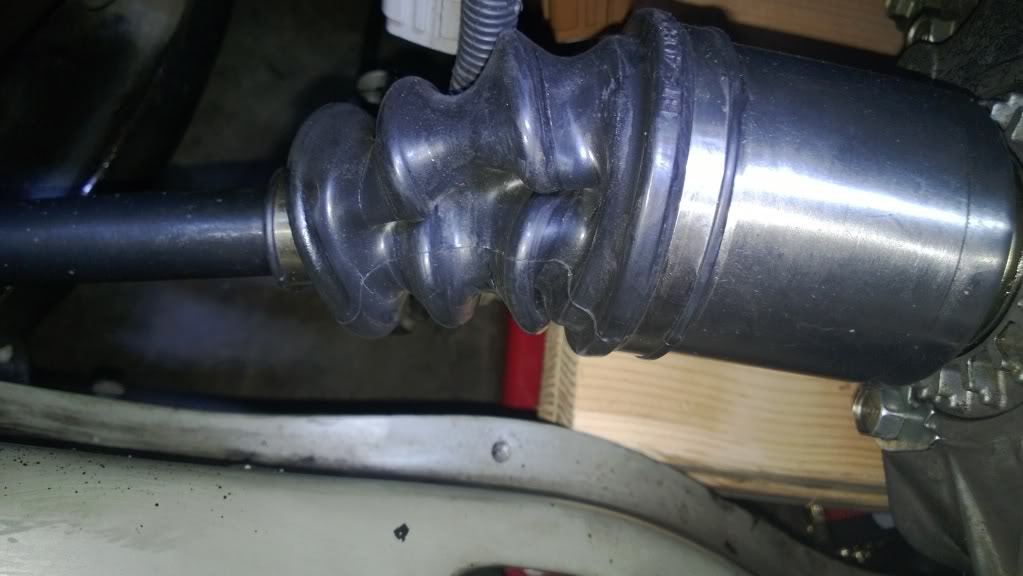
The only thing I am not entirely satisfied with would be the front CV boots look like this... I am hoping it is because the front end of the car is still not supporting the weight of the motor... it is still hanging from the engine hoist barely.