
Chicken's Crosstrek

Thread Starter
Churro Aficionado
iTrader: (38)
Joined: Feb 2008
Posts: 54,661
From: IG - @thomas.teammoist
Car Info: IG - @TEAMMOISTOFFICIAL
Got home yesterday from work and test mounted all the wiring and plugged in the switches to a temp LED light bar (just to make sure everything worked before putting it in it's final resting place).
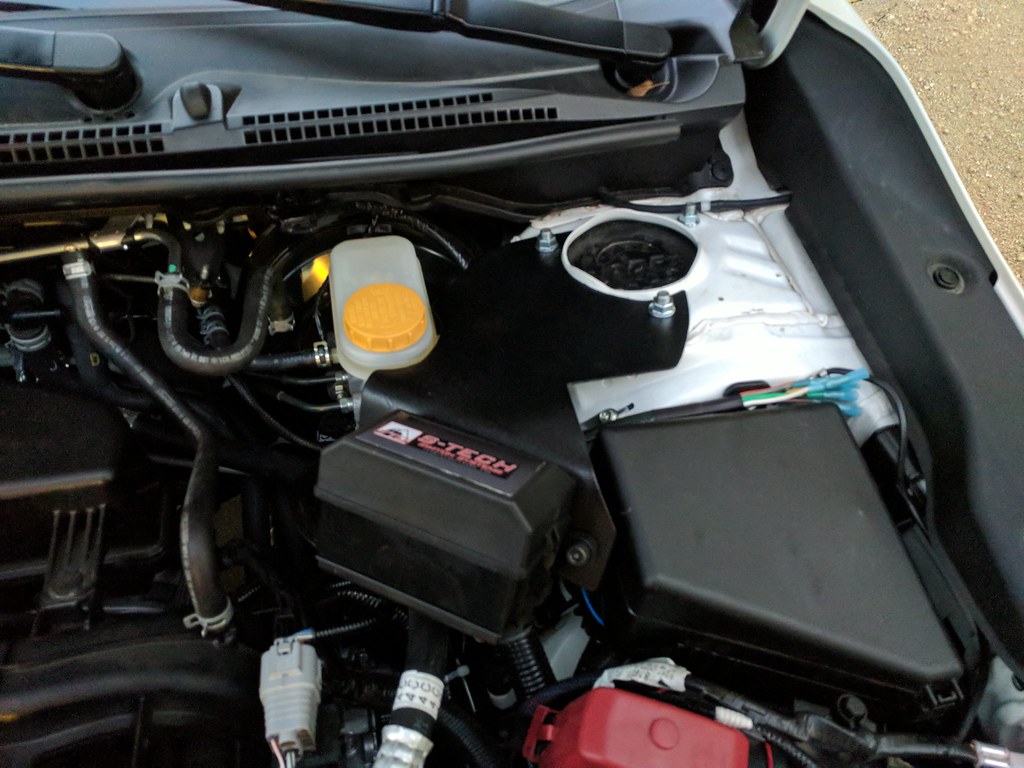
Everything worked great! I ran the power to the battery and negative to the ground on the drivers side strut tower base (where the battery grounds out). The secondary power wire (smaller one) I ran straight to the battery over an accessory fuse so I can turn on any of the lights/accessories without the car running. I just have to turn them off when Im done The smaller blue wire I ran to an accessory fuse as that wire is for the smaller "always on" bottom LED for the switches.
I ran the 6 accessory power lines under the bracket I made and they are, for now, sitting between the drivers strut tower and main fuse block (as seen in the pics).
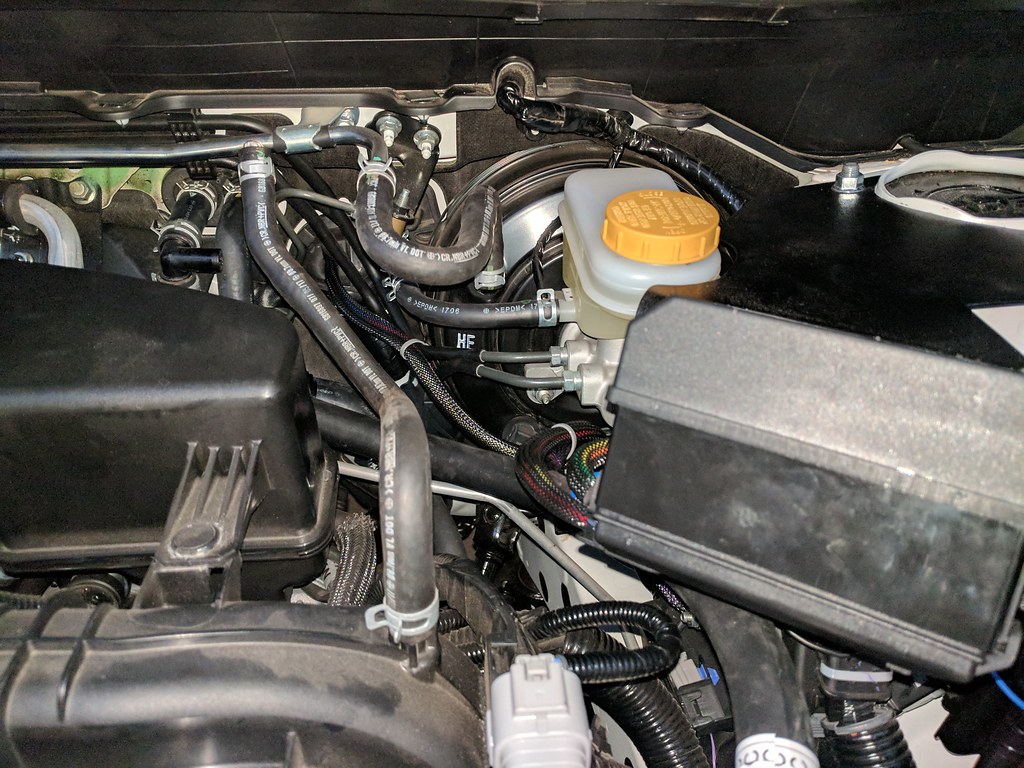
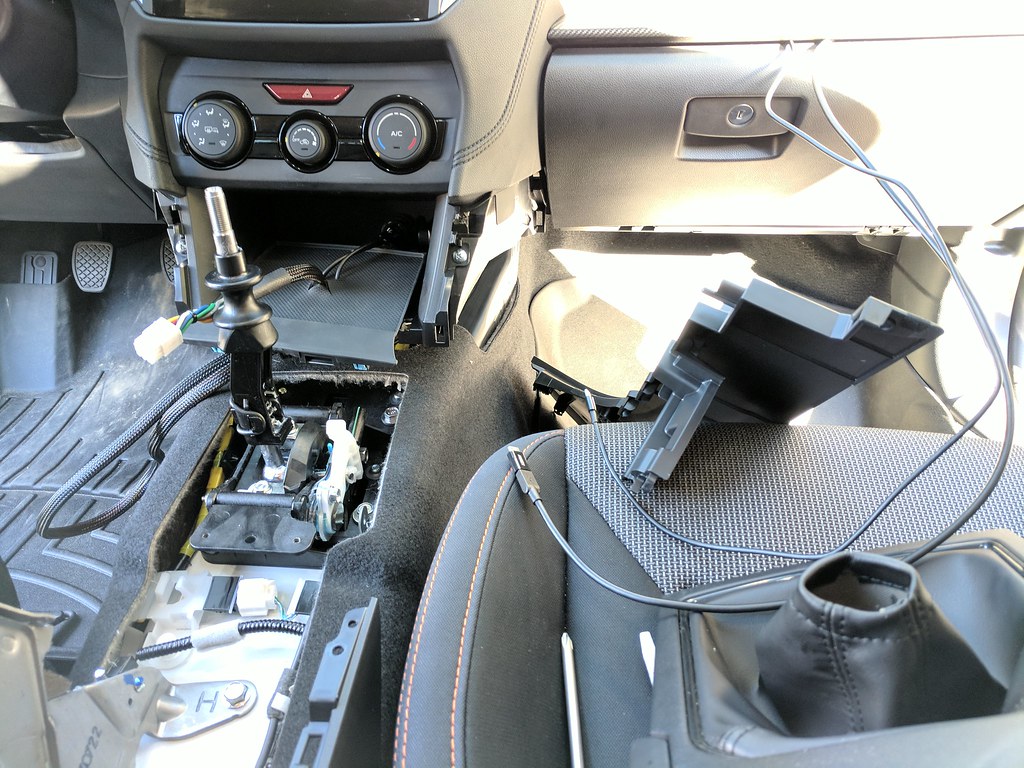
Honestly so far, the hardest part of all this was running the lead cable into the cabin. I ran it through the wirewall with the main harness. You can see it in the second pic where I ziptied the cable to the brake line to keep it out of the way and it continues on through.
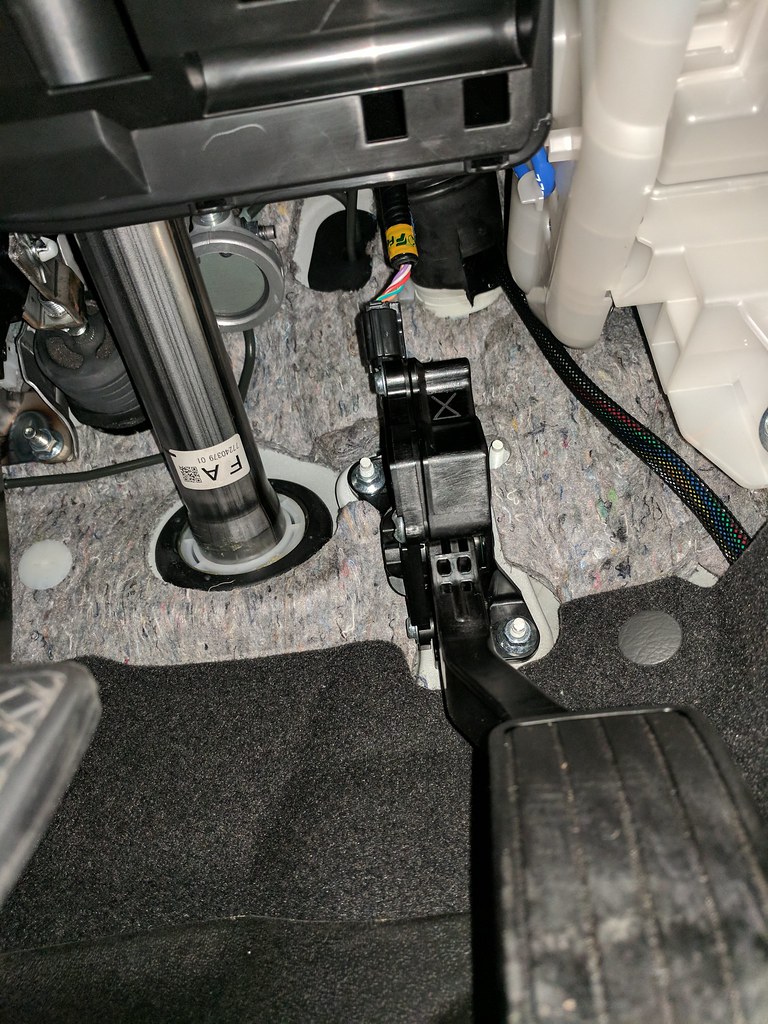
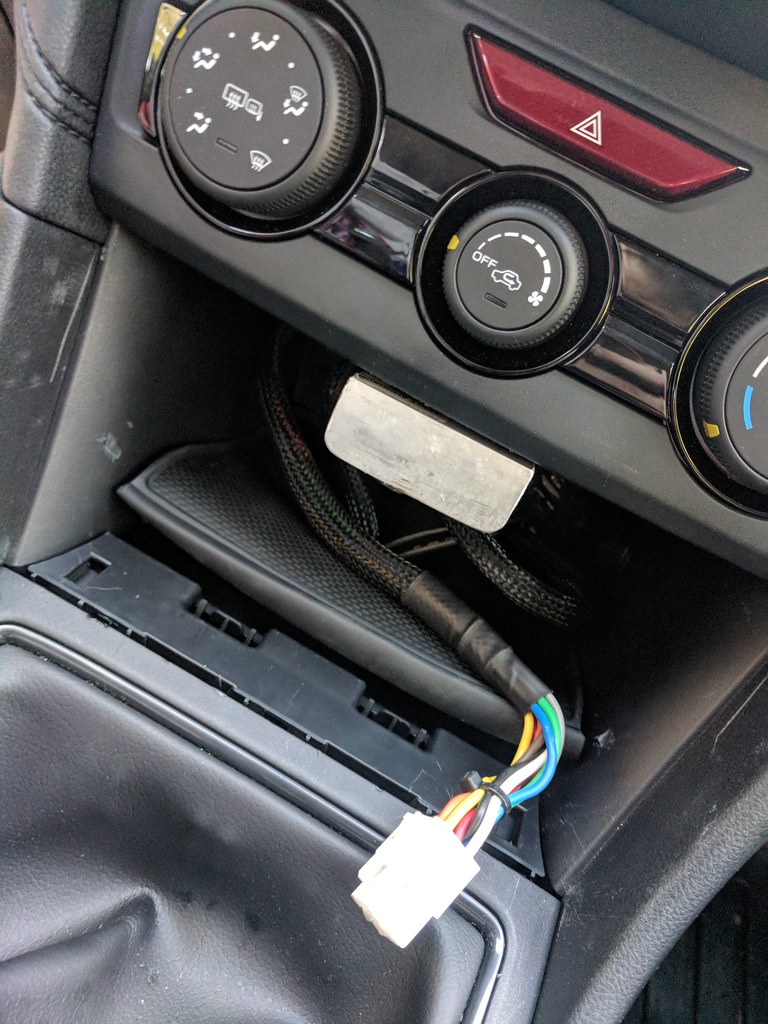
The last picture is from under the dash. The pedal seen is the gas pedal. Directly above that is where the main harness comes into the car. I slit a hole in the grommet to pull the lead wire through. You can see it drops down and then I tucked it behind the carpeting.
Thats as far as I got yesterday. Today Im hoping to run the lead wire into the dash to come up into the cubby. Then I can connect the switches and set the plate in place!
Everything worked great! I ran the power to the battery and negative to the ground on the drivers side strut tower base (where the battery grounds out). The secondary power wire (smaller one) I ran straight to the battery over an accessory fuse so I can turn on any of the lights/accessories without the car running. I just have to turn them off when Im done
The smaller blue wire I ran to an accessory fuse as that wire is for the smaller "always on" bottom LED for the switches.I ran the 6 accessory power lines under the bracket I made and they are, for now, sitting between the drivers strut tower and main fuse block (as seen in the pics).
Honestly so far, the hardest part of all this was running the lead cable into the cabin. I ran it through the wirewall with the main harness. You can see it in the second pic where I ziptied the cable to the brake line to keep it out of the way and it continues on through.
The last picture is from under the dash. The pedal seen is the gas pedal. Directly above that is where the main harness comes into the car. I slit a hole in the grommet to pull the lead wire through. You can see it drops down and then I tucked it behind the carpeting.
Thats as far as I got yesterday. Today Im hoping to run the lead wire into the dash to come up into the cubby. Then I can connect the switches and set the plate in place!

Thread Starter
Churro Aficionado
iTrader: (38)
Joined: Feb 2008
Posts: 54,661
From: IG - @thomas.teammoist
Car Info: IG - @TEAMMOISTOFFICIAL
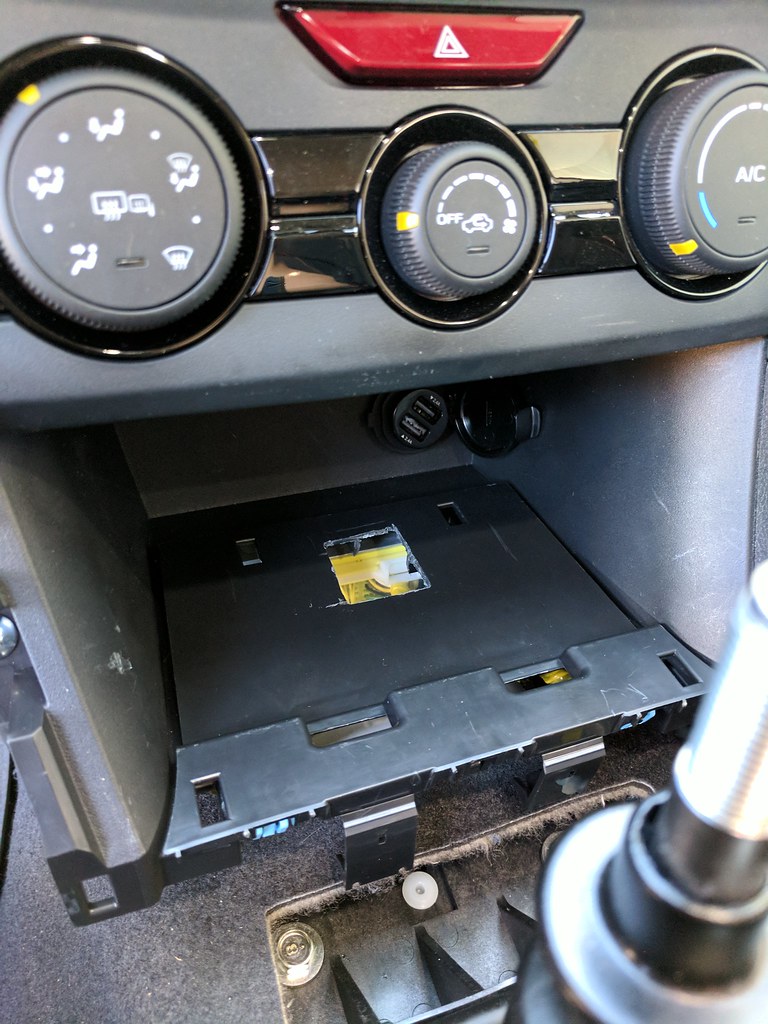
More done yesterday. Tore the center console apart to run the wiring up into the cubby.
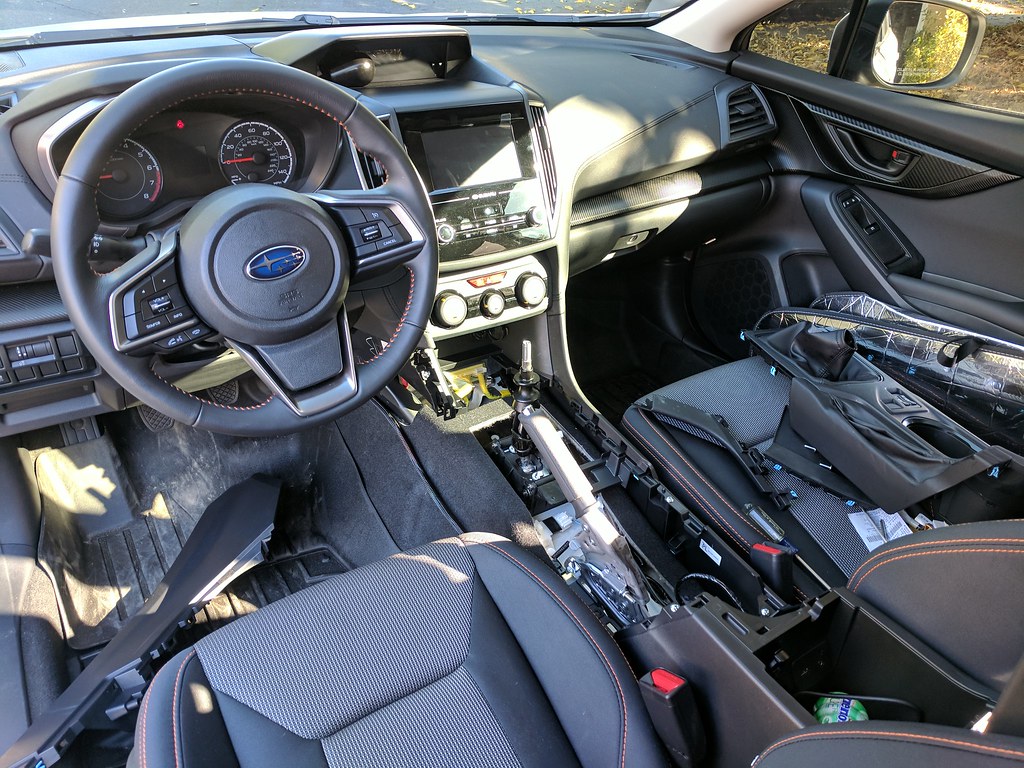
There is a flat plastic "plate" that clips into the cubby to make the bottom of it. I decided that this will be the sacrificial piece that I cut into. It will be cheap/easy to replace in the future if I ever need to.
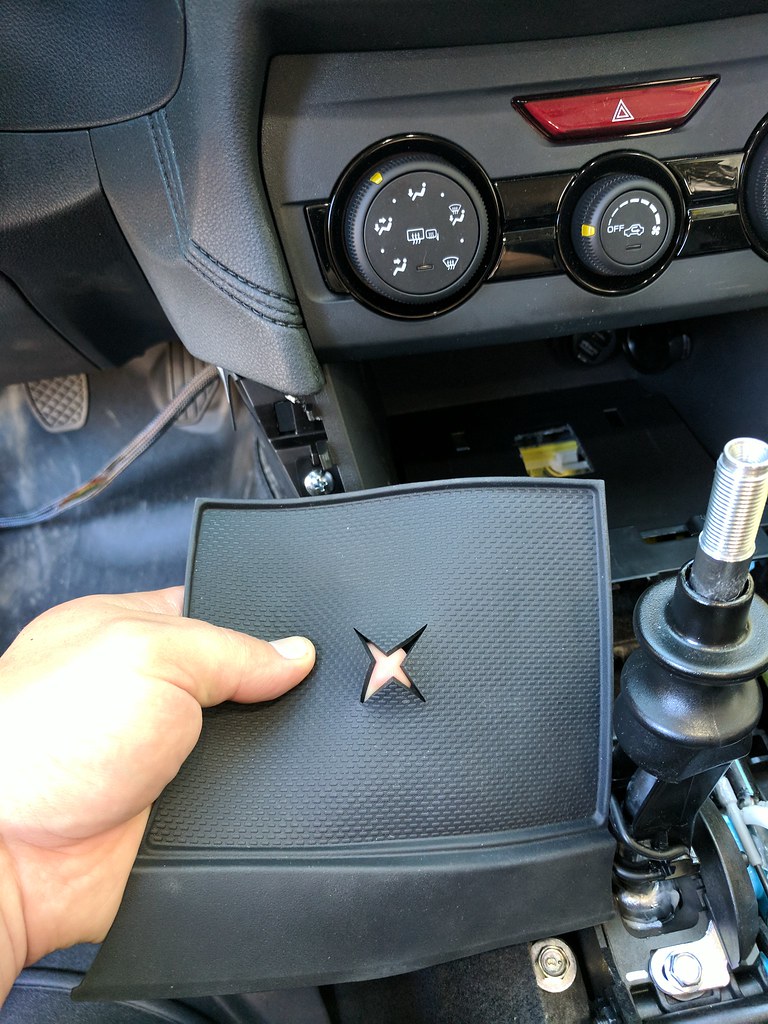
On top of that, there is a small rubber mat to keep things from rolling around in the cubby. Again, this would be cheap/easy to replace if need be, so a simple X cut to let the wires run through it from under.
There is a flat plastic "plate" that clips into the cubby to make the bottom of it. I decided that this will be the sacrificial piece that I cut into. It will be cheap/easy to replace in the future if I ever need to.
On top of that, there is a small rubber mat to keep things from rolling around in the cubby. Again, this would be cheap/easy to replace if need be, so a simple X cut to let the wires run through it from under.
Thread Starter
Churro Aficionado
iTrader: (38)
Joined: Feb 2008
Posts: 54,661
From: IG - @thomas.teammoist
Car Info: IG - @TEAMMOISTOFFICIAL
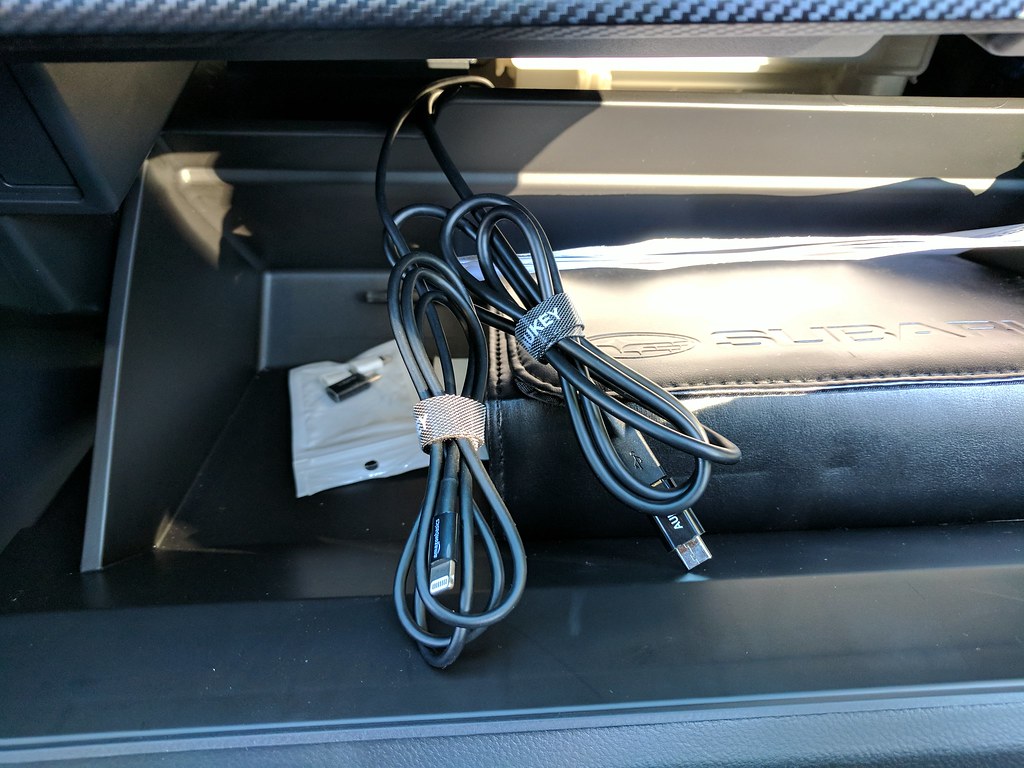
I also had this idea running around my head since I got the car. Since I am enclosing the cubby, the cigarette adapter is getting closed off. So I installed one of the dual USB charging ports in it, then got 2 six foot cables (one for iPhone and one for Android), and ran them behind the dash and into the glove box. So that port is no longer "wasted" and the passenger can pop open the glove box to charge either type of phone they have.
Everything put back together, showing the cables coming in/out of the cubby. Now the braided cable to the back of the switches, has maybe 2ft of length. So I just wove it around in a zig-zag and everything fit nicely.
Im OCD so I cable tied the cables together while they're not being used in the glove box. Easy to store and not get tangled up. There is enough length on both of them where the passenger can be sitting all the way back in their seat and still charge their phone while holding it, or put it in the cupholders to sit and charge.
I installed the switches yesterday, but it does not want to sit in place anymore as it did earlier. I did not take into account all the wiring behind the switches and the extra length of the lead wire in the cubby. So it has some "spring" tension behind it. Not a lot, but just enough to where it will not sit in the cubby by itself. Originally I planned on making a couple brackets along the sides of the cubby and mount them to it. I was going to use some strong magnets and glue them onto the back of the aluminum bracket so the switch panel will just "stick" to it. I think ill be going back to that idea, or something similar.
So im one step closer with having this all done, just small details to iron out!.
Thread Starter
Churro Aficionado
iTrader: (38)
Joined: Feb 2008
Posts: 54,661
From: IG - @thomas.teammoist
Car Info: IG - @TEAMMOISTOFFICIAL
Thank ya sir!
I also forgot, there is another cigarette lighter power plug in the armrest. I also put a dual USB charging adapter in that. I ran another cable through the armrest and center console up under the dash. As of right now, its just sitting behind the drivers side fuse panel.
I figure that if I ever decide to get a window phone mount, I will have charging as an option there.
It's QQ thankyouverymuch
iTrader: (39)
Joined: May 2007
Posts: 19,721
From: San Jose
Car Info: 2011 SWP WRX Hatch
Thank ya sir!
I also forgot, there is another cigarette lighter power plug in the armrest. I also put a dual USB charging adapter in that. I ran another cable through the armrest and center console up under the dash. As of right now, its just sitting behind the drivers side fuse panel.
I figure that if I ever decide to get a window phone mount, I will have charging as an option there.
I also forgot, there is another cigarette lighter power plug in the armrest. I also put a dual USB charging adapter in that. I ran another cable through the armrest and center console up under the dash. As of right now, its just sitting behind the drivers side fuse panel.
I figure that if I ever decide to get a window phone mount, I will have charging as an option there.
I put a 5 port USB adapter in the center. 3 cables routed out the slot in the lid, Lighting (My phone), micro USB (Work phone), and mini USB (GoPro).
I have a 2 port USB adapter in the cubby plug. That has a lighting that goes up to the top of my A pillar for when I put my phone on my windshield.
Thread Starter
Churro Aficionado
iTrader: (38)
Joined: Feb 2008
Posts: 54,661
From: IG - @thomas.teammoist
Car Info: IG - @TEAMMOISTOFFICIAL
I hardwired one in the STi that comes up from behind the dash on the drivers side for a window mount.
I liked the idea of just USB cable and not having to tap into anything if I didnt need to.
I liked the idea of just USB cable and not having to tap into anything if I didnt need to.
Thread Starter
Churro Aficionado
iTrader: (38)
Joined: Feb 2008
Posts: 54,661
From: IG - @thomas.teammoist
Car Info: IG - @TEAMMOISTOFFICIAL
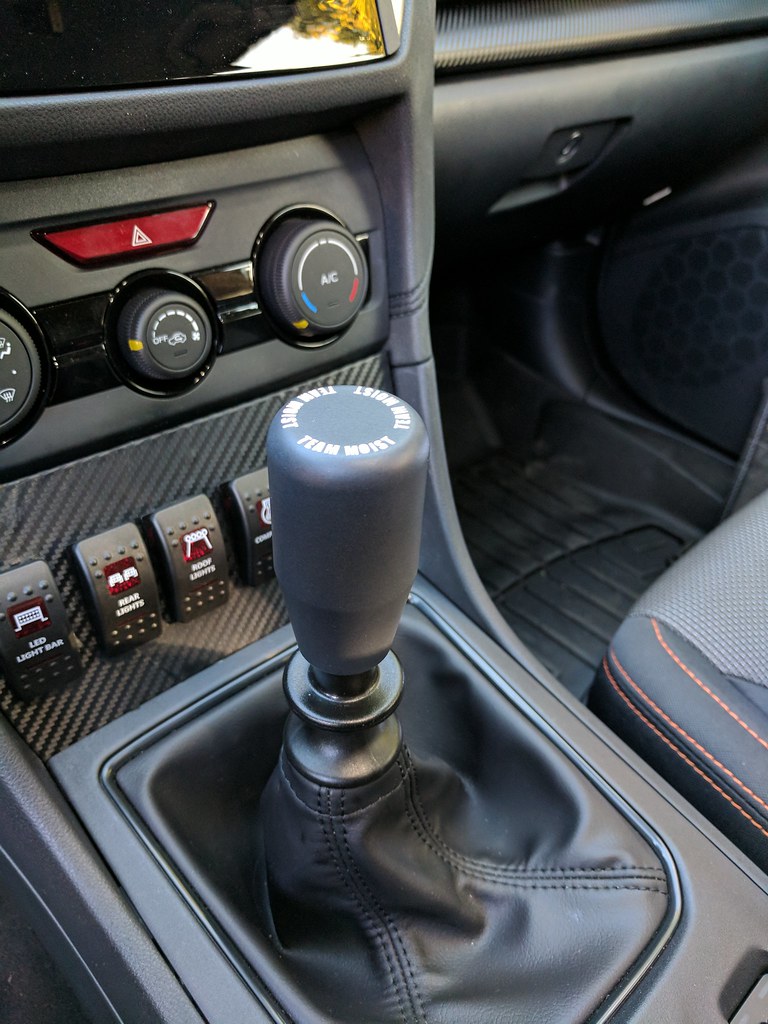
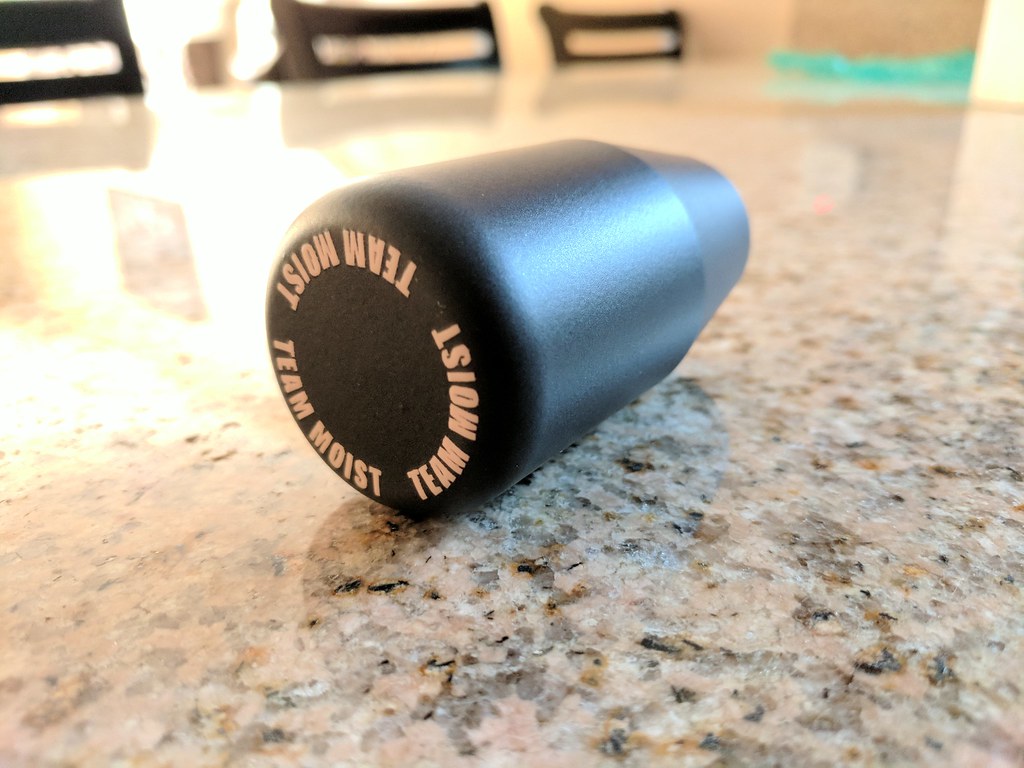
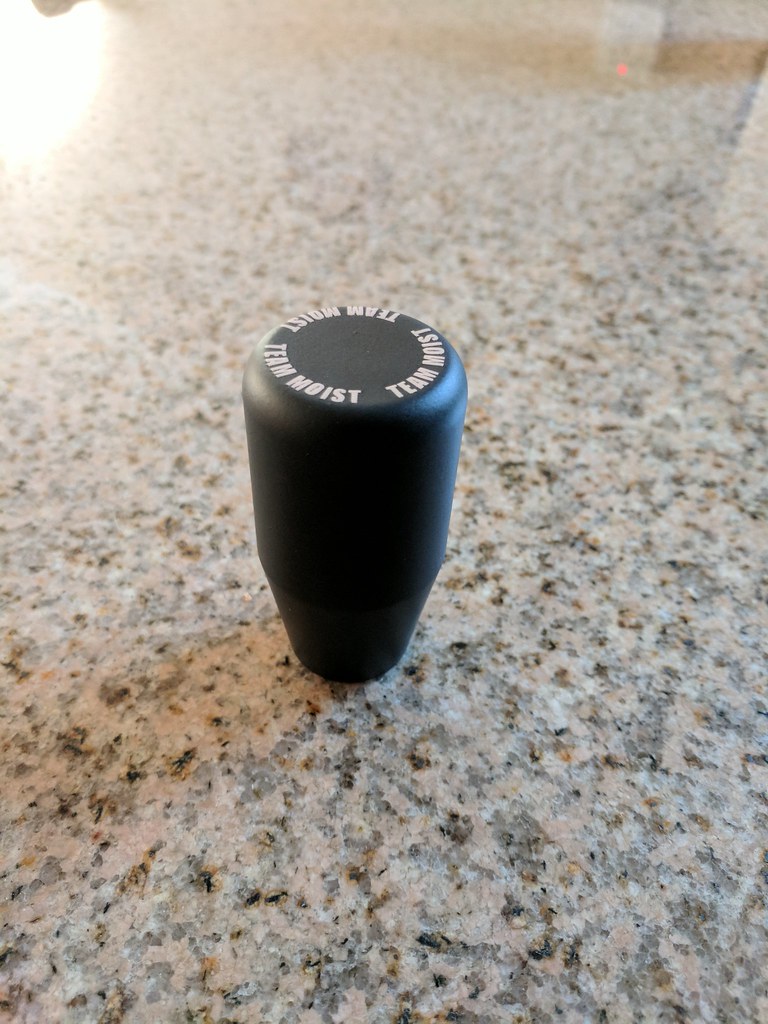
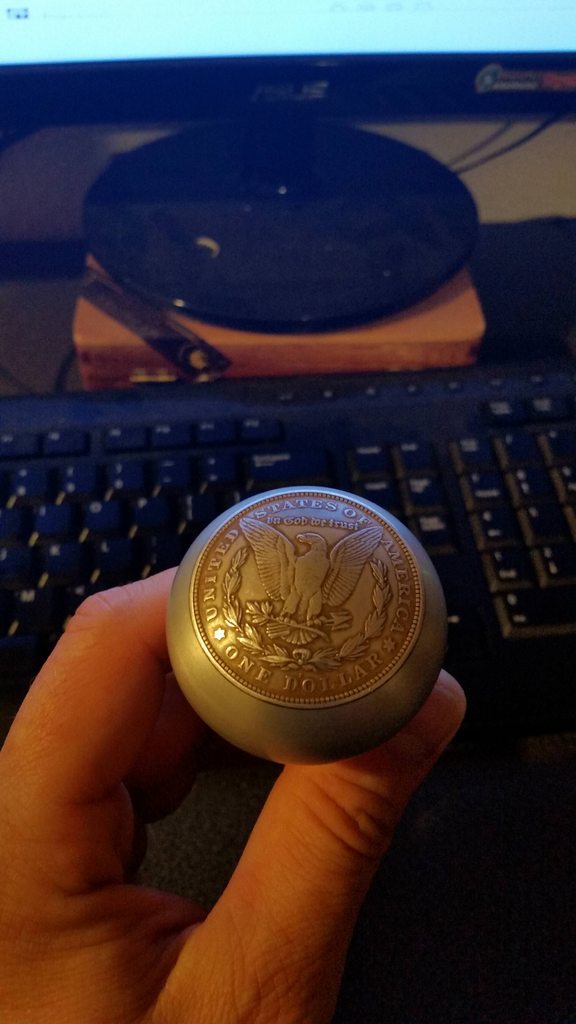
Been rockin my custom made shift **** I got from BDR Fab for the last few days!
If you're looking for something made, shoot them an email - https://www.bdrfabrication.com/
If you're looking for something made, shoot them an email - https://www.bdrfabrication.com/
Registered User
iTrader: (11)
Joined: Jan 2008
Posts: 6,849
From: Cheesesteakville
Car Info: 05 wrx wagon, 90 celica alltrac, 66 mustang
Been rockin my custom made shift **** I got from BDR Fab for the last few days!
If you're looking for something made, shoot them an email - https://www.bdrfabrication.com/
knobbyphotos
If you're looking for something made, shoot them an email - https://www.bdrfabrication.com/
knobbyphotos
Here is my custom ****:
Thread Starter
Churro Aficionado
iTrader: (38)
Joined: Feb 2008
Posts: 54,661
From: IG - @thomas.teammoist
Car Info: IG - @TEAMMOISTOFFICIAL
Finished up the switch panel Friday after work.
My original idea was to have 2 brackets on the sides of the cubby with magnets behind them. I decided to just try one in the center top of the cubby, worked out great.
Here is the bracket I made with aluminum angle

Used JB weld to lock on some old hard drive magnets
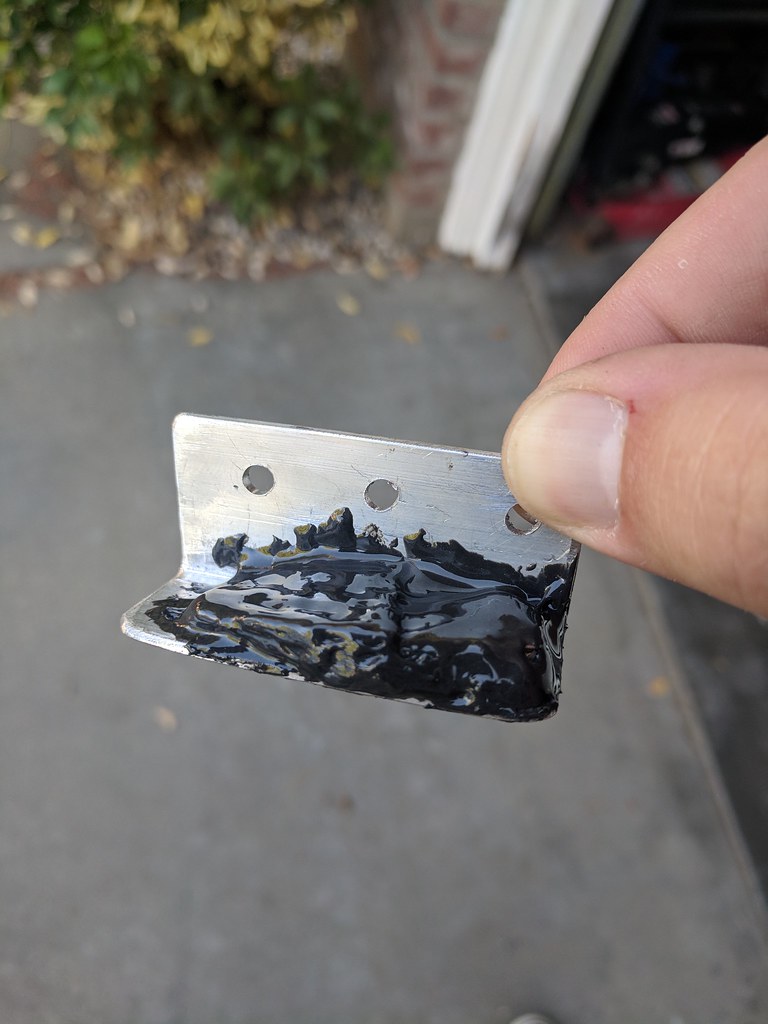
Holds to the back of the switch panel plenty strong, even through the aluminum and electrical tape of the back of the panel.

Used 2 small self tapping screws to hold it in place.
My original idea was to have 2 brackets on the sides of the cubby with magnets behind them. I decided to just try one in the center top of the cubby, worked out great.
Here is the bracket I made with aluminum angle
Used JB weld to lock on some old hard drive magnets
Holds to the back of the switch panel plenty strong, even through the aluminum and electrical tape of the back of the panel.
Used 2 small self tapping screws to hold it in place.

