'02 wrb wrx wagon

Thread Starter
Registered User
iTrader: (11)
Joined: Aug 2005
Posts: 5,808
From: Concord
Car Info: 04 STi
First mods - Gutted uppipe, Samco IC hoses
Intercooler hoses
Stock Uppipe
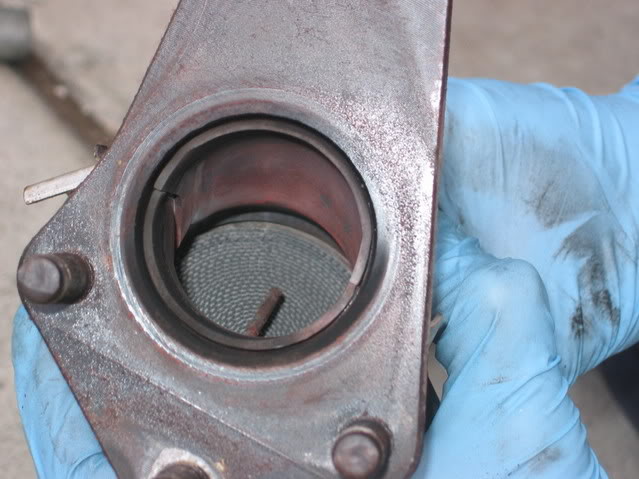
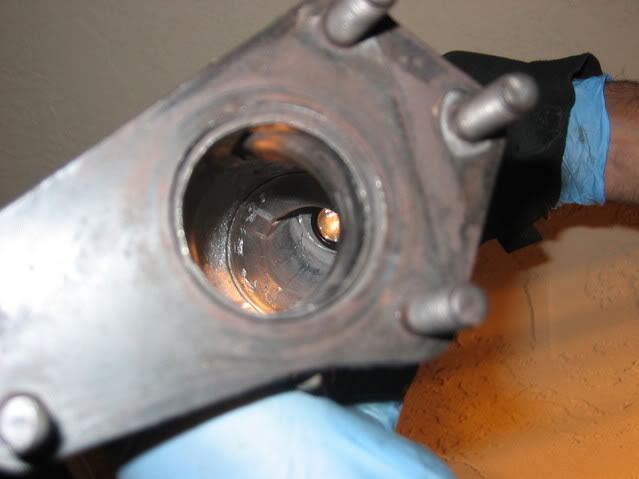
Gutted Uppipe
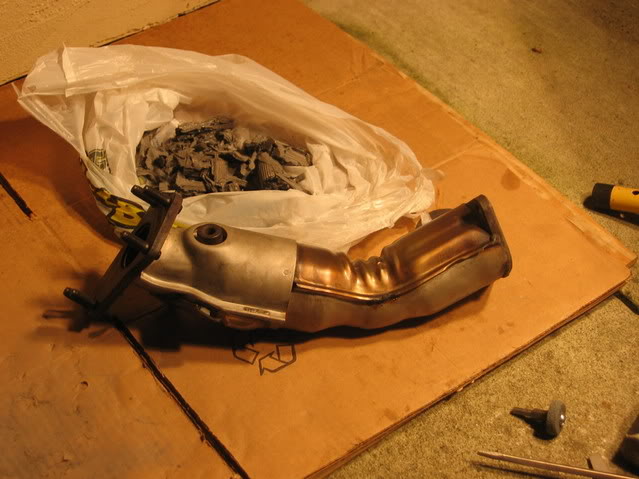
Gutted Leftover Cat
http://webpages.charter.net/baraboo_...ppipe_fix.html
After fully drilling out every last speck of cat and dust, we proceeded to hone, and polish the internals and cat-bond ribbing, with his air dremel bits.
Last was the hoses when we started putting the intercooler back on.
It took my mechanic friend (expert in my opinion) and me (retard with car) about 10 - 12 hours Sat and Sun working leisurly with plenty of breaks. It is a basic job, but without lots of good tools and help, it would not be pretty. The heatshield customizing, 02 sensors, and drilling out the cat are by far the most time consuming.
For instrutions installing the uppipe and turboback , I followed the posts on Scoobymods.com
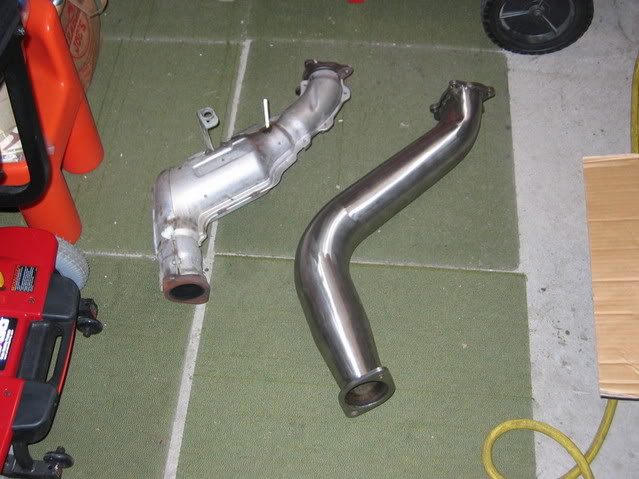
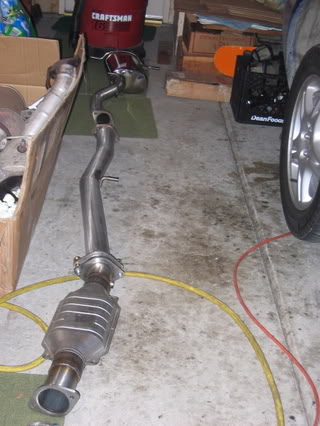
Next was TurboXS Turboback exhaust with highflow cat and standard muffler.
Stock Uppipe
Gutted Uppipe
Gutted Leftover Cat
http://webpages.charter.net/baraboo_...ppipe_fix.html
After fully drilling out every last speck of cat and dust, we proceeded to hone, and polish the internals and cat-bond ribbing, with his air dremel bits.
Last was the hoses when we started putting the intercooler back on.
It took my mechanic friend (expert in my opinion) and me (retard with car) about 10 - 12 hours Sat and Sun working leisurly with plenty of breaks. It is a basic job, but without lots of good tools and help, it would not be pretty. The heatshield customizing, 02 sensors, and drilling out the cat are by far the most time consuming.
For instrutions installing the uppipe and turboback , I followed the posts on Scoobymods.com
Next was TurboXS Turboback exhaust with highflow cat and standard muffler.
Last edited by subie OCD; Nov 25, 2006 at 09:44 AM.
Thread Starter
Registered User
iTrader: (11)
Joined: Aug 2005
Posts: 5,808
From: Concord
Car Info: 04 STi
First mods continued - TurboXS Turboback Exhuast
As you can see, the TurboXS dwarfs the stock downpipe. The downpipe has quite a unique turbo whistle, its low and burbly at idle and rips at WOT
My only complaint is the highflow cat. I dont really think it does a whole lot as I can smell the exhuast with my nose-dyno, lol.
After install, I reset the ecu by disconnecting the negative battery terminal and pumped the brakes then took it out for a drive. WOW, faster, louder and even more of a blast to drive.
Downpipe compared to stock
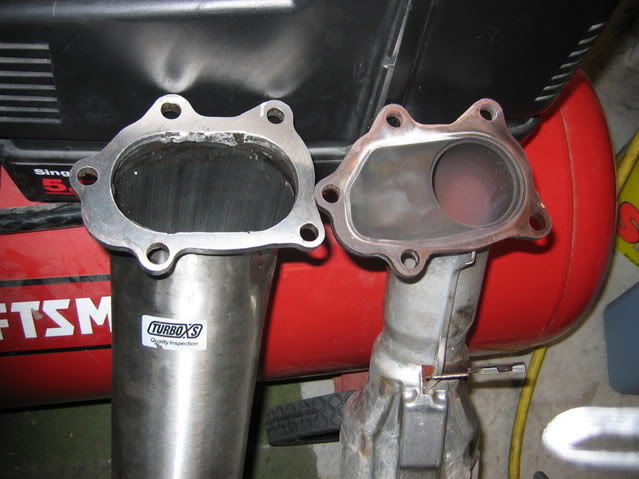
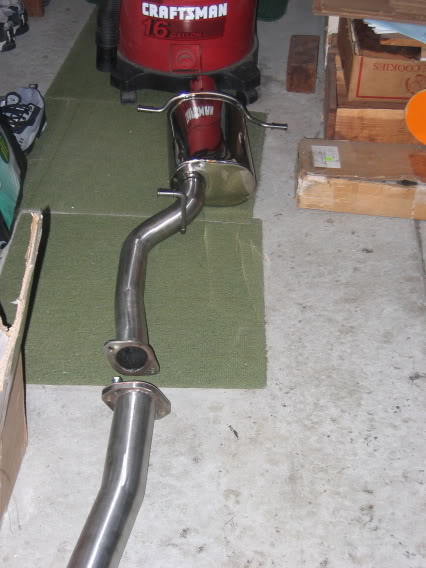
Standard/magnaflow muffler and highflow cat
My only complaint is the highflow cat. I dont really think it does a whole lot as I can smell the exhuast with my nose-dyno, lol.
After install, I reset the ecu by disconnecting the negative battery terminal and pumped the brakes then took it out for a drive. WOW, faster, louder and even more of a blast to drive.
Downpipe compared to stock
Standard/magnaflow muffler and highflow cat
Last edited by subie OCD; Nov 25, 2006 at 09:46 AM.
Thread Starter
Registered User
iTrader: (11)
Joined: Aug 2005
Posts: 5,808
From: Concord
Car Info: 04 STi
Second Mod - Wheels and tires
Duplicolor Bronze --

My technique for DIY painted wheels
Dismount the wheels from the car (you can keep the tires on).
You need to sand the clearcoat off first. I used 800 grit wetsand, then finished it with 1000 grit wetsand. This was overkill...too fine. It took like 1 - 1.5 hours per wheel to sand the clearcoat off. If I were to do it over again, I would use 400 or 600 grit, then finish/polish with 800 wetsand.
Once all the clear is off and its pretty smooth, wash the wheels with a sponge and hose, then dry them off. For the paint to stick well, you need to get them REALLY clean, so to get rid off any grease/fingerprints use 100% acetone (nail polish remover) to clean the surface. You can find it at RiteAId / Longs for a few bucks.
When they are all dry you can start to paint. I used index cards to block the tire from being painted. Just wedge a bunch of index cards in between the rim and tire. That will block off the tire from overspray, unless you get really crazy with the paint.
I painted them in a garage, with little ventalation, it sucked! Make sure you have good ventalation or a mask for all the fumes. I used Etching primer, Bronze Wheel Paint and Clearcoat (all Duplicolor) I did 2 light coats of etching primer, then waited 30 Min before applying the bronze. I think I did like 5 light coats of bronze (waiting 10-15 minutes between coats), applying in a SLOW horizontal sweeping motion, slightly overlapping and about 5 - 7 inches away from the wheel.
When I felt like all the surface was properly covered in bronze, I waited 1 hour before applying the clearcoat. I did 2-3 coats of clear, but if I were to do it over again I would do 5 - 6 to make it a little shinier. Then wait 24 hours for them to dry.
If you have any painting skills, it should come out nice. Before I did this, I went to a paint store and asked for advice, as I had never painted anything. Im going to re-paint them again better....I didnt use enough clearcoat, so they get dirty with grime and brake dust VERY fast. More clearcoat will solve this issue.
Last edited by subie OCD; Nov 25, 2006 at 09:48 AM.

the artist formerly known as mcdrama
iTrader: (23)
Joined: Apr 2004
Posts: 6,428
From: Santa Cruz Mountains, CA.
Car Info: WRBP 2015 WRX Premium/CVT
I still have the stock third cat and I can smell plenty of fuel still. I need to get a high flow cat.
Get yourself a Cobb AP and protune and you'll be good.
Get yourself a Cobb AP and protune and you'll be good.
Thread Starter
Registered User
iTrader: (11)
Joined: Aug 2005
Posts: 5,808
From: Concord
Car Info: 04 STi
Originally Posted by mcdrama
I still have the stock third cat and I can smell plenty of fuel still. I need to get a high flow cat.
Get yourself a Cobb AP and protune and you'll be good.
Get yourself a Cobb AP and protune and you'll be good.
 I have ecutek with custom tune. I really wish I had the AP and protuned...but at the time there was no custom tuning for it so I went with ecutek.
First time I had it tuned by Vishnu and most recently by Mike/Gruppe-S.
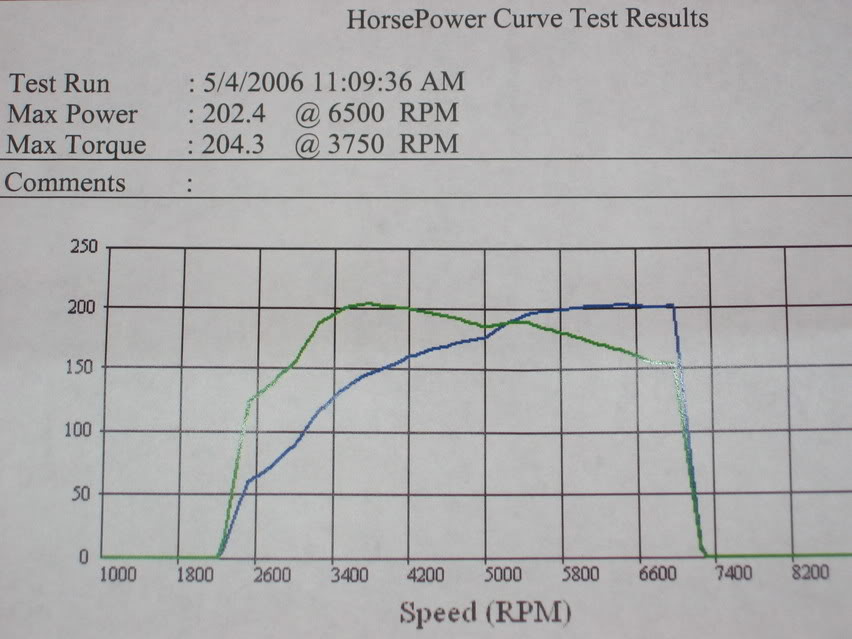
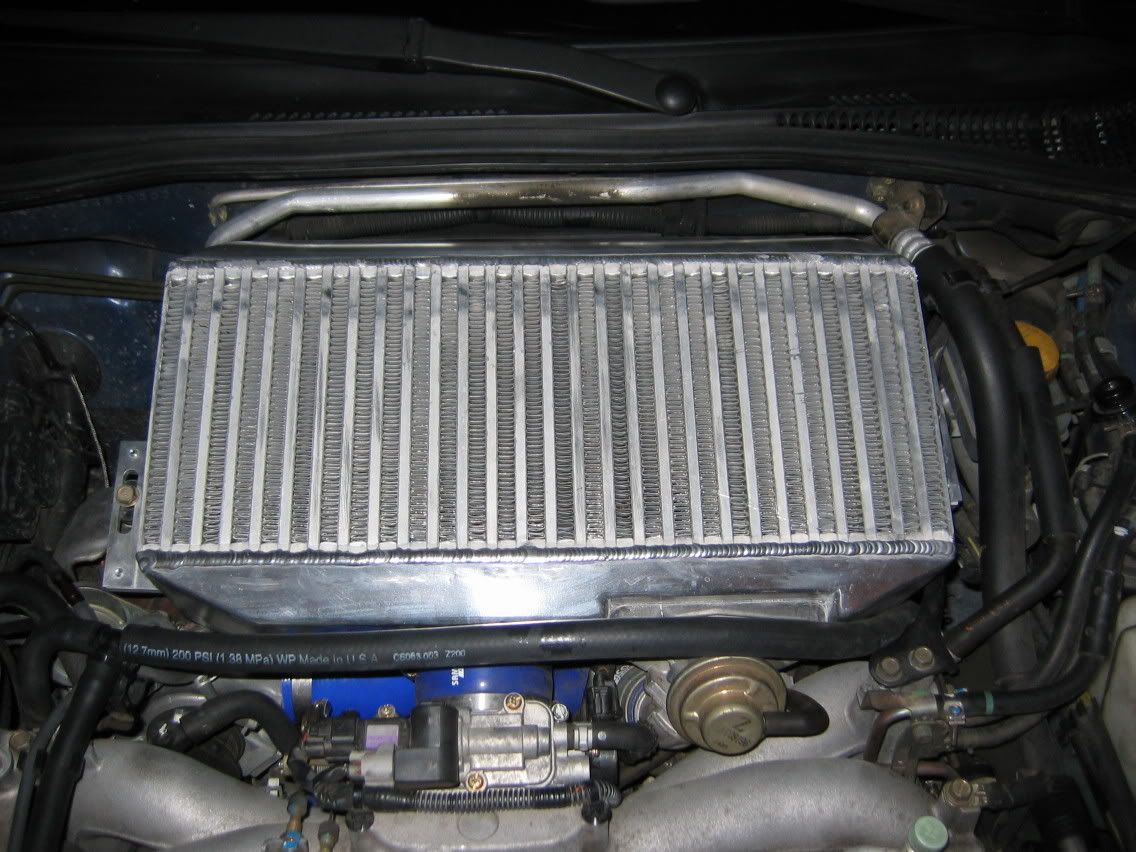
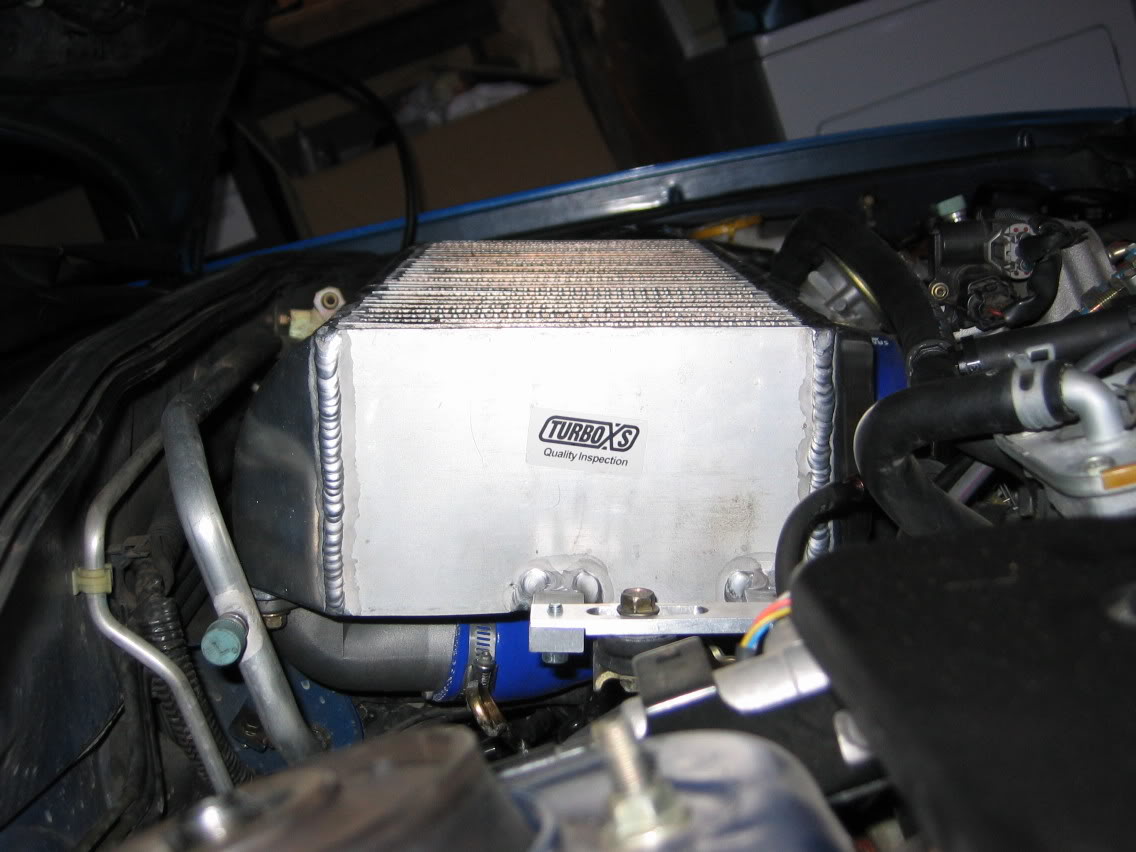
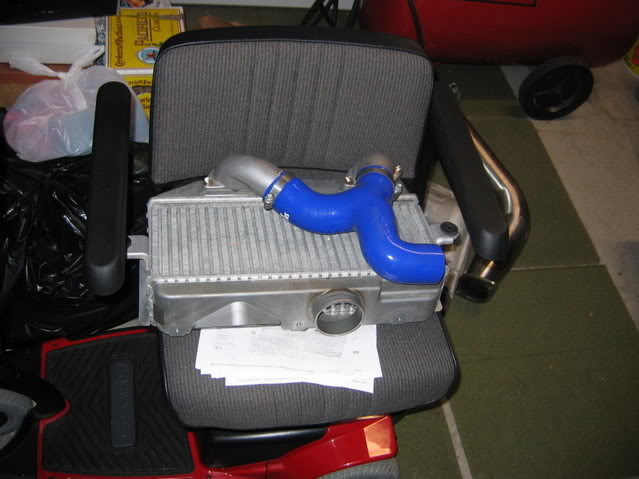
This was in May '06 with 55K miles, up, tbe, IC hoses and TurboXS TMIC. Also boost and egt gauges (I'll post those and the TMIC later).
This is a killer setup, so fun! Supposedly its a conservative tune as the car came in running badly retarded timing and Mike didnt want to run a hot tune. Ive heard stock STi's do between 215/215~225/225 hp/tq on this dyno in comparison. It hits and holds 17-18lbs max boost and is very responsive; egts are good, even when flogged hard on the freeway :thumbsup:
Jeff, Im leaning towards the vf22 or pe1820. I think those are the best on 91 octane from my reading. Im not really worried about lag...as long as boost comes in hard around 4000rpms I'll be stoked. I probably wont do this for a while though...Im also not sure if I want to take a wallet hit from splurging on the AP. Multiple custom maps, CEL reader and all the other jazz is superior to ecutek. Also, a race map for the pe1820, vf22...or hell, even the stock turbo on 100/104 octane would be amazing. We'll see...
Thread Starter
Registered User
iTrader: (11)
Joined: Aug 2005
Posts: 5,808
From: Concord
Car Info: 04 STi
3rd - Endlinks and rear swaybar -- early '05
I like the way the wrx handles stock so all of my suspension mods are fairly conservative. The first suspension upgrades were Whiteline steel endlinks (front and rear) and a 20mm rear swaybar from a wrx sedan. Install was very simple, the endlinks came with instructions and grease. I also used teflon tape around the endlink bushings to prevent weird noises (squeaks, clunks, etc)
The stock endlinks are plastic/rubber, so the whitelines made a big difference in steering and entering/exiting turns. Less bodyroll and a nice 'sharp' feeling when turning. The bigger rear bar was a good addition also since the stock wagon rear bar is 17mm, there is less 'plow' but the car still feels neutral. I can now pitch out the rear if I feel like
Heres a crusty pic, I dont have any when they were brand new --
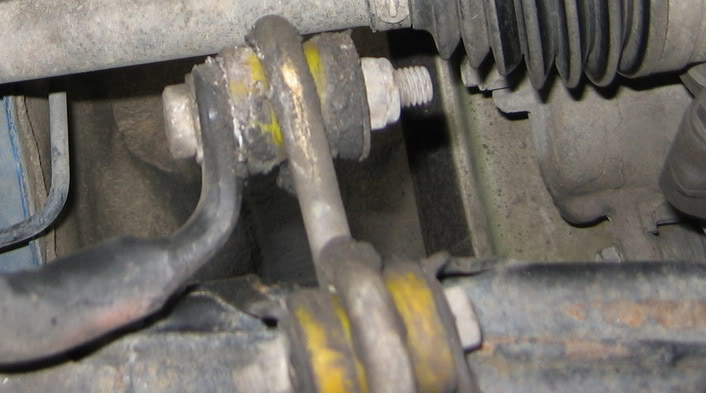
These are the regular steel links. I may upgrade to the heavy duty links with a front sway bar and bigger rear bar but Im really happy with how it feels now. I still like having a bit of play in the suspension, I dont want it to be too stiff for mud and snow.
The stock endlinks are plastic/rubber, so the whitelines made a big difference in steering and entering/exiting turns. Less bodyroll and a nice 'sharp' feeling when turning. The bigger rear bar was a good addition also since the stock wagon rear bar is 17mm, there is less 'plow' but the car still feels neutral. I can now pitch out the rear if I feel like
Heres a crusty pic, I dont have any when they were brand new --
These are the regular steel links. I may upgrade to the heavy duty links with a front sway bar and bigger rear bar but Im really happy with how it feels now. I still like having a bit of play in the suspension, I dont want it to be too stiff for mud and snow.
Thread Starter
Registered User
iTrader: (11)
Joined: Aug 2005
Posts: 5,808
From: Concord
Car Info: 04 STi
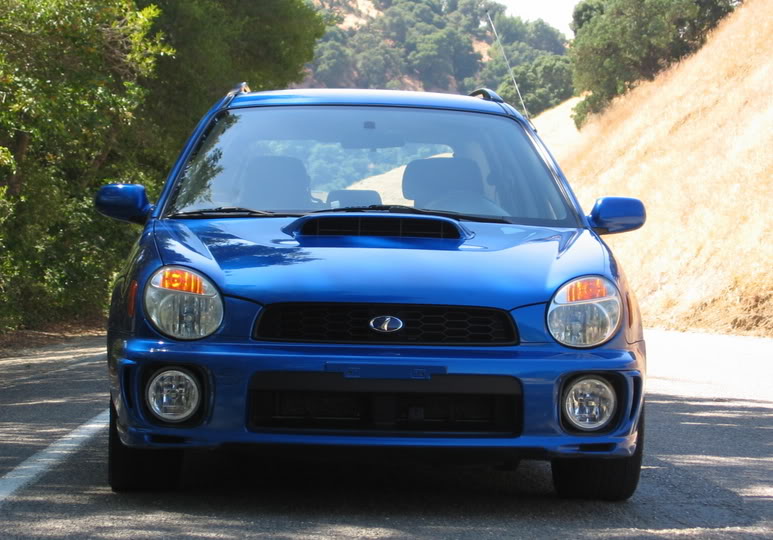
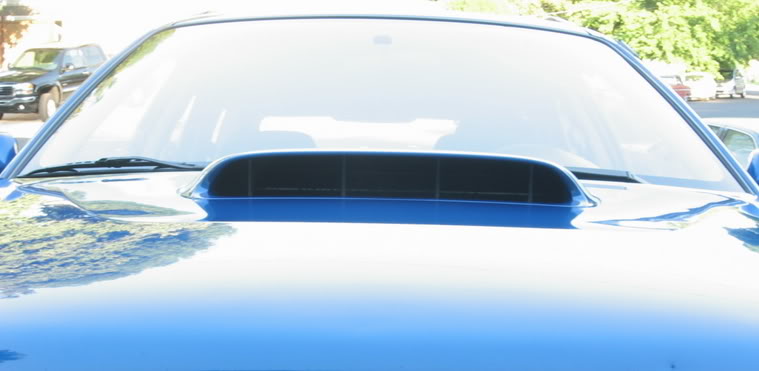
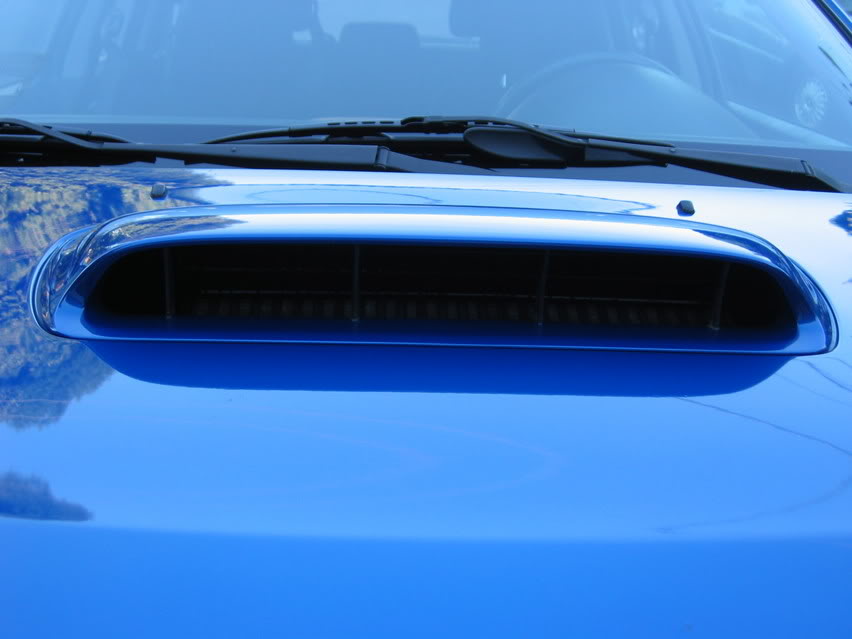
JDM STi hoodscoop
I love this one, its one of my favorites. More airflow keeps it cooler plus it adds more style, the bigger scoop looks so much better than stock.
Thread Starter
Registered User
iTrader: (11)
Joined: Aug 2005
Posts: 5,808
From: Concord
Car Info: 04 STi
I wish I would have done these first. If you dont have gauges, you dont really know whats going on. Omori boost and egt w/ replica autometer bezel. Good setup. Only gripe is that the egt can read funky when wet (shaky needle).


GB motorsports did the install.
GB motorsports did the install.
Thread Starter
Registered User
iTrader: (11)
Joined: Aug 2005
Posts: 5,808
From: Concord
Car Info: 04 STi
I think my next step was adding prodrive springs and kyb-gr2 struts
Before

After

Im very happy with this setup. Body roll was reduced (not eliminated), ride comfort is very close to stock and the drop is perfect...not to mention this setup was less than $600 shipped to my door. I think this is a GREAT setup for a daily driver, it handles superb with my other susp. stuff and looks great
Before
After
Im very happy with this setup. Body roll was reduced (not eliminated), ride comfort is very close to stock and the drop is perfect...not to mention this setup was less than $600 shipped to my door. I think this is a GREAT setup for a daily driver, it handles superb with my other susp. stuff and looks great
Registered User
iTrader: (4)
Joined: Aug 2004
Posts: 658
From: Bakersfield
Car Info: 06 STI WRB/Gold
I can't wait till you upgrade your turbo. It will be really fun when you take the leap. Awesome job so far nice and slow, that was my approach too. Had my car two and a half years before my upgrades.
Thread Starter
Registered User
iTrader: (11)
Joined: Aug 2005
Posts: 5,808
From: Concord
Car Info: 04 STi
Next, I had some Whiteline steering rack bushings put in while my car was having the clutch replaced. My clutch was burnt up at ~50K miles. I think I slipped it about 8 times too many .
The steering rack bushings were a great addition for the money (less than $30). Steering response feels much sharper. I would def. recommend them.
I cant wait either! I have to fix some other problems first though. My alignment is all jacked up and I keep screwing up my tires. It should be fixed soon though...
. The steering rack bushings were a great addition for the money (less than $30). Steering response feels much sharper. I would def. recommend them.
Originally Posted by lovesmysuby04
I can't wait till you upgrade your turbo. It will be really fun when you take the leap. Awesome job so far nice and slow, that was my approach too. Had my car two and a half years before my upgrades.