
Boost Addict's 08 WRX Project - 233whp/334wtq - Pics, Vids, Dyno

Thread Starter
VIP Member
Joined: Apr 2003
Posts: 846
From: Orange County, CA
Car Info: 08 WRX - 401whp/408wtq
BC RACING BR SERIES COILOVER REVIEW:
Strap yourself in tightly. Seriously. And I wish you the best of luck wiping that stupid grin off your face when you slingshot through turns with a new found confidence.
Before installing the BC Racing BR Series Coilovers in my WRX, everyone knew how unhappy I was with the old setup. As I've repeated many times before through my experience, do not buy a stiff side-walled, sticky tire and pair it with stock struts, even if you're on 'lowering springs'. Not a great combination. Whether you like or not, Body Roll is writing you love letters in every corner, begging for you to stay. And no matter how badly you want to throw those letters out the window, your curiosity piques and, frankly, you're screwed.
Enter the value-priced, yet feature-laden BC Racing BR Series Coilover for the 08-09 WRX Sedan. Visually, even, the coilovers are a real treat to soak up with your eyes. They are tidy and neat with very user-friendly click ***** on the top of each strut to allow for on the fly adjustments. They have a slim overall size which is much thinner than the bulky, stock setup. Everybody say 'hello' to more clearance for larger sway bars. A beautiful mirror-black finish with light gold fixtures makes this a real classy and appealing setup, but can they perform?
BC Racing currently allows you to choose your own spring rates at no additional charge. Oh boy! Give Boost 1 psi, and he'll take 17. On BC's website, they list the front rates at 8k and the rear at 6k. My intention was to promote more oversteer, so naturally I opted to up the rear rates to 8k. (For more information regarding how to promote understeer or oversteer, please look back a page or so for the research I did before selecting the spring rates.)
I received the coilovers and the installation went very smooth! It took a comfortable 2 hours on a lift with air tools. The ride height it came with lowered the rear an additional .25" from the STI Pinks I previously had on. The front lowered an additional .50" from the STI Pinks, which was great, since I didn't really like the previous imbalance. Now the wheel gaps between front and rear were dead even! Very cool, but not cool enough After a quick test drive to check for creaks, noises and clunks, we went back on the lift because Boost wants to street sweep on the weekends. In automotive terms, that means, 'lower the front'! And lower we did! A little over half an inch was lost in ride height as I stood to the side and grinned in joy. Now here's the beauty of the BC's; while some other coilovers lose suspension travel when you adjust the ride height, the height adjustment of the BC's is completely independent, therefore maintaining full travel!
With 30-clicks of dampening adjustment, it will take you a while to find your sweet spot. Now, I don't mean you will dislike them out of the box; you won't. And to call any of the settings 'uncomfortable' would be a complete mis-understanding. But since each click literally feels different, it's fun to dial in what you individually consider 'perfect'. I've played with my settings so much that I don't recall where they've ended up. Add a click here, remove two clicks there, etc... you end up losing your spot. As a general rule of thumb, I personally don't like to have the adjustment all the way on either end. If you want it fully stiff or fully soft, just stay at least one click away from the max of either end. That kind of use will help promote longer strut life and should prevent any premature failures.
On fully stiff, you may find the ride too jouncy for your daily street drive. And the truth is, it's not the type of bounce that's caused by an over-sprung/under-dampened suspension. It's more the fact that it takes such a significant force to compress the suspension, that you just end up not compressing, and simply skip over little road imperfections. Once at a higher speed, the car is glued to the ground and has such an abundance of lateral grip!
On fully soft, it's super comfortable, almost too comfortable to believe you're sitting on a sport suspension system! Now I don't mean it's Cadillac soft. It's not. It's still firm, but extremely comfortable! You still benefit from that fantastic high speed grip, but can putt around town in a more comfortable fashion. There are only 2 downsides to having the settings on soft. The first is that the steering becomes a little less immediate during transitioning. No big deal, it's still better than it was! Second, is that you get a lot of compression at low speed corners which in my case equates to fender rubbing.
I've got the rears set close to about 30% away from full stiff, and the fronts are maybe 35% away from full stiff. I also dialed in a maximum of -1.0 degree of camber in the front and have left the rears at about -1.5. My front camber used to be about -.20 and desperately needed a change! The car rides incredibly solid and firm. Bumps are soaked up with confidence. No more bouncing around after each bump, just one meaningful compress/rebound cycle and it's done. 'Composed' is the absolute best way to describe the feeling now! The stance I went with is very slant. I have the front lower than the rear and it's very visually impacting! The downside is that Body Roll discovered your affair with BC and is no longer sending you letters. It makes you feel like a jerk for leaving, but the cornering force is so immense that you forgive yourself! In fact, when taking a planted, 90 degree right turn around 30 mph, you sometimes wonder what Body Roll's been up to lately... Oh hell, let's be honest; you'll never miss it! Let's talk wheel spin for a second. With 334 ft-lbs channeled through the wheels, it's always been hard to catch grip from a standstill at launch. But Subaru's AWD system never let me down! It would actively distribute the power and within about a second after launch, it would regain grip and launch me forward. Things have changed. Can you believe that a suspension modification helps put the power you have to the ground more efficiently? By no longer squatting in the rear during launch, all the energy is transmitted through the diff and to the wheels! I've never felt such differential lash as I do now(Boost makes a note that he needs stiffer diff bushings). I can feather off the clutch, launching at 3500 RPM and spin through the entire first gear as it scampers to regain grip by redline! I'm talking 2 full seconds of all four tires spinning from the line... What a rush! Under braking, the annoying dive is almost entirely gone! Same goes with the acceleration. What used to squat the rear and push you down and back, now just pushes you back with a stronger, more concentrated force.
Regarding some of the driving dynamics and handling, I've given several 'experienced' people rides. While none of them speak any legitimate German, I keep hearing foreign things like "Blah, Blah, Blah, BMW, Blah, Blah, Blah, Porsche, Blah, Blah, Blah, Sauerkraut." So I'm not quite sure what to tell you about what they think, but they usually have a pretty stupid grin on their face as they are muttering this gibberish.
Overall, I am completely satisfied with the BC Racing BR Series Coilovers and sincerely couldn't ask for a better system. While there are higher end kits out there, this has proven more than sufficient and has impressed me thoroughly. There is not one squeak, one rattle, one problem, one inconsistency or anything to report! My 235-wide glue-like tires are now being used to their maximum potential and have learned to progressively give up grip, no longer leaving it up to the chassis. With the spring rates I chose and the alignment I have done, the car is significantly more neutral in the corners. This means my goal to find more oversteer was successful! It's natural tendency is still to understeer initially, but it's far less than it used to be. Once you're in the corner though, you have a lot more control now with your throttle foot! If you're in the sweet spot of the torque band, you can literally make small adjustments to your cornering angle just with throttle input! It's an awesome feeling that was sadly missing in the stock and modified setup I previously had. Ideally, I would like to see a little more initial snap in the steering, which I feel a larger front sway bar will help me accomplish. I opted for PERRINs 25mm front bar because, frankly, with a smaller strut, I have the room to do it I also opted for their 22mm rear bar to generate a little more oversteer. Both units are adjustable and will be coupled with their respective PERRIN endlinks. I hope to achieve snappier transition response with the sway bars, which will get rid of that initial tendency to understeer. And with some experimentation with the adjustments, I'm hoping I can keep a very similar mid-corner feel as I have now. Although, a slight bit more oversteer isn't unwelcome either!
Before I leave you with a plethora of pictures, I should give you my final thoughts. Simply put, it's the best $1000(approx) you'll spend on your car. To anyone interested in springs, I cannot stress enough to strongly consider saving your pennies to prevent doing something like this twice. A coilover system like this is worlds superior to any aftermarket spring you can pick out. This kit includes springs, struts, front camber plates, independent ride height adjustment, 30-clicks of adjust-ability, pillow-ball mounts, bump stops under its dust boot and a 1-year warranty. There is nothing left to think about. This system makes such an overall change to the driving dynamics of the car! And it's a modification that you can feel and utilize, every single time you're behind the wheel!
----
The BC Racing BR Series Coilovers

Entering Surgery

OEM Strut Tops/cover - Front

OEM Strut Tops - Rear

STI Pink Springs, Kumho Ecsta XS 235/45/17

Notice how tight the clearances are between the narrow OEM Rear Sway Bar and the struts. Not to worry, the BC's leave plenty of clearance to welcome the new PERRIN RSB! Also displayed is a great reason to change the OEM endlinks to support the larger bars!

If you put your ear close to the Tokico calipers, you can hear them whisper rumors of Brembo's moving in to replace them.

OEM Front vs BC Front

OEM Rear vs BC Rear

Adjustment **** on top of BC Front Strut

Adjustment **** on top of BC Rear Strut

Front BC coilovers installed

Rear BC coilovers installed

Getting Aligned
The Stance

Another Stance Shot

I'll post more pictures of the stance from more angles soon!
Strap yourself in tightly. Seriously. And I wish you the best of luck wiping that stupid grin off your face when you slingshot through turns with a new found confidence.
Before installing the BC Racing BR Series Coilovers in my WRX, everyone knew how unhappy I was with the old setup. As I've repeated many times before through my experience, do not buy a stiff side-walled, sticky tire and pair it with stock struts, even if you're on 'lowering springs'. Not a great combination. Whether you like or not, Body Roll is writing you love letters in every corner, begging for you to stay. And no matter how badly you want to throw those letters out the window, your curiosity piques and, frankly, you're screwed.
Enter the value-priced, yet feature-laden BC Racing BR Series Coilover for the 08-09 WRX Sedan. Visually, even, the coilovers are a real treat to soak up with your eyes. They are tidy and neat with very user-friendly click ***** on the top of each strut to allow for on the fly adjustments. They have a slim overall size which is much thinner than the bulky, stock setup. Everybody say 'hello' to more clearance for larger sway bars. A beautiful mirror-black finish with light gold fixtures makes this a real classy and appealing setup, but can they perform?
BC Racing currently allows you to choose your own spring rates at no additional charge. Oh boy!
Give Boost 1 psi, and he'll take 17. On BC's website, they list the front rates at 8k and the rear at 6k. My intention was to promote more oversteer, so naturally I opted to up the rear rates to 8k. (For more information regarding how to promote understeer or oversteer, please look back a page or so for the research I did before selecting the spring rates.)I received the coilovers and the installation went very smooth! It took a comfortable 2 hours on a lift with air tools. The ride height it came with lowered the rear an additional .25" from the STI Pinks I previously had on. The front lowered an additional .50" from the STI Pinks, which was great, since I didn't really like the previous imbalance. Now the wheel gaps between front and rear were dead even! Very cool, but not cool enough
After a quick test drive to check for creaks, noises and clunks, we went back on the lift because Boost wants to street sweep on the weekends. In automotive terms, that means, 'lower the front'! And lower we did! A little over half an inch was lost in ride height as I stood to the side and grinned in joy. Now here's the beauty of the BC's; while some other coilovers lose suspension travel when you adjust the ride height, the height adjustment of the BC's is completely independent, therefore maintaining full travel!With 30-clicks of dampening adjustment, it will take you a while to find your sweet spot. Now, I don't mean you will dislike them out of the box; you won't. And to call any of the settings 'uncomfortable' would be a complete mis-understanding. But since each click literally feels different, it's fun to dial in what you individually consider 'perfect'. I've played with my settings so much that I don't recall where they've ended up. Add a click here, remove two clicks there, etc... you end up losing your spot. As a general rule of thumb, I personally don't like to have the adjustment all the way on either end. If you want it fully stiff or fully soft, just stay at least one click away from the max of either end. That kind of use will help promote longer strut life and should prevent any premature failures.
On fully stiff, you may find the ride too jouncy for your daily street drive. And the truth is, it's not the type of bounce that's caused by an over-sprung/under-dampened suspension. It's more the fact that it takes such a significant force to compress the suspension, that you just end up not compressing, and simply skip over little road imperfections. Once at a higher speed, the car is glued to the ground and has such an abundance of lateral grip!
On fully soft, it's super comfortable, almost too comfortable to believe you're sitting on a sport suspension system! Now I don't mean it's Cadillac soft. It's not. It's still firm, but extremely comfortable! You still benefit from that fantastic high speed grip, but can putt around town in a more comfortable fashion. There are only 2 downsides to having the settings on soft. The first is that the steering becomes a little less immediate during transitioning. No big deal, it's still better than it was! Second, is that you get a lot of compression at low speed corners which in my case equates to fender rubbing.
I've got the rears set close to about 30% away from full stiff, and the fronts are maybe 35% away from full stiff. I also dialed in a maximum of -1.0 degree of camber in the front and have left the rears at about -1.5. My front camber used to be about -.20 and desperately needed a change! The car rides incredibly solid and firm. Bumps are soaked up with confidence. No more bouncing around after each bump, just one meaningful compress/rebound cycle and it's done. 'Composed' is the absolute best way to describe the feeling now! The stance I went with is very slant. I have the front lower than the rear and it's very visually impacting! The downside is that Body Roll discovered your affair with BC and is no longer sending you letters. It makes you feel like a jerk for leaving, but the cornering force is so immense that you forgive yourself! In fact, when taking a planted, 90 degree right turn around 30 mph, you sometimes wonder what Body Roll's been up to lately... Oh hell, let's be honest; you'll never miss it! Let's talk wheel spin for a second. With 334 ft-lbs channeled through the wheels, it's always been hard to catch grip from a standstill at launch. But Subaru's AWD system never let me down! It would actively distribute the power and within about a second after launch, it would regain grip and launch me forward. Things have changed. Can you believe that a suspension modification helps put the power you have to the ground more efficiently? By no longer squatting in the rear during launch, all the energy is transmitted through the diff and to the wheels! I've never felt such differential lash as I do now(Boost makes a note that he needs stiffer diff bushings). I can feather off the clutch, launching at 3500 RPM and spin through the entire first gear as it scampers to regain grip by redline! I'm talking 2 full seconds of all four tires spinning from the line... What a rush! Under braking, the annoying dive is almost entirely gone! Same goes with the acceleration. What used to squat the rear and push you down and back, now just pushes you back with a stronger, more concentrated force.
Regarding some of the driving dynamics and handling, I've given several 'experienced' people rides. While none of them speak any legitimate German, I keep hearing foreign things like "Blah, Blah, Blah, BMW, Blah, Blah, Blah, Porsche, Blah, Blah, Blah, Sauerkraut." So I'm not quite sure what to tell you about what they think, but they usually have a pretty stupid grin on their face as they are muttering this gibberish.
Overall, I am completely satisfied with the BC Racing BR Series Coilovers and sincerely couldn't ask for a better system. While there are higher end kits out there, this has proven more than sufficient and has impressed me thoroughly. There is not one squeak, one rattle, one problem, one inconsistency or anything to report! My 235-wide glue-like tires are now being used to their maximum potential and have learned to progressively give up grip, no longer leaving it up to the chassis. With the spring rates I chose and the alignment I have done, the car is significantly more neutral in the corners. This means my goal to find more oversteer was successful! It's natural tendency is still to understeer initially, but it's far less than it used to be. Once you're in the corner though, you have a lot more control now with your throttle foot! If you're in the sweet spot of the torque band, you can literally make small adjustments to your cornering angle just with throttle input! It's an awesome feeling that was sadly missing in the stock and modified setup I previously had. Ideally, I would like to see a little more initial snap in the steering, which I feel a larger front sway bar will help me accomplish. I opted for PERRINs 25mm front bar because, frankly, with a smaller strut, I have the room to do it
I also opted for their 22mm rear bar to generate a little more oversteer. Both units are adjustable and will be coupled with their respective PERRIN endlinks. I hope to achieve snappier transition response with the sway bars, which will get rid of that initial tendency to understeer. And with some experimentation with the adjustments, I'm hoping I can keep a very similar mid-corner feel as I have now. Although, a slight bit more oversteer isn't unwelcome either!Before I leave you with a plethora of pictures, I should give you my final thoughts. Simply put, it's the best $1000(approx) you'll spend on your car. To anyone interested in springs, I cannot stress enough to strongly consider saving your pennies to prevent doing something like this twice. A coilover system like this is worlds superior to any aftermarket spring you can pick out. This kit includes springs, struts, front camber plates, independent ride height adjustment, 30-clicks of adjust-ability, pillow-ball mounts, bump stops under its dust boot and a 1-year warranty. There is nothing left to think about. This system makes such an overall change to the driving dynamics of the car! And it's a modification that you can feel and utilize, every single time you're behind the wheel!
----
The BC Racing BR Series Coilovers
Entering Surgery
OEM Strut Tops/cover - Front
OEM Strut Tops - Rear
STI Pink Springs, Kumho Ecsta XS 235/45/17
Notice how tight the clearances are between the narrow OEM Rear Sway Bar and the struts. Not to worry, the BC's leave plenty of clearance to welcome the new PERRIN RSB! Also displayed is a great reason to change the OEM endlinks to support the larger bars!
If you put your ear close to the Tokico calipers, you can hear them whisper rumors of Brembo's moving in to replace them.
OEM Front vs BC Front
OEM Rear vs BC Rear
Adjustment **** on top of BC Front Strut
Adjustment **** on top of BC Rear Strut
Front BC coilovers installed
Rear BC coilovers installed
Getting Aligned
The Stance
Another Stance Shot
I'll post more pictures of the stance from more angles soon!


Registered User
Joined: Aug 2004
Posts: 24
Car Info: 09 WRX
awesome
I just wanted to drop a line and say how absolutely rocked I am by all the suspension tuning youre doing and all the research behind it. lookin forward to seeing how all the different components add up! 
Thread Starter
VIP Member
Joined: Apr 2003
Posts: 846
From: Orange County, CA
Car Info: 08 WRX - 401whp/408wtq
PM me if you're interested in a set of the coilovers.
Glad to hear! I'm excited about the way everything is coming together as well. The sway bars have been installed too and I'm really enjoying the new-found balance of the car. I will be doing a complete review on the sway bars as well once I spend some more miles behind the wheel.
Last edited by Boost Addict; Jul 13, 2009 at 09:12 AM.

Registered User
iTrader: (1)
Joined: Jun 2008
Posts: 34
From: San Mateo, CA
Car Info: 2008 WRX Wagon - CBR600F4i
I would also like to say thanks for all the info. It helps a lot to know how the different parts are changing your car. It especially helps those who have to pick and choose what upgrades to get. Thanks!
Thread Starter
VIP Member
Joined: Apr 2003
Posts: 846
From: Orange County, CA
Car Info: 08 WRX - 401whp/408wtq
 glad to hear it's helping you out!
Thread Starter
VIP Member
Joined: Apr 2003
Posts: 846
From: Orange County, CA
Car Info: 08 WRX - 401whp/408wtq
Update. 07/14/09
So we actually attacked the install today. First, an update to the shopping list as some items were changed or added.
- 2004 Subaru WRX STI Brembo Gran Turismo Calipers (Front and Rear)
- Centric Premium Front Rotors 2004 Subaru WRX STI Spec (Custom Slotted)
- Centric Rear Rotors 2004 Subaru WRX STI Spec (High Temp Painted and Custom Slotted)
- 2004 Subaru WRX STI Brembo brake pads
- 2008 Subaru WRX STI Master Cylinder**
- 2008 WRX Goodridge Stainless Steel Braided Brake Lines
- ATE Super Blue Racing Brake Fluid (Dot-4, 2 cans)
- 2004 Subaru WRX STI Front and Rear Caliper to Knuckle Bolts
- 2001 Honda Civic EX Inca Pearl Touch-Up Paint if needed
*2004 STI rotors share the same bolt pattern as the 08-09 WRXs
**Master Cylinder only. Brake Booster on 08 STI and 08 WRX are the same part number.
----
Master Cylinder:
Visually, the 08-09 STI master cylinder and the 08-09 WRX master cylinder are IDENTICAL! One is not larger than the other, so perhaps the difference lies in the internals. All I know is that they are different part numbers, and it was a suggested upgrade with these brakes by MicMckee (thanks for the heads up!). Installation was completely straight forward, a direct replacement!
A shot of the STI master cylinder installed with ATE Super Blue RBF filled in.

Front Brake Install:
I am pleased to report that installation of the front was very straight forward. 04 STI spec rotors bolted up with no issue. The Calipers bolted up with the proper bolts with no issue. The stainless lines were also a direct replacement. Even the splash shield stayed out of the way. Everything bolted up beautifully and boy did it look great!
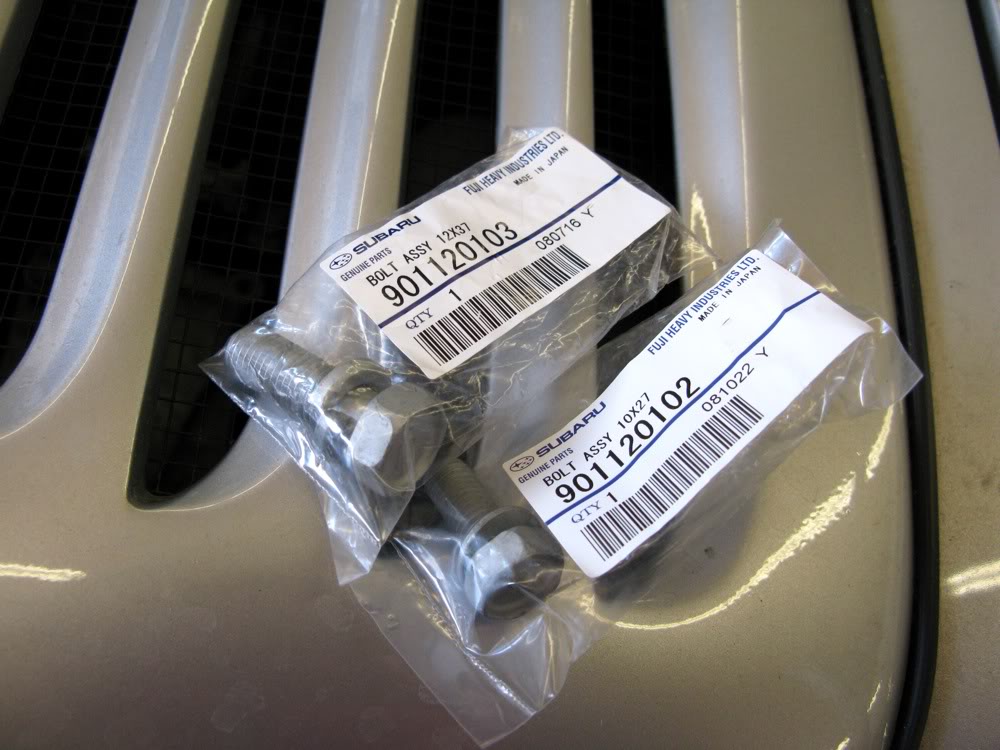
Proper Bolts for Front and Rear Caliper to Knuckle Installation (103 for Front, 102 for Rear)
ATE Super Blue Racing Brake Fluid

OEM Caliper vs 04 STI Caliper


OEM Front Rotor vs 04 STI Spec Front Rotor

Splash shield clearance with no bending or cutting.

OEM Rubber Brake Line vs Goodridge G-Stop Stainless Line

Goodridge Stainless Line Installed

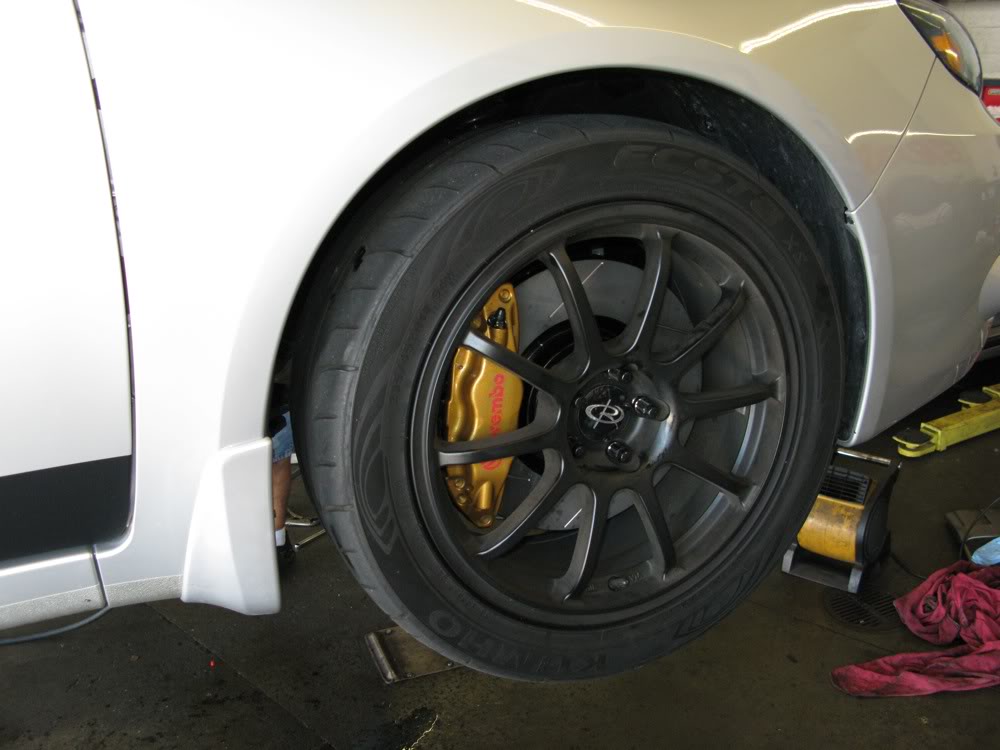
Some images of the Brembo's Bolted Up.


Other Angles.


Money Shot!

-----
Rear Brake Install:
Here is where we, and most others, have had to get creative. First and foremost, I went ahead and lightly shot the rotors with an ultra high-temp black to get the hat and vents to match the front and to combat rust. Rotor fitment requires a few steps. The splash guard is completely in the way. Some suggest cutting reliefs and bending them back. Since we feel that defeats half the purpose, we decide to avoid a potential rattle situation and simply cut it out. We're in Southern California, where adverse weather is super rare, besides, we won't mind the additional cooling with the shield removed. Next, as seen in other threads, the inner lip on the back-side of the rotor needs to be shaved down about .150" to be properly seated on the hub. We took care of that rather easily, see picture below. At this point, we test fitted the rotors, which went on beautifully. We then slipped the caliper over the rotor and noticed that the knuckles were too far apart for the Brembo caliper to bolt on to! Uh oh.
At this point, we're exploring a couple of sources to find a proper adapter that will bolt onto the knuckles and provide two closer mounting points for the Brembo caliper. As cheezeball mentioned above, FastWRX.com does offer a solution for earlier WRXs, however they have yet to test it on the 3rd gen. We've gotten in touch with them and hope they will work with us to get this confirmed and tested soon!
A few pictures in the meantime. More will follow once we successfully mount the Rear Brakes on.
OEM rear rotor vs 04 STI spec rear rotor

Shaving Down the inner Lip that prevents proper seating to hub surface.

Removed Rear Splash Guard

Rear Hub Detail w/ Splash Guard Removed

Stay tuned.
So we actually attacked the install today. First, an update to the shopping list as some items were changed or added.
- 2004 Subaru WRX STI Brembo Gran Turismo Calipers (Front and Rear)
- Centric Premium Front Rotors 2004 Subaru WRX STI Spec (Custom Slotted)
- Centric Rear Rotors 2004 Subaru WRX STI Spec (High Temp Painted and Custom Slotted)
- 2004 Subaru WRX STI Brembo brake pads
- 2008 Subaru WRX STI Master Cylinder**
- 2008 WRX Goodridge Stainless Steel Braided Brake Lines
- ATE Super Blue Racing Brake Fluid (Dot-4, 2 cans)
- 2004 Subaru WRX STI Front and Rear Caliper to Knuckle Bolts
- 2001 Honda Civic EX Inca Pearl Touch-Up Paint if needed
*2004 STI rotors share the same bolt pattern as the 08-09 WRXs
**Master Cylinder only. Brake Booster on 08 STI and 08 WRX are the same part number.
----
Master Cylinder:
Visually, the 08-09 STI master cylinder and the 08-09 WRX master cylinder are IDENTICAL! One is not larger than the other, so perhaps the difference lies in the internals. All I know is that they are different part numbers, and it was a suggested upgrade with these brakes by MicMckee (thanks for the heads up!). Installation was completely straight forward, a direct replacement!
A shot of the STI master cylinder installed with ATE Super Blue RBF filled in.
Front Brake Install:
I am pleased to report that installation of the front was very straight forward. 04 STI spec rotors bolted up with no issue. The Calipers bolted up with the proper bolts with no issue. The stainless lines were also a direct replacement. Even the splash shield stayed out of the way. Everything bolted up beautifully and boy did it look great!
Proper Bolts for Front and Rear Caliper to Knuckle Installation (103 for Front, 102 for Rear)
ATE Super Blue Racing Brake Fluid
OEM Caliper vs 04 STI Caliper
OEM Front Rotor vs 04 STI Spec Front Rotor
Splash shield clearance with no bending or cutting.
OEM Rubber Brake Line vs Goodridge G-Stop Stainless Line
Goodridge Stainless Line Installed
Some images of the Brembo's Bolted Up.
Other Angles.
Money Shot!
-----
Rear Brake Install:
Here is where we, and most others, have had to get creative. First and foremost, I went ahead and lightly shot the rotors with an ultra high-temp black to get the hat and vents to match the front and to combat rust. Rotor fitment requires a few steps. The splash guard is completely in the way. Some suggest cutting reliefs and bending them back. Since we feel that defeats half the purpose, we decide to avoid a potential rattle situation and simply cut it out. We're in Southern California, where adverse weather is super rare, besides, we won't mind the additional cooling with the shield removed. Next, as seen in other threads, the inner lip on the back-side of the rotor needs to be shaved down about .150" to be properly seated on the hub. We took care of that rather easily, see picture below. At this point, we test fitted the rotors, which went on beautifully. We then slipped the caliper over the rotor and noticed that the knuckles were too far apart for the Brembo caliper to bolt on to! Uh oh.
At this point, we're exploring a couple of sources to find a proper adapter that will bolt onto the knuckles and provide two closer mounting points for the Brembo caliper. As cheezeball mentioned above, FastWRX.com does offer a solution for earlier WRXs, however they have yet to test it on the 3rd gen. We've gotten in touch with them and hope they will work with us to get this confirmed and tested soon!
A few pictures in the meantime. More will follow once we successfully mount the Rear Brakes on.
OEM rear rotor vs 04 STI spec rear rotor
Shaving Down the inner Lip that prevents proper seating to hub surface.
Removed Rear Splash Guard
Rear Hub Detail w/ Splash Guard Removed
Stay tuned.
Thread Starter
VIP Member
Joined: Apr 2003
Posts: 846
From: Orange County, CA
Car Info: 08 WRX - 401whp/408wtq
Registered User
Joined: Jun 2009
Posts: 54
From: Central Valley, Ca
Car Info: '09 SWP WRX Sedan; '91 Jetta GLi 16V
Wow...that's all I can say ! It took a few days for me to finish reading you thread but it was well worth it. I've never seen such a well documented progression of mods. I personally would like to thank you for sharing your time and educating us with what modifications work and what doesn't. I wish you all the luck with your future mods.
! It took a few days for me to finish reading you thread but it was well worth it. I've never seen such a well documented progression of mods. I personally would like to thank you for sharing your time and educating us with what modifications work and what doesn't. I wish you all the luck with your future mods.
Thread Starter
VIP Member
Joined: Apr 2003
Posts: 846
From: Orange County, CA
Car Info: 08 WRX - 401whp/408wtq
Wow...that's all I can say ! It took a few days for me to finish reading you thread but it was well worth it. I've never seen such a well documented progression of mods. I personally would like to thank you for sharing your time and educating us with what modifications work and what doesn't. I wish you all the luck with your future mods.
! It took a few days for me to finish reading you thread but it was well worth it. I've never seen such a well documented progression of mods. I personally would like to thank you for sharing your time and educating us with what modifications work and what doesn't. I wish you all the luck with your future mods.Quick Update:
We will be tackling the rear brakes on Wednesday if all goes as planned. We've ordered the AVO Brembo Caliper Adapter.
Thread Starter
VIP Member
Joined: Apr 2003
Posts: 846
From: Orange County, CA
Car Info: 08 WRX - 401whp/408wtq
Update everyone.
Had some new bulbs waiting for me when I got home from work this evening. The anticipation simply didn't let me wait...
What I went with:
Low Beam - H11 - Nokya 7000k Arctic White
High Beam/Daytime Running Lamps - 9005 - Nokya 2500k Hyper Yellow
Fog Lamps - 9006 - Nokya 2500k Hyper Yellow
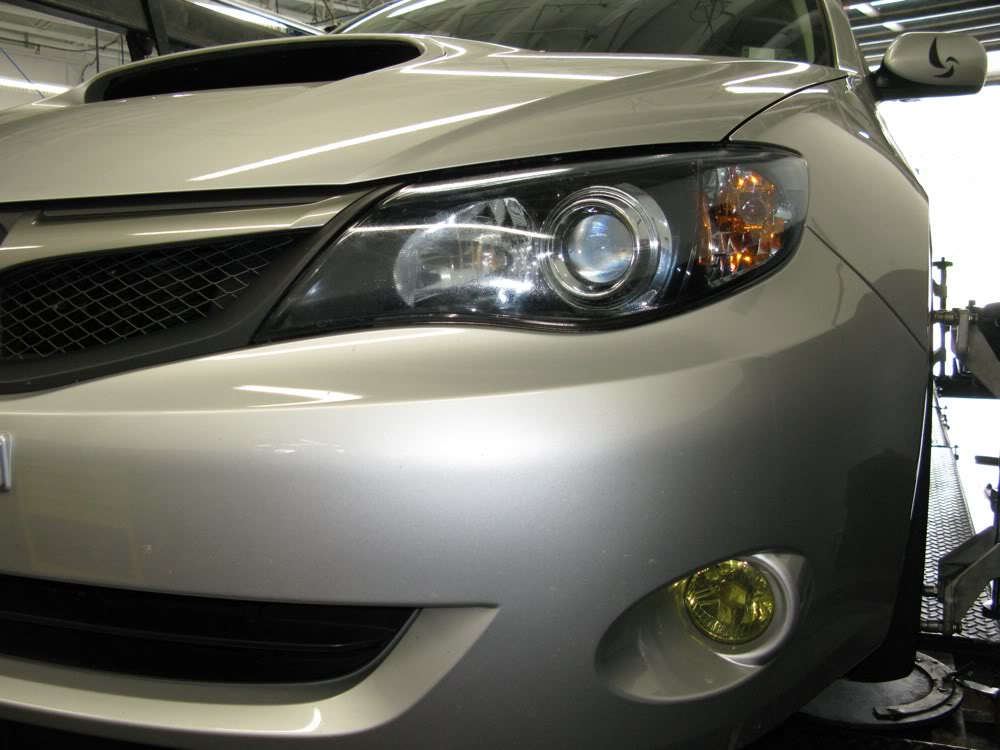
Overall Impressions:
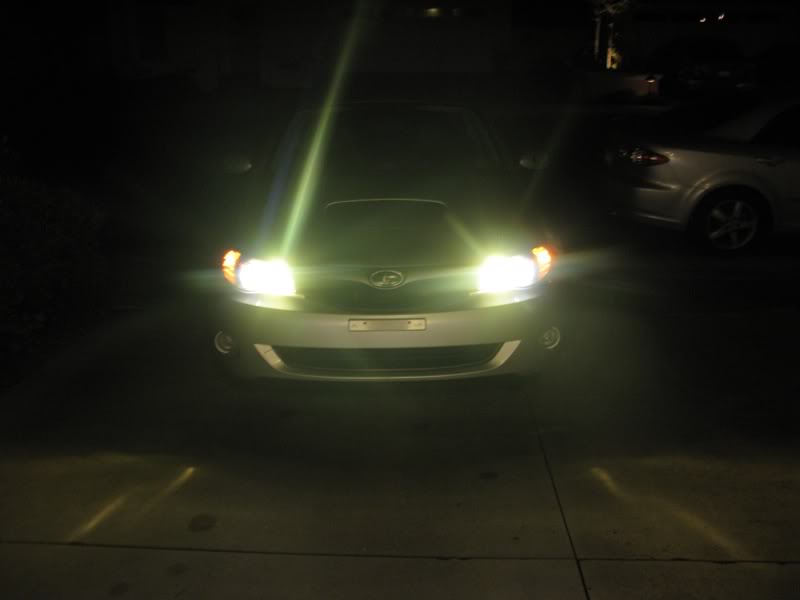
Big applause to Nokya! I was looking for a low cost option that would class up the lighting and increase visibility in foggy conditions without having to step into the realm of HID's. The Hyper Yellow Bulbs are very bright! I absolutely love the color. They are a very, undeniably vibrant yellow. In the pictures, it appears the white-balance of my camera may be off, as the Hyper Yellow lamps didn't photograph as yellow as they appear, and the Arctic White lamps didn't photograph as blue as they appear. The most accurate depiction of the Arctic White appears in the OEM vs Nokya picture where the driver's side is with Nokya bulbs and the Passenger Side is oem. The most accurate picture of the Hyper Yellow is in the last and final picture of just the Nokya bulbs installed. The Arctic White is a very crisp color of white that simply has the cool softness of blue, but does not look cheap or bad. Nokya considers it to be similar in color to a 7000k, but I'd put it closer to a 5000-5500k. Visibility has likely dimmed slightly because of filtering, but the low beams provide such a nice tone of white, that I enjoy it a lot more and feel like I've given nothing up. Now for some pictures!
OEM Low Beams and Fog Lights against Garage Door

Nokya Low Beams and Fog Lights against Garage Door

--
OEM Low Beams and High Beams against Garage Door

Nokya Low Beams and High Beams against Garage Door

--
OEM Low Beams and Fog Lights

Nokya Low Beams and Fog Lights

--
OEM Low Beams and High Beams

Nokya Low Beams and High Beams
--
OEM vs Nokya Low Beams and Fog Lights

--
OEM vs Nokya Low Beams and High Beams

--
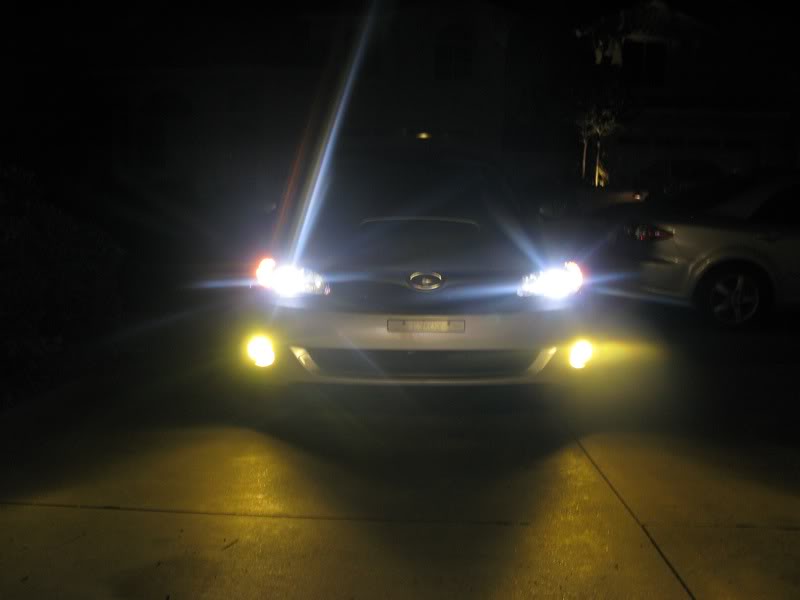
Additional Picture of the Nokya Set Up
Had some new bulbs waiting for me when I got home from work this evening. The anticipation simply didn't let me wait...
What I went with:
Low Beam - H11 - Nokya 7000k Arctic White
High Beam/Daytime Running Lamps - 9005 - Nokya 2500k Hyper Yellow
Fog Lamps - 9006 - Nokya 2500k Hyper Yellow
Overall Impressions:
Big applause to Nokya! I was looking for a low cost option that would class up the lighting and increase visibility in foggy conditions without having to step into the realm of HID's. The Hyper Yellow Bulbs are very bright! I absolutely love the color. They are a very, undeniably vibrant yellow. In the pictures, it appears the white-balance of my camera may be off, as the Hyper Yellow lamps didn't photograph as yellow as they appear, and the Arctic White lamps didn't photograph as blue as they appear. The most accurate depiction of the Arctic White appears in the OEM vs Nokya picture where the driver's side is with Nokya bulbs and the Passenger Side is oem. The most accurate picture of the Hyper Yellow is in the last and final picture of just the Nokya bulbs installed. The Arctic White is a very crisp color of white that simply has the cool softness of blue, but does not look cheap or bad. Nokya considers it to be similar in color to a 7000k, but I'd put it closer to a 5000-5500k. Visibility has likely dimmed slightly because of filtering, but the low beams provide such a nice tone of white, that I enjoy it a lot more and feel like I've given nothing up. Now for some pictures!
OEM Low Beams and Fog Lights against Garage Door
Nokya Low Beams and Fog Lights against Garage Door
--
OEM Low Beams and High Beams against Garage Door
Nokya Low Beams and High Beams against Garage Door
--
OEM Low Beams and Fog Lights
Nokya Low Beams and Fog Lights
--
OEM Low Beams and High Beams
Nokya Low Beams and High Beams
--
OEM vs Nokya Low Beams and Fog Lights
--
OEM vs Nokya Low Beams and High Beams
--
Additional Picture of the Nokya Set Up
Registered User
iTrader: (14)
Joined: Jan 2006
Posts: 852
From: Washington
Car Info: 05 wrb wrx wagon
wow awesome, looks like HID. i recently installed a DDM HID kit in my wrx, and i'm loving it. been looking for bulbs to replace my highs, but since they're also daytime runners, i'm afraid of messing them up because of the lower wattage, or whatever the issue is with DRL's.
once again, love this thread.
once again, love this thread.