
Boost Addict's 08 WRX Project - 233whp/334wtq - Pics, Vids, Dyno

Thread Starter
VIP Member
Joined: Apr 2003
Posts: 846
From: Orange County, CA
Car Info: 08 WRX - 401whp/408wtq
Boost Addict's 08 WRX Project - 303whp/334wtq - Pics, Vids, Dyno
Hey everyone!
After a very long hiatus, I am back! I had a Super Charged 03 Mustang GT when I first joined i-club. For years I wanted a WRX, so instead of buying one, I spent time helping friends modify them and provided lots of support on i-clubs boards! Shortly after the admins upgraded me to VIP status, I left and bought a Mazdaspeed 6. Loved it! Long story short, I'm back and with a 2008 WRX and a new business in the oven! I've been logging the build of this WRX in other forums, and am bringing it over here in it's entirety and will keep it updated!
I'll do my best to remain helpful, encourage knowledge, and learn from everyone else! The beauty of a forum like this is that we all come together with a common interest and can share our individual views, opinions, and suggestions. I too was once a 'newbie' and thanks to forums like these, I have gained a lot of knowledge and am happy to share what I know. But everyday is a learning experience and even I am not exempt from asking an obvious question So please, DO NOT HESITATE. If you feel embarrassed, feel free to PM me! Assuming knowledge and passing it around is the most harmful thing in a forum.
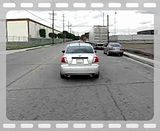
I'm the proud owner of the 08 Base WRX Sedan seen here. My goal is to approach this thread as a One Stop Shop regarding my WRX, so that I'm not all over the forums with it. I'd like to eventually fill this thread with Pictures, Videos, Modifications, Reviews and Impressions of this car. I will also continually do my best to remain unbiased and objective in my reviews and opinions.
So thank you in advance for your interest, opinions, questions and, in general, for joining along with this automotive journey of mine.
Respectfully,
Vim
------------------------------- August 8, 2008 -------------------------------
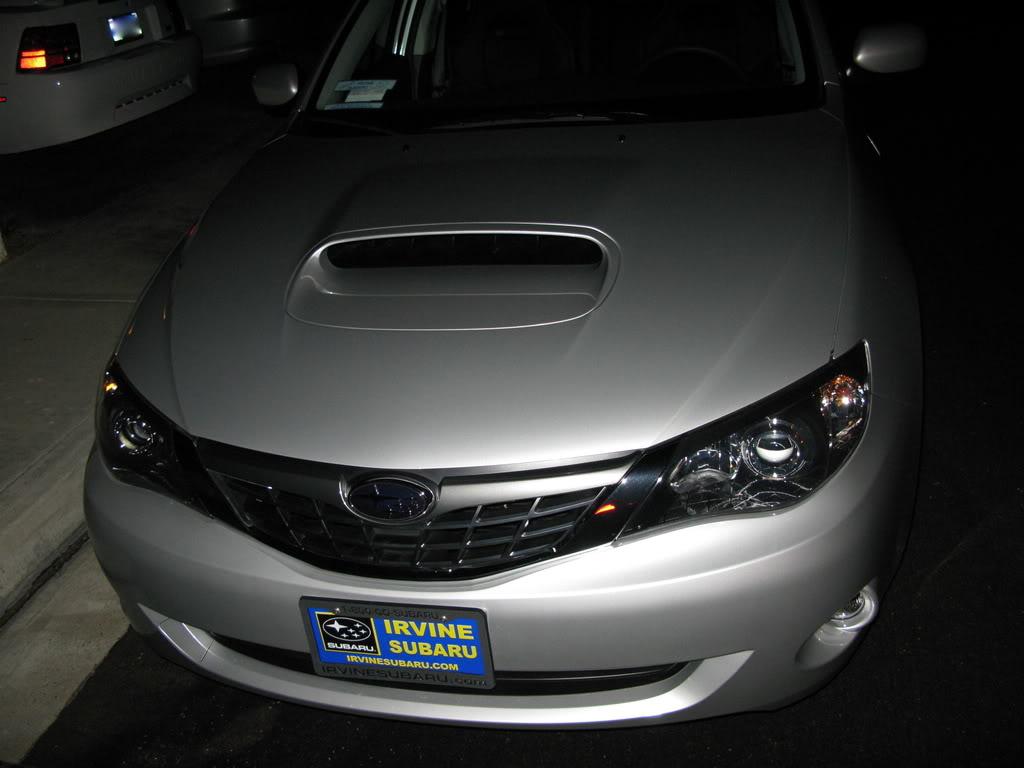
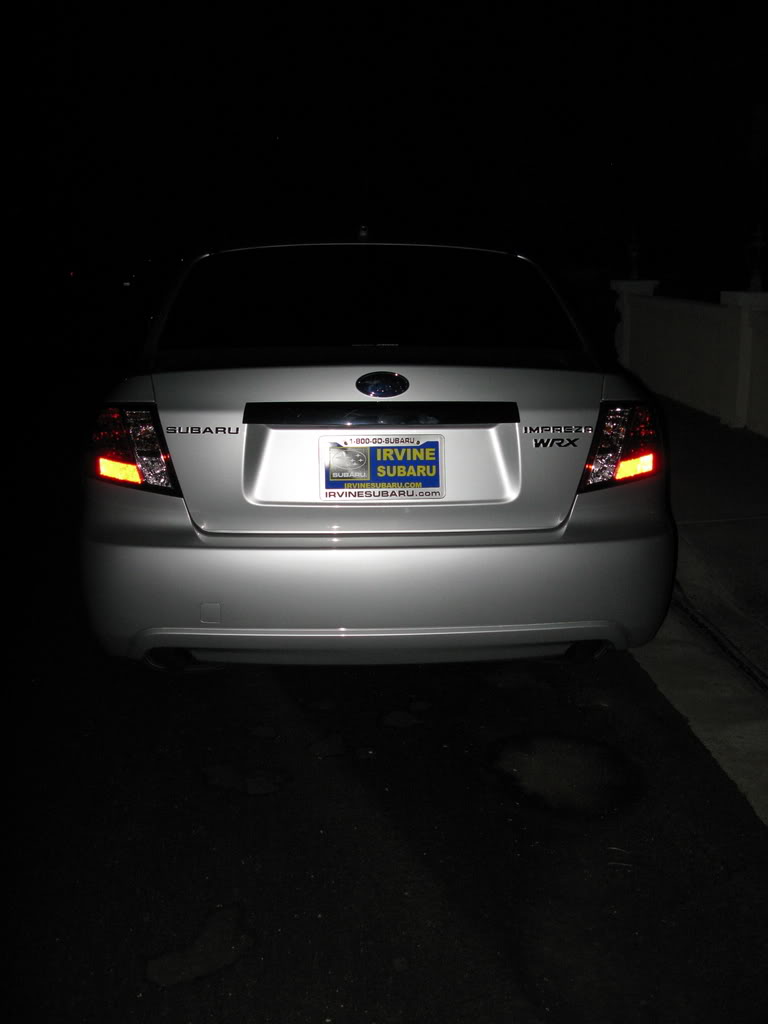
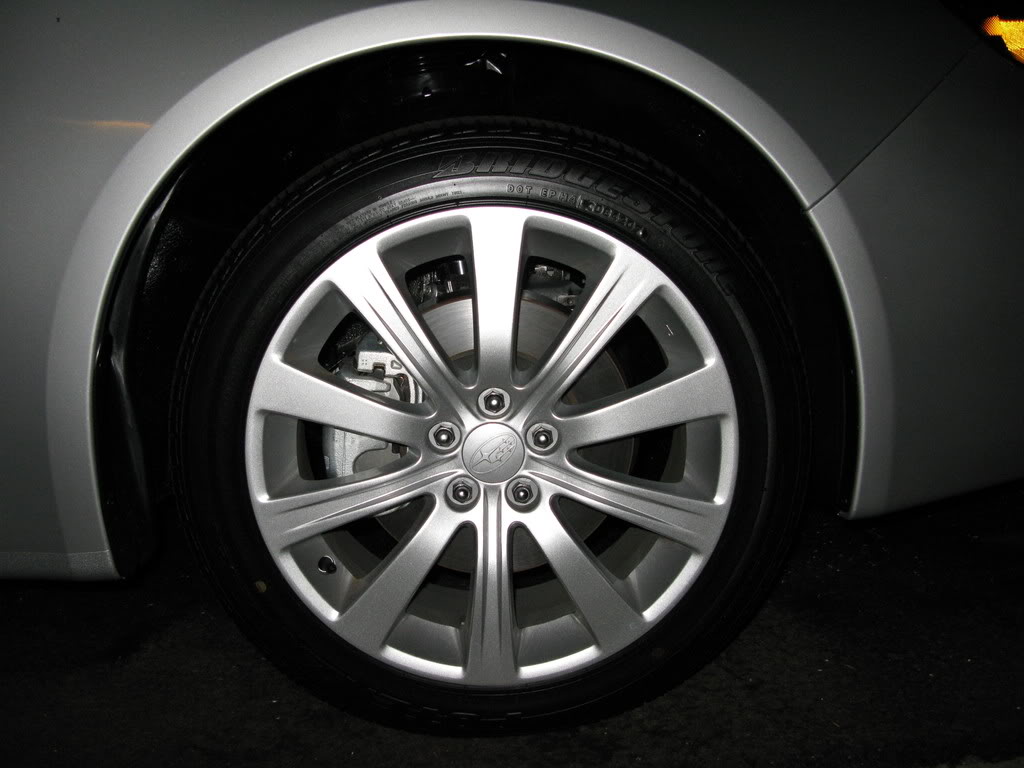
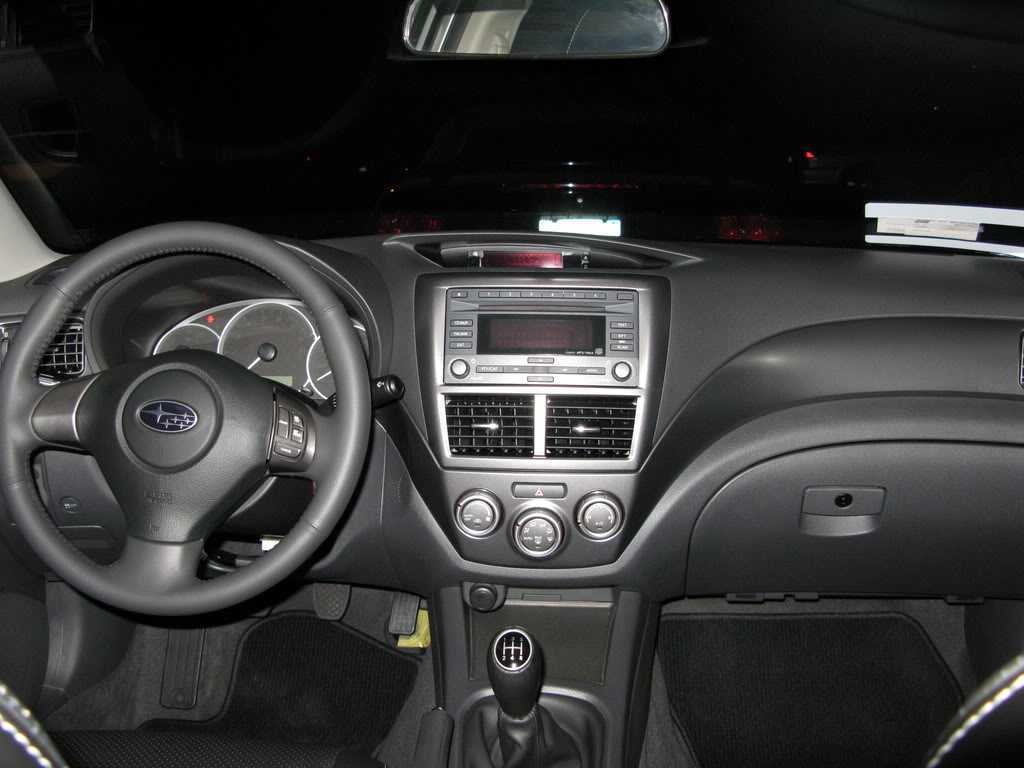
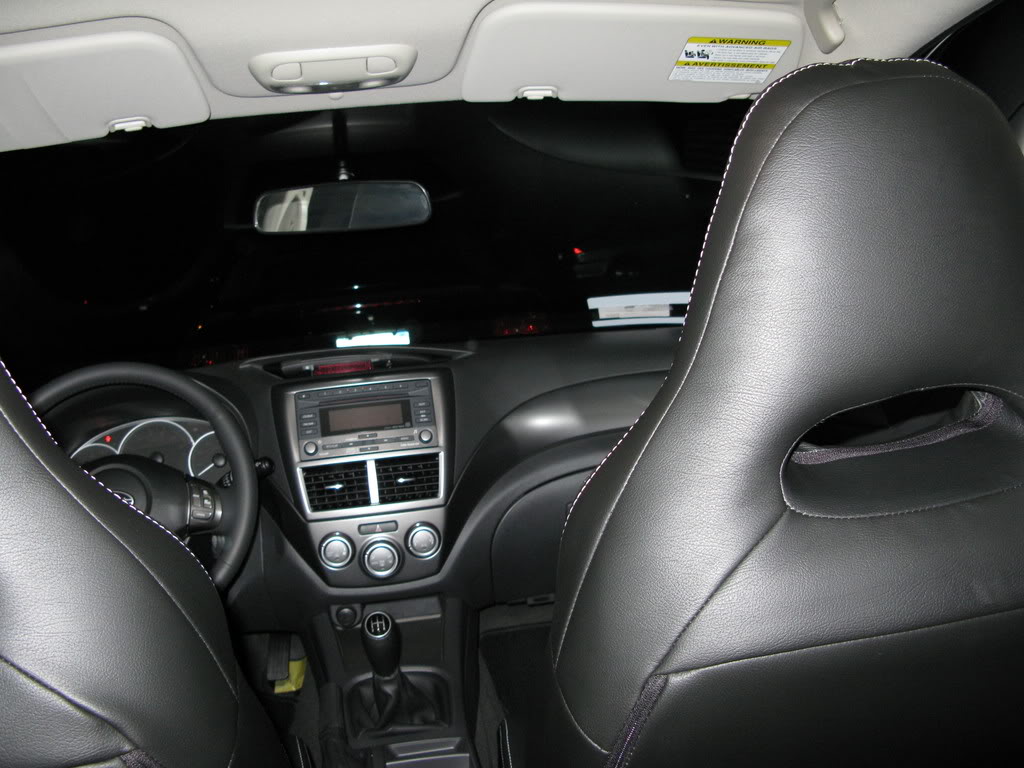
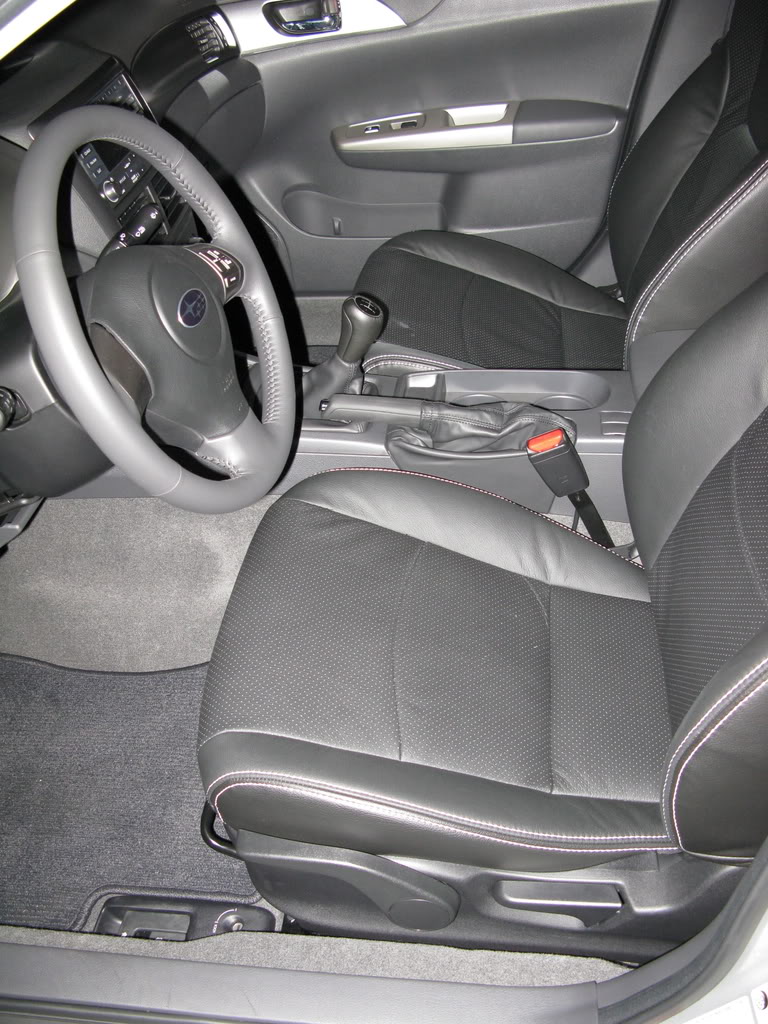
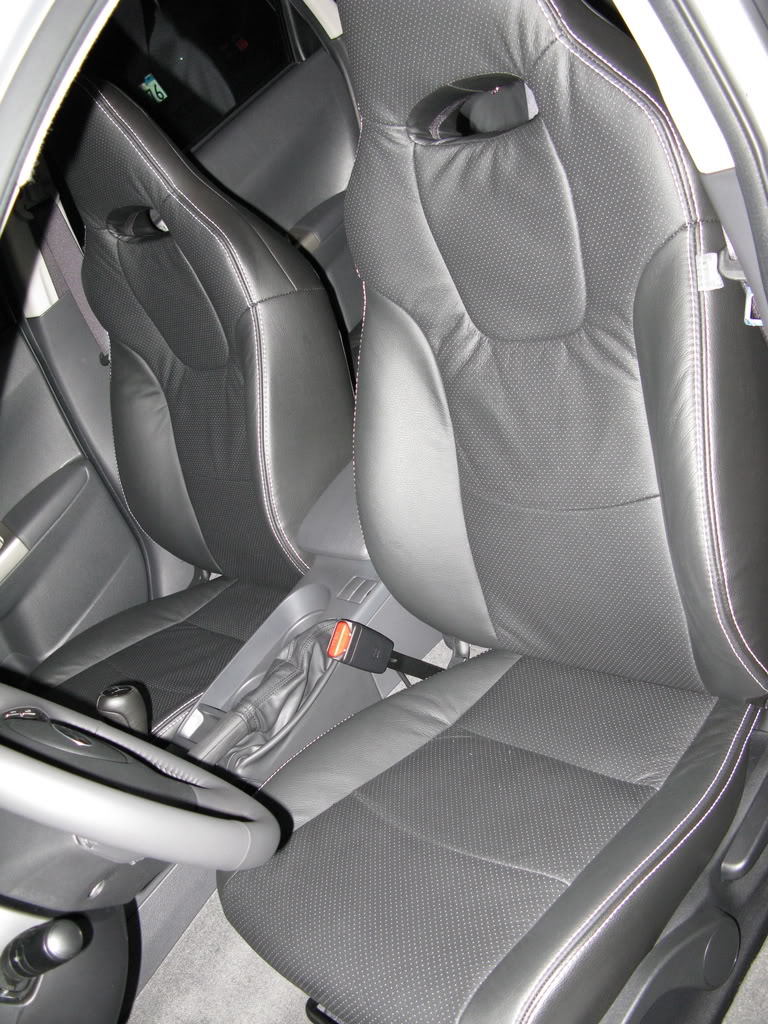
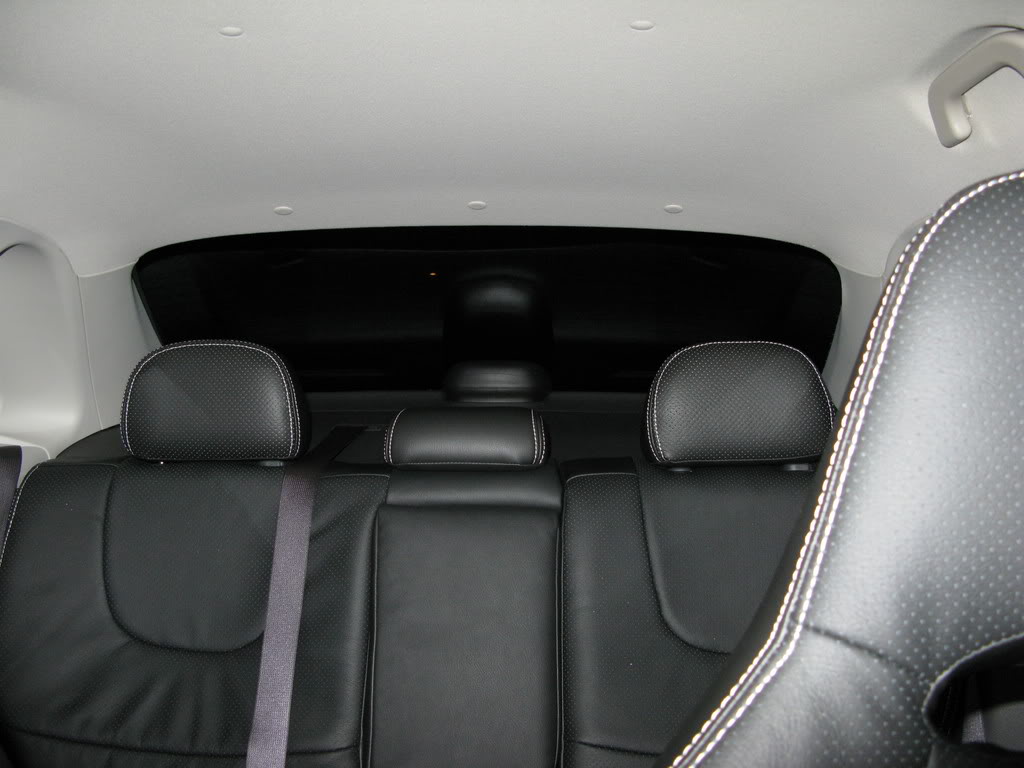
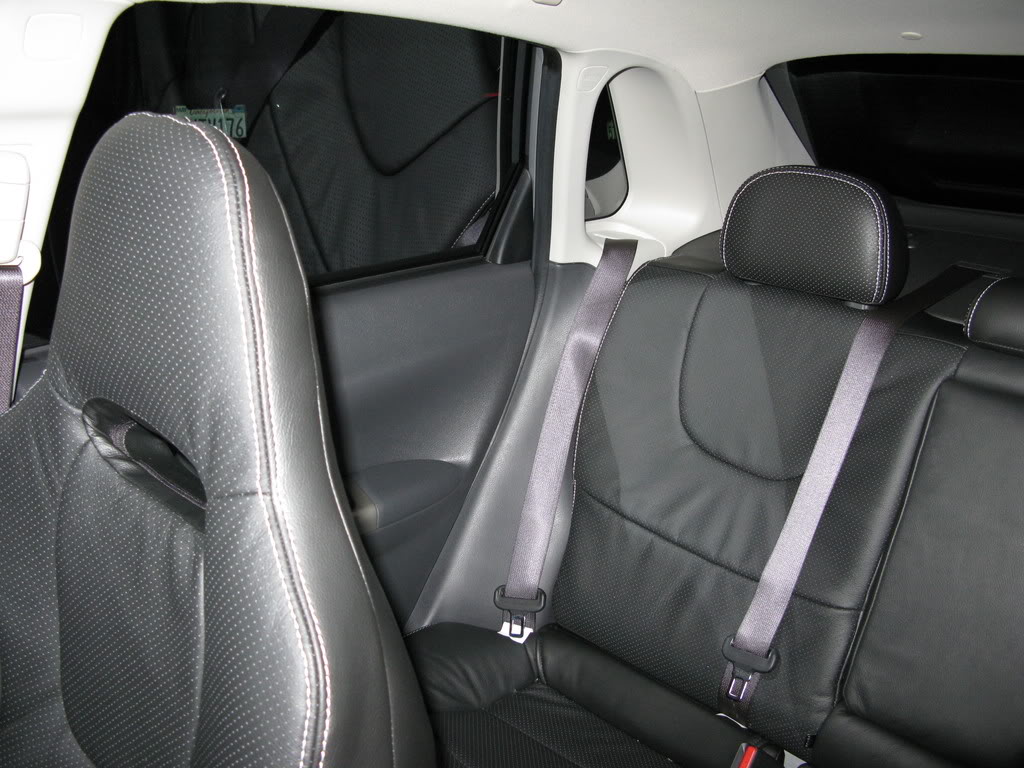
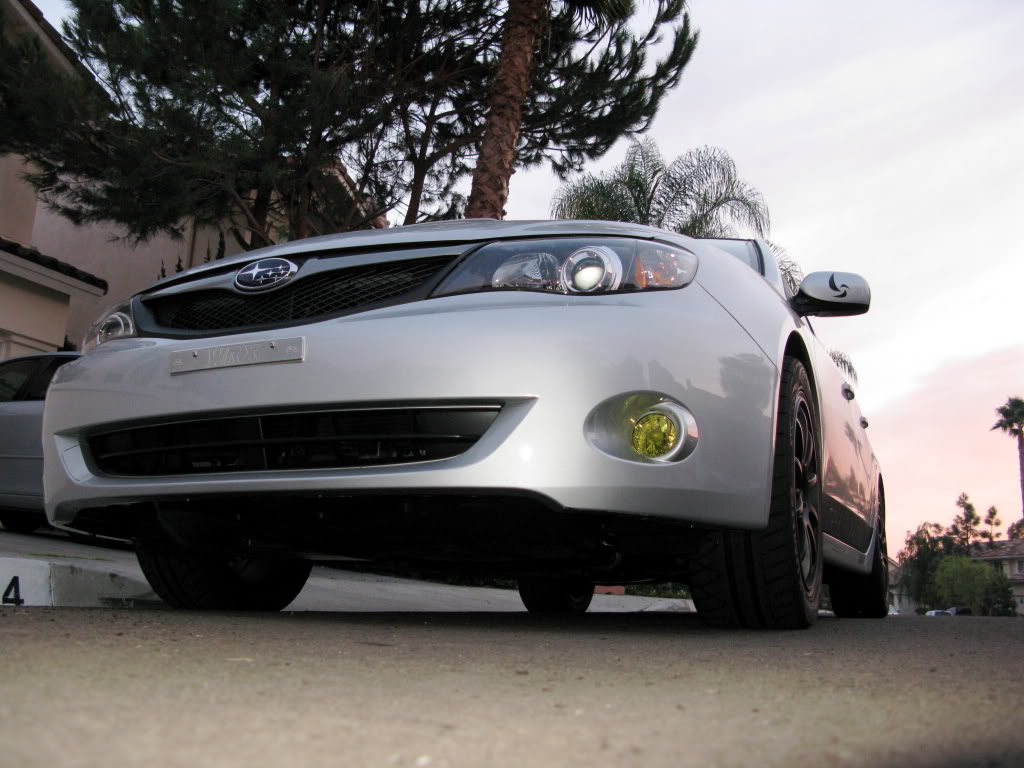
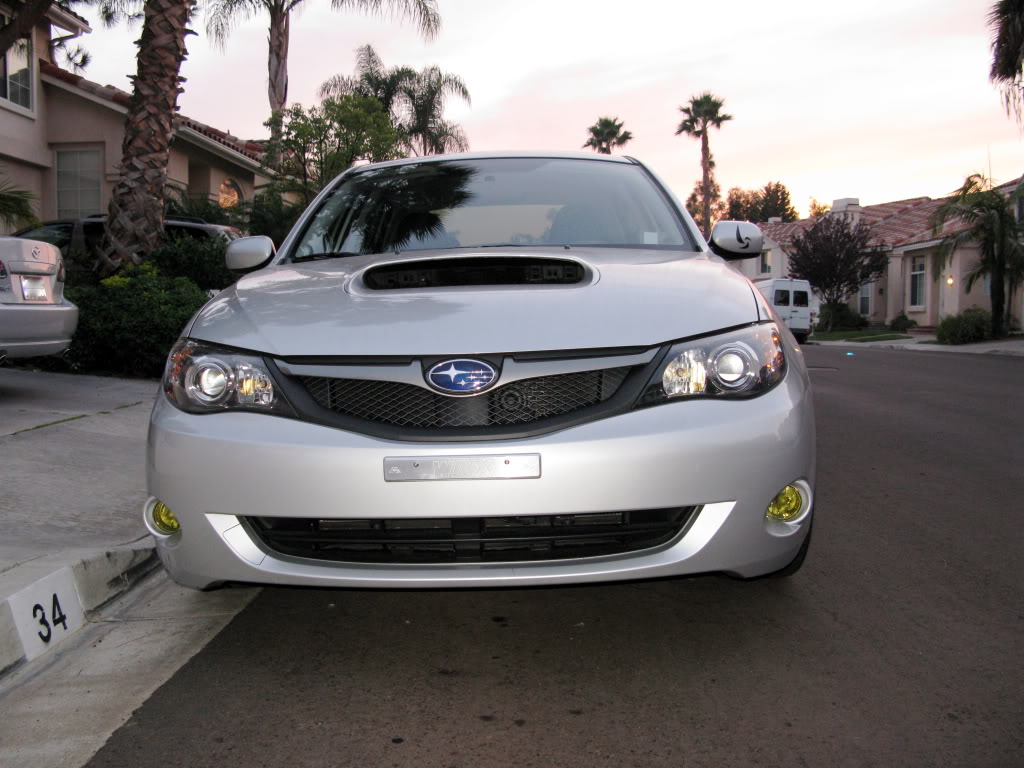
Today, I picked up my Spark Silver Metallic WRX. It is the Base model to which I have opted for the following: fog lights, custom Coach leather upholstery and Formula One 15% tint. While it is dark out, a friend encouraged me to take pictures of it, so I did. They didn't turn out too terrible. I tried to capture the car from each general angle, giving you an idea of the blank canvas I will be working with. There is a lot of focus on interior shots, as I am very happy with the outcome of the Coach leather. I chose solid black bolsters and perforated black surfaces with white French stitch to commemorate the same theme that was present in my late Speed6. If you notice, the leather looks a bit rippled up top, but I was told that will tighten up within 2 weeks, as the leather needs to dry and shrink a bit. If by then it does not meet my satisfaction, they have agreed to re-upholster the interior at no charge. I've gotta be honest, I am quite happy with it, and I feel it adds a great element of luxury to an otherwise economical-minded interior. I think it makes the rest of the interior look more... upscale. Please Enjoy!
EXTERIOR -

INTERIOR -
---------------------------------------------------------------------------------
Here, I have put together a list of modifications that we have to look forward to in reviewing their effect on the vehicle. At this point, I will give a synopsis why I've chosen each modification and what I intend to gain from it. I will also post some pictures to complement them.
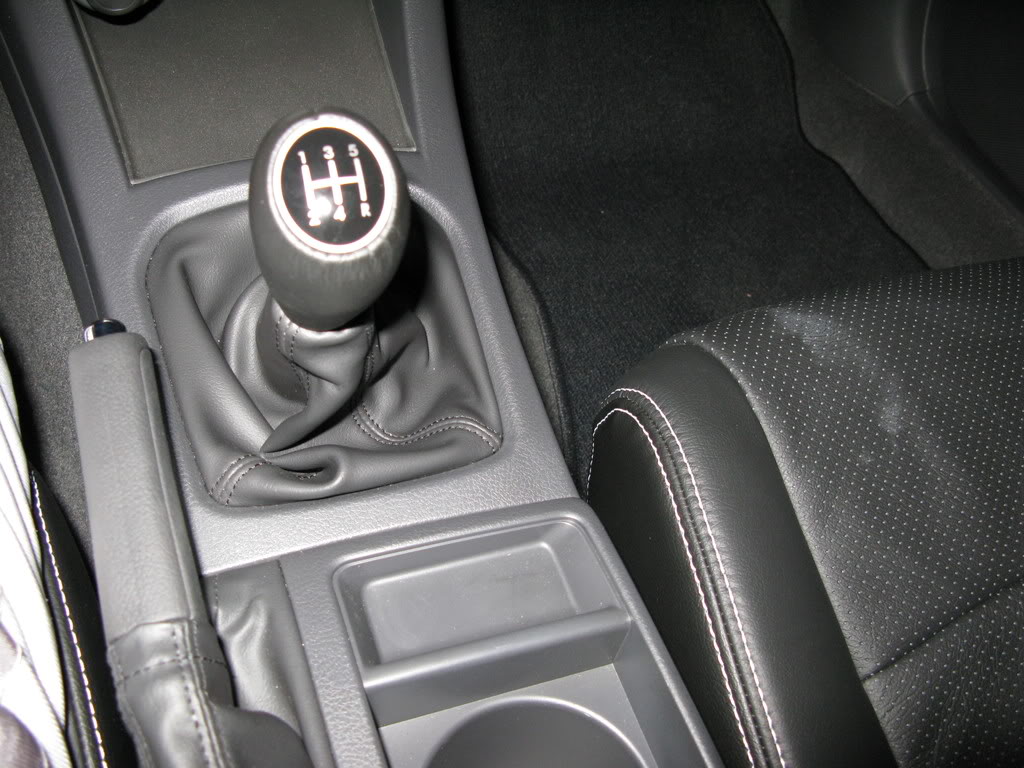
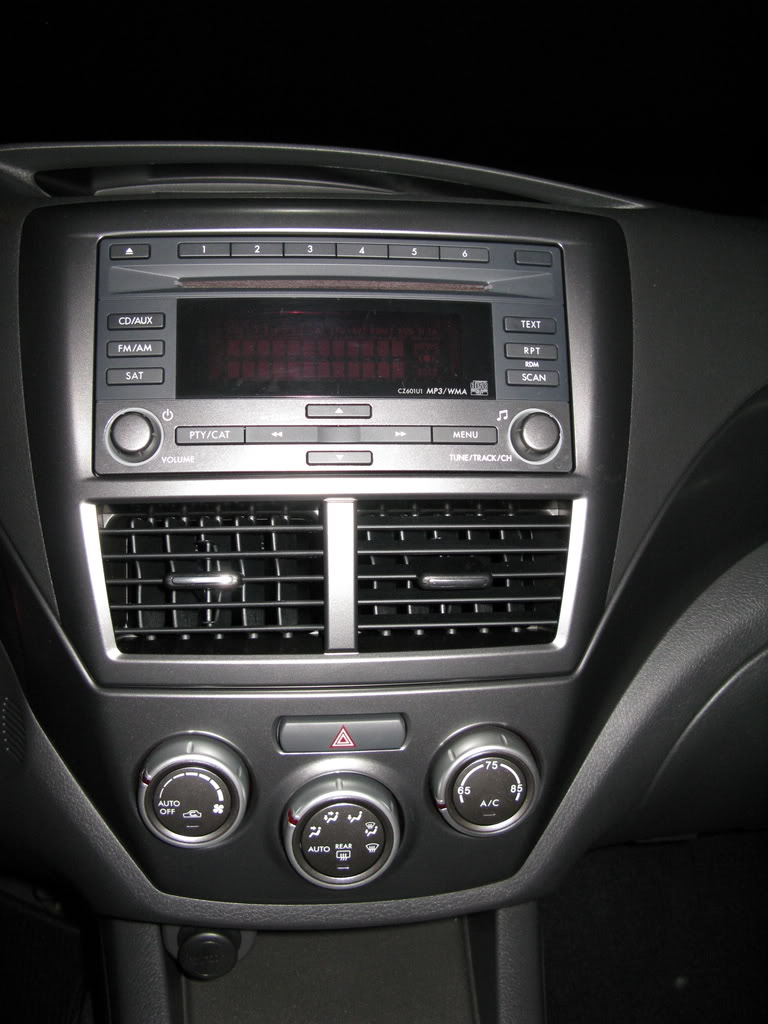
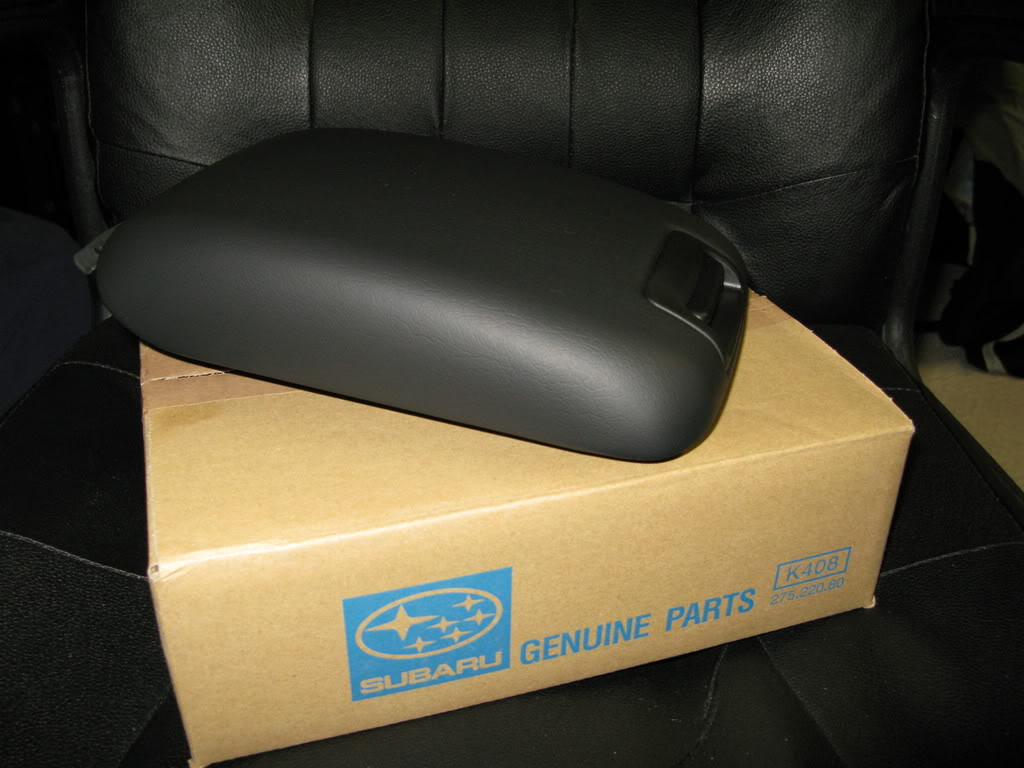
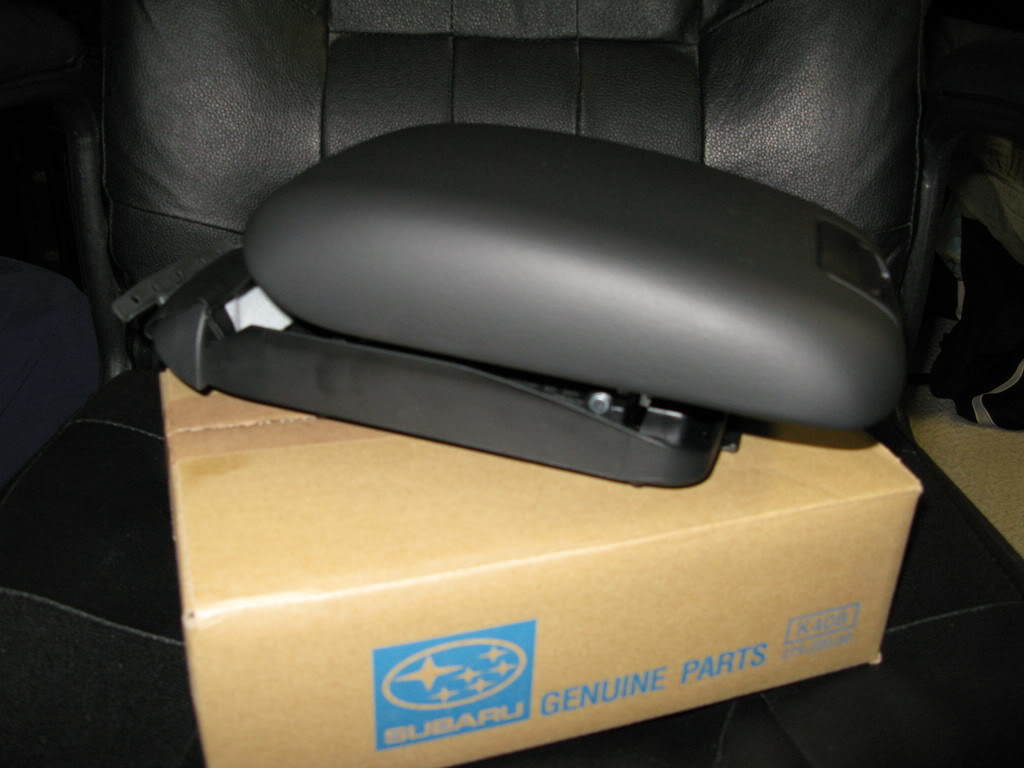
SUBARU ARMREST EXTENSION - While not the most exciting piece to find on a modification list, I found this extension to be an absolute necessity! With an extremely tall shifter and center compartment that are placed far from one another, I found it difficult to find a comfortable place to rest my arm while cruising. With an 11-mile long, gentle test drive, it became unacceptable to keep my elbow either floating, or placing my resting pressure on the shifter itself while in gear or neutral. After flipping through the Genuine Accessories brochure I found my saving grace to be a modification that I used to once ridicule as, 'Who the heck would waste their money on one of those? hah!' This Armrest Extension from Subaru is made of a nice quality that isn't leather, and appears to be nicer than a standard rubber. It has a convincingly deceptive look of leather and is firm yet supple to the touch, much like leather. I expect this to be a worthy upgrade, considering the factory compartment lid is a very hard plastic piece. This Extension, however, boasts the ability to extend up and forward to meet the driver's elbow in a more comfortable spot.
Armrest Extension in closed position
Armrest Extension in open position
---------------------------------------------------------------------------------
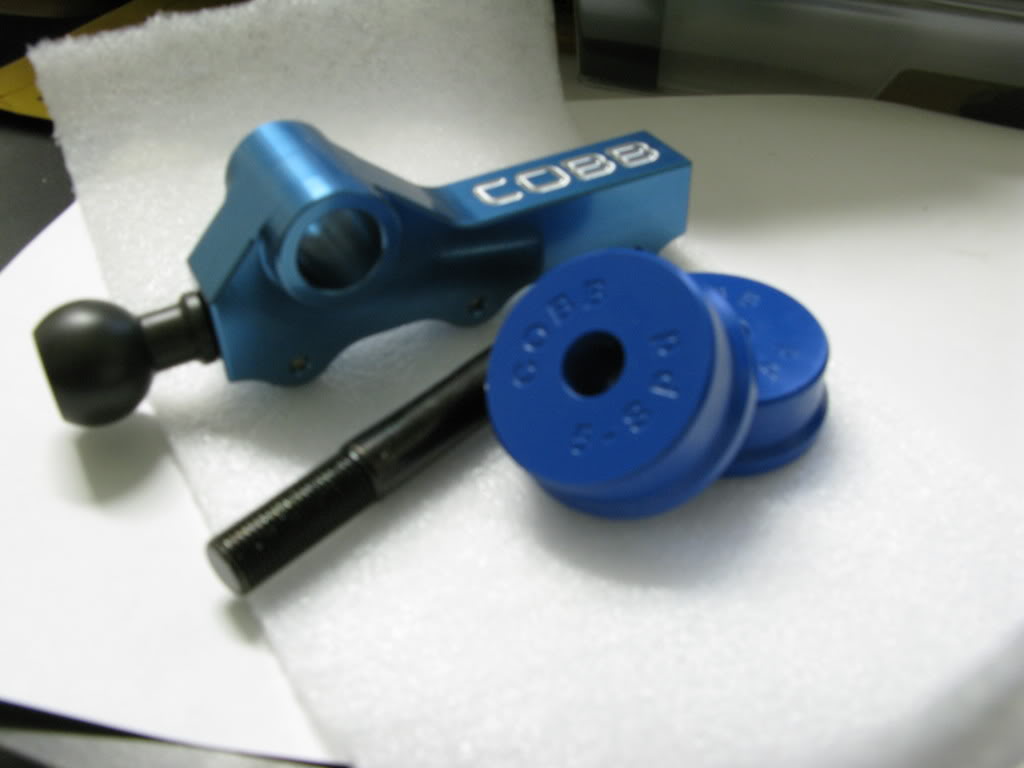
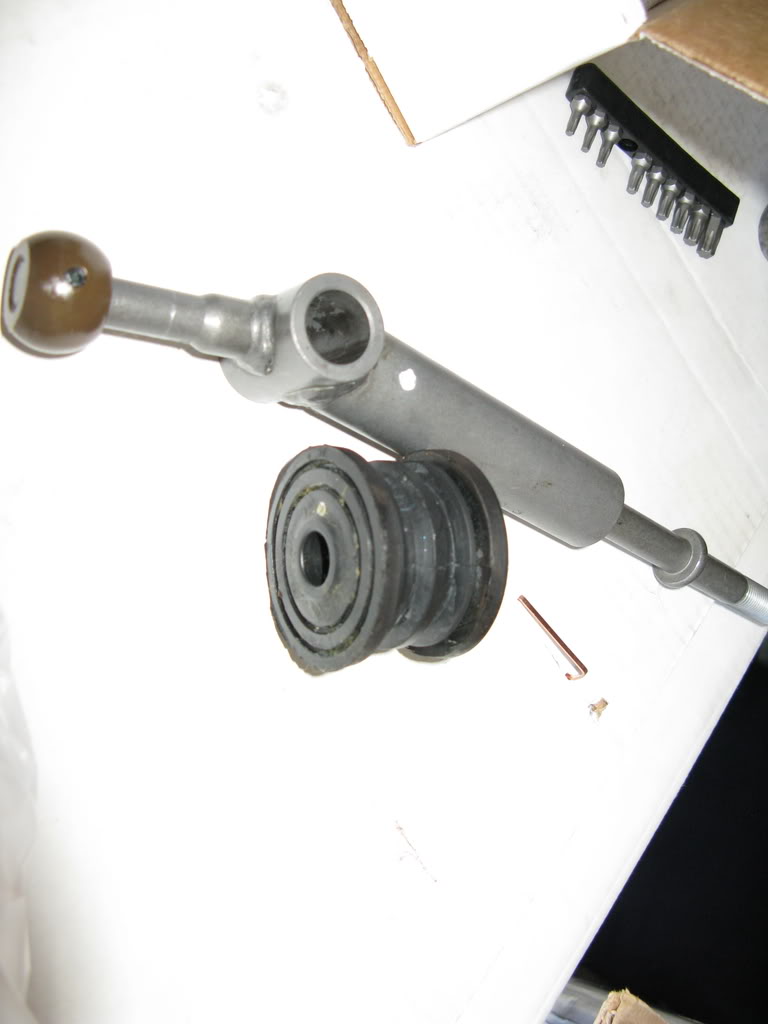
COBB DOUBLE ADJUSTABLE SHIFTER & HARDENED BUSHINGS - The first time I test dove this car, was when I still owned my 'Speed6. I could not believe the lack of feedback, accuracy, or precision this piece had. It's important to note that I had the TWM Stage 2 Shifter & Bushings in my Mazda which sat the shifter at a perfect height and performed flawlessly, feeling almost like a directly linked unit! In defense of the Subaru's shifter, it does fall into it's gates rather nicely with a confident 'snick'. But to find the gate, one must swim through the vague rod and make assumptions as to where it's going. Also, the throw length, once you find your gear, is quite pleasing! It's not a long throw by any means, it just lacks any positive feedback from the transmission to which it's directly linked to. With the COBB unit, I hope to lower the obnoxious height of the shifter to a more reasonable and sporty position, hopefully lining it up close to the same height as the armrest will rise to. I expect the throw length to decrease as well, allowing for quickly timed shifts to be performed flawlessly. The bushings are perhaps the most important part of this modification, as the vague, swim-through feel of the shifter is about as large a complaint as it's touch the ceiling height. With the hardened bushings, COBB has given the expectation that the shifter should feel more directly connected and provide better feedback to the driver. I am looking forward to this effect, as I feel this upgrade has the potential to really take this shifter from a butter churner to a sporty extension of a more engaging vehicle!
COBB shifter and bushings
---------------------------------------------------------------------------------
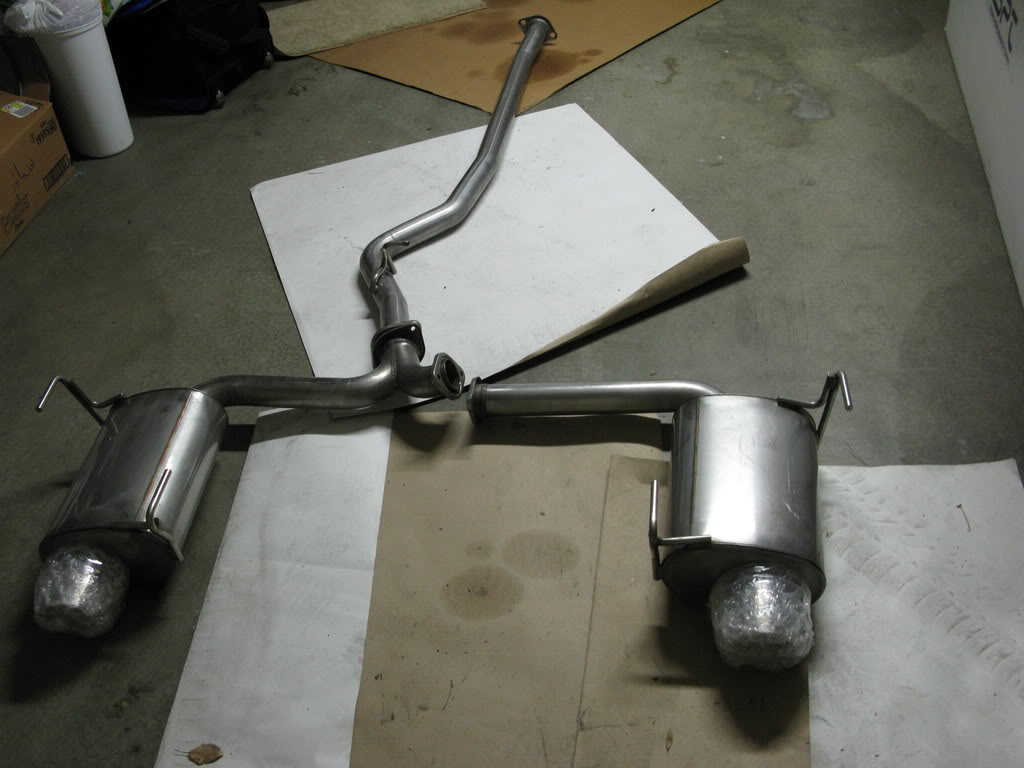
SPT CAT-BACK DUAL EXHAUST SYSTEM - You can spot a modified Subaru a mile away, not by it's looks, but by it's sound. Subaru's Boxer motor with it's firing pattern coupled with their unequal length exhaust manifolds, create a signature rumble that can only be replicated by another Subie. The sound has become it's fingerprint. Once heard, it creates a classically conditioned, Pavlovian response to rear one's head up and look for the nearest Subaru. And my God, does it sound good! I've been in love with the sound since 2001, and have drooled at it ever since. If I'm driving a Subaru, I'm getting it's signature with it, damn it! I do not intend to gain much horsepower from this modification, but I do intend to free up some restriction and back pressure. The sound just so happens to be a effect of this decrease in restriction. But once can achieve this rumble through any Cat-Back, so why SPT? Subaru Performance Tuning is the in-house tuner for Subaru. I'm not sure how far we can get away with considering them a tuner, but I can rather accurately call them a branch of Subaru that hires out after-market tuners to do some R&D and private label parts for them. The private labeling does have it's benefit though, and that benefit rhymes with the word, warranty. This vehicle is a lease, and the less I need to worry about removing in the end, the easier the road for me. The SPT modifications are considered 'warranty friendly' and this one happens to intrigue me with a couple of other unique features. Being an SPT modification, the sound is rather subtle. I consider this a very positive feature, as I believe I can make out what seems to look like a Down Pipe in my very near future every time I rub my eyes. Another unique feature of this specific exhaust is it's size. I've always been an advocate of increasing diameter, but not by too much, as it will retain back pressure which will prevent the loss of torque commonly plaguing excessively free-flowing, large diameter exhausts made for boosted cars. On my Mazdaspeed, I had a MagnaFlow Cat-Back which boasted 2.5" mandrel pipes, which in turn, caused no notable restriction in my 284whp/307wtq application. The benefit was less resonance, preventing the loss of torque, and in general, a smoother, quieter operation. Much like the MagnaFlow, this SPT Cat-Back features 2.5" mandrel bent piping as well... at least in the mid-section. Conversely, here is where things get interesting. Just prior to the rear y-split, the exhaust smoothly increases to a 3" pipe. Upon splitting, the 3" diameter continues out to each respective side, through the mufflers and ends in monster 4" tips with SPT's logo handsomely etched into them. I believe this design is utilized to remove some of the unnecessary back pressure that a y-split design can create by choosing visual appeal over performance efficiency. While on the topic of visual appeal, I am really looking forward to the 4" tips to nicely fill in the large exhaust openings on either side of the rear valance! The SPT Cat-Back has thus far impressed me with the design alone, so I expect fitment to be equally impressive. I also expect this system to exhibit a smooth, mellow note which will rumble with strong presence, but muffle down my full Turbo-Back setup.
SPT Cat-Back laid out
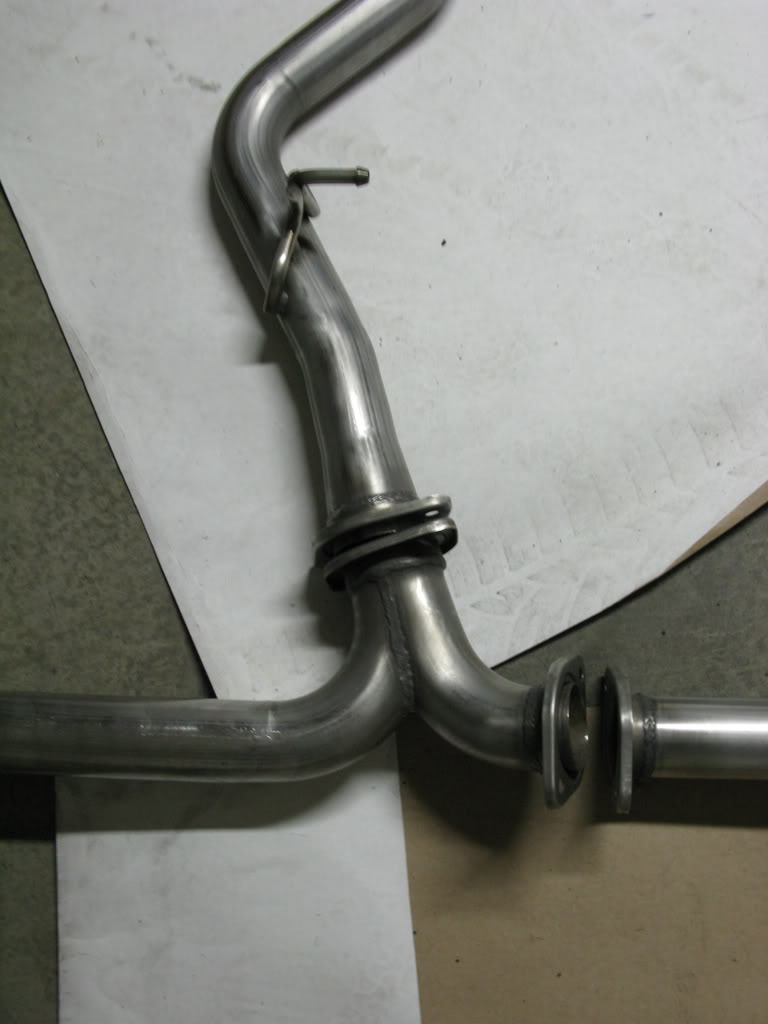
SPT Cat-Back intermediate pipe diameter increase from 2.5" to 3"

SPT Cat-Back y-split detail
---------------------------------------------------------------------------------
SPT SPORT SPRINGS - The 2008 WRX is notoriously known for it's body roll and 'comfortable' suspension. Even with little time behind the wheel and only a few turns under my belt, I have already uncovered a desperate need for an increased spring rate. Now don't get me wrong, these will get you by just fine around town, but if you intend on doing any spirited driving, or even tackling your favorite corners with a little gusto, the stock springs are far too soft. The stock dampers live up to their task though, providing a firm compression and great rebound. The springs on the other hand, simply do not feel stiff enough for the task. SPT, once again being warranty friendly, offers a sportier option for the WRX. While I do not know what the increase in spring rate is, I am hoping for this to be a suitable option. Wheel gap should also decrease, but not radically, offering a more planted, canyon-ready look without compromising too much ground clearance. I am expecting to have sharper turn-in, less body roll, and a sportier look with these coils. Since there is not much technical detail about them out there, I am going into this with a bit of a gamble. But I believe they are made by Eibach, and my experience with their products have been second to none. I am really looking forward to reviewing this modification.
<<NO PICTURES YET - THIS ITEM IS DUE TO ARRIVE ON MONDAY AUGUST 11, 2008>>
---------------------------------------------------------------------------------
COBB DOWN-PIPE WITH HIGH FLOW CAT - The down-pipe is where the biggest restrictions exist on the exhaust side of the turbo. Removing catalytic converters, or replacing them with more efficient units, will yield smoother exhaust flow and significantly reduce back pressure resulting in earlier boost response and high power across the entire rpm band. This is considered one of the most potent modifications to most modern turbocharged vehicles. A down-pipe provides a lot of power gain, for such a simple replacement! The COBB unit integrates a high flow metallic substrate catalytic converter that keeps things flowing well, while allowing the vehicle to pass emissions, preventing the unappealing smell of a cat-less vehicle, and keeping sound levels acceptable. There is also a very unique sound of the waste gate gases passing through that happens to become very audible with this modification. I expect a lot of power out of this modification and hope it delivers.
<<NO PICTURES YET - THIS ITEM IS CURRENTLY ON A 2-WEEK BACK-ORDER THROUGH THE MANUFACTURER>>
---------------------------------------------------------------------------------
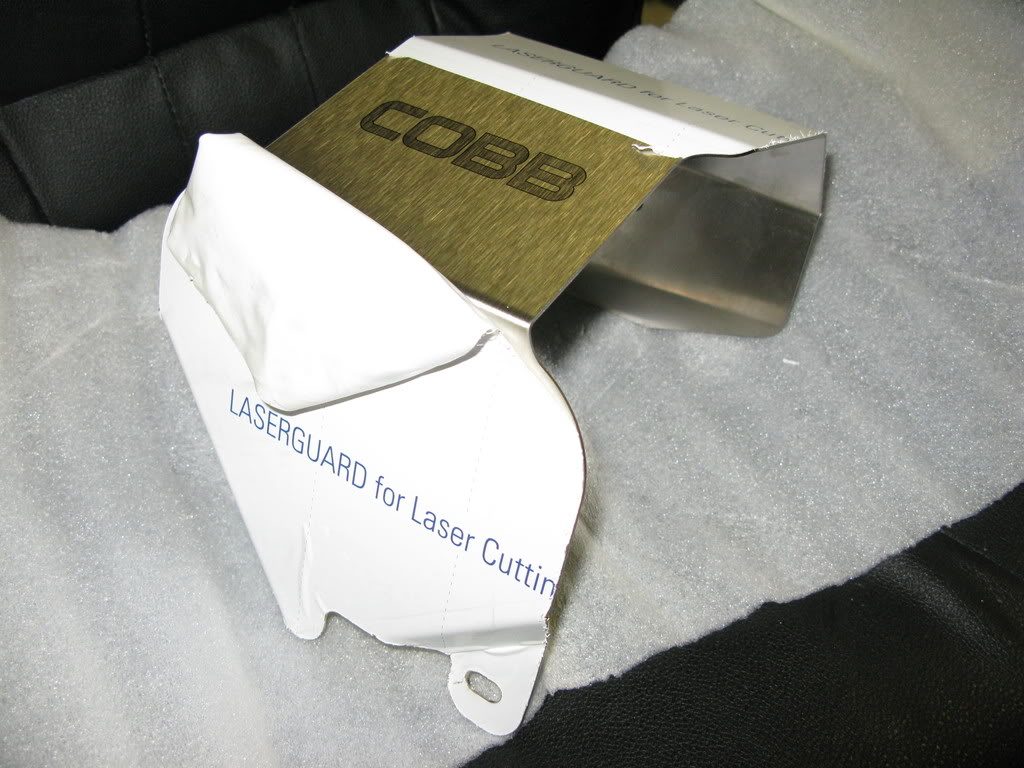
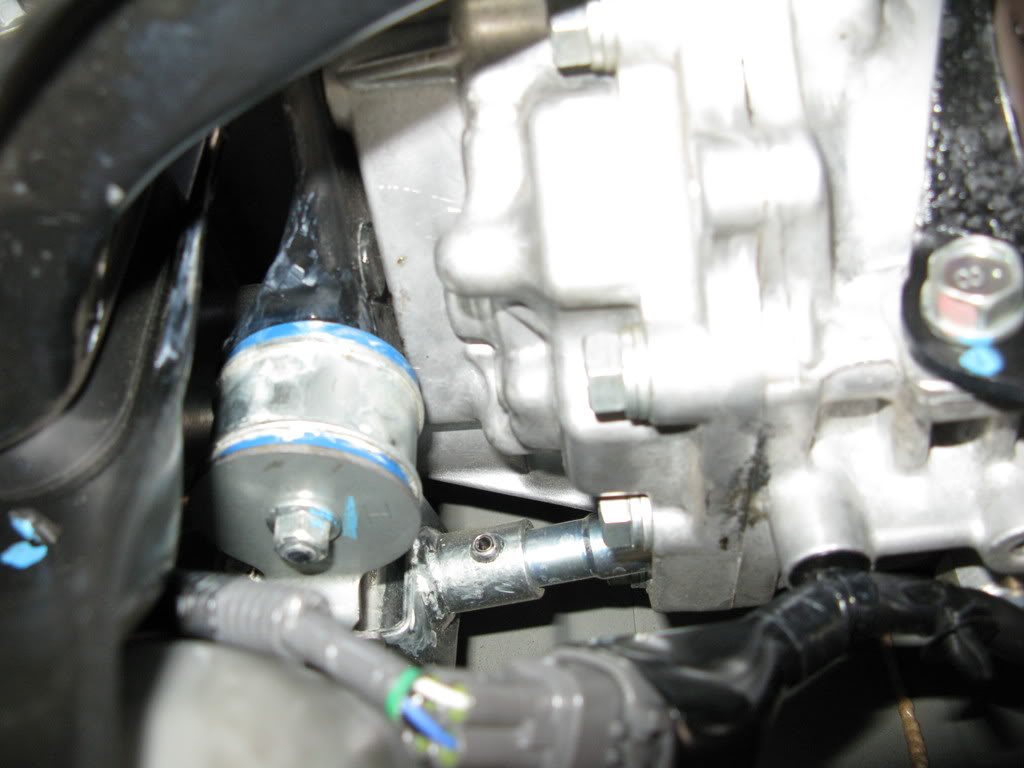
COBB HEAT SHIELD - Much like the MZR Turbo DISI motor, the turbocharger in a Subaru H-4 lies behind the engine, just in front of the firewall. However, unlike the DISI's location of the intercooler being above the motor, Subaru's intercooler is placed just behind the engine to prevent heat soak from the engine's rising heat. However, this application places the intercooler almost directly above the turbocharger, which is quite possibly the hottest part of the engine bay when under boost. To prevent heat soaking, Subaru employed a thick shield to go above the down-pipe to cover the exhaust side of the turbo and prevent heat soaking the intercooler. It's a great design, but with the replacement of the down-pipe with an after-market unit, the factory heat shield no longer fits. While most individuals will trim or just completely remove their heat shields, I personally feel it is mandatory to keep one in place. Economically speaking, I would have trimmed my factory shield. But with this car being a Lease, I do need to re-install the stock down-pipe with no trace of modification. COBB has created a heat shield that will effectively complete the same task as the factory shield, while looking good at the same time!
COBB heat shield
---------------------------------------------------------------------------------
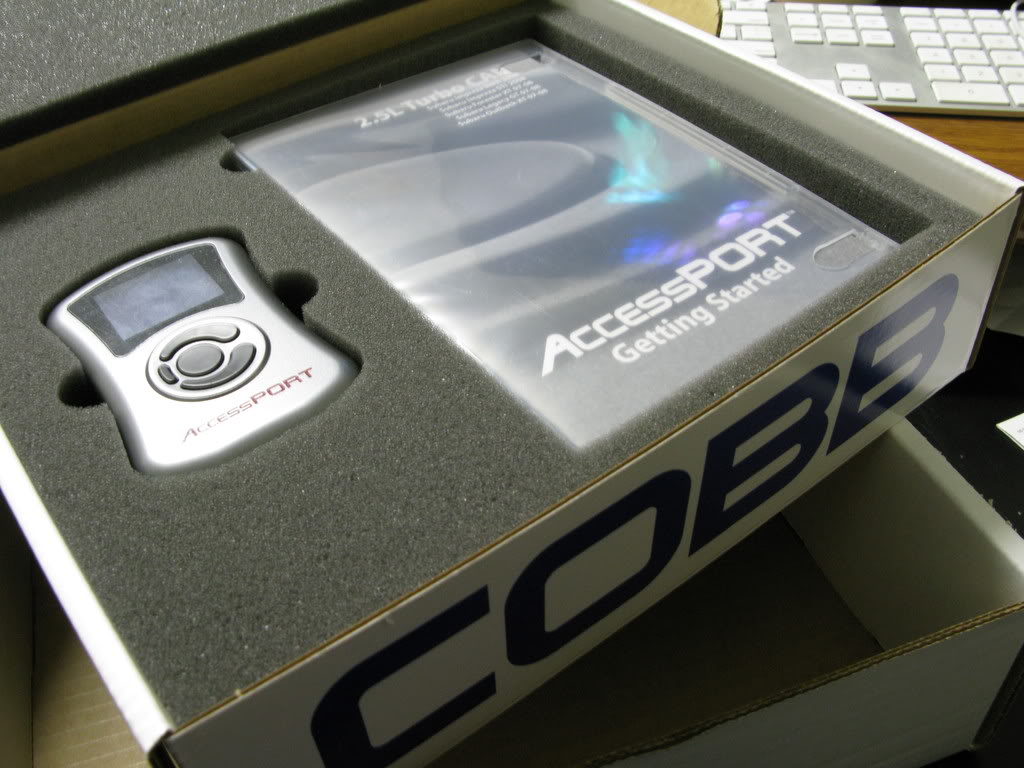
COBB AccessPORT - Like Peanut Butter to Jelly, COBB has been successfully re-tuning Subaru's across America, with their sophisticated AccessPORT unit! Their company grew from a tiny tuner to massive market share in a matter of years. They worked hard and passionately to provide top of the line products, often embarrassing the competition with their results! Reliability for this product is top notch and the gains are significant. Not only does one benefit from more power, but it is also more usable and is applied smoother, resulting in a more pleasurable driving experience. The AccessPORT remains an undetectable modification, and is very simply to marry to and un-marry from a car. Maps can be switched on the spot to select Anti-Theft, Valet, Economy, or any of your pre-programmed ECU maps. They have even begun to include Launch Control on many of their applications. I am looking forward to using this modification with it's Stage 1 settings while my exhaust system remains stock, then re-flashing to Stage 2 parameters once my turbo-back system is installed. I also intend to do real world 0-60 runs and possibly 1/8 mile comparisons between Stock, Stage 1, and Stage 2. This is a no-brainer modification for any Subaru owner!
COBB AccessPORT box cover

COBB AccessPORT box contents
---------------------------------------------------------------------------------
After a very long hiatus, I am back! I had a Super Charged 03 Mustang GT when I first joined i-club. For years I wanted a WRX, so instead of buying one, I spent time helping friends modify them and provided lots of support on i-clubs boards! Shortly after the admins upgraded me to VIP status, I left and bought a Mazdaspeed 6. Loved it! Long story short, I'm back and with a 2008 WRX and a new business in the oven! I've been logging the build of this WRX in other forums, and am bringing it over here in it's entirety and will keep it updated!
I'll do my best to remain helpful, encourage knowledge, and learn from everyone else! The beauty of a forum like this is that we all come together with a common interest and can share our individual views, opinions, and suggestions. I too was once a 'newbie' and thanks to forums like these, I have gained a lot of knowledge and am happy to share what I know. But everyday is a learning experience and even I am not exempt from asking an obvious question
So please, DO NOT HESITATE. If you feel embarrassed, feel free to PM me! Assuming knowledge and passing it around is the most harmful thing in a forum.I'm the proud owner of the 08 Base WRX Sedan seen here. My goal is to approach this thread as a One Stop Shop regarding my WRX, so that I'm not all over the forums with it. I'd like to eventually fill this thread with Pictures, Videos, Modifications, Reviews and Impressions of this car. I will also continually do my best to remain unbiased and objective in my reviews and opinions.
So thank you in advance for your interest, opinions, questions and, in general, for joining along with this automotive journey of mine.
Respectfully,
Vim
------------------------------- August 8, 2008 -------------------------------
Today, I picked up my Spark Silver Metallic WRX. It is the Base model to which I have opted for the following: fog lights, custom Coach leather upholstery and Formula One 15% tint. While it is dark out, a friend encouraged me to take pictures of it, so I did. They didn't turn out too terrible. I tried to capture the car from each general angle, giving you an idea of the blank canvas I will be working with. There is a lot of focus on interior shots, as I am very happy with the outcome of the Coach leather. I chose solid black bolsters and perforated black surfaces with white French stitch to commemorate the same theme that was present in my late Speed6. If you notice, the leather looks a bit rippled up top, but I was told that will tighten up within 2 weeks, as the leather needs to dry and shrink a bit. If by then it does not meet my satisfaction, they have agreed to re-upholster the interior at no charge. I've gotta be honest, I am quite happy with it, and I feel it adds a great element of luxury to an otherwise economical-minded interior. I think it makes the rest of the interior look more... upscale. Please Enjoy!
EXTERIOR -
INTERIOR -
---------------------------------------------------------------------------------
Here, I have put together a list of modifications that we have to look forward to in reviewing their effect on the vehicle. At this point, I will give a synopsis why I've chosen each modification and what I intend to gain from it. I will also post some pictures to complement them.
SUBARU ARMREST EXTENSION - While not the most exciting piece to find on a modification list, I found this extension to be an absolute necessity! With an extremely tall shifter and center compartment that are placed far from one another, I found it difficult to find a comfortable place to rest my arm while cruising. With an 11-mile long, gentle test drive, it became unacceptable to keep my elbow either floating, or placing my resting pressure on the shifter itself while in gear or neutral. After flipping through the Genuine Accessories brochure I found my saving grace to be a modification that I used to once ridicule as, 'Who the heck would waste their money on one of those? hah!' This Armrest Extension from Subaru is made of a nice quality that isn't leather, and appears to be nicer than a standard rubber. It has a convincingly deceptive look of leather and is firm yet supple to the touch, much like leather. I expect this to be a worthy upgrade, considering the factory compartment lid is a very hard plastic piece. This Extension, however, boasts the ability to extend up and forward to meet the driver's elbow in a more comfortable spot.
Armrest Extension in closed position
Armrest Extension in open position
---------------------------------------------------------------------------------
COBB DOUBLE ADJUSTABLE SHIFTER & HARDENED BUSHINGS - The first time I test dove this car, was when I still owned my 'Speed6. I could not believe the lack of feedback, accuracy, or precision this piece had. It's important to note that I had the TWM Stage 2 Shifter & Bushings in my Mazda which sat the shifter at a perfect height and performed flawlessly, feeling almost like a directly linked unit! In defense of the Subaru's shifter, it does fall into it's gates rather nicely with a confident 'snick'. But to find the gate, one must swim through the vague rod and make assumptions as to where it's going. Also, the throw length, once you find your gear, is quite pleasing! It's not a long throw by any means, it just lacks any positive feedback from the transmission to which it's directly linked to. With the COBB unit, I hope to lower the obnoxious height of the shifter to a more reasonable and sporty position, hopefully lining it up close to the same height as the armrest will rise to. I expect the throw length to decrease as well, allowing for quickly timed shifts to be performed flawlessly. The bushings are perhaps the most important part of this modification, as the vague, swim-through feel of the shifter is about as large a complaint as it's touch the ceiling height. With the hardened bushings, COBB has given the expectation that the shifter should feel more directly connected and provide better feedback to the driver. I am looking forward to this effect, as I feel this upgrade has the potential to really take this shifter from a butter churner to a sporty extension of a more engaging vehicle!
COBB shifter and bushings
---------------------------------------------------------------------------------
SPT CAT-BACK DUAL EXHAUST SYSTEM - You can spot a modified Subaru a mile away, not by it's looks, but by it's sound. Subaru's Boxer motor with it's firing pattern coupled with their unequal length exhaust manifolds, create a signature rumble that can only be replicated by another Subie. The sound has become it's fingerprint. Once heard, it creates a classically conditioned, Pavlovian response to rear one's head up and look for the nearest Subaru. And my God, does it sound good! I've been in love with the sound since 2001, and have drooled at it ever since. If I'm driving a Subaru, I'm getting it's signature with it, damn it! I do not intend to gain much horsepower from this modification, but I do intend to free up some restriction and back pressure. The sound just so happens to be a effect of this decrease in restriction. But once can achieve this rumble through any Cat-Back, so why SPT? Subaru Performance Tuning is the in-house tuner for Subaru. I'm not sure how far we can get away with considering them a tuner, but I can rather accurately call them a branch of Subaru that hires out after-market tuners to do some R&D and private label parts for them. The private labeling does have it's benefit though, and that benefit rhymes with the word, warranty. This vehicle is a lease, and the less I need to worry about removing in the end, the easier the road for me. The SPT modifications are considered 'warranty friendly' and this one happens to intrigue me with a couple of other unique features. Being an SPT modification, the sound is rather subtle. I consider this a very positive feature, as I believe I can make out what seems to look like a Down Pipe in my very near future every time I rub my eyes. Another unique feature of this specific exhaust is it's size. I've always been an advocate of increasing diameter, but not by too much, as it will retain back pressure which will prevent the loss of torque commonly plaguing excessively free-flowing, large diameter exhausts made for boosted cars. On my Mazdaspeed, I had a MagnaFlow Cat-Back which boasted 2.5" mandrel pipes, which in turn, caused no notable restriction in my 284whp/307wtq application. The benefit was less resonance, preventing the loss of torque, and in general, a smoother, quieter operation. Much like the MagnaFlow, this SPT Cat-Back features 2.5" mandrel bent piping as well... at least in the mid-section. Conversely, here is where things get interesting. Just prior to the rear y-split, the exhaust smoothly increases to a 3" pipe. Upon splitting, the 3" diameter continues out to each respective side, through the mufflers and ends in monster 4" tips with SPT's logo handsomely etched into them. I believe this design is utilized to remove some of the unnecessary back pressure that a y-split design can create by choosing visual appeal over performance efficiency. While on the topic of visual appeal, I am really looking forward to the 4" tips to nicely fill in the large exhaust openings on either side of the rear valance! The SPT Cat-Back has thus far impressed me with the design alone, so I expect fitment to be equally impressive. I also expect this system to exhibit a smooth, mellow note which will rumble with strong presence, but muffle down my full Turbo-Back setup.
SPT Cat-Back laid out
SPT Cat-Back intermediate pipe diameter increase from 2.5" to 3"
SPT Cat-Back y-split detail
---------------------------------------------------------------------------------
SPT SPORT SPRINGS - The 2008 WRX is notoriously known for it's body roll and 'comfortable' suspension. Even with little time behind the wheel and only a few turns under my belt, I have already uncovered a desperate need for an increased spring rate. Now don't get me wrong, these will get you by just fine around town, but if you intend on doing any spirited driving, or even tackling your favorite corners with a little gusto, the stock springs are far too soft. The stock dampers live up to their task though, providing a firm compression and great rebound. The springs on the other hand, simply do not feel stiff enough for the task. SPT, once again being warranty friendly, offers a sportier option for the WRX. While I do not know what the increase in spring rate is, I am hoping for this to be a suitable option. Wheel gap should also decrease, but not radically, offering a more planted, canyon-ready look without compromising too much ground clearance. I am expecting to have sharper turn-in, less body roll, and a sportier look with these coils. Since there is not much technical detail about them out there, I am going into this with a bit of a gamble. But I believe they are made by Eibach, and my experience with their products have been second to none. I am really looking forward to reviewing this modification.
<<NO PICTURES YET - THIS ITEM IS DUE TO ARRIVE ON MONDAY AUGUST 11, 2008>>
---------------------------------------------------------------------------------
COBB DOWN-PIPE WITH HIGH FLOW CAT - The down-pipe is where the biggest restrictions exist on the exhaust side of the turbo. Removing catalytic converters, or replacing them with more efficient units, will yield smoother exhaust flow and significantly reduce back pressure resulting in earlier boost response and high power across the entire rpm band. This is considered one of the most potent modifications to most modern turbocharged vehicles. A down-pipe provides a lot of power gain, for such a simple replacement! The COBB unit integrates a high flow metallic substrate catalytic converter that keeps things flowing well, while allowing the vehicle to pass emissions, preventing the unappealing smell of a cat-less vehicle, and keeping sound levels acceptable. There is also a very unique sound of the waste gate gases passing through that happens to become very audible with this modification. I expect a lot of power out of this modification and hope it delivers.
<<NO PICTURES YET - THIS ITEM IS CURRENTLY ON A 2-WEEK BACK-ORDER THROUGH THE MANUFACTURER>>
---------------------------------------------------------------------------------
COBB HEAT SHIELD - Much like the MZR Turbo DISI motor, the turbocharger in a Subaru H-4 lies behind the engine, just in front of the firewall. However, unlike the DISI's location of the intercooler being above the motor, Subaru's intercooler is placed just behind the engine to prevent heat soak from the engine's rising heat. However, this application places the intercooler almost directly above the turbocharger, which is quite possibly the hottest part of the engine bay when under boost. To prevent heat soaking, Subaru employed a thick shield to go above the down-pipe to cover the exhaust side of the turbo and prevent heat soaking the intercooler. It's a great design, but with the replacement of the down-pipe with an after-market unit, the factory heat shield no longer fits. While most individuals will trim or just completely remove their heat shields, I personally feel it is mandatory to keep one in place. Economically speaking, I would have trimmed my factory shield. But with this car being a Lease, I do need to re-install the stock down-pipe with no trace of modification. COBB has created a heat shield that will effectively complete the same task as the factory shield, while looking good at the same time!
COBB heat shield
---------------------------------------------------------------------------------
COBB AccessPORT - Like Peanut Butter to Jelly, COBB has been successfully re-tuning Subaru's across America, with their sophisticated AccessPORT unit! Their company grew from a tiny tuner to massive market share in a matter of years. They worked hard and passionately to provide top of the line products, often embarrassing the competition with their results! Reliability for this product is top notch and the gains are significant. Not only does one benefit from more power, but it is also more usable and is applied smoother, resulting in a more pleasurable driving experience. The AccessPORT remains an undetectable modification, and is very simply to marry to and un-marry from a car. Maps can be switched on the spot to select Anti-Theft, Valet, Economy, or any of your pre-programmed ECU maps. They have even begun to include Launch Control on many of their applications. I am looking forward to using this modification with it's Stage 1 settings while my exhaust system remains stock, then re-flashing to Stage 2 parameters once my turbo-back system is installed. I also intend to do real world 0-60 runs and possibly 1/8 mile comparisons between Stock, Stage 1, and Stage 2. This is a no-brainer modification for any Subaru owner!
COBB AccessPORT box cover
COBB AccessPORT box contents
---------------------------------------------------------------------------------
STAY TUNED!!!
Last edited by Boost Addict; Jun 19, 2009 at 12:28 AM.
Thread Starter
VIP Member
Joined: Apr 2003
Posts: 846
From: Orange County, CA
Car Info: 08 WRX - 401whp/408wtq
Here's a quick update for everyone... Springs are installed, and the Shifter + Bushings have been installed for a few days now. I have taken all the necessary pics, just need to take the time to write up a review on them. Expect it sometime this weekend! Thanks for everyones interest and patience.
As far as some scoop on performance, I have enough mileage on the car to try a couple 0-60 runs.
The clutch is very sensitive.... Let me rephrase that: It grips very hard and instantly, while pedal feel is soft, so it's difficult to 'feel' what's going on in order to modulate it properly and ride the clutch out smoothly.
However, I've only tried it with some trail running shoes... I normally achieve my best launches with Pumas which have a very thin sole which allows a lot of the vibration to transmit through the pedal and gives me a better idea of what the clutch is doing at what point. I will re-attempt some launches then.
I've gotta tip my hat to Subaru.. The numbers on paper aren't very impressive.. especially the HP/TQ figures. Neither are the gears... They are tall and not very sporty, which certainly doesn't help acceleration... While they allow a broad area for the power to dance through, there just isn't much power to use! So I am at a loss of words when I conclude that this car can boogie! WRXs have typically been tested to run 0-60 between 5.4-6.0 seconds. In fact, the best published time may very well be 5.4...
Launching at 4k rpm, the vehicle loses grip (thanks to the re92s) and so the power dies down before it can regain it's acceleration. Results? 5.8-5.9
Launching at 3k rpm results in a momentary bog down, but then revs fly up to reward you with 5.5-5.7 times. Not bad, eh? Alright, so obviously once the clutch is engaged this baby can move... Where's the sweet spot?
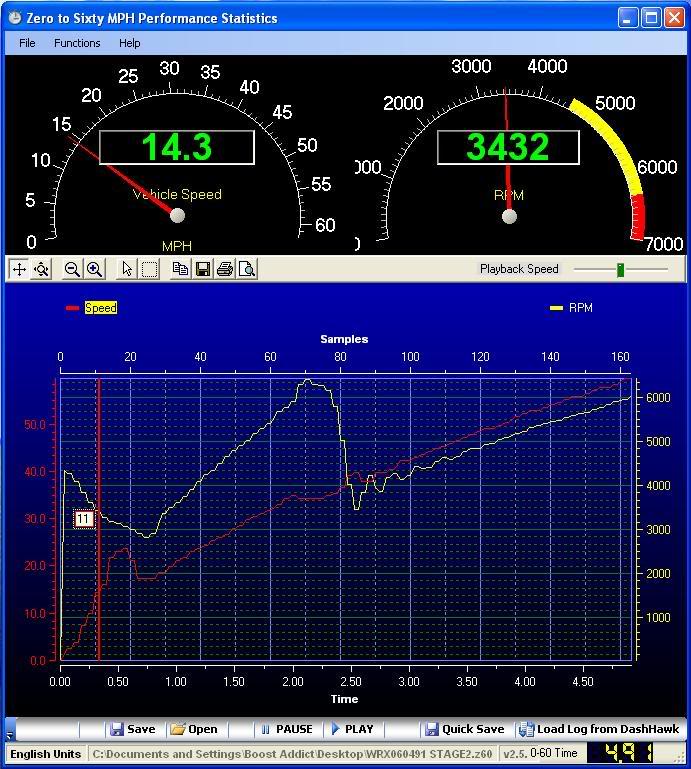
I've only managed to do a total of 4 runs today and one of them was the best launch. I started rolling in at 4500 rpm then the clutch fully engaged by 2600, which is just prior to the peak torque of the car at 2800... The car went flying through first... I carefully shifted to 2nd, and finished the gear off with a 0-60 run clocking in at 5.30 seconds. The graph is posted below... Studying the graph, you can see some serious weaknesses on the drivers(my) behalf...
First, the launch... I wasted some time and engaged the clutch too aggressively still, as you see the MPH decreased prior to re-increasing.. That's a major time waster! The other issue is again with the engagement of the clutch... Too grabby!!!! So even entering second you'll notice MPH rise, then drop, then rise again. What's happening here is that the clutch grabs so instantly that the entire weight of the drivetrain (including all 4 wheels) are causing a force against the flywheel from accelerating, so they momentarily stall or halt the engines movement! I think with my Pumas and some more practice learning the feedback of the clutch I can get this little Subie into the 5 flat territory, as just by looking at the graph, there's plenty of time to save!

As far as some scoop on performance, I have enough mileage on the car to try a couple 0-60 runs.
The clutch is very sensitive.... Let me rephrase that: It grips very hard and instantly, while pedal feel is soft, so it's difficult to 'feel' what's going on in order to modulate it properly and ride the clutch out smoothly.
However, I've only tried it with some trail running shoes... I normally achieve my best launches with Pumas which have a very thin sole which allows a lot of the vibration to transmit through the pedal and gives me a better idea of what the clutch is doing at what point. I will re-attempt some launches then.
I've gotta tip my hat to Subaru.. The numbers on paper aren't very impressive.. especially the HP/TQ figures. Neither are the gears... They are tall and not very sporty, which certainly doesn't help acceleration... While they allow a broad area for the power to dance through, there just isn't much power to use! So I am at a loss of words when I conclude that this car can boogie! WRXs have typically been tested to run 0-60 between 5.4-6.0 seconds. In fact, the best published time may very well be 5.4...
Launching at 4k rpm, the vehicle loses grip (thanks to the re92s) and so the power dies down before it can regain it's acceleration. Results? 5.8-5.9
Launching at 3k rpm results in a momentary bog down, but then revs fly up to reward you with 5.5-5.7 times. Not bad, eh? Alright, so obviously once the clutch is engaged this baby can move... Where's the sweet spot?
I've only managed to do a total of 4 runs today and one of them was the best launch. I started rolling in at 4500 rpm then the clutch fully engaged by 2600, which is just prior to the peak torque of the car at 2800... The car went flying through first... I carefully shifted to 2nd, and finished the gear off with a 0-60 run clocking in at 5.30 seconds. The graph is posted below... Studying the graph, you can see some serious weaknesses on the drivers(my) behalf...
First, the launch... I wasted some time and engaged the clutch too aggressively still, as you see the MPH decreased prior to re-increasing.. That's a major time waster! The other issue is again with the engagement of the clutch... Too grabby!!!! So even entering second you'll notice MPH rise, then drop, then rise again. What's happening here is that the clutch grabs so instantly that the entire weight of the drivetrain (including all 4 wheels) are causing a force against the flywheel from accelerating, so they momentarily stall or halt the engines movement! I think with my Pumas and some more practice learning the feedback of the clutch I can get this little Subie into the 5 flat territory, as just by looking at the graph, there's plenty of time to save!
Thread Starter
VIP Member
Joined: Apr 2003
Posts: 846
From: Orange County, CA
Car Info: 08 WRX - 401whp/408wtq
I really apologize for the delay, but its been a hectic(read: busy) last few weeks of the quarter at my bank. On top of that, I'm viciously working with my partner on incorporating our business... We're going to be an online vendor for performance parts with a strong focus on Customer Service. We will start out specializing in Subarus and Mazdaspeeds then expand from there. We're expecting to be up and running by February of 2009. TrebleRacing.com
I've already done an exhaust video for everyone, and still need to do an 'after' video for my shifter. Oh btw, did my first 0-60 trial in COBB Stage 2 mode... nailed a 4.91 I think it's capable of 4.7-4.8s with my pumas and some concentration...
More updates to come! Thanks for the interest and patience!
I've already done an exhaust video for everyone, and still need to do an 'after' video for my shifter. Oh btw, did my first 0-60 trial in COBB Stage 2 mode... nailed a 4.91
I think it's capable of 4.7-4.8s with my pumas and some concentration...More updates to come! Thanks for the interest and patience!
Thread Starter
VIP Member
Joined: Apr 2003
Posts: 846
From: Orange County, CA
Car Info: 08 WRX - 401whp/408wtq
Boy, do I owe you guys some updates!!!!
Well the car is pretty much done!
COBB Shifter: Thank the lord for this mod. I've gotten so accustomed to the short throws, that it took a picture of the stock shifter to remind me how inadequate it used to be. The stock shifter was rubbery, vague, and made you doubt any quick shift. The Cobb coupled with the bushings has completely turned this around. The throws are short, stiff, confident and click precisely into gear. The new shifter certainly takes more effort to move than the stock unit, but it's a good difference. It feels more sporty and purposeful. The stock shifter adds a nice touch of luxury to the WRX, but a touch that steers it away from its sporting nature. More details on the shifter below
SPT Springs: The car is significantly lower in the rear, but the front could use a little more of a drop. Ride is identical to the stock springs in terms of softness/harshness. I felt that these springs were a substantial improvement initially at ridding the car of its tipping, but initial turn in was still somewhat laggy and sluggish. If I decide to buy-out at the end of the lease, expect the full suspension to be addressed.
SPT Exhaust and Invidia Catted Downpipe: Without these mods, the car is a Corolla. There is something really refreshing and attitude inducing when you get that boxer rumble out of those tailpipes. It's like the beast has finally come to life. No longer are you merely putting around town silently, you're rumbling past people who can't help but turn their heads. I'm finally getting the Subaru wave from other Subie owners. I think before the TBE, people just didn't notice the car, and when they glanced, they wouldn't figure it for a Subie. Now I get the wave often This TBE set-up is fantastic! Nice deep rumble down low without being intrusive. No drone, unless you're downshifting, and even then, causes no annoyance. In the cabin, most of the noise is generated from the downpipe, you can hear its resonance through the firewall. But as far as actual Cat-Back noise, it's very subtle. Conversations can easily be carried, unless you're dropping the hammer full throttle. And even then, no major screaming going on; just some nice purposeful roaring. Comments I've gotten tend to always fall into the "it sounds mean" category. I'm very happy with it, as I can slip by cops emitting a low blub-blub-blub, but then rip past sports cars with a full on roar. I dig it!
AccessPORT: This device is simply great. At Stage 1, it made quite a significant difference. Then I tuned to Stage 2, after the TBE, and while the car felt a bit faster, it may or may not have been. I guess I should say a bit more about the AP, but there's really not much else to report, which is a good thing. No hiccups, no cold-starts, no lag, no hesitation. It works flawlessy, everytime, the way it should! My personal best 0-60 remains at 4.91, which I feel is insufficient. I expect to hit the mid-4 range with a custom tune. So I will be heading to Church Automotive on Tuesday the 16th to get my AccessPORT custom tuned by Shawn. The problem is, I'm only hitting 12.8 psi in 1st and 2nd gears (where 0-60s are accomplished), ~13.3 psi in 3rd, then ~17.8 psi in 4th and 5th. In 4th and 5th, the car scoots on the highway, but the first 2 gears need more boost. Accomplishing ~17psi in 1st and 2nd will send this car flying confidently in the mid-4 second range. Let's see if we can get that accomplished next week!
Rota G-Force 17x8 and Kumho Ecsta XS 235/45 ZR-17: Holy handling prowess, Batman! This was the mod this car desperately needed!!! Talk about a planted, purposeful stance, endless grip, sharper handling and quicker response. The wheel and tire package together save me about 4 lbs per corner in rotational mass, which isn't huge. It is considered a great benefit since I have over an inch of additional contact patch per corner on the ground. Stock wheels were 17x7, and the tires were a skinny 205/50 in all season trim. Less rubber to the ground, more sidewall, and more weight. Sounds like a loser in stock trim! I realize now one of the biggest weaknesses of the stock WRX is NOT the suspension itself, but instead, the rubber! With a slushy sidewall and AS tires, the car wasn't eager to turn in, nor did it hold well under accelerating corners. You would turn in, wait... then the car would push unless you overwhelmed it with more throttle, then it would transition to an electronically assisted oversteer. It worked, I guess, but didn't invoke any confidence. What a change these wheels/tires made: The donut-gobbling heavweight went to boot camp and came out an athletic super hero. He has the same strength overall, but now he's fit, agile and willing to get moving! The stiff sidewalls of the XS have almost removed all the tippy-toppy body roll of the rex. I was pleased at that! Cornering is now more confident, and you now you can actually recover quick enough to switch directions more abruptly. In stock form, the car would shift its weight over, and you'd have to wait for it to recover, or the rear would want to slide and the stability control would go bananas and kill power. The grip of the XS are monstrous! I can get them to progressively whine doing roughly 65 on an on-ramp... The whining will increase in volume until you're ready to lose grip. It's a very progressive process that doesn't alarm you with a sudden loss of grip; call it 'friendly'. At launch, it's almost impossible to lose traction, unless you do a 4500 rpm dump which results in a pointless chirp follpwed by an abundance of grip that practically halts the car before it gets going. Best launches are progressive feathering lifts of the clutch in the 3500 range. Wet traction, I haven't been able to test much, but with the couple days that we had rain, I can't report any major danger. I would assume the stockers would hold better in rain, since they are all seasons, but in all honesty, I couldn't really get these to slip unless deliberately driving idiotic. Another note on the tires, is that the steering effort has increased slightly, but again, feels purposeful and planted. The car feels less likely to want to stray from its intended line. But initial turn in is snappy! These tires read your mind as soon as you input a little change of direction. They are quick tires when it comes to turning!
Sound System: So here's what I'm running, Infinity Kappa 6.5 components in the front doors, swapped with Reference tweeters (due to fitment issues). Inifinity Kappa 6.5 2-ways in the rear doors, 10-inch Pioneer Champion Series Sub in sealed box, all powered by Zeus 8006 5-ch amp. I have never been let down by the sound quality of Infinity. I've previously used Reference Series products and love the brightness of the sound. I compared Kappa and Perfect lines recently and found the only significant difference to be wattage and how loud you want things to get. The Kappa series is MORE than sufficient. I am running betwee 400-600w RMS through the system and it sounds incredible. The speakers can still handle more power, while the sub is running pretty high. I didn't want to compromise on speaker quality, so I went with my favorite. As far as the sub is concerned, it dishes out tight, accurate bass that can get things shaking if you want it to. But stays fairly low key when it's not wanted. Some music that I listen to include: Tool, Chevelle, dredg, APC, Michael Jackson, Smashing Pumpkins, Maroon 5, etc... The entire spectrum of sound is filled in VERY nicely, great staging, great balance of bass, and among the most crisp highs I've heard. Everything sounds tight and accurate... It did require a bit of tuning and balancing to get the mids out from being buried, but now it's sounded outstanding. On the stock system, I could crank it to max volume 40 with windows down on the highway and it'd be barely audible. Now I'm hearing great sound at volume 30 on the highway w/ windows down. Cruising along the streets with windows up, I am at a very comfortable listening level at volume 10. The stock system would get drowned out between road, tire, and gear noise even at volume 10. Sometimes I had to double check if it were on. I had the base sound system.
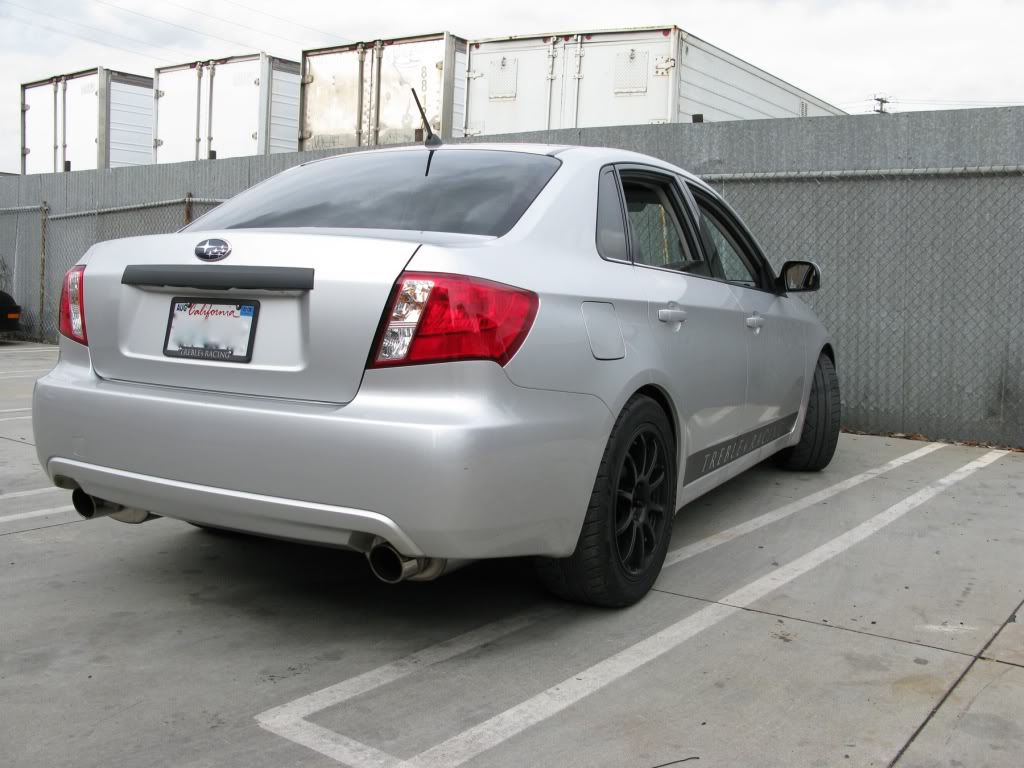
2009 Grille/Rear debadge: Let's face it... that Chrysler looking front grill with chrome sides was just unfitting for a WRX. I've done away with that and gotten the 2009 grill and debadged the WRX off of it. Now the front end has a fluid design to it with no shiny interruptions. I am pleased with the look. The trunk lid of the car was a mess... Chrome strip, chrome SUBARU, chrome IMPREZA, chrome WRX. It's all gone. I removed the chrome lettering and removed the chrome strip and had it wrapped in a satin black vinyl that matches the wheels, grill, and other vinyl. The pictures I am placing below don't show the car debadged, but they'll do for now.
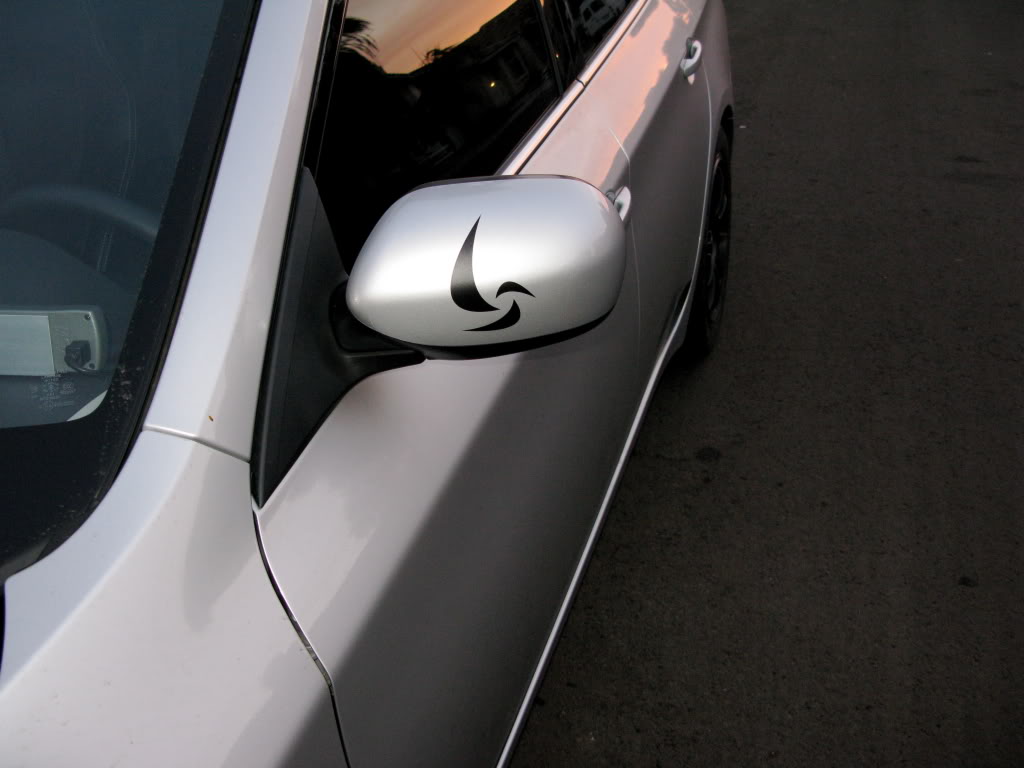
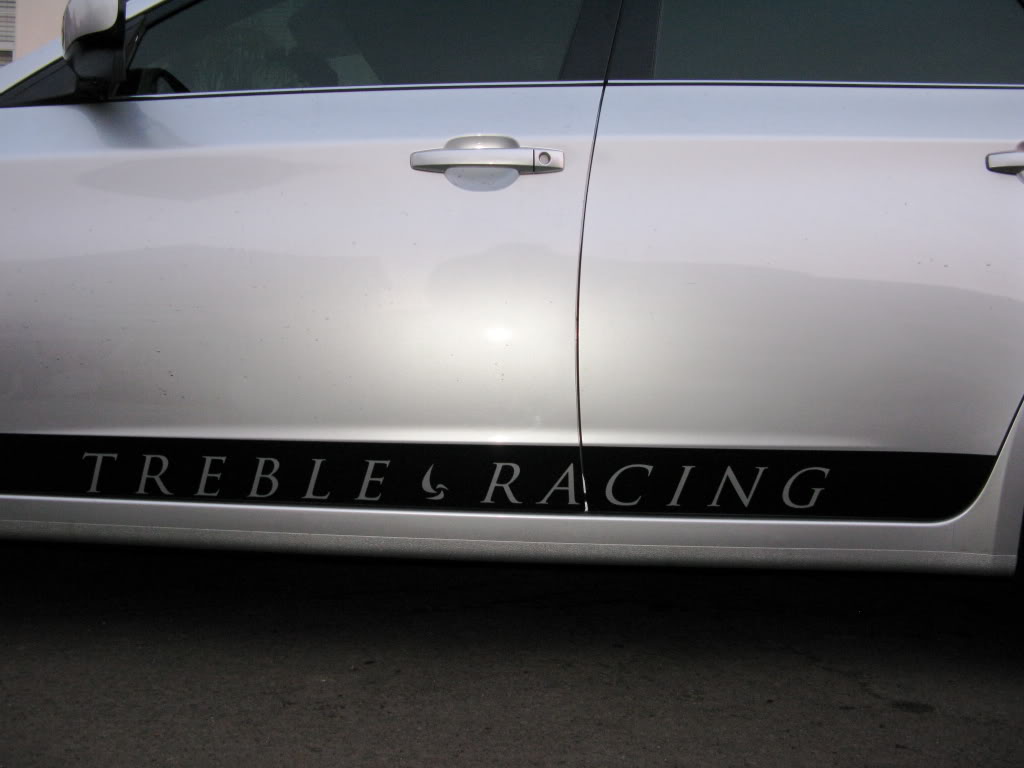
Custom Vinyls: Believe me. I hate graphics. Until this day, I refused to put stickers/vinyls on my car as I find them distracting and pointless. But I am the proud owner of a new business: Treble Racing. We incorporate in 2 weeks, and should be up and fully running by February 2009. We are an online vendor who will access to over 50 different brands to meet your needs while changing what you expect from the industry in terms of customer service! Naturally, I had to get some promotional vinyl done on my car for marketing purposes. I chose a design that blended well with the vehicles lines and remained subtle. There are two ways to vinyl a car. One is an overwhelming approach which allows the vinyl to speak and mute out the car itself. The other approach is more subtle that still lets the car do the talking, then when looked at again, the vinyls are noticed. I went with the latter approach. Feedback has been great, even from people who hate graphics, so I think we've accomplished the task rather well. We are working on a universal windshield design that will be applied later. The blades on the driver's side mirror will be kind of our signature placement for the logo.
Taillight Tint: Headlight Armor is where I got the taillight film and foglight film. The foglight film went on easy and has remained on well. The taillight film on the other hand has began lifting on the most rounded edges, evenly on both lights. I am considering peeling them off and going with a spray-on solution that would look much cleaner in my opinion.
Overall Impressions: I am very pleased with the performance and comfort balance of this car. It feels like a brawny, go-getter when you're on it and cruises very comfortably when you're light on the hammer. The power delivery is smooth and precise, but lacks some excitement in the first 3 gears. Don't get me wrong, it winds up rather quickly with early spool and torque on demand, but lacks the chest punching power my Speed6 had. I guess when you take lag out of the equation, the result is a more tapered introduction of boost which is less exciting to feel. But considering how much less power this car has, it is still respectable to put down sub-5 second 0-60 times. But seeing my boost levels at 12-13 psi is just plain disheartening. Then again, at the same time, it gives me an optimistic expectation in terms of what Shawn Church can unlock from it. A lot of the modifications were selected carefully and with reversibility in mind. If I decide to keep the car, expect a more thorough approach to the suspension including more aggressive springs, bars and most likely shocks. Performance-wise, I'd most likely go with a larger turbo and different intercooler solution, as well as a full new custom tune. I'd expect it to be a monster at that point. But if I decide to turn it in at the end of the two years, I will most likely pick up a 2010 Mazdaspeed3 and go from there. In the meantime, it gets me around, gets the business name out, and is still a respectable run on the track!
-----
As promised, more details on the COBB Short Shifter. Enjoy
STOCK SHIFTER & BUSHING
BEFORE

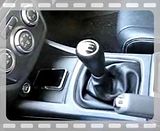
AFTER
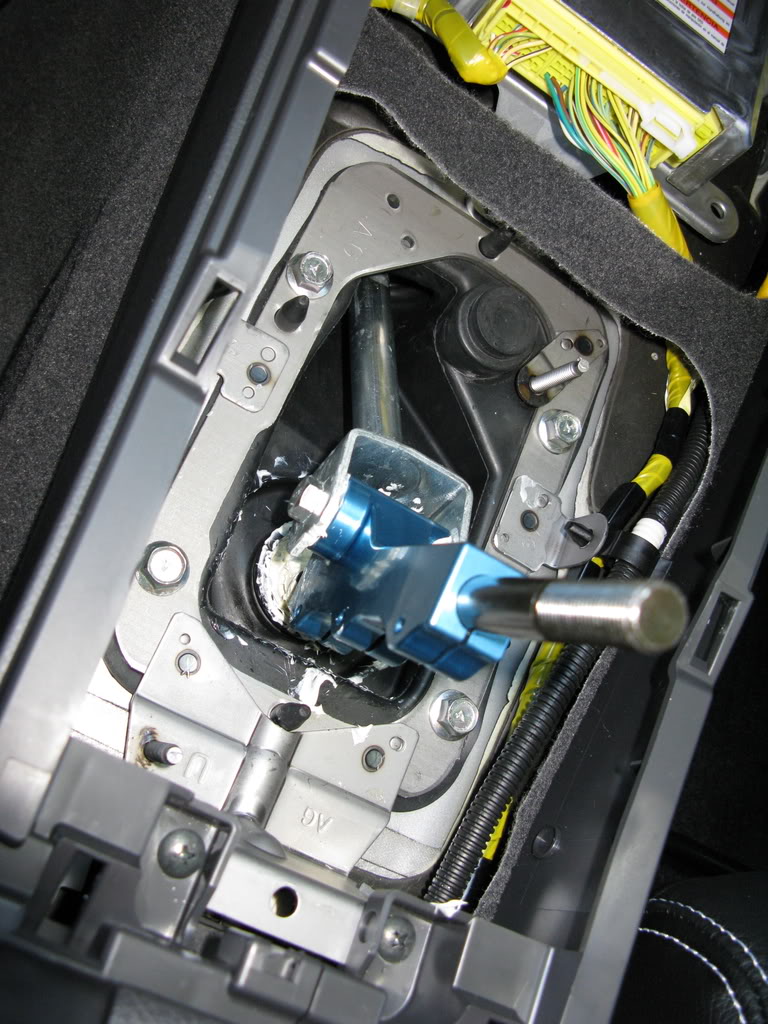
AFTER
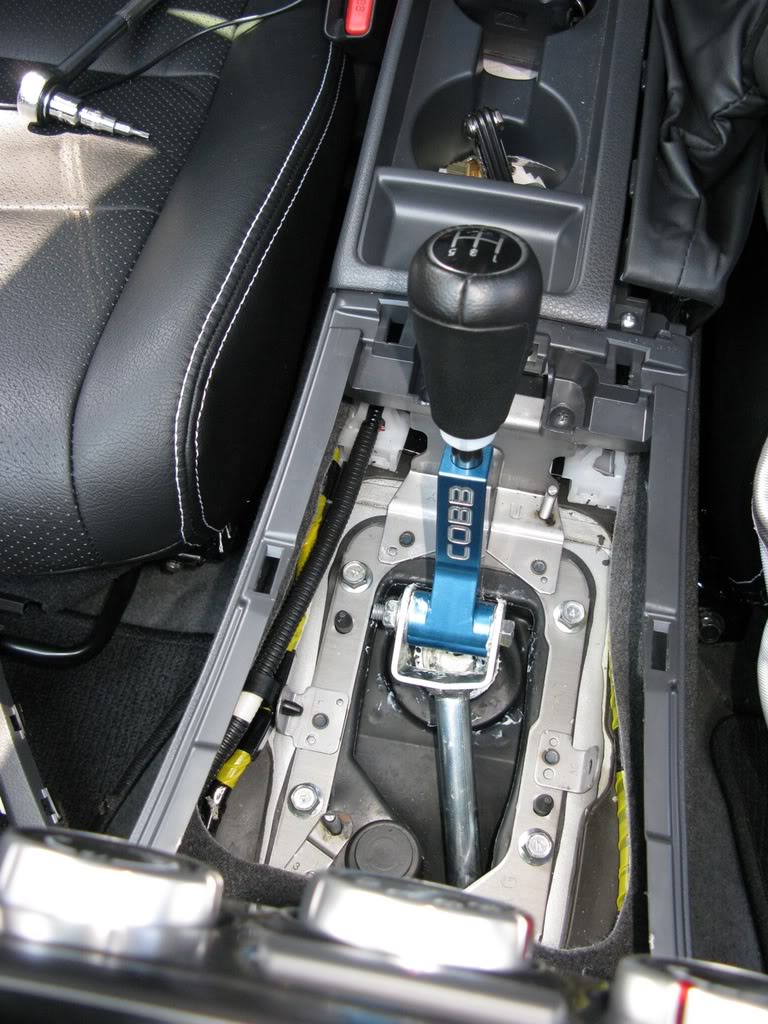
BUSHING INSTALLED
BEFORE VIDEO
AFTER VIDEO
Well the car is pretty much done!
COBB Shifter: Thank the lord for this mod. I've gotten so accustomed to the short throws, that it took a picture of the stock shifter to remind me how inadequate it used to be. The stock shifter was rubbery, vague, and made you doubt any quick shift. The Cobb coupled with the bushings has completely turned this around. The throws are short, stiff, confident and click precisely into gear. The new shifter certainly takes more effort to move than the stock unit, but it's a good difference. It feels more sporty and purposeful. The stock shifter adds a nice touch of luxury to the WRX, but a touch that steers it away from its sporting nature. More details on the shifter below
SPT Springs: The car is significantly lower in the rear, but the front could use a little more of a drop. Ride is identical to the stock springs in terms of softness/harshness. I felt that these springs were a substantial improvement initially at ridding the car of its tipping, but initial turn in was still somewhat laggy and sluggish. If I decide to buy-out at the end of the lease, expect the full suspension to be addressed.
SPT Exhaust and Invidia Catted Downpipe: Without these mods, the car is a Corolla. There is something really refreshing and attitude inducing when you get that boxer rumble out of those tailpipes. It's like the beast has finally come to life. No longer are you merely putting around town silently, you're rumbling past people who can't help but turn their heads. I'm finally getting the Subaru wave from other Subie owners. I think before the TBE, people just didn't notice the car, and when they glanced, they wouldn't figure it for a Subie. Now I get the wave often
This TBE set-up is fantastic! Nice deep rumble down low without being intrusive. No drone, unless you're downshifting, and even then, causes no annoyance. In the cabin, most of the noise is generated from the downpipe, you can hear its resonance through the firewall. But as far as actual Cat-Back noise, it's very subtle. Conversations can easily be carried, unless you're dropping the hammer full throttle. And even then, no major screaming going on; just some nice purposeful roaring. Comments I've gotten tend to always fall into the "it sounds mean" category. I'm very happy with it, as I can slip by cops emitting a low blub-blub-blub, but then rip past sports cars with a full on roar. I dig it!AccessPORT: This device is simply great. At Stage 1, it made quite a significant difference. Then I tuned to Stage 2, after the TBE, and while the car felt a bit faster, it may or may not have been. I guess I should say a bit more about the AP, but there's really not much else to report, which is a good thing. No hiccups, no cold-starts, no lag, no hesitation. It works flawlessy, everytime, the way it should! My personal best 0-60 remains at 4.91, which I feel is insufficient. I expect to hit the mid-4 range with a custom tune. So I will be heading to Church Automotive on Tuesday the 16th to get my AccessPORT custom tuned by Shawn. The problem is, I'm only hitting 12.8 psi in 1st and 2nd gears (where 0-60s are accomplished), ~13.3 psi in 3rd, then ~17.8 psi in 4th and 5th. In 4th and 5th, the car scoots on the highway, but the first 2 gears need more boost. Accomplishing ~17psi in 1st and 2nd will send this car flying confidently in the mid-4 second range. Let's see if we can get that accomplished next week!
Rota G-Force 17x8 and Kumho Ecsta XS 235/45 ZR-17: Holy handling prowess, Batman! This was the mod this car desperately needed!!! Talk about a planted, purposeful stance, endless grip, sharper handling and quicker response. The wheel and tire package together save me about 4 lbs per corner in rotational mass, which isn't huge. It is considered a great benefit since I have over an inch of additional contact patch per corner on the ground. Stock wheels were 17x7, and the tires were a skinny 205/50 in all season trim. Less rubber to the ground, more sidewall, and more weight. Sounds like a loser in stock trim! I realize now one of the biggest weaknesses of the stock WRX is NOT the suspension itself, but instead, the rubber! With a slushy sidewall and AS tires, the car wasn't eager to turn in, nor did it hold well under accelerating corners. You would turn in, wait... then the car would push unless you overwhelmed it with more throttle, then it would transition to an electronically assisted oversteer. It worked, I guess, but didn't invoke any confidence. What a change these wheels/tires made: The donut-gobbling heavweight went to boot camp and came out an athletic super hero. He has the same strength overall, but now he's fit, agile and willing to get moving! The stiff sidewalls of the XS have almost removed all the tippy-toppy body roll of the rex. I was pleased at that! Cornering is now more confident, and you now you can actually recover quick enough to switch directions more abruptly. In stock form, the car would shift its weight over, and you'd have to wait for it to recover, or the rear would want to slide and the stability control would go bananas and kill power. The grip of the XS are monstrous! I can get them to progressively whine doing roughly 65 on an on-ramp... The whining will increase in volume until you're ready to lose grip. It's a very progressive process that doesn't alarm you with a sudden loss of grip; call it 'friendly'
. At launch, it's almost impossible to lose traction, unless you do a 4500 rpm dump which results in a pointless chirp follpwed by an abundance of grip that practically halts the car before it gets going. Best launches are progressive feathering lifts of the clutch in the 3500 range. Wet traction, I haven't been able to test much, but with the couple days that we had rain, I can't report any major danger. I would assume the stockers would hold better in rain, since they are all seasons, but in all honesty, I couldn't really get these to slip unless deliberately driving idiotic. Another note on the tires, is that the steering effort has increased slightly, but again, feels purposeful and planted. The car feels less likely to want to stray from its intended line. But initial turn in is snappy! These tires read your mind as soon as you input a little change of direction. They are quick tires when it comes to turning!Sound System: So here's what I'm running, Infinity Kappa 6.5 components in the front doors, swapped with Reference tweeters (due to fitment issues). Inifinity Kappa 6.5 2-ways in the rear doors, 10-inch Pioneer Champion Series Sub in sealed box, all powered by Zeus 8006 5-ch amp. I have never been let down by the sound quality of Infinity. I've previously used Reference Series products and love the brightness of the sound. I compared Kappa and Perfect lines recently and found the only significant difference to be wattage and how loud you want things to get. The Kappa series is MORE than sufficient. I am running betwee 400-600w RMS through the system and it sounds incredible. The speakers can still handle more power, while the sub is running pretty high. I didn't want to compromise on speaker quality, so I went with my favorite. As far as the sub is concerned, it dishes out tight, accurate bass that can get things shaking if you want it to. But stays fairly low key when it's not wanted. Some music that I listen to include: Tool, Chevelle, dredg, APC, Michael Jackson, Smashing Pumpkins, Maroon 5, etc... The entire spectrum of sound is filled in VERY nicely, great staging, great balance of bass, and among the most crisp highs I've heard. Everything sounds tight and accurate... It did require a bit of tuning and balancing to get the mids out from being buried, but now it's sounded outstanding. On the stock system, I could crank it to max volume 40 with windows down on the highway and it'd be barely audible. Now I'm hearing great sound at volume 30 on the highway w/ windows down. Cruising along the streets with windows up, I am at a very comfortable listening level at volume 10. The stock system would get drowned out between road, tire, and gear noise even at volume 10. Sometimes I had to double check if it were on. I had the base sound system.
2009 Grille/Rear debadge: Let's face it... that Chrysler looking front grill with chrome sides was just unfitting for a WRX. I've done away with that and gotten the 2009 grill and debadged the WRX off of it. Now the front end has a fluid design to it with no shiny interruptions. I am pleased with the look. The trunk lid of the car was a mess... Chrome strip, chrome SUBARU, chrome IMPREZA, chrome WRX. It's all gone. I removed the chrome lettering and removed the chrome strip and had it wrapped in a satin black vinyl that matches the wheels, grill, and other vinyl. The pictures I am placing below don't show the car debadged, but they'll do for now.
Custom Vinyls: Believe me. I hate graphics. Until this day, I refused to put stickers/vinyls on my car as I find them distracting and pointless. But I am the proud owner of a new business: Treble Racing. We incorporate in 2 weeks, and should be up and fully running by February 2009. We are an online vendor who will access to over 50 different brands to meet your needs while changing what you expect from the industry in terms of customer service! Naturally, I had to get some promotional vinyl done on my car for marketing purposes. I chose a design that blended well with the vehicles lines and remained subtle. There are two ways to vinyl a car. One is an overwhelming approach which allows the vinyl to speak and mute out the car itself. The other approach is more subtle that still lets the car do the talking, then when looked at again, the vinyls are noticed. I went with the latter approach. Feedback has been great, even from people who hate graphics, so I think we've accomplished the task rather well. We are working on a universal windshield design that will be applied later. The blades on the driver's side mirror will be kind of our signature placement for the logo.
Taillight Tint: Headlight Armor is where I got the taillight film and foglight film. The foglight film went on easy and has remained on well. The taillight film on the other hand has began lifting on the most rounded edges, evenly on both lights. I am considering peeling them off and going with a spray-on solution that would look much cleaner in my opinion.
Overall Impressions: I am very pleased with the performance and comfort balance of this car. It feels like a brawny, go-getter when you're on it and cruises very comfortably when you're light on the hammer. The power delivery is smooth and precise, but lacks some excitement in the first 3 gears. Don't get me wrong, it winds up rather quickly with early spool and torque on demand, but lacks the chest punching power my Speed6 had. I guess when you take lag out of the equation, the result is a more tapered introduction of boost which is less exciting to feel. But considering how much less power this car has, it is still respectable to put down sub-5 second 0-60 times. But seeing my boost levels at 12-13 psi is just plain disheartening. Then again, at the same time, it gives me an optimistic expectation in terms of what Shawn Church can unlock from it. A lot of the modifications were selected carefully and with reversibility in mind. If I decide to keep the car, expect a more thorough approach to the suspension including more aggressive springs, bars and most likely shocks. Performance-wise, I'd most likely go with a larger turbo and different intercooler solution, as well as a full new custom tune. I'd expect it to be a monster at that point. But if I decide to turn it in at the end of the two years, I will most likely pick up a 2010 Mazdaspeed3 and go from there. In the meantime, it gets me around, gets the business name out, and is still a respectable run on the track!
-----
As promised, more details on the COBB Short Shifter. Enjoy
STOCK SHIFTER & BUSHING
BEFORE
AFTER
AFTER
BUSHING INSTALLED
BEFORE VIDEO
AFTER VIDEO
Last edited by Boost Addict; Dec 28, 2008 at 02:22 AM.
Thread Starter
VIP Member
Joined: Apr 2003
Posts: 846
From: Orange County, CA
Car Info: 08 WRX - 401whp/408wtq
Video and Pics
Here's a little video of the Turbo-Back set up. SPT Cat-Back and Invidia catted DP.
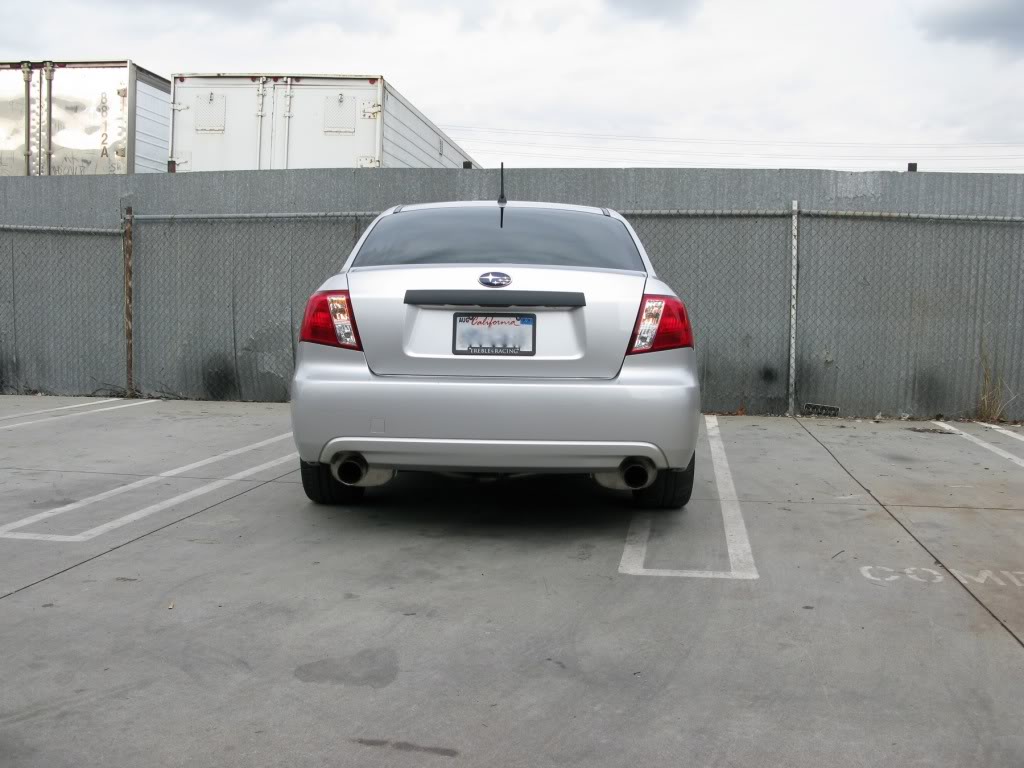
A couple pictures before debadging the rear, car is filthy
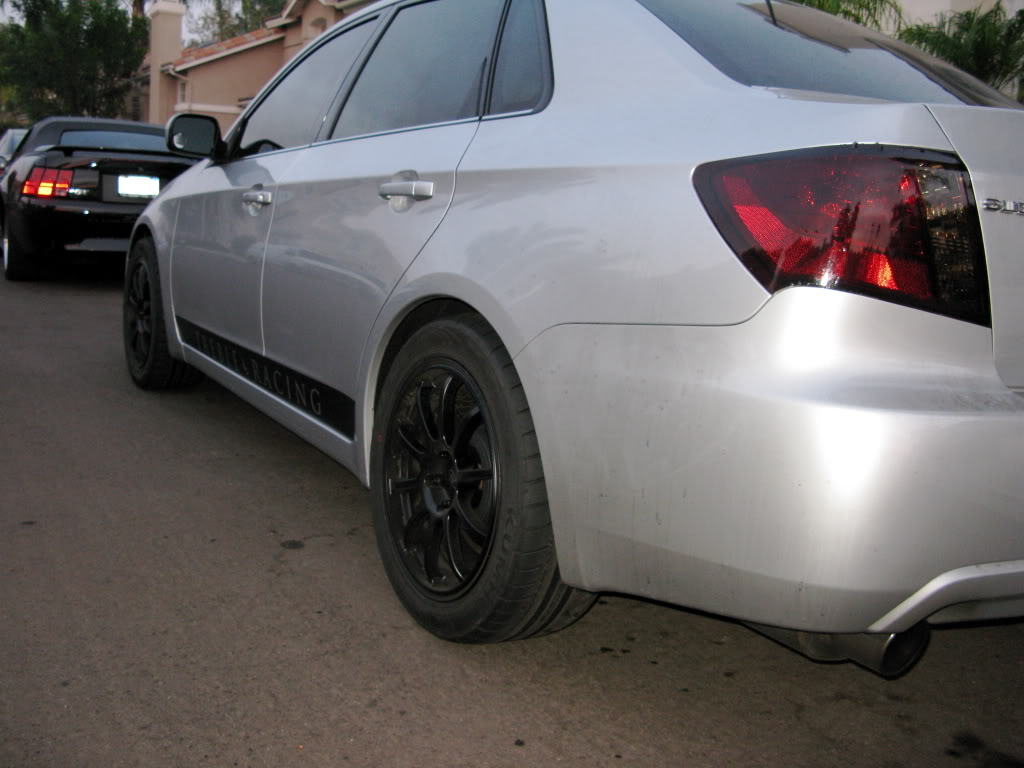
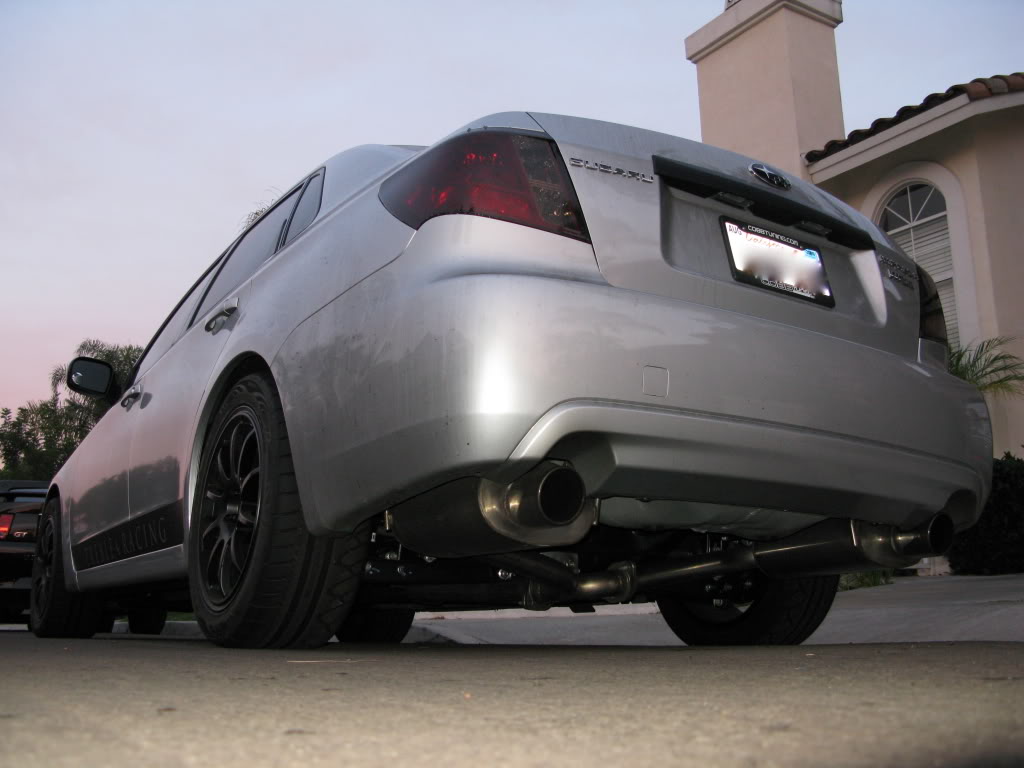
That planted stance!! Check out the flush look of the wheels/tires!
Rear 3/4 view
09 Grill, license plate finisher, fog light covers
Treble Racing logo
Treble Racing Side Graphics
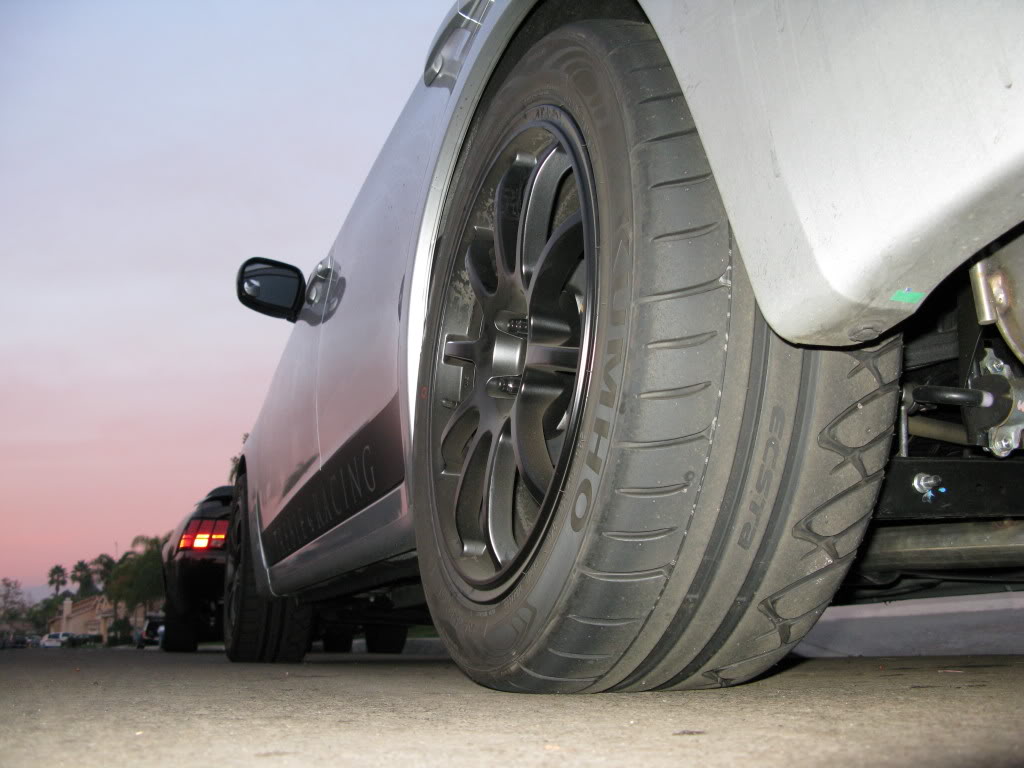
Need a towel...
Holy rubber!
Here's a little video of the Turbo-Back set up. SPT Cat-Back and Invidia catted DP.
A couple pictures before debadging the rear, car is filthy
That planted stance!! Check out the flush look of the wheels/tires!
Rear 3/4 view
09 Grill, license plate finisher, fog light covers
Treble Racing logo
Treble Racing Side Graphics
Need a towel...
Holy rubber!
Thread Starter
VIP Member
Joined: Apr 2003
Posts: 846
From: Orange County, CA
Car Info: 08 WRX - 401whp/408wtq
UPDATE!
So, I took the car into Church's to get a custom tune. I discovered a few things while I was there. The stock turbo spools very fast and dies... very fast.
first and foremost, Shawn Church is the man. There are lots of boys and men in this world, but Shawn is THE man (it's dyno proven). Ask me if I'm religious, and I'll reply, "I believe in Church". This man works efficiently, professionally, and puts his heart in everything he tunes. I can'thelp but respect every aspect of the way this guy runs his business. Thank you Shawn. He was able to extract some serious torque from my Subie, and safely too! We hit a wall in terms of horsepower and Shawn pointed at the snail to take blame. The snail blushed.
The end result was wicked to say the least. Coast into a left turn in 2nd gear, stab the throttle just past the apex to 3000rpm and all four Kumhos progressively slide out and tighten the nose. The tail doesn't just sweep around using the front tires as pivot points... No. They ALL spin out. But it's not scary, it's almost like you've entered a slow motion mode, mid-corner in a video game, and you can now steer, countersteer, or just aim and shoot. It's so disconnected from the road, yet, so controlled.
Bog the motor early in first and feel that addictive boost rush punch your chest, pressing your heart against your spine. Then feel it coast to 6k rpm. Shift to second and feel a momentary pull, then again, a coast. Wait, why are we coasting during a flat out run through the first 3? Oh, I know why... No horsepower. Don't get me wrong, the power is there... It's just masked by tall gearing, obscene amounts of short lived torque, and just a lack of top end power. The car feels powerful, but unwilling to accelerate with any motivation. Capable, but lazy ('Brilliant but lazy' - Doc Oc). It will spin all four rubbers without a shrug when it hits peak boost, but it doesn't like to be rushed to red line. While I describe the acceleration with a significant amount of disappointment, don't believe for a moment that it is any less than it was before the tune. It's significantly stronger and smoother, I just expected a good amount more out of the top end. I figure an additional 30-40 whp in the mid-high range would really give this car a competitive advantage over most on the road.
Overall, it was a day that revealed to me my next and final step. The turbo needs to be changed out to accomplish my goal. My goal for this car is ~300whp and ~350 wtq. I fell short by a long shot in the horsepower department, but was close in torque output. The main reason for lower hp output is that the turbo just can't efficiently push any more air in the mid-upper range.
First some pics, the dyno sheet, and then a couple videos!
No tint on the tails is starting to grow on me
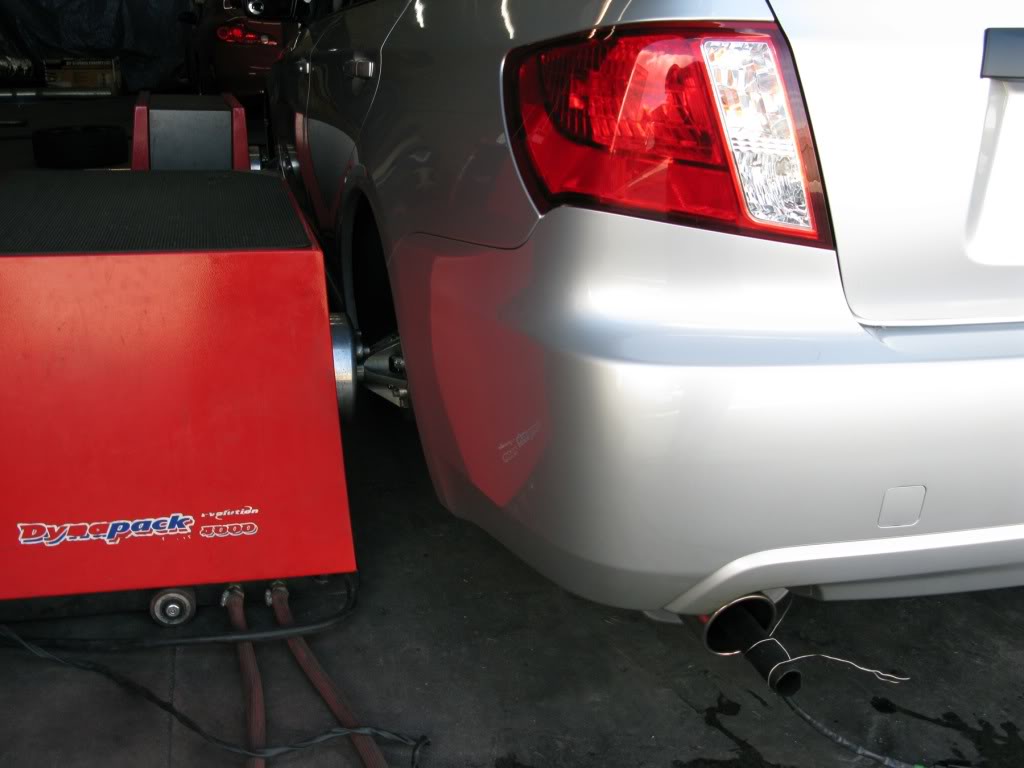
Nice footprint!
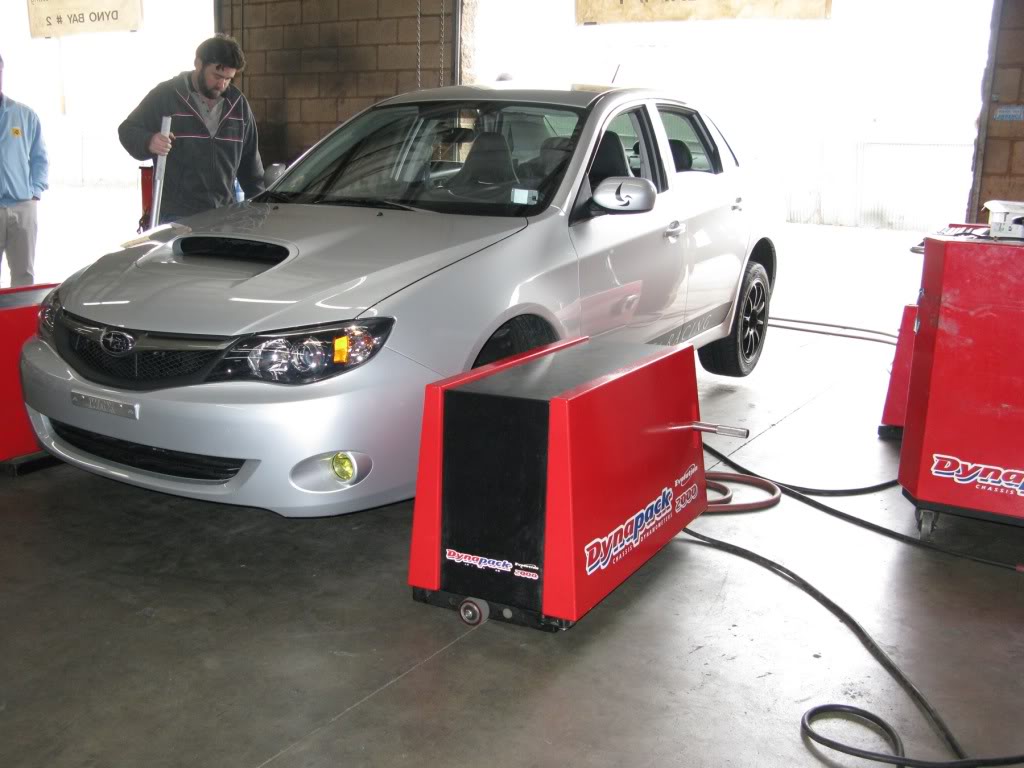
Dynapack! It just doesn't look right
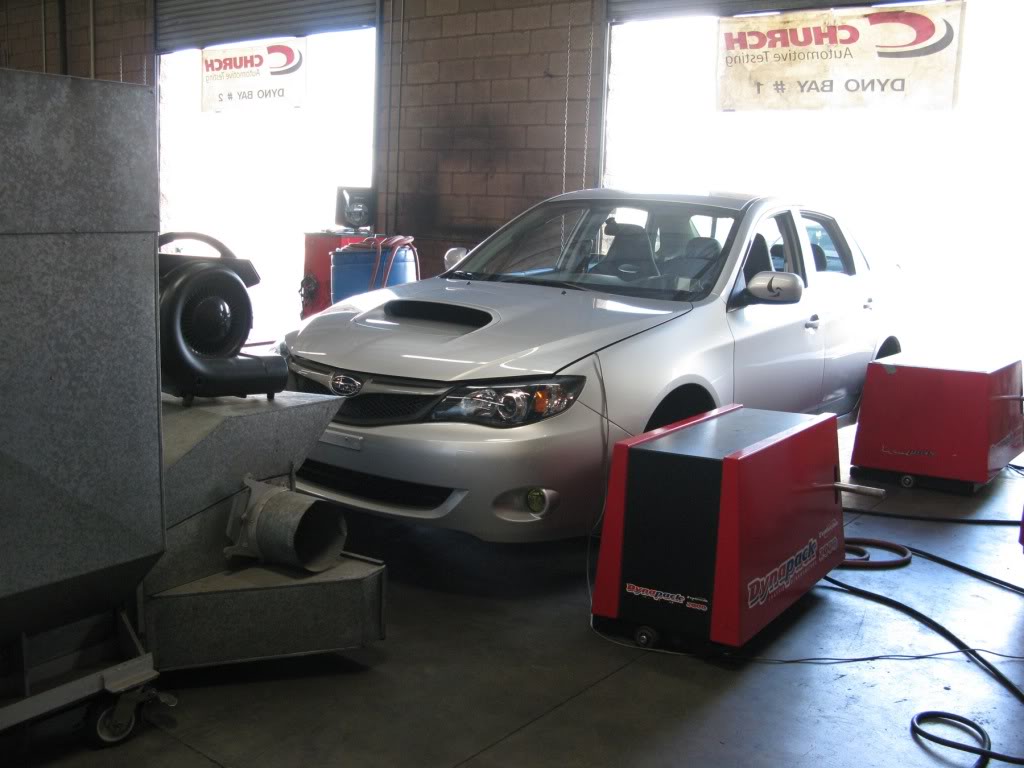
Ready for a baseline dyno run
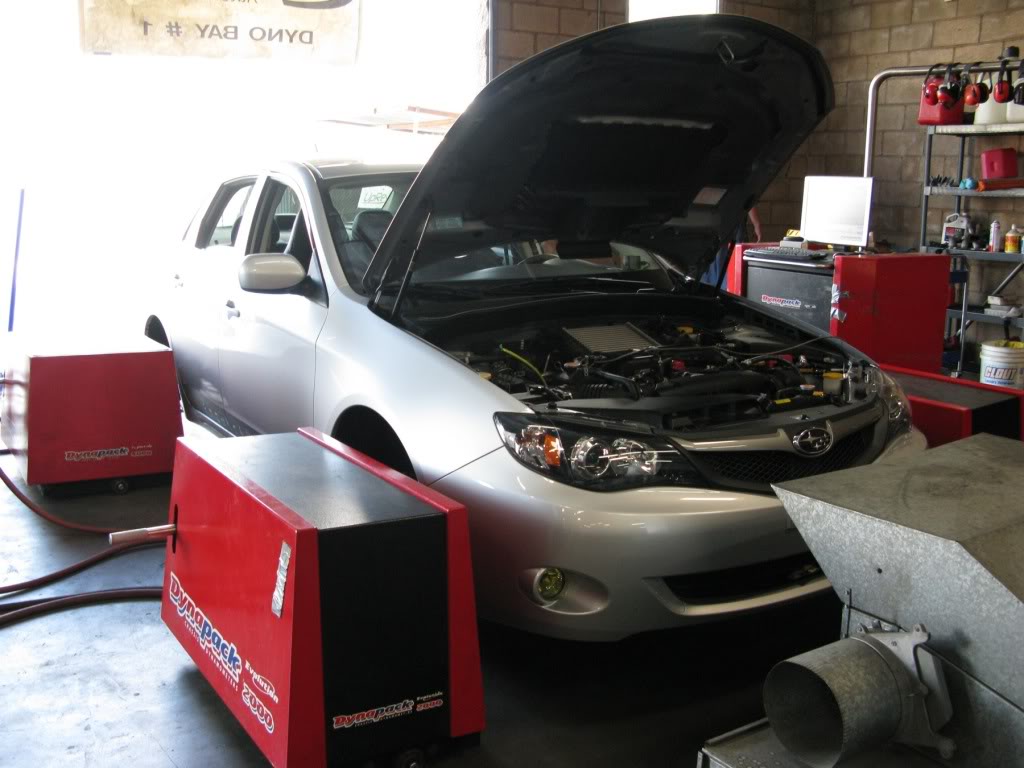
Here we go
A friend took this picture of me driving through a rally course. I was mid-jump (note: rear wheel) when he snapped this action shot. I photo shopped in a Church Automotive Testing Garage backdrop and Shawn Church himself. Not a bad job huh?
------
The Proof is in the Pudding! Church Tune vs PERRIN Stage 2 vs Stock
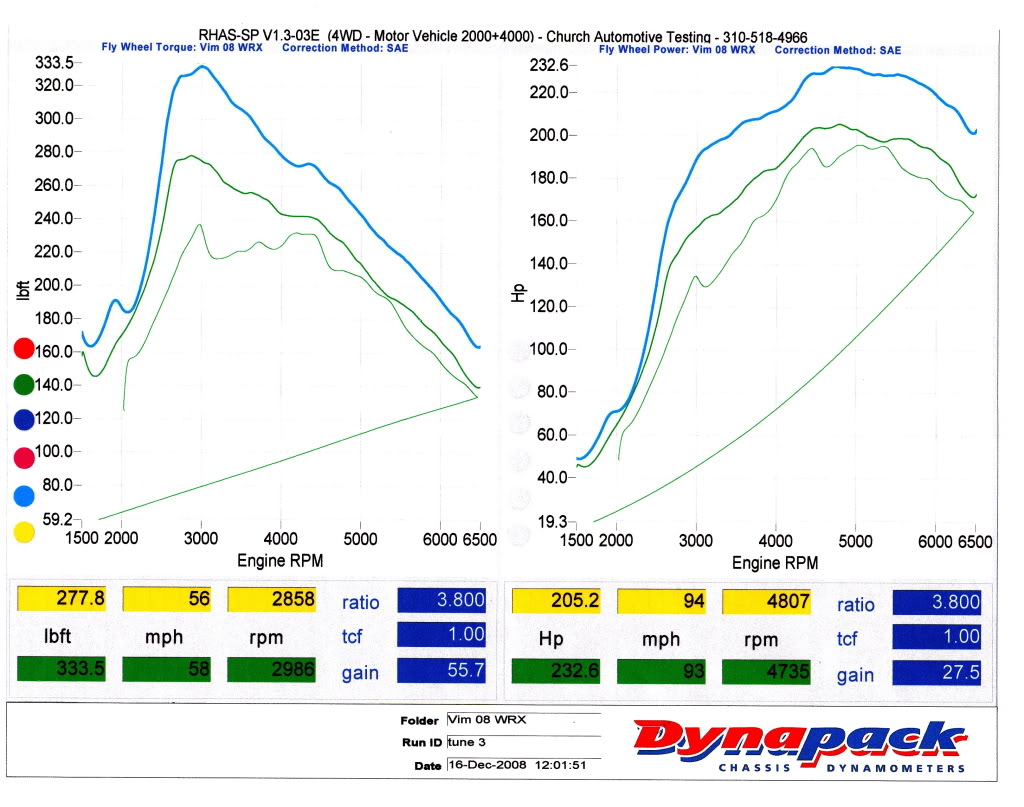
Blue line is Church's Custom Tune
Dark Green is the PERRIN Stage 2 Tune I was running
Light Green is a stock 08 WRX
Shawn was able to extract an additional 27.5 whp and 55.7 wtq from the PERRIN Stage 2 map which was already helping me make a good deal more power than stock!
Church Tune vs Stock
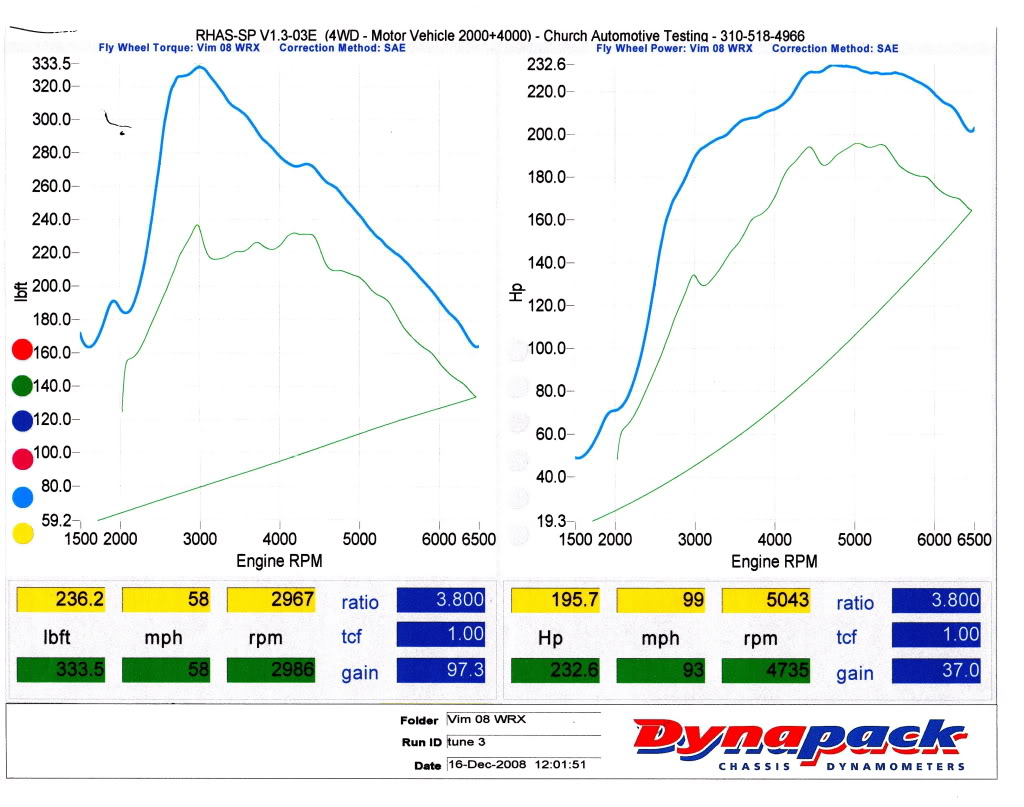
Blue line is Church's Custom Tune
Green is a stock 08 WRX
Note that Shawn made an additional 37 whp and 97.3 wtq over stock!!!!
----
This was the second best tune of the day... He hits 231 whp and 333 wtq
After tuning, Shawn rides along with you while you road test the car. He was kind enough to film me doing a 0-60 attempt with the new tune. Insert Excuse: I had recently adjusted my seats and hadn't done a launch with the new positioning, hence I was unfamiliar with the clutch engagement point. Long story short: I rode on the clutch until midway through first. No 0-60 time was recorded. At least it SOUNDS good, Yum!
----
What's Next?
Shawn showed me a dyno that inspired me. He was able to get an 08 STI to put out over 290 whp and about 340 wtq with only intake and cat-back. The spool up was about 500-700 rpm later, but hit hard and held well! The horsepower figures held nice and high to redline... He suspects it will make at least the same if not more power on mine since I have a high flow downpipe. The vf48, however, does not bolt onto my 08 WRX. Instead, I need to obtain the vf52 which has the same internals, but wrapped in a Legacy/WRX friendly housing. The vf52 is the turbo used in the 09 WRX, and is capable of comfortably making 280-320 whp. It will have more lag than my current application, but with thrusting power all the way to redline, it's a small compromise I'm willing to make.
The 09 WRX also shares the same injectors as the STI. This fact serves as a clue for me to get the STI injectors as well before I get this bad boy retuned. I will be out an additional 1500-1700 in total, but the car will be more than fast enough to run LOW 4s 0-60, and should be capable of 12s in the 1/4 mile.
I'm just waiting for the right deal on the new snail, but I will keep everyone posted. Thanks for following along my journey!
So, I took the car into Church's to get a custom tune. I discovered a few things while I was there. The stock turbo spools very fast and dies... very fast.
first and foremost, Shawn Church is the man. There are lots of boys and men in this world, but Shawn is THE man (it's dyno proven). Ask me if I'm religious, and I'll reply, "I believe in Church". This man works efficiently, professionally, and puts his heart in everything he tunes. I can'thelp but respect every aspect of the way this guy runs his business. Thank you Shawn. He was able to extract some serious torque from my Subie, and safely too! We hit a wall in terms of horsepower and Shawn pointed at the snail to take blame. The snail blushed.
The end result was wicked to say the least. Coast into a left turn in 2nd gear, stab the throttle just past the apex to 3000rpm and all four Kumhos progressively slide out and tighten the nose. The tail doesn't just sweep around using the front tires as pivot points... No. They ALL spin out. But it's not scary, it's almost like you've entered a slow motion mode, mid-corner in a video game, and you can now steer, countersteer, or just aim and shoot. It's so disconnected from the road, yet, so controlled.
Bog the motor early in first and feel that addictive boost rush punch your chest, pressing your heart against your spine. Then feel it coast to 6k rpm. Shift to second and feel a momentary pull, then again, a coast. Wait, why are we coasting during a flat out run through the first 3? Oh, I know why... No horsepower. Don't get me wrong, the power is there... It's just masked by tall gearing, obscene amounts of short lived torque, and just a lack of top end power. The car feels powerful, but unwilling to accelerate with any motivation. Capable, but lazy ('Brilliant but lazy' - Doc Oc). It will spin all four rubbers without a shrug when it hits peak boost, but it doesn't like to be rushed to red line. While I describe the acceleration with a significant amount of disappointment, don't believe for a moment that it is any less than it was before the tune. It's significantly stronger and smoother, I just expected a good amount more out of the top end. I figure an additional 30-40 whp in the mid-high range would really give this car a competitive advantage over most on the road.
Overall, it was a day that revealed to me my next and final step. The turbo needs to be changed out to accomplish my goal. My goal for this car is ~300whp and ~350 wtq. I fell short by a long shot in the horsepower department, but was close in torque output. The main reason for lower hp output is that the turbo just can't efficiently push any more air in the mid-upper range.
First some pics, the dyno sheet, and then a couple videos!
No tint on the tails is starting to grow on me
Nice footprint!
Dynapack! It just doesn't look right
Ready for a baseline dyno run
Here we go
A friend took this picture of me driving through a rally course. I was mid-jump (note: rear wheel) when he snapped this action shot. I photo shopped in a Church Automotive Testing Garage backdrop and Shawn Church himself. Not a bad job huh?
------
The Proof is in the Pudding! Church Tune vs PERRIN Stage 2 vs Stock
Blue line is Church's Custom Tune
Dark Green is the PERRIN Stage 2 Tune I was running
Light Green is a stock 08 WRX
Shawn was able to extract an additional 27.5 whp and 55.7 wtq from the PERRIN Stage 2 map which was already helping me make a good deal more power than stock!
Church Tune vs Stock
Blue line is Church's Custom Tune
Green is a stock 08 WRX
Note that Shawn made an additional 37 whp and 97.3 wtq over stock!!!!
----
This was the second best tune of the day... He hits 231 whp and 333 wtq
After tuning, Shawn rides along with you while you road test the car. He was kind enough to film me doing a 0-60 attempt with the new tune. Insert Excuse: I had recently adjusted my seats and hadn't done a launch with the new positioning, hence I was unfamiliar with the clutch engagement point. Long story short: I rode on the clutch until midway through first. No 0-60 time was recorded. At least it SOUNDS good, Yum!
----
What's Next?
Shawn showed me a dyno that inspired me. He was able to get an 08 STI to put out over 290 whp and about 340 wtq with only intake and cat-back. The spool up was about 500-700 rpm later, but hit hard and held well! The horsepower figures held nice and high to redline... He suspects it will make at least the same if not more power on mine since I have a high flow downpipe. The vf48, however, does not bolt onto my 08 WRX. Instead, I need to obtain the vf52 which has the same internals, but wrapped in a Legacy/WRX friendly housing. The vf52 is the turbo used in the 09 WRX, and is capable of comfortably making 280-320 whp. It will have more lag than my current application, but with thrusting power all the way to redline, it's a small compromise I'm willing to make.
The 09 WRX also shares the same injectors as the STI. This fact serves as a clue for me to get the STI injectors as well before I get this bad boy retuned. I will be out an additional 1500-1700 in total, but the car will be more than fast enough to run LOW 4s 0-60, and should be capable of 12s in the 1/4 mile.
I'm just waiting for the right deal on the new snail, but I will keep everyone posted. Thanks for following along my journey!
Thread Starter
VIP Member
Joined: Apr 2003
Posts: 846
From: Orange County, CA
Car Info: 08 WRX - 401whp/408wtq
So discussing my goals with Shawn, the tuner, he figures the stock injectors won't even be flowing at 85% if we hit the 300 whp mark. So he doesn't really see a necessity in upgrading the injectors for the 300whp mark. The 08 WRX we believe is running 540cc injectors, which is just shy of what the old STI pinks would pump out. With 550cc injectors Shawns gotten over 400 whp out of cars, so he feels the stockers can handle an easy 325 if the turbo could pump it out.
We will research this a little further while I shop prices. But I have decided on a brand new vf52. With my mods in mind, we're expecting to see 290+ whp and 340+ wtq. I would be more than happy with those figures! That would mean an additional 60 whp than what I put down and tremendous pull to redline! The torque curve should be flatter, wide spread and more usable with a modest gain. The way it's set up now, it spools up a tad early for my taste. My daily driving consists of shifts between 2600-3200 depending on road, incline, etc... And if I'm even a little heavy on the pedal, it snaps on the boost and makes for a bit of a jerky ride. Not to say it can't be avoided, but it would be nicer to have the rush come on 500 rpm later.
We will research this a little further while I shop prices. But I have decided on a brand new vf52. With my mods in mind, we're expecting to see 290+ whp and 340+ wtq. I would be more than happy with those figures! That would mean an additional 60 whp than what I put down and tremendous pull to redline! The torque curve should be flatter, wide spread and more usable with a modest gain. The way it's set up now, it spools up a tad early for my taste. My daily driving consists of shifts between 2600-3200 depending on road, incline, etc... And if I'm even a little heavy on the pedal, it snaps on the boost and makes for a bit of a jerky ride. Not to say it can't be avoided, but it would be nicer to have the rush come on 500 rpm later.
Thread Starter
VIP Member
Joined: Apr 2003
Posts: 846
From: Orange County, CA
Car Info: 08 WRX - 401whp/408wtq
UPDATE
ORDERED!
IHI VF52 Turbocharger
PERRIN Top Mount Intercooler (Silver)
Parts due in 2 weeks, because the Turbo is backordered and I want it all shipped at once.
Expect a new Church Tune by the end of January 2009 and hopefully numbers close to 290 whp and 340 wtq!!!
ORDERED!
IHI VF52 Turbocharger
PERRIN Top Mount Intercooler (Silver)
Parts due in 2 weeks, because the Turbo is backordered and I want it all shipped at once.
Expect a new Church Tune by the end of January 2009 and hopefully numbers close to 290 whp and 340 wtq!!!
Thread Starter
VIP Member
Joined: Apr 2003
Posts: 846
From: Orange County, CA
Car Info: 08 WRX - 401whp/408wtq
My recent thoughts on how to approach the intake:
I have noticed that the claims for power increases on intakes for 08+ WRXs have been far greater than for previous models, but that's probably due to the intake leaning out the mixture and allowing the turbo to spin easier creating more momentary boost. Although I firmly believe that these big gains will slowly decrease to almost no gain on untuned cars, as the ECU will eventually correct the AFRs and keep things closer to the stoichiometric 14.7:1 as miles rack on.
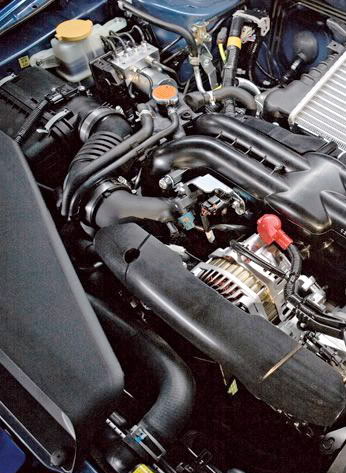
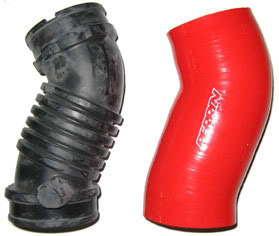
Thinking more about it, I'm coming closer to a decision. I like the way the stock unit pulls air in from the gap between the hood and grill, in fact I prefer that over the fender well. It then travels to the air box, which I have no problem with. It's the corrugated S-bend that I feel can cause a pretty turbulent restriction at higher rates of air flow. Perrins Afta-Maf silicone hose appears to be a great solution for this!
So now I'm thinking, "Great, but why stop there?" Instead of the $300 I might have blown on an aluminum piped intake. I can do a panel filter, silicone afta-maf hose, and silicone turbo-inlet hose. Essentially create my own boxed-in CAI unit that pulls air in from the front and travels through a smooth, glassy silicon hose directly into the turbo! I'm teetering back and forth about the Turbo inlet hose, as it would require cutting of the stock hose to remove, but I'll brew on this idea for a while. Any input would be much appreciated.
STOCK 08 WRX INTAKE SYSTEM (Ram Scoop > Air Box > MAF > Corrugated S-bend > Turbo Inlet Hose)
PERRIN AFTA-MAF S-TUBE vs STOCK S-TUBE
PERRIN TURBO INLET HOSE vs STOCK TURBO INLET HOSE

PERRIN AFTA-MAF INSTALLED (looks like an 04-05 WRX though)
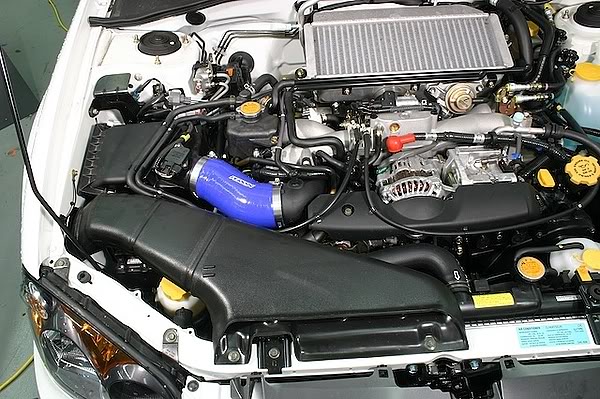
I have noticed that the claims for power increases on intakes for 08+ WRXs have been far greater than for previous models, but that's probably due to the intake leaning out the mixture and allowing the turbo to spin easier creating more momentary boost. Although I firmly believe that these big gains will slowly decrease to almost no gain on untuned cars, as the ECU will eventually correct the AFRs and keep things closer to the stoichiometric 14.7:1 as miles rack on.
Thinking more about it, I'm coming closer to a decision. I like the way the stock unit pulls air in from the gap between the hood and grill, in fact I prefer that over the fender well. It then travels to the air box, which I have no problem with. It's the corrugated S-bend that I feel can cause a pretty turbulent restriction at higher rates of air flow. Perrins Afta-Maf silicone hose appears to be a great solution for this!
So now I'm thinking, "Great, but why stop there?" Instead of the $300 I might have blown on an aluminum piped intake. I can do a panel filter, silicone afta-maf hose, and silicone turbo-inlet hose. Essentially create my own boxed-in CAI unit that pulls air in from the front and travels through a smooth, glassy silicon hose directly into the turbo! I'm teetering back and forth about the Turbo inlet hose, as it would require cutting of the stock hose to remove, but I'll brew on this idea for a while. Any input would be much appreciated.
STOCK 08 WRX INTAKE SYSTEM (Ram Scoop > Air Box > MAF > Corrugated S-bend > Turbo Inlet Hose)
PERRIN AFTA-MAF S-TUBE vs STOCK S-TUBE
PERRIN TURBO INLET HOSE vs STOCK TURBO INLET HOSE
PERRIN AFTA-MAF INSTALLED (looks like an 04-05 WRX though)
Thread Starter
VIP Member
Joined: Apr 2003
Posts: 846
From: Orange County, CA
Car Info: 08 WRX - 401whp/408wtq
Call me crazy, but I think this Filter + Post MAF hose + Inlet hose will be a great solution for maintaining great low end grunt and allowing better flow up in the higher RPM! I'm kind of excited to giving this a shot and seeing how things fare. I put together a diagram earlier today and made a modded version... Check it out.
STOCK SET-UP
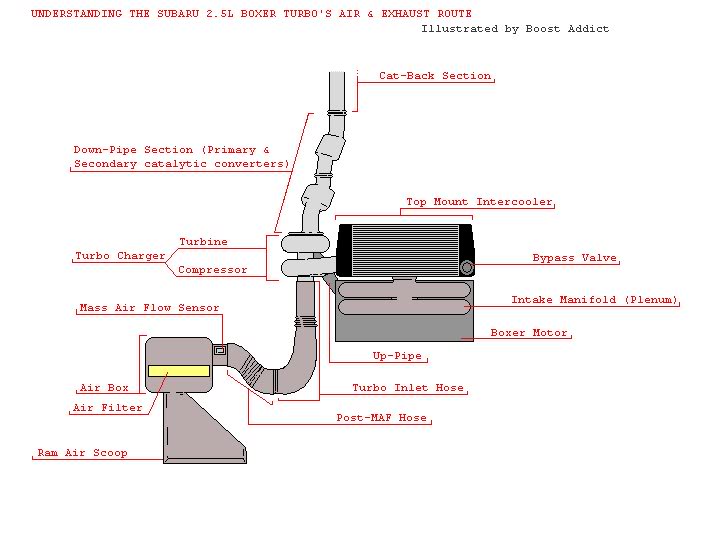
MODDED SET-UP Option 1 w/ Cold Air Intake

MODDED SET-UP Option 2 w/ Perrin hoses
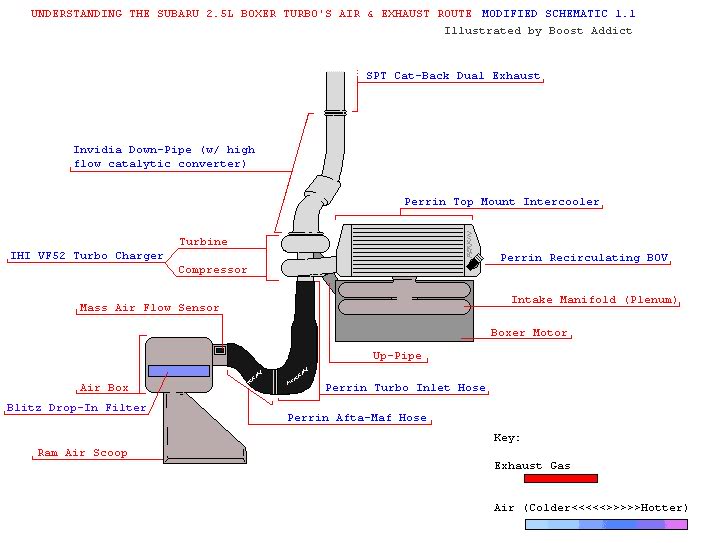
I'm thinking Option 2. Any thoughts?
I'm kind of excited to giving this a shot and seeing how things fare. I put together a diagram earlier today and made a modded version... Check it out.STOCK SET-UP
MODDED SET-UP Option 1 w/ Cold Air Intake
MODDED SET-UP Option 2 w/ Perrin hoses
I'm thinking Option 2. Any thoughts?
Thread Starter
VIP Member
Joined: Apr 2003
Posts: 846
From: Orange County, CA
Car Info: 08 WRX - 401whp/408wtq
More thoughts on the intake decision: It's filter volume that would be the biggest benefit from an aftermarket intake.
If no gain is to be expected from the drop-in filter itself, I know I can count on the PERRIN hoses flowing more quickly and effectively than the stock pieces. Whether that will equate to more power or not, is up for debate. I am in firm belief that the stock airbox itself will be more than sufficient for my 290 whp goal and beyond. And in fact, I do believe I might be leaving maybe ~5 whp on the table in the top end by going this route, but it just might be worth the sacrifice.
I've never been formally educated in physics, so I can't think of the correct term. Maybe you can help me out here. But I know that when you have too large of a pipe, or too much space, there is no immediacy for the air to flow through. It has something to do with the way the air is pulsed in. When a pipe is smaller and the space is used more effectively, the air has a tendency to flow through faster. Whereas if it's too large a pipe, you can have 'dead spots'. I also know that if a filter is boxed in, there can be a pressure differential which promotes more of a vacuum or ram effect. Please feel free to correct me or modify my thoughts here.
The Injen was the unit I was sold on, if I was to go with any aftermarket cold air intake. It's the one that I felt was done right. Great placement of the MAF sensor (least turbulent area), great idea in blocking off the filter from heat, and good idea in going with an un-oiled cotton filter. But if I can avoid the modified engine bay look, I'd like to. Also, I got pretty tired of the constant CAI noise my Speed6 would make under any notable load. Those long aluminum pipes can really become bothersome with their swirly, resonating swish sounds they make while delivering air. Don't get me wrong, I appreciate some induction noise, but the consistency and volume of it made me consider not going back.
The K&N unit looks like a nice and solid piece. I enjoy the fact that it's black and still has a surrounding heat shield. I also like that it doesn't sit in the fender well and can be exposed to in-coming air more readily. And although it's expected to increase induction noise, it's a short pipe that shouldn't lend itself to too much resonance. What I'm not a big fan of is the MAF placement, but of course, I am getting a custom tune, so that's probably not too big of an issue. Also, the filter looks to be the same a la carte oiled variety that come on all their units. I've had K&N systems in the past and have never had a MAF fouling issue (just don't over oil the thing ).
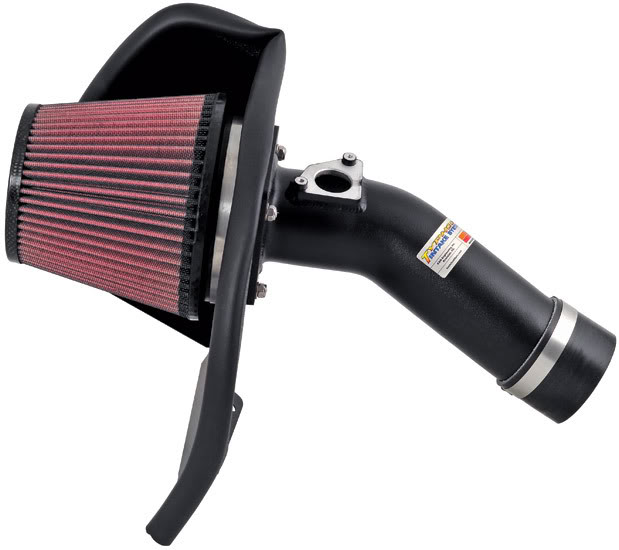
If no gain is to be expected from the drop-in filter itself, I know I can count on the PERRIN hoses flowing more quickly and effectively than the stock pieces. Whether that will equate to more power or not, is up for debate. I am in firm belief that the stock airbox itself will be more than sufficient for my 290 whp goal and beyond. And in fact, I do believe I might be leaving maybe ~5 whp on the table in the top end by going this route, but it just might be worth the sacrifice.
I've never been formally educated in physics, so I can't think of the correct term. Maybe you can help me out here. But I know that when you have too large of a pipe, or too much space, there is no immediacy for the air to flow through. It has something to do with the way the air is pulsed in. When a pipe is smaller and the space is used more effectively, the air has a tendency to flow through faster. Whereas if it's too large a pipe, you can have 'dead spots'. I also know that if a filter is boxed in, there can be a pressure differential which promotes more of a vacuum or ram effect. Please feel free to correct me or modify my thoughts here.
The Injen was the unit I was sold on, if I was to go with any aftermarket cold air intake. It's the one that I felt was done right. Great placement of the MAF sensor (least turbulent area), great idea in blocking off the filter from heat, and good idea in going with an un-oiled cotton filter. But if I can avoid the modified engine bay look, I'd like to. Also, I got pretty tired of the constant CAI noise my Speed6 would make under any notable load. Those long aluminum pipes can really become bothersome with their swirly, resonating swish sounds they make while delivering air. Don't get me wrong, I appreciate some induction noise, but the consistency and volume of it made me consider not going back.
The K&N unit looks like a nice and solid piece. I enjoy the fact that it's black and still has a surrounding heat shield. I also like that it doesn't sit in the fender well and can be exposed to in-coming air more readily. And although it's expected to increase induction noise, it's a short pipe that shouldn't lend itself to too much resonance. What I'm not a big fan of is the MAF placement, but of course, I am getting a custom tune, so that's probably not too big of an issue. Also, the filter looks to be the same a la carte oiled variety that come on all their units. I've had K&N systems in the past and have never had a MAF fouling issue (just don't over oil the thing
).
Registered User
iTrader: (1)
Joined: Oct 2007
Posts: 252
From: Manteca , Ca
Car Info: N/A Forester 2013
I unfortunatly only have swift springs ( thanx mann engenering!) and a drop in k&n. I'm gonna put my sways in soonish just got the rear endlinks. I wanna put a full invidia tbe on and get a pro tune. then maybe swap out the struts with either 09s or aftermarket. whenever they come out. then maybe in time turbo swap and all that good stuff... depends on money... ya know how that goes. oh yeah and don't forget goldies with some sticker tires on. and forgive the spellin and grammer been drinkin and I'm on my jankie *** phone.
Thread Starter
VIP Member
Joined: Apr 2003
Posts: 846
From: Orange County, CA
Car Info: 08 WRX - 401whp/408wtq
I unfortunatly only have swift springs ( thanx mann engenering!) and a drop in k&n. I'm gonna put my sways in soonish just got the rear endlinks. I wanna put a full invidia tbe on and get a pro tune. then maybe swap out the struts with either 09s or aftermarket. whenever they come out. then maybe in time turbo swap and all that good stuff... depends on money... ya know how that goes. oh yeah and don't forget goldies with some sticker tires on. and forgive the spellin and grammer been drinkin and I'm on my jankie *** phone.
Haha, you've really shown your dedication! I love it.
How are those Swift springs? Low? Stiff?
You're plans sounds pretty solid and I can't wait to see what you do with it. What color is it?
---
I am off to install my K&N SRI. I'll be back with pics and videos later today.
