
RWD SR20/95' Impreza L

Thread Starter
Registered User
Joined: Jul 2009
Posts: 206
From: S.F. Bay Area, CA
Car Info: RWD SR20/Impreza
Thread Starter
Registered User
Joined: Jul 2009
Posts: 206
From: S.F. Bay Area, CA
Car Info: RWD SR20/Impreza
*i want to apologize for the inconvenience, but from here on out i will be updating with (imageshack) which means the photos will be 640x480 thumbnails that will need to be clicked to view in bigger images. My photobucket account started acting funny on me...update #10 will hopefully be up late this week or early next week*
Thread Starter
Registered User
Joined: Jul 2009
Posts: 206
From: S.F. Bay Area, CA
Car Info: RWD SR20/Impreza
Update #10:
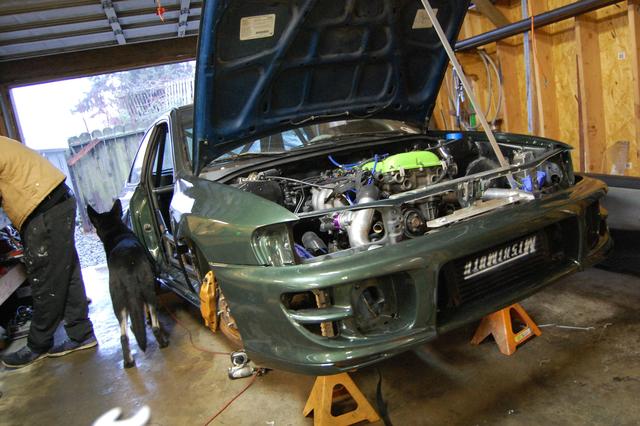
This is where the car stands as of today (1/11/12)
Last night we got everything together and managed to get the FIRST START UP! The wiring worked flawlessly! We had some kinks such as a broken hose in the fuel pump, but it fired right up. The reason the video was cut short after start up is because there was a minor fuel problem that we are working on now. ENJOY!
Last edited by RiSky; Jan 12, 2012 at 06:56 PM.
Thread Starter
Registered User
Joined: Jul 2009
Posts: 206
From: S.F. Bay Area, CA
Car Info: RWD SR20/Impreza
Thread Starter
Registered User
Joined: Jul 2009
Posts: 206
From: S.F. Bay Area, CA
Car Info: RWD SR20/Impreza
Update #11:
This is where the car stands as of today (1/15/12)
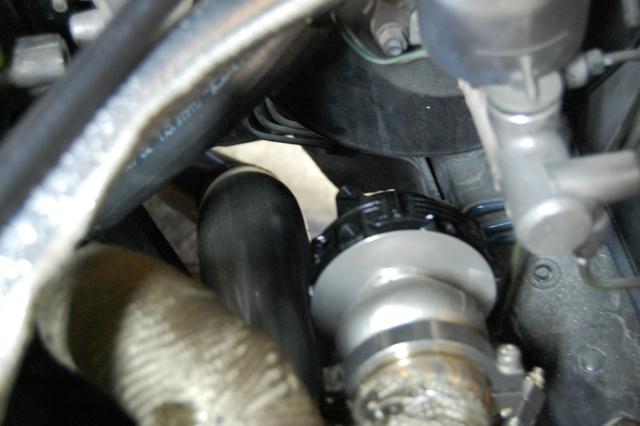
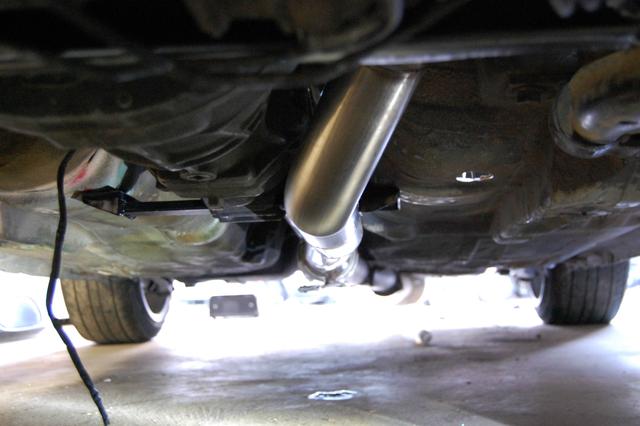
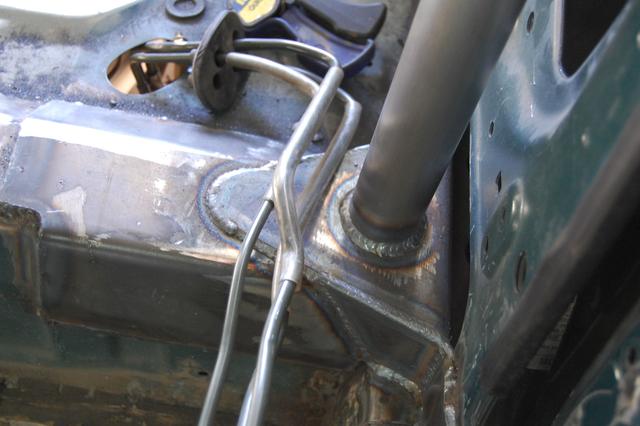
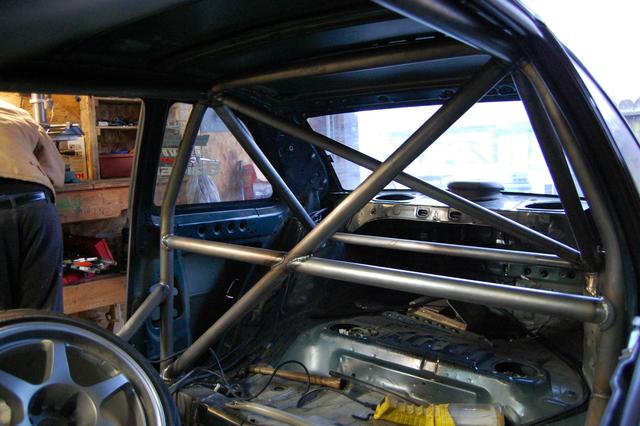
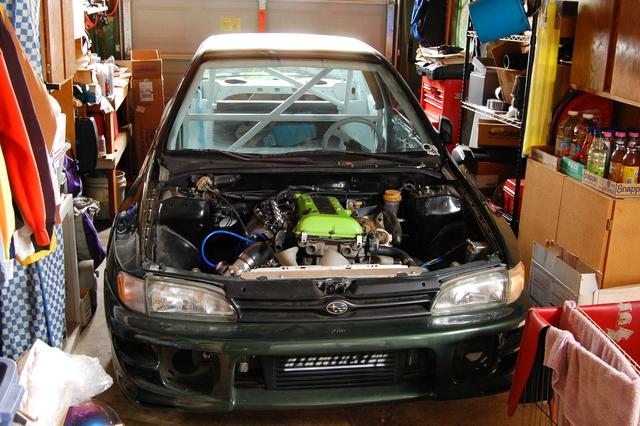
First off let me thank everyone for viewing the video. The video has reached 1,148 views which I'm pretty happy about. We also managed to find out why the motor wasn't getting oil to the head; the oil pan was dented in so the oil pick-up was blocked, so I replaced it with my tomei pan and now it works 110%. We managed to start on the rollcage as well which is coming out really well thanks to cricks custom fabrication (where my car has been the past few months). Some of you have replied/or PM'd me on the downpipe clearance so before we took it out to weld in the O2 bung I took some pictures for you.
Here is a view from directly over the wastegate & under the car:
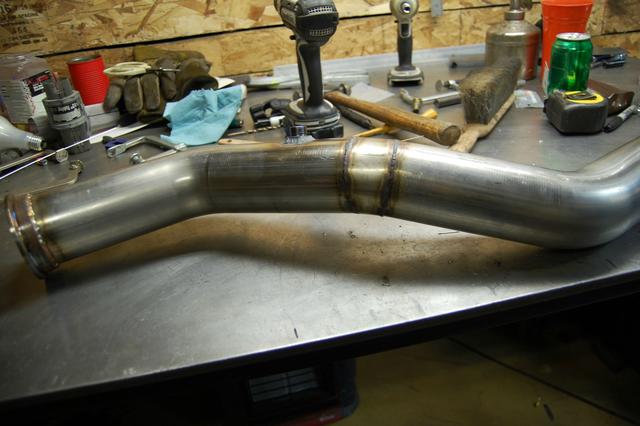
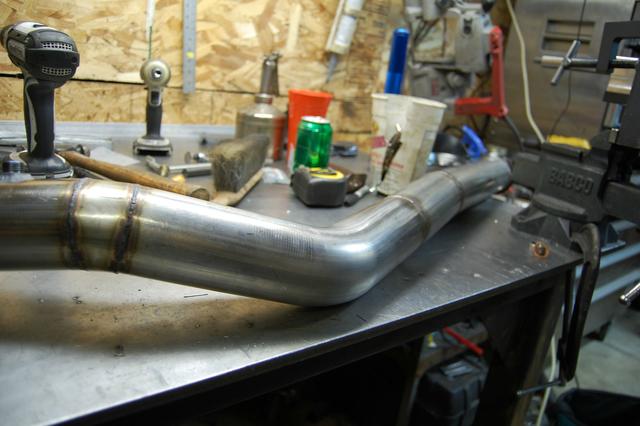
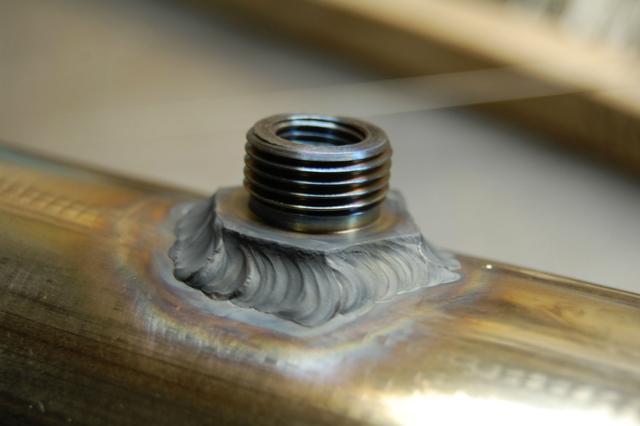
Downpipe out of the car/Weld-In O2:

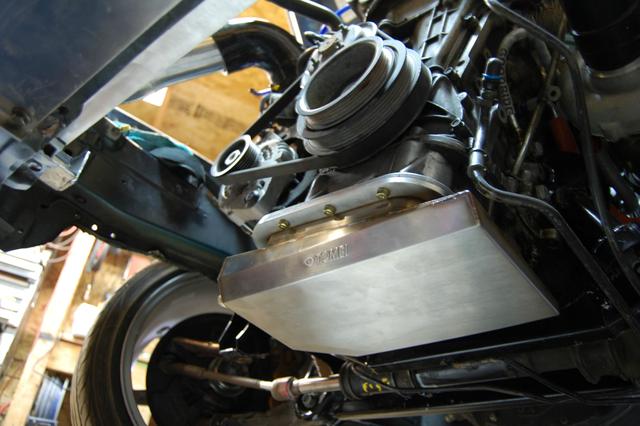
New oil pan installed:
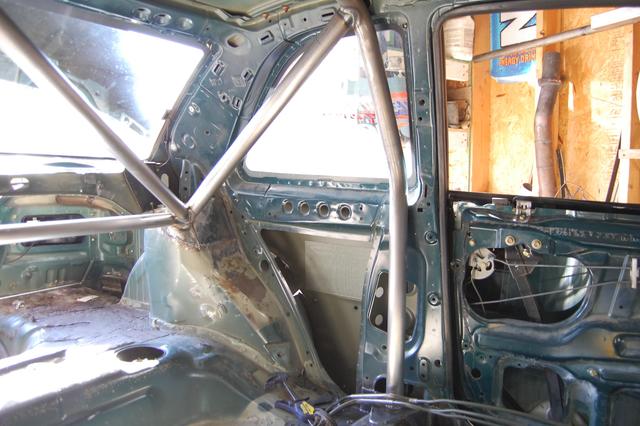
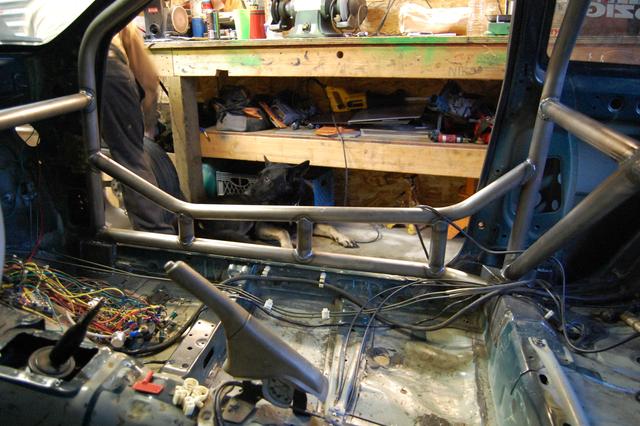
Beginning stage of roll cage:

That is it for now, but more pictures of the cage should be posted more next week as it gets more developed.
This is where the car stands as of today (1/15/12)
First off let me thank everyone for viewing the video. The video has reached 1,148 views which I'm pretty happy about. We also managed to find out why the motor wasn't getting oil to the head; the oil pan was dented in so the oil pick-up was blocked, so I replaced it with my tomei pan and now it works 110%. We managed to start on the rollcage as well which is coming out really well thanks to cricks custom fabrication (where my car has been the past few months). Some of you have replied/or PM'd me on the downpipe clearance so before we took it out to weld in the O2 bung I took some pictures for you.
Here is a view from directly over the wastegate & under the car:
Downpipe out of the car/Weld-In O2:
New oil pan installed:
Beginning stage of roll cage:
That is it for now, but more pictures of the cage should be posted more next week as it gets more developed.
Registered User
iTrader: (2)
Joined: Sep 2007
Posts: 1,569
From: Discovery Bay, CA
Car Info: Evo X GSR, F250 Powerstroke Diesel
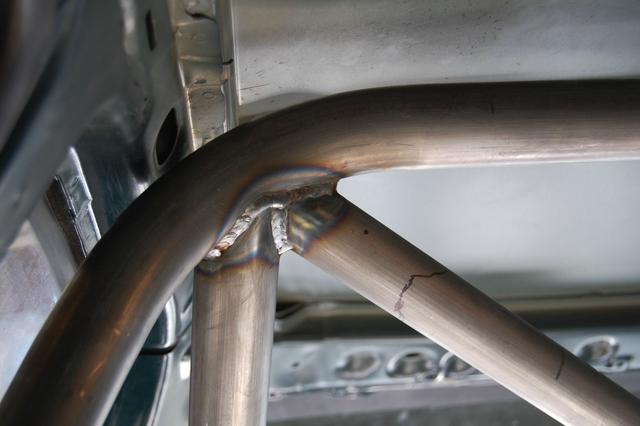
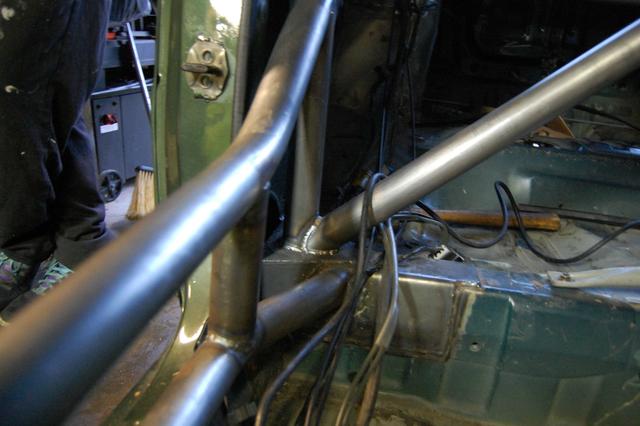
Just some constructive criticism. All the grey all over your weld is carbide pricipatation from too much heat/lack of purge. That thin wall stainless is pretty tricky to weld you really need to purge the inside or use a flux like solar flux B. if your having a problem over running your red hot puddle and getting grey welds you can switch to a large gas lens like a 12 cup if your using a wp17/18 style torch, or buy one of the large Pyrex cups with a gas lens for the wp9/20 style. And I hope your using 1/16th tungsten as well, anything bigger will take more heat to accomplish the same weld.
But I love this project man, I came from SE-R's so I love SR20�s!


But I love this project man, I came from SE-R's so I love SR20�s!
Thread Starter
Registered User
Joined: Jul 2009
Posts: 206
From: S.F. Bay Area, CA
Car Info: RWD SR20/Impreza
Just some constructive criticism. All the grey all over your weld is carbide pricipatation from too much heat/lack of purge. That thin wall stainless is pretty tricky to weld you really need to purge the inside or use a flux like solar flux B. if your having a problem over running your red hot puddle and getting grey welds you can switch to a large gas lens like a 12 cup if your using a wp17/18 style torch, or buy one of the large Pyrex cups with a gas lens for the wp9/20 style. And I hope your using 1/16th tungsten as well, anything bigger will take more heat to accomplish the same weld.
But I love this project man, I came from SE-R's so I love SR20�s!
But I love this project man, I came from SE-R's so I love SR20�s!
Registered User
iTrader: (2)
Joined: Sep 2007
Posts: 1,569
From: Discovery Bay, CA
Car Info: Evo X GSR, F250 Powerstroke Diesel
HAVE FUN!
Thread Starter
Registered User
Joined: Jul 2009
Posts: 206
From: S.F. Bay Area, CA
Car Info: RWD SR20/Impreza
I've always wanted a RWD sr20 man. Would love to do a SR510. The SR20 was possibly the best engine ever made IMO. But the reason why it's soo important to control the heat input on stainless is as stainless is heated it's starts to lose its corrosion resistance properties. Also it took me along time to realize that sometimes reducing heat input does not mean turning down the amps it can also mean running hotter and quicker. Sometimes by welding very slow (like most beginning TIG welders until they get comfortable) you are actually putting more heat into the metal. Another good tip for stainless is get a spray bottle of distilled water and spray it on the weld after every weld and blow it off with compressed air. Don't try this with any old metal though, only stainless and don't use tap water because tap water has chlorine in it that can lead to chloride cracking. FWIW I'm a code welder by trade.
HAVE FUN!
HAVE FUN!
Thread Starter
Registered User
Joined: Jul 2009
Posts: 206
From: S.F. Bay Area, CA
Car Info: RWD SR20/Impreza
Update #12:
This is where the car stands as of today (1/20/12)
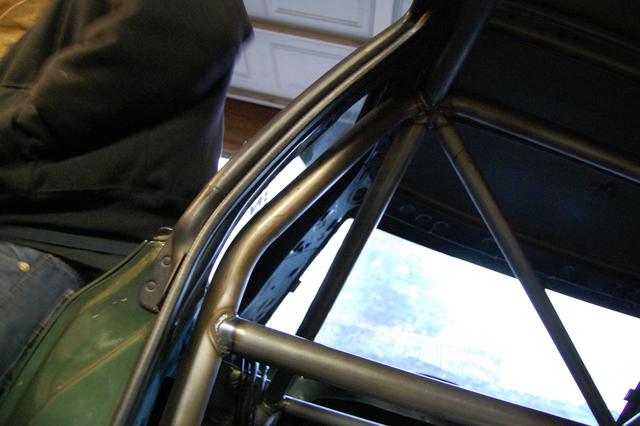
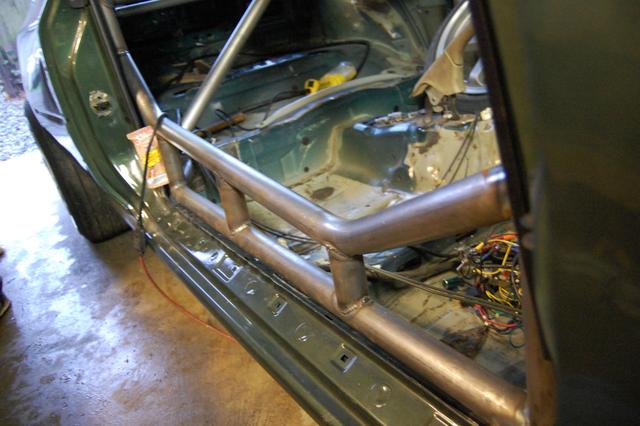
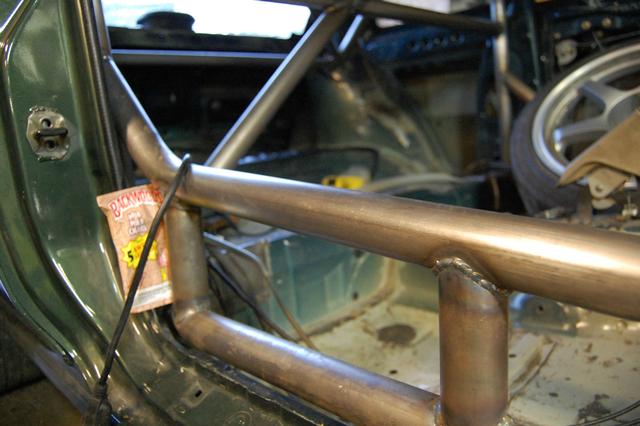
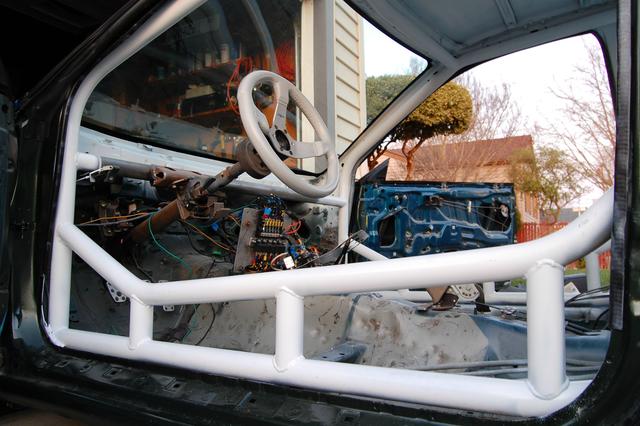
Hello Everyone! Well the cage is finally finished and I must say I'm extremely pleased with it. We tried doing something really unique with the door bars to go with the rest of the car, and I think we hit the nail on the head with this design. Also we managed to mock up the fitment for the front bumper. The bumper support is currently being made right now, but we are just about there. Here is how the cage came out.
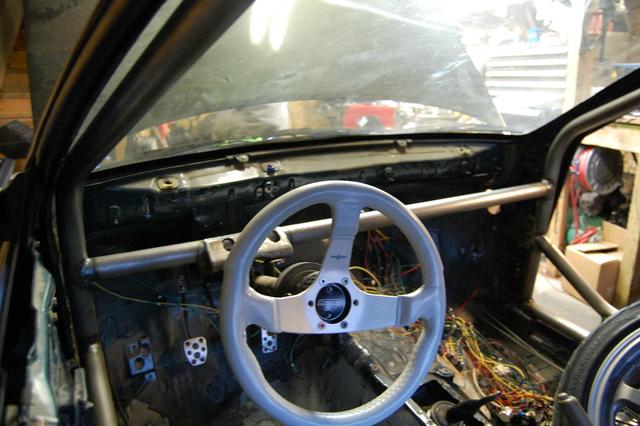
Will post pictures when front end is complete!
This is where the car stands as of today (1/20/12)
Hello Everyone! Well the cage is finally finished and I must say I'm extremely pleased with it. We tried doing something really unique with the door bars to go with the rest of the car, and I think we hit the nail on the head with this design. Also we managed to mock up the fitment for the front bumper. The bumper support is currently being made right now, but we are just about there. Here is how the cage came out.
Will post pictures when front end is complete!
Thread Starter
Registered User
Joined: Jul 2009
Posts: 206
From: S.F. Bay Area, CA
Car Info: RWD SR20/Impreza
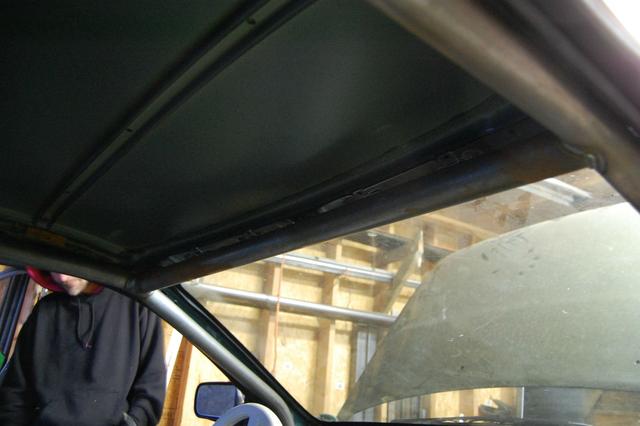
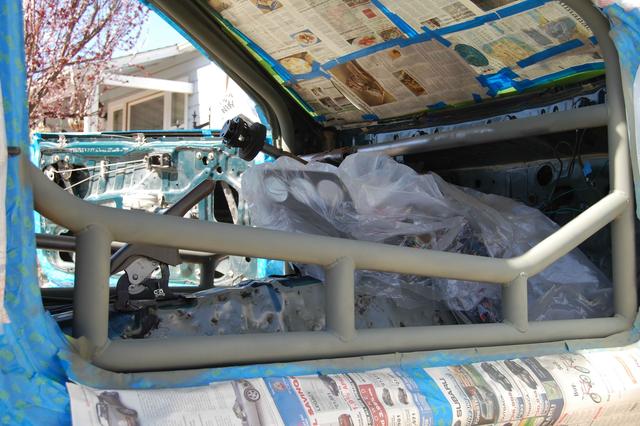
Update #13:
This is where the car stands as of today (3/31/12)
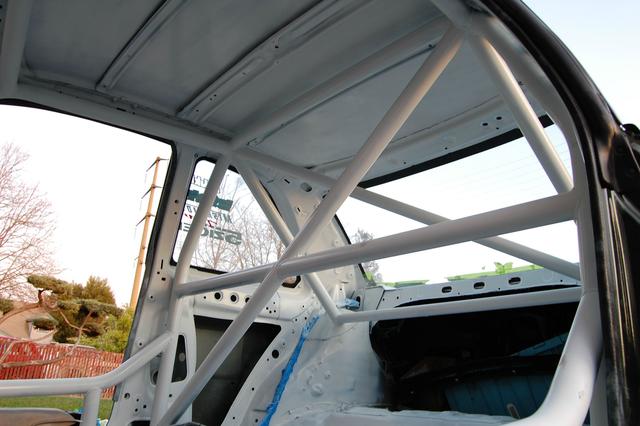
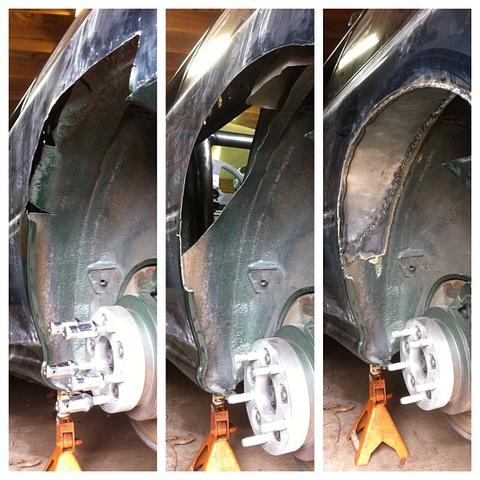
Hello everyone! Sorry for the delay of updates. I had to save some money up so I could start progressing quicker with the build. You all should be pleased to know that the updates will start flowing a little more smoothly now. Since the last update I painted the interior of the car and also ordered some parts through Garage Boso (who is tuning my car). Within the next few days we will be pulling the motor and installing the new parts then dropping it back in for tuning purposes. I also managed to pick up a R180 from a 05 STi that is currently being modded by Weir Performance and should be done this Monday coming up (4/2). Once my axles from the driveshaftshop come in my whole driveline will be complete. Here are the interior cage pictures. I will be uploading more pictures as parts come in and get installed. Note: I forgot to upload a picture of how we cut out my quarter panels after they were done so I included that as well. Thanks for looking!
Priming Stages:

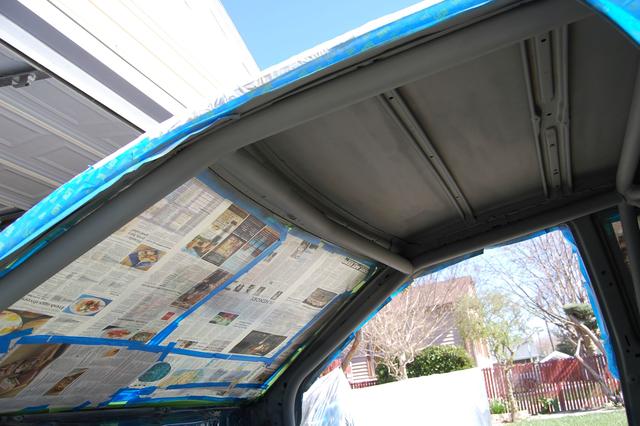
Painted:
Quater Panel:
This is where the car stands as of today (3/31/12)
Hello everyone! Sorry for the delay of updates. I had to save some money up so I could start progressing quicker with the build. You all should be pleased to know that the updates will start flowing a little more smoothly now. Since the last update I painted the interior of the car and also ordered some parts through Garage Boso (who is tuning my car). Within the next few days we will be pulling the motor and installing the new parts then dropping it back in for tuning purposes. I also managed to pick up a R180 from a 05 STi that is currently being modded by Weir Performance and should be done this Monday coming up (4/2). Once my axles from the driveshaftshop come in my whole driveline will be complete. Here are the interior cage pictures. I will be uploading more pictures as parts come in and get installed. Note: I forgot to upload a picture of how we cut out my quarter panels after they were done so I included that as well. Thanks for looking!
Priming Stages:
Painted:
Quater Panel: