
The down n/ dirty DIY, lil' bit at a time bugeye self-improvement thread

Thread Starter
Registered User
iTrader: (10)
Joined: Jan 2011
Posts: 951
From: 51-uhohh area code
Car Info: 0[[XXXXoXXXX]]0
The down n' dirty DIY, lil' bit at a time bugeye self-improvement thread
Hello all,
This won't be some mind-blowing thread that has legions of followers. I just wanted to document things that I'm (slowly) doing to my poor, little DD wagon. It's my second WRX wagon, both 02's. First one was a Vishnu "Stage 0" when I bought it unknowingly modded, then found the secret key sequence to change maps; wicked fast, 17 PSI, pink injectors, WL rear bar, Koni dampers. Awesome car. I wrecked her, all my fault (but the cat shouldn't have caught the center console on fire- which ultimately totaled it), and I live with that everyday. So, I am sorta trying to replicate that performance a lil' at a time.
It's also here The down n/ dirty DIY, lil' bit at a time bugeye self-improvement thread - NASIOC, should be pretty much identical. NASIOC is my "linked in" for technical and such, i-club is my facebook for the local flavor, for the most part.
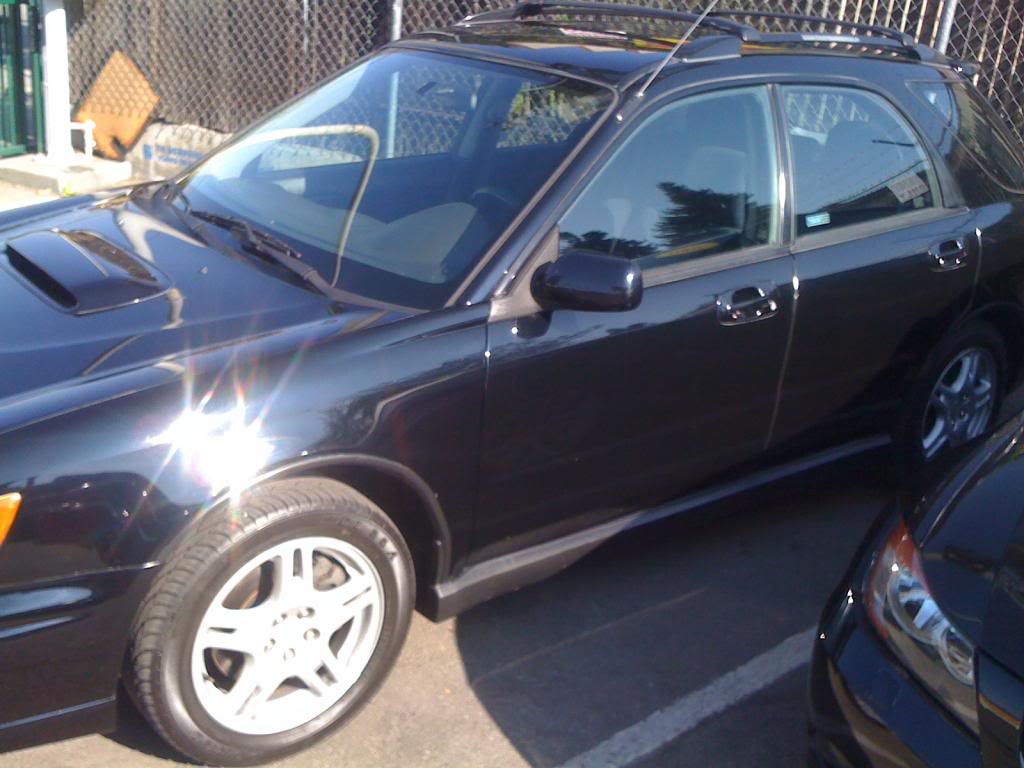
She's mostly stock for now, 111K miles, dented a bit, cracked here and there, but she's solid and doesn't lose a drop of oil in 6K+ miles. Looking for mild power mods to improve drivability and some oomph. Want a balanced car that goes, stops and corners like it should. At most, an AP and tune later on to tie it all together. HI-Flow catted downpipe at the extreme (unless that new CA smog law comes to reality and only a visual and OBDII check).
Day one, 87,xxx miles
Noise makers:
Done:
...
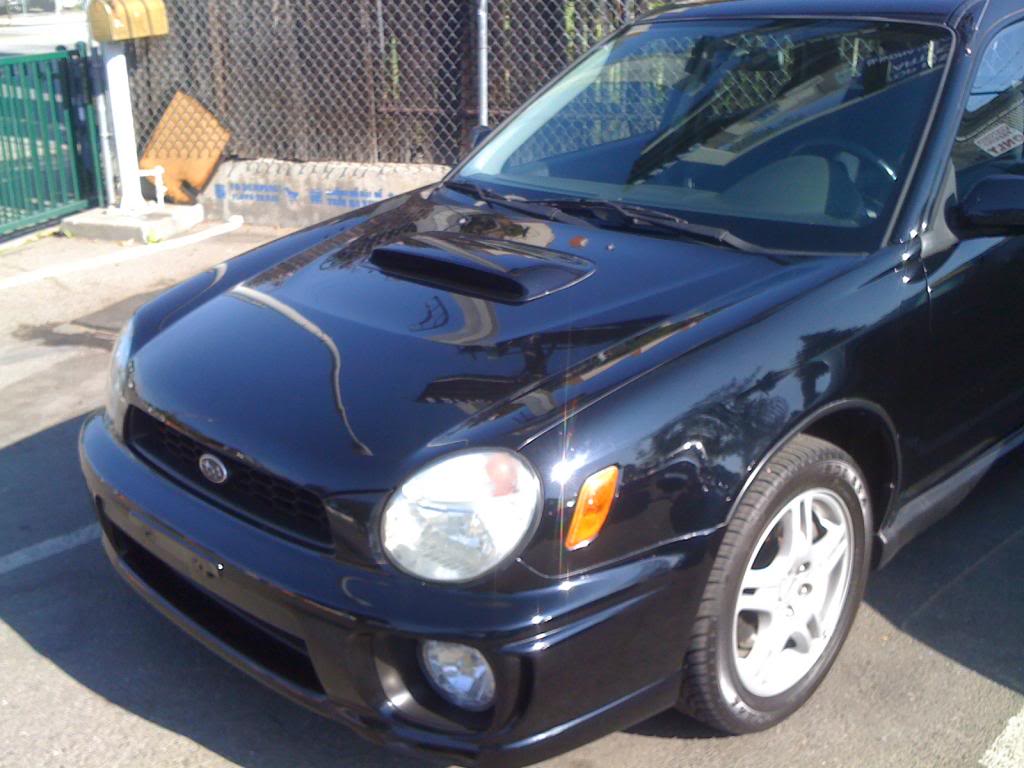
V7 JDM STI hood scoop and splitter (ok, mostly for looks...gotta try something to stop east bay lesbians from pulling up next to me and being disappointed )
Koyo all Al rad after OEM pooped the bed. 2012
Gimmick lightweight crank pulley; def idles better and 1st, 2nd gears have smoother acceleration. 5-3-15
PnP TMIC inlet elbows w/ reflective foil wrapping;
Mishimoto Y-pipe & TB hose, t-bolt clamps;
PnP OEM throttle body [OCT 2015]
PnP OEM cast Fe "Crucial" headers w/ lava wrap & Hvy duty foil shields
'11 STI up-pipe to remove OEM UP cat (yay), light PnP work, w/ foil tape, lava wrap and Hvy duty foil sheet shields
PTP Turbo blankie (with ThermoTec silver heat spray on interior to help the wool stay put)
AVO Turboworld combo MAF hose and turbo inlet (gorgeous...)
GS hi-flow X-pipe (w/ wrap & foil tape -scored a deal on lightly used one)
Hush Catback, 3" with GS adapter to OEM DP, TS exh hangers
[Dec 2015]
Planned:
Heat tape or Thermo-Tec silver spray on TMIC end tank and side near turbo (write-up...)
VDO boost gauge
Cobb AP V2 and stage 1 OTS tune at first, then e-tune from ???
Handling/Braking/Drivetrain:
Done:
02/03 sedan 20 mm rear sway bar with 04 STI rear bar mounts :ritz:
ProThane 20mm rear sway bushings 2015
DIY rear subframe lockdown (botox) bolts 2011?
Kartboy rear sway links 2012?
ebay (DME) rear wagon strut top bar with WL quick releases :ritz: 2012
Centric prem. rotors and stoptech street pads all 'round with superblue fluid (cannot recommend highly enough; still hording 2 cans since it's illegal now )
TorqueSolutions shifter bushings, front and rear 2012
TS tranny cradle bushings 2012
Kartboy/TiC shift lever bushings 2012
OEM momo **** 2012
Kartboy rear outrigger bushings, comfort 2013
DIY Trans mount goo mod (fill OEM mount bushing gaps with window-weld; more filled than Gp N but same hardness) 3-23-14
WL 22259 bushing kit for the OEM front links 7-26-14
Kartboy comfort rear diff bushings 2-22-15
eBay machined Al pitch-stop [OCT 2015]
H-brace, Cusco [MAY 2016]
Planned opcorn::
ebay (DME) front strut top bar = ready, now that TMIC is back on with mods
...
...
Group N eng. mounts or at least NEW ones, existing feel shot...
Perrin short shift adapter
H-6 brake mod
TB in progress...
This won't be some mind-blowing thread that has legions of followers. I just wanted to document things that I'm (slowly) doing to my poor, little DD wagon. It's my second WRX wagon, both 02's. First one was a Vishnu "Stage 0" when I bought it unknowingly modded, then found the secret key sequence to change maps; wicked fast, 17 PSI, pink injectors, WL rear bar, Koni dampers. Awesome car. I wrecked her, all my fault (but the cat shouldn't have caught the center console on fire- which ultimately totaled it), and I live with that everyday. So, I am sorta trying to replicate that performance a lil' at a time.
It's also here The down n/ dirty DIY, lil' bit at a time bugeye self-improvement thread - NASIOC, should be pretty much identical. NASIOC is my "linked in" for technical and such, i-club is my facebook for the local flavor, for the most part.
She's mostly stock for now, 111K miles, dented a bit, cracked here and there, but she's solid and doesn't lose a drop of oil in 6K+ miles. Looking for mild power mods to improve drivability and some oomph. Want a balanced car that goes, stops and corners like it should. At most, an AP and tune later on to tie it all together. HI-Flow catted downpipe at the extreme (unless that new CA smog law comes to reality and only a visual and OBDII check).
Day one, 87,xxx miles
Noise makers:
Done:
V7 JDM STI hood scoop and splitter (ok, mostly for looks...gotta try something to stop east bay lesbians from pulling up next to me and being disappointed )
Koyo all Al rad after OEM pooped the bed. 2012
Gimmick lightweight crank pulley; def idles better and 1st, 2nd gears have smoother acceleration. 5-3-15
PnP TMIC inlet elbows w/ reflective foil wrapping;
Mishimoto Y-pipe & TB hose, t-bolt clamps;
PnP OEM throttle body [OCT 2015]
PnP OEM cast Fe "Crucial" headers w/ lava wrap & Hvy duty foil shields
'11 STI up-pipe to remove OEM UP cat (yay), light PnP work, w/ foil tape, lava wrap and Hvy duty foil sheet shields
PTP Turbo blankie (with ThermoTec silver heat spray on interior to help the wool stay put)
AVO Turboworld combo MAF hose and turbo inlet (gorgeous...)
GS hi-flow X-pipe (w/ wrap & foil tape -scored a deal on lightly used one)
Hush Catback, 3" with GS adapter to OEM DP, TS exh hangers
[Dec 2015]
Planned:
Heat tape or Thermo-Tec silver spray on TMIC end tank and side near turbo (write-up...)
VDO boost gauge
Cobb AP V2 and stage 1 OTS tune at first, then e-tune from ???
Handling/Braking/Drivetrain:
Done:
02/03 sedan 20 mm rear sway bar with 04 STI rear bar mounts :ritz:
ProThane 20mm rear sway bushings 2015
DIY rear subframe lockdown (botox) bolts 2011?
Kartboy rear sway links 2012?
ebay (DME) rear wagon strut top bar with WL quick releases :ritz: 2012
Centric prem. rotors and stoptech street pads all 'round with superblue fluid (cannot recommend highly enough; still hording 2 cans since it's illegal now )
TorqueSolutions shifter bushings, front and rear 2012
TS tranny cradle bushings 2012
Kartboy/TiC shift lever bushings 2012
OEM momo **** 2012
Kartboy rear outrigger bushings, comfort 2013
DIY Trans mount goo mod (fill OEM mount bushing gaps with window-weld; more filled than Gp N but same hardness) 3-23-14
WL 22259 bushing kit for the OEM front links 7-26-14
Kartboy comfort rear diff bushings 2-22-15
eBay machined Al pitch-stop [OCT 2015]
H-brace, Cusco [MAY 2016]
Planned
opcorn::ebay (DME) front strut top bar = ready, now that TMIC is back on with mods
...
...
Group N eng. mounts or at least NEW ones, existing feel shot...
Perrin short shift adapter
H-6 brake mod
TB in progress...
Last edited by oaklandish_WRX; May 3, 2016 at 02:27 PM.
Thread Starter
Registered User
iTrader: (10)
Joined: Jan 2011
Posts: 951
From: 51-uhohh area code
Car Info: 0[[XXXXoXXXX]]0
Appearance:
Done:
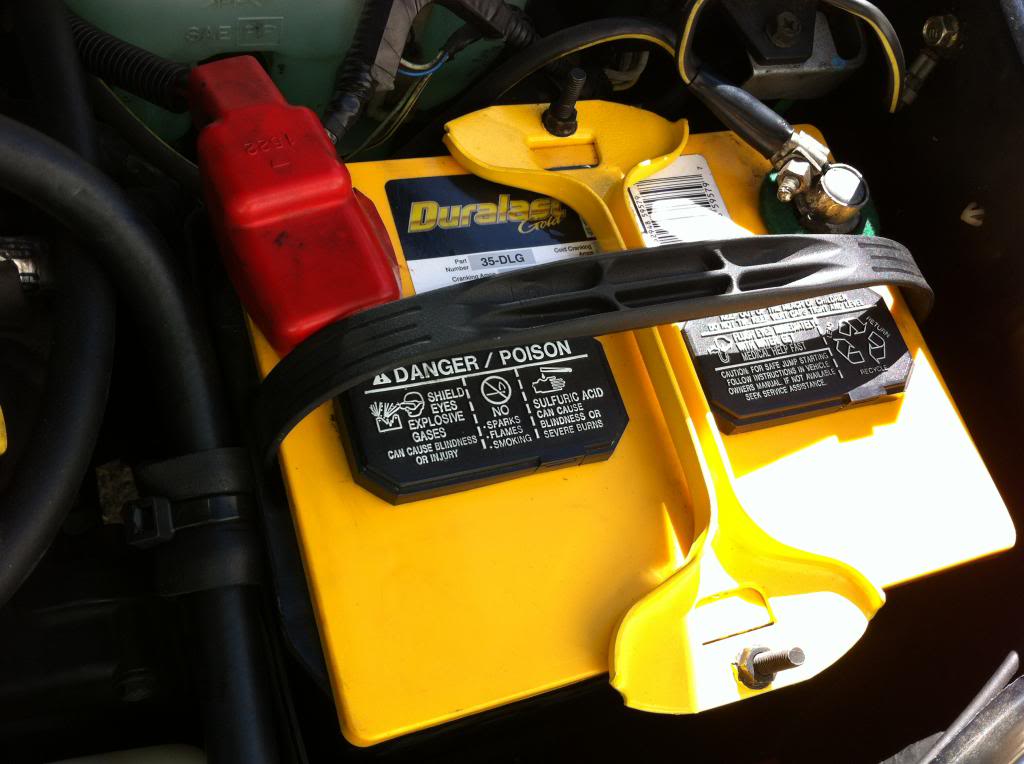
Sprayed the alt cover [below], boost solenoid cover, and battery hold down in yellow. Matches the battery top and contrasts the engine bay (and dirty engine); now easily shows how dirty the underhood is as the yellow shows everything lol
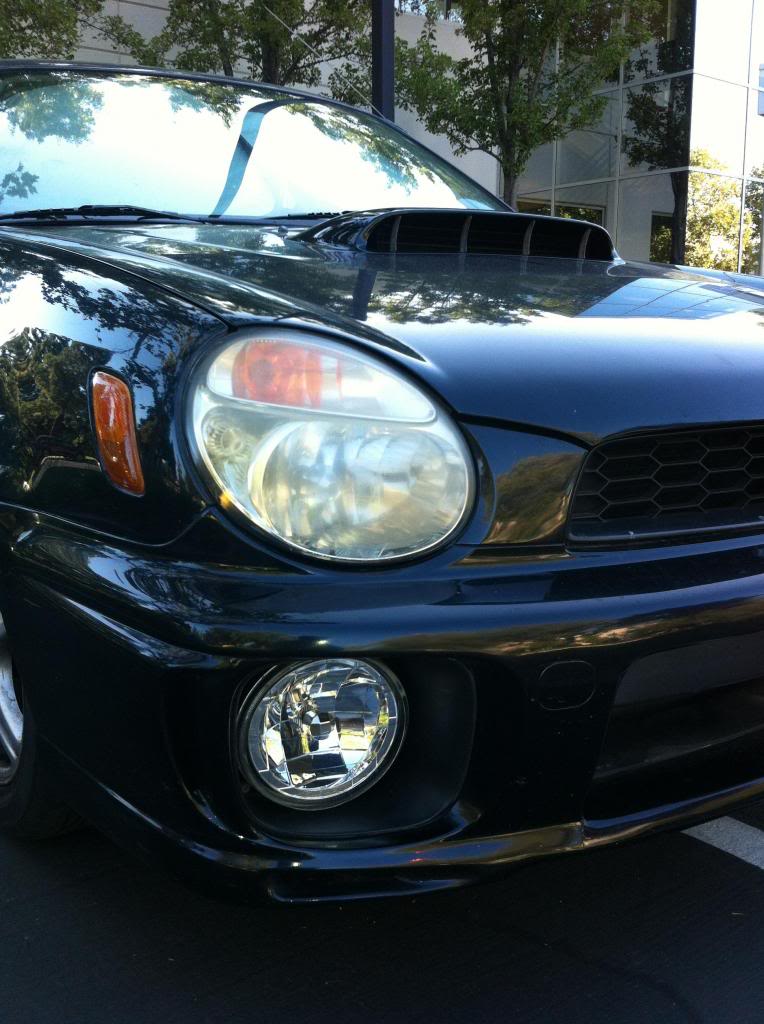
V7 Scoop + splitter...how I found one in good shape, in MBP, I'll never know.
CatzFET high output bulbs in fogs
DIY cargo mat from garage floor mat
DIY TMIC screen mesh
Front plate bracket to raise it and angle it backwards a la --> \(IIII
LEDs for map and room lights
LEDs for rear plate lights
Great condition OEM fogs w/ rockblocker film
Planned:
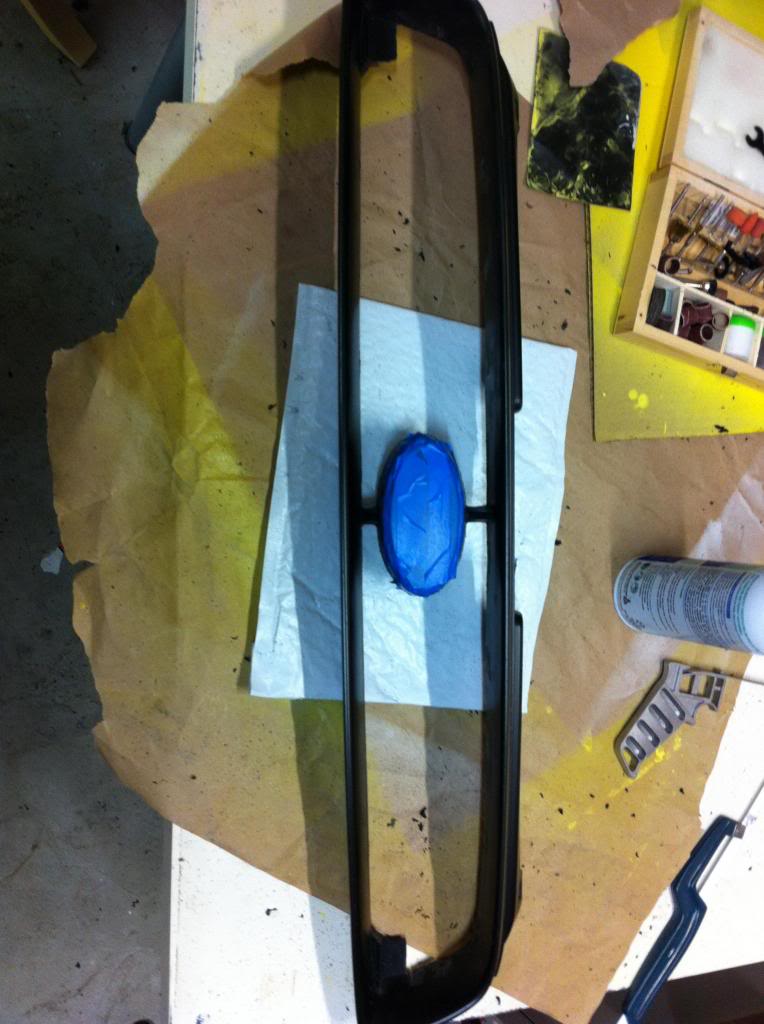
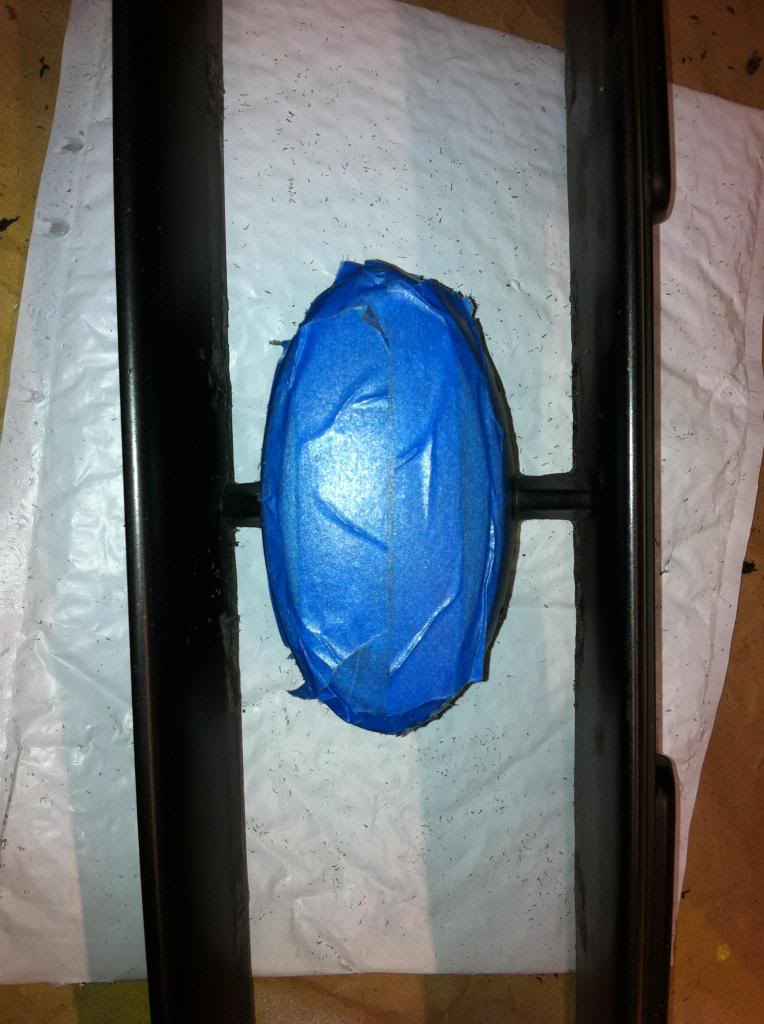
DIY grille mod: gut the plastic 'cept badge (JDM "i"), replace with steel mesh, re-shoot plastic bits in trim black [in progress now...pics below. Mesh is on now, just needs prime n paint]
Hella 'tones behind grille
blacked out low mile used OEM headlights
ebay radiator diverter plate
Philips VisionPlus bulbs
DIY cutting board mudflaps/air-brakes (not IKEA, but still Swedish!)
Done:
Sprayed the alt cover [below], boost solenoid cover, and battery hold down in yellow. Matches the battery top and contrasts the engine bay (and dirty engine); now easily shows how dirty the underhood is as the yellow shows everything lol
V7 Scoop + splitter...how I found one in good shape, in MBP, I'll never know.
CatzFET high output bulbs in fogs
DIY cargo mat from garage floor mat
DIY TMIC screen mesh
Front plate bracket to raise it and angle it backwards a la --> \(IIII
LEDs for map and room lights
LEDs for rear plate lights
Great condition OEM fogs w/ rockblocker film
Planned:
DIY grille mod: gut the plastic 'cept badge (JDM "i"), replace with steel mesh, re-shoot plastic bits in trim black [in progress now...pics below. Mesh is on now, just needs prime n paint]
Hella 'tones behind grille
blacked out low mile used OEM headlights
ebay radiator diverter plate
Philips VisionPlus bulbs
DIY cutting board mudflaps/air-brakes (not IKEA, but still Swedish!)
Last edited by oaklandish_WRX; Jan 16, 2014 at 01:40 PM. Reason: moar 2
VIP Member
iTrader: (24)
Joined: Sep 2012
Posts: 1,642
From: San Jose
Car Info: 2000 Legacy GT, 2000 Echo 1989 Camry All-Trac
Thread Starter
Registered User
iTrader: (10)
Joined: Jan 2011
Posts: 951
From: 51-uhohh area code
Car Info: 0[[XXXXoXXXX]]0
About $20 on mcmaster-Carr and with the minimum purchase for the parts I had a full 2nd set that I sold so it was less than $10 for mine. I can pm the deets if ya like. LMK
The real expense was a tap to clean out the chassis female threads; must be clean n free or you can snap a weld and be sad banana.
VIP Member
iTrader: (24)
Joined: Sep 2012
Posts: 1,642
From: San Jose
Car Info: 2000 Legacy GT, 2000 Echo 1989 Camry All-Trac
Originally Posted by oaklandish_WRX
Thanks!
Originally Posted by oaklandish_WRX
The real expense was a tap to clean out the chassis female threads; must be clean n free or you can snap a weld and be sad banana.

Thread Starter
Registered User
iTrader: (10)
Joined: Jan 2011
Posts: 951
From: 51-uhohh area code
Car Info: 0[[XXXXoXXXX]]0
It pulls the subframe assembly up to the chassis. Along with the strut bar and it made a huge difference. Add the 20mm bar, links and outrigger bushings (forgot those above) and rear is very solid and the car rotates well but controlled.
VIP Member
iTrader: (24)
Joined: Sep 2012
Posts: 1,642
From: San Jose
Car Info: 2000 Legacy GT, 2000 Echo 1989 Camry All-Trac
Gotcha gotcha. I'll have a look under my car and see how it works.
I've a 24mm rear bar, reinforced mounts and endlinks - I'd say the bar made a huge difference, and the endlinks and mounts, which went on later, helped a lot on turns (bye bye understeer).
Then again, before even the sway bar et al I also had almost every poly bushing you can do put on. I'm just always curious which particular suspension mods make the most difference (as said, sways were the biggest change, and many if not all will back that up).
Registered User
Joined: Dec 2013
Posts: 83
From: Santa Rosa
Car Info: 2002 WRX Wagon
Sounds like you're following budget-friendly/DIY mods.
If you're going to keep the stock panel filter and housing for the intake, I'd suggest going with the Intake Silencer delete mod. Turbo spool sounds wicked after removing the tube in the fender.
If you're going to keep the stock panel filter and housing for the intake, I'd suggest going with the Intake Silencer delete mod. Turbo spool sounds wicked after removing the tube in the fender.
Thread Starter
Registered User
iTrader: (10)
Joined: Jan 2011
Posts: 951
From: 51-uhohh area code
Car Info: 0[[XXXXoXXXX]]0
Thanks for the reminder...I've already got the replacement tube that goes in where the snorkus does. Just gotta get off my *** and install it.
Thread Starter
Registered User
iTrader: (10)
Joined: Jan 2011
Posts: 951
From: 51-uhohh area code
Car Info: 0[[XXXXoXXXX]]0
So, TMIC elbows are done PnP-ing. I was being too easy on them, just grabbed the HSS dremel cutter and really hogged on them for the entry knife-edging. Then flap wheel and finally hand sanding. Pics later...
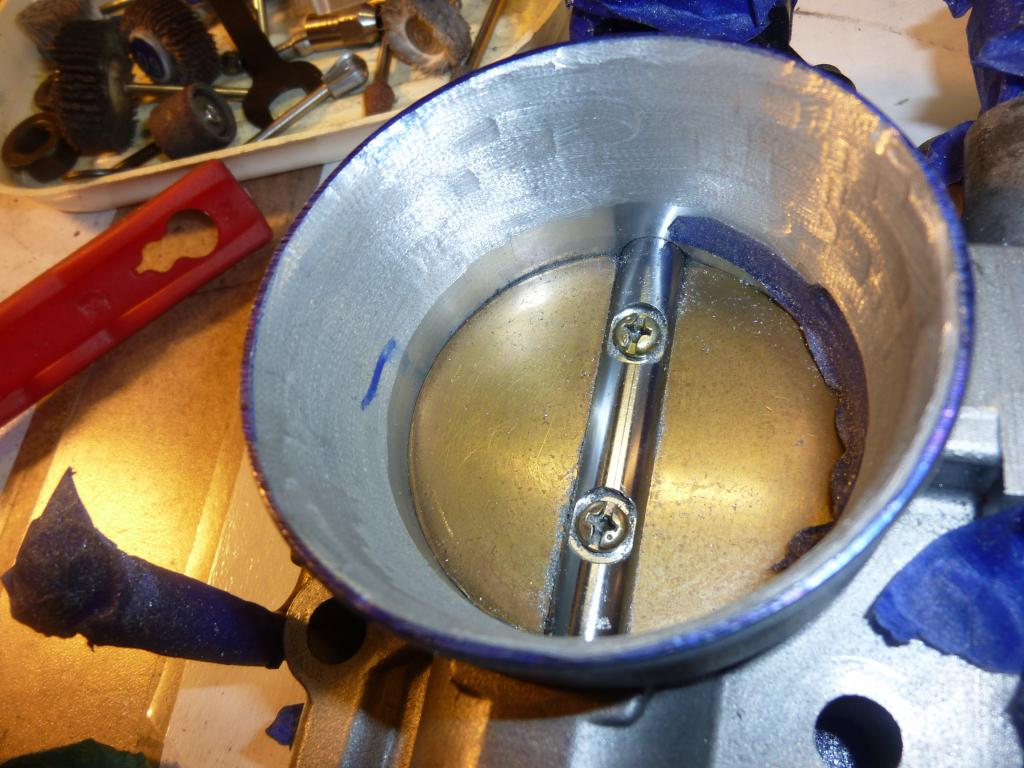
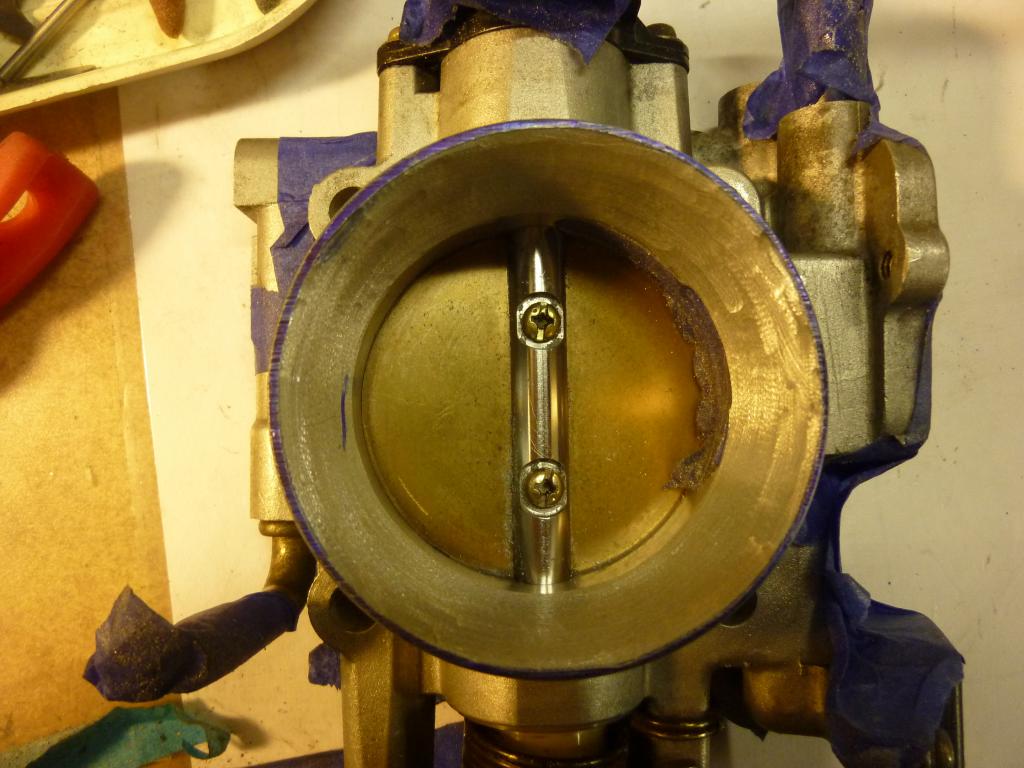
TB work is well on its way: good knife-edge on the alum. begun, butterfly edged (see above), "step" on inlet side ground down and blended. Prolly just another hour or so on it and it'll be ready for re-assembly. Gonna try for a very polished effect here in the TB. Yeee!
Also tried some work on the exh manifold - sheesh. started ok with stones and a dbl cut carbide in a dremel on ONE port. Very slow, but to be expected. More about training me. Then tried a BNIB harbor freight "cutout" tool, a rotazip like thing with a ball-end carbide burr. Damn good thing I had the collet tight - it vibrated SO bad it almost jumped out of my hands, could barely turn it off. Then, when trying to restart it (empty) it won't, like the switch is dead. Muy furioso! So, out $25 since I bought it over 90 days ago. Lesson learned.
Pro PnP services for the exhaust work is looking more and more likely, as I'll now have to buy a proper die grinder, flame shaped burr(s), LOTS more flap wheels and cartridge rolls and most important: time.
Last edited by oaklandish_WRX; Feb 11, 2014 at 04:15 PM.
VIP Member
iTrader: (24)
Joined: Sep 2012
Posts: 1,642
From: San Jose
Car Info: 2000 Legacy GT, 2000 Echo 1989 Camry All-Trac
Yo, I was actually planning to do some DIY PnP myself, and have a die grinder and carbide tip if you're interested if borrowing. Could do a joint sesh; I've got some TGV deletes I've been meaning to polish out - I've also wanted to do my TMIC elbows too.
The difference between it and a Dremel (got one of those too if need be) is like filling a tire with a bike pump versus a compressor
The difference between it and a Dremel (got one of those too if need be) is like filling a tire with a bike pump versus a compressor
Last edited by de_engineered; Feb 11, 2014 at 08:27 PM.
Thread Starter
Registered User
iTrader: (10)
Joined: Jan 2011
Posts: 951
From: 51-uhohh area code
Car Info: 0[[XXXXoXXXX]]0
Yo, I was actually planning to do some DIY PnP myself, and have a die grinder and carbide tip if you're interested if borrowing. Could do a joint sesh; I've got some TGV deletes I've been meaning to polish out - I've also wanted to do my TMIC elbows too.
The difference between it and a Dremel (got one of those too if need be) is like filling a tire with a bike pump versus a compressor
The difference between it and a Dremel (got one of those too if need be) is like filling a tire with a bike pump versus a compressor
The dremel is ok or even better for tmic and TB work, IMHO. ESpecially with a flex pen attachment.
Thanks
Thread Starter
Registered User
iTrader: (10)
Joined: Jan 2011
Posts: 951
From: 51-uhohh area code
Car Info: 0[[XXXXoXXXX]]0
So....
I ran the numbers (spreadsheets FTW) and my best guess comparing purchasing even a cheap HF die grinder and variable speed controller, better carbides, plus other accessories needed; then add in my time (low and variable), mess and the potential to screw things up royally and the modest fee to PnP my existing (spare) headers is a no brainer even with shipping boat-anchors to and fro. Financially, it's a wash almost.
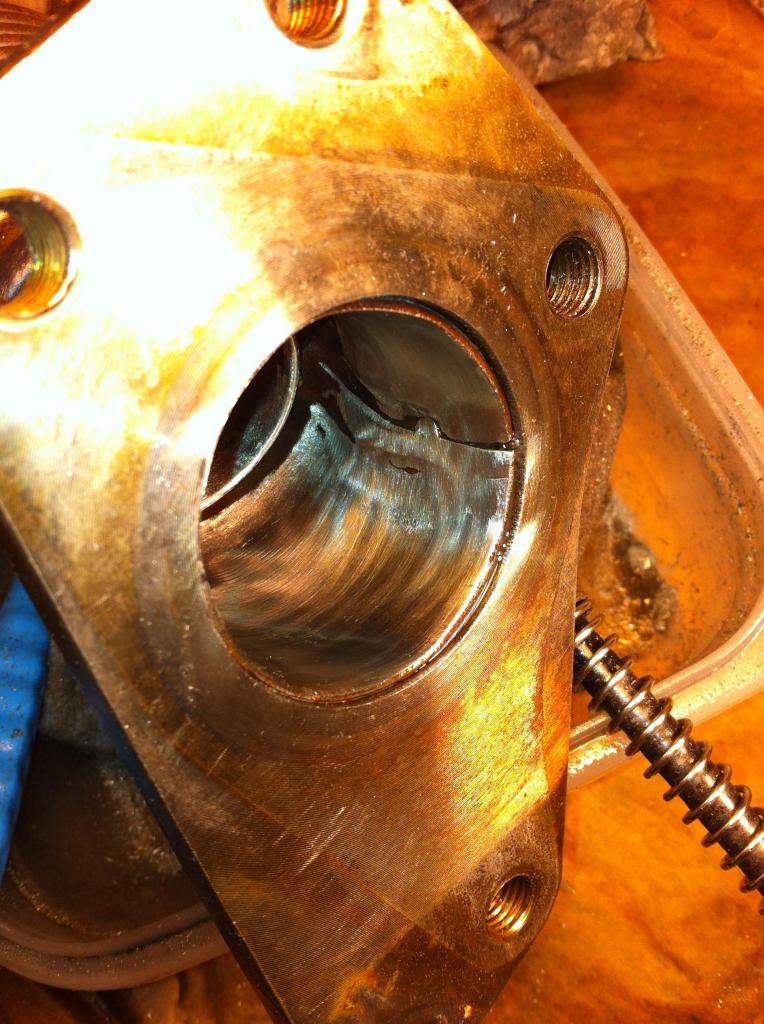
So, since the collectors are going pro treatment, and I scored a lightly used GS X pipe that needs nothing PnP-wise, that left the OEM 2011 STI up pipe. The inlet to the UP is larger than the exit of the passgr side collector outlet and I wanted to retain an anti-reversion step there, so the exit diameter will stay about the same as now, just polished up by the pro service.
That left me and my dremel to hack on the UP inlet to clean it up, remove a step and generally make it smooth as possible as far into the pipe as possible. Same for the exit of the UP at the turbo but really just polishing so that there is no increase in diameter, wanted to nozzle it down and accelerate exh gas flow right before the poor lil' TD04. In the best situation, I'd have the turbo inlet PnP'd...maybe when I kill this one. Just no funds/time/spare turbo right now.
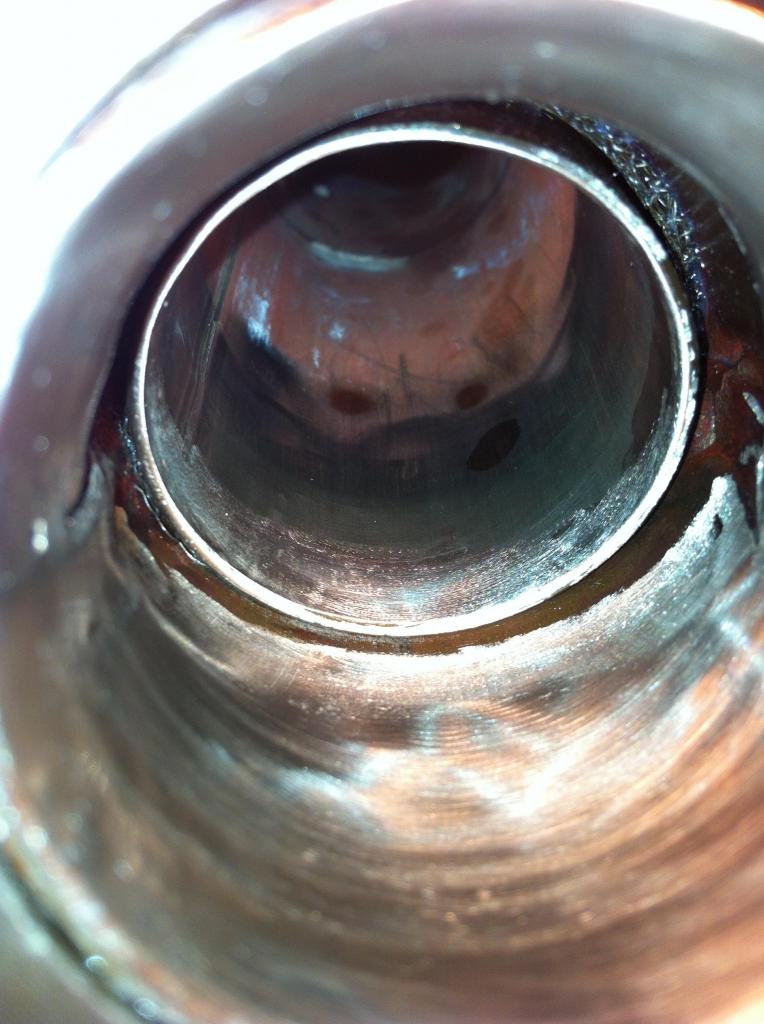
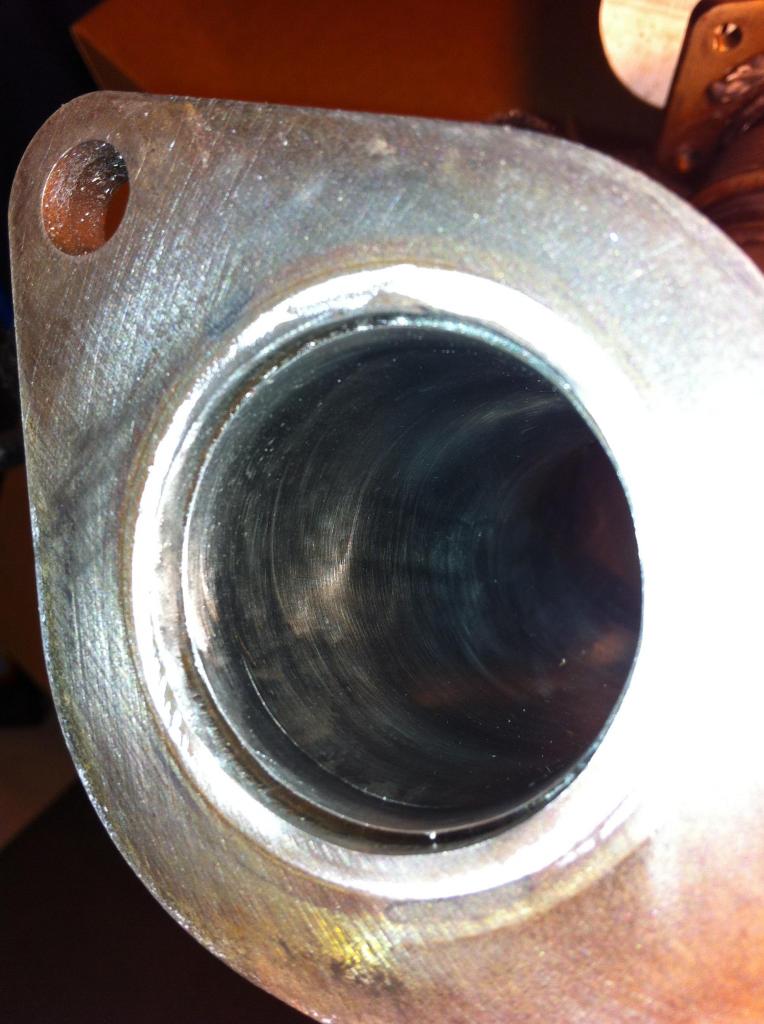
The UP exit port got a good scrape down and removal of some extra weld beads just after the flex section; there is a slight bend as the tube enters the turbo flange, so I took care to really clean up the outside bend on the inner wall, as this is where the gases likely will "hit" and change direction(?). Alum Ox. stone and some carbide burr to get through the very hard weld bead lumps, then 60 and 180 grit flapwheels. I had some 800 grit wet/dry handy, so gave it a final going over by hand to really make it smooth. The lower portion of the pipe extends thru the larger ID flex in a continuous pipe, "blowing" into the short bendy section just before the turbo flange. I was able to reach the first inch or two of this pipe section to smooth it, too.
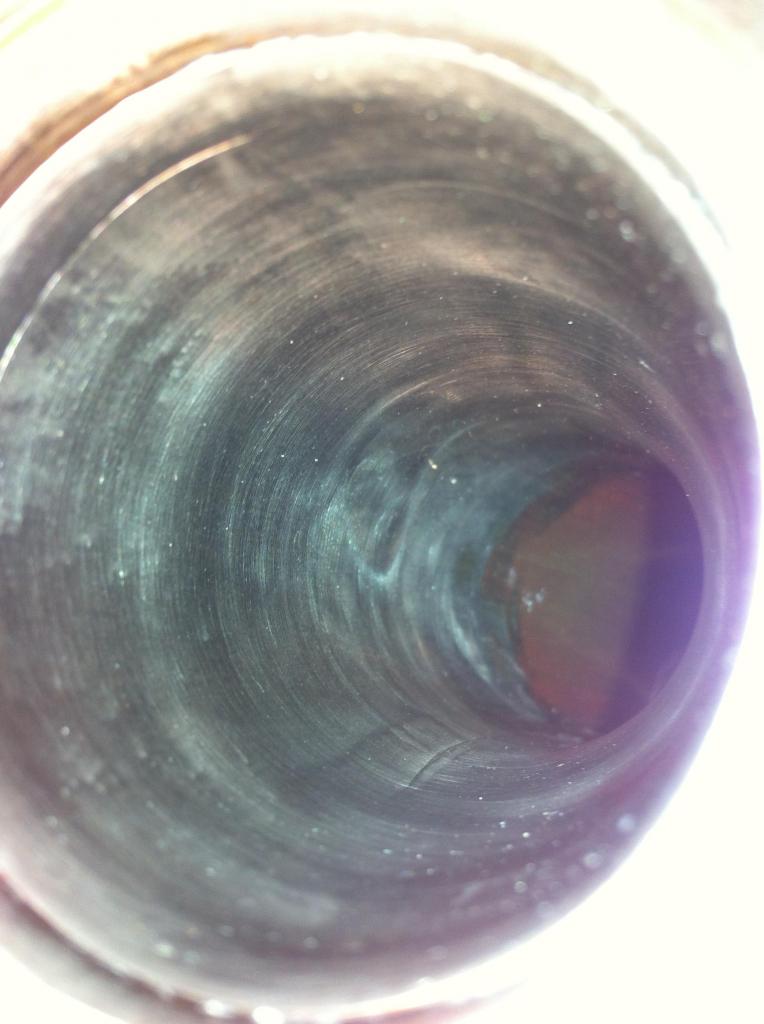
The UP entry got similar treatment, but more material was removed (aforementioned reversion step) and it was smoothed about 6" into the pipe up to the 180 flapwheel, which is pretty darn smooth on stainless. I may get some 240 and/or 320 crossbuffs (to finish my TB and TMIC elbows), and go back at it , time permitting. Idea being to get a highly reflective interior that would help keep heat in the exh gas stream.
This is all probably just ****ing in the wind compared to the real gains from just going with a catless UP. But, it couldn't hurt spool and low/mid torque. The UP and headers, PnP TMIC elbows, PnP TB will probably go in in the April time-frame, pending funds for the outside service.
thanks...
I ran the numbers (spreadsheets FTW) and my best guess comparing purchasing even a cheap HF die grinder and variable speed controller, better carbides, plus other accessories needed; then add in my time (low and variable), mess and the potential to screw things up royally and the modest fee to PnP my existing (spare) headers is a no brainer even with shipping boat-anchors to and fro. Financially, it's a wash almost.
So, since the collectors are going pro treatment, and I scored a lightly used GS X pipe that needs nothing PnP-wise, that left the OEM 2011 STI up pipe. The inlet to the UP is larger than the exit of the passgr side collector outlet and I wanted to retain an anti-reversion step there, so the exit diameter will stay about the same as now, just polished up by the pro service.
That left me and my dremel to hack on the UP inlet to clean it up, remove a step and generally make it smooth as possible as far into the pipe as possible. Same for the exit of the UP at the turbo but really just polishing so that there is no increase in diameter, wanted to nozzle it down and accelerate exh gas flow right before the poor lil' TD04. In the best situation, I'd have the turbo inlet PnP'd...maybe when I kill this one. Just no funds/time/spare turbo right now.
The UP exit port got a good scrape down and removal of some extra weld beads just after the flex section; there is a slight bend as the tube enters the turbo flange, so I took care to really clean up the outside bend on the inner wall, as this is where the gases likely will "hit" and change direction(?). Alum Ox. stone and some carbide burr to get through the very hard weld bead lumps, then 60 and 180 grit flapwheels. I had some 800 grit wet/dry handy, so gave it a final going over by hand to really make it smooth. The lower portion of the pipe extends thru the larger ID flex in a continuous pipe, "blowing" into the short bendy section just before the turbo flange. I was able to reach the first inch or two of this pipe section to smooth it, too.
The UP entry got similar treatment, but more material was removed (aforementioned reversion step) and it was smoothed about 6" into the pipe up to the 180 flapwheel, which is pretty darn smooth on stainless. I may get some 240 and/or 320 crossbuffs (to finish my TB and TMIC elbows), and go back at it
, time permitting. Idea being to get a highly reflective interior that would help keep heat in the exh gas stream. This is all probably just ****ing in the wind compared to the real gains from just going with a catless UP. But, it couldn't hurt spool and low/mid torque. The UP and headers, PnP TMIC elbows, PnP TB will probably go in in the April time-frame, pending funds for the outside service.
thanks...
Last edited by oaklandish_WRX; Jun 16, 2015 at 04:00 PM. Reason: pix
Thread Starter
Registered User
iTrader: (10)
Joined: Jan 2011
Posts: 951
From: 51-uhohh area code
Car Info: 0[[XXXXoXXXX]]0
Put on a DIY Window-weld'ed 5MT mount. No chance to drive more than around block, but berry nice! Reverse is better, 2-3 is better. Shifter stays put even under accel
Cannot wait for the rear diff bushings next week and Scotty cocktail.
Sorry no pics, but I went whole-hog on filling the OEM mount, way more than others on the subie sites have shown.
edit: It's like a new tranny...everything is smooth, connected and power delivery is seamless. So ****ed I waited so long to put this on, especially since it took less than an hour (w/ hand tools...and I was already BEAT from other stuff yesterday).