
DIY - Front and Rear Strut Bar Install


Thread Starter
VIP Member
Joined: Apr 2006
Posts: 50
From: Flagstaff, AZ
Car Info: 05' PSM 2.5 RS Wagon w/ JDM Roof Vent
Alright, I got my Ebay STi replica strut bars in today. And so I threw them on today.
So here is a DIY to help those of you who want to put on some strut bars.
Note: This modification was performed on a 05' 2.5 RS Wagon, the sedan differs in the rear. So if you have a sedan, good luck with the rear.
Tools needed:
10mm Wrench / Socket
12mm Wrench
12mm Socket (needed for wagon)
17mm Wrench / Socket (x2) (for tightening strut bar)
X-Acto Knife
Flathead Screw Driver
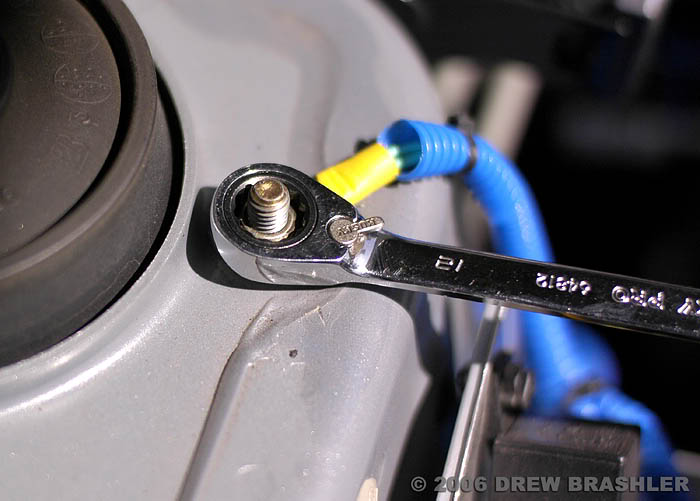
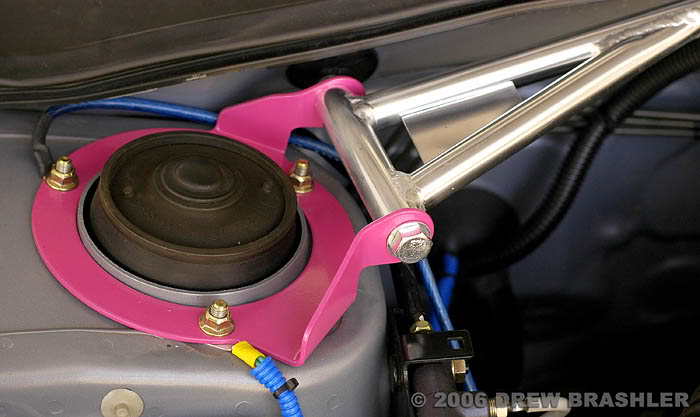
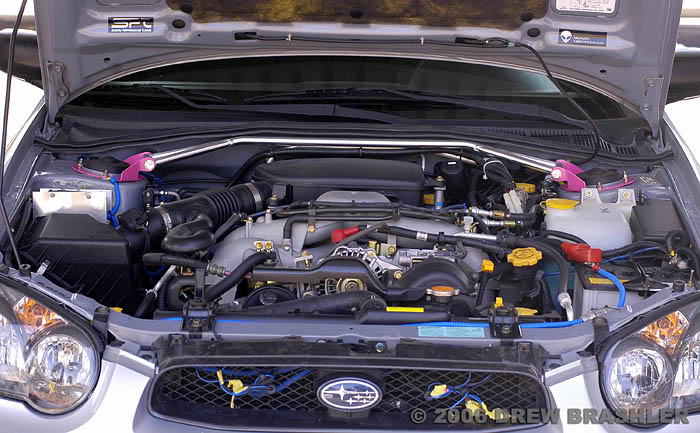
Step 1 - Moving the AC lines: Open the hood. First you need to move the AC line to have the strut bar fit.
Break out your 10mm wrench or socket. The 10mm nut you need to remove is located here in the photo below:
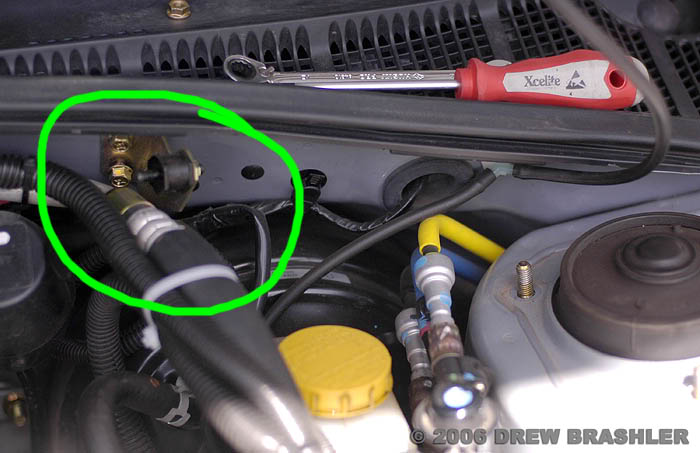
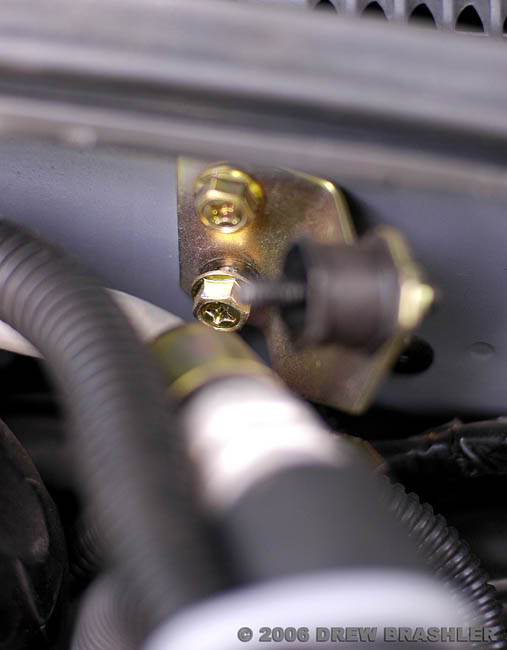
Remove the nut and rotate the flange that is attached to the AC line down, like so:
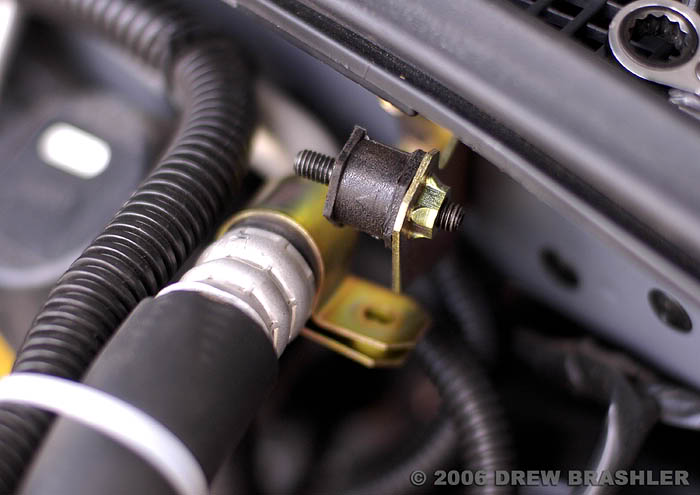
After you do that, you need to remove the bracket attached to the firewall. This is held in with two 10mm bolts. Remove those and pull the bracket off.
Step 2 - Prepping to mount the brackets: Grab a 12mm Wrench, pick a side to start on and take off the 3 nuts on top of the strut. Repeat on the other side.
Step 3 - Attaching the bar: Attach the bar to the driver side bracket. Use the two 17mm wrenches to tighten. Make it tight enough where you can still move the bracket, but not where it is loose. Attach the bar to the passenger side bracket next, and hand tighten the bolt.
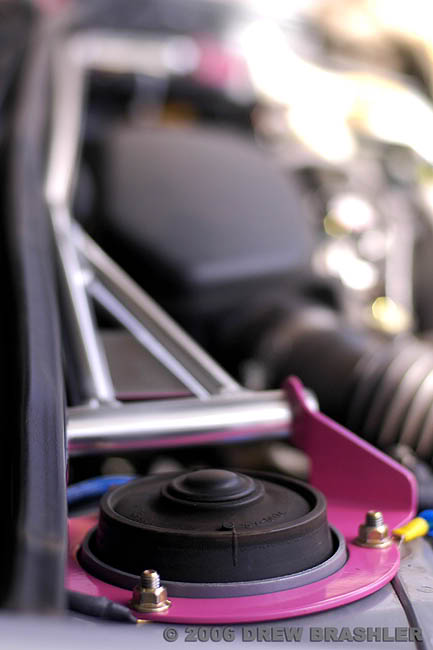
Note which bracket is which side. The longer side is mounted toward you. (this photo was taken after install)
Step 4 � Mounting the Driver Side Bracket: Mount the driver side bracket and replace the 3 10mm nuts, but leave them a bit loose.
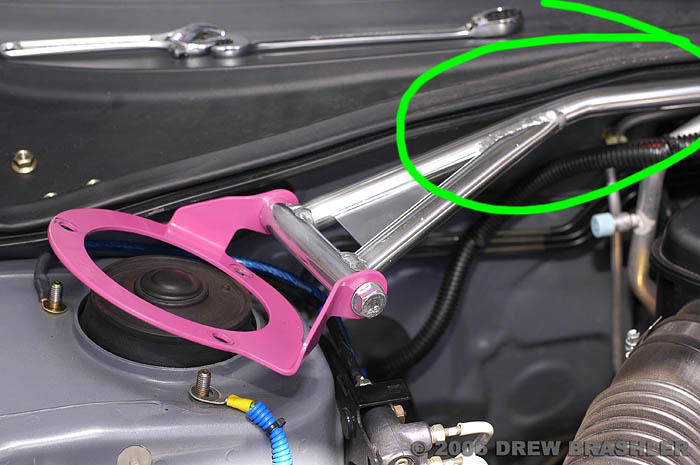
Step 5 � Mounting the Passenger Side Bracket: This is the part that gets a bit tricky. If you look at the photo below, you have to get the bar past this one spot highlighted in green. Just work with it for a while, took me about 2 mins to pop in.
Step 6 � Tightening Down the Nuts for the Brackets: Next tighten all 6 of the 12mm nuts for the brackets (a 12mm socket works great for this).
Step 7 � Tightening the Bar to the Bracket: Take your two 17mm wrenches and tighten the bolt and nut attaching the bar to the brackets.
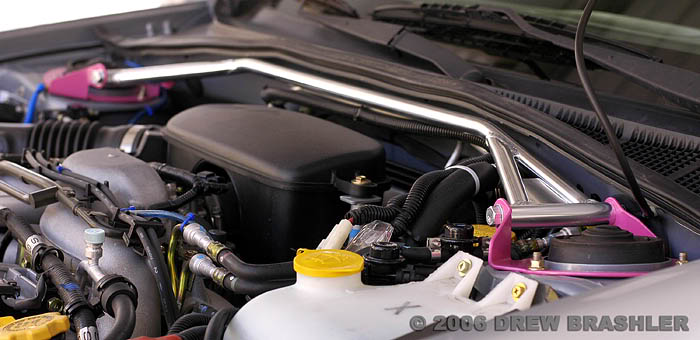
Now the front is done!
Step back and observe the beauty:
(yes my light bar is gone right now. I just got my car back from the autobody shop getting a new bumper. A girl backed into my front bumper and scratched it up really bad. Anyway I got a new bumper, and I haven't put on the old bar because, I'm getting a Rally Innovations light bar )
)
So here is a DIY to help those of you who want to put on some strut bars.
Note: This modification was performed on a 05' 2.5 RS Wagon, the sedan differs in the rear. So if you have a sedan, good luck with the rear.
Tools needed:
10mm Wrench / Socket
12mm Wrench
12mm Socket (needed for wagon)
17mm Wrench / Socket (x2) (for tightening strut bar)
X-Acto Knife
Flathead Screw Driver
Step 1 - Moving the AC lines: Open the hood. First you need to move the AC line to have the strut bar fit.
Break out your 10mm wrench or socket. The 10mm nut you need to remove is located here in the photo below:
Remove the nut and rotate the flange that is attached to the AC line down, like so:
After you do that, you need to remove the bracket attached to the firewall. This is held in with two 10mm bolts. Remove those and pull the bracket off.
Step 2 - Prepping to mount the brackets: Grab a 12mm Wrench, pick a side to start on and take off the 3 nuts on top of the strut. Repeat on the other side.
Step 3 - Attaching the bar: Attach the bar to the driver side bracket. Use the two 17mm wrenches to tighten. Make it tight enough where you can still move the bracket, but not where it is loose. Attach the bar to the passenger side bracket next, and hand tighten the bolt.
Note which bracket is which side. The longer side is mounted toward you. (this photo was taken after install)
Step 4 � Mounting the Driver Side Bracket: Mount the driver side bracket and replace the 3 10mm nuts, but leave them a bit loose.
Step 5 � Mounting the Passenger Side Bracket: This is the part that gets a bit tricky. If you look at the photo below, you have to get the bar past this one spot highlighted in green. Just work with it for a while, took me about 2 mins to pop in.
Step 6 � Tightening Down the Nuts for the Brackets: Next tighten all 6 of the 12mm nuts for the brackets (a 12mm socket works great for this).
Step 7 � Tightening the Bar to the Bracket: Take your two 17mm wrenches and tighten the bolt and nut attaching the bar to the brackets.
Now the front is done!
Step back and observe the beauty:
(yes my light bar is gone right now. I just got my car back from the autobody shop getting a new bumper. A girl backed into my front bumper and scratched it up really bad. Anyway I got a new bumper, and I haven't put on the old bar because, I'm getting a Rally Innovations light bar
)
Thread Starter
VIP Member
Joined: Apr 2006
Posts: 50
From: Flagstaff, AZ
Car Info: 05' PSM 2.5 RS Wagon w/ JDM Roof Vent
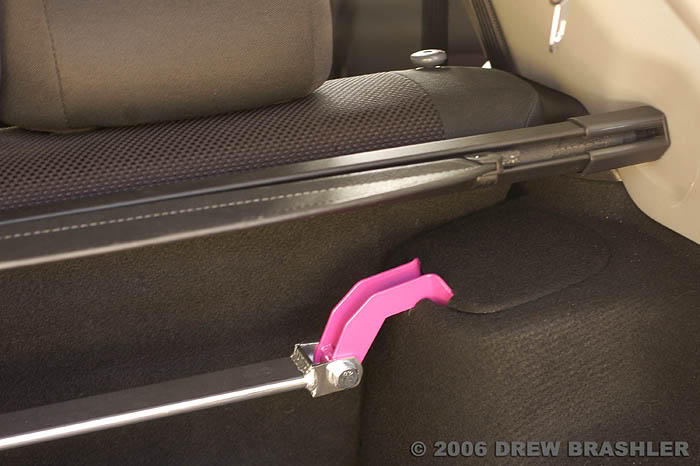
Now to the back. The best thing about wagons? Folding rear seats. If you have a sedan, I�m sorry, I have heard it is a bit difficult to do, but it�s doable, just takes longer.
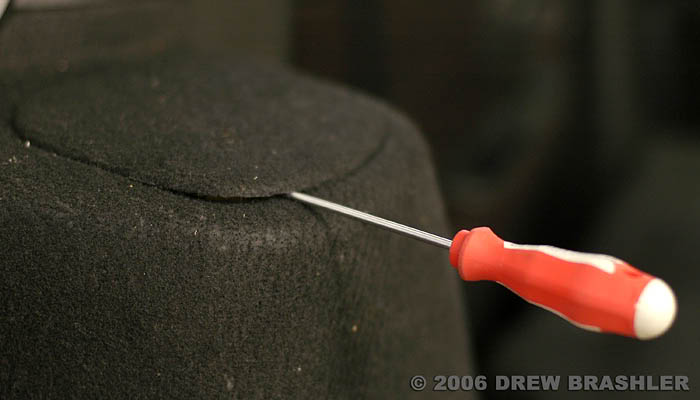
Step 1 � Prepping: Fold down the seats and break out your flathead screwdriver. Take out the trim piece that covers the rear strut.
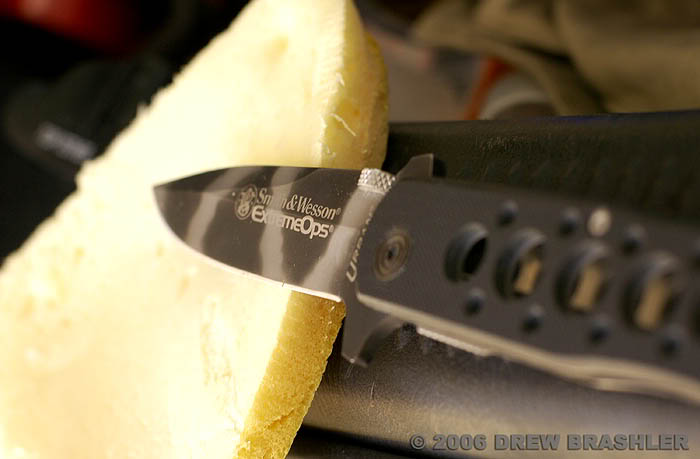
Step 2 � Playing with knifes: Bust out your knife and cut the yellow stuff off.

(Knifes are fun)
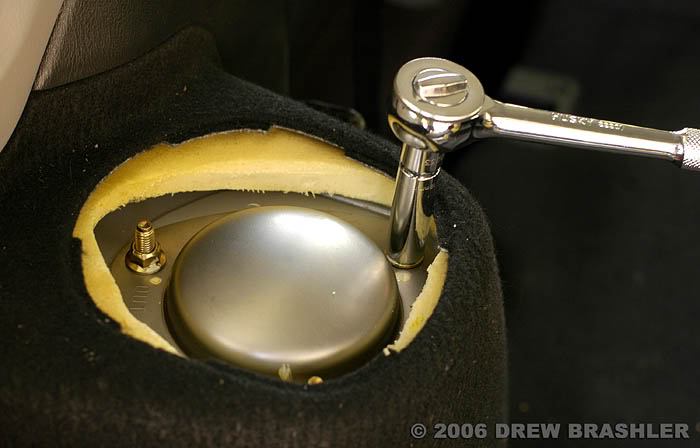
Step 3 � Removing the nuts: This is where you NEED a 12mm socket. Remove the 3 12mm nuts off the top of the strut.
Step 4 � Repeat: Repeat steps 1-3 for the other side.
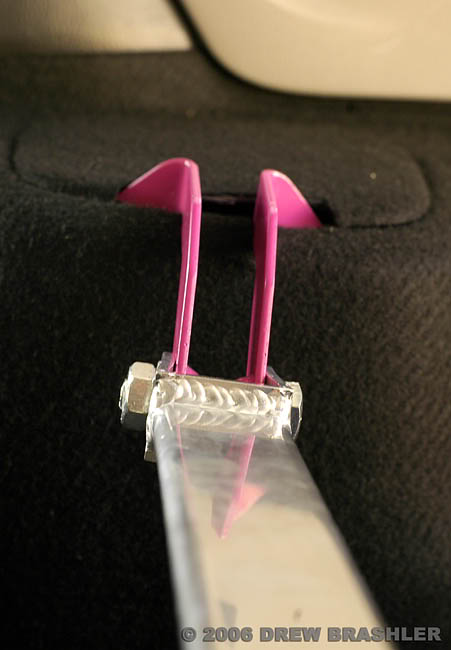
Step 5 � Placing the Bracket: I mounted the driver side bracket first. Angle the bracket up and put the side toward you in first. (note the flat side is pointed toward the front of the car)
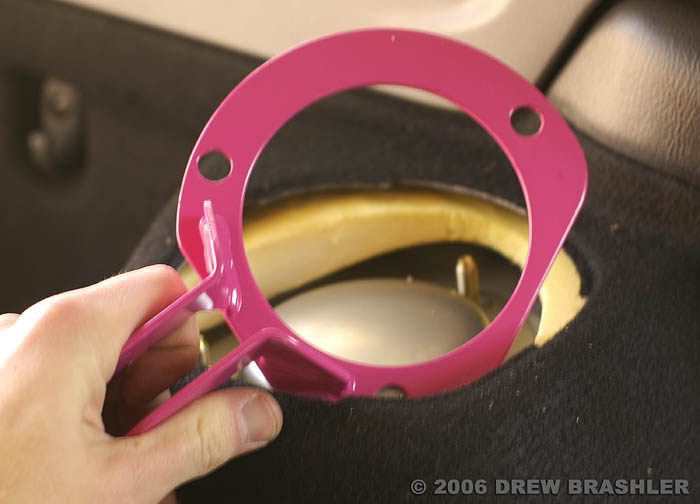
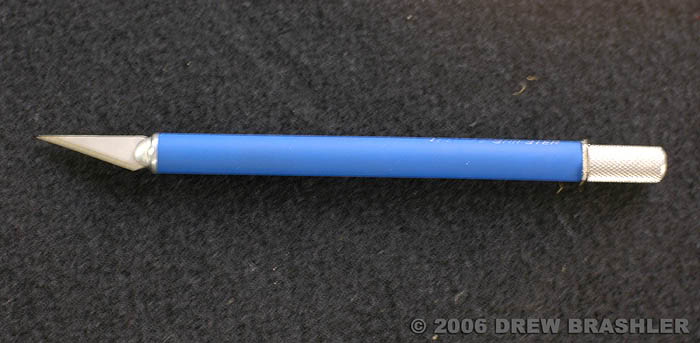
Step 6 � Playing with knifes part 2: You need to cut away at the flooring to make the bracket fit. Get a GOOD knife for this. An X-Acto knife will work great for this. (you can pick one up at any hobbie shop)
Cut away like so:
Step 7 � Repeat: Repeat Steps 5 and 6 for the other side.
Step 8 � Mounting the Driver Side Bracket: Grab your 12mm socket and tighten down the 3 nuts that will hold the driver side bracket.
Step 9 � Attach the Bar to the Driver Side Bracket: Grab your two 17mm wrenches and tighten those bolts down, but make it a tid bit loose. You will bend the metal on the bar that attaches to the bolts making this tighten down, this is normal.
Step 10 � Mounting the Passenger Side Bracket: Grab your 12mm socket and tighten down the 3 nuts that will hold the passenger side bracket.
Step 11 � Mounting the Bar to the Passenger Side Bracket: Repeat Step 9 for the passenger side.
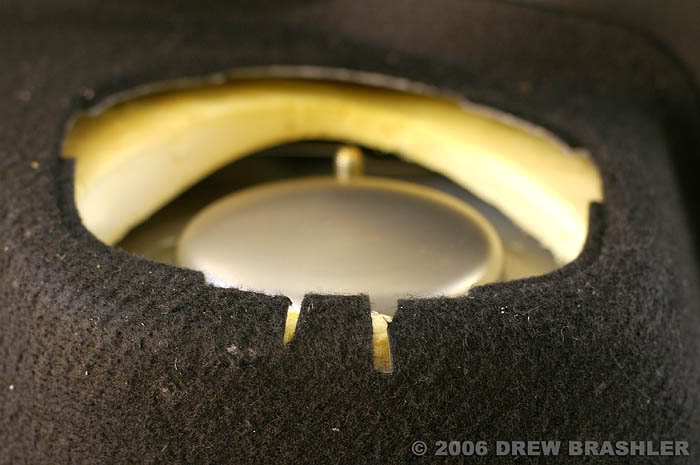
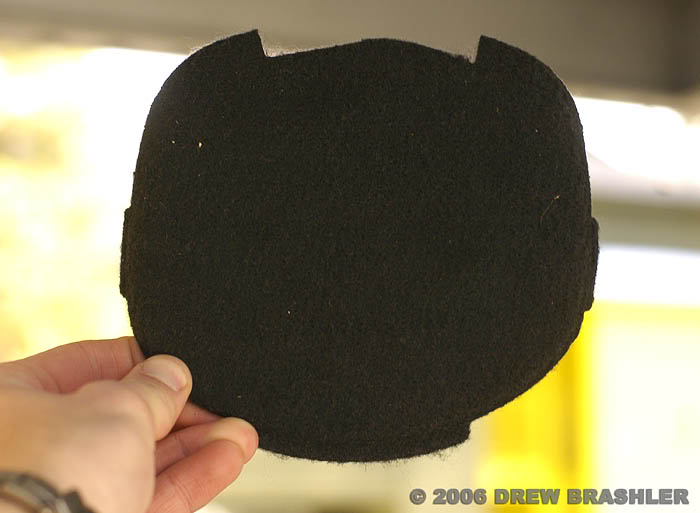
Step 12 � Playing with knifes part 3 Use the X-Acto knife and cut the trim piece that covers the strut like this: (notice where the tabs are, if you don�t, you will cut it on the wrong side)
If you have a sedan, I�m sorry, I have heard it is a bit difficult to do, but it�s doable, just takes longer.Step 1 � Prepping: Fold down the seats and break out your flathead screwdriver. Take out the trim piece that covers the rear strut.
Step 2 � Playing with knifes: Bust out your knife and cut the yellow stuff off.
(Knifes are fun
)Step 3 � Removing the nuts: This is where you NEED a 12mm socket. Remove the 3 12mm nuts off the top of the strut.
Step 4 � Repeat: Repeat steps 1-3 for the other side.
Step 5 � Placing the Bracket: I mounted the driver side bracket first. Angle the bracket up and put the side toward you in first. (note the flat side is pointed toward the front of the car)
Step 6 � Playing with knifes part 2: You need to cut away at the flooring to make the bracket fit. Get a GOOD knife for this. An X-Acto knife will work great for this. (you can pick one up at any hobbie shop)
Cut away like so:
Step 7 � Repeat: Repeat Steps 5 and 6 for the other side.
Step 8 � Mounting the Driver Side Bracket: Grab your 12mm socket and tighten down the 3 nuts that will hold the driver side bracket.
Step 9 � Attach the Bar to the Driver Side Bracket: Grab your two 17mm wrenches and tighten those bolts down, but make it a tid bit loose. You will bend the metal on the bar that attaches to the bolts making this tighten down, this is normal.
Step 10 � Mounting the Passenger Side Bracket: Grab your 12mm socket and tighten down the 3 nuts that will hold the passenger side bracket.
Step 11 � Mounting the Bar to the Passenger Side Bracket: Repeat Step 9 for the passenger side.
Step 12 � Playing with knifes part 3 Use the X-Acto knife and cut the trim piece that covers the strut like this: (notice where the tabs are, if you don�t, you will cut it on the wrong side)
Thread Starter
VIP Member
Joined: Apr 2006
Posts: 50
From: Flagstaff, AZ
Car Info: 05' PSM 2.5 RS Wagon w/ JDM Roof Vent
Step 13 � Repeat Playing with knifes part 3 Repeat Step 12 on other side.
When it is cut and installed it should look like this: (this is the passenger side)

Step 14 � Finishing up and observing beauty: Put the seats back up, replace whatever else you took out for the install. And then step back and observe the beauty.
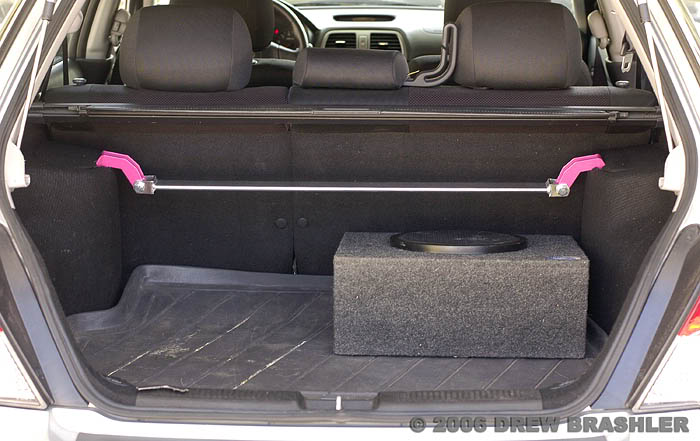
You are done! Good job.
I hope you enjoyed this DIY. If you have any questions feel free to contact me and ask.
Drew Brashler
When it is cut and installed it should look like this: (this is the passenger side)
Step 14 � Finishing up and observing beauty: Put the seats back up, replace whatever else you took out for the install. And then step back and observe the beauty.
You are done! Good job.
I hope you enjoyed this DIY. If you have any questions feel free to contact me and ask.
Drew Brashler
VIP Member
iTrader: (4)
Joined: Jul 2004
Posts: 4,143
From: Yokohama, Japan
Car Info: Ver IV STi Wagon
Gotta finish off my rears covers like that...if I can find them 
You are definately a busy suby owner, nice write ups on the installs. Probably some of the best DIY's in a while. Keep it up....need some ideas
You are definately a busy suby owner, nice write ups on the installs. Probably some of the best DIY's in a while. Keep it up....need some ideas

Registered User
Joined: Sep 2004
Posts: 49
From: Puerto Rico
Car Info: 08 ReX
Saw them on ebay. did you buy the H-brace package too or only the strutbars...
Now, I want to put'em too on my 05 Wag, But i would like the ease of quick release bolts.
Whiteline has a kit for this but I do not know if it fits any kind of strut bar o just the one's from Whiteline. I can't find info saying otherwise, maybe someone here knows
It should be a great addon as if you need cargo space, quick release and take the bar out without tools.
http://www.whiteline.com.au/docs/bulletins/095_ksbQ.pdf
Couple of people sell them, they are about $40 the set.
Thread Starter
VIP Member
Joined: Apr 2006
Posts: 50
From: Flagstaff, AZ
Car Info: 05' PSM 2.5 RS Wagon w/ JDM Roof Vent
Originally Posted by phoenyx
Saw them on ebay. did you buy the H-brace package too or only the strutbars...
Now, I want to put'em too on my 05 Wag, But i would like the ease of quick release bolts.
Whiteline has a kit for this but I do not know if it fits any kind of strut bar o just the one's from Whiteline. I can't find info saying otherwise, maybe someone here knows
It should be a great addon as if you need cargo space, quick release and take the bar out without tools.
http://www.whiteline.com.au/docs/bulletins/095_ksbQ.pdf
Couple of people sell them, they are about $40 the set.
Now, I want to put'em too on my 05 Wag, But i would like the ease of quick release bolts.
Whiteline has a kit for this but I do not know if it fits any kind of strut bar o just the one's from Whiteline. I can't find info saying otherwise, maybe someone here knows
It should be a great addon as if you need cargo space, quick release and take the bar out without tools.
http://www.whiteline.com.au/docs/bulletins/095_ksbQ.pdf
Couple of people sell them, they are about $40 the set.
Thread Starter
VIP Member
Joined: Apr 2006
Posts: 50
From: Flagstaff, AZ
Car Info: 05' PSM 2.5 RS Wagon w/ JDM Roof Vent
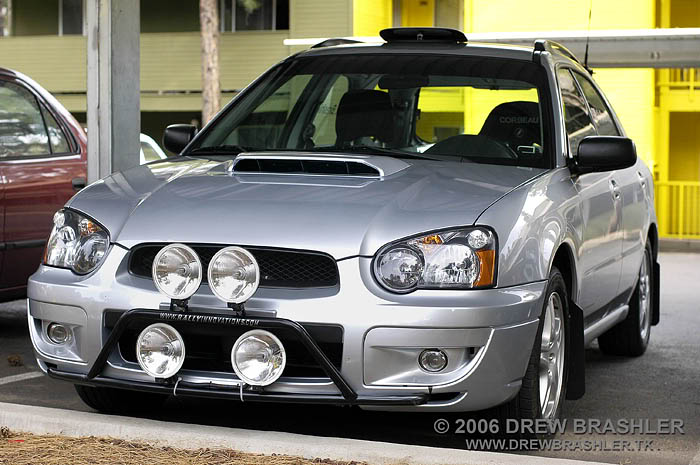
^^ They were wires from my front light bar that I used to have on my car.
I installed these the week when my old light bar was off, and I was waiting to get my new light bar on.
The old:
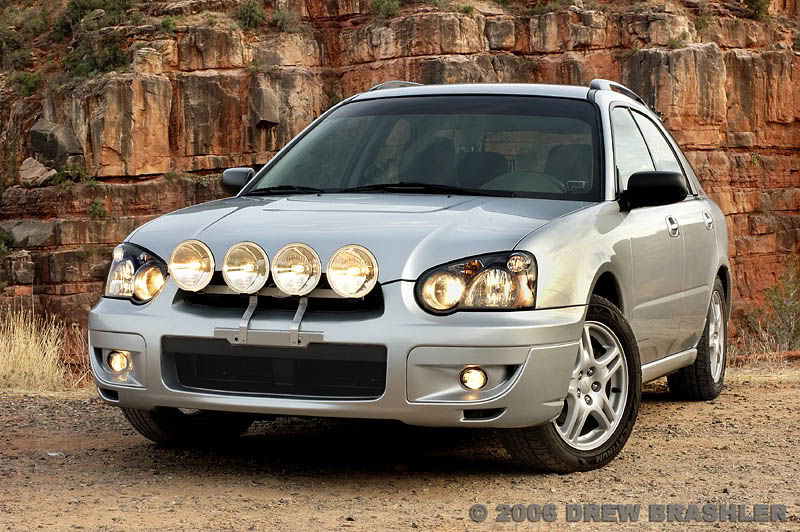
The new bar:
I installed these the week when my old light bar was off, and I was waiting to get my new light bar on.
The old:
The new bar:
Registered User
Joined: Sep 2004
Posts: 49
From: Puerto Rico
Car Info: 08 ReX
Originally Posted by Yesitsdrew5310
Nice on the quick release! I did not buy the H-brace with it. The H-brace will make more understeer. My wagon already had enough understeer, so I did not purchase it.
btw...nice driving lights..the new ones..
I see that you also put in a wrx hood w. scoop and rally mudguards...
do much rallying?
is a there a turbo along the way?
Thread Starter
VIP Member
Joined: Apr 2006
Posts: 50
From: Flagstaff, AZ
Car Info: 05' PSM 2.5 RS Wagon w/ JDM Roof Vent
Originally Posted by phoenyx
Understood, still I would like to know if someone has done the quick release on these so that I may purchase them. Gonna have to start a thread...
btw...nice driving lights..the new ones..
I see that you also put in a wrx hood w. scoop and rally mudguards...
do much rallying?
is a there a turbo along the way?
btw...nice driving lights..the new ones..
I see that you also put in a wrx hood w. scoop and rally mudguards...
do much rallying?
is a there a turbo along the way?
Registered User
iTrader: (10)
Joined: Mar 2006
Posts: 2,498
From: Dublin, California
Car Info: 09 STi, 10 Cayman S
Hmm...H brace causes understeer? How much? I have my rear cobb sway on stiffest setting, making a little oversteer actually..so many it would even it out? I heard it really gives better response though...or does it not?

Thread
Thread Starter
Forum
Replies
Last Post
rally_wrx
Hawaii Classifieds
2
Aug 1, 2010 02:29 PM
alienbreed69
Hawaii Classifieds
2
Jul 15, 2009 11:25 AM
khizzle
NorCal Classifieds
22
May 2, 2009 12:56 AM
gesundlich
Used Aftermarket Car Parts For Sale
1
Oct 28, 2006 09:56 AM
DaFastOne
NorCal Classifieds
3
Jun 2, 2005 11:53 PM