
Dash Clock Removal and Repair Tutorial

Thread Starter
VIP Member
iTrader: (24)
Joined: Sep 2012
Posts: 1,642
From: San Jose
Car Info: 2000 Legacy GT, 2000 Echo 1989 Camry All-Trac
Dash Clock Removal and Repair Tutorial
So back when I got my WRX, the clock was already not working.
Possible solutions to this were:
-Whole new clock assembly
-The resistor fix (example - it's a Forrester but they use the same type of clock)
And as I found out in my case actually neither would have done the trick. For whatever reason, botched install or servicing or whatever, the connector was cut off altogether.
(Heads up: after disassembling all the console, I was actually able to pop the clock out from the top and not under - the first time I removed, I did go the underneath route though, and in case you otherwise need to know how to get in there, this is here)
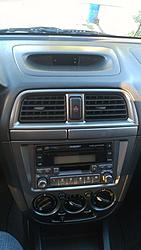
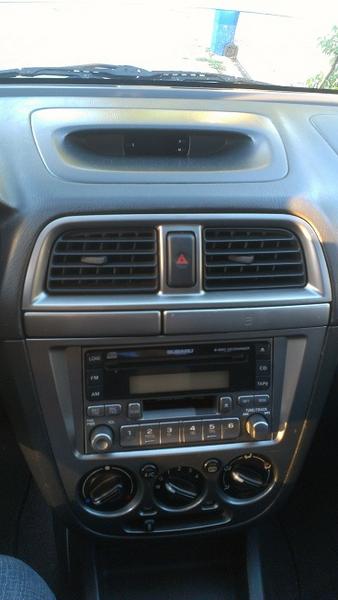
The stock console.
Pop that cup holder you shouldn't be using (real sports cars don't have em right? ). They'll be two screws on either side. They aren't exactly flush with the dash surface, so bear that in mind while unscrewing and screwing back in.
Removed screws.
Weight savings 101.

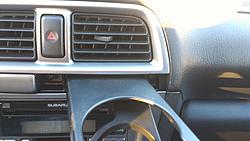
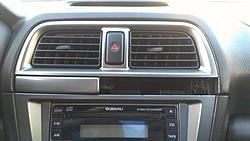
Air vents and emergency light switch next - wiggle a bit, to the right and out did it for me.
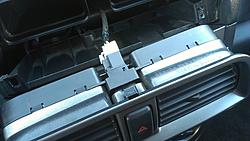
Detach the e-light switch.

Might not hurt to swab out the air vents, I did.
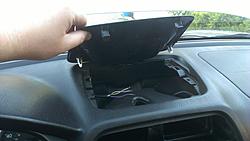
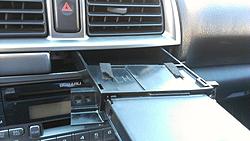
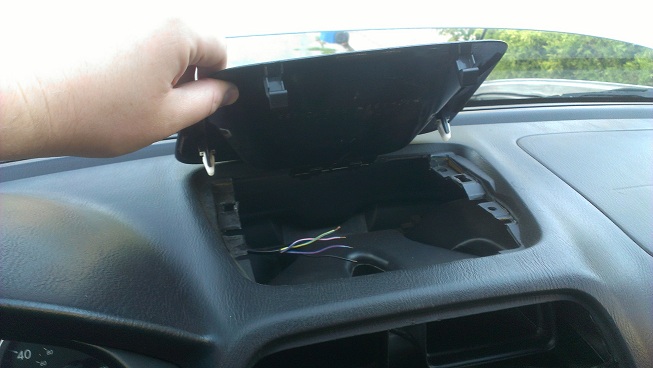
As said, I did this this time from the top, just some gently but firm prying from the top (side nearest to the windshield) with a flathead. For others it might be easier to go from underneath.
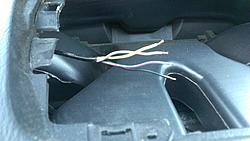
And there's my problem.
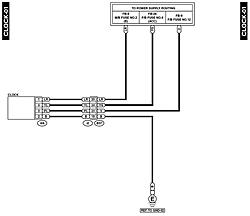
This is from the service manual - important are the colors of the wiring.
Now, if anyone knows the type of connector this is, and if it can be readily had at an electronics shop, do let me know.
Otherwise, I'm going to use a 0.100" MTA connector. I'll solder some leads from the pins on the clock, probably have to cut off the polarity guide/plug assumbly so I can reach it with my iron.
To be continued tomorrow...
Possible solutions to this were:
-Whole new clock assembly
-The resistor fix (example - it's a Forrester but they use the same type of clock)
And as I found out in my case actually neither would have done the trick. For whatever reason, botched install or servicing or whatever, the connector was cut off altogether.
(Heads up: after disassembling all the console, I was actually able to pop the clock out from the top and not under - the first time I removed, I did go the underneath route though, and in case you otherwise need to know how to get in there, this is here)
The stock console.

Pop that cup holder you shouldn't be using (real sports cars don't have em right?
). They'll be two screws on either side. They aren't exactly flush with the dash surface, so bear that in mind while unscrewing and screwing back in.
Removed screws.

Weight savings 101.

Air vents and emergency light switch next - wiggle a bit, to the right and out did it for me.

Detach the e-light switch.

Might not hurt to swab out the air vents, I did.
As said, I did this this time from the top, just some gently but firm prying from the top (side nearest to the windshield) with a flathead. For others it might be easier to go from underneath.

And there's my problem.

This is from the service manual - important are the colors of the wiring.
Now, if anyone knows the type of connector this is, and if it can be readily had at an electronics shop, do let me know.
Otherwise, I'm going to use a 0.100" MTA connector. I'll solder some leads from the pins on the clock, probably have to cut off the polarity guide/plug assumbly so I can reach it with my iron.
To be continued tomorrow...
Thread Starter
VIP Member
iTrader: (24)
Joined: Sep 2012
Posts: 1,642
From: San Jose
Car Info: 2000 Legacy GT, 2000 Echo 1989 Camry All-Trac

Thread
Thread Starter
Forum
Replies
Last Post
nukem384
How Tos / Installations
0
Mar 12, 2013 08:23 PM
dyepball1
Interior, Exterior & Lighting
3
Aug 30, 2006 06:33 PM