
how-to:06-07 STi rear diffuser install on other Imprezas

Thread Starter
Registered User
iTrader: (34)
Joined: Aug 2009
Posts: 3,759
From: Roaming streets of Vacaville
Car Info: FR-S + WRB Bugeye.
This is a how-to on installing a 06-07 STI rear diffuser onto any Impreza that is not a 06-07 STI. Install time take about 30 mins as long as you prep and have everything you need. This method is simple yet effective, and best of all cheap! Compared to buying a Cusco brace of course. Now to the list of needed parts:
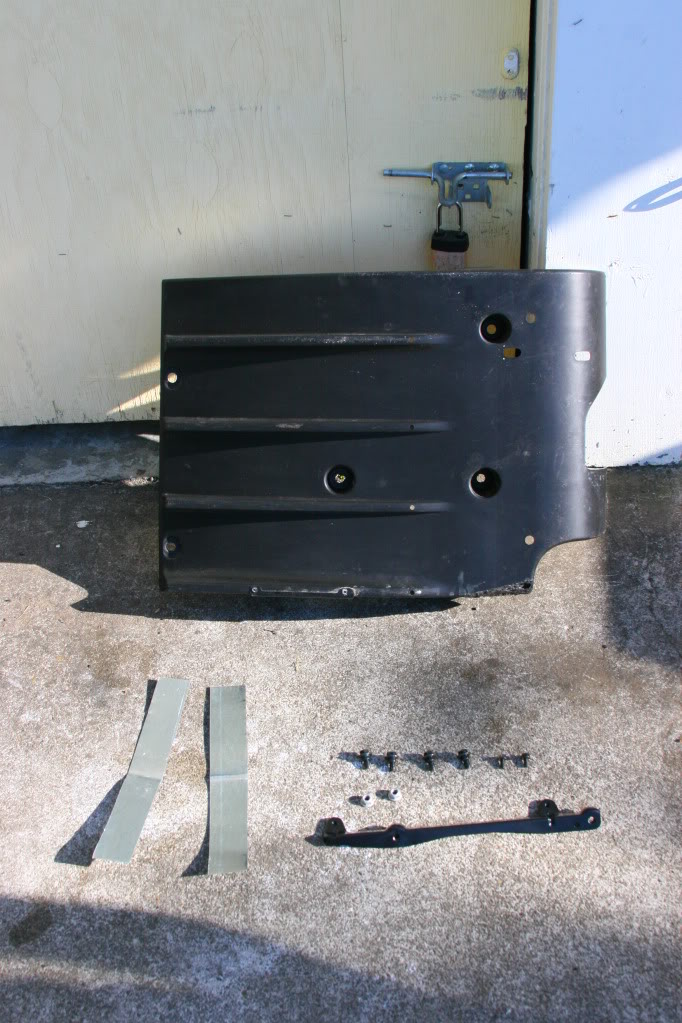
1. 06-07 STI rear diffuser
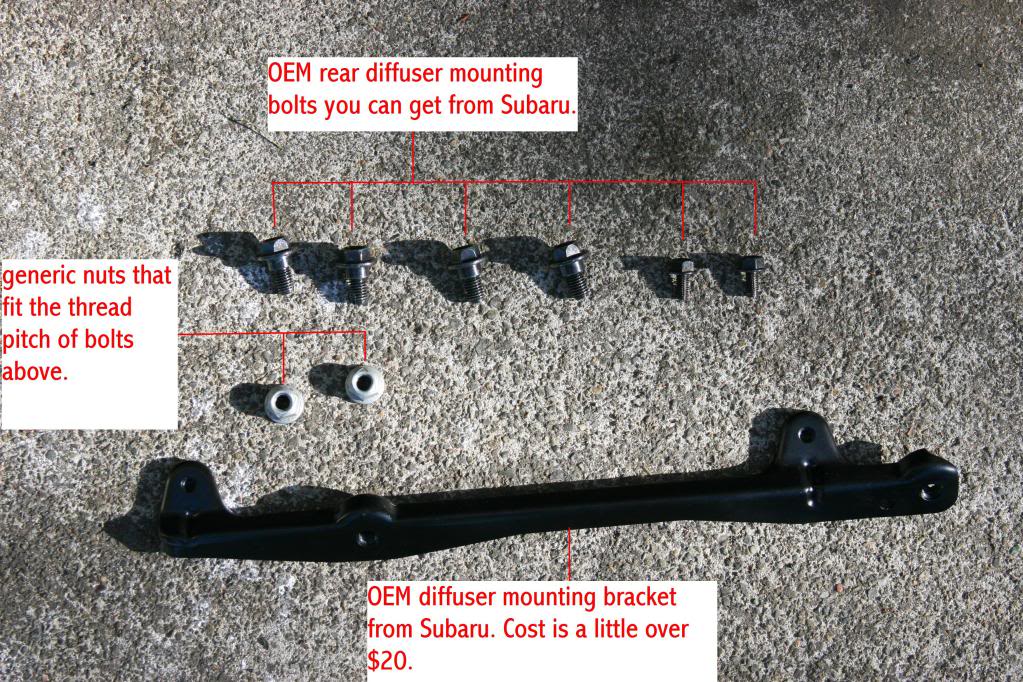
2. OEM diffuser mounting bracket
3. 2 diffuser mounting bracket bolts to secure the bracket to the body of the car. Can be OEM or ones that work.
4. 4 diffuser mounting bolts. Can be the OEM ones from Subaru or any of your choice.
5. 2 nuts that share the same thread pitch as the bolts in #4
6. 2 strips of sheet metal.
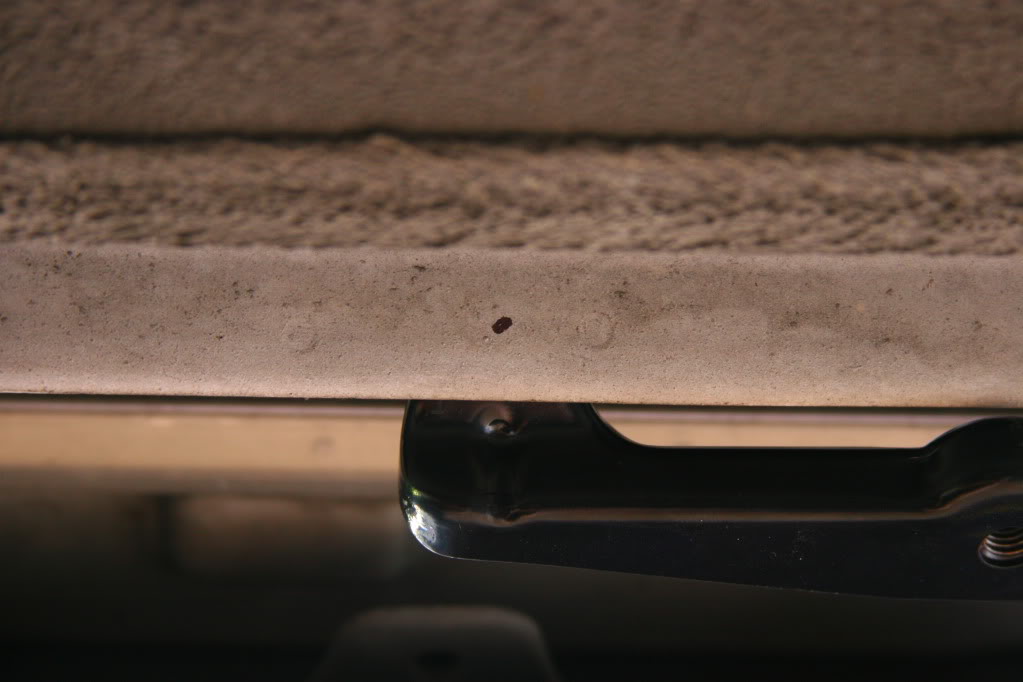
Now jack up the rear of your car so you have enough work space underneath the rear bumper. Get out you drill and find a drill bit that is closest to the size of the bolts you're using and prepare to get metal everywhere. Now get your measuring device and drill and crawl under the car on you back with your head facing the front of the car. You will see some holes aready on the metal you need to cut through,( don't think about using these, the diffuser will mount up off center big time). Get your measuring tape and measure out 1 3/4 of an inch away from the last hole on the driver's side of the car.
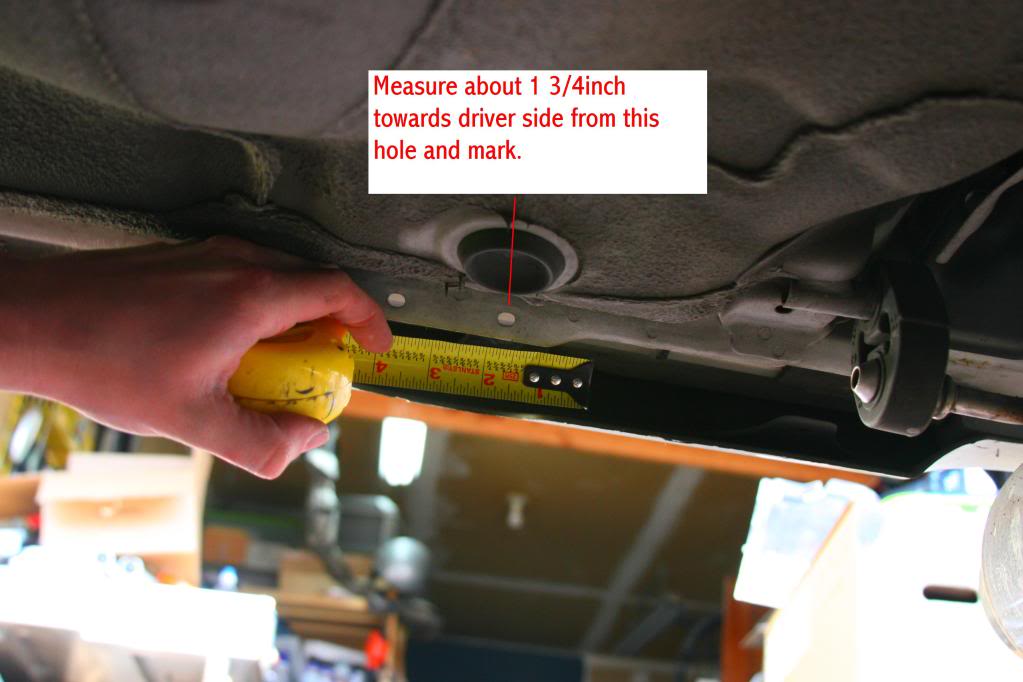
Make a mark with a sharpie or anyway you can. Now put a hole there and bore it out enough for the bracket bolts to go through.
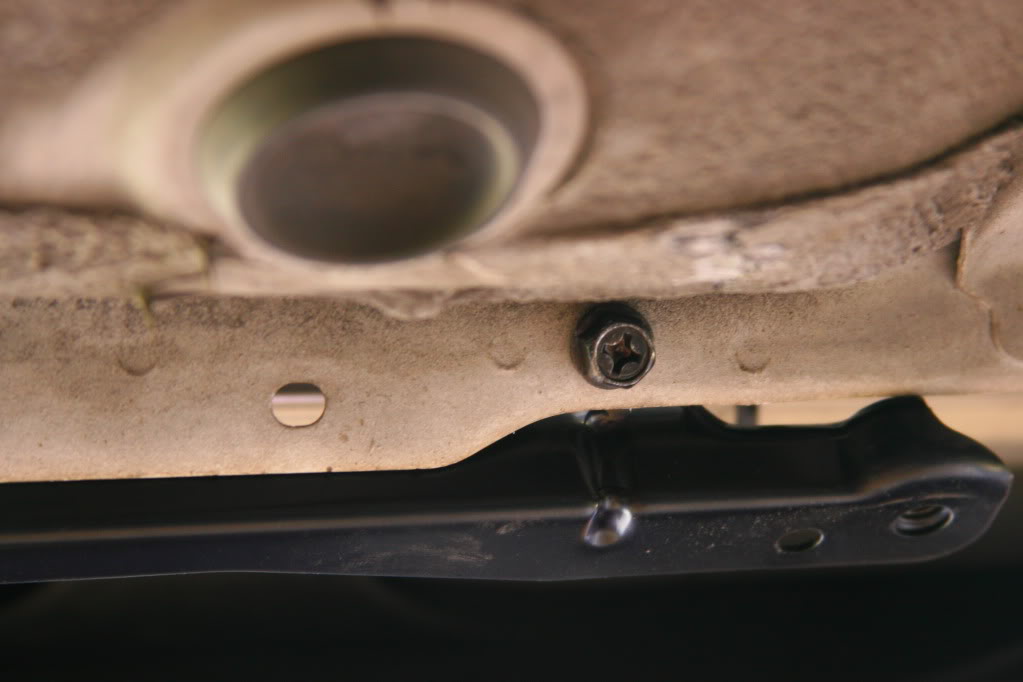
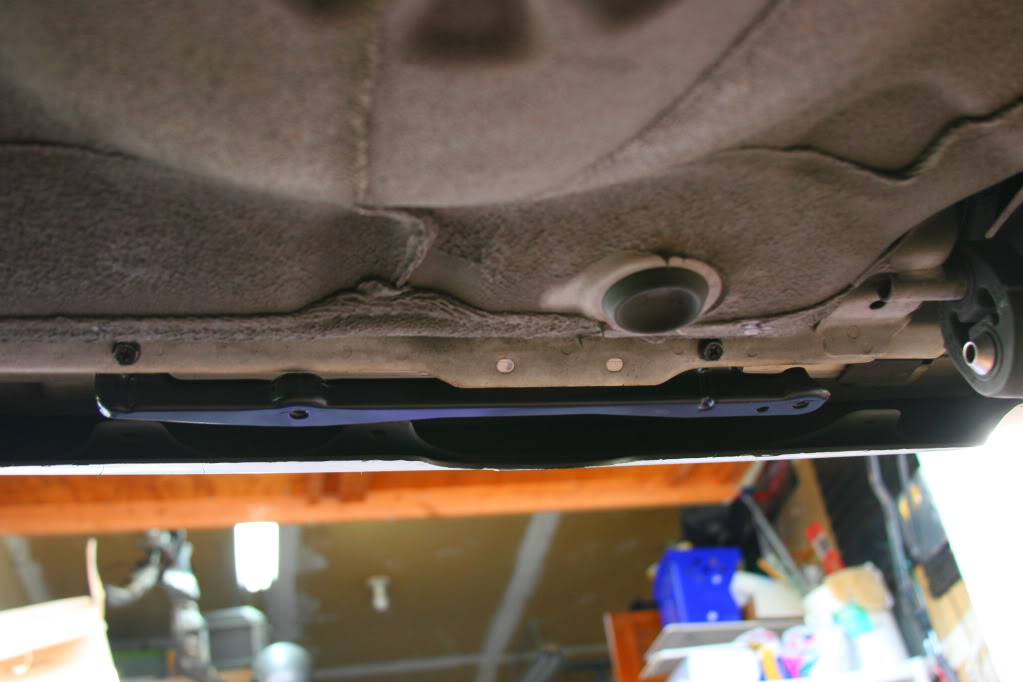
Now with that side somewhat loosely mounted, go to the other side of the mount and line up the other hole to where you want it to be.
And drill a hole. You might be off a little, so just use the drill and bore out the hole till it is right and the bolt will fit through and screw in with no problem. Once both sides are mounted, eye ball it as good as you can to make sure it's as level as you can get it. It's ok if it's off by a little, cause no one will tell. But if it's enought to notice then use the drill and bore the hole out again in the direction it needs to be fixed.
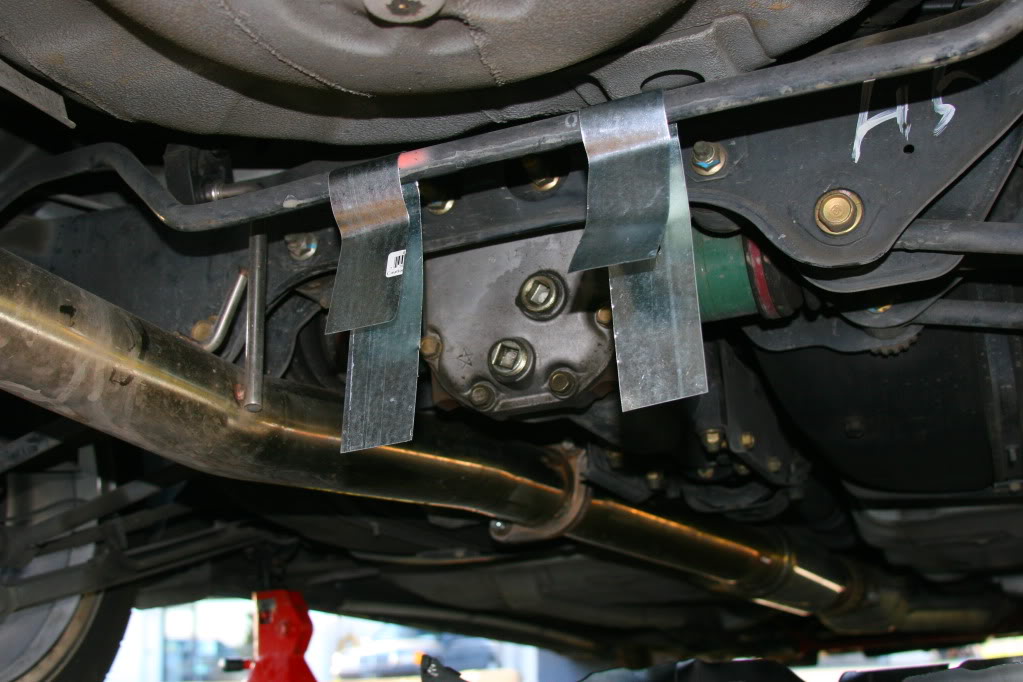
Now we can go to our strips of sheetmetal. Make sure you cut the strips to be at least inches long just incase. Now change out the drill bit to the larger of the two for the diffuser bolt size bit. And drill a hole in both the strips about two inches in, in the middle of the strip. These holes don't have to be exact or perfect. Now mount the strips onto the diffuser using 2 of the 4 bolts and the 2 nuts you have. Leave the strips flat with the longer end of them facing the front of the car. Now mount the diffuser to the bumper side bracket and let hang. Take the strips and fold them over your rear sway bar and take as much slake out as you can so the diffuser is "sucked" up to the body of the car.

Once you have it nice and tight and the bends in the metal, unmount the diffuser and leave the strips on the sway.
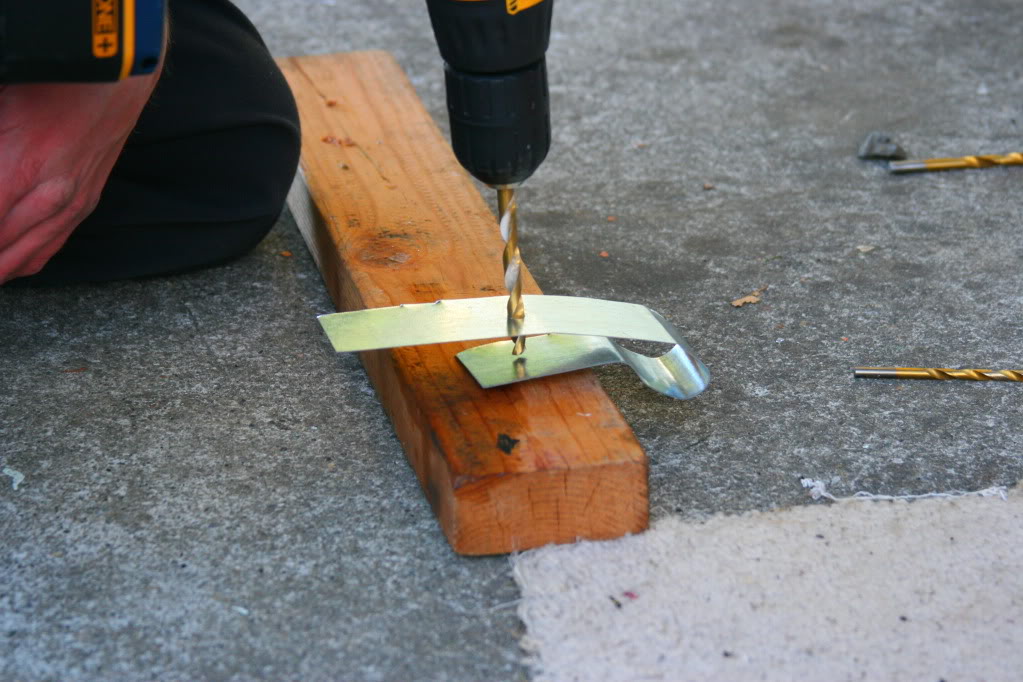
With the diffuser off you can reshape/bend the metal to make sure it's tight enough so there's no slack so it doesn't sag when mounted. Once you're satisfied with the bends you are going to drill another hole using the existing hole as a guide so that they line up when mounted.
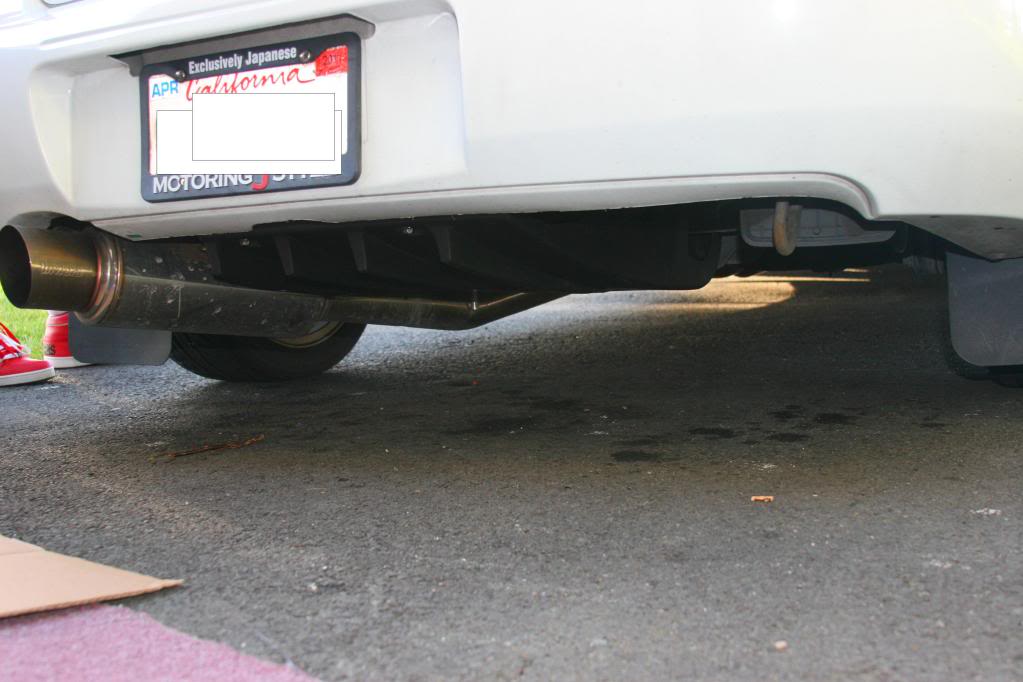
Now that you have all the holes, go ahead and mount it to the car and check it out to see if you're happy with how it sits. If it looks off take it down and bore out whatever holes need it. If it looks good, lower it off the jack stands and admire your work. One way I check to see if it's centered is compare the fins on the diffuser to where they are in relation to the license plate. There are 4 fins on the diffuser and the plate should sit just inside both the outside fins.
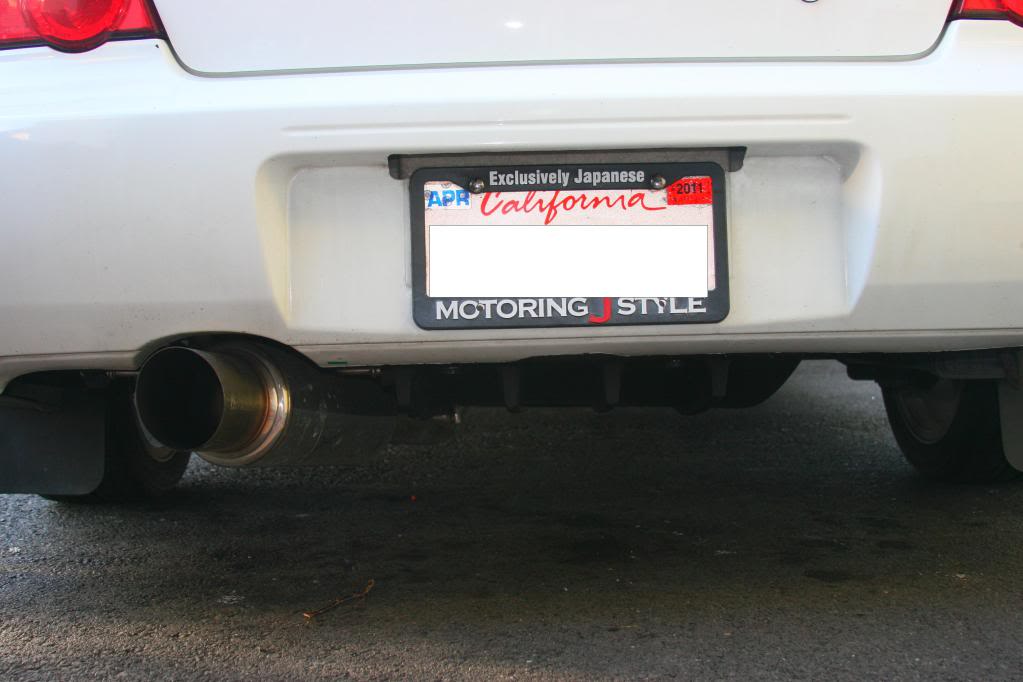
Finshed product is clean and no one can tell you used such a ghetto but effective method to mount it. Best of all it looks OEM and sits pretty much the same as the real 06-07 STI does.
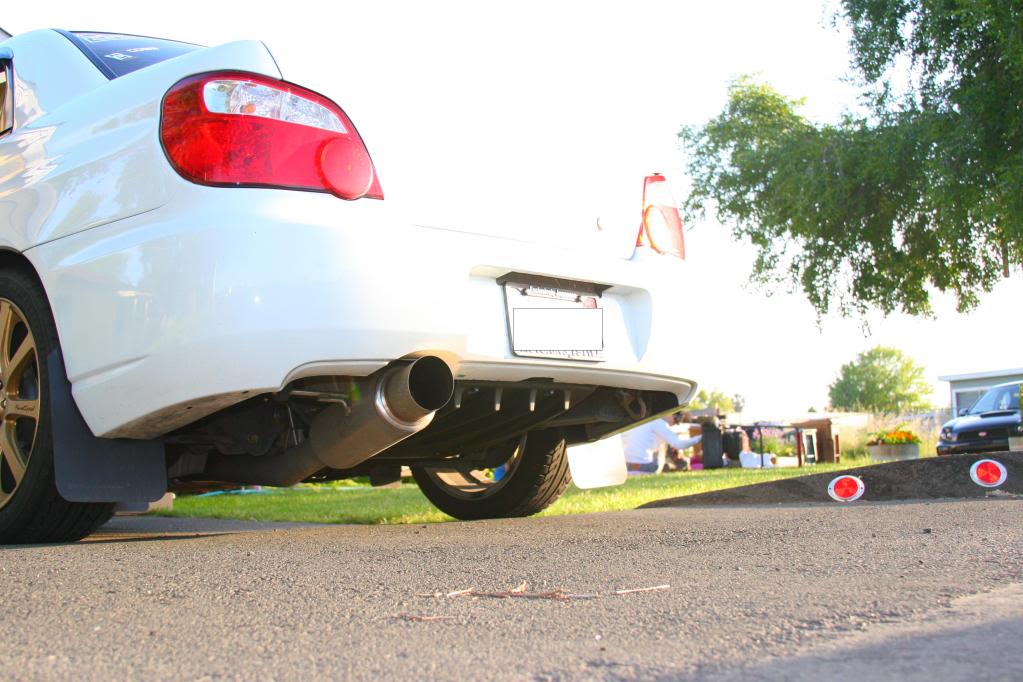
I have had my diffuser mounting in this maner and it has stood the test of time with ZERO problems. Hope some of you guys find this helpful. Thanks for looking.
1. 06-07 STI rear diffuser
2. OEM diffuser mounting bracket
3. 2 diffuser mounting bracket bolts to secure the bracket to the body of the car. Can be OEM or ones that work.
4. 4 diffuser mounting bolts. Can be the OEM ones from Subaru or any of your choice.
5. 2 nuts that share the same thread pitch as the bolts in #4
6. 2 strips of sheet metal.
Now jack up the rear of your car so you have enough work space underneath the rear bumper. Get out you drill and find a drill bit that is closest to the size of the bolts you're using and prepare to get metal everywhere. Now get your measuring device and drill and crawl under the car on you back with your head facing the front of the car. You will see some holes aready on the metal you need to cut through,( don't think about using these, the diffuser will mount up off center big time). Get your measuring tape and measure out 1 3/4 of an inch away from the last hole on the driver's side of the car.
Make a mark with a sharpie or anyway you can. Now put a hole there and bore it out enough for the bracket bolts to go through.
Now with that side somewhat loosely mounted, go to the other side of the mount and line up the other hole to where you want it to be.
And drill a hole. You might be off a little, so just use the drill and bore out the hole till it is right and the bolt will fit through and screw in with no problem. Once both sides are mounted, eye ball it as good as you can to make sure it's as level as you can get it. It's ok if it's off by a little, cause no one will tell. But if it's enought to notice then use the drill and bore the hole out again in the direction it needs to be fixed.
Now we can go to our strips of sheetmetal. Make sure you cut the strips to be at least inches long just incase. Now change out the drill bit to the larger of the two for the diffuser bolt size bit. And drill a hole in both the strips about two inches in, in the middle of the strip. These holes don't have to be exact or perfect. Now mount the strips onto the diffuser using 2 of the 4 bolts and the 2 nuts you have. Leave the strips flat with the longer end of them facing the front of the car. Now mount the diffuser to the bumper side bracket and let hang. Take the strips and fold them over your rear sway bar and take as much slake out as you can so the diffuser is "sucked" up to the body of the car.
Once you have it nice and tight and the bends in the metal, unmount the diffuser and leave the strips on the sway.
With the diffuser off you can reshape/bend the metal to make sure it's tight enough so there's no slack so it doesn't sag when mounted. Once you're satisfied with the bends you are going to drill another hole using the existing hole as a guide so that they line up when mounted.
Now that you have all the holes, go ahead and mount it to the car and check it out to see if you're happy with how it sits. If it looks off take it down and bore out whatever holes need it. If it looks good, lower it off the jack stands and admire your work. One way I check to see if it's centered is compare the fins on the diffuser to where they are in relation to the license plate. There are 4 fins on the diffuser and the plate should sit just inside both the outside fins.
Finshed product is clean and no one can tell you used such a ghetto but effective method to mount it. Best of all it looks OEM and sits pretty much the same as the real 06-07 STI does.
I have had my diffuser mounting in this maner and it has stood the test of time with ZERO problems. Hope some of you guys find this helpful. Thanks for looking.
Thread Starter
Registered User
iTrader: (34)
Joined: Aug 2009
Posts: 3,759
From: Roaming streets of Vacaville
Car Info: FR-S + WRB Bugeye.
Sry if some of the pics aren't working. Just B*tch at me about them and I'll see what I can do to fix it if it's keeping you from being able to complete the project.

Thread Starter
Registered User
iTrader: (34)
Joined: Aug 2009
Posts: 3,759
From: Roaming streets of Vacaville
Car Info: FR-S + WRB Bugeye.
nope!! no noise once so ever. I also wrapped electrical tape around the sheetmetal to help prevent scraps/squeeking. Duct tape would work fine to. But the car in the above pics is a buddy's car, and we didn't put any tape around the metal( mainly cause I forgot
 ) Put have heard no complaints from him.
Thread Starter
Registered User
iTrader: (34)
Joined: Aug 2009
Posts: 3,759
From: Roaming streets of Vacaville
Car Info: FR-S + WRB Bugeye.
Yeah I've seen a few guys do that. I was trying to avoid putting holes in the spare tire well, that way it doesn't effect the value of the car (if it happens to at all).

 hahaha

Thread
Thread Starter
Forum
Replies
Last Post
kingjames_115
NorCal Classifieds
19
Mar 22, 2014 08:20 PM
CBSubie
NorCal Classifieds
20
Feb 15, 2014 12:57 AM
mystilexzero
NorCal Classifieds
16
Aug 28, 2013 09:49 PM
khizzle
NorCal Classifieds
22
May 2, 2009 12:56 AM
Speed Element
Suspension, Handling, and Brakes
1
May 2, 2006 03:03 PM