
DIY: MY04-MY05 STi mesh fog covers

Thread Starter
VIP Member
iTrader: (39)
Joined: Jun 2005
Posts: 4,939
From: Seibukan Dojo /HI. Kendo Federation
Car Info: Seishin-teki kyōkō/Intonjutsu/Shinobi-ir
DIY: MY04-MY05 STi mesh fog covers
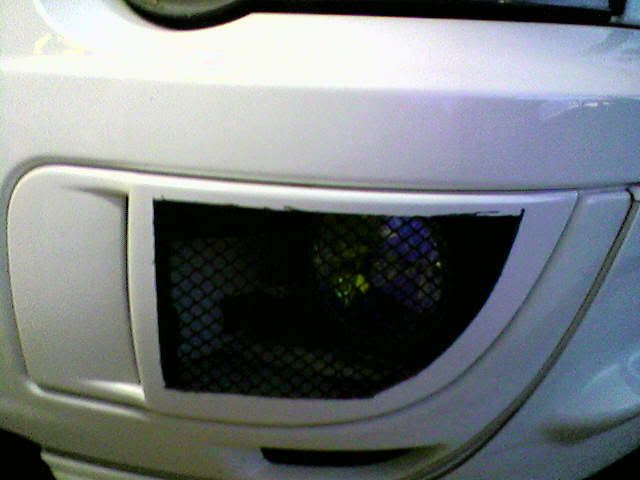
Here you go guys, just finally done the STi mesh foglight covers that are only found for the bugeye's.. Jus now gotta touch up spray on the STi insignia..Any comments or suggestions are more than welcome to better this project.
thanks
walter
Bugeye STi mesh covers

Peanut Eye STi mesh covers


thanks
walter
Bugeye STi mesh covers
Peanut Eye STi mesh covers
Thread Starter
VIP Member
iTrader: (39)
Joined: Jun 2005
Posts: 4,939
From: Seibukan Dojo /HI. Kendo Federation
Car Info: Seishin-teki kyōkō/Intonjutsu/Shinobi-ir
Hey randy,
I used a dremmel with cutoff wheel to cut out the portion and then used a sander to smooth off the edges..
I was thinking about it but wanted to Spray the STi logo white. Ill photoshop it and see how it looks like then proceed from there. Thanks Norris and Randy for the comments.
I used a dremmel with cutoff wheel to cut out the portion and then used a sander to smooth off the edges..
Originally Posted by Tiare
I would paint the grill white... just for camouflage!
Registered User
iTrader: (7)
Joined: May 2005
Posts: 1,531
From: battling between the mountain munstas! Kalihi
Car Info: GC8 Type-R, BH5 Wangon Gen3 and 05 SV650 Naked!
Here you go guys, just finally done the STi mesh foglight covers that are only found for the bugeye's.. Jus now gotta touch up spray on the STi insignia..Any comments or suggestions are more than welcome to better this project.
thanks
walter
Bugeye STi mesh covers
Peanut Eye STi mesh covers
thanks
walter
Bugeye STi mesh covers
Peanut Eye STi mesh covers
Thread Starter
VIP Member
iTrader: (39)
Joined: Jun 2005
Posts: 4,939
From: Seibukan Dojo /HI. Kendo Federation
Car Info: Seishin-teki kyōkō/Intonjutsu/Shinobi-ir
^^^
Hey Ryan,
Yeah, I noticed the crooked lines and thought i cut crooked but it was just the pre-cut lines made with a Permanent marker. But definetly will touch up on the rest and find a lay over border to cover the outline portion to make it look like a professional made this..
thanks guys,
walter
Hey Ryan,
Yeah, I noticed the crooked lines and thought i cut crooked but it was just the pre-cut lines made with a Permanent marker. But definetly will touch up on the rest and find a lay over border to cover the outline portion to make it look like a professional made this..
thanks guys,
walter

Registered User
iTrader: (33)
Joined: Nov 2002
Posts: 10,455
From: Boostin' troubles away - 4EAT Memories 12.87@103.2
Car Info: 51E LHD V7 STI (2.0)
as specified in the other thread, I would have used a tighter mesh and redo the curved area. Looks good!
How are you securing the mesh to the cover?
How are you securing the mesh to the cover?
Thread Starter
VIP Member
iTrader: (39)
Joined: Jun 2005
Posts: 4,939
From: Seibukan Dojo /HI. Kendo Federation
Car Info: Seishin-teki kyōkō/Intonjutsu/Shinobi-ir
I just used this black silicone paste thingy. Jus took a break from refining the curved area alittle more.. Melting plastic FTW!!
Thread Starter
VIP Member
iTrader: (39)
Joined: Jun 2005
Posts: 4,939
From: Seibukan Dojo /HI. Kendo Federation
Car Info: Seishin-teki kyōkō/Intonjutsu/Shinobi-ir
VIP Member
iTrader: (7)
Joined: May 2003
Posts: 4,990
From: on da compz...readin' yo blogz
Car Info: "the loud one"
^^^
Hey Ryan,
Yeah, I noticed the crooked lines and thought i cut crooked but it was just the pre-cut lines made with a Permanent marker. But definetly will touch up on the rest and find a lay over border to cover the outline portion to make it look like a professional made this..
thanks guys,
walter
Hey Ryan,
Yeah, I noticed the crooked lines and thought i cut crooked but it was just the pre-cut lines made with a Permanent marker. But definetly will touch up on the rest and find a lay over border to cover the outline portion to make it look like a professional made this..
thanks guys,
walter

