The Reverend's shaggin wagon

 03-22-2019, 02:40 PM
#347
Call me Pebbles
Thread Starter
iTrader: (11)
Join Date: Nov 2011
Location: I do all my own physics.
Posts: 5,908
Car Info: Moist
Big updates completed just in time for autocross season. Didn't go complete ham as expected BUT the STi driveline and suspension conversion is complete! Got the 5x114 swap all buttoned and bolted so the car is now effectively a bugeye STi wagon!
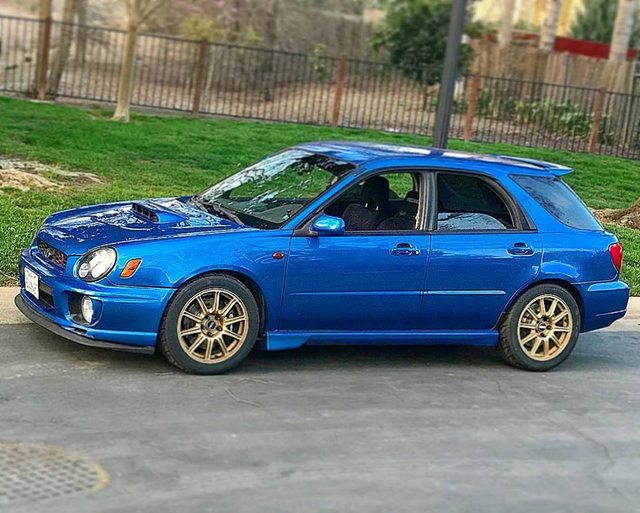
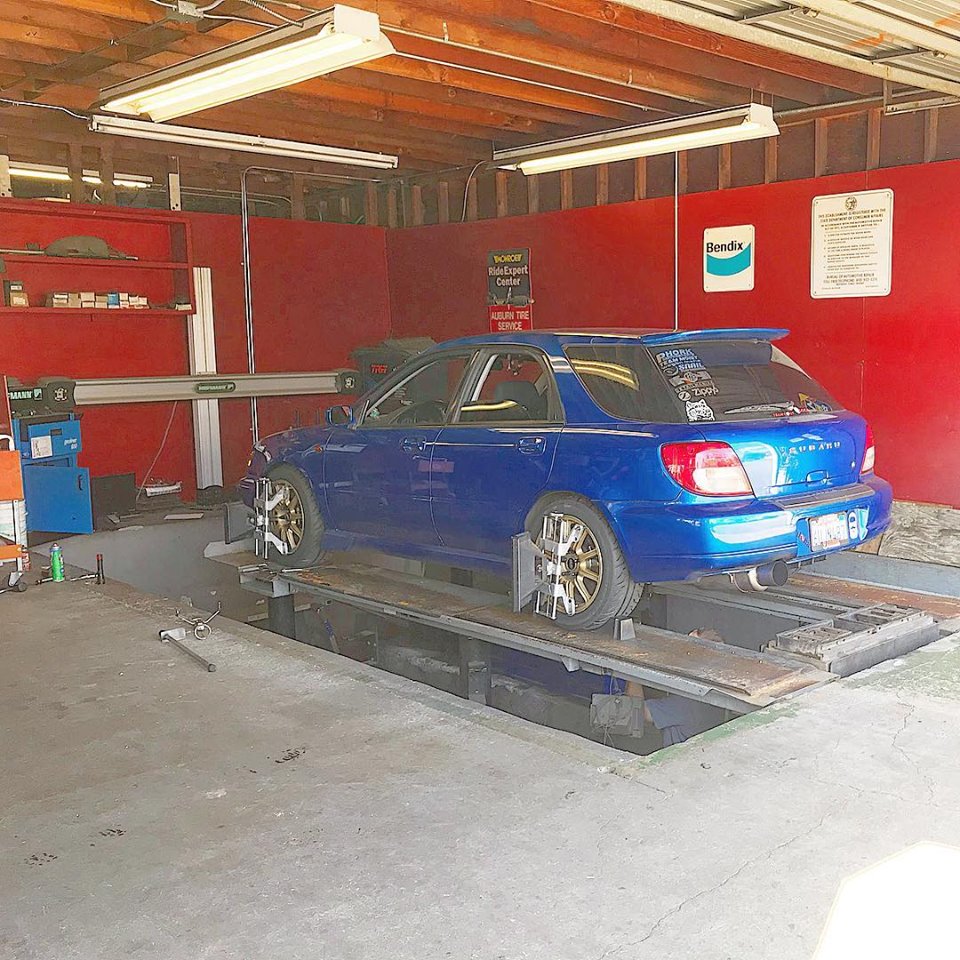
Had some equipment issues with getting the alignment perfectly dialed (losing the rear camber bolts and need to investigate why I only have limited front camber), but got it good enough to rock for autocross this weekend. Rolling on goldies for now while I still sort the flare stuff.
Had some equipment issues with getting the alignment perfectly dialed (losing the rear camber bolts and need to investigate why I only have limited front camber), but got it good enough to rock for autocross this weekend. Rolling on goldies for now while I still sort the flare stuff.
 08-22-2019, 01:51 PM
#349
Call me Pebbles
Thread Starter
iTrader: (11)
Join Date: Nov 2011
Location: I do all my own physics.
Posts: 5,908
Car Info: Moist
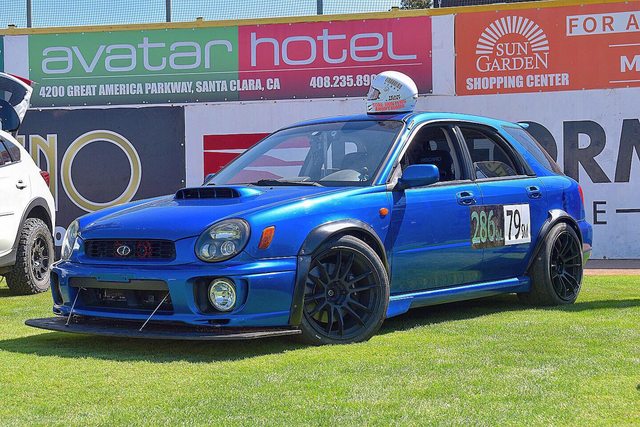
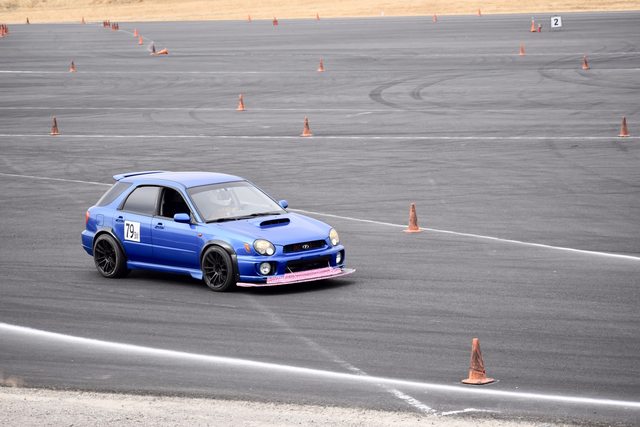
Here a few quick snaps from autocross back in March:
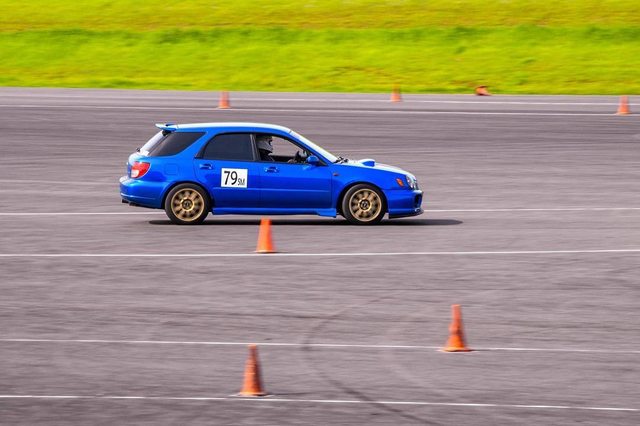
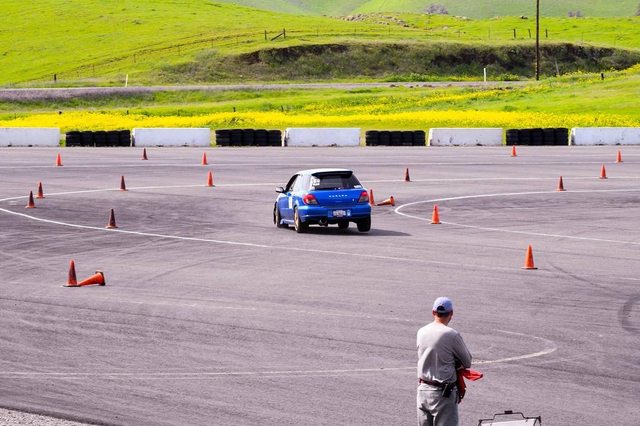
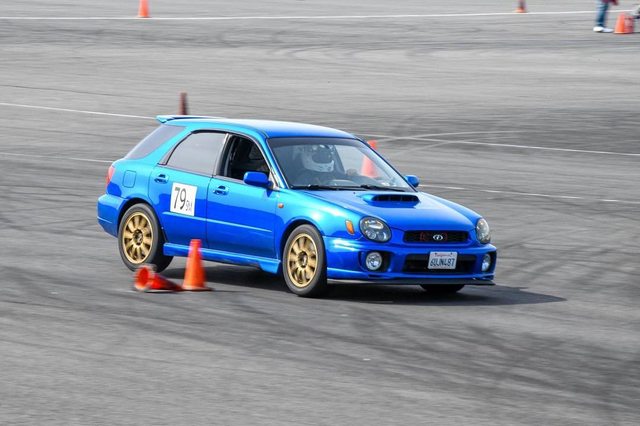
As you can tell from the last two pictures, a softer rear bar is needed so the 27mm bar has been replaced with a 24mm bar.
Life has been real interesting in the last few months since then and haven't had time, until recently, to do anything with the car. With a little moistling on the way (due February 2020), the car is probably going be taken as far as it ever will be and just driven from here out, but who knows what the future has in store. I was able to take it out for the last Round of autocross last weekend with some fun additions and this thing absolutely rips!
Added some little updates like the addition of a Fumoto oil drain valve and freshened up the stoppers with Power Stop's "Track Day" pad and rotor kit. The Power Stops did AMAZING at autocross. I would even argue they performed better than the Carbotechs. I had almost no fade (and God knows I was hammering the brakes) and bite was consistent and linear. Best of all, rotors and pads for both axles was cheaper than JUST the Carbotech pads. I am going to be rocking these Power Stops for a while.
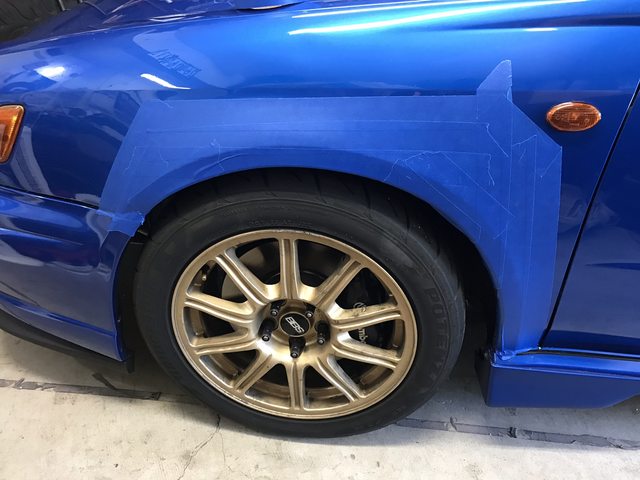
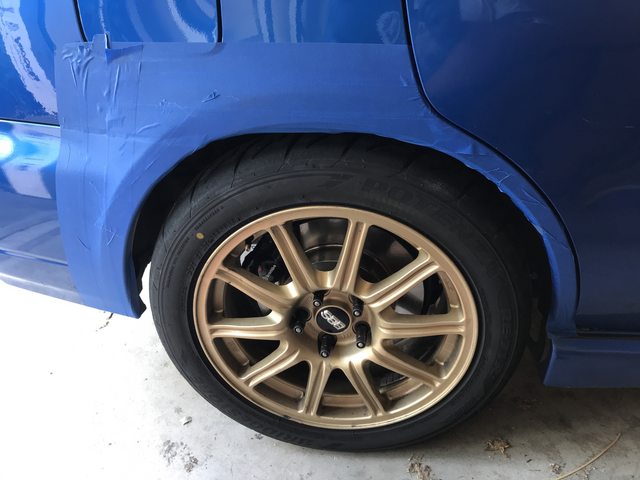
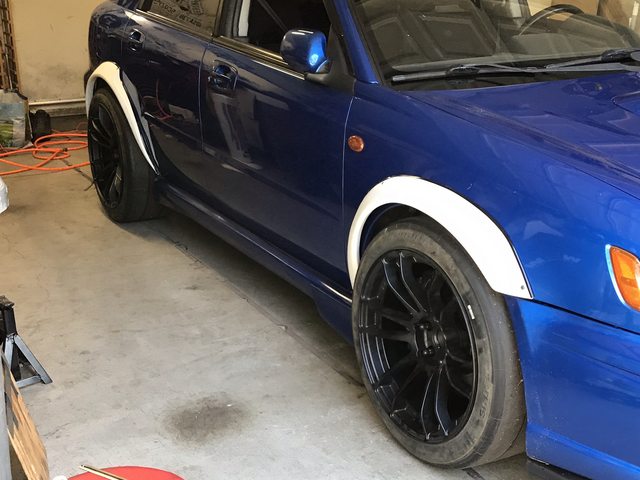
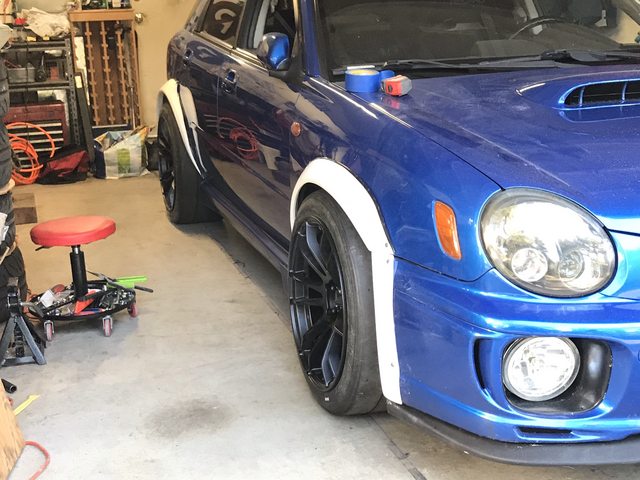
But the real fun was had by the other additions. Got set of brand new 275/35 C91s on slightly used 18x10.5 +22 57Xtremes from Travis who made me a deal I couldn't pass up. This gave me an excuse to finally get the Subyflares installed. Behold the following—
Tape off area to make marks and such, and to protect the paint:
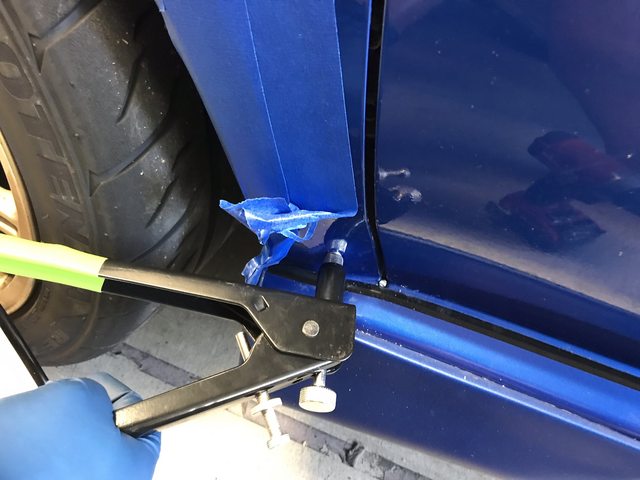
The second last point-of-no-return, drilling holes for the rivets:
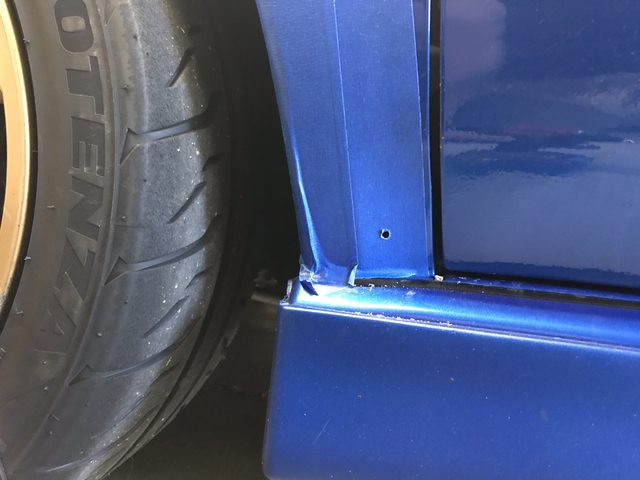
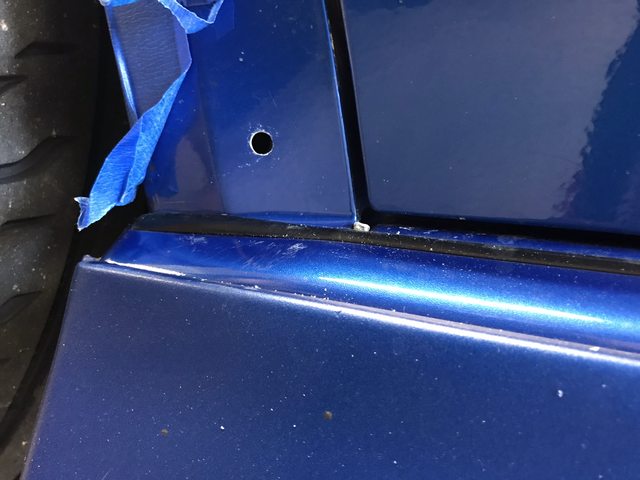
Paint the holes to protect from rusting:

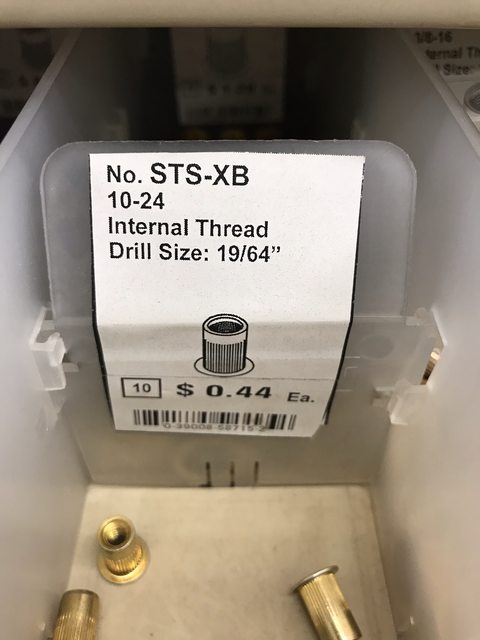
I used internal thread rivets to make installation easy and, more importantly, make the flares removable:

Do for all mounting points:
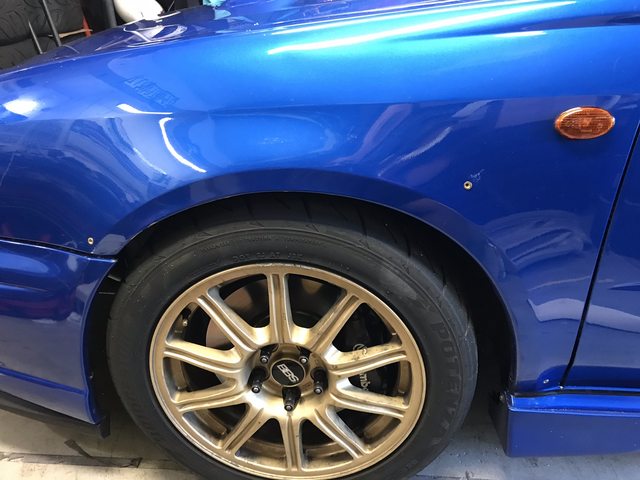
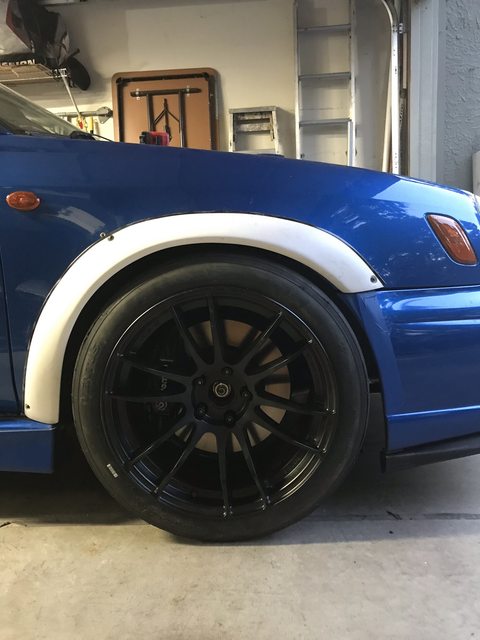
I added some rubber trim to protect the paint and clean up the look. Then, mount:
Move to the rear, rinse, and repeat:
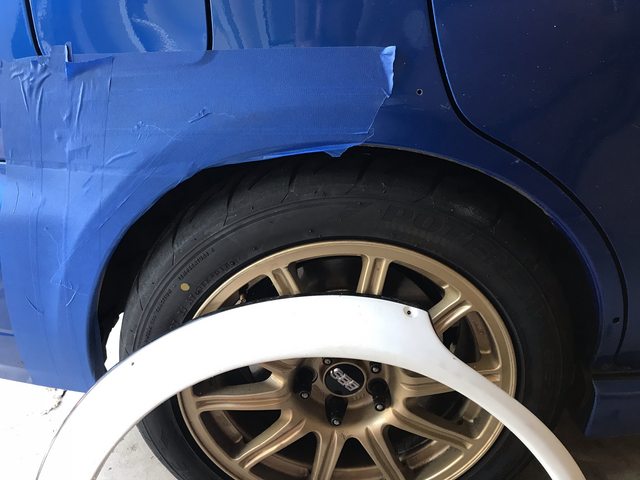
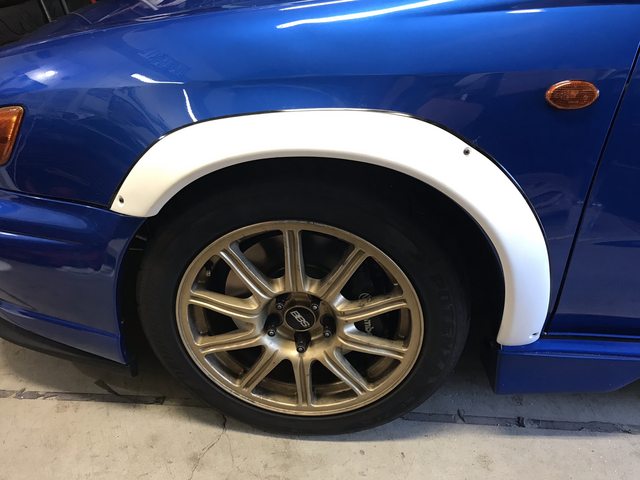
Intermediate step. Install isn’t perfect and will require much... MUCH... more adjusting, trimming, fitting, cussing, etc.:
Now, the truly painful part—cutting:
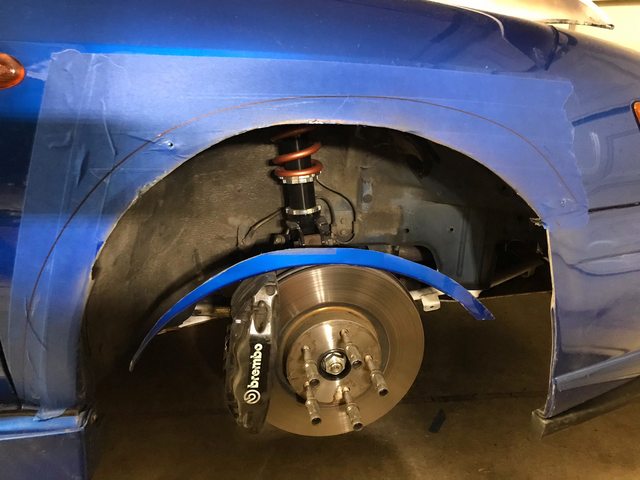
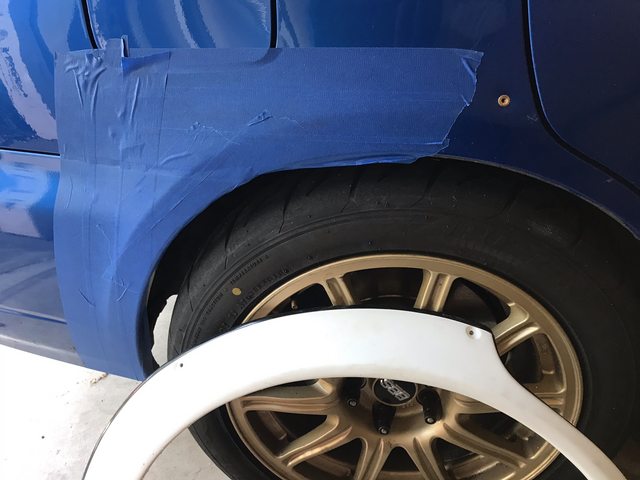
Once everything was cut, clearance, and trimmed to my liking, and pulling the flare forward (ignore the old rivet hanging out), fit front valence:
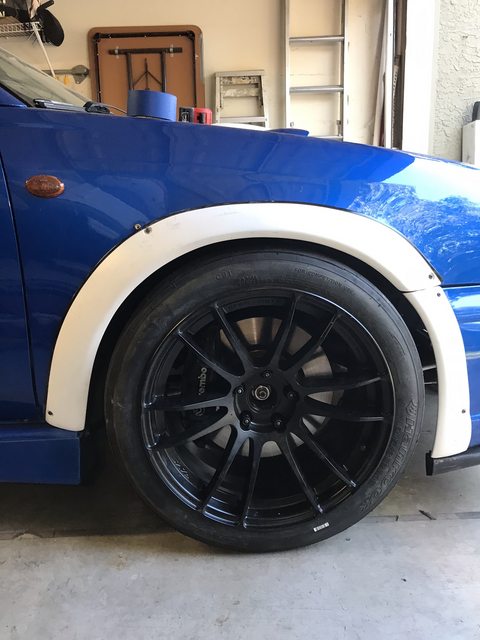
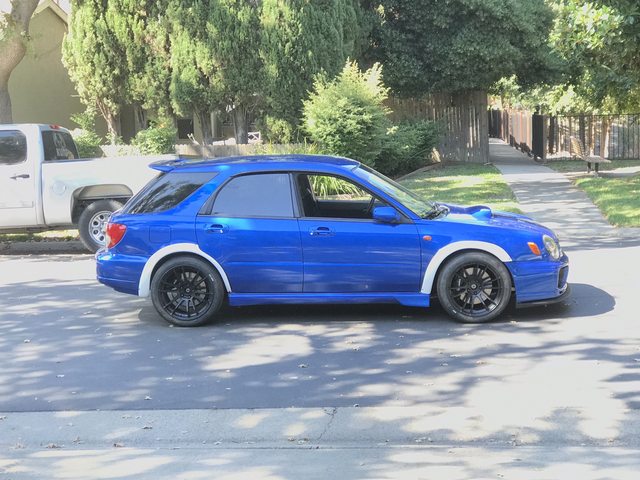
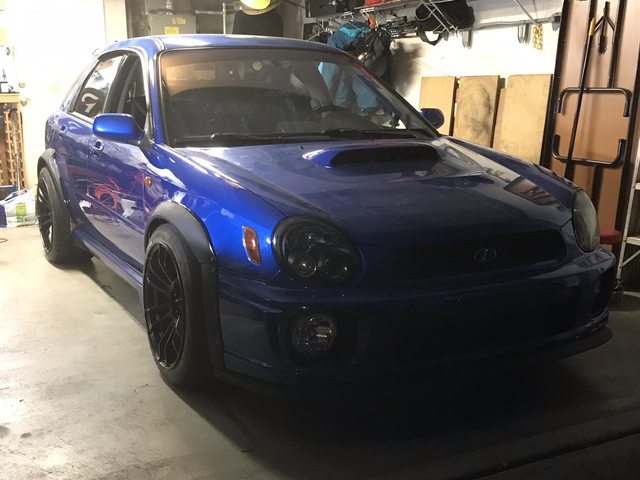
Had autocross the next morning and still undecided on color, I just hit it with a few layers of black primer:
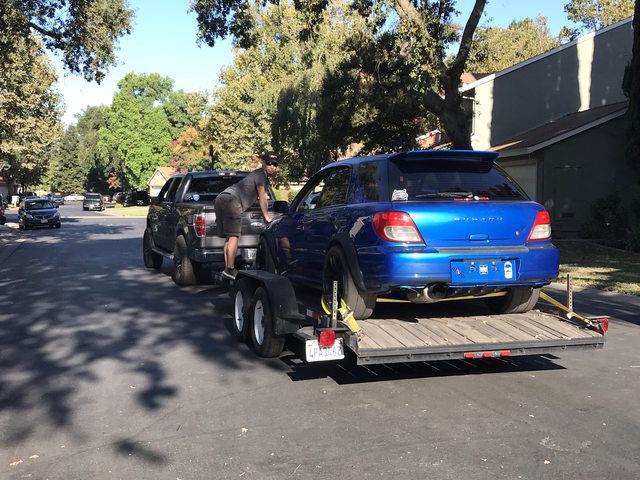
Not really wanting to drive the 90 miles to THill on slicks, on to the trailer he goes (gender-fluid import model came with the trailer):
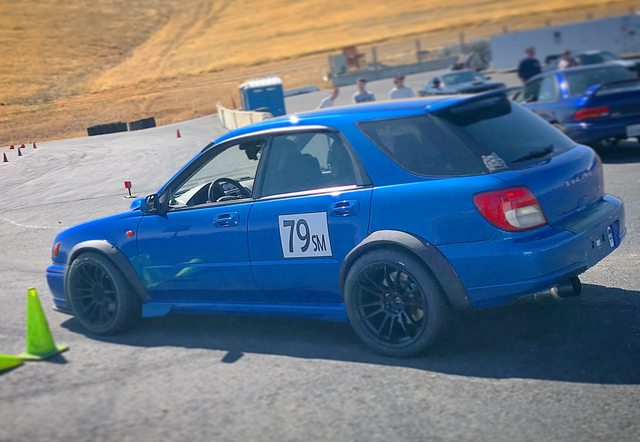
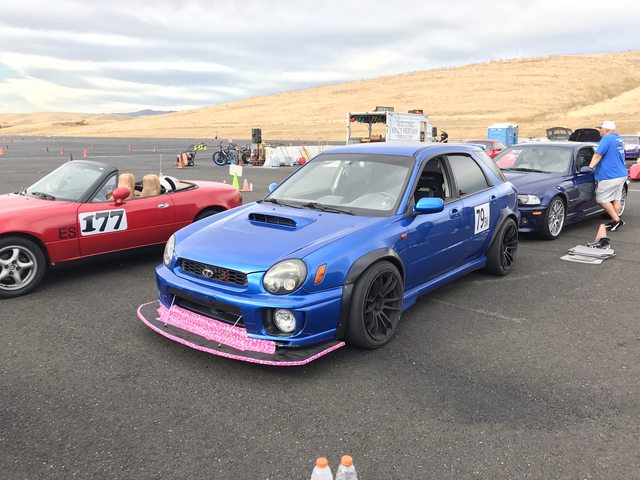
Toby ready for launch at autocross looking all serious and mean:
Got some good video at autocross to put together that I will post later.
Final thoughts on the Subyflares: It is *almost* blasphemous to call these “Karltons”. Yes, they are based on Karlton molds, but these are fiberglass and not ABS which makes working with them a bit more challenging. These are almost “knock-off” quality when compared to the original Karltons when it comes to fit and finish. In the end, they work. They’re kinda close, but they take a lot of work. A lot. Not just some minor trimming and massaging, but a lot of trimming. Granted, I went into this a bit blind, but for the price and riding the coattails of the Karlton’s reputation, a little additional time and QA/QC could go a long way into justifying the cost. If I had to do it all over, I would go with ABW. /soapbox
Back to our regularly schedule programming: Toby flies on slicks! So much grip! The super wide meats make turn-in a bit vague requiring much more input and response a bit slower. The trade off, however, HOLY ****. I was able to carry so much more speed than anticipated through sections that I could (should) have grabbed third instead of riding the limiter. Still playing with pressures to see where the sweet spot is, but cars I am usually three to four seconds behind on minute(ish)-long courses were only ahead of me by within one to two seconds or less.
Plans for the future include trimming and welding the rear fenders to allow for lowering the rear and adjusting weight distribution, painting the flares (really digging the black and blue look so I may go with a flat black finish), repairing the front lip (trailer ramp issues already addressed), and more seat time.
As you can tell from the last two pictures, a softer rear bar is needed so the 27mm bar has been replaced with a 24mm bar.
Life has been real interesting in the last few months since then and haven't had time, until recently, to do anything with the car. With a little moistling on the way (due February 2020), the car is probably going be taken as far as it ever will be and just driven from here out, but who knows what the future has in store. I was able to take it out for the last Round of autocross last weekend with some fun additions and this thing absolutely rips!
Added some little updates like the addition of a Fumoto oil drain valve and freshened up the stoppers with Power Stop's "Track Day" pad and rotor kit. The Power Stops did AMAZING at autocross. I would even argue they performed better than the Carbotechs. I had almost no fade (and God knows I was hammering the brakes) and bite was consistent and linear. Best of all, rotors and pads for both axles was cheaper than JUST the Carbotech pads. I am going to be rocking these Power Stops for a while.
But the real fun was had by the other additions. Got set of brand new 275/35 C91s on slightly used 18x10.5 +22 57Xtremes from Travis who made me a deal I couldn't pass up. This gave me an excuse to finally get the Subyflares installed. Behold the following—
Tape off area to make marks and such, and to protect the paint:
The second last point-of-no-return, drilling holes for the rivets:
Paint the holes to protect from rusting:
I used internal thread rivets to make installation easy and, more importantly, make the flares removable:
Do for all mounting points:
I added some rubber trim to protect the paint and clean up the look. Then, mount:
Move to the rear, rinse, and repeat:
Intermediate step. Install isn’t perfect and will require much... MUCH... more adjusting, trimming, fitting, cussing, etc.:
Now, the truly painful part—cutting:
Once everything was cut, clearance, and trimmed to my liking, and pulling the flare forward (ignore the old rivet hanging out), fit front valence:
Had autocross the next morning and still undecided on color, I just hit it with a few layers of black primer:
Not really wanting to drive the 90 miles to THill on slicks, on to the trailer he goes (gender-fluid import model came with the trailer):
Toby ready for launch at autocross looking all serious and mean:
Got some good video at autocross to put together that I will post later.
Final thoughts on the Subyflares: It is *almost* blasphemous to call these “Karltons”. Yes, they are based on Karlton molds, but these are fiberglass and not ABS which makes working with them a bit more challenging. These are almost “knock-off” quality when compared to the original Karltons when it comes to fit and finish. In the end, they work. They’re kinda close, but they take a lot of work. A lot. Not just some minor trimming and massaging, but a lot of trimming. Granted, I went into this a bit blind, but for the price and riding the coattails of the Karlton’s reputation, a little additional time and QA/QC could go a long way into justifying the cost. If I had to do it all over, I would go with ABW. /soapbox
Back to our regularly schedule programming: Toby flies on slicks! So much grip! The super wide meats make turn-in a bit vague requiring much more input and response a bit slower. The trade off, however, HOLY ****. I was able to carry so much more speed than anticipated through sections that I could (should) have grabbed third instead of riding the limiter. Still playing with pressures to see where the sweet spot is, but cars I am usually three to four seconds behind on minute(ish)-long courses were only ahead of me by within one to two seconds or less.
Plans for the future include trimming and welding the rear fenders to allow for lowering the rear and adjusting weight distribution, painting the flares (really digging the black and blue look so I may go with a flat black finish), repairing the front lip (trailer ramp issues already addressed), and more seat time.
Last edited by Rev. Rob Large; 08-22-2019 at 01:55 PM.
09-23-2019, 12:02 PM
#354
Call me Pebbles
Thread Starter
iTrader: (11)
Join Date: Nov 2011
Location: I do all my own physics.
Posts: 5,908
Car Info: Moist
This was a fun "little" project I knocked out in about a week with less $100 spent in materials. For a first run, I'm super happy with how it turned out.
Hardware store (like Home Depot, but I support the local mom-and-pop Supply Hardware):
(1) 4' x 8' 19/32 plywood cut down to 41" x 68" ~ $30
(2) 6" x 6" angle brackets (typically used for shelving or fences) ~ $5 each
(2) 12" tie straps ~ $5 each
(2) 1/8" hitch pins ~ $1 each
(2) 1/4"-20 threadserts ~ $1.50 each (add $20 for a threaded riveter if you don't have one)
Longer hardware for splitter rods and bolts for chassis mounts ~ $20
(2) cans of your favorite spray paint ~ $5 each
Amazon:
(2) 13" splitter rods (amazon) ~ $20 shipped
Walmart:
(2) Unicorn duct tape ~ $5 each
Here is the rough schematic I started with using quick measurements and maxing out allowable specs per SCCA SM-class rules:
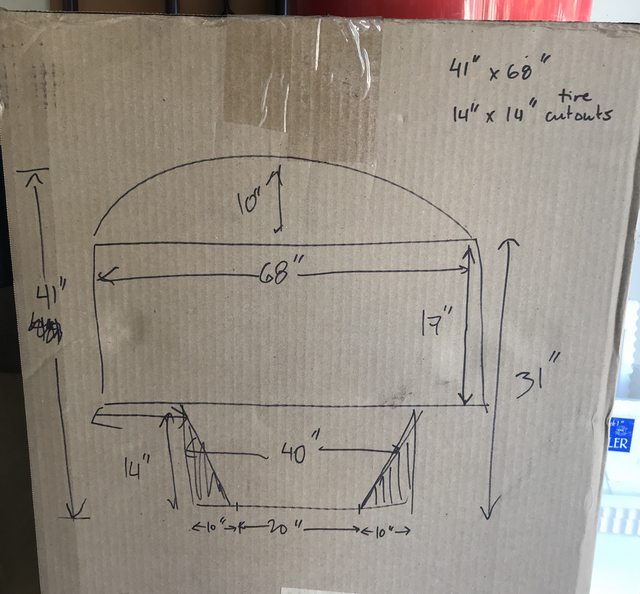
I didn't get a picture of it, but the trick part came trying to cut the front curve of the splitter. After cuting the tire cutouts I had a big T-shaped piece. I used a jack to hold up the plywood to the underside of the car and "finessed" it into place making sure it straight and square with the centerline of the car. With the bumper cover still on, I used a plum bob and giant T-square to trace out the bodyline and added 6" away while staying within the width of the car as allowed by the rules. I then cut that line and held it back up under the car with a jack to double check I was within the 6" rule:
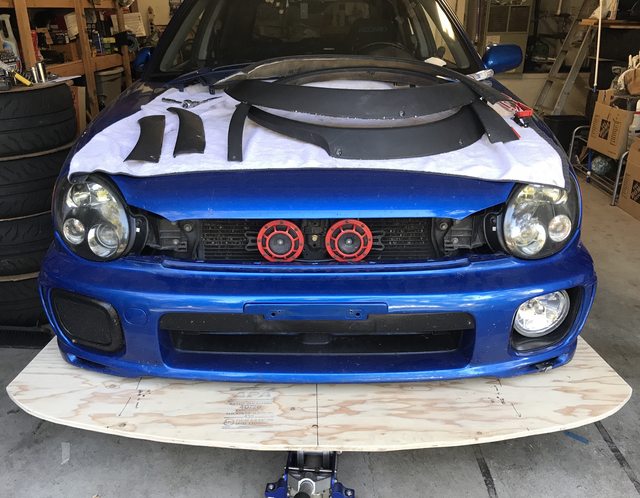
Taking the bumper cover for ease of access, I then aligned and placed the chassis mounts (6" x 6" brackets on top bolted through the plywood and tied underneath with the 12" straps for over-engineering) which were bolted to the front frame rails (1/4"-20 threadserts into the frame rail near the radiator support) and added the front support rods.
[img]https://i.imgur.com/YJwFBKXl.jpg[limg]
The bumper cover has convenient holes that allow access to the underside of the front bumper beam. I mount the U-brackets for the support rods and replaced the hardware with the hitch pin to make removal easy*:
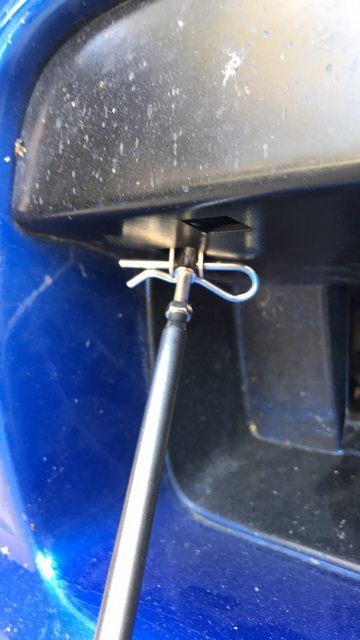
*Note about this: Taking the front bumper cover on and off becomes a little challenging trying to get it over the U-brackets. I actually bent one of them in a rush to get the cover on so I might be taking a Dremel to this area to make getting the cover over the U-bracket easier.
Everything bolted up, I had to do the highly-technical and scientific "Is it legit?" test:
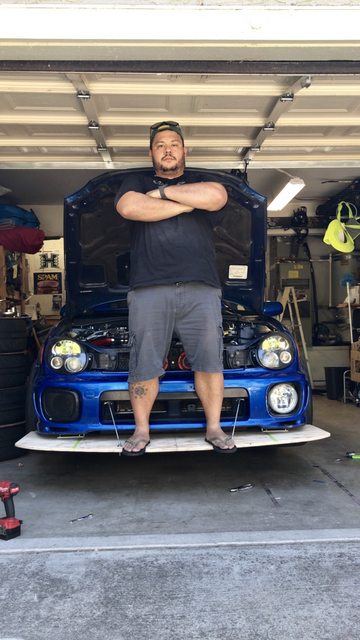
At worst, there was only a few millimeters of play (difference in diameter between the holes and the hitch pins) with my fat *** standing on it, but feels solid otherwise.
Last step, obviously, hit with as much paint as you want--go crazy with it. And here is how mine turned out:
I'm very happy with how it turned out. A few notes for some future adjustments or changes:
For "street cred", stop here.
For practical application, keep going.
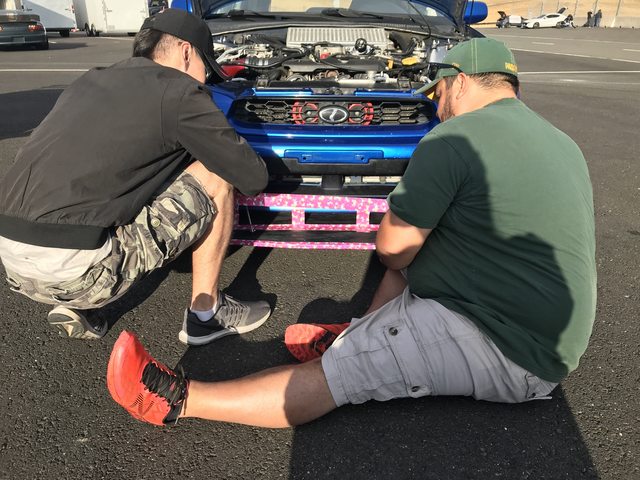
The function of a splitter is basically an upside-down wing. The flat surface allows for air to move quickly under the car and an air dam, or the front of the car, slows air moving over the top of the splitter. The velocity differential creates a net forces downward (slower air speed/higher pressure on top, faster air speed/lower air pressure underneath)--more downforce, more grip. The way I designed mine had a key component missing: an air dam on top. Since this was quick and dirty project, I didn't have the opportunity, prior to autocross, to run to the hardware store to fabricate a solution since it was 0800 Sunday and we were already up at Thunderhill, so we improvised. Here's where the unicorn duct tape comes in:
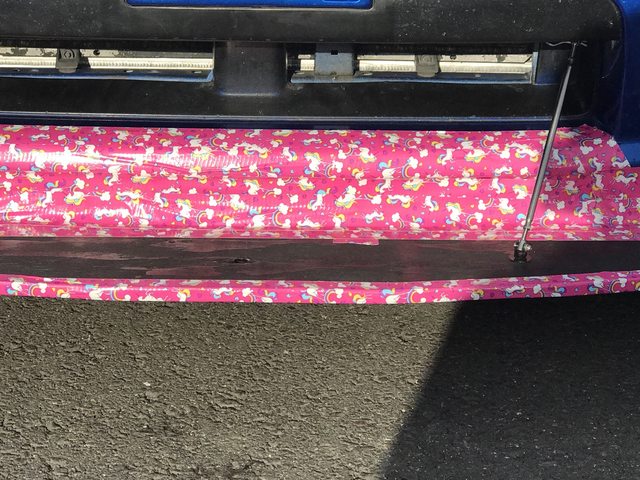
Stylish and functional. Can't beat that.
Hardware store (like Home Depot, but I support the local mom-and-pop Supply Hardware):
(1) 4' x 8' 19/32 plywood cut down to 41" x 68" ~ $30
(2) 6" x 6" angle brackets (typically used for shelving or fences) ~ $5 each
(2) 12" tie straps ~ $5 each
(2) 1/8" hitch pins ~ $1 each
(2) 1/4"-20 threadserts ~ $1.50 each (add $20 for a threaded riveter if you don't have one)
Longer hardware for splitter rods and bolts for chassis mounts ~ $20
(2) cans of your favorite spray paint ~ $5 each
Amazon:
(2) 13" splitter rods (amazon) ~ $20 shipped
Walmart:
(2) Unicorn duct tape ~ $5 each
Here is the rough schematic I started with using quick measurements and maxing out allowable specs per SCCA SM-class rules:
I didn't get a picture of it, but the trick part came trying to cut the front curve of the splitter. After cuting the tire cutouts I had a big T-shaped piece. I used a jack to hold up the plywood to the underside of the car and "finessed" it into place making sure it straight and square with the centerline of the car. With the bumper cover still on, I used a plum bob and giant T-square to trace out the bodyline and added 6" away while staying within the width of the car as allowed by the rules. I then cut that line and held it back up under the car with a jack to double check I was within the 6" rule:
Taking the bumper cover for ease of access, I then aligned and placed the chassis mounts (6" x 6" brackets on top bolted through the plywood and tied underneath with the 12" straps for over-engineering) which were bolted to the front frame rails (1/4"-20 threadserts into the frame rail near the radiator support) and added the front support rods.
[img]https://i.imgur.com/YJwFBKXl.jpg[limg]
The bumper cover has convenient holes that allow access to the underside of the front bumper beam. I mount the U-brackets for the support rods and replaced the hardware with the hitch pin to make removal easy*:
*Note about this: Taking the front bumper cover on and off becomes a little challenging trying to get it over the U-brackets. I actually bent one of them in a rush to get the cover on so I might be taking a Dremel to this area to make getting the cover over the U-bracket easier.
Everything bolted up, I had to do the highly-technical and scientific "Is it legit?" test:
At worst, there was only a few millimeters of play (difference in diameter between the holes and the hitch pins) with my fat *** standing on it, but feels solid otherwise.
Last step, obviously, hit with as much paint as you want--go crazy with it. And here is how mine turned out:
I'm very happy with how it turned out. A few notes for some future adjustments or changes:
- As you can see it's not perfectly level with the ground. The splitter extends so far back that it hits the skid plate which is lower than the radiator support. I want to mount the whole splitter lower so switching to longer chassis mount brackets will hopefully solve this, but that may necessitate either (a) longer support rods or (b) moving the support rod mounts on the splitter closer to the car. Option A is more ideal (if I can find 15" support rods or somehow fabricate my own) as Option B will limit pitch adjustability. I also want to add a tie strap under the support rod mounts to really solidify the forward mounting.
- As for the current chassis mounts, they require removing the front bumper cover which, while not a huge pain in the ***, is less than ideal so further exploration and experimentation is needed there.
- Once everything is where I want it, we go alumalite!
For "street cred", stop here.
For practical application, keep going.
The function of a splitter is basically an upside-down wing. The flat surface allows for air to move quickly under the car and an air dam, or the front of the car, slows air moving over the top of the splitter. The velocity differential creates a net forces downward (slower air speed/higher pressure on top, faster air speed/lower air pressure underneath)--more downforce, more grip. The way I designed mine had a key component missing: an air dam on top. Since this was quick and dirty project, I didn't have the opportunity, prior to autocross, to run to the hardware store to fabricate a solution since it was 0800 Sunday and we were already up at Thunderhill, so we improvised. Here's where the unicorn duct tape comes in:
Stylish and functional. Can't beat that.
Last edited by Rev. Rob Large; 09-23-2019 at 12:10 PM.
07-25-2020, 08:38 PM
#357
Call me Pebbles
Thread Starter
iTrader: (11)
Join Date: Nov 2011
Location: I do all my own physics.
Posts: 5,908
Car Info: Moist
Not done yet..
Coming soon:
Carberry Snail Performance Engine Management/Tune
Delicious Tuning Flex Fuel Kit
Radium Engineering FST With Single AEM 50-1200 E85 Surge Tank
Coming soon:
Carberry Snail Performance Engine Management/Tune
Delicious Tuning Flex Fuel Kit
Radium Engineering FST With Single AEM 50-1200 E85 Surge Tank
09-06-2020, 09:25 PM
#358
Call me Pebbles
Thread Starter
iTrader: (11)
Join Date: Nov 2011
Location: I do all my own physics.
Posts: 5,908
Car Info: Moist
Delicious Tuning ethanol sensor and Radium Engineering fuel surge tank are in.
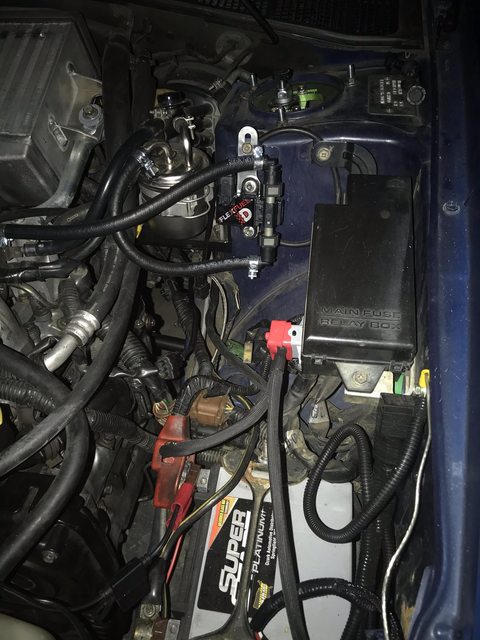
Ethanol sensor was about as easy as they come. Ethanol sensor goes inline between the engine bay fuel filter and intake manifold fuel lines with three plugs on the harness: one for the sensor, one for the rear O2 sensor, and one for the front driver TGV. Put the "brain" in the cab near the filler cover release and ran the cables back out to the engine bay via the grommeted hole behind the pedals.
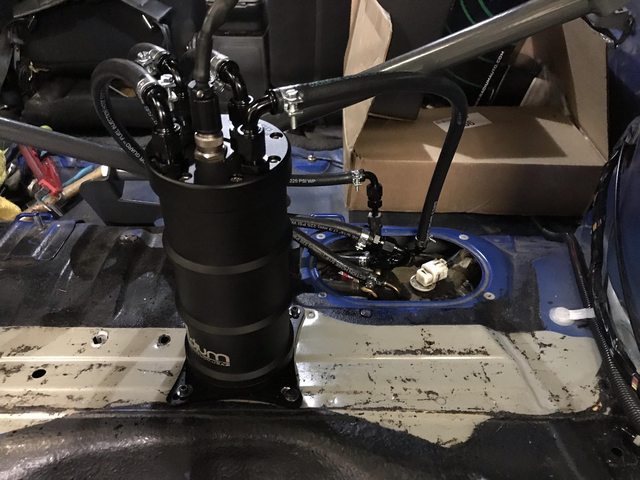
Had to get creative with the fuel lines and AN fittings to plumb the fuel surge tank to keep it relatively neat. Used Earl's vapor guard fuel line and AN fittings from Earl's and Racetronix:
- From in-tank push pump 5/16" quick connect (QC) female 90-degree to male -6AN, -6AN female 90-degree to -6AN female, -6AN male to 5/16" Vapor Guard straight male
- From return line 5/16" Vapor Guard straight male to -6AN male, -6AN female 150-degree to -6AN female, -6AN male to 5/16" Vapor Guard straight male
- To in-tank return, 5/16" Vapor Guard fuel line onto spigot
- To engine 5/16" QC male to -6AN male, -6AN female 90-degree to -6AN female, -6AN male to 5/16" Vapor Guard straight male
All four run 5/16" Vapor Guard fuel line up to -6AN female 90-degree to -6AN female attaching to the four -6AN male fittings on the FST
Did thread rivets into the floor pan and bolted the FST down. Had iWire do a plug-and-play harness for the FST and a second fuel pump controller for the fuel pump in the FST. Everything wired up nicely, ran cables up to the front for constant and switched power. Checked pressures after filling the FST and didn't see or smell any leaks.
Got a date with Travis in a few weeks for some flex fuel tuning and some other fun "extras" to go with the tune.
Ethanol sensor was about as easy as they come. Ethanol sensor goes inline between the engine bay fuel filter and intake manifold fuel lines with three plugs on the harness: one for the sensor, one for the rear O2 sensor, and one for the front driver TGV. Put the "brain" in the cab near the filler cover release and ran the cables back out to the engine bay via the grommeted hole behind the pedals.
Had to get creative with the fuel lines and AN fittings to plumb the fuel surge tank to keep it relatively neat. Used Earl's vapor guard fuel line and AN fittings from Earl's and Racetronix:
- From in-tank push pump 5/16" quick connect (QC) female 90-degree to male -6AN, -6AN female 90-degree to -6AN female, -6AN male to 5/16" Vapor Guard straight male
- From return line 5/16" Vapor Guard straight male to -6AN male, -6AN female 150-degree to -6AN female, -6AN male to 5/16" Vapor Guard straight male
- To in-tank return, 5/16" Vapor Guard fuel line onto spigot
- To engine 5/16" QC male to -6AN male, -6AN female 90-degree to -6AN female, -6AN male to 5/16" Vapor Guard straight male
All four run 5/16" Vapor Guard fuel line up to -6AN female 90-degree to -6AN female attaching to the four -6AN male fittings on the FST
Did thread rivets into the floor pan and bolted the FST down. Had iWire do a plug-and-play harness for the FST and a second fuel pump controller for the fuel pump in the FST. Everything wired up nicely, ran cables up to the front for constant and switched power. Checked pressures after filling the FST and didn't see or smell any leaks.
Got a date with Travis in a few weeks for some flex fuel tuning and some other fun "extras" to go with the tune.
09-22-2020, 09:57 AM
#359
Call me Pebbles
Thread Starter
iTrader: (11)
Join Date: Nov 2011
Location: I do all my own physics.
Posts: 5,908
Car Info: Moist
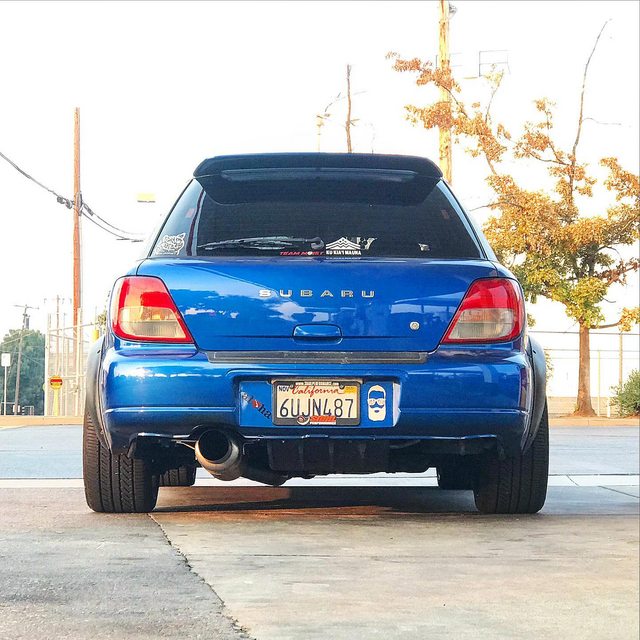
Autumnal Equinox Update, but first gratuitous booty shot:
Travis did his thing. Switched the ROM over to Carberry and cranked it up. Dashed line is on 91ACN (pump gas) at 17 psi, solid line is on E85 (closer to E70) at 22 psi.
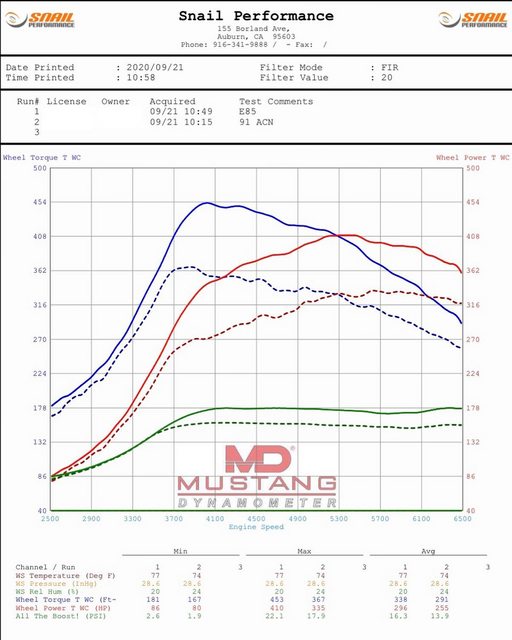
After wrestling with a minor electrical issue (loose wire at the MapDCCD wheel speed sensor processor), got everything dialed and this thing ****ING rips. This, by far, is the best the car has ever felt and ran. If you have the dumb 16-bit ECU, drop everything and get tuned on a Carberry. It starts, idles, runs, and accelerates so much smoother than with the Accessport, plus you get the added bonus of fun little features like anti-lag and two-step (BRRAPBAPBAPBANGBANG). Took it out for a couple pulls, launched it and scratched second! It's like riding a raging bull! It's nutty.
Going to try to make autocross this weekend and will try to get video then. Until then, if you need me, follow the tire marks.
Travis did his thing. Switched the ROM over to Carberry and cranked it up. Dashed line is on 91ACN (pump gas) at 17 psi, solid line is on E85 (closer to E70) at 22 psi.
After wrestling with a minor electrical issue (loose wire at the MapDCCD wheel speed sensor processor), got everything dialed and this thing ****ING rips. This, by far, is the best the car has ever felt and ran. If you have the dumb 16-bit ECU, drop everything and get tuned on a Carberry. It starts, idles, runs, and accelerates so much smoother than with the Accessport, plus you get the added bonus of fun little features like anti-lag and two-step (BRRAPBAPBAPBANGBANG). Took it out for a couple pulls, launched it and scratched second! It's like riding a raging bull! It's nutty.
Going to try to make autocross this weekend and will try to get video then. Until then, if you need me, follow the tire marks.
