
Chicken's Crosstrek

Thread Starter
Churro Aficionado
iTrader: (38)
Joined: Feb 2008
Posts: 54,661
From: IG - @thomas.teammoist
Car Info: IG - @TEAMMOISTOFFICIAL
The Crosstrek fogs are slightly domed too, just have to take a slow and stretch it here and there so you dont get any bubbles.
Playing with all the vinyl wrapped stuff ive done, had given me a bit more patients with this type stuff lol. Still cant imagine doing an entire car tho!
Thread Starter
Churro Aficionado
iTrader: (38)
Joined: Feb 2008
Posts: 54,661
From: IG - @thomas.teammoist
Car Info: IG - @TEAMMOISTOFFICIAL
Got my storage pulley system finally all situated. Now I can back into the garage and install/remove the RTT off/on the car, myself. No need to ask someone to help me take it on or off the car 
Going to tweak a couple small things, maybe slightly shorter tow straps, carabiners, or both to get a few more inches to raise it up. As is, I myself can walk under the tent without hitting and the hood of the car can open 95% of the way.


Going to tweak a couple small things, maybe slightly shorter tow straps, carabiners, or both to get a few more inches to raise it up. As is, I myself can walk under the tent without hitting and the hood of the car can open 95% of the way.
Thread Starter
Churro Aficionado
iTrader: (38)
Joined: Feb 2008
Posts: 54,661
From: IG - @thomas.teammoist
Car Info: IG - @TEAMMOISTOFFICIAL
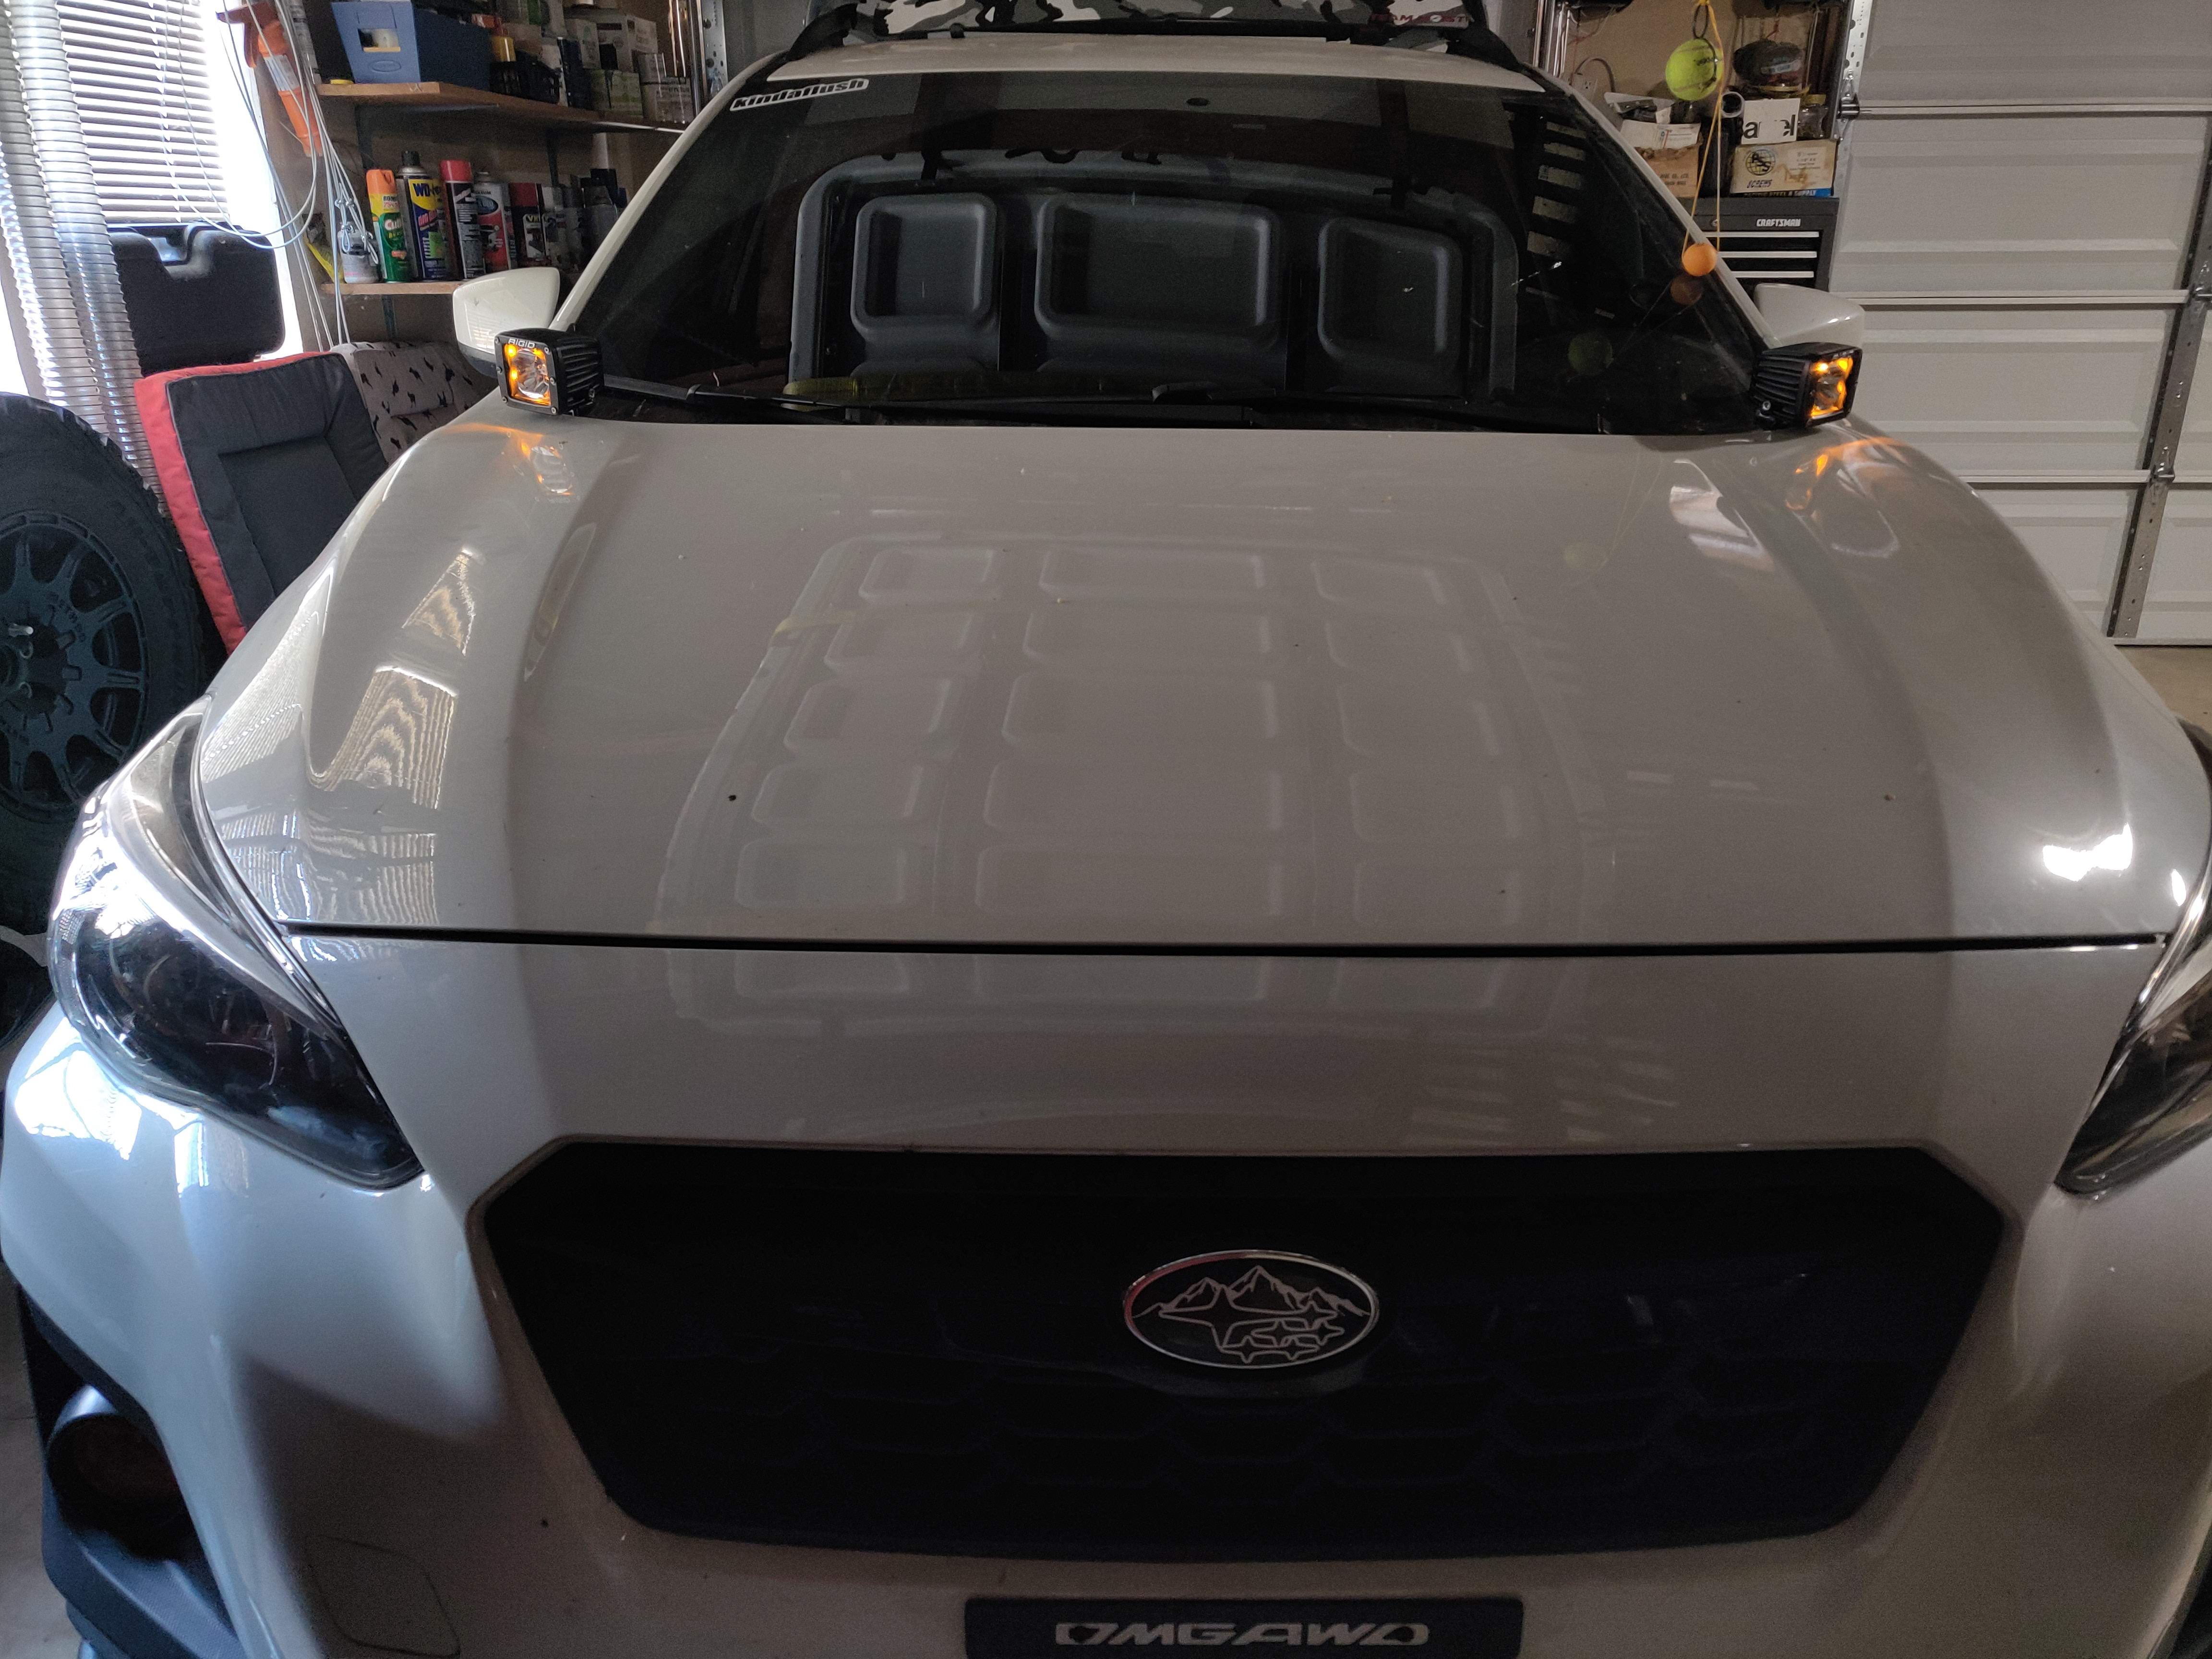
Started of the next revamp mod this morning. New ditch lights from Rigid.


Main difference, besides MUCH better build quality over my previous ones, are these have back-lighting. These are the radiance versions. They have four back-light options (yellow wasnt an option), so I got amber, thus the lamin-x film change from yellow to amber lol.

These are not TOTALLY plug-n-play with the old harness that I had made with weather-pack connectors. Since they have the back-light, they have a 3rd wire for power. So I snipped out the old ones (left the connectors as I can use them elsewhere at some point) and bought some new 3 wire connectors here: https://amzn.to/3kqbmff

Hardest part of all this was running another wire into the cab to my switch panel, I did that yesterday morning. I had to get a new rocker switch as the current ones are on/off. I purchased a new one (should be here tomorrow) that is on/off/on. Thus the new wire being ran in is another power for the back-lighting.
With all my connections, solder - heat shrink - heat shrink everything together.


Got both driver and passenger lights mounted and soldered to the new weather-pack connectors. That's where I left off for right now. The rest will be super easy, soldering the other end to the wires that are already ran in the car from the previous lights. MIGHT finish that side later today, but it's going to be hot the rest of the week (why i started earlier this morning lol), so if anything I should finish tomorrow morning before the switch arrives.
Main difference, besides MUCH better build quality over my previous ones, are these have back-lighting. These are the radiance versions. They have four back-light options (yellow wasnt an option), so I got amber, thus the lamin-x film change from yellow to amber lol.
These are not TOTALLY plug-n-play with the old harness that I had made with weather-pack connectors. Since they have the back-light, they have a 3rd wire for power. So I snipped out the old ones (left the connectors as I can use them elsewhere at some point) and bought some new 3 wire connectors here: https://amzn.to/3kqbmff
Hardest part of all this was running another wire into the cab to my switch panel, I did that yesterday morning. I had to get a new rocker switch as the current ones are on/off. I purchased a new one (should be here tomorrow) that is on/off/on. Thus the new wire being ran in is another power for the back-lighting.
With all my connections, solder - heat shrink - heat shrink everything together.
Got both driver and passenger lights mounted and soldered to the new weather-pack connectors. That's where I left off for right now. The rest will be super easy, soldering the other end to the wires that are already ran in the car from the previous lights. MIGHT finish that side later today, but it's going to be hot the rest of the week (why i started earlier this morning lol), so if anything I should finish tomorrow morning before the switch arrives.
Thread Starter
Churro Aficionado
iTrader: (38)
Joined: Feb 2008
Posts: 54,661
From: IG - @thomas.teammoist
Car Info: IG - @TEAMMOISTOFFICIAL
Well the switch came a day early... so I ran out and finished up the soldering.
Hard to see a big difference since there is so much light bleeding into the garage, will have to get some night shots pretty soon.

New switch in.
Center = off
Top = ditch lights
bottom = back lighting

Hard to see a big difference since there is so much light bleeding into the garage, will have to get some night shots pretty soon.
New switch in.
Center = off
Top = ditch lights
bottom = back lighting

Thread Starter
Churro Aficionado
iTrader: (38)
Joined: Feb 2008
Posts: 54,661
From: IG - @thomas.teammoist
Car Info: IG - @TEAMMOISTOFFICIAL
More mods..
Got a raido for trips and didnt like any of the "off the shelf" options. I ended up buying this mount off amazon: https://amzn.to/3iz6vH9 but did not want to use the self tapping screws directly into some of the interior trim.
I wanted:
-something within easy reach while driving
-easy to install/remove
-no perm "damage" to the interior
-not expensive
So made my own haha. Made a bracket to mount the amazon one I bought. Tore apart the center console and ended up in the dash.
The bracket i came up with

Mounted behind the drivers hvac vent


wrapped it black to look decent
amazon mount connected

radio

Not TOTALLY happy with it, but it'll do for now in time for the next trip. Version two will be coming at some point im sure hah.
Got a raido for trips and didnt like any of the "off the shelf" options. I ended up buying this mount off amazon: https://amzn.to/3iz6vH9 but did not want to use the self tapping screws directly into some of the interior trim.
I wanted:
-something within easy reach while driving
-easy to install/remove
-no perm "damage" to the interior
-not expensive
So made my own haha. Made a bracket to mount the amazon one I bought. Tore apart the center console and ended up in the dash.
The bracket i came up with
Mounted behind the drivers hvac vent
wrapped it black to look decent
amazon mount connected
radio
Not TOTALLY happy with it, but it'll do for now in time for the next trip. Version two will be coming at some point im sure hah.

Thread Starter
Churro Aficionado
iTrader: (38)
Joined: Feb 2008
Posts: 54,661
From: IG - @thomas.teammoist
Car Info: IG - @TEAMMOISTOFFICIAL
Thread Starter
Churro Aficionado
iTrader: (38)
Joined: Feb 2008
Posts: 54,661
From: IG - @thomas.teammoist
Car Info: IG - @TEAMMOISTOFFICIAL
Changed up the rear tire carrier license plate mount. Wanted something easier to take on/off.
I bought this on amazon: https://amzn.to/3mSYAXJ
Doesnt say it's for a Crosstrek, but it fit perfectly.
Everything the kit came with


Ready to have some fun this weekend.
I bought this on amazon: https://amzn.to/3mSYAXJ
Doesnt say it's for a Crosstrek, but it fit perfectly.
Everything the kit came with
Ready to have some fun this weekend.
Thread Starter
Churro Aficionado
iTrader: (38)
Joined: Feb 2008
Posts: 54,661
From: IG - @thomas.teammoist
Car Info: IG - @TEAMMOISTOFFICIAL
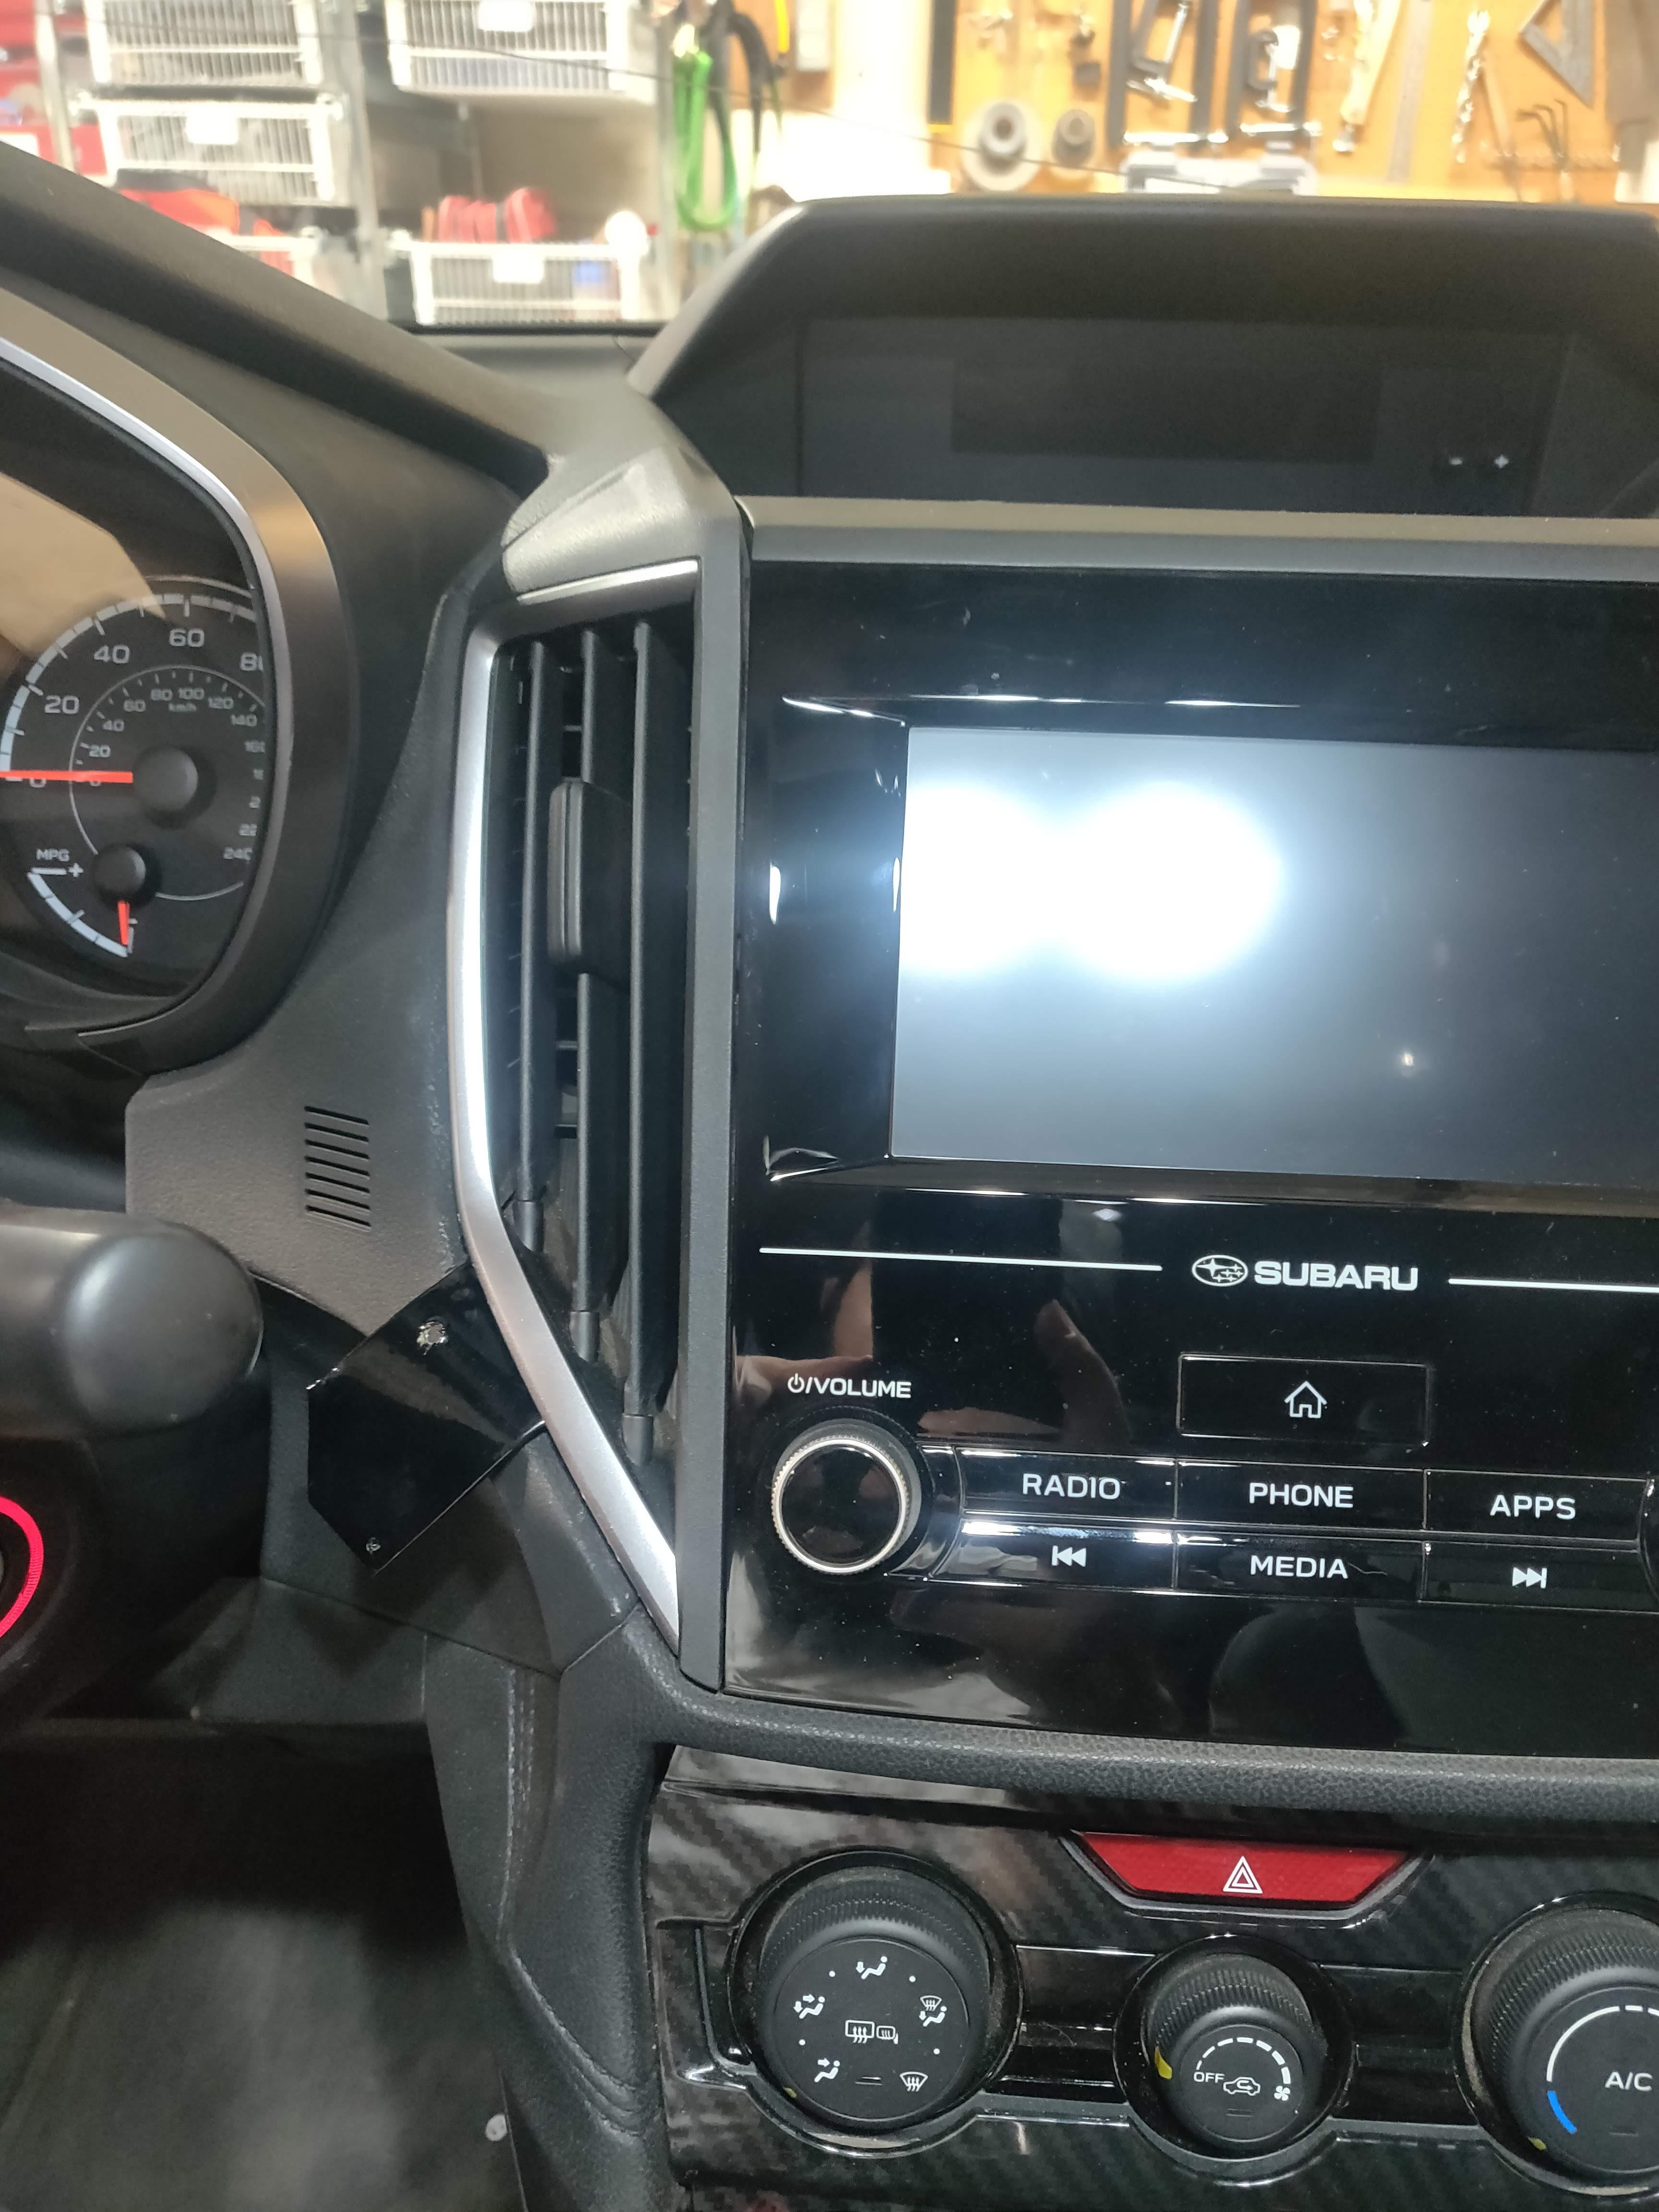
radio mount version 2.


Moved it over to the passenger vent. I liked the placement of ver 1 better since it was closer to the driver, but one thing I did not figure into the mount before i made ver 1.. it was almost blocking the key from going into the ignition haha. I could still get the key in and turn the car on, but it was not "normal". Had to bend my wrist a certain way and only hold the key with 2 fingers.
So ver 2 obviously takes care of that, and is only slightly further away. Can still open the glovebox just fine, and not in the way of the passenger at all.
Thread Starter
Churro Aficionado
iTrader: (38)
Joined: Feb 2008
Posts: 54,661
From: IG - @thomas.teammoist
Car Info: IG - @TEAMMOISTOFFICIAL
Sat was an off road day. Myself and 6 other cars (2 other Subarus) did the 20+ mile trek to just shy of Tahoe. The trail was MUCH worse condition than it was last year when I did it. Took just over 4 hours to cover the trail (including stops).


Thread Starter
Churro Aficionado
iTrader: (38)
Joined: Feb 2008
Posts: 54,661
From: IG - @thomas.teammoist
Car Info: IG - @TEAMMOISTOFFICIAL
Another day with another mod. "Raptabru" front grill lights


Full write up and more pics found here:
https://www.subaruxvforum.com/thread...l-leds.178493/
Full write up and more pics found here:
https://www.subaruxvforum.com/thread...l-leds.178493/
iTrader: (12)
Joined: Jun 2008
Posts: 4,030
From: In Mother Russia...
Car Info: ...zeh car drives you!
How useful are the light bar and upper hood (flood?) lamps?
I am torn between..those are pretty neat!...and...Those are definition of douche nozzle uselessness!
I am torn between..those are pretty neat!...and...Those are definition of douche nozzle uselessness!