Chicken's Crosstrek

 05-18-2018, 06:57 AM
#366
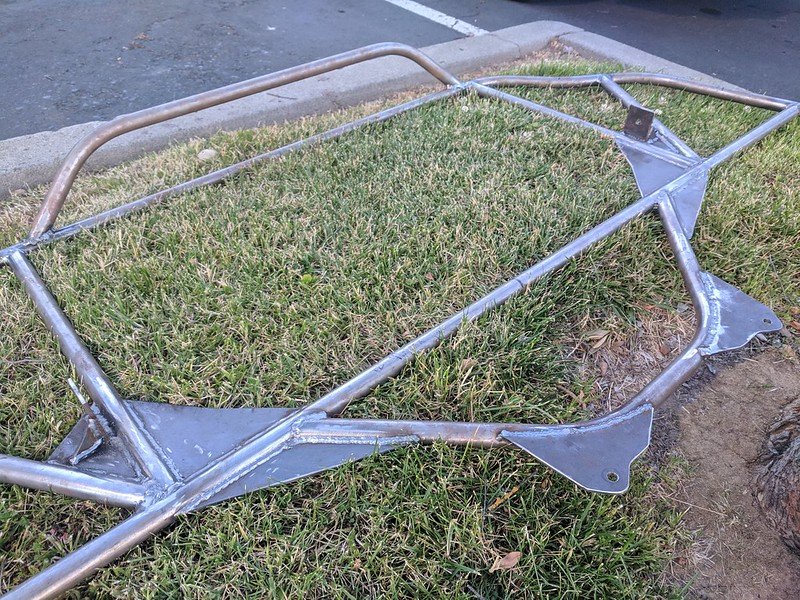
Last night at our weekly Subaru meet. My buddy dropped off the finished product for the brush guard!
He added in some gussets and did the final weld on everything. It looks awesome IMO! Today after work ill be priming it, and painting (most likely bedliner).
Ill take a couple snaps doing that, then show how it bolts up and still works with the Primitive front skid!
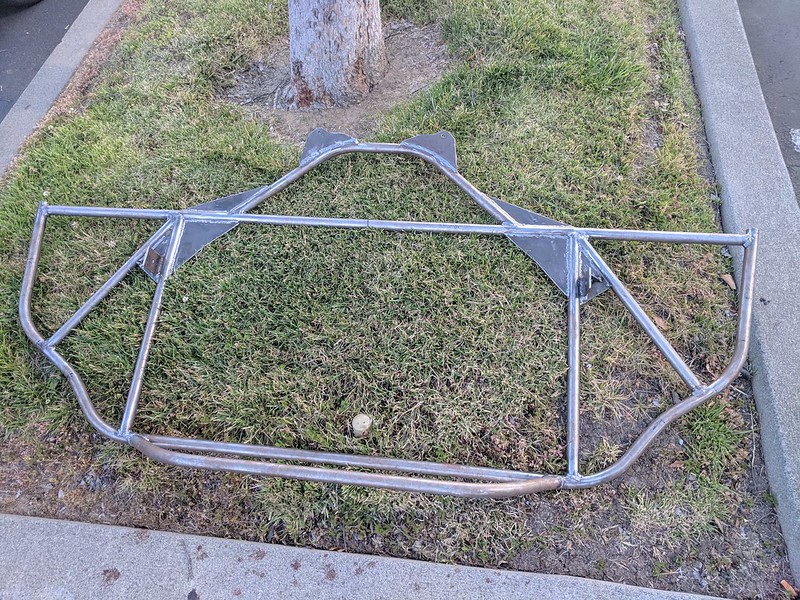
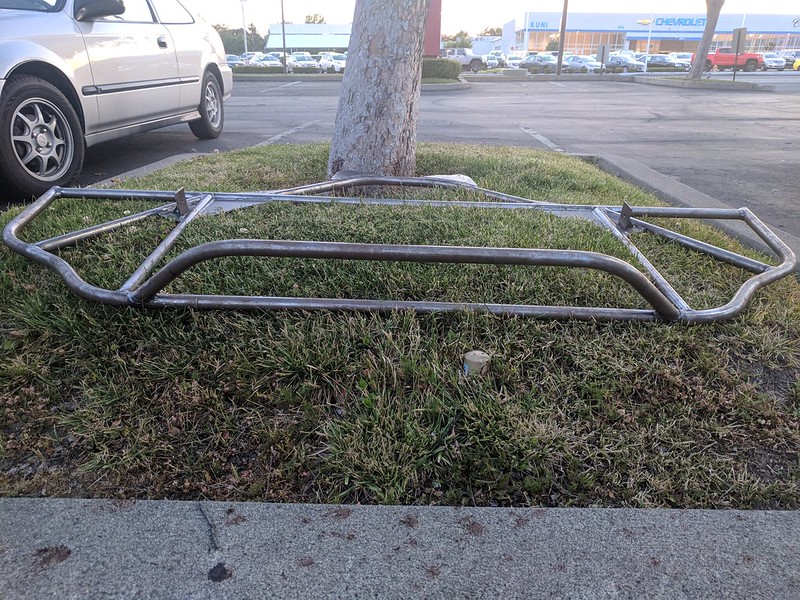
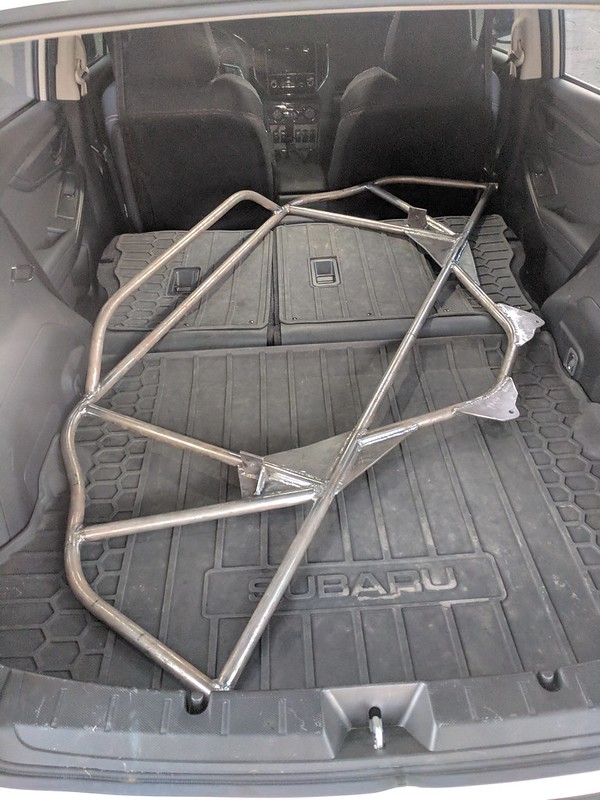
Juuuuust fit in the back lol
He added in some gussets and did the final weld on everything. It looks awesome IMO! Today after work ill be priming it, and painting (most likely bedliner).
Ill take a couple snaps doing that, then show how it bolts up and still works with the Primitive front skid!
Juuuuust fit in the back lol
05-21-2018, 08:00 AM
#367
Did a lot of stuff on the car this weekend.
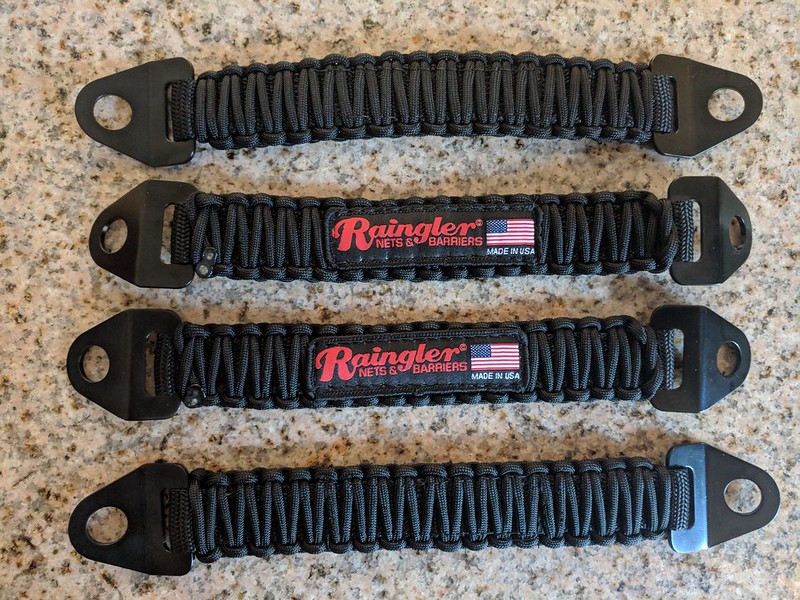
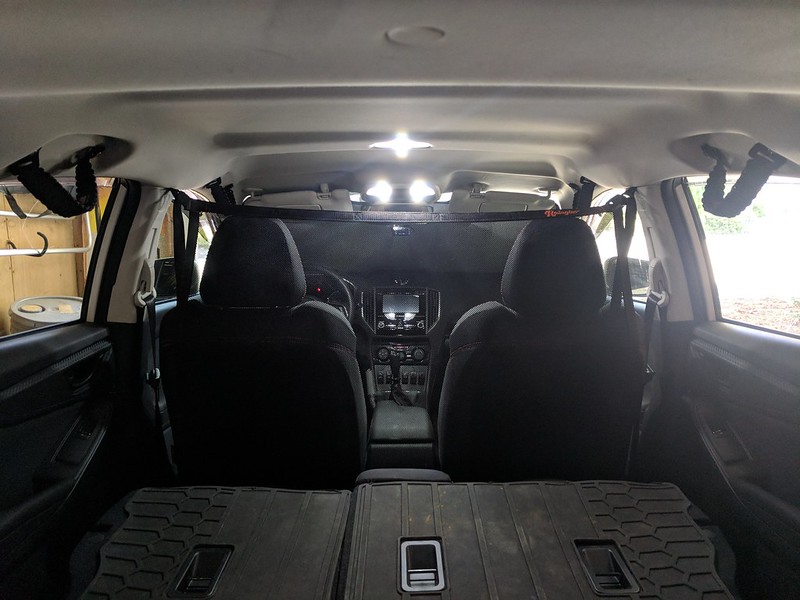
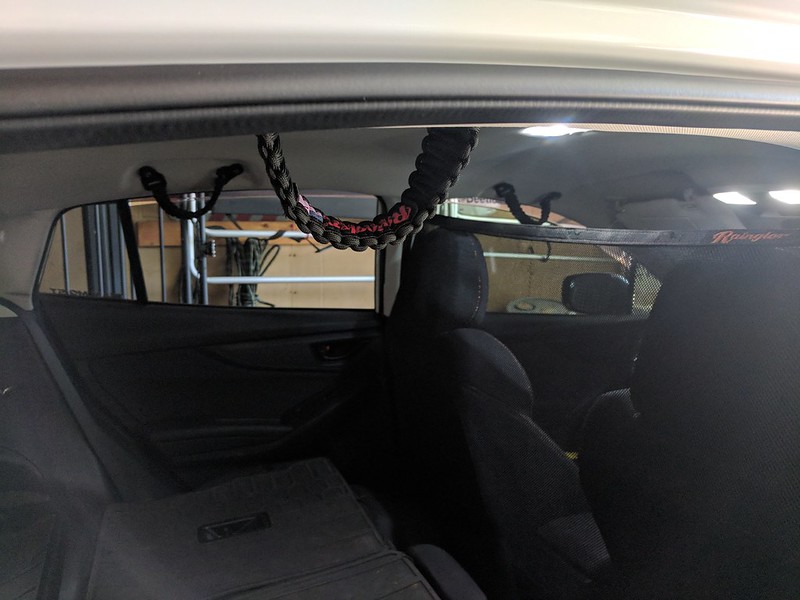
I got my Rainger grab handles in on Friday and installed them over the weekend. They are straps wrapped in paracord, I chose all black, but they have numerous colors to pick from.
Here are the steps I took to install mine.
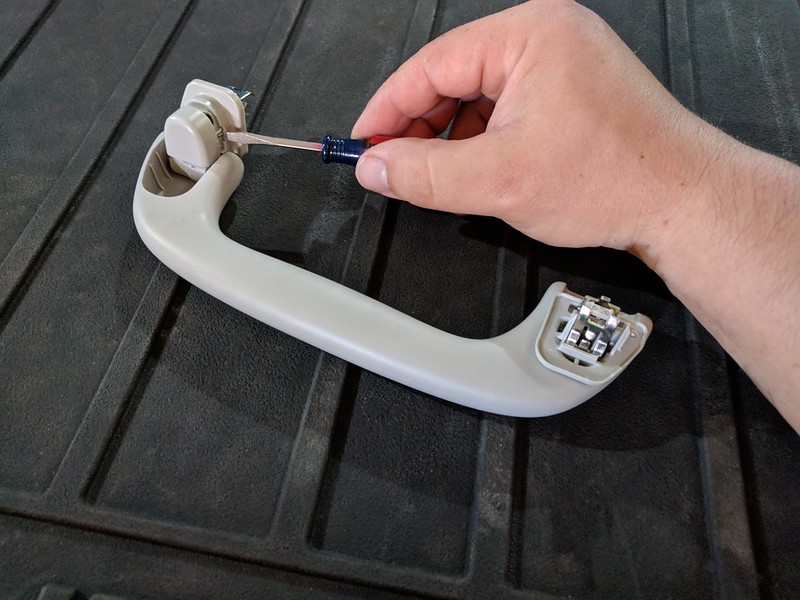
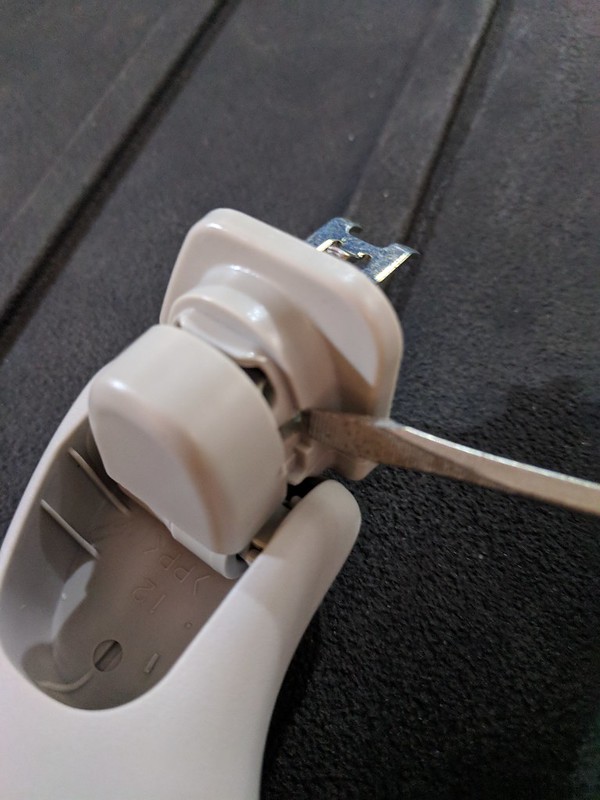
First you have to remove the OEM handles. I forgot to snap a pic or two of them in the car, so I did it after.
All I did was take a small flat head screw driver and pressed/twisted it in on each side of the plastic caps. The caps will become lose where they can slide in/out. From there, you can basically pull the handles out of the roof.
The kit comes with all the hardware, but I did end up going to my local hardware store to pick up some extra washers to make it a bit easier.
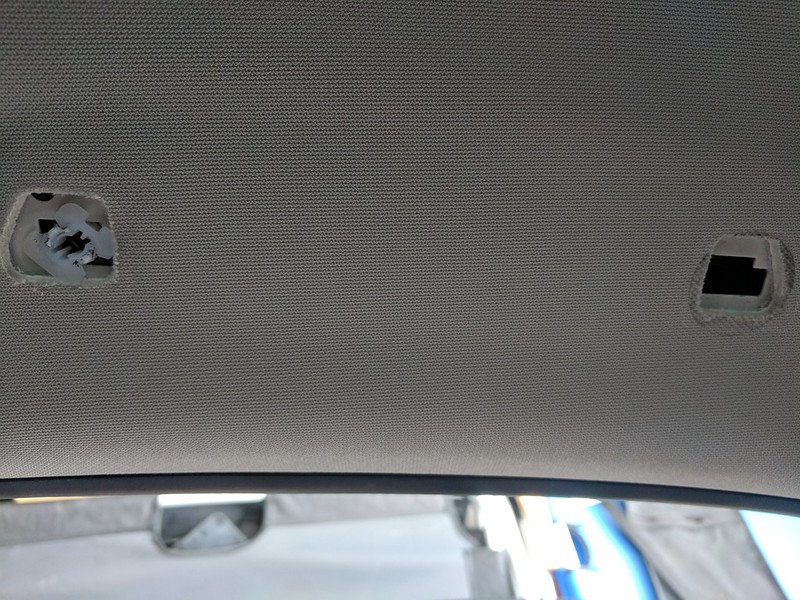
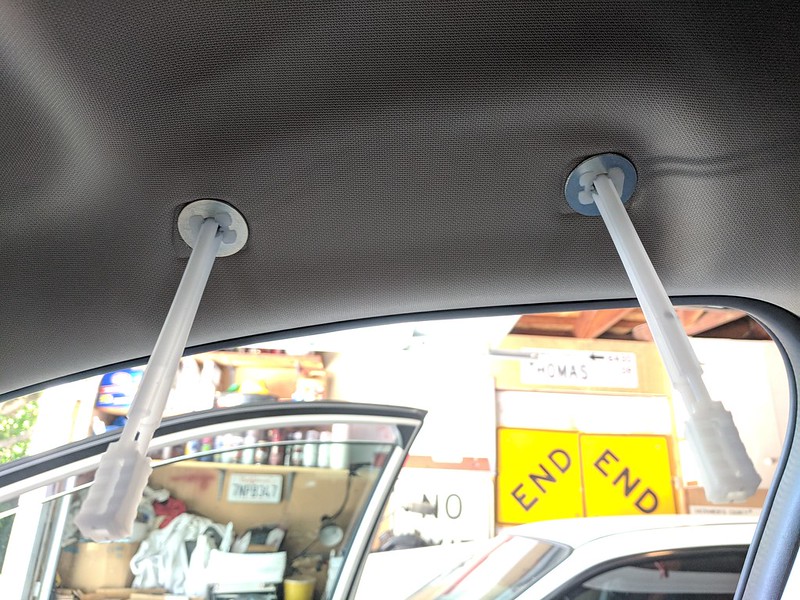
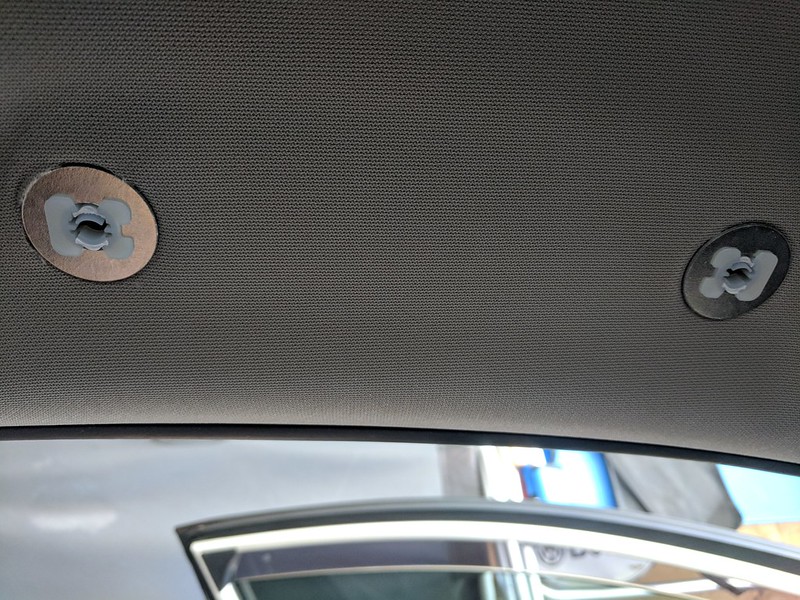
The anchors slide up into the roof of the car, and you slide the base up and it acts somewhat like a zip-tie. You would need to rotate the entire thing to get the base to site horizontal with the opening, but there is not enough room in the cavity for the metal anchor to rotate. So I would get something looking like this:
It was a bit lose, and not super secure. So this is where the new washers I picked up came into play.
I got my Rainger grab handles in on Friday and installed them over the weekend. They are straps wrapped in paracord, I chose all black, but they have numerous colors to pick from.
Here are the steps I took to install mine.
First you have to remove the OEM handles. I forgot to snap a pic or two of them in the car, so I did it after.
All I did was take a small flat head screw driver and pressed/twisted it in on each side of the plastic caps. The caps will become lose where they can slide in/out. From there, you can basically pull the handles out of the roof.
The kit comes with all the hardware, but I did end up going to my local hardware store to pick up some extra washers to make it a bit easier.
The anchors slide up into the roof of the car, and you slide the base up and it acts somewhat like a zip-tie. You would need to rotate the entire thing to get the base to site horizontal with the opening, but there is not enough room in the cavity for the metal anchor to rotate. So I would get something looking like this:
It was a bit lose, and not super secure. So this is where the new washers I picked up came into play.
05-21-2018, 08:00 AM
#368
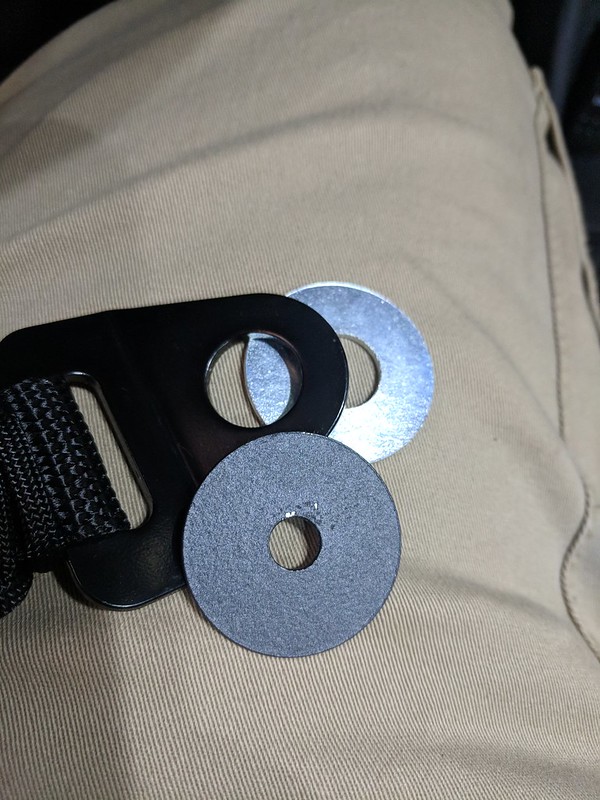
Here you can see the anchor with zip-tie base on the right The black washer on bottom comes with the kit, the metallic washer up top is what I added.
The one I added is the same outer diameter as the ones that came, but the inner diameter is larger. It is just large enough to slide over the metal anchor and to sit perfectly around the base of the zip (you can see one on there is the picture below)
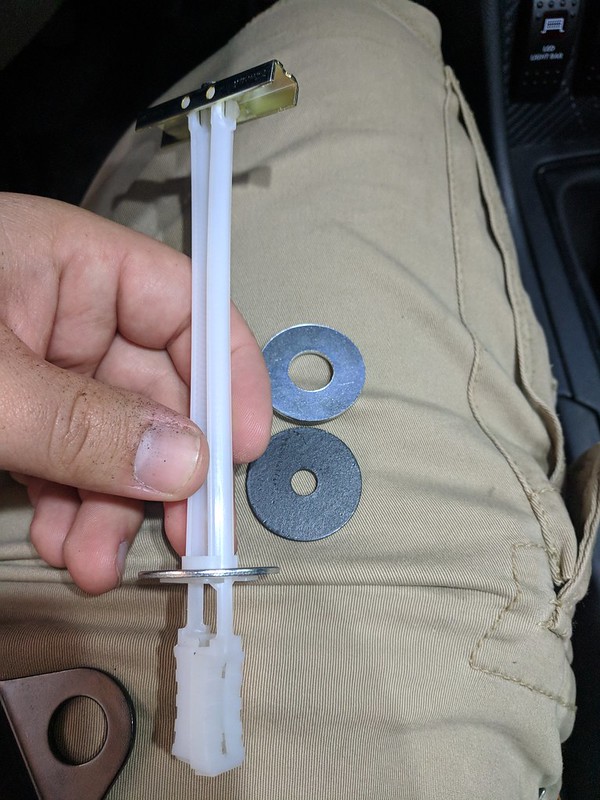
So I would be this combination of these, my washer, strap, black washer. Followed by a small hard rubber washer and the bolt.
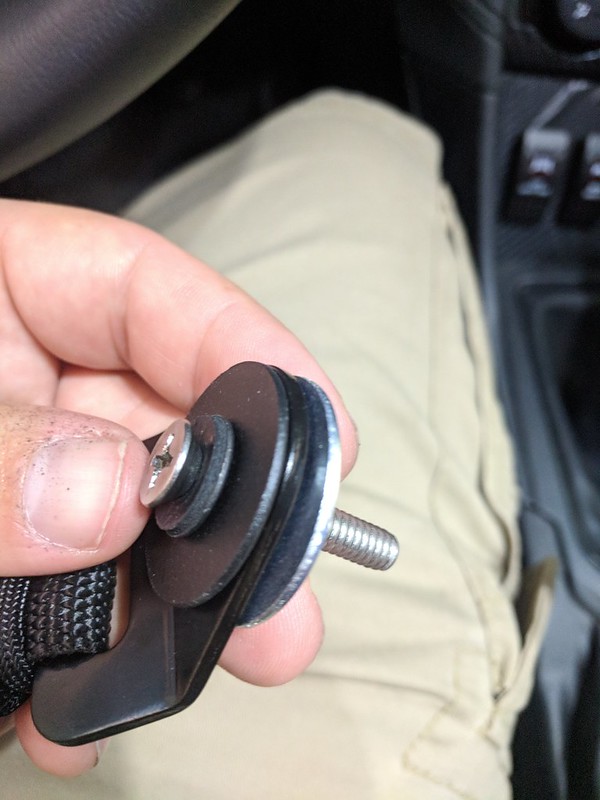
Here is what they look like when first set into place. You zip up the base and they keep the washer in place against the roof.
The one I added is the same outer diameter as the ones that came, but the inner diameter is larger. It is just large enough to slide over the metal anchor and to sit perfectly around the base of the zip (you can see one on there is the picture below)
So I would be this combination of these, my washer, strap, black washer. Followed by a small hard rubber washer and the bolt.
Here is what they look like when first set into place. You zip up the base and they keep the washer in place against the roof.

 05-21-2018, 08:14 AM
#370
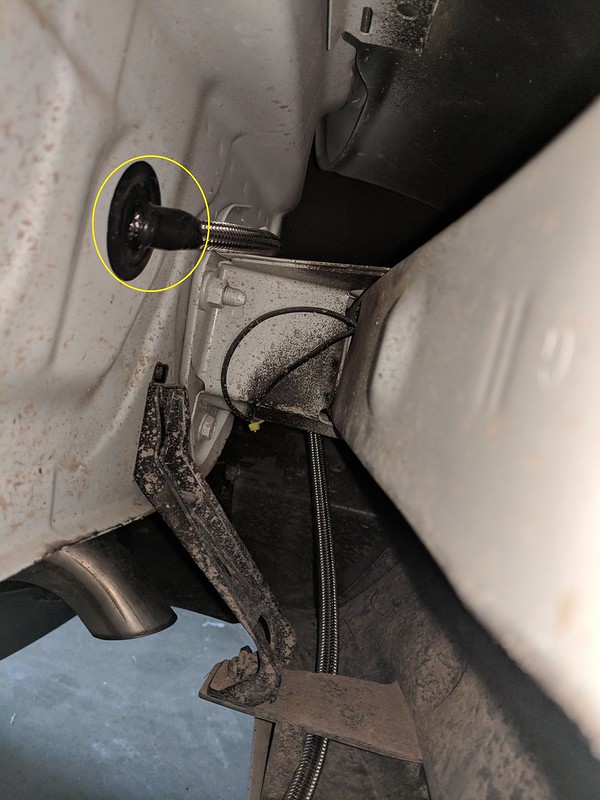
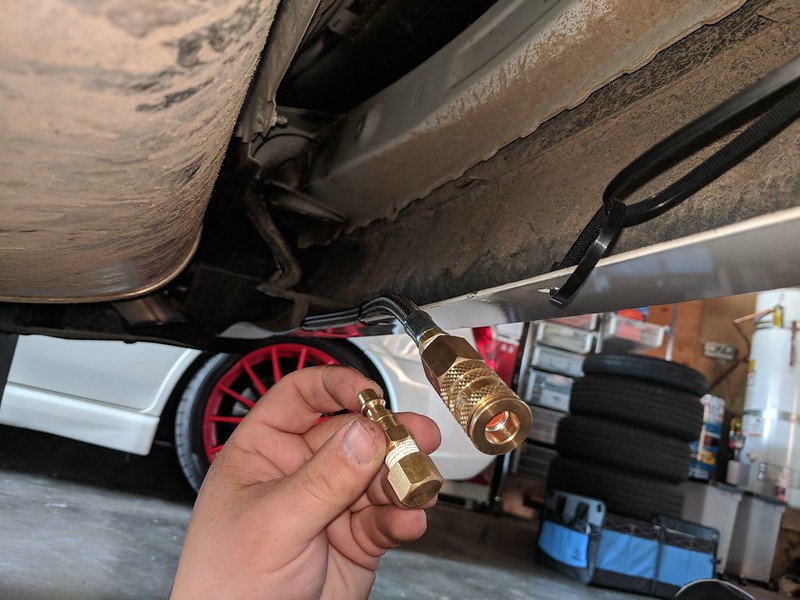
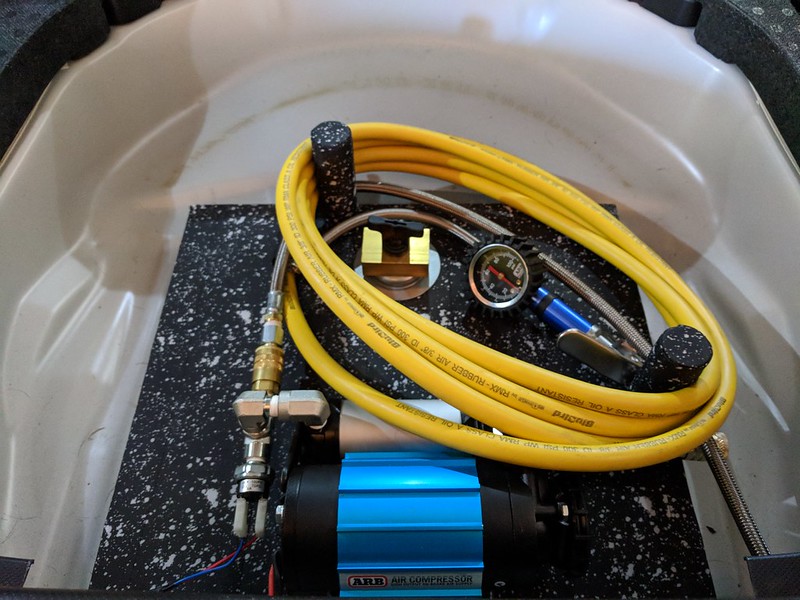
I finally had time to finish up the compressor install.. well the air line to outside the car anyways.
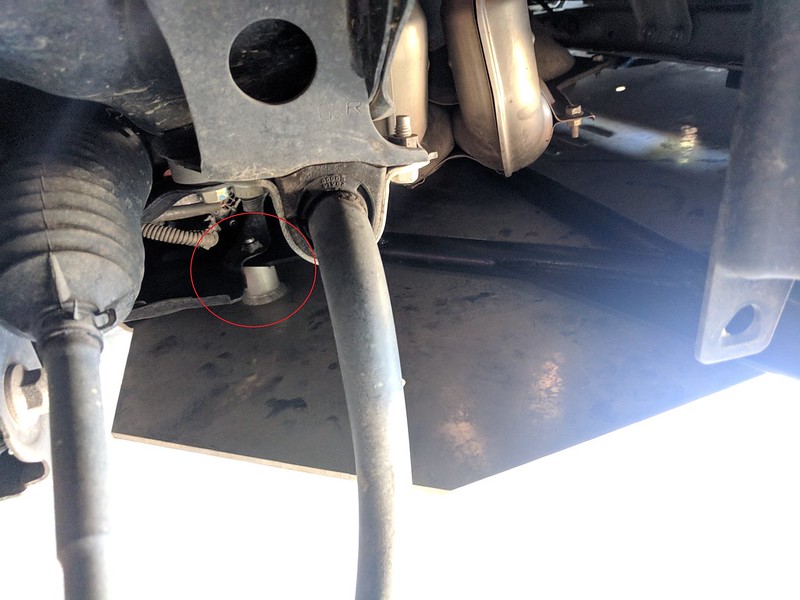
So the stainless line wraps around the posts I made and exits the car at the seal circled in yellow. I wrapped both sides of the stainless line in some silicone rubber tape to give a better seal from dirt/whatever from getting in.
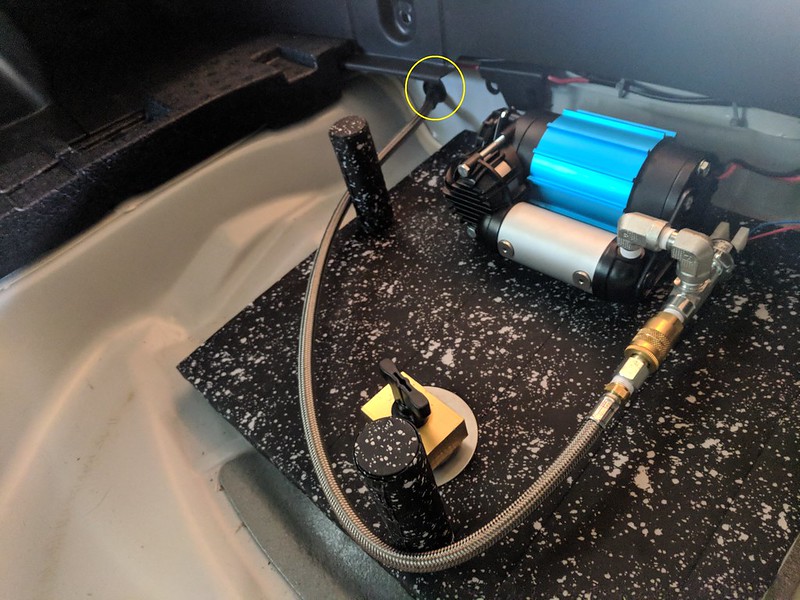
From there the line heads towards the passenger side of the car, drops behind the bumper beam attachment point and runs along the bottom of the bumper cover towards the center.
There are a handful of holes on the very edge of the bumper cover. The furthest two in the picture, I used zip-ties to secure the air line in place. The closest zip-tie holding the quick connect is lose. It is just tight enough to keep the quick connect tucked up behind the bumper and not letting it fall.
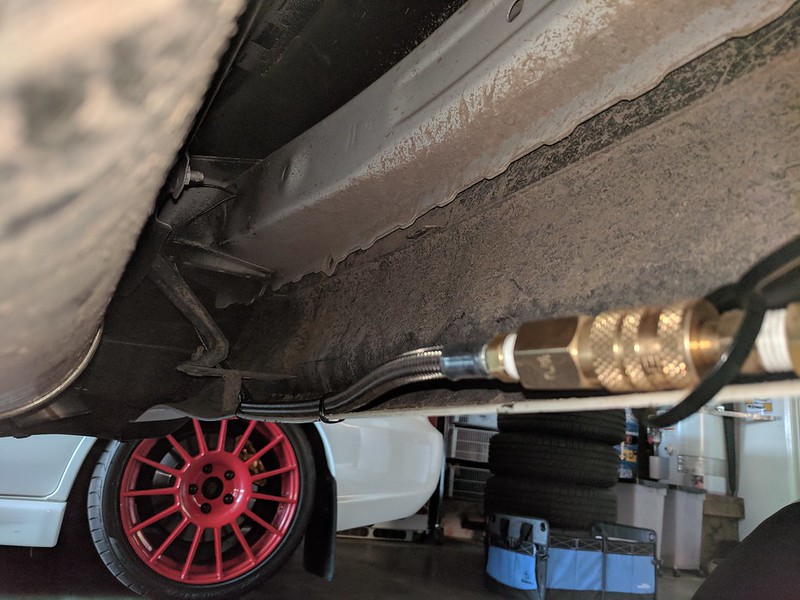
It is still lose enough for me to be able to reach under and pull the air hose out. I also used a quick connect fitting, and capped it off, to use as a dust plug. So with everything sitting under the bumper cover, so dirt will be getting into the line or plugging it up.
So the stainless line wraps around the posts I made and exits the car at the seal circled in yellow. I wrapped both sides of the stainless line in some silicone rubber tape to give a better seal from dirt/whatever from getting in.
From there the line heads towards the passenger side of the car, drops behind the bumper beam attachment point and runs along the bottom of the bumper cover towards the center.
There are a handful of holes on the very edge of the bumper cover. The furthest two in the picture, I used zip-ties to secure the air line in place. The closest zip-tie holding the quick connect is lose. It is just tight enough to keep the quick connect tucked up behind the bumper and not letting it fall.
It is still lose enough for me to be able to reach under and pull the air hose out. I also used a quick connect fitting, and capped it off, to use as a dust plug. So with everything sitting under the bumper cover, so dirt will be getting into the line or plugging it up.
05-21-2018, 08:22 AM
#371
So now Ill be able to reach under the bumper, hang the quick connect and plug in an air hose.
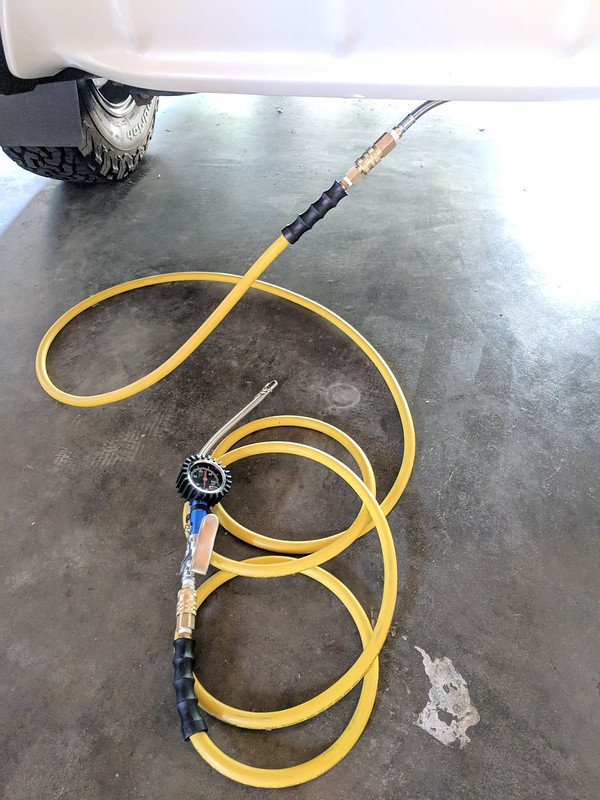
The hose is the perfect length just to reach past the front tires. So I can walk around either side to air up all 4 tires.
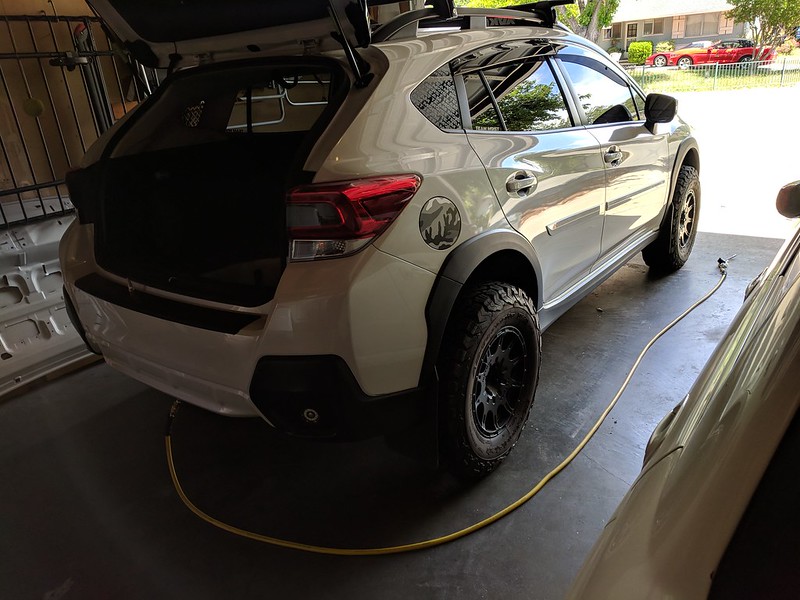
Everything wrapped up and set away.
When I plan a trip to be off-road, Ill keep the hose/nozzle in the back of the car in a bin or something much easier to get to. So if I have a full trunk, I dont need to remove everything to get to the hose. I will also be adding in a small tool kit into this area as well.
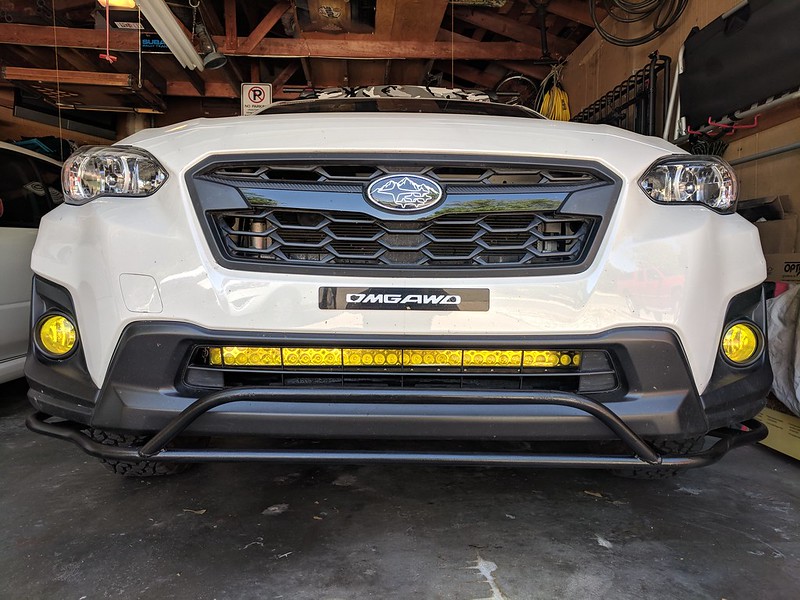
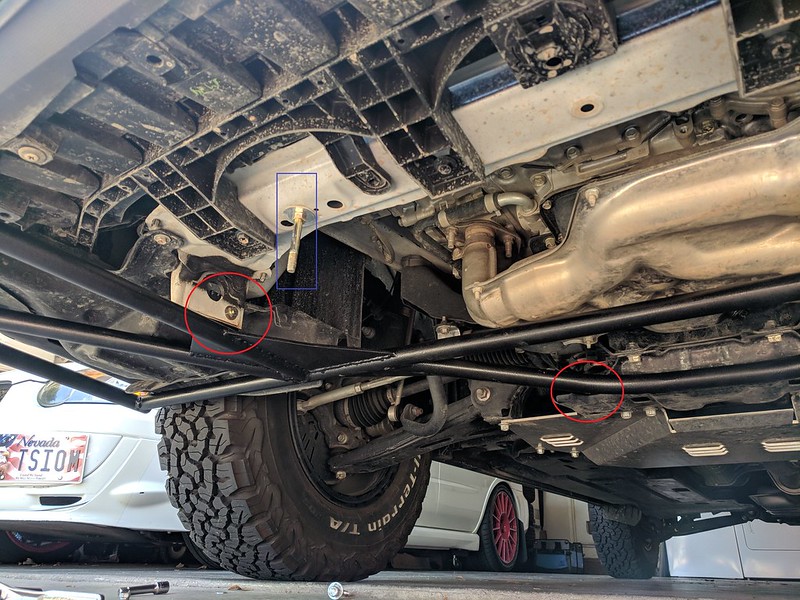
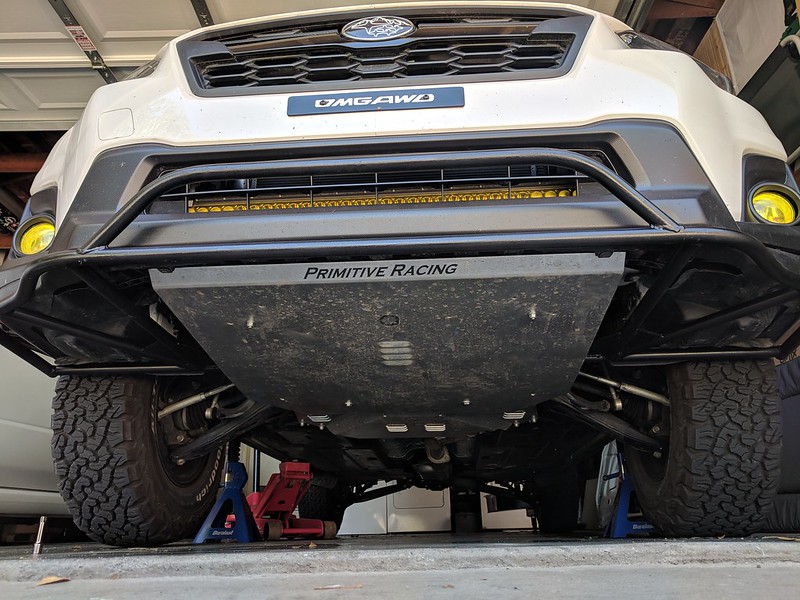
Then on to what most probably want to see lol. I got the bumper guard installed. I prepped, primered, and coated the guard in a spray on black bed liner. Here is how it all bolted up and works with the Primitive skid plate.
The blue rectangle is the hanging hardware where the Primitive skit mounts up. The red circles are where the bumper guard mounts. Note that there are only 2 extra bolts (in the front). The rear of the guard uses the rear hardware from the Primitive skid plate.
The hose is the perfect length just to reach past the front tires. So I can walk around either side to air up all 4 tires.
Everything wrapped up and set away.
When I plan a trip to be off-road, Ill keep the hose/nozzle in the back of the car in a bin or something much easier to get to. So if I have a full trunk, I dont need to remove everything to get to the hose. I will also be adding in a small tool kit into this area as well.
Then on to what most probably want to see lol. I got the bumper guard installed. I prepped, primered, and coated the guard in a spray on black bed liner. Here is how it all bolted up and works with the Primitive skid plate.
The blue rectangle is the hanging hardware where the Primitive skit mounts up. The red circles are where the bumper guard mounts. Note that there are only 2 extra bolts (in the front). The rear of the guard uses the rear hardware from the Primitive skid plate.
05-21-2018, 08:27 AM
#372
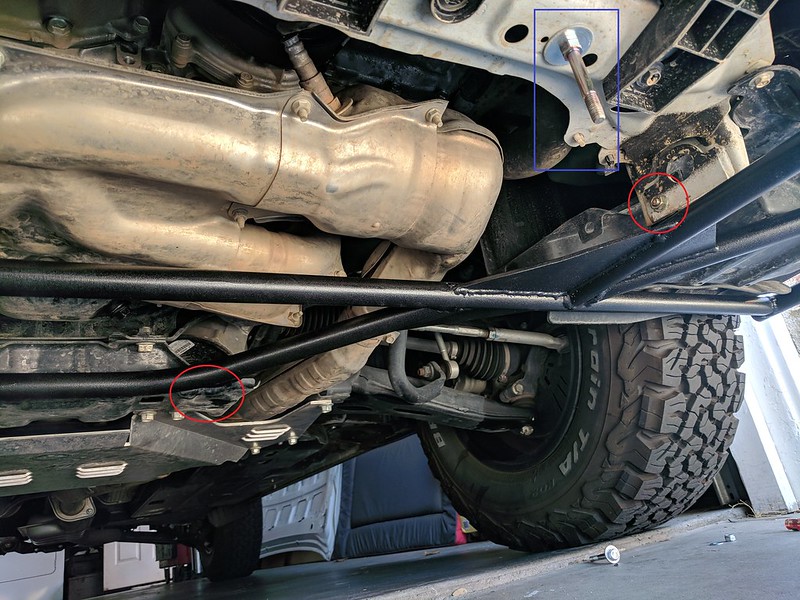
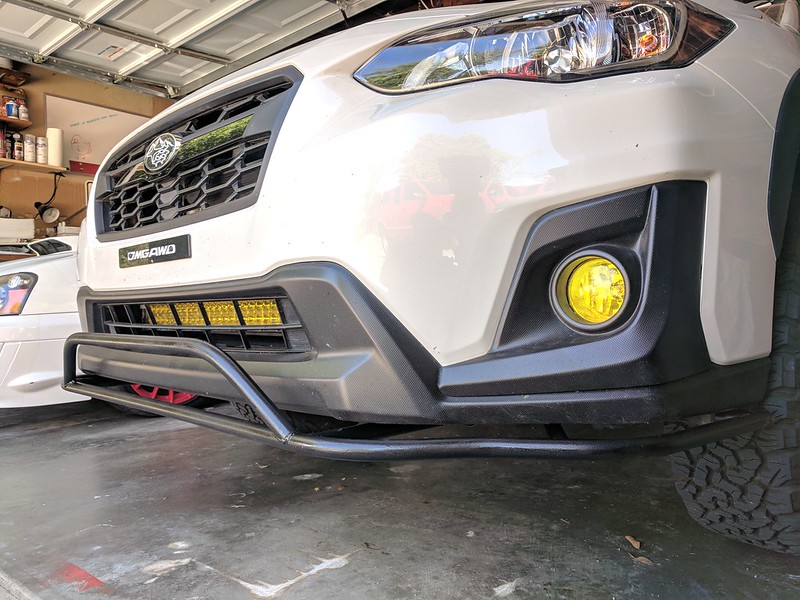
I used grade 8 bolt/nuts to secure the front mounting. The tab on the guard bolts right into place on the tow points. The two points already had a hole in place, no extra drilling!
Here are the rear mounting points.
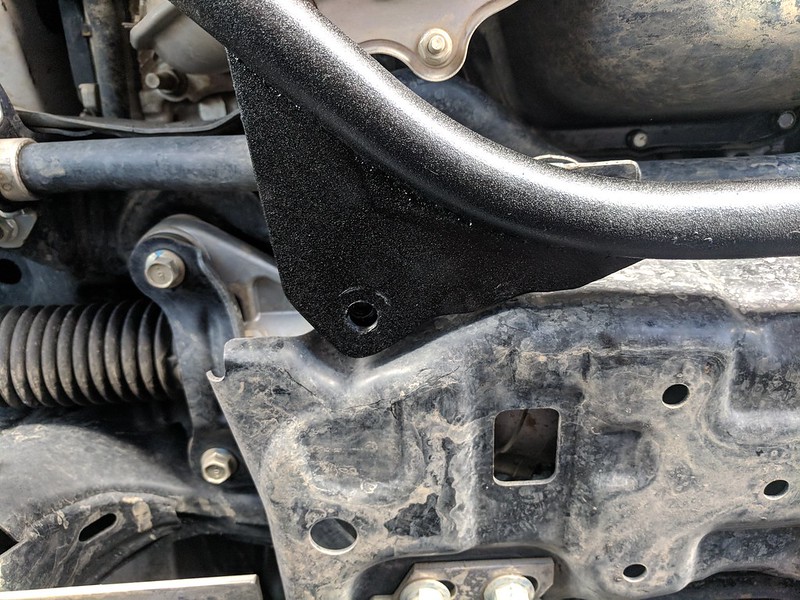
They line up with the holes in the crossmember where the Primitive skid plate mounts. So basically these tabs are going to be sandwiched between the crossmember and skid plate. No extra hardware needed.
05-21-2018, 08:34 AM
#373
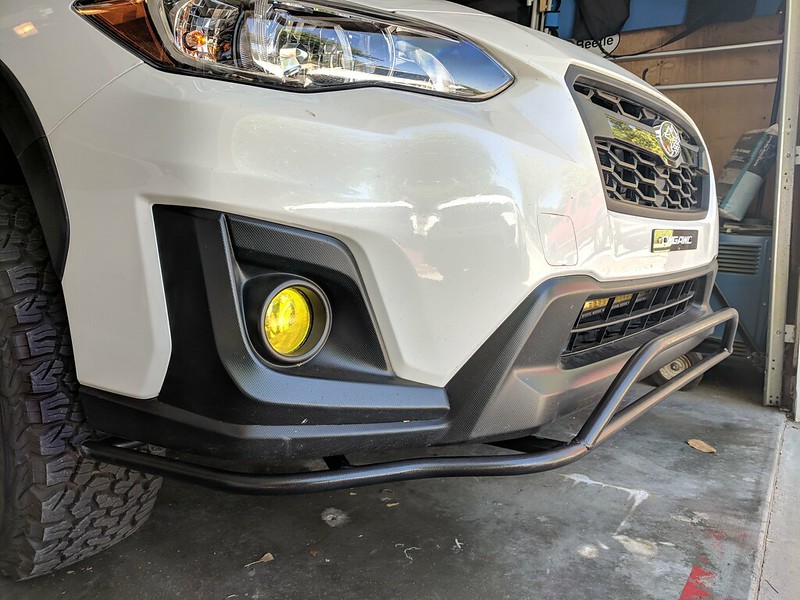
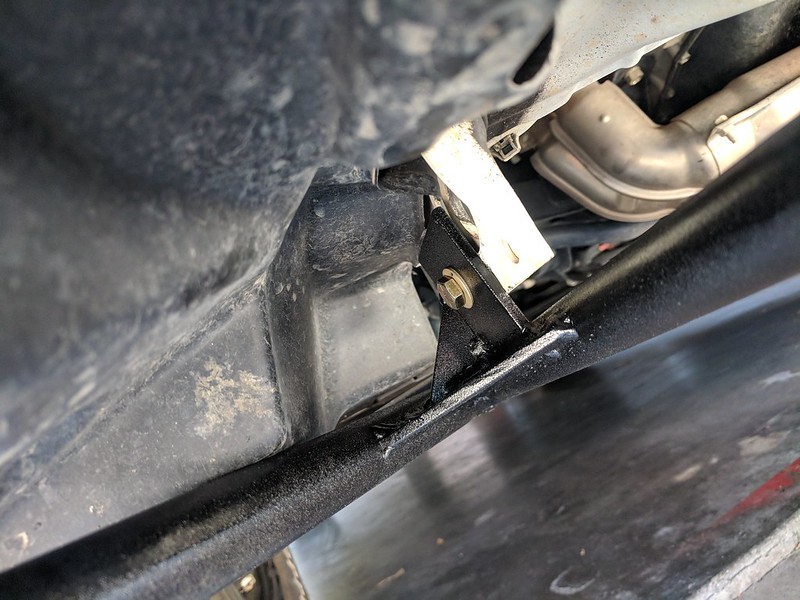
View with the skid plate installed.
I installed the front nuts onto the hanging bolts first, loosely. Then worked my way to the back of the skid. One of the bars on the guard JUST BARELY touches the skid plate, so I had to push the rear of the plate up and hold it in place while I hand threaded the mounting bolt on. I did that for both sides. Once everything was in and hand tight for all four mounting points, I went over all four with a ratchet to tighten them up.
Here in the red circle is the rear mounting hardware from the plate with the guard mount sandwiched between.
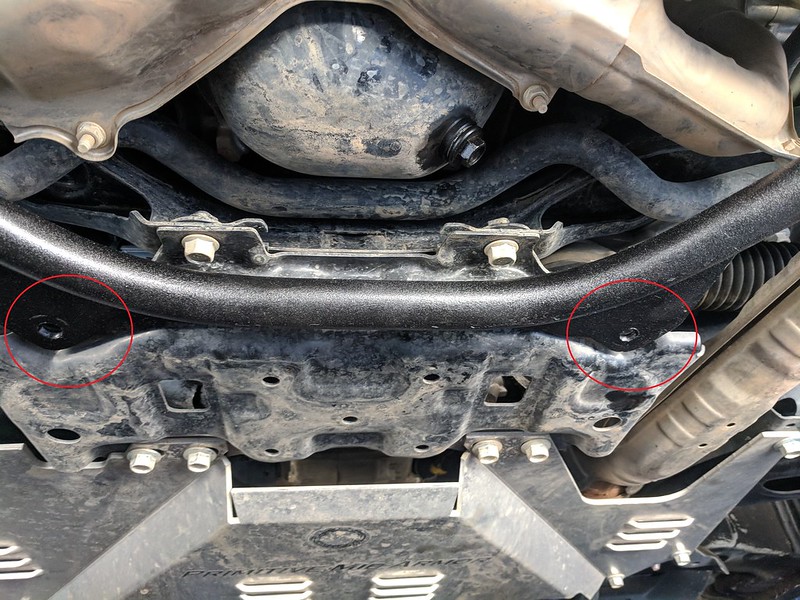
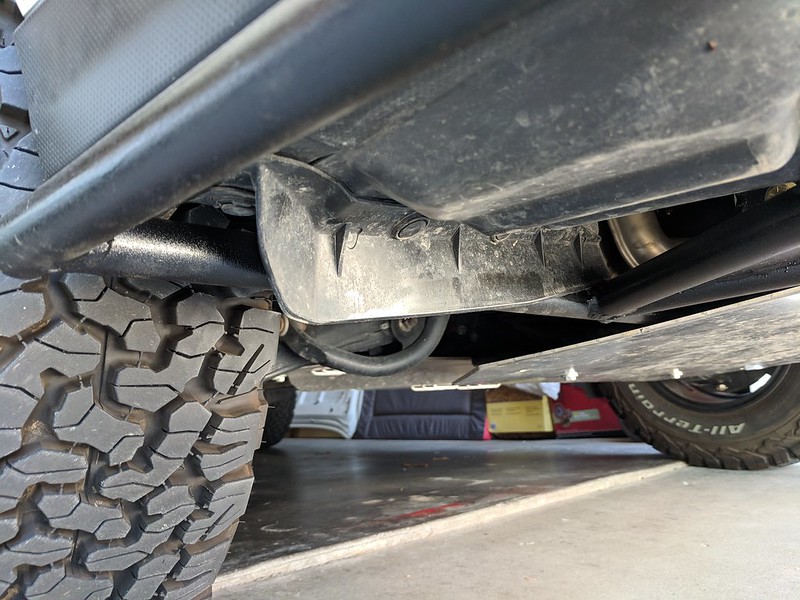
The only issue I had was since pushing the guard up into place, it pushed some of the plastic under tray/flashing around. So my front tires were rubbing on this mini "front mud flap" thing. Easy fix, I just folded it over in front of the bar instead of hanging behind it.
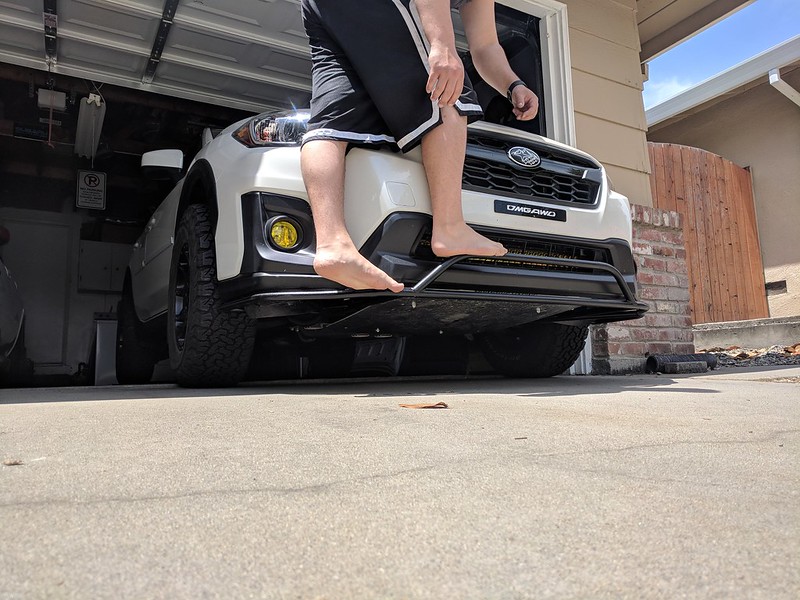
Its plenty strong, I stood on it and it didnt budge a bit. I can grab the upper hood and rock the car up and down.
I installed the front nuts onto the hanging bolts first, loosely. Then worked my way to the back of the skid. One of the bars on the guard JUST BARELY touches the skid plate, so I had to push the rear of the plate up and hold it in place while I hand threaded the mounting bolt on. I did that for both sides. Once everything was in and hand tight for all four mounting points, I went over all four with a ratchet to tighten them up.
Here in the red circle is the rear mounting hardware from the plate with the guard mount sandwiched between.
The only issue I had was since pushing the guard up into place, it pushed some of the plastic under tray/flashing around. So my front tires were rubbing on this mini "front mud flap" thing. Easy fix, I just folded it over in front of the bar instead of hanging behind it.
Its plenty strong, I stood on it and it didnt budge a bit. I can grab the upper hood and rock the car up and down.