My FULL 4/2 pot rebuild with pics!!
 10-19-2011, 11:11 AM
#1
Registered User
Thread Starter
iTrader: (2)

Join Date: Jul 2011
Location: Sacramento
Posts: 491
Car Info: 04 WRX Wagon, 06 Forester XT, 99 Legacy Sedan
My FULL 4/2 pot rebuild with pics!!
For those of you who dont know, I bought a set of 4/2 pot calipers off of a 2007 WRX from a no-name german dismantler in SoCal. This was after months of search for the right deal. I will take a moment to mention how much I love statewidelist.com where you can search every Craigslist site within a state at the same time.
This is how they showed up with next day shipping
IMAG0464.jpg?t=1316538824
After cleaning them off.
IMAG0466.jpg?t=1318885261
After sand blasting them. Note that I taped the piston areas with painters tape. I would use clean release duct tape next time as the painters tape began to come off during sandblasting.
IMAG0477.jpg?t=1317184555
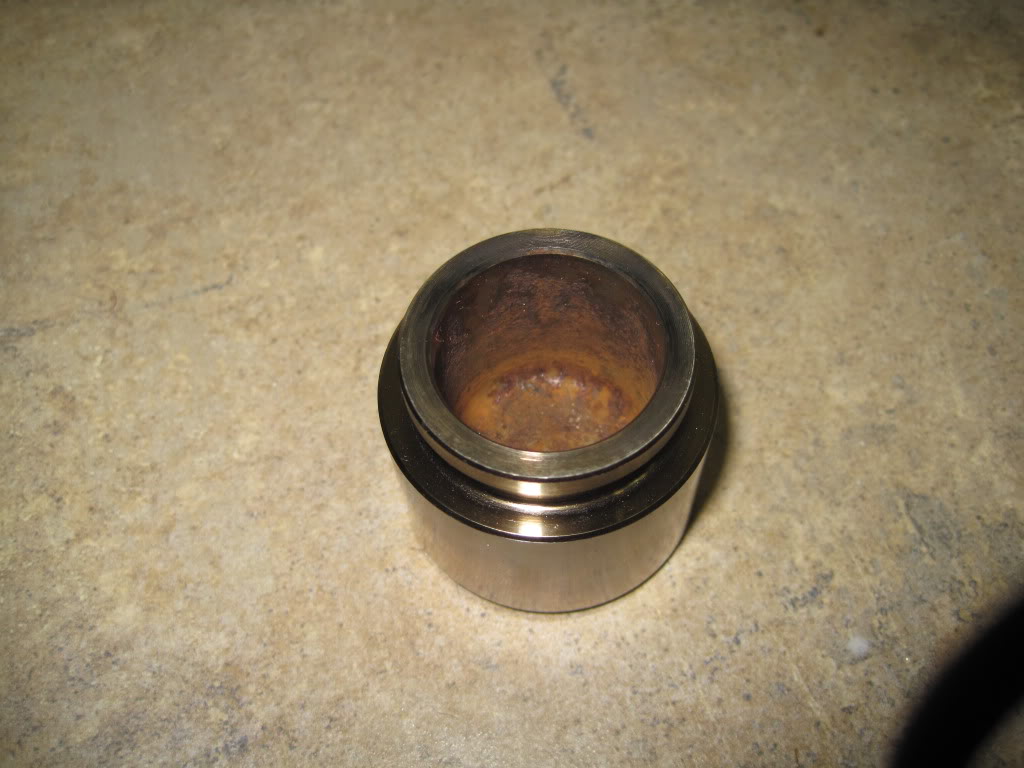
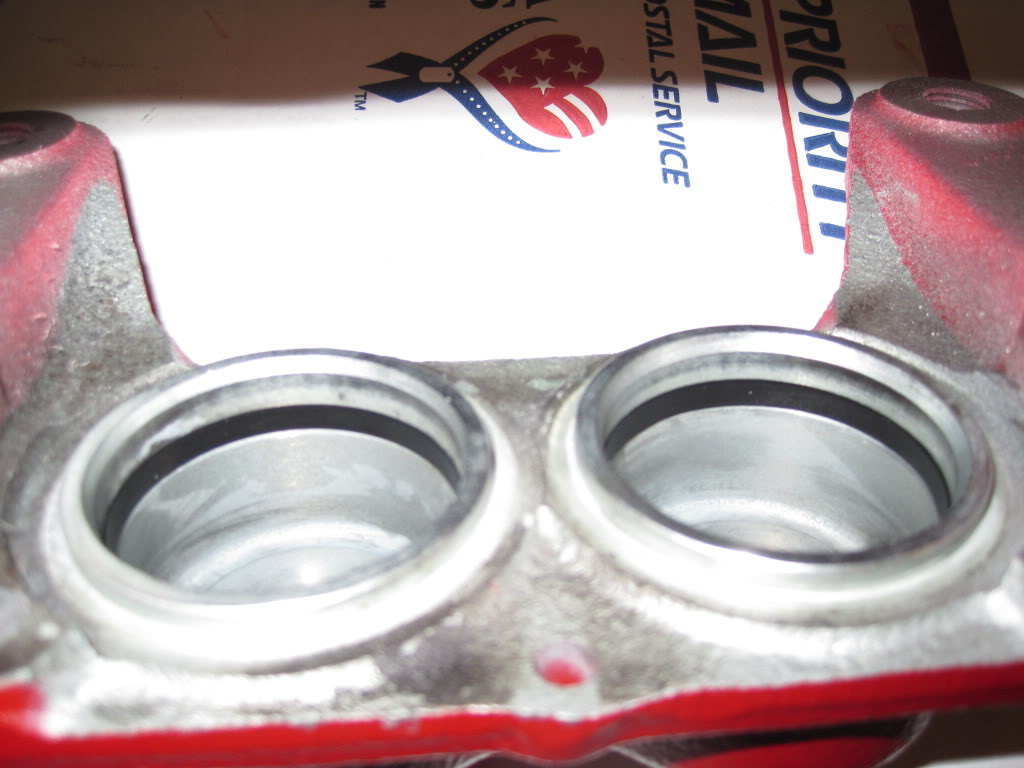
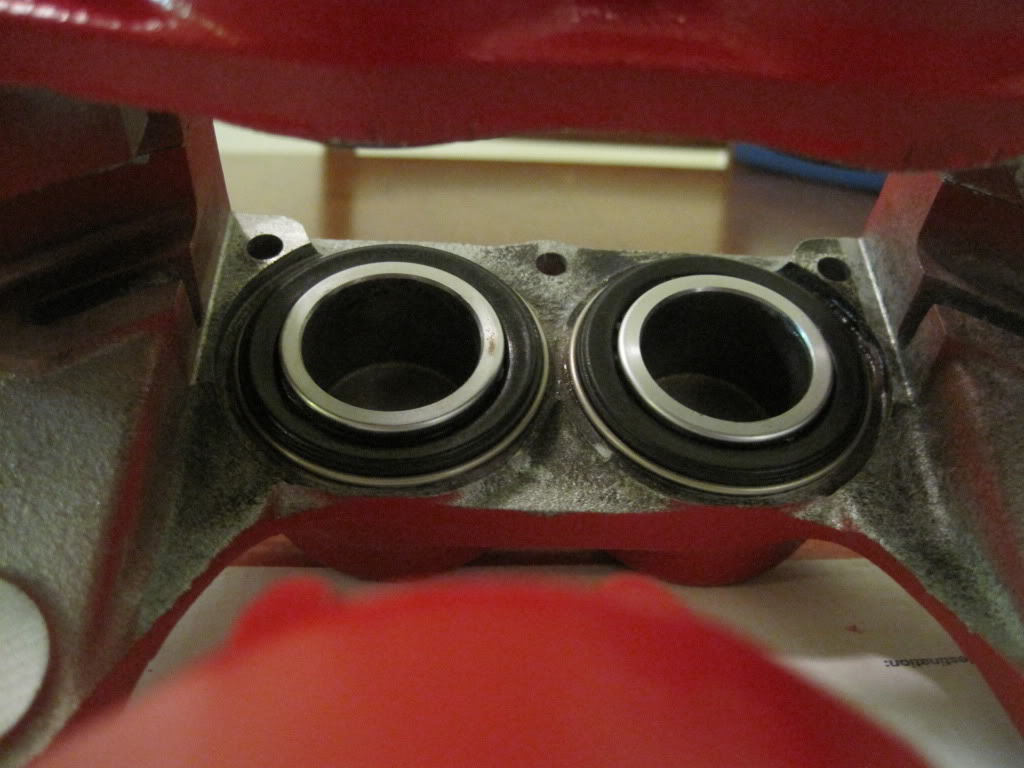
Calipers with all pins, clips, pads, pistons, seals and boots removed.
IMAG0489.jpg?t=1317519087
A few of the pistons had surface rust on the outside of the piston (not the part that seals). That was removed with Evapo-rust.
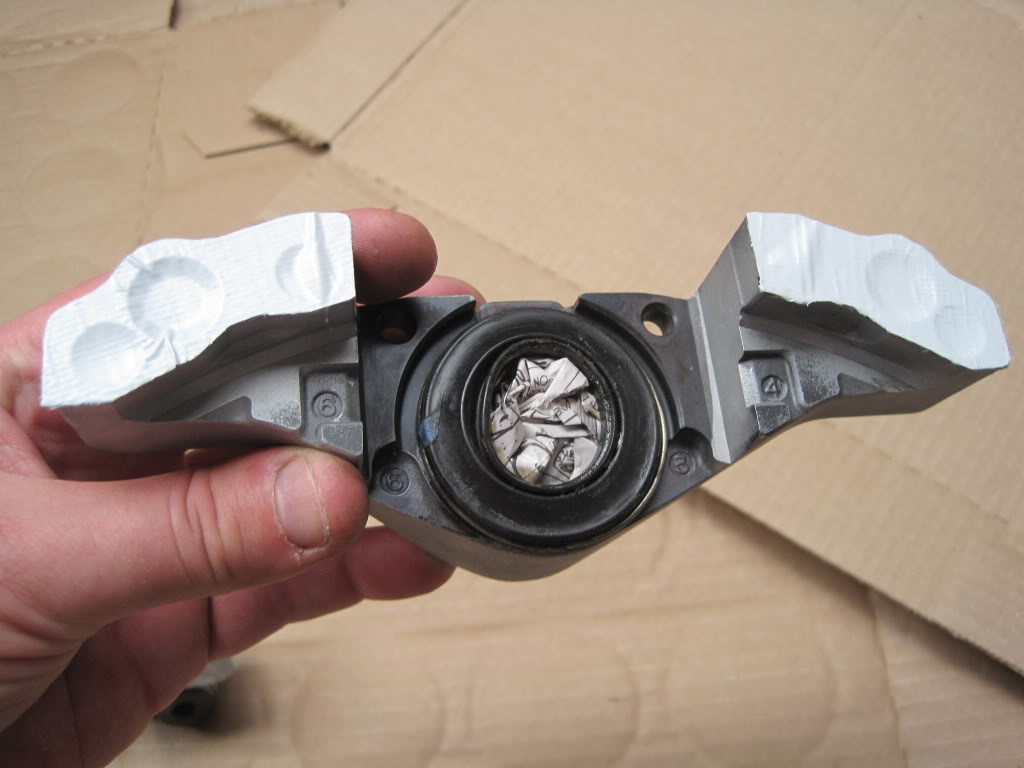
Split calipers, remove AND SAVE O-Rings, tape mating surfaces.
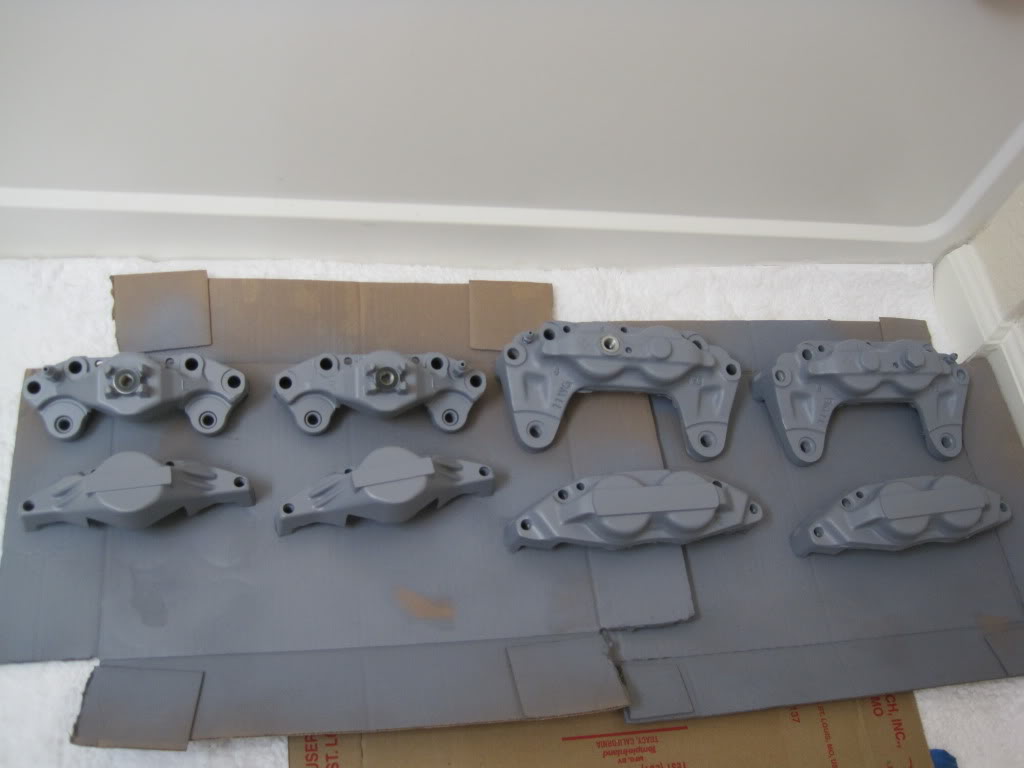
3 coats of VHT flameproof primer. I left the old bleeder in as I was replacing them with speedbleeders. I also got a bolt to seal the brake line hole.
070.jpg?t=1318885835
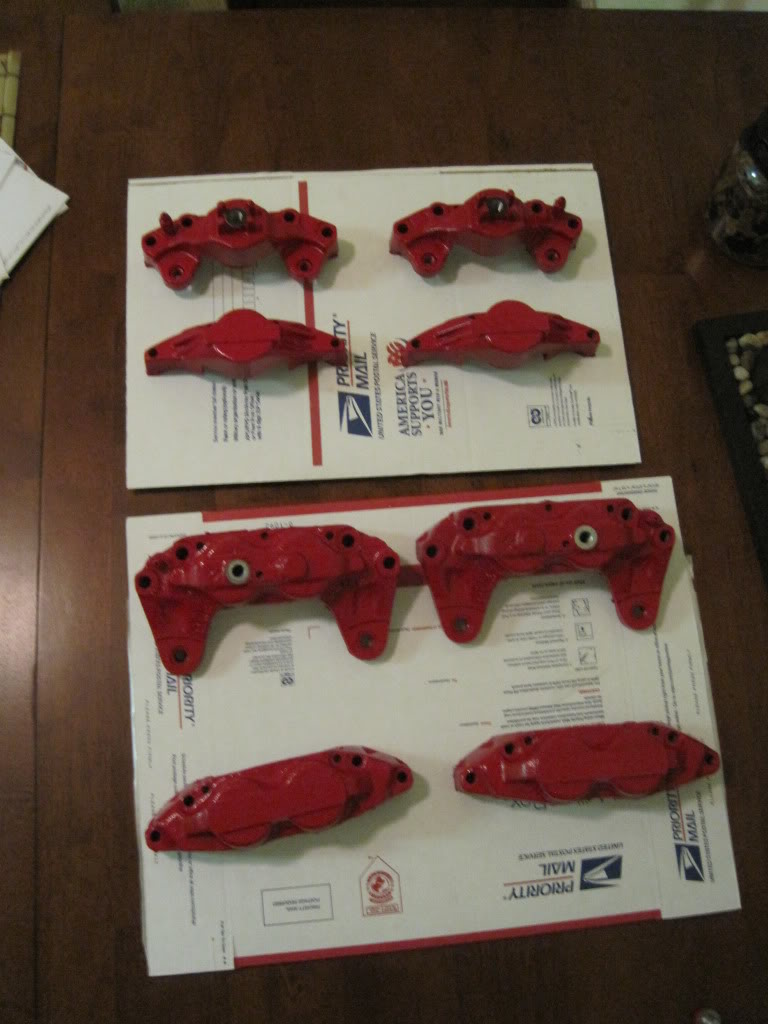
3 Coats of VHT Real Red Caliper paint:
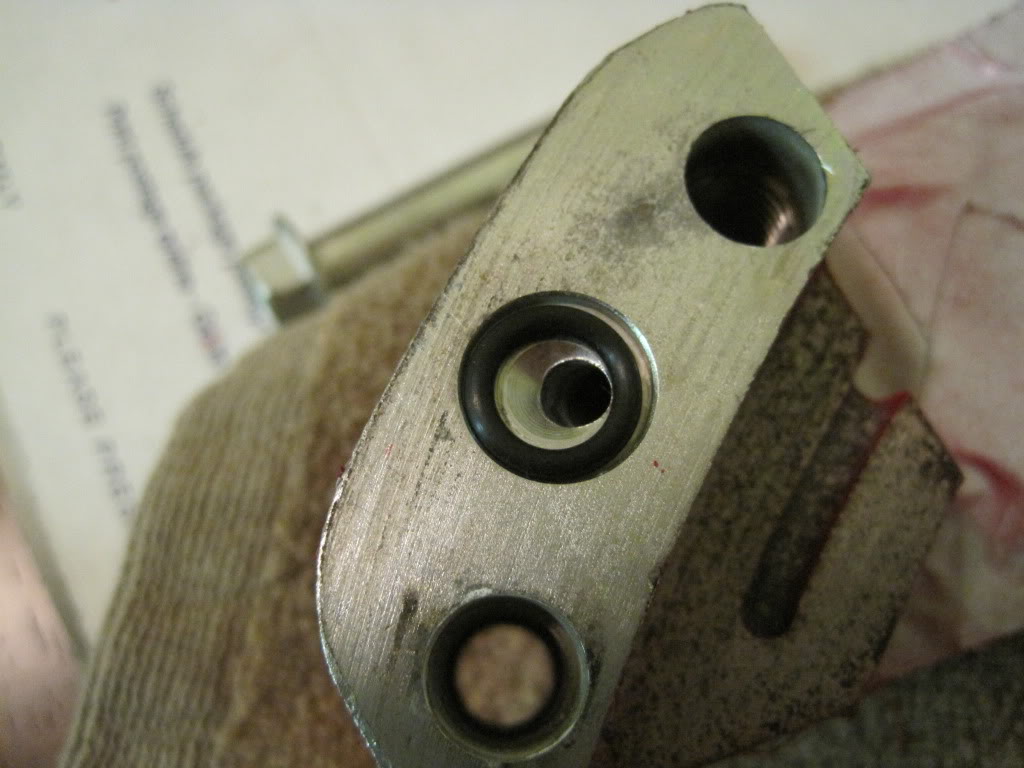
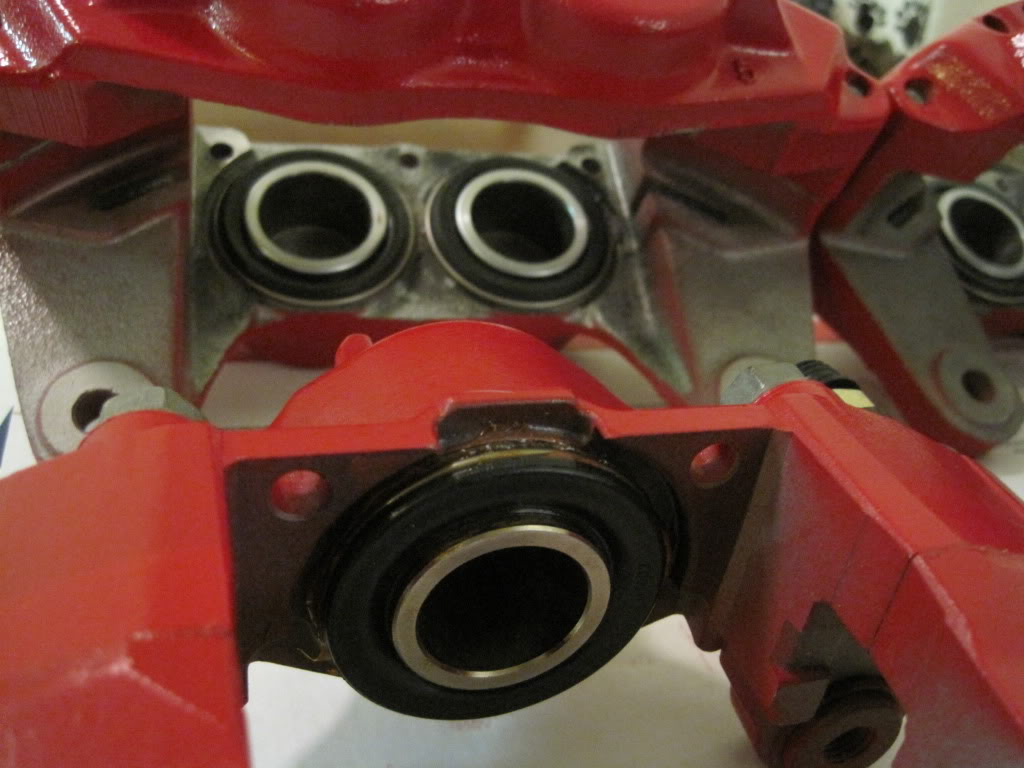
I ended up REUSING THE OEM O-rings because they fit the recessed opening much better than the Z1motorsports O-Ring.
OEM notice how the O-ring is nearly perfectly fitted to the opening:

Z1motorsports Notice the gap between the rounded O-Ring and the recessed area that it fits in:
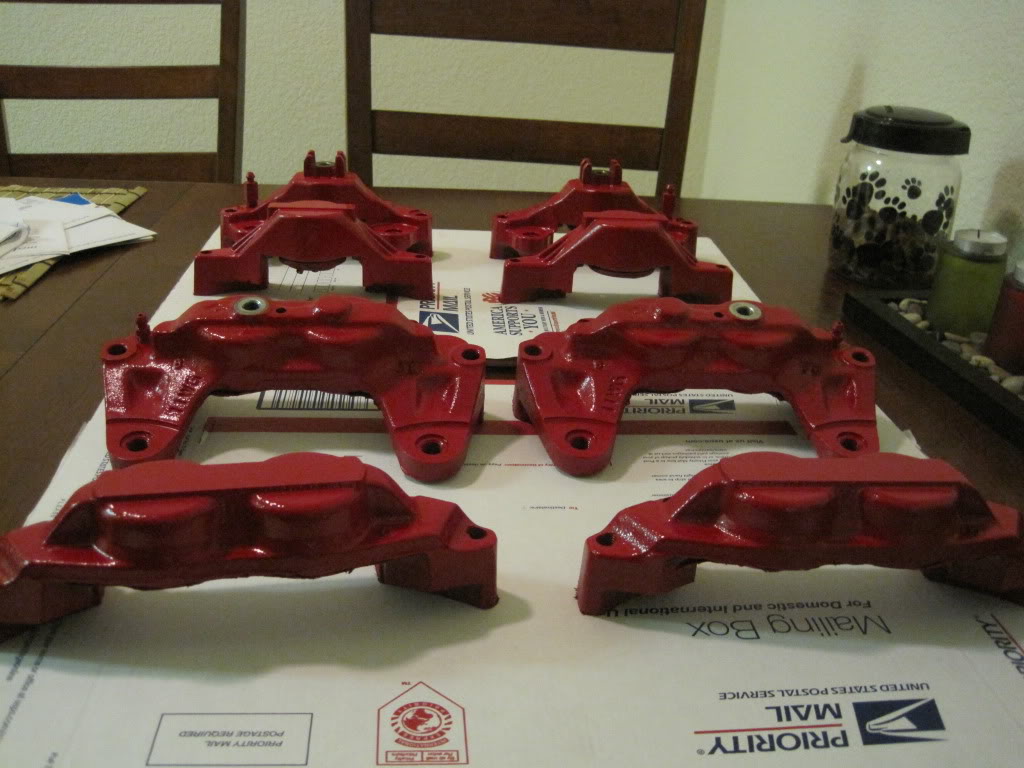
Reassembled with touch up coats of Red paint along seams of calipers. FYI I tried two methods of covering the piston area prior to painting. One involved using newspaper to stuff the hole for the piston and use the boots/rings that are going to be replaced anyways to cover the area. The other involved using clean release duct tape. Both worked great but the first method was quicker.
106.jpg?t=1318886365
Applying Ebay Hi Temp decals from seller SuperGraphicsF1 (website is Subaru Brake Decals - Super Graphics F1)
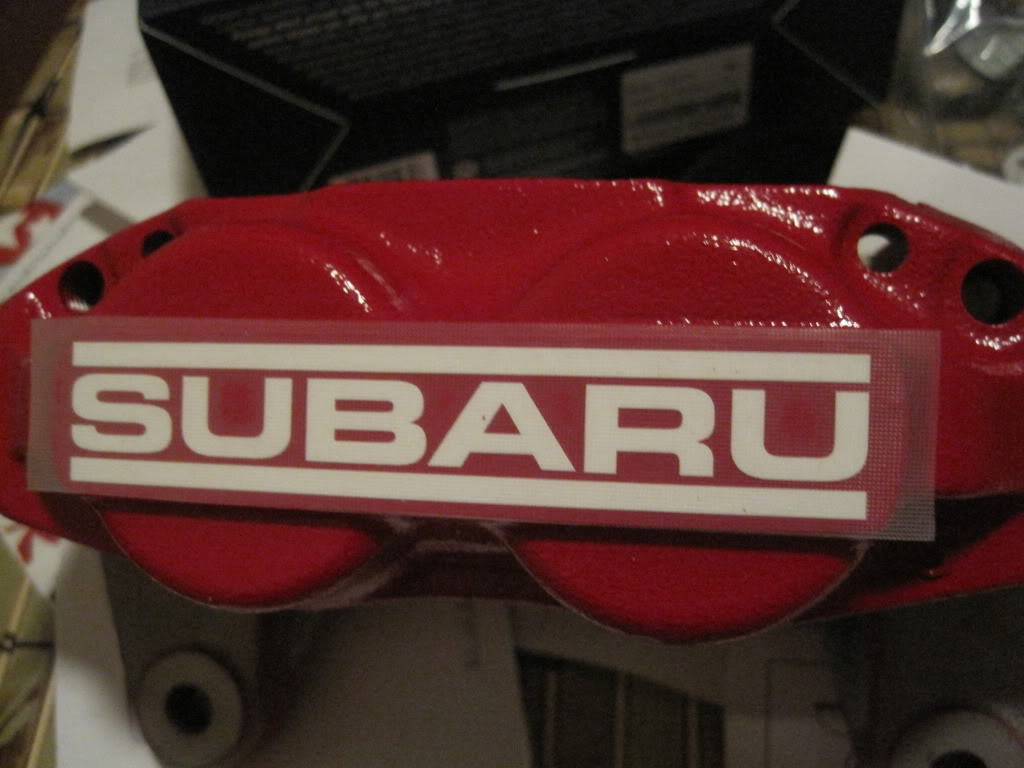
3 coats of VHT Caliper Clear Coat over the decals then time to start putting the seals and pistons in.
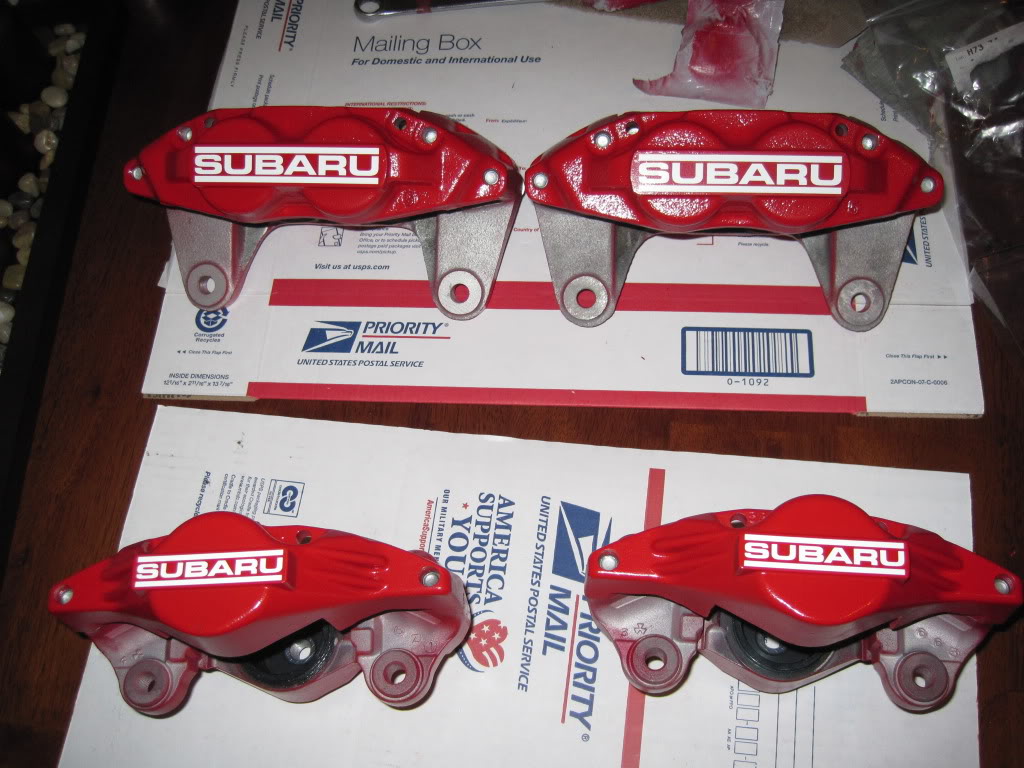
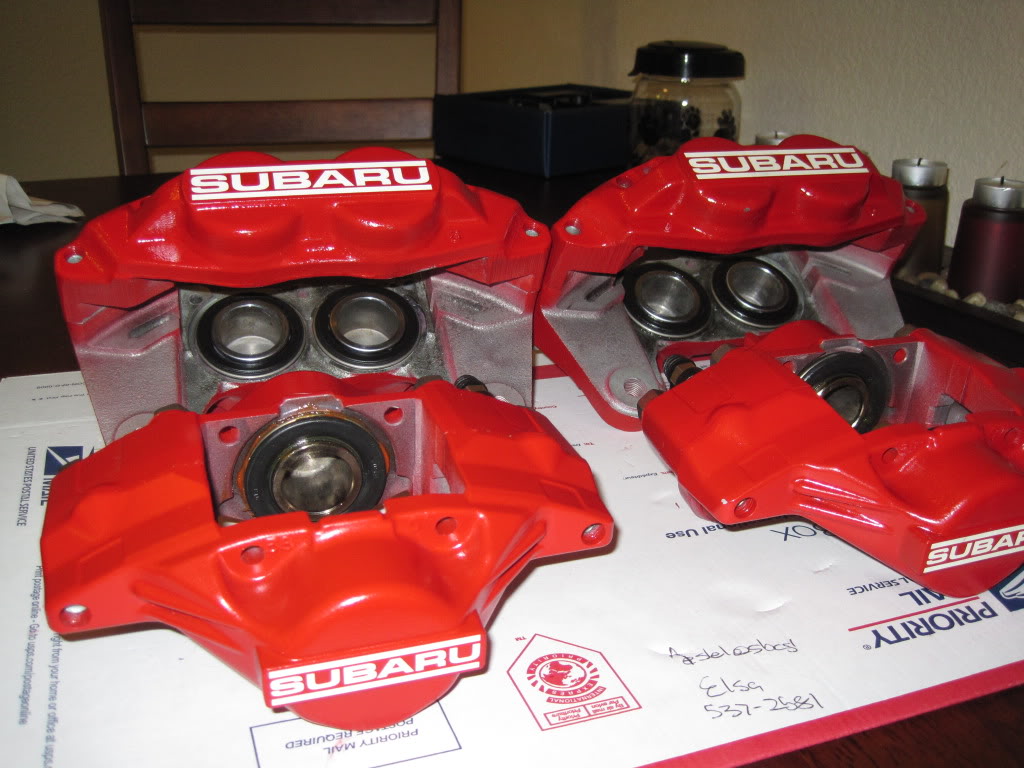
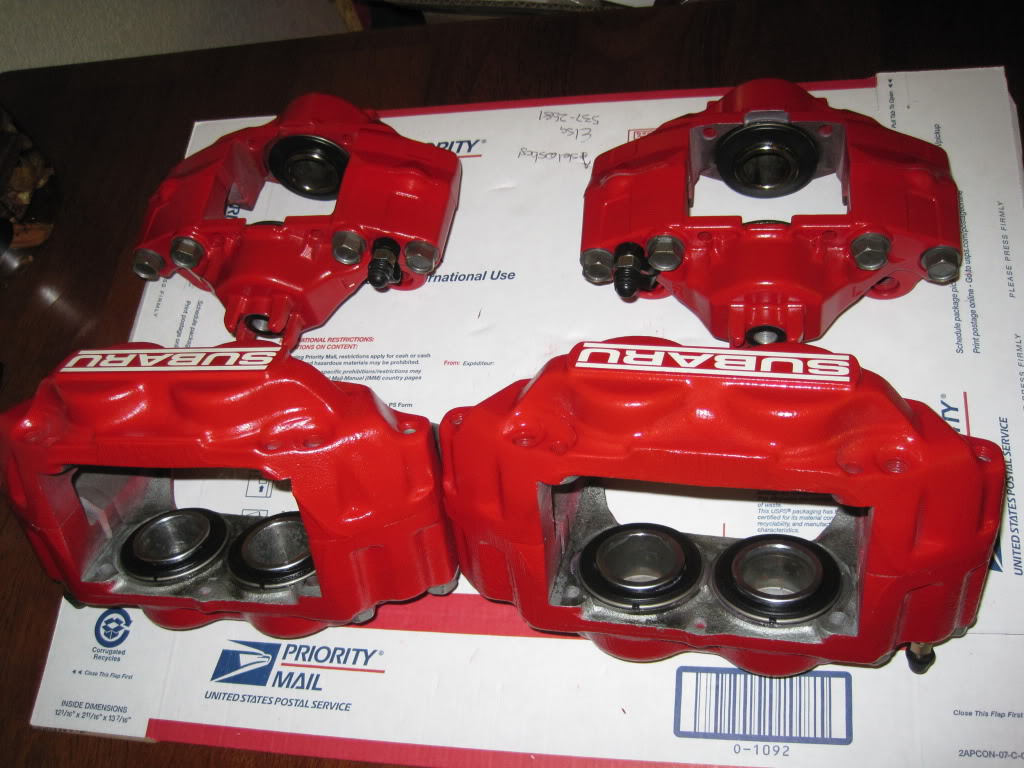
Finished product fully reassembled.
A few thoughts on the process:
Splitting the calipers seemed to be the easiest way to cleanly paint under/around the bolts.
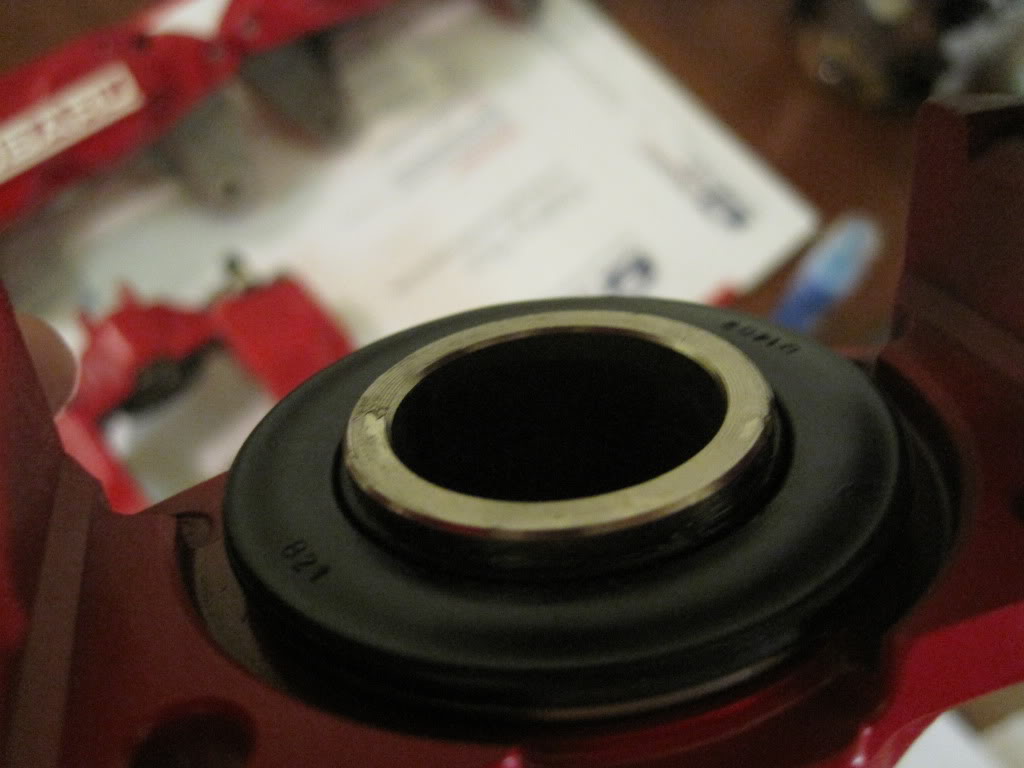
The O-Rings in the center seemed completely unaffected by the first 4 years of use. I opted to use the OEM ring instead of the Z1motorsports o-rings.
I would recommend barely rebolting the two sides together prior to touching up any seams or missed spots and baking. If you try to tightly bolt the two sides together before baking the final product, the soft paint will tear or pull up right around the bolt flanges where they make contact with the painted surface. In thinking about it afterwards, the rear 2 pots didnt have this problem because the bolt has a washer and not a flange... adding a washer between the flange bolt and the soft, painted surface might eliminate this issue while the paint is still soft. Then after all touch-up and baking is done (paint is hard), the washers can be removed one at a time to avoid the calipers splitting the painted seam again.
Once you take the calipers out of the oven, DONT TOUCH THEM AT ALL. The paint is hot and INCREDIBALLY easy to peel and tear.
The decals seem to be of REALLY good quality and they were really easy to apply.
Thanks for reading!!!
This is how they showed up with next day shipping
IMAG0464.jpg?t=1316538824
After cleaning them off.
IMAG0466.jpg?t=1318885261
After sand blasting them. Note that I taped the piston areas with painters tape. I would use clean release duct tape next time as the painters tape began to come off during sandblasting.
IMAG0477.jpg?t=1317184555
Calipers with all pins, clips, pads, pistons, seals and boots removed.
IMAG0489.jpg?t=1317519087
A few of the pistons had surface rust on the outside of the piston (not the part that seals). That was removed with Evapo-rust.
Split calipers, remove AND SAVE O-Rings, tape mating surfaces.
3 coats of VHT flameproof primer. I left the old bleeder in as I was replacing them with speedbleeders. I also got a bolt to seal the brake line hole.
070.jpg?t=1318885835
3 Coats of VHT Real Red Caliper paint:
I ended up REUSING THE OEM O-rings because they fit the recessed opening much better than the Z1motorsports O-Ring.
OEM notice how the O-ring is nearly perfectly fitted to the opening:
Z1motorsports Notice the gap between the rounded O-Ring and the recessed area that it fits in:
Reassembled with touch up coats of Red paint along seams of calipers. FYI I tried two methods of covering the piston area prior to painting. One involved using newspaper to stuff the hole for the piston and use the boots/rings that are going to be replaced anyways to cover the area. The other involved using clean release duct tape. Both worked great but the first method was quicker.
106.jpg?t=1318886365
Applying Ebay Hi Temp decals from seller SuperGraphicsF1 (website is Subaru Brake Decals - Super Graphics F1)
3 coats of VHT Caliper Clear Coat over the decals then time to start putting the seals and pistons in.
Finished product fully reassembled.
A few thoughts on the process:
Splitting the calipers seemed to be the easiest way to cleanly paint under/around the bolts.
The O-Rings in the center seemed completely unaffected by the first 4 years of use. I opted to use the OEM ring instead of the Z1motorsports o-rings.
I would recommend barely rebolting the two sides together prior to touching up any seams or missed spots and baking. If you try to tightly bolt the two sides together before baking the final product, the soft paint will tear or pull up right around the bolt flanges where they make contact with the painted surface. In thinking about it afterwards, the rear 2 pots didnt have this problem because the bolt has a washer and not a flange... adding a washer between the flange bolt and the soft, painted surface might eliminate this issue while the paint is still soft. Then after all touch-up and baking is done (paint is hard), the washers can be removed one at a time to avoid the calipers splitting the painted seam again.
Once you take the calipers out of the oven, DONT TOUCH THEM AT ALL. The paint is hot and INCREDIBALLY easy to peel and tear.
The decals seem to be of REALLY good quality and they were really easy to apply.
Thanks for reading!!!
Last edited by Harry Maneuvers; 01-06-2012 at 09:30 AM.

 10-19-2011, 04:41 PM
#6
If in doubt, FLAT OUT
iTrader: (33)
Join Date: Oct 2010
Location: Nor Cal SJ
Posts: 7,035
Car Info: 2010 Hatch, 2011 Sedan
Wow, nice job.
I have a quick question on the 4pots, do they use the same pads as the other years (04-05) or are they different? I know the rotors are the same.
I have a quick question on the 4pots, do they use the same pads as the other years (04-05) or are they different? I know the rotors are the same.
Last edited by 04GG; 10-19-2011 at 04:45 PM.
10-20-2011, 08:05 AM
#8
Registered User
Thread Starter
iTrader: (2)
Join Date: Jul 2011
Location: Sacramento
Posts: 491
Car Info: 04 WRX Wagon, 06 Forester XT, 99 Legacy Sedan
@ 04GG: I am pretty sure that the earlier 4 pots and the later USDM 4 pots are the exact same aside from the raised letters.
@ Burnyou2: they wouldnt have come out this good without your help man. I cant thank you or your sandblaster enough! Next time you need a second set of hands... let me know.
@ Burnyou2: they wouldnt have come out this good without your help man. I cant thank you or your sandblaster enough! Next time you need a second set of hands... let me know.
Last edited by Harry Maneuvers; 10-20-2011 at 08:08 AM.
10-20-2011, 09:02 AM
#9

The 06-07 USDM 4pots can use the JDM early 4pots(raised letter) pads and even the Nissan 300ZX 4pots pads, they are all the same. USDM 04-05 OEM pads is using totally different pads due to different caliper(2 pots).
10-20-2011, 09:03 AM
#10
I know when i was trying to find pads for the rears, the USDM pads did not fit.
But they do look great man. How much was the rebuild kit and how long did the entire process take?
10-23-2011, 10:44 AM
#11
Registered User
Thread Starter
iTrader: (2)
Join Date: Jul 2011
Location: Sacramento
Posts: 491
Car Info: 04 WRX Wagon, 06 Forester XT, 99 Legacy Sedan
Correct, raised letters mean JDM because there were no USDM subaru's with 4 pots prior to the 06/07 USDM wrx.
I am nearly positive that all pads are interchangeable like ORWRX stated.
Total cost of rebuild was $174.95 with optional speedbleeders not including rust remover of your choice if needed. This includes the $17 for unneeded O-Rings:
Bolts and washers to fill banjo bolt hole - $5
Sandblasting -Free thanks to Burnyou2
Scotch� Tough Duct Tape - Outdoor Clean Release Painters Tape. - AMAZING STUFF!!!! - $9 at The Home Depot.
VHT Caliper Cleaner - $5.50 at autozone
VHT FlameProof™ Coating - SP100 Flat Grey primer - $8 at Tognottis
VHT Caliper Paint - SP731 Real Red - $12 at autozone
VHT Caliper Paint - SP730 Gloss Clear - $7 on amazon although I am pretty sure Tognottis will have it.
Hi Temp Decals from Subaru Brake Decals - Super Graphics F1 - $20.64 shipped for all four decals.
Amazon.com: Goodridge Speed Bleeder - 7mm x 1.0 , Size: 7mm SB7100: Automotive
Amazon.com: Goodridge Speed Bleeder - 10mm x 1.0 , Size: 10mm SB1010: Automotive - Both sets of speedbleeders shipped for $35 from amazon.
Front (26297FA051) and rear (26697FA000) OEM caliper seal/rebuild kit - $55.81 shipped from subarugenuineparts.com (cheapest place)
The O-Rings from Z1motorsport were $17 but I didnt use them...
Time spend doing this:
Prepping and sandlbasting calipers - 3 hours
Prepping and 3 coats of primer - 1.5 hours then dry for at least 1 day.
Prepping and 3 coats of Real Red - 1.5 hours then dry for at least 5 days before trying to bake.
Applying decals - .5 hours
Prepping and 3 coats of gloss clear - 1.5 hours then dry for at least 5 days before trying to bake.
Reassembling piston seals, pistons, piston boots and retaining rings - 1 hour.
I am sure I am leaving out little things here and there like splitting the calipers and paint touch up. I did the 3 stages of painting (prime, paint and clear) on 3 separate Saturdays.
Last edited by Harry Maneuvers; 10-23-2011 at 04:56 PM.
05-17-2012, 10:15 PM
#12
Registered User
Thread Starter
iTrader: (2)
Join Date: Jul 2011
Location: Sacramento
Posts: 491
Car Info: 04 WRX Wagon, 06 Forester XT, 99 Legacy Sedan
FYI - 550 Degrees is TOO HOT FOR THE 2 POT REAR BOOT TO HANDLE WHILE BAKING ON THE VHT CLEARCOAT!!!!!!!!


Update to follow with whether or not the internal seal was affected.
Update to follow with whether or not the internal seal was affected.

 Lol
Lol