OEM STi Roof Vane Install
 03-13-2010, 12:36 AM
#1
OEM STi Roof Vane Install
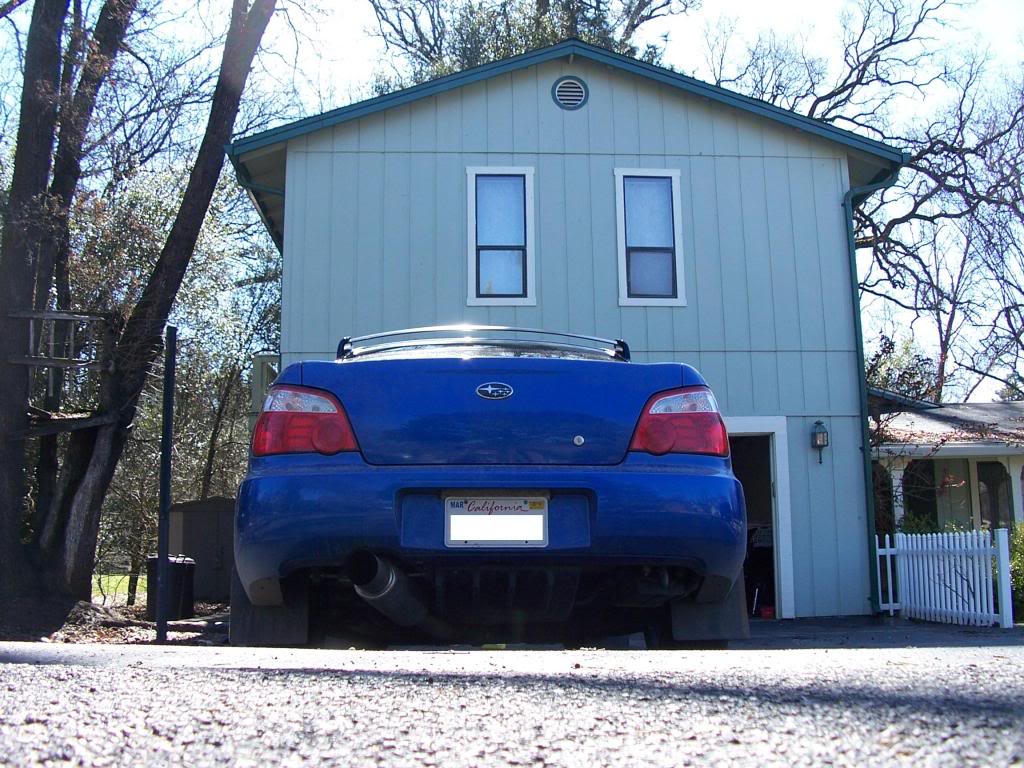
Ok, so after a long wait, I finally got an OEM roof vane. There was also a lack of any good writeups on how to do this mod so here's my experience with this. Oh, and this is my first writeup. 
This works for all 02-07 WRX and 04/05 STi's. Supposedly this can be mounted to a GC and legacies as well, but that goes beyond what this thread will tell you. This is for the OEM vane. The ebay carbon fiber ones are more difficult to install.
Foreword: This mod can be pretty difficult and has a lot of variables. Just be warned that it's tricky and expect to possibly get creative to do some steps. I'm going to explain what I did and some ideas that may help you. However you are doing this at your own risk and I am not responsible for any mistakes you may make. The most important thing about this install is to take your time!
Tools:
14mm socket
flat head screwdriver
High powered drill
very sharp and good quality drill bits: 1/4" and smaller
some kind of marker
Knife or scissors
Friends to hold stuff
Measuring tape
optionals: punch, strong wood nails, hammer
Materials:
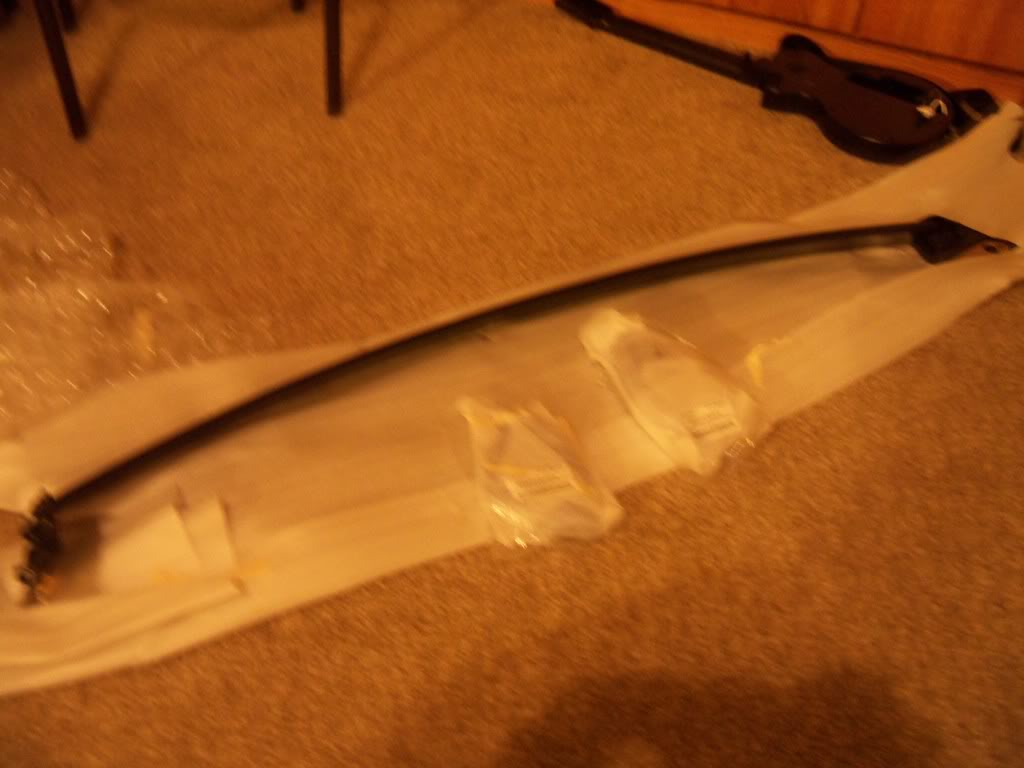
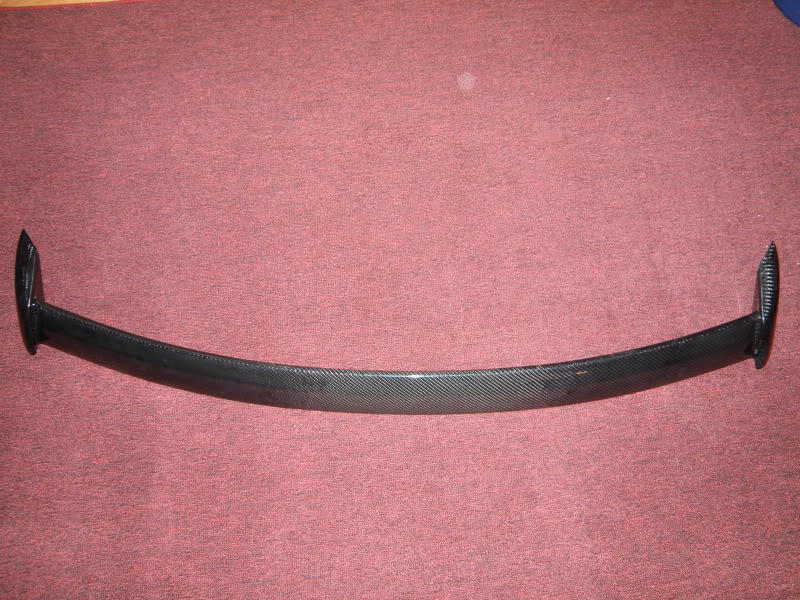
OEM roof vane (part #96021FE000) and side caps
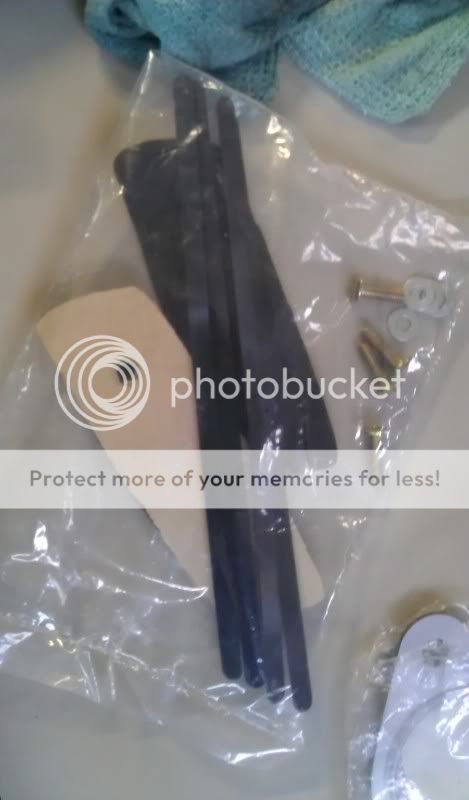
4x 1/4" bolts (I went with stainless steel ones) 2.5" long
Washers and lock washers
Lock nuts
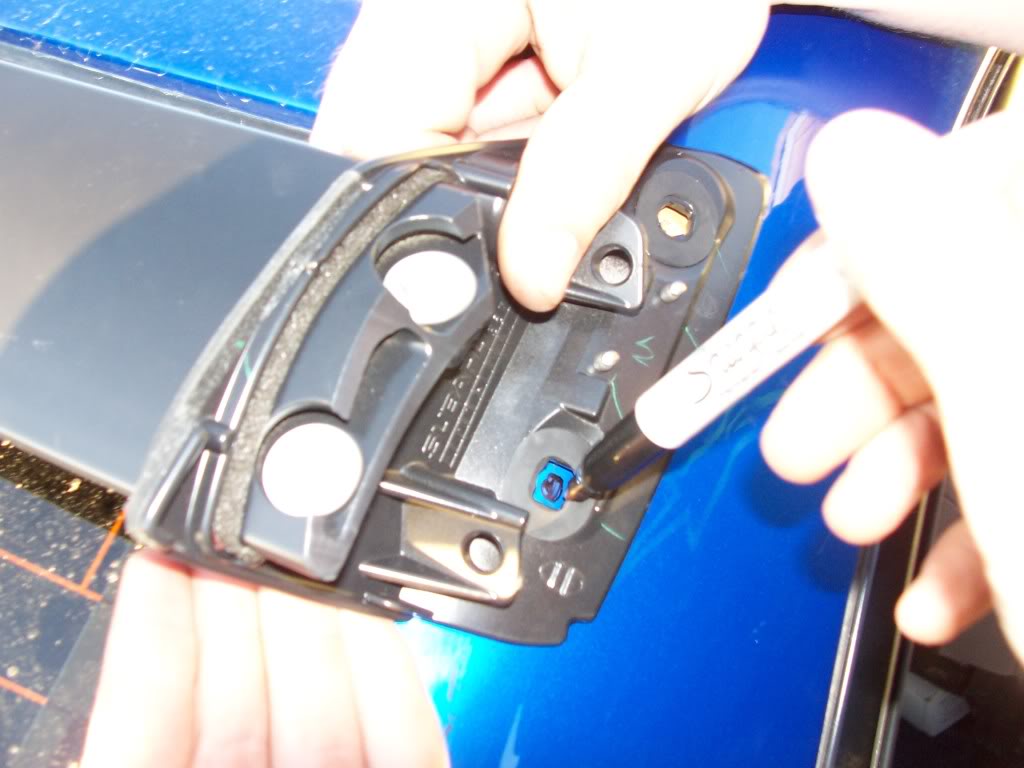
Note: When you look at the bottom of the OEM vane's base mounts, you will notice a little plastic tab that sticks out between the holes and gets in the way of mounting to the car. No one addressed this so I did some research. You can drill a third hole for it or do what me and many others do and just cut it off with the scissors or knife since it makes no difference for the install.
Step 1: Now things are going to get fragile so be very careful from here! Take the flat head screwdriver or similar tool and pop out the pop pins that are holding the rear-most part of the headliner in place and remove the pins. Be careful because the headliner is fragile and will crease very easily.

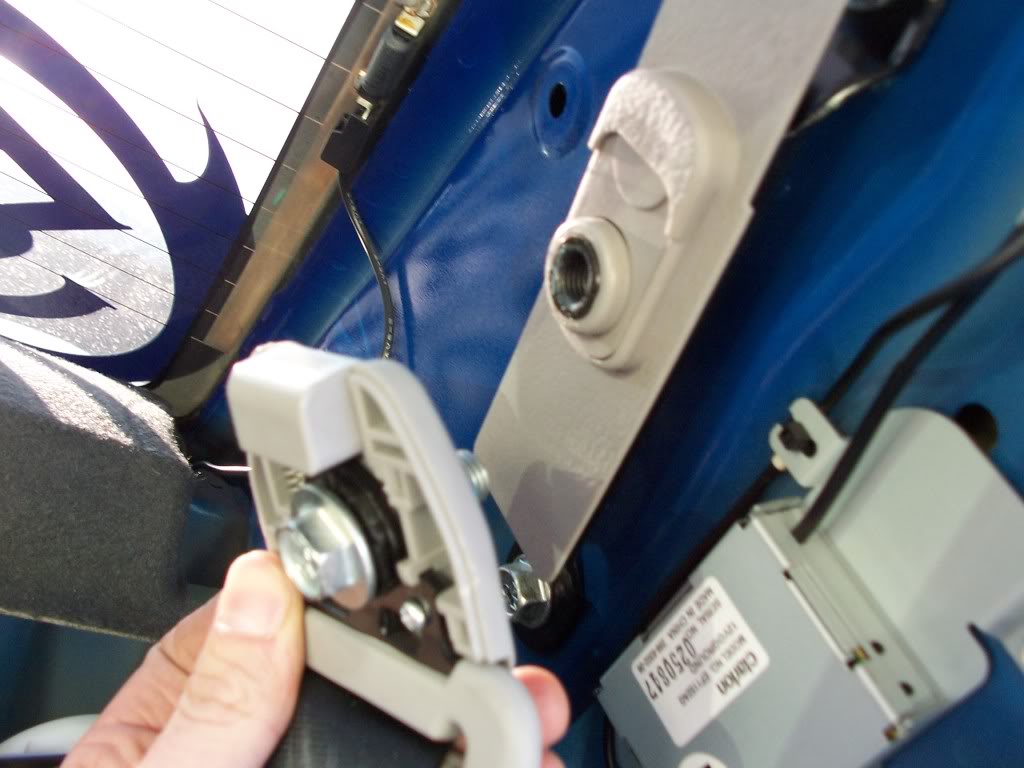
Step 2: Stick that flat head screwdriver into the cap that is on the bracket holding up the seatbelt at the highest point and gently pry the cap off one side at a time.

Step 3: Grab the 14mm socket and loosen the seatbelt bracket. Once that is loose, set it aside and out of the way. (this pic already has the trim piece off, I am just showing you what bolt released the belt bracket.)
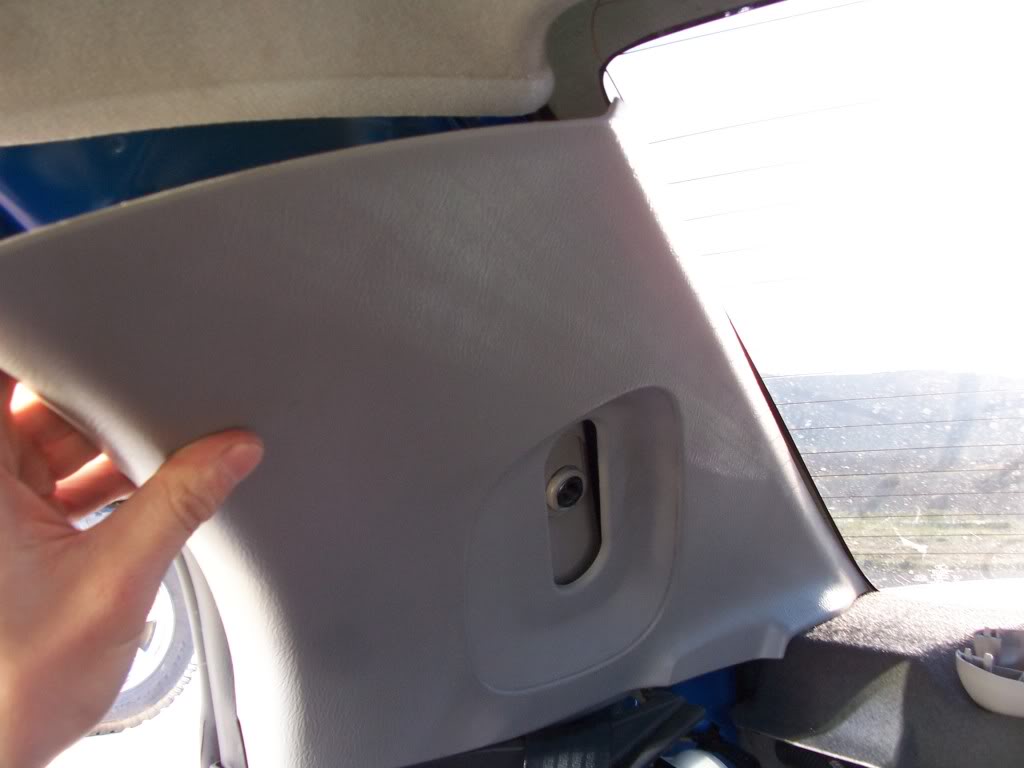
Step 4: Pulling from the top, remove the trim piece that is covering the C pillar. This just pops out pretty easily.
Now that we have all the interior trimmings out of the way we can move on to the main event: lining things up and drilling some holes!
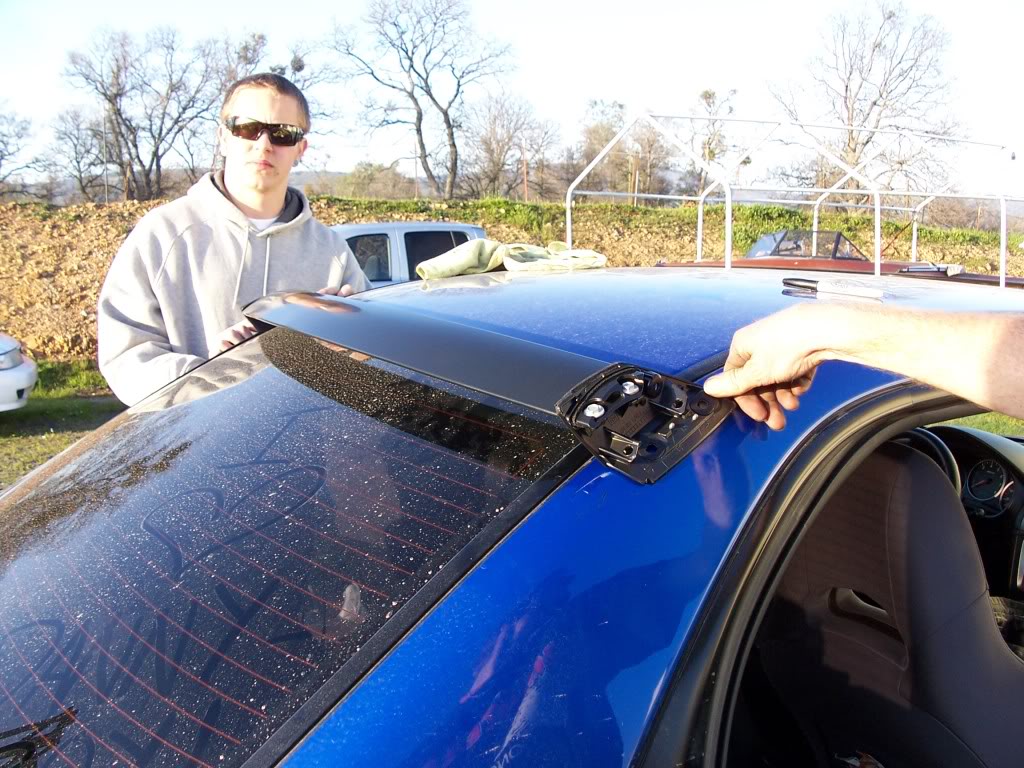
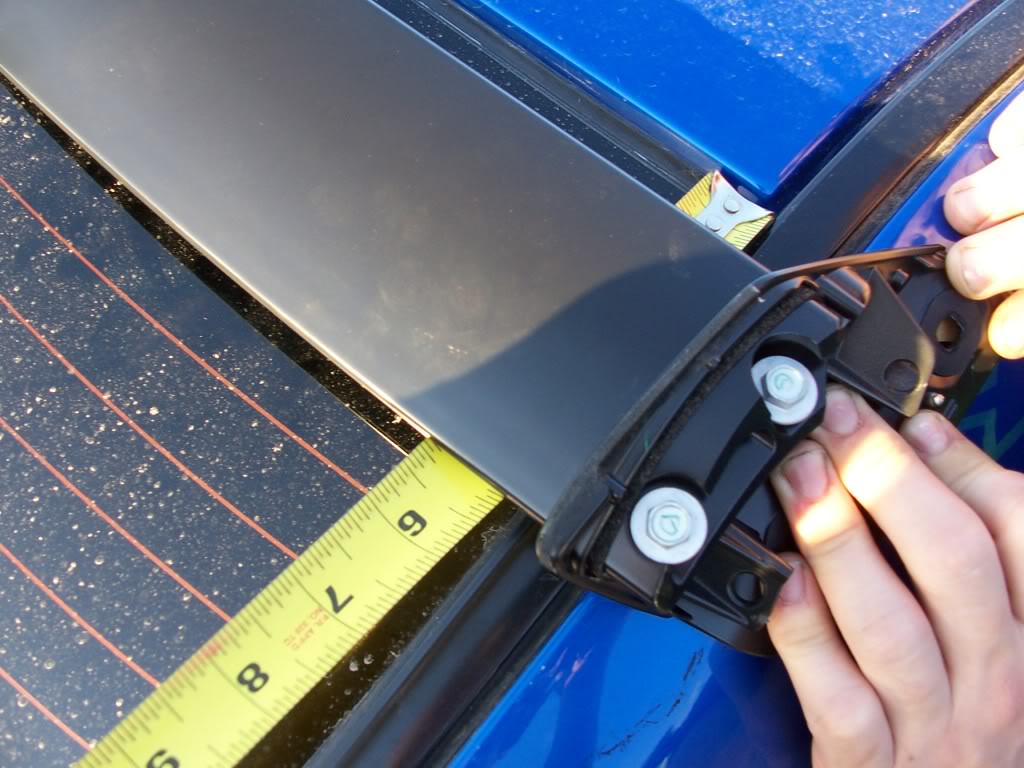
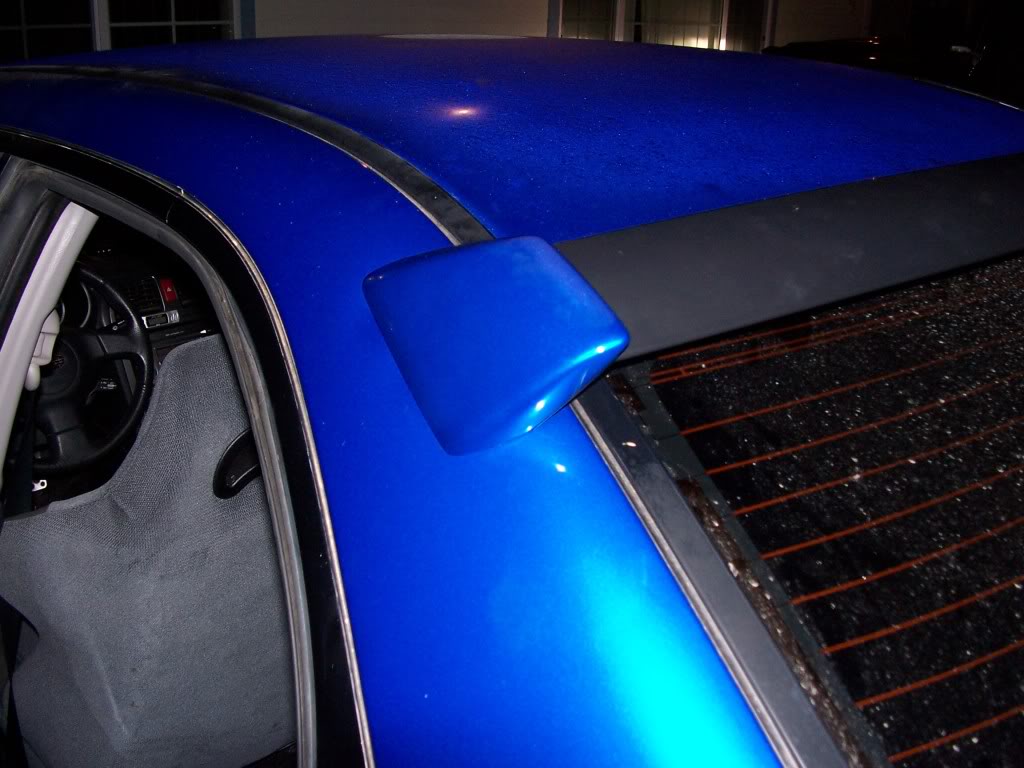
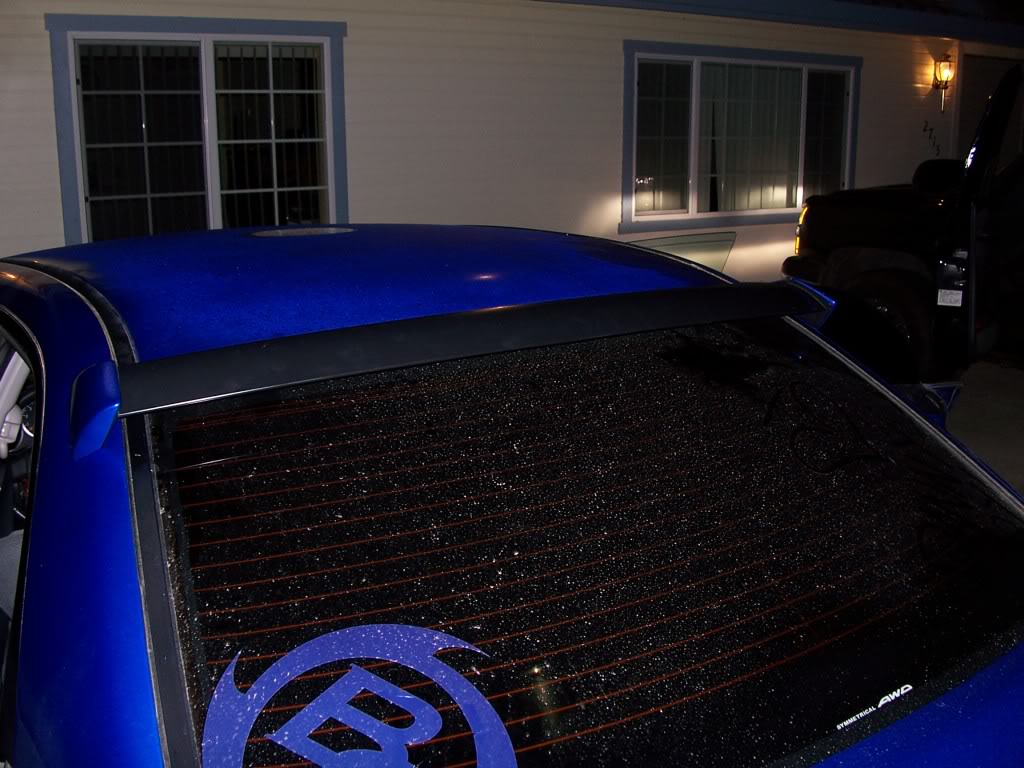
Step 5: Make sure the endcaps are off the roof vane and have your friends hold the roof vane up against the car. Have them hold it in the general area of where the vain is supposed to be. It helps to have looked at some STi's prior to doing this, but it's not necessary. Once you're in the general area of the right spot you will notice that there is pretty much one spot where the base contours perfectly with the body. Have one side lined up into this spot and make sure your friend holds it steady there. Then go to the other side and see how close you can get to the same spot. Then adjust each side as necessary compensating distance until it looks dead on and the base sits flush with the body. No break out the measuring tape and measure everything twice. (Or five times if you're me) I measure from the edge of the window to the edge of the base laterally. As well as measuring from the top of the window to the rear-most end of the vane itself by passing the tape measure underneath the vane. (see pic) I found that this was a good way to make sure everything is lined up and symmetrical. Now have your friends hold it very tight! Pull out a marker and mark the center of the holes.
This works for all 02-07 WRX and 04/05 STi's. Supposedly this can be mounted to a GC and legacies as well, but that goes beyond what this thread will tell you. This is for the OEM vane. The ebay carbon fiber ones are more difficult to install.
Foreword: This mod can be pretty difficult and has a lot of variables. Just be warned that it's tricky and expect to possibly get creative to do some steps. I'm going to explain what I did and some ideas that may help you. However you are doing this at your own risk and I am not responsible for any mistakes you may make. The most important thing about this install is to take your time!
Tools:
14mm socket
flat head screwdriver
High powered drill
very sharp and good quality drill bits: 1/4" and smaller
some kind of marker
Knife or scissors
Friends to hold stuff
Measuring tape
optionals: punch, strong wood nails, hammer
Materials:
OEM roof vane (part #96021FE000) and side caps
4x 1/4" bolts (I went with stainless steel ones) 2.5" long
Washers and lock washers
Lock nuts
Note: When you look at the bottom of the OEM vane's base mounts, you will notice a little plastic tab that sticks out between the holes and gets in the way of mounting to the car. No one addressed this so I did some research. You can drill a third hole for it or do what me and many others do and just cut it off with the scissors or knife since it makes no difference for the install.
Step 1: Now things are going to get fragile so be very careful from here! Take the flat head screwdriver or similar tool and pop out the pop pins that are holding the rear-most part of the headliner in place and remove the pins. Be careful because the headliner is fragile and will crease very easily.
Step 2: Stick that flat head screwdriver into the cap that is on the bracket holding up the seatbelt at the highest point and gently pry the cap off one side at a time.
Step 3: Grab the 14mm socket and loosen the seatbelt bracket. Once that is loose, set it aside and out of the way. (this pic already has the trim piece off, I am just showing you what bolt released the belt bracket.)
Step 4: Pulling from the top, remove the trim piece that is covering the C pillar. This just pops out pretty easily.
Now that we have all the interior trimmings out of the way we can move on to the main event: lining things up and drilling some holes!
Step 5: Make sure the endcaps are off the roof vane and have your friends hold the roof vane up against the car. Have them hold it in the general area of where the vain is supposed to be. It helps to have looked at some STi's prior to doing this, but it's not necessary. Once you're in the general area of the right spot you will notice that there is pretty much one spot where the base contours perfectly with the body. Have one side lined up into this spot and make sure your friend holds it steady there. Then go to the other side and see how close you can get to the same spot. Then adjust each side as necessary compensating distance until it looks dead on and the base sits flush with the body. No break out the measuring tape and measure everything twice. (Or five times if you're me) I measure from the edge of the window to the edge of the base laterally. As well as measuring from the top of the window to the rear-most end of the vane itself by passing the tape measure underneath the vane. (see pic) I found that this was a good way to make sure everything is lined up and symmetrical. Now have your friends hold it very tight! Pull out a marker and mark the center of the holes.
Last edited by snowflow; 03-13-2010 at 11:33 AM.
 03-13-2010, 12:37 AM
#2
Optional step: I tapped a small indent with a punch to help get the bit started when I drill. Don't punch it too hard though as the roof is thin and can dent in pretty easily.
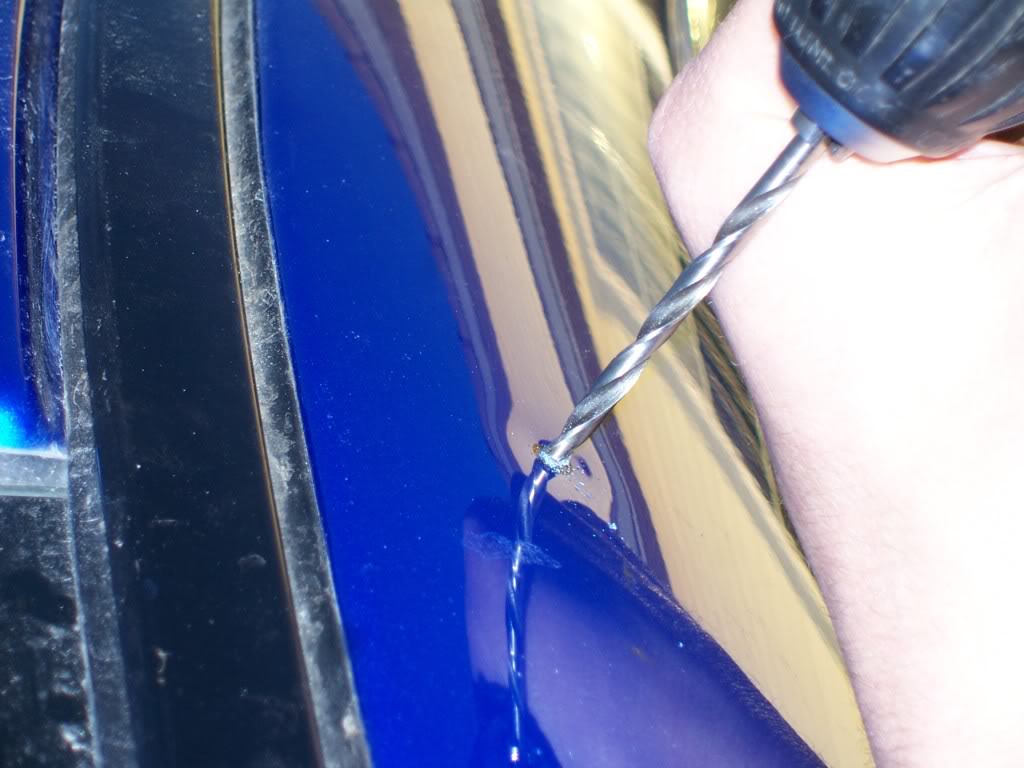
Step 6: DRILL!
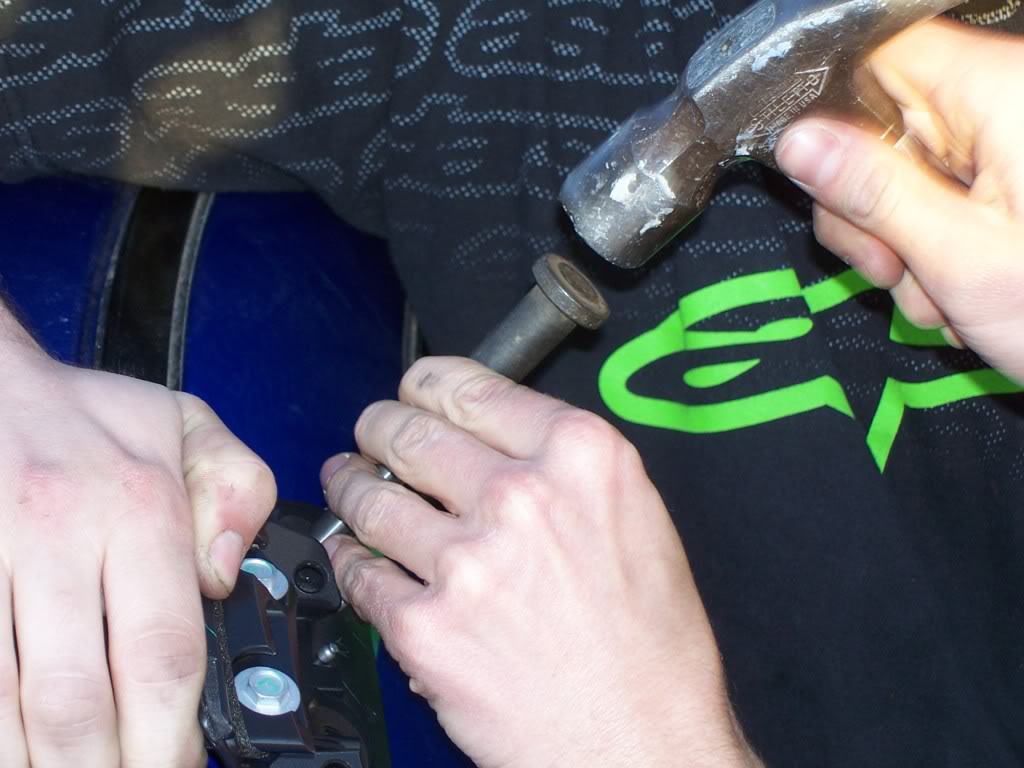
Ya, pretty much that's it right there. Grab your drill and your A-game. You will be drilling through 3 layers. The second layer is the thickest and the trickiest to drill through. Start with a smaller bit before you work your way up to the 1/4". I used a 7/32 to start with or slightly larger. The first layer is thing and easy to get though. Just take your time and move slowly. This part is, in my opinion, the trickiest and most tedious part of this whole install. You will come up to the second layer at a horrible angle and this will make it nearly impossible to get the bit to bite into it. A good drill bit will help immensely.
There are a few tips to make this easier. I experimented with a few different methods to help get the bit to bite. First I took a nail and put in into the hole in the first layer and tried to simulate the angle that the bolt would be mounted at, then hit it with the hammer to make an indent to help the bit bite. For the other 3 holes I pushed the drill a little higher up onto the second later which made the angle better for drilling. It is very important to take your time and move slowly in this step. If you push too hard and drill too quickly while flexing the bit, it WILL break. Take your time and drill carefully. Be patient, because this layer will take a while to get through. Once through the second layer with your pilot hole, move to the 1/4" bit. If you chose to drill higher like I did for most of the holes, now turn on the drill and put it through the second layer but not into the third layer. Now as the bit is spinning, push down, but not too hard as to flex the bit too much and let the bit take out some material, making the second later hole oval and correcting the high angle that you went with to get the bit to bite in the first place. If you have a better way to do this, like with a dremel, go for it, but that's what I did and it worked well.
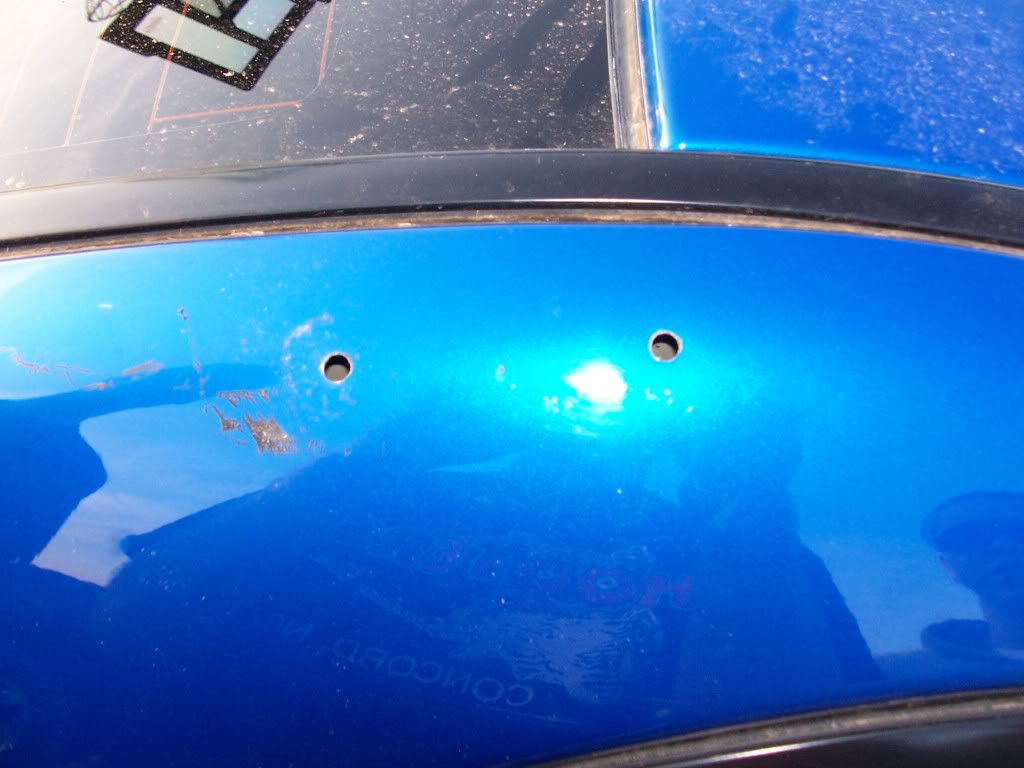
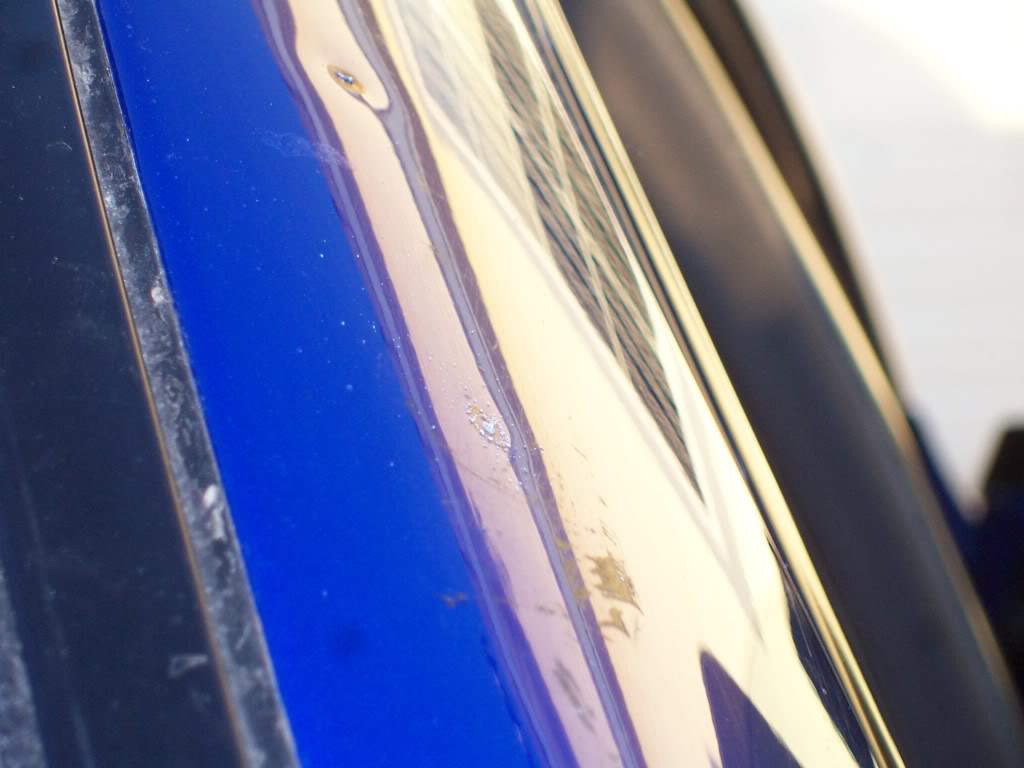
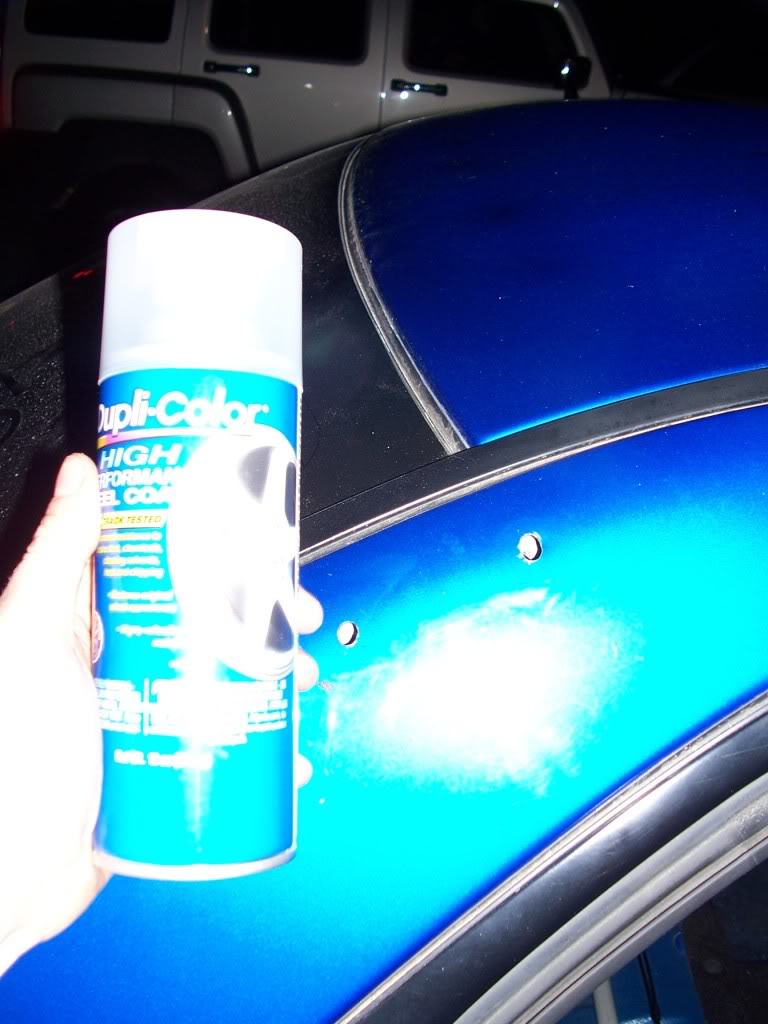
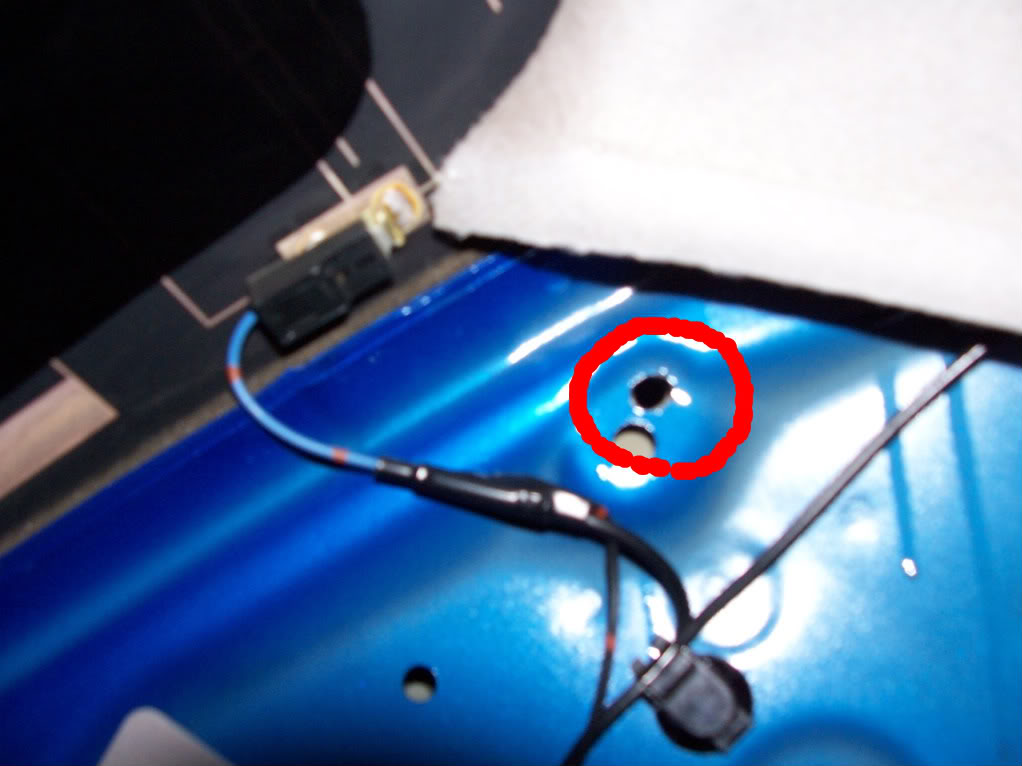
Step 7: Now you're in the home stretch and when you have the angle right on the second layer, just go ahead and drill through the third and final layer. Once that is done, deburr the edges of the holes and shoot the bare metal with some rust inhibitor or paint. I used some leftover Duplicolor wheel clearcoat on my edges.
These pics will show you the general area of where you can expect to have your drill bit come through on the inside.
Top-slightly underneath the headliner
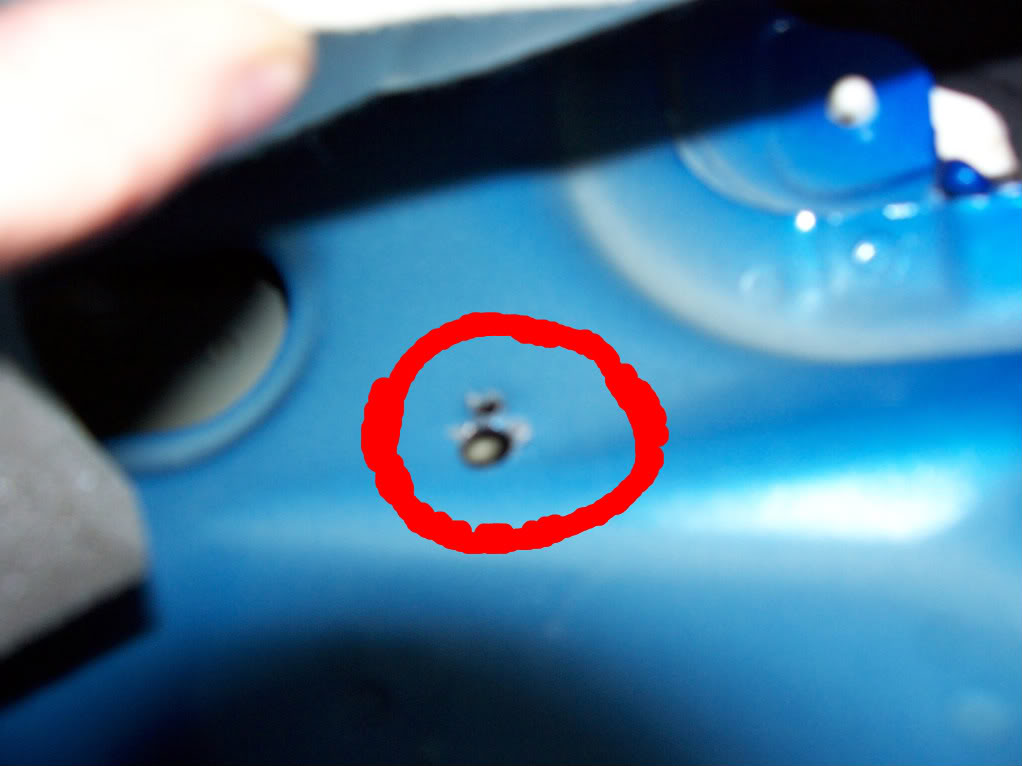
Bottom
Step 8: Have your friends lift the vane back up over the holes you just drilled. Make sure it's perfectly aligned over the holes. Remove the backing from the double sided tap on the base of the vane and stick it down where you want it.
Step 9: Just about done, but don't get cocky. You still need to be very gentle here. Take the bolts, add a washer on the head and stick them through the holes. On the inside, add a washer, lock washer, and the lock nut. Tighten them down very lightly!!! Due not torque these hard at all. Just snug with the ratchet. Overtightening the bolts WILL dent in your C pillar on the outside. You do not want that to happen. Once it's snug, it's not going anywhere.
Step 10: Snag the end caps on and put the push pin in. Then reassemble the inside still being careful not to crease the headliner in the reverse order you took it apart. Be sure to torque down the seat belt bracket. I don't remember the exact torque but it's pretty tight, somewhere in the vicinity of 40 ft/lbs. When putting the C pillar panels back on, you will notice that one of the pins won't be able to go in because there is now a bolt in the way. Just remove that one pin and the panel will go on nice and clean and will be on there just as tight as before.

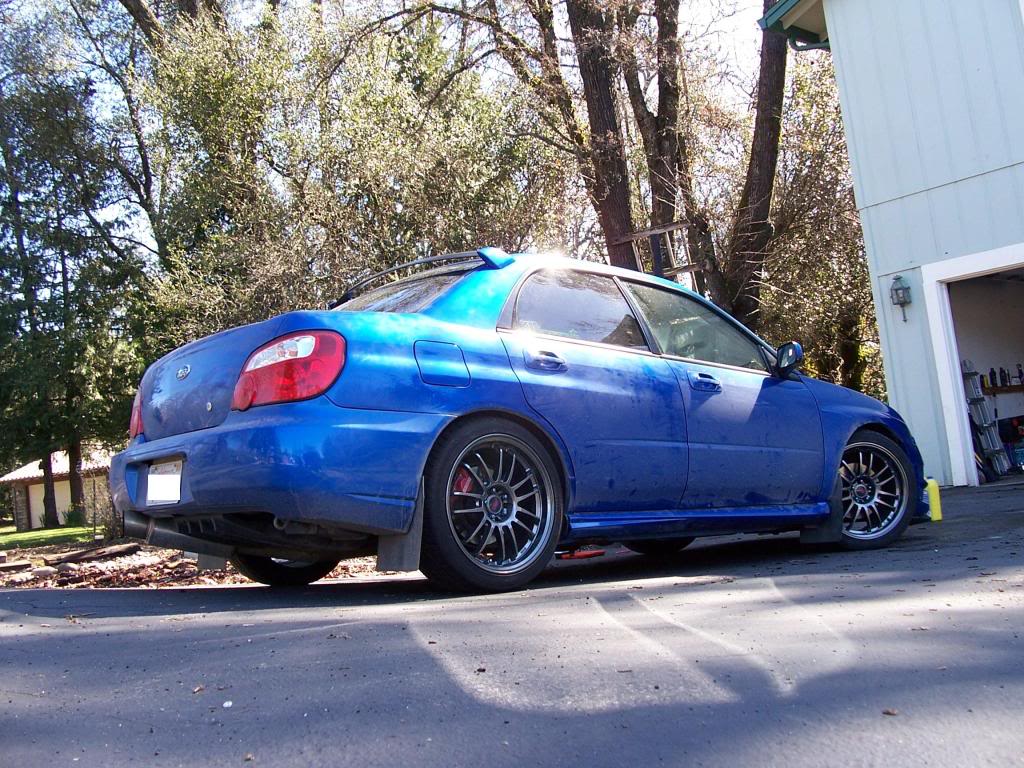
Congratulations! You have now just done one of the scariest DIY installs on your car. Now go grab a beer and admire your work.
Feel free to post up any question you may have and i'll do my best to help you out. Also feel free to post about any errors I have made or if I forgot to put something it and add any input or tips on making this easier.
-Dan
Step 6: DRILL!
Ya, pretty much that's it right there. Grab your drill and your A-game. You will be drilling through 3 layers. The second layer is the thickest and the trickiest to drill through. Start with a smaller bit before you work your way up to the 1/4". I used a 7/32 to start with or slightly larger. The first layer is thing and easy to get though. Just take your time and move slowly. This part is, in my opinion, the trickiest and most tedious part of this whole install. You will come up to the second layer at a horrible angle and this will make it nearly impossible to get the bit to bite into it. A good drill bit will help immensely.
There are a few tips to make this easier. I experimented with a few different methods to help get the bit to bite. First I took a nail and put in into the hole in the first layer and tried to simulate the angle that the bolt would be mounted at, then hit it with the hammer to make an indent to help the bit bite. For the other 3 holes I pushed the drill a little higher up onto the second later which made the angle better for drilling. It is very important to take your time and move slowly in this step. If you push too hard and drill too quickly while flexing the bit, it WILL break. Take your time and drill carefully. Be patient, because this layer will take a while to get through. Once through the second layer with your pilot hole, move to the 1/4" bit. If you chose to drill higher like I did for most of the holes, now turn on the drill and put it through the second layer but not into the third layer. Now as the bit is spinning, push down, but not too hard as to flex the bit too much and let the bit take out some material, making the second later hole oval and correcting the high angle that you went with to get the bit to bite in the first place. If you have a better way to do this, like with a dremel, go for it, but that's what I did and it worked well.
Step 7: Now you're in the home stretch and when you have the angle right on the second layer, just go ahead and drill through the third and final layer. Once that is done, deburr the edges of the holes and shoot the bare metal with some rust inhibitor or paint. I used some leftover Duplicolor wheel clearcoat on my edges.
These pics will show you the general area of where you can expect to have your drill bit come through on the inside.
Top-slightly underneath the headliner
Bottom
Step 8: Have your friends lift the vane back up over the holes you just drilled. Make sure it's perfectly aligned over the holes. Remove the backing from the double sided tap on the base of the vane and stick it down where you want it.
Step 9: Just about done, but don't get cocky. You still need to be very gentle here. Take the bolts, add a washer on the head and stick them through the holes. On the inside, add a washer, lock washer, and the lock nut. Tighten them down very lightly!!! Due not torque these hard at all. Just snug with the ratchet. Overtightening the bolts WILL dent in your C pillar on the outside. You do not want that to happen. Once it's snug, it's not going anywhere.
Step 10: Snag the end caps on and put the push pin in. Then reassemble the inside still being careful not to crease the headliner in the reverse order you took it apart. Be sure to torque down the seat belt bracket. I don't remember the exact torque but it's pretty tight, somewhere in the vicinity of 40 ft/lbs. When putting the C pillar panels back on, you will notice that one of the pins won't be able to go in because there is now a bolt in the way. Just remove that one pin and the panel will go on nice and clean and will be on there just as tight as before.
Congratulations! You have now just done one of the scariest DIY installs on your car. Now go grab a beer and admire your work.
Feel free to post up any question you may have and i'll do my best to help you out. Also feel free to post about any errors I have made or if I forgot to put something it and add any input or tips on making this easier.
-Dan
Last edited by snowflow; 03-13-2010 at 11:33 AM.

 08-22-2012, 11:01 AM
#12
Registered User

Join Date: Jul 2011
Location: Moretown, VT / Savannah, GA
Posts: 13
Car Info: 2005 Subaru Impreza 2.5RS
Nice writeup. I have a roof vane spoiler thats been sitting around forever. I'm hesitant to drill into the car, also, its not the oem one with the removable side caps. its a one piece, so when lining it up on the car, you cant see the holes.
it also came with a few other things...
theres a couple what looks like templates.. you can see the back of one is grey/brown colored, and the other it black(you can remove the brown sticker backing and stick it to the car.) I believe i can stick those to the car to mark the holes.. then i guess process would be the same, with the provided bolts.. although they look kind of short, no? also what are the zip tie things for?
08-22-2012, 11:05 AM
#13
Registered User
Join Date: Jul 2011
Location: Moretown, VT / Savannah, GA
Posts: 13
Car Info: 2005 Subaru Impreza 2.5RS
also i'm assuming i leave the foam templates on the car right, mount spoiler on top of them? this would lessen the risk of water getting in and down in the holes as well as preventing scratches...
08-22-2012, 12:12 PM
#14
Drilling through all three layers of SM is totally not needed. You risk water damage to your interior as well as greatly rase your chances of screwing up the drilling since the middle peice of SM is angled and hard to get through straight.
All you need to drill through is the top layer, then secure the vane with 4 stainless steel molly bolts. They are self-tightening and there is nothing else needed. I have done this install multiple times.
All you need to drill through is the top layer, then secure the vane with 4 stainless steel molly bolts. They are self-tightening and there is nothing else needed. I have done this install multiple times.
09-19-2012, 06:57 PM
#15
Nice install, though if I could recommend 2 things that may make it a bit more "finished."
1. Use a smaller punch. The use of a larger one seems to have caused a few sizable dings. I realize they're being covered up by the roof vane bracket but nevertheless, some people (myself) are **** about those sorts of things.
2. As opposed to the duplicolor clearcoat (which will peel/yellow really quickly) I'd use a small jar of OEM touchup paint to swab inside of the freshly drilled holes. That way you know you're getting good coverage on the egdes and preventing any rust from starting, and thus nipping the potential of future leaks in the bud. I'd also pack a bit of RTV Sealant on the threads of the bolt/around the head to make certain there'd be no chance of future leakage. It won't harm the paint and is fairly easy to remove with a light solvent.
Cheers, and if I had a sedan I'd be totally down for this install myself.
I can't agree or disagree with this due to my lack of knowledge on the topic of drilling into a Subaru (new owner here), but I can totally agree that toggle bolts would be an excellent way to go on the mounting hardware. Just make sure you go stainless and all should go without flaw.
1. Use a smaller punch. The use of a larger one seems to have caused a few sizable dings. I realize they're being covered up by the roof vane bracket but nevertheless, some people (myself) are **** about those sorts of things.
2. As opposed to the duplicolor clearcoat (which will peel/yellow really quickly) I'd use a small jar of OEM touchup paint to swab inside of the freshly drilled holes. That way you know you're getting good coverage on the egdes and preventing any rust from starting, and thus nipping the potential of future leaks in the bud. I'd also pack a bit of RTV Sealant on the threads of the bolt/around the head to make certain there'd be no chance of future leakage. It won't harm the paint and is fairly easy to remove with a light solvent.
Cheers, and if I had a sedan I'd be totally down for this install myself.
Drilling through all three layers of SM is totally not needed. You risk water damage to your interior as well as greatly rase your chances of screwing up the drilling since the middle peice of SM is angled and hard to get through straight.
All you need to drill through is the top layer, then secure the vane with 4 stainless steel molly bolts. They are self-tightening and there is nothing else needed. I have done this install multiple times.
All you need to drill through is the top layer, then secure the vane with 4 stainless steel molly bolts. They are self-tightening and there is nothing else needed. I have done this install multiple times.
Last edited by KennyBooBear; 09-19-2012 at 07:00 PM.