2015 WRX STI Bayson R (Matte black) Rear Diffuser Installed w/Pics
 12-20-2014, 08:28 PM
#1
Registered User
Thread Starter
iTrader: (2)
Join Date: Sep 2006
Location: Ewa Beach Hawaii
Posts: 1,049
Car Info: 2015 CWP STI
2015 WRX STI Bayson R (Matte black) Rear Diffuser Installed w/Pics
For you 2015'ers. It's $144 on ebay, you can't go wrong with this vs paying nearly $400 from Subaru for the same thing minus the sliver paint. This is a little write-up for you to see what you're up against when installing this bad boy.
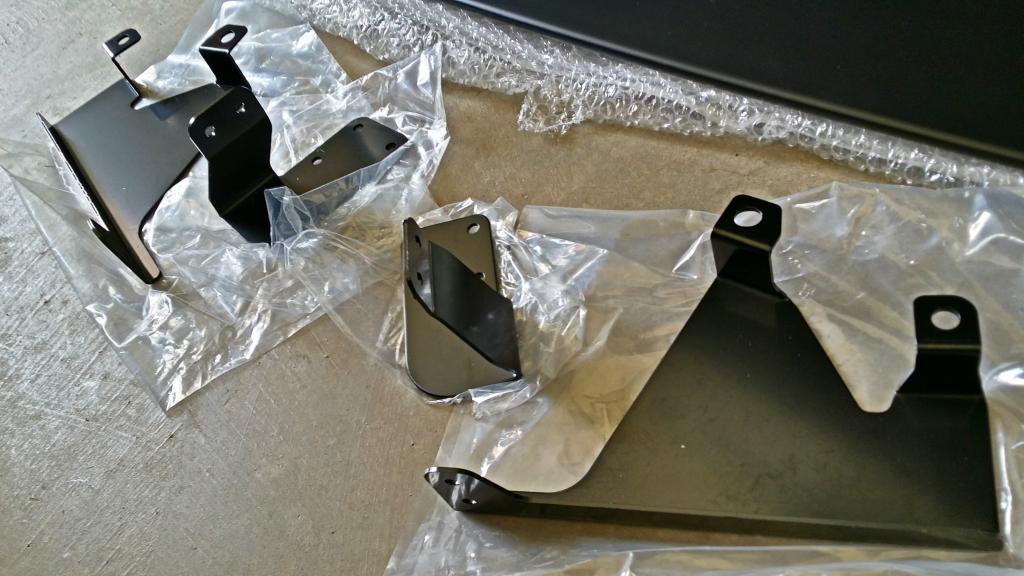
Here's what comes in the box. Luckily I've been very fortunate with their shipping and haven't received damaged parts like others have.

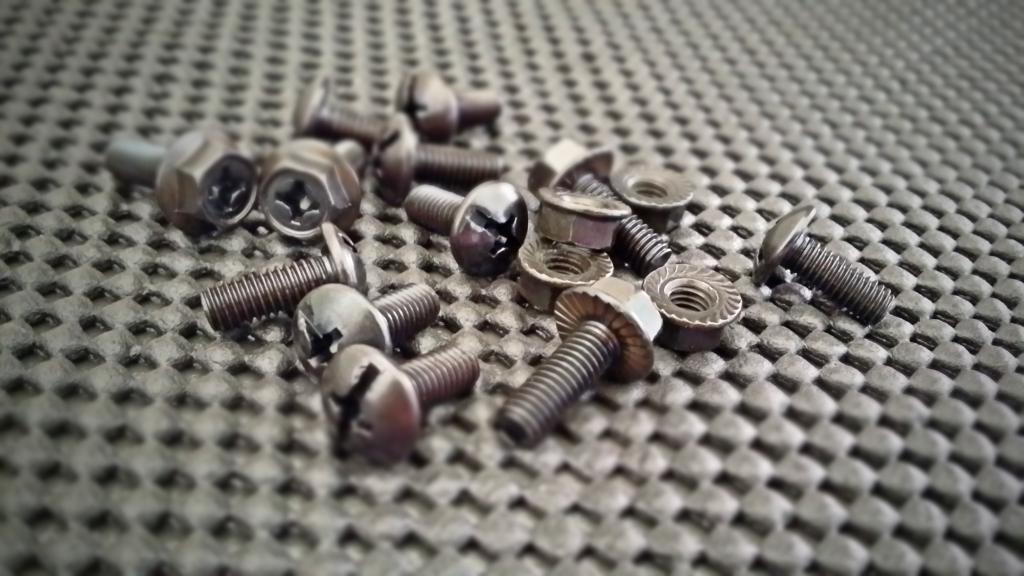
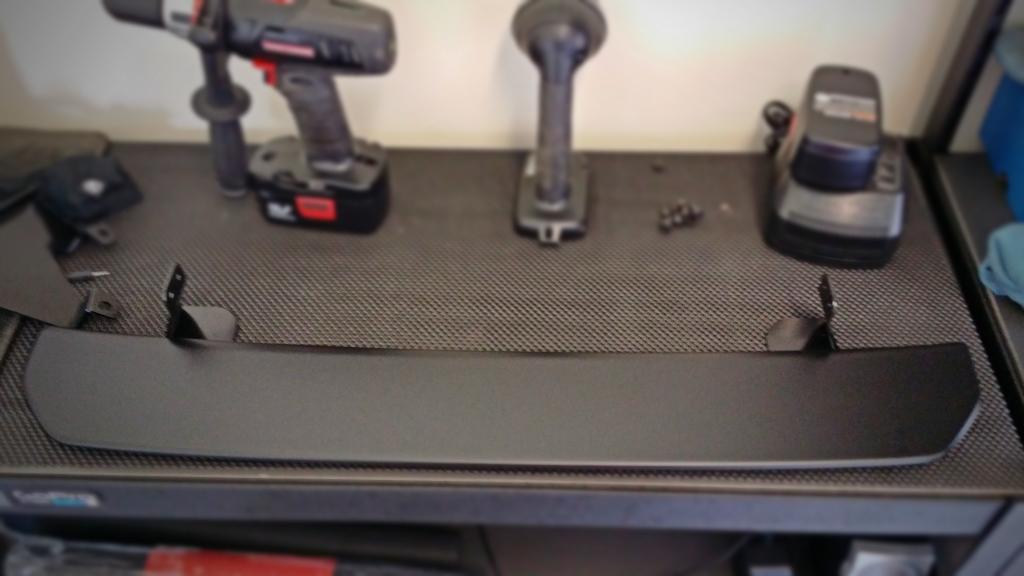
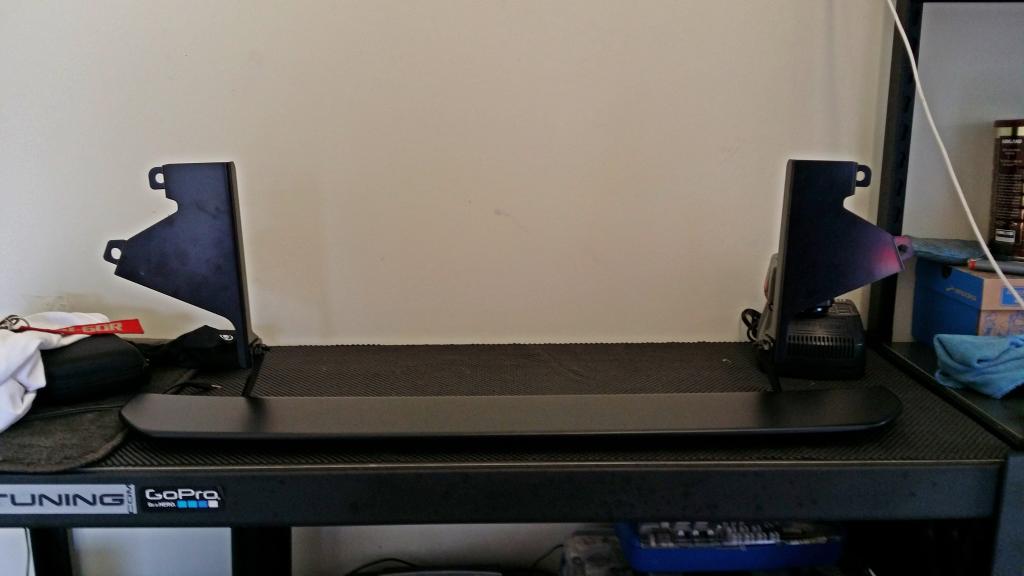
Even the hardware looks to have great quality. The brackets seem strong and have a good weight to them. Best so far from Bayson R.
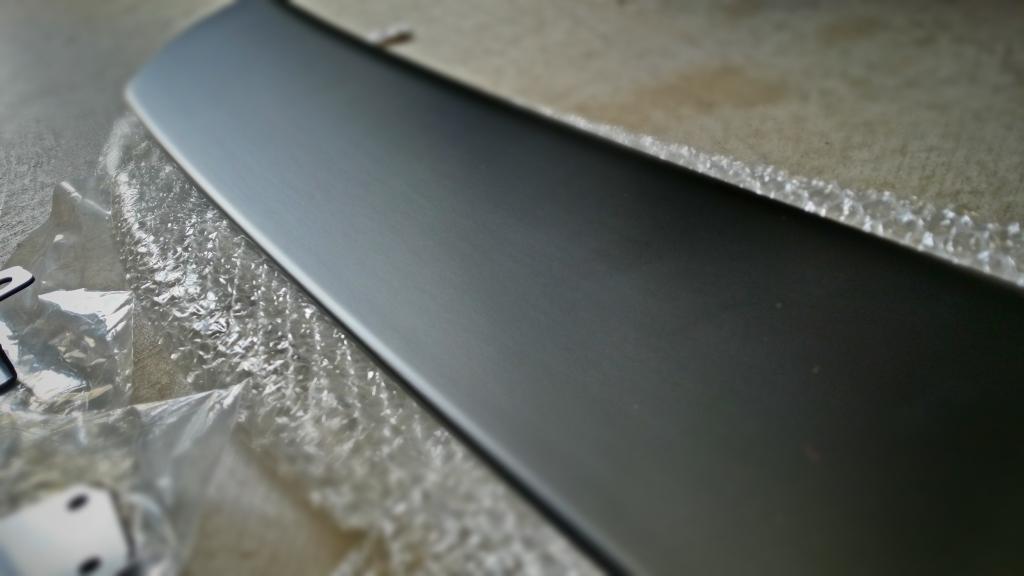
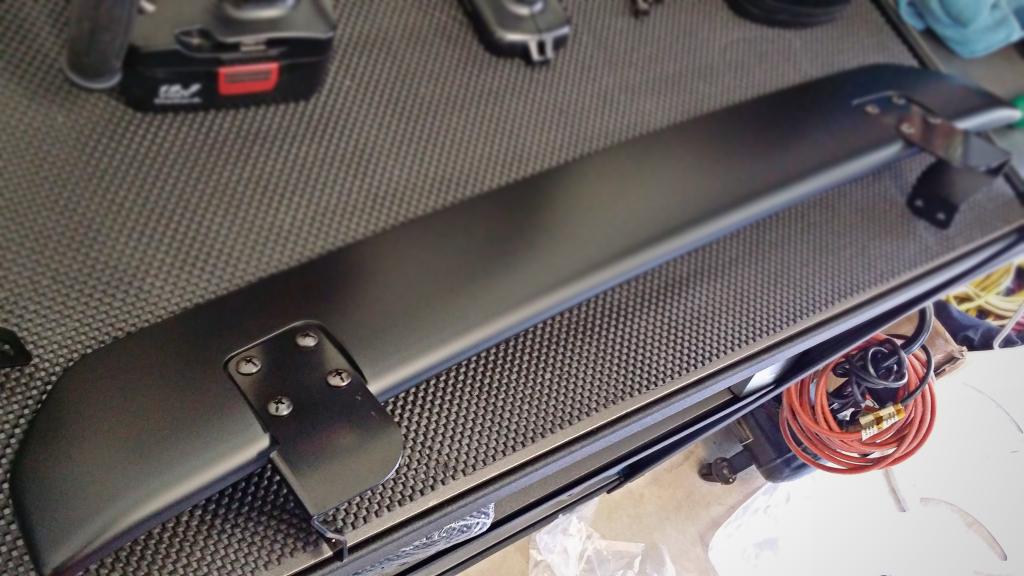
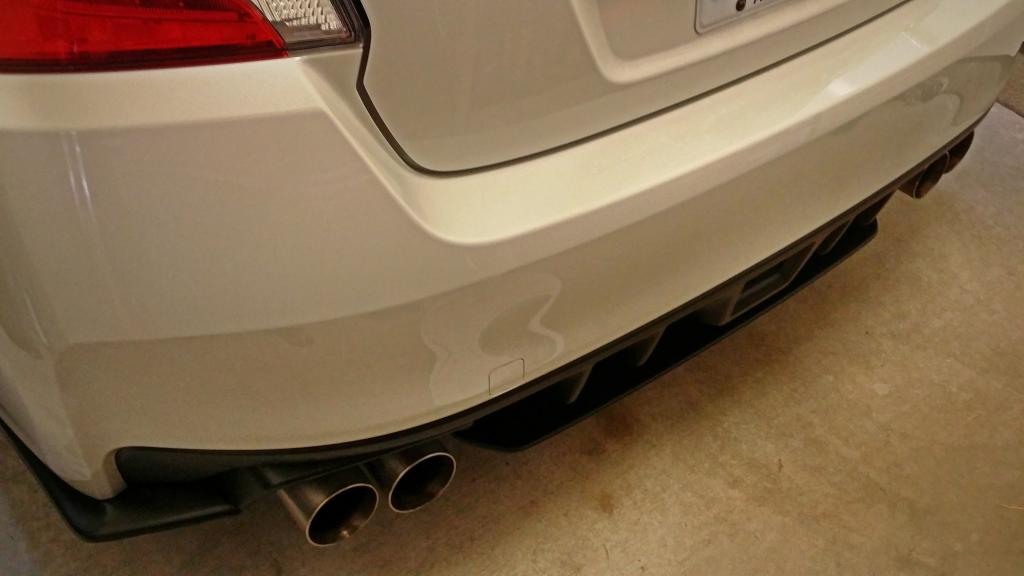
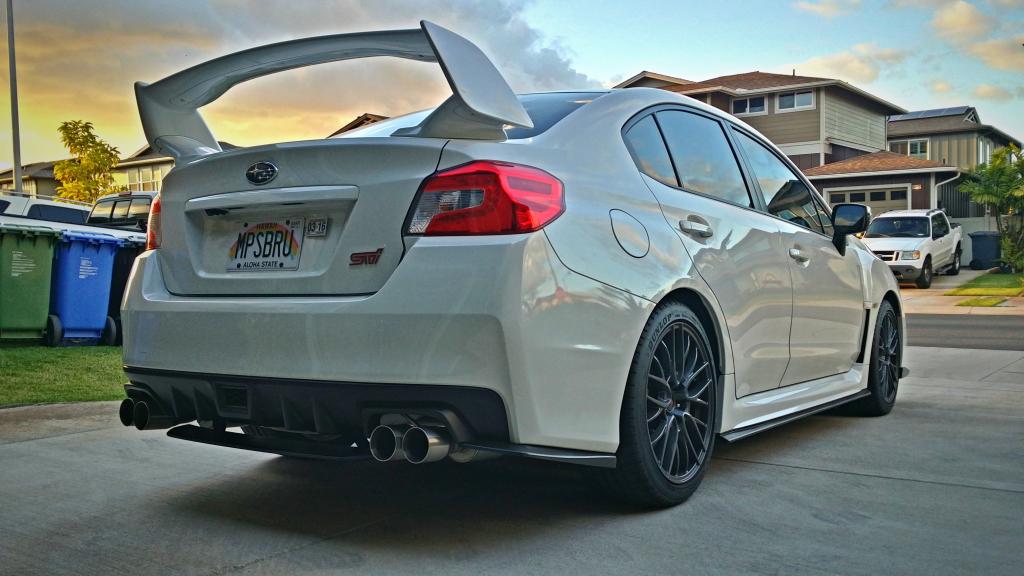
Here's the matte black finish that I purchased. The OEM unit is glossy silver, yuck!! The color seems to match close enough to the bumper...if the lighting is right. But it doesnt bother me at all. It also feels like it's worth something and not just a hollow piece of ABS that will just bend easily.
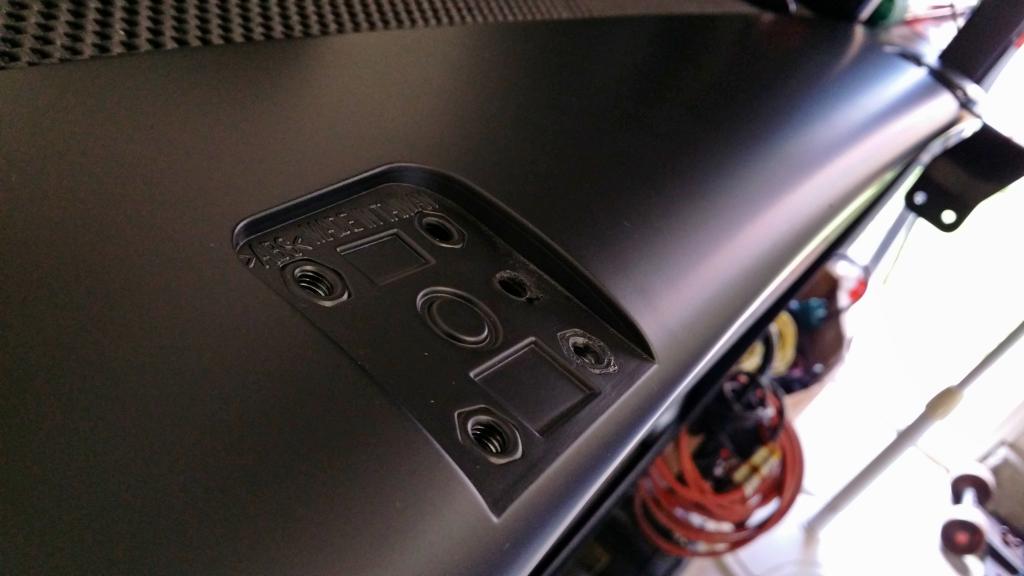
Of course as usual, Bayson R did not include instructions but I eventually figured it out. Here's the first set of hardware I installed onto the diffuser. The brackets are dummy proof and can only be installed one way. The dome screws attach the brackets like so to the diffuser.
After a few minutes looking under the car and scratching my head, I figured out how it's installed. **EDIT** Swap left and right
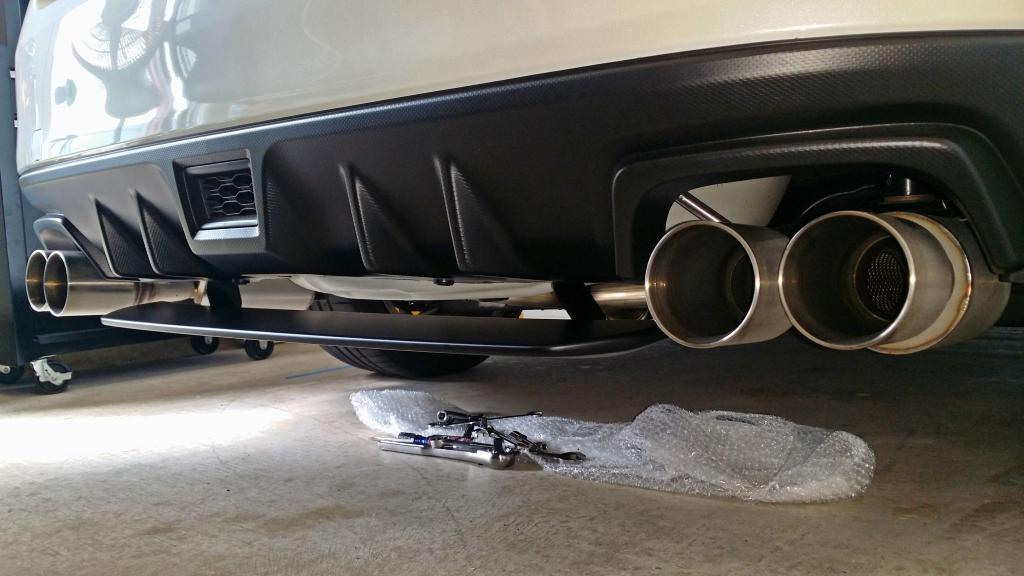
I was also fortunate enough to not have to remove the rear bumper or mufflers only because I had Nameless mufflers which are smaller than the factory cans. Those with Nameless deletes will have a field day with this install.
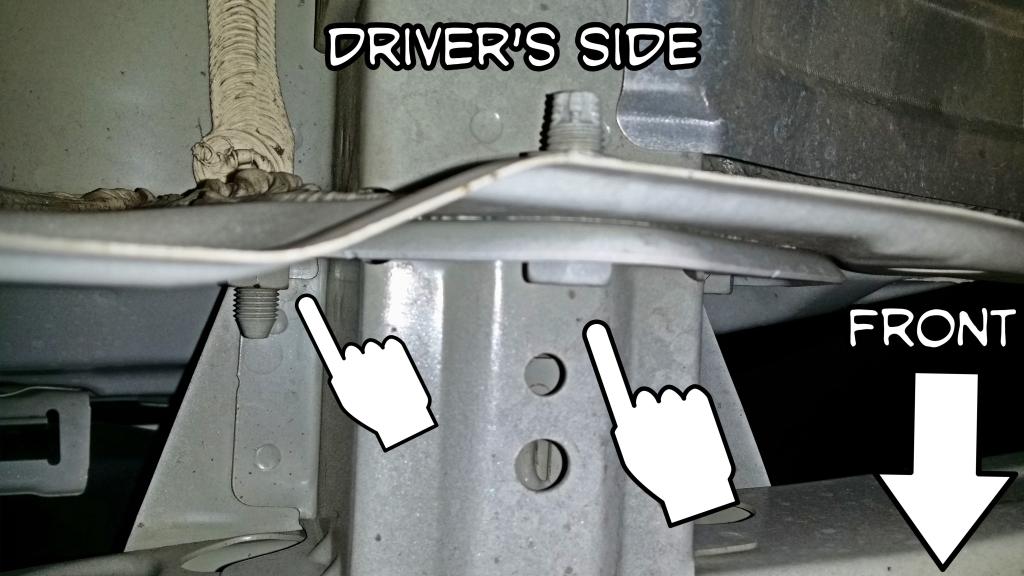
First thing to look at is getting to this 14mm bolt and nut on both sides behind the lower part of the bumper beam. If you were to lie down under the rear bumper with your head between the left or right muffler and license plate, you'll see where to place the big brackets that hold the diffuser in place.
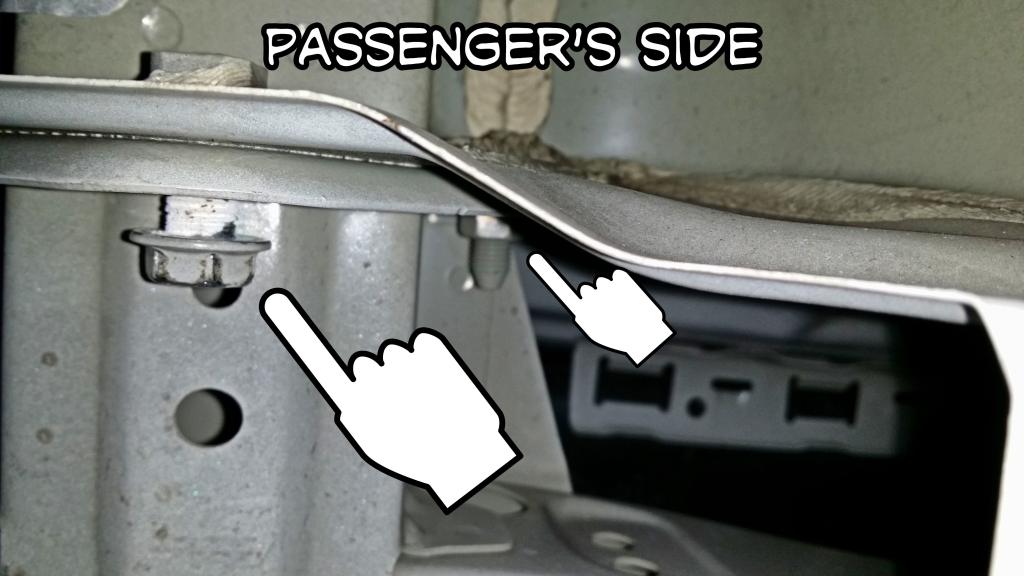
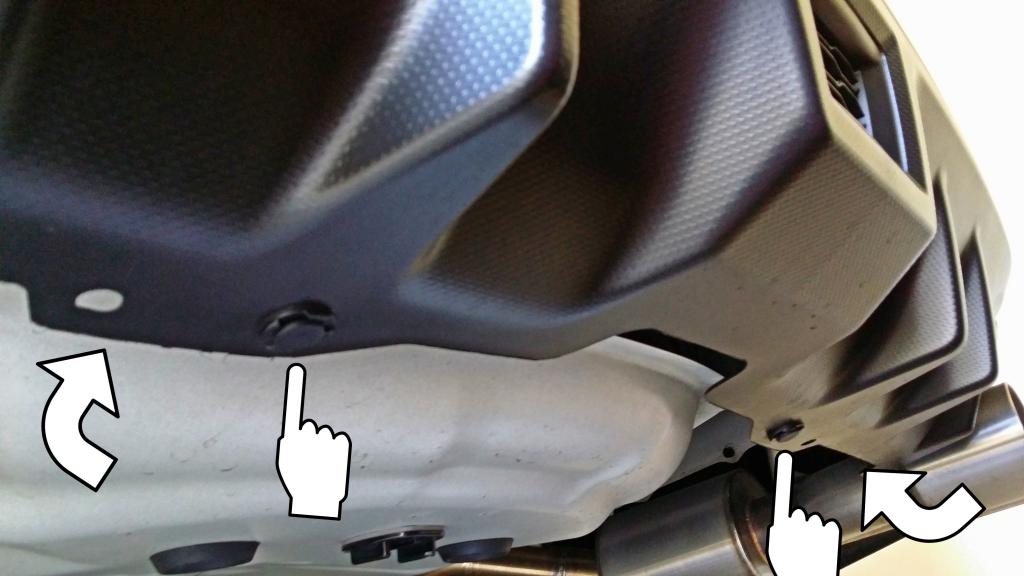
Now to get there without removing the bumper, you can remove the 4 pop clips that holds the lower part of the rear bumper up.
As some have said, you have to be creative with tools to get the nut and bolts without removing the rear bumper, as intended by Subaru. I used a 1/2" drive 24" breaker bar to loosen the 14mm nuts and bolts and then switched between a 14mm ratcheting wrench, 14mm 6-point box end wrench to remove and reinstall them. I then muscled the bolt back with the breaker bar. Once you get the big bracket on, the nut will be hard to get to so I used two piggybacked combo wrenches to tighten the nut down.
It looked like this in the end.
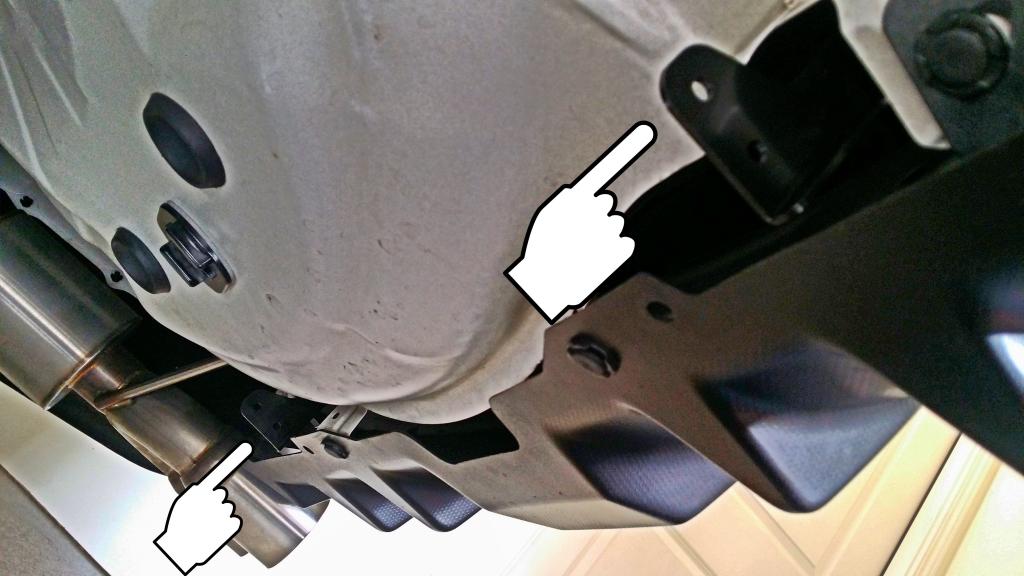
Install the diffuser by bringing and lining up the left and right brackets of the diffuser onto the big left and right brackets you've just installed on the car and tighten the 10mm bolts and nuts down.
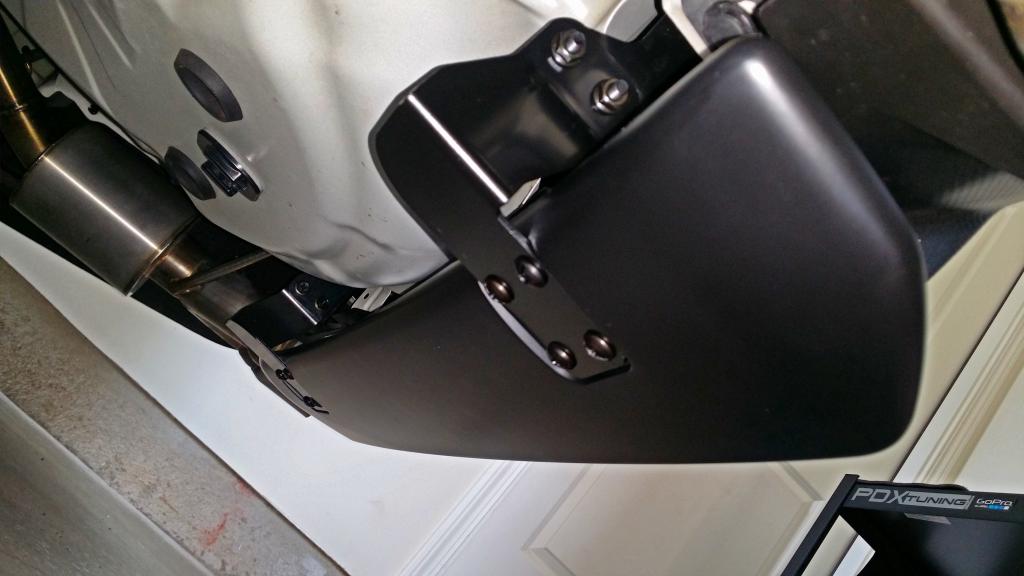
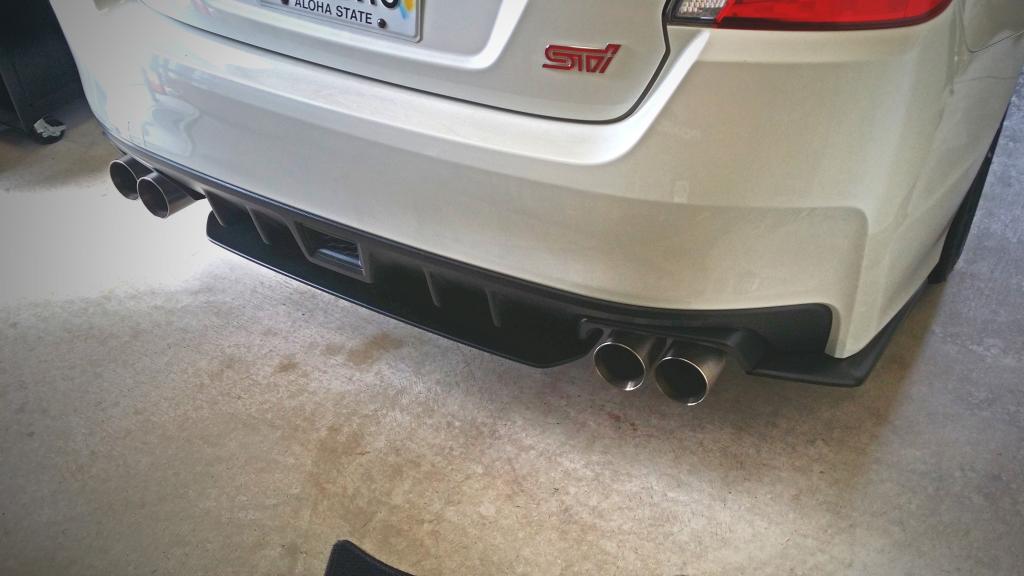
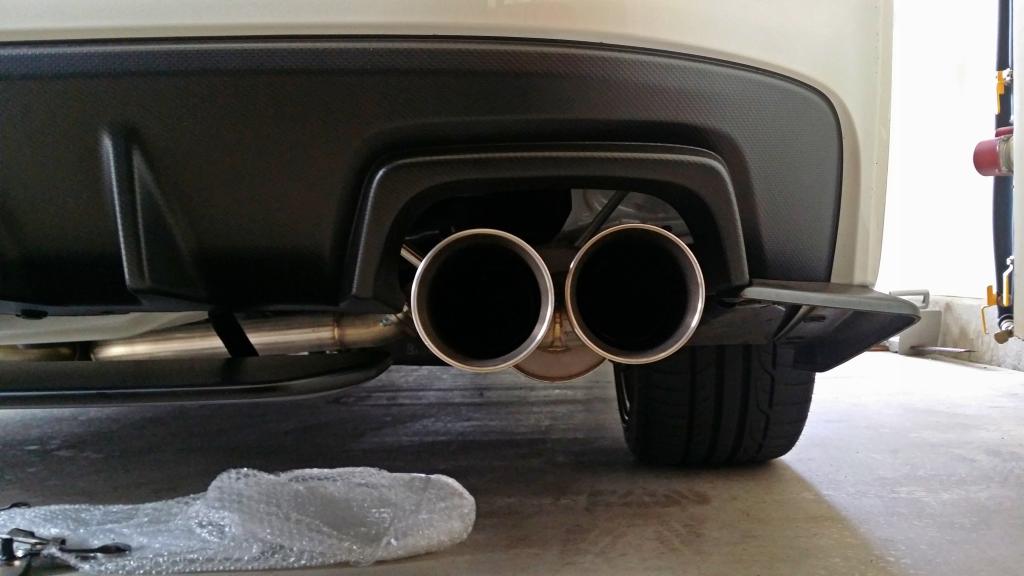
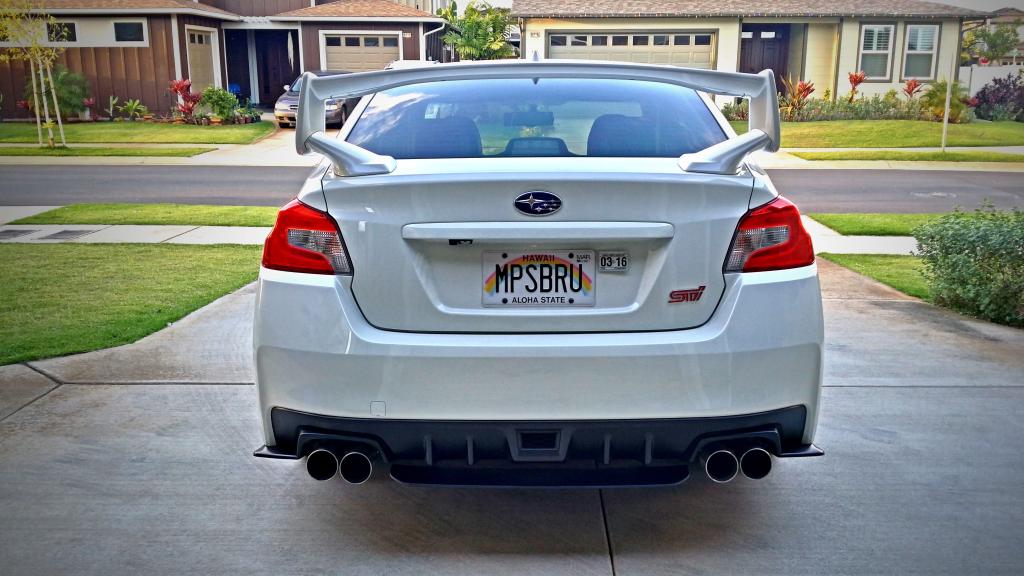
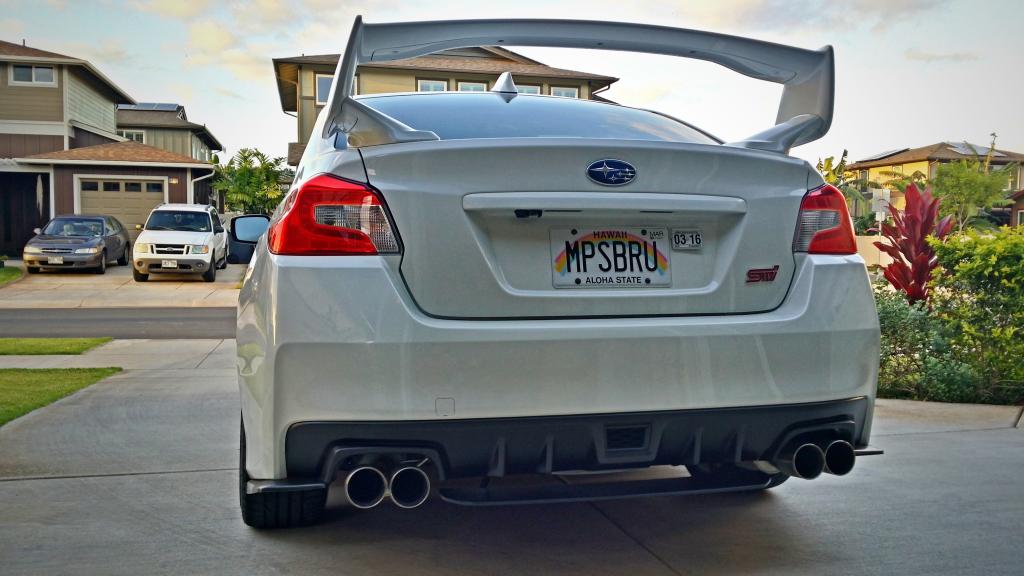
Job done. Took me 1.5 hours. I would've liked for it to hang a little higher to match the HTAutos spats but it just grew on me the way it is. Aero department is finally done for me. Now to perhaps move onto handling!! Enjoy the pics!!
Here's what comes in the box. Luckily I've been very fortunate with their shipping and haven't received damaged parts like others have.

Even the hardware looks to have great quality. The brackets seem strong and have a good weight to them. Best so far from Bayson R.


Here's the matte black finish that I purchased. The OEM unit is glossy silver, yuck!! The color seems to match close enough to the bumper...if the lighting is right. But it doesnt bother me at all. It also feels like it's worth something and not just a hollow piece of ABS that will just bend easily.


Of course as usual, Bayson R did not include instructions but I eventually figured it out. Here's the first set of hardware I installed onto the diffuser. The brackets are dummy proof and can only be installed one way. The dome screws attach the brackets like so to the diffuser.


After a few minutes looking under the car and scratching my head, I figured out how it's installed. **EDIT** Swap left and right

I was also fortunate enough to not have to remove the rear bumper or mufflers only because I had Nameless mufflers which are smaller than the factory cans. Those with Nameless deletes will have a field day with this install.
First thing to look at is getting to this 14mm bolt and nut on both sides behind the lower part of the bumper beam. If you were to lie down under the rear bumper with your head between the left or right muffler and license plate, you'll see where to place the big brackets that hold the diffuser in place.


Now to get there without removing the bumper, you can remove the 4 pop clips that holds the lower part of the rear bumper up.

As some have said, you have to be creative with tools to get the nut and bolts without removing the rear bumper, as intended by Subaru. I used a 1/2" drive 24" breaker bar to loosen the 14mm nuts and bolts and then switched between a 14mm ratcheting wrench, 14mm 6-point box end wrench to remove and reinstall them. I then muscled the bolt back with the breaker bar. Once you get the big bracket on, the nut will be hard to get to so I used two piggybacked combo wrenches to tighten the nut down.
It looked like this in the end.

Install the diffuser by bringing and lining up the left and right brackets of the diffuser onto the big left and right brackets you've just installed on the car and tighten the 10mm bolts and nuts down.

Job done. Took me 1.5 hours. I would've liked for it to hang a little higher to match the HTAutos spats but it just grew on me the way it is. Aero department is finally done for me. Now to perhaps move onto handling!! Enjoy the pics!!


Last edited by joejoe69; 12-20-2014 at 09:36 PM.
 12-20-2014, 08:54 PM
#2
Registered User
Join Date: Nov 2014
Location: Hawaii
Posts: 41
Car Info: Four wheeler
looking good joe but every time you add something to your car I gotta change my plans LOL, don't wanna be mistaken as the wrong person hahaha but at least I know what my car would've looked like 
Last edited by flat; 12-20-2014 at 08:58 PM.


 12-25-2014, 11:15 AM
#14
Registered User
Thread Starter
iTrader: (2)
Join Date: Sep 2006
Location: Ewa Beach Hawaii
Posts: 1,049
Car Info: 2015 CWP STI