DIY intercooler spray kit..Less than $50 :0)
 04-26-2014, 07:26 PM
#1
Registered User
Thread Starter
Join Date: Dec 2013
Location: Australia
Posts: 85
Car Info: 1998 Club Spec WRX
DIY intercooler spray kit..Less than $50 :0)
This is an easy mod that will improve performance by water cooling the IC. This is a standard feature on some Stis that can be easily done to your standard top mount or even front mount...
You will need a second hand Sti dual pump windscreen washer reservoir. My local Wrx wrecker had several of these for $20 including the 2 pumps and the hoses..
You will also need a Boost pressure switch which is available on ebay for $25 including freight. They are made in the USA and are the same as the much more expensive Hobbs switches that you can buy locally for a lot more than $25.
You will also need 2x180 degrees irrigation mini sprays which your local hardware store will have for 39cents each or you can buy the genuine Sti ones for $30 each nerd .
You will also need some wire to run power and earth as well as some connectors and a crimping tool. And a few cable ties.
This entire mod cost me less than $50 and works brilliantly.
Here are some photos...
This one is of the finished sprays doing there thing. Because they are set up to spray when approaching full boost I have connected them up to the windscreen washer spray for the photos..
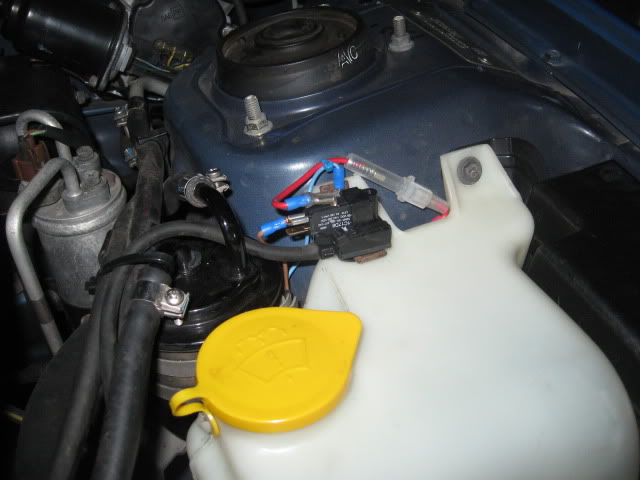
This is the reservoir which is twice the capacity of the normal windscreen washer bottle but bolts straight in to your standard Wrx. Notice the pumps are at different depths in the bottle. This is so you don't use all your water on your intercooler and then cant wash your windscreen.
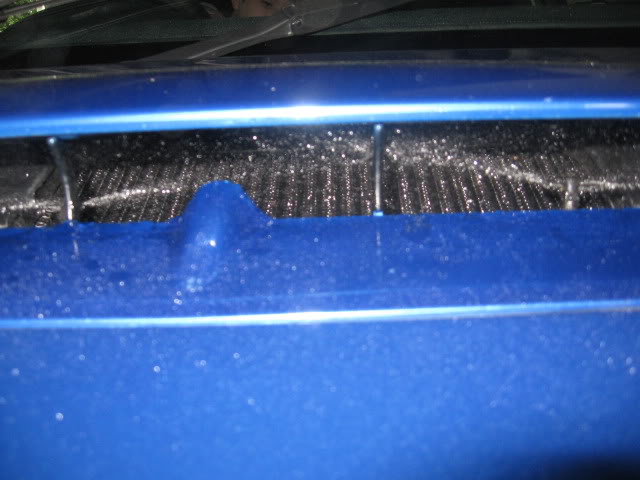
This is the sprays from underneath. There is two small platform areas on the ledge in front of the intercooler. This is where you drill the holes for the nozzles. Drill the holes just big enough for the hose to fit through. This hole will then be a very tight fit once the nozzles are inserted so that when you pull/push the nozzles back into the hole it is more than tight enough to hold them in place while still being able to tun them to adjust where they spray. Use you windscreen pump to get them spraying i the right place.
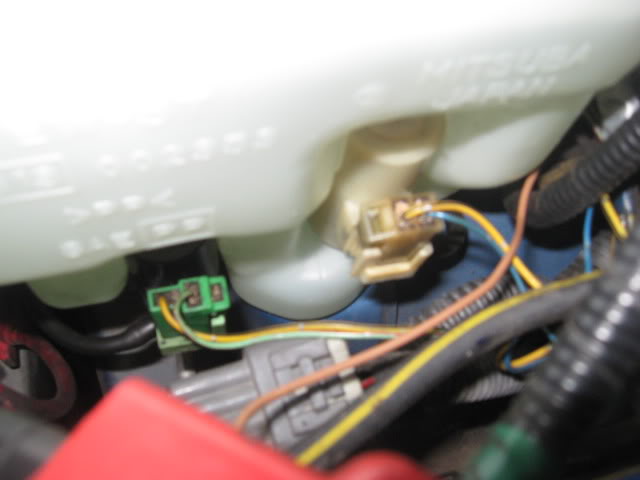
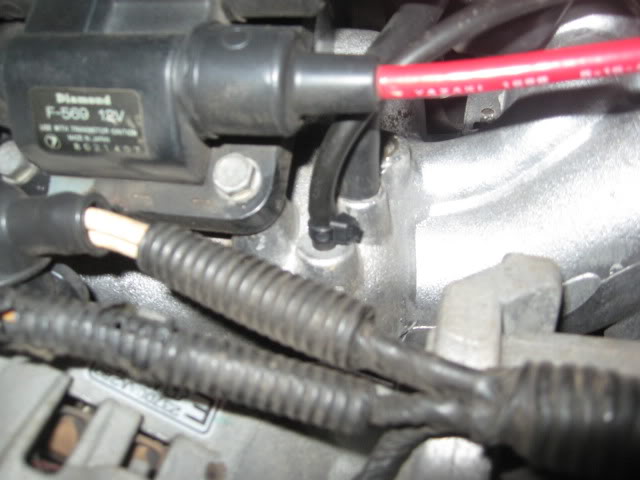
This is the boost pressure switch. It has 3 terminals on it. The top one (red 12 volt) is a fused link directly to your battery. The next one is "always off" which is switched on when the boost reaches the desired pressure. It is the brown wire that goes to the intercooler spray pump (top one) on the water bottle, and the bottom connection on the switch , which you don't use, is the "always ON" terminal which can be used for other applications to turn things OFF at a required boost. The earth (blue wire) wire you can see cable tied near the fused wire is an earth for the other terminal on the pump. I found it easy just to join two wires to the pump and run them both to the switch and use the switch bracket as a mounting point for the pump earth . Make sure you get the connection plug for the intercooler pump from the wrecker. He will have to cut it from the loom for you. It has a blue wire, which I joined some blue wire to and a yellow wire which I joined the brown wire to as I had no yellow wire.
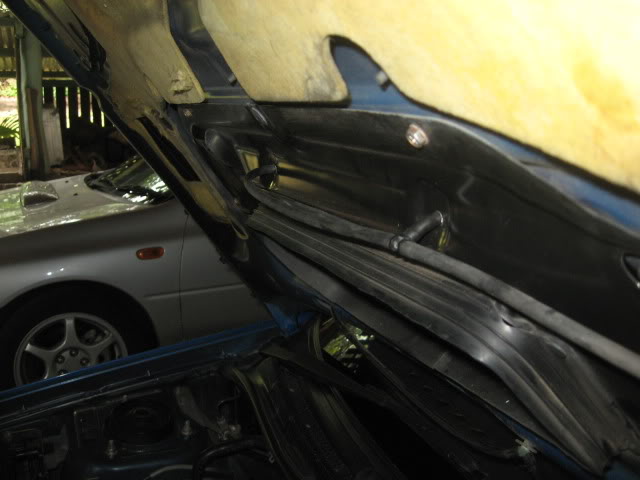
This photo is the hose that runs from the switch to this spare vacuum tube on the top of the manifold. It is the same hose as the water hose and just runs from the manifold to the hose connection on the bottom of the switch..
So install all that But for the sake of adjusting the boost switch simply run the hose out through you bonnet scoop and onto the top of your bonnet instead of to the nozzles so you can see when the water comes on because you now need to road test/setup the switch to come on at the desired boost pressure. I have set mine up to only come on when I reach almost max boost, in other words when I am getting up it. There is no point in it coming on with normal driving other wise you will be filling your water bottle every day. You will need a small allen key to adjust the switch. There is a hole in the top of the switch that you screw down (clockwise)for it come on at higher boost and screw it up(anticlockwise) to decrease the pressure that it comes on at. I had to adjust it down (clockwise ) for coming on at around 14lb. My max boost is set to 16lb (180kwtatw 8) .
Once you are happy with the adjustment then connect the hose to the nozzles and you are done. If anyone does this and then gets there car re-dynoed, I would be very interested in the increase numbers and the % of increase.
You can do this to you front mount as well by mounting the sprays in the front bumper in front of the intercooler. I have that setup on one of my silver hatches. Remember if you are doing this , you will need to run the hose up higher than the bottle then down to the bumper otherwise you will siphon the water out of your bottle :shock: .. Any way have fun and let us know how you got on.. Cheers..
PS...the ebay items mentioned further down are now expired off ebay BUT is you search Ebay for "boost pressure switch" you will find the ones you need ...
You will need a second hand Sti dual pump windscreen washer reservoir. My local Wrx wrecker had several of these for $20 including the 2 pumps and the hoses..
You will also need a Boost pressure switch which is available on ebay for $25 including freight. They are made in the USA and are the same as the much more expensive Hobbs switches that you can buy locally for a lot more than $25.
You will also need 2x180 degrees irrigation mini sprays which your local hardware store will have for 39cents each or you can buy the genuine Sti ones for $30 each nerd .
You will also need some wire to run power and earth as well as some connectors and a crimping tool. And a few cable ties.
This entire mod cost me less than $50 and works brilliantly.
Here are some photos...
This one is of the finished sprays doing there thing. Because they are set up to spray when approaching full boost I have connected them up to the windscreen washer spray for the photos..
This is the reservoir which is twice the capacity of the normal windscreen washer bottle but bolts straight in to your standard Wrx. Notice the pumps are at different depths in the bottle. This is so you don't use all your water on your intercooler and then cant wash your windscreen.
This is the sprays from underneath. There is two small platform areas on the ledge in front of the intercooler. This is where you drill the holes for the nozzles. Drill the holes just big enough for the hose to fit through. This hole will then be a very tight fit once the nozzles are inserted so that when you pull/push the nozzles back into the hole it is more than tight enough to hold them in place while still being able to tun them to adjust where they spray. Use you windscreen pump to get them spraying i the right place.
This is the boost pressure switch. It has 3 terminals on it. The top one (red 12 volt) is a fused link directly to your battery. The next one is "always off" which is switched on when the boost reaches the desired pressure. It is the brown wire that goes to the intercooler spray pump (top one) on the water bottle, and the bottom connection on the switch , which you don't use, is the "always ON" terminal which can be used for other applications to turn things OFF at a required boost. The earth (blue wire) wire you can see cable tied near the fused wire is an earth for the other terminal on the pump. I found it easy just to join two wires to the pump and run them both to the switch and use the switch bracket as a mounting point for the pump earth . Make sure you get the connection plug for the intercooler pump from the wrecker. He will have to cut it from the loom for you. It has a blue wire, which I joined some blue wire to and a yellow wire which I joined the brown wire to as I had no yellow wire.
This photo is the hose that runs from the switch to this spare vacuum tube on the top of the manifold. It is the same hose as the water hose and just runs from the manifold to the hose connection on the bottom of the switch..
So install all that But for the sake of adjusting the boost switch simply run the hose out through you bonnet scoop and onto the top of your bonnet instead of to the nozzles so you can see when the water comes on because you now need to road test/setup the switch to come on at the desired boost pressure. I have set mine up to only come on when I reach almost max boost, in other words when I am getting up it. There is no point in it coming on with normal driving other wise you will be filling your water bottle every day. You will need a small allen key to adjust the switch. There is a hole in the top of the switch that you screw down (clockwise)for it come on at higher boost and screw it up(anticlockwise) to decrease the pressure that it comes on at. I had to adjust it down (clockwise ) for coming on at around 14lb. My max boost is set to 16lb (180kwtatw 8) .
Once you are happy with the adjustment then connect the hose to the nozzles and you are done. If anyone does this and then gets there car re-dynoed, I would be very interested in the increase numbers and the % of increase.
You can do this to you front mount as well by mounting the sprays in the front bumper in front of the intercooler. I have that setup on one of my silver hatches. Remember if you are doing this , you will need to run the hose up higher than the bottle then down to the bumper otherwise you will siphon the water out of your bottle :shock: .. Any way have fun and let us know how you got on.. Cheers..
PS...the ebay items mentioned further down are now expired off ebay BUT is you search Ebay for "boost pressure switch" you will find the ones you need ...
Last edited by Stifull; 04-26-2014 at 07:39 PM.


Thread
Thread Starter
Forum
Replies
Last Post
stimul8n
NorCal Classifieds
4
10-25-2004 09:35 AM
diranged
NorCal Classifieds
17
05-23-2004 05:01 AM
diranged
NorCal Classifieds
0
02-25-2004 09:29 AM
Astacun1
Engine/Power - EJ20T (pre-2006 WRX and JDM)
2
02-21-2003 04:04 AM